Introduction
GIFs have become an immensely popular form of visual content on social media platforms, with Instagram being no exception. These animated images offer a fun and engaging way to grab attention and showcase creativity. Whether you want to entertain your followers, promote your brand, or simply express yourself, knowing how to create and upload GIFs on Instagram can be a valuable skill.
In this article, we will guide you through the process of making GIFs specifically tailored for Instagram. From choosing the right content to finding suitable apps and editing tools, we will cover all the necessary steps to help you create eye-catching GIFs that can enhance your Instagram presence.
But first, let’s understand why it’s important to incorporate GIFs into your Instagram strategy. GIFs have the power to convey emotions, add humor, or provide a sneak peek into a larger story. They can make your Instagram feed more vibrant and dynamic, increasing the likelihood of engagement from your audience.
Moreover, GIFs are highly shareable, allowing your followers to easily spread your content to their own networks. This can greatly expand the reach of your brand and help you gain new followers or customers.
So, whether you’re an individual looking to create captivating personal posts or a business aiming to boost your online presence, learning how to make GIFs for Instagram will undoubtedly benefit your social media strategy. Let’s dive into the process of creating mesmerizing GIFs that will leave a lasting impression on your viewers.
Choosing the Right Content for a GIF
When creating a GIF for Instagram, it’s important to select the right type of content that will resonate with your audience. Here are a few factors to consider when choosing the perfect content for your GIF:
- Relevance: Your GIF should align with your brand or personal style. Determine the message or emotion you want to convey, and select content that reflects that.
- Entertainment Value: GIFs that entertain or engage viewers are more likely to capture attention and be shared. Look for content that is humorous, visually appealing, or emotionally evocative.
- Length: Keep in mind that Instagram has a limit of 15 seconds for videos. While GIFs don’t have a specific time limit, it’s generally recommended to keep them short and concise. Consider creating GIFs from shorter videos or multiple images to ensure they fit within the maximum duration.
- Looping Potential: GIFs play on a continuous loop, so pick content that is visually interesting even when repeated. Look for actions or movements that can be captivating in a looped format.
- Quality: While GIFs can have a playful and casual vibe, it’s important to maintain a certain level of quality. Choose content that is clear, well-lit, and visually appealing to ensure your GIFs leave a positive impression.
It’s also important to consider your target audience when selecting content for your GIFs. What type of content is most likely to resonate with them? Are there specific themes, trends, or interests that you can incorporate into your GIFs? Understanding your audience and tailoring your content accordingly will help you create GIFs that are more likely to be appreciated and shared.
Once you have a clear idea of the type of content you want to create, let’s move on to the next step: finding and downloading GIF-making apps that will help you bring your vision to life.
Finding and Downloading GIF-Making Apps
To create GIFs for Instagram, you’ll need to find and download GIF-making apps that suit your needs. Fortunately, there are a variety of apps available, both for iOS and Android devices, that make GIF creation a breeze. Here are a few popular options:
- GIPHY: GIPHY is a widely-used platform known for its extensive library of GIFs. You can use their app to create your own GIFs by importing videos or photos, adding effects, captions, and stickers, and then easily save and share them on Instagram.
- ImgPlay: ImgPlay is a versatile app that allows you to create GIFs from videos, Live Photos, burst photos, and even existing GIFs. It offers various editing features like trimming, adding captions, adjusting speed, and applying filters to enhance your GIFs.
- Boomerang: While not a dedicated GIF-making app, Boomerang by Instagram is a popular choice for creating short, looped video clips. It captures a burst of photos and stitches them together into a unique GIF-like format that can be directly shared on Instagram.
- Legend: If you want to create text-based GIFs, Legend is a great app to use. It allows you to animate text with different fonts and styles, giving your GIFs a unique and attention-grabbing visual appeal.
Once you’ve identified the app that best suits your needs, simply go to your device’s app store, search for the app by name, and follow the instructions to download and install it on your phone.
It’s worth noting that some of these apps offer premium features or in-app purchases for additional customization options. While the free versions provide ample functionality, you may choose to upgrade if you require more advanced editing tools or want to access a wider range of effects and stickers.
Now that you have a GIF-making app ready to go, let’s move on to the step-by-step process of creating and customizing your GIF for Instagram.
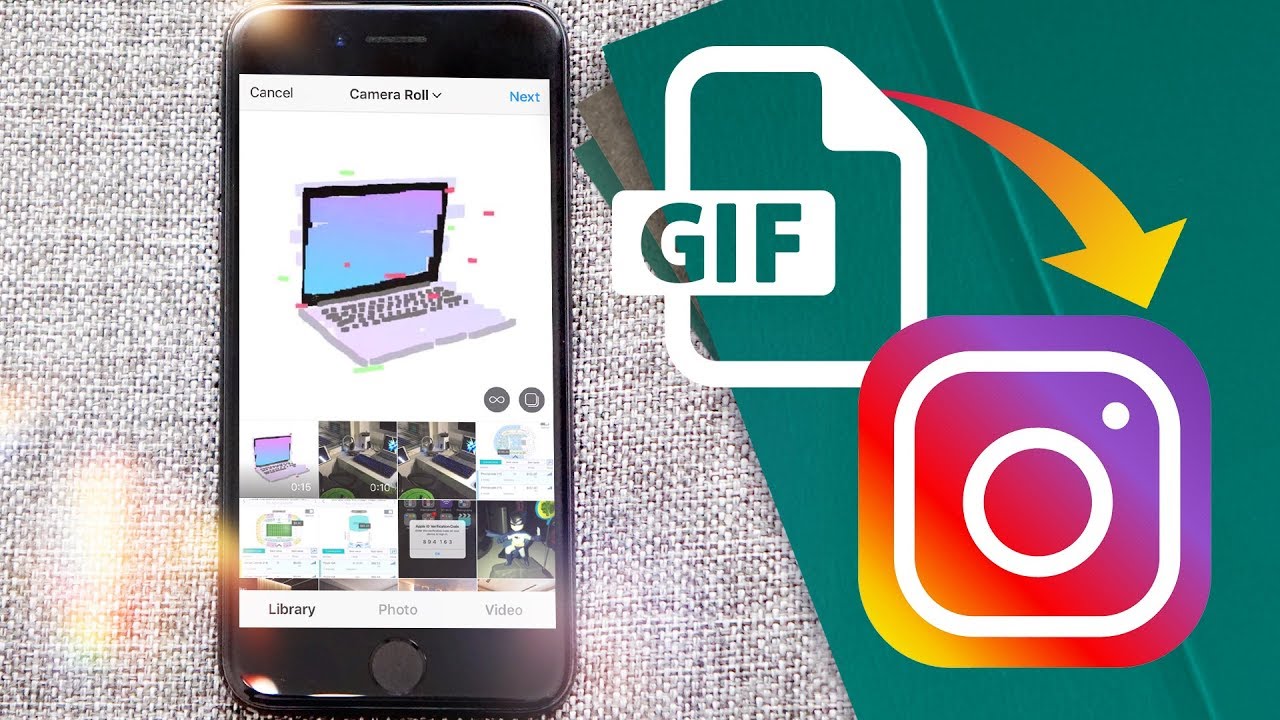
Step 1: Importing Photos or Videos
Once you have a GIF-making app installed on your device, it’s time to start creating your GIF for Instagram. The first step is to import the photos or videos you want to use for your GIF. Here’s how:
- Open the GIF-making app: Launch the app on your device. You may be prompted to grant necessary permissions, such as access to your camera roll or camera.
- Select your source: Look for an option to import media, which is usually represented by a “+” or camera icon. Tap on it to proceed.
- Choose photos or videos: Depending on the app, you’ll have the option to import either photos or videos. Select the appropriate option for your content.
- Browse and select: The app will open your device’s photo library or video gallery. Browse through your media and select the photos or videos you want to include in your GIF. Some apps allow you to select multiple media files at once.
- Confirm your selection: After choosing your media, confirm your selection by tapping on a “Done” or “Next” button.
Once you have successfully imported your photos or videos, you’ll be ready to move on to the next step: editing and customizing your GIF.
Note that different apps may offer slightly different importing processes, but the overall steps remain similar. Some apps may provide additional features like looping options, trimming videos, or rearranging the order of the imported media. Explore the app’s interface and tools to get familiar with its capabilities.
With your content imported, let’s dive into step 2: editing and customizing your GIF to make it truly stand out on Instagram.
Step 2: Editing and Customizing Your GIF
Now that you have imported your desired photos or videos for your GIF, it’s time to unleash your creativity and customize it using the tools provided by the GIF-making app. Follow these steps to edit and customize your GIF:
- Edit your sequence: Depending on the app, you may have the option to rearrange the order of your imported media. Ensure that your photos or videos are in the desired sequence by dragging and dropping them in the app’s interface.
- Trim or crop your content: If necessary, you can trim or crop your media to remove any unwanted sections. This helps to keep your GIF focused and concise. Look for editing tools within the app to perform these actions.
- Adjust the duration: Some apps allow you to control the duration of each frame in your GIF. Experiment with different durations to achieve the desired effect – shorter durations create a faster-paced GIF, while longer durations slow it down.
- Apply effects or filters: Many GIF-making apps offer a range of effects and filters to enhance your content. From adjusting brightness and contrast to adding artistic filters, explore the app’s editing options to find an effect that complements your GIF.
- Experiment with overlays: Some apps provide overlays, such as stickers or graphics, that can be added on top of your GIF. These overlays can add a touch of creativity or branding to your content. Explore the app’s library of overlays and experiment with different options.
Take your time in this step and let your creativity shine. Play around with the different editing tools, effects, and filters to achieve your desired look and feel. Remember, the goal is to create a visually captivating GIF that will engage your Instagram followers.
Once you are satisfied with the edits and customizations, it’s time to move on to the next step: adding text, stickers, or filters to further enhance your GIF.
Step 3: Adding Text, Stickers, or Filters
Now that you have edited and customized your GIF, it’s time to add extra elements to make it even more engaging and expressive. Here’s how you can enhance your GIF by adding text, stickers, or filters:
- Add text: Look for the text tool within the GIF-making app and tap on it. You’ll be able to enter your desired text, choose a font, adjust the size and color, and position it on the GIF. Consider adding catchy captions, witty phrases, or meaningful quotes to convey your message effectively.
- Include stickers or emojis: Many GIF-making apps provide a wide selection of stickers or emojis that you can add to your GIF. From expressive faces to doodles and icons, explore the app’s sticker collection and choose ones that align with your message or style. Position them on the GIF as desired.
- Apply filters: Just like photo editing apps, some GIF-making apps offer a range of filters that you can apply to your GIF to enhance its visual appeal. Play around with different filters to find one that suits the mood or atmosphere you want to create.
- Resize or rotate elements: If necessary, you can resize or rotate the added text, stickers, or filters to fit perfectly within your GIF. Use the resizing and rotating tools provided by the app to adjust the position and orientation of these elements.
When adding text, stickers, or filters, make sure they complement the overall theme and content of your GIF. Avoid overcrowding the GIF with too many elements, as it can distract the viewer from the main focus. Keep it balanced and visually appealing.
Once you are satisfied with the additions you’ve made, it’s time to move on to step 4: exporting and saving your GIF.
Step 4: Exporting and Saving Your GIF
After you’ve finished editing, customizing, and adding extra elements to your GIF, it’s time to export and save your creation. By following these steps, you’ll be able to preserve your GIF and get it ready for uploading to Instagram:
- Preview your GIF: Take a moment to review your final creation. Play it back to ensure that all the edits, customizations, and additions look as intended. Check for any errors or inconsistencies that might have occurred during the editing process.
- Adjust settings: Some GIF-making apps allow you to adjust additional settings before exporting. These settings might include the output file format, resolution, or quality. Take a look at the app’s export or save settings to determine if any adjustments need to be made.
- Export or save your GIF: Look for an option within the app that allows you to save or export your GIF to your device’s photo library. Tap on it and follow the provided instructions. The app might prompt you to choose a file name or select a specific folder for saving.
- Check the file format: Ensure that the exported GIF is in a compatible format for Instagram. GIFs are widely supported, but it’s good to confirm that the file format is either .gif or .mp4 to avoid any issues during the uploading process.
Once your GIF is saved to your photo library or camera roll, it’s time to consider the final steps: uploading the GIF to your Instagram account and capturing your audience’s attention.
Remember, the process of exporting and saving might vary slightly depending on the GIF-making app you’re using. It’s always a good idea to refer to the app’s documentation or help section for more specific instructions if needed.
With your GIF saved and ready, let’s move on to the next section where we’ll explore the necessary steps for uploading your GIF to Instagram.
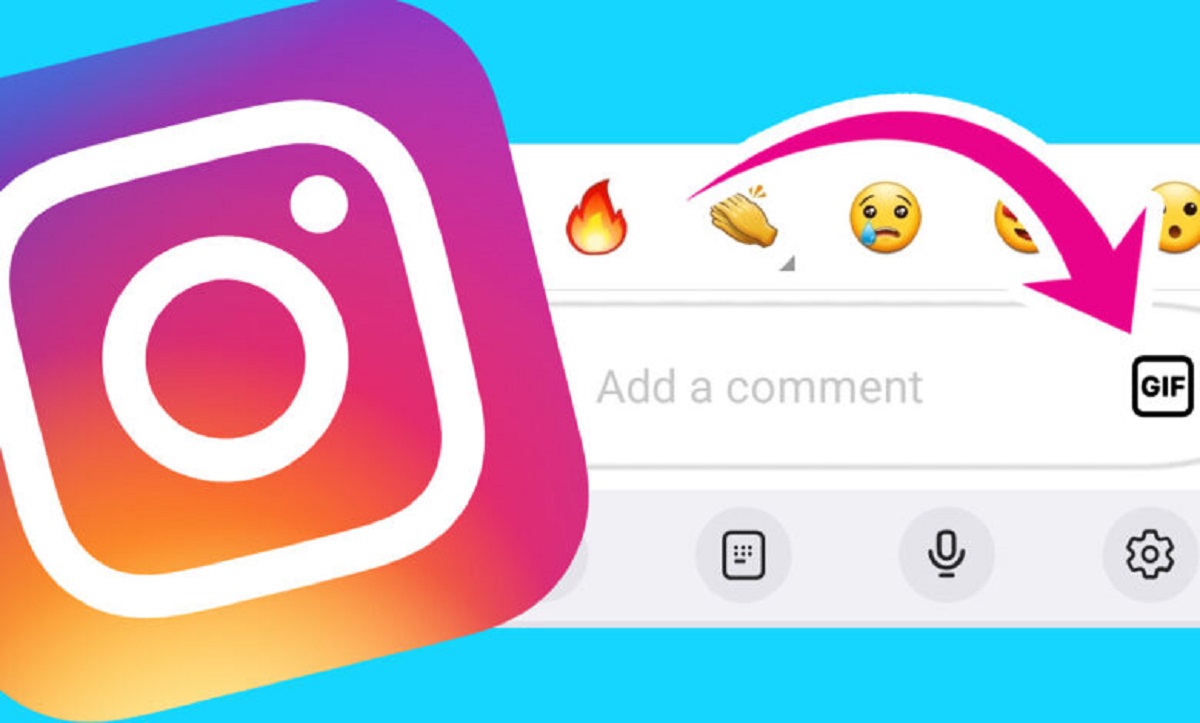
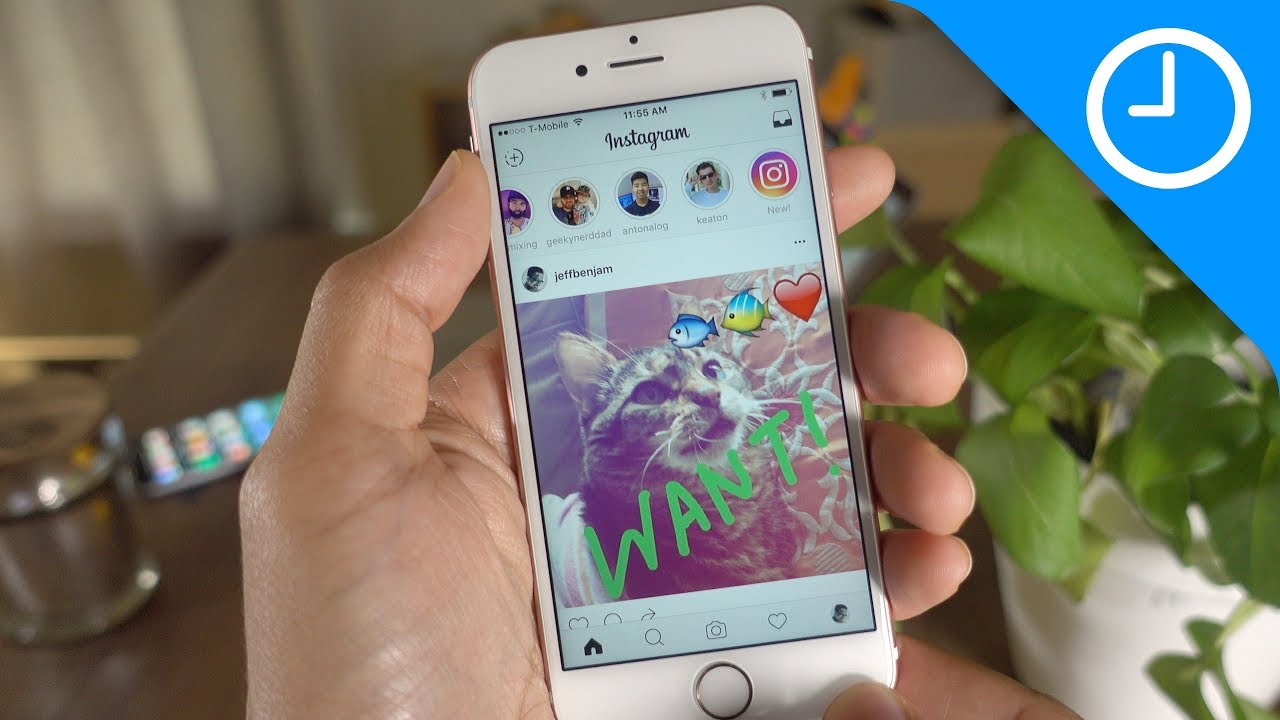
Uploading Your GIF to Instagram
Now that you have created and saved your captivating GIF, it’s time to share it with your Instagram followers. Follow these steps to successfully upload your GIF to Instagram:
- Open the Instagram app: Launch the Instagram app on your device. If you haven’t already, log in to your Instagram account.
- Tap the ‘+’ icon: Look for the ‘+’ icon at the bottom center of the screen and tap on it. This will take you to the ‘New Post’ screen.
- Select your GIF: In the ‘New Post’ screen, locate and tap on the ‘Library’ or ‘Gallery’ option. This will allow you to access your device’s photo library or camera roll.
- Find your GIF: Find and select your saved GIF from the photo library or camera roll. You can use the search or filter options within the app to locate your GIF more quickly if you have a large collection of media.
- Apply optional edits: Instagram provides basic editing tools that you can use to further enhance your GIF before posting. You can adjust the brightness, contrast, saturation, and other settings if desired.
- Add a caption and hashtags: Write a catchy, descriptive caption that complements your GIF. You can also add relevant hashtags to increase the visibility of your post. Consider using hashtags related to the content, theme, or mood of your GIF.
- Tag relevant accounts: If your GIF relates to a specific person, brand, or event, consider tagging the relevant Instagram accounts in your post. This can help increase engagement and visibility for your GIF.
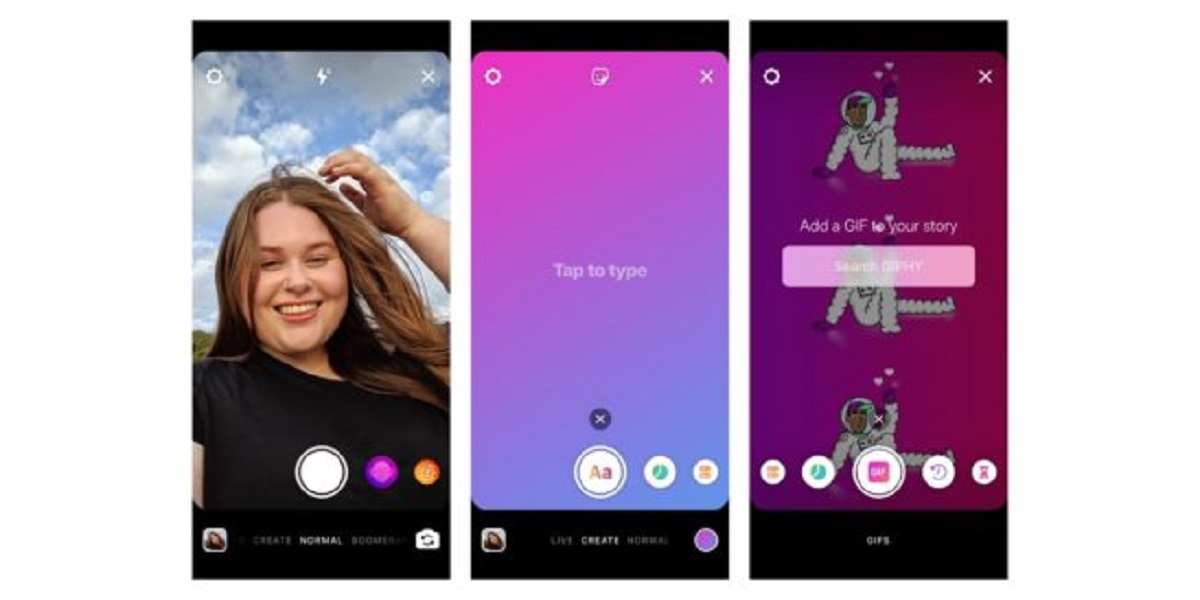
- Select your desired post format: By default, Instagram treats GIFs as videos. However, you may choose to upload your GIF as a ‘Video’ or as a ‘Story’ depending on the context and engagement you’re aiming for.
- Post your GIF: Once you’re satisfied with the caption, tags, and post format, click on the ‘Share’ or ‘Post’ button to upload your GIF to Instagram. It will then be visible to your followers in their feed or story, depending on the chosen format.
And there you have it! Your visually captivating GIF is now live on your Instagram feed or story, ready to engage and entertain your audience.
Keep in mind that Instagram has certain limitations for file size and dimensions, so ensure your GIF meets the platform’s requirements to ensure successful uploading and optimal performance.
Now that you know how to upload your GIF to Instagram, let’s explore some tips and tricks to create even more engaging GIFs for your audience.
Tips and Tricks for Creating Engaging GIFs for Instagram
Creating compelling and engaging GIFs for Instagram takes a mix of creativity, attention to detail, and knowledge of what resonates with your audience. Here are some valuable tips and tricks to help you create GIFs that capture attention and drive engagement:
- Keep it concise: With the limited attention span of Instagram users, it’s important to keep your GIFs short and concise. Aim for a duration of around 3 to 7 seconds to ensure your message is effectively conveyed within the limited time frame.
- Make it visually appealing: Ensure that your GIF stands out visually by using vibrant colors, interesting compositions, and captivating movements. Consider using high-quality images or videos to enhance the overall impact.
- Add a touch of humor: Infusing humor into your GIFs can increase their shareability and enhance engagement. Whether it’s a funny caption, comical movements, or humorous expressions, incorporating humor can make your GIFs more memorable and enjoyable.
- Experiment with different effects: Explore the various editing tools and effects offered by the GIF-making app to add unique and creative elements to your GIFs. Consider using effects like slow motion, boomerang, or selective coloring to make your GIFs stand out.
- Focus on storytelling: Use your GIF to tell a compelling story or convey a clear message. Whether it’s showcasing a product, sharing behind-the-scenes footage, or capturing a special moment, a well-crafted narrative can make your GIFs more engaging and memorable.
- Optimize for mobile: Remember that Instagram is primarily accessed on mobile devices. Ensure that your GIF is optimized for mobile viewing by using appropriate dimensions, a clear and readable font size for any text, and avoiding small details that may be difficult to see on smaller screens.
- Use relevant hashtags: Hashtags can help increase the visibility of your GIF and reach a wider audience. Research popular hashtags in your niche or industry and use them strategically in your captions to connect with like-minded Instagram users.
- Engage with your audience: Encourage interaction and engagement with your GIFs by asking questions, inviting comments, or running contests. Respond to comments and messages promptly to build a connection with your audience and foster a sense of community.
- Test and analyze performance: Don’t be afraid to experiment with different approaches and styles of GIFs. Monitor the performance of your GIFs using Instagram Insights or other analytics tools to identify what resonates with your audience and drive further engagement.
Remember, these tips are not exhaustive, and it’s important to continuously adapt and evolve your GIF creation strategy based on the preferences and feedback of your audience.
With these tips in mind, you’re well-equipped to create engaging and memorable GIFs that captivate your Instagram followers and boost your online presence.
Conclusion
GIFs have become a popular and effective way to capture attention and engage audiences on Instagram. By following the steps outlined in this article, you can create visually captivating GIFs tailored specifically for Instagram. From choosing the right content and finding the perfect GIF-making app to editing, customizing, and uploading your GIFs, each step plays a crucial role in creating compelling and shareable content.
Remember to choose content that is relevant, entertaining, and visually appealing. Leverage the features and tools provided by GIF-making apps to enhance your GIFs with text, stickers, filters, and other creative elements. Pay attention to the details and ensure your GIFs are optimized for mobile viewing.
When uploading your GIFs to Instagram, take advantage of captions, hashtags, and tagging to attract and engage your target audience. Be sure to interact and engage with your followers to foster a sense of community and build connections.
Lastly, continue to experiment, analyze performance, and refine your approach. Understand what works best for your audience through analytics, and adapt your GIF creation strategy accordingly.
Now that you have acquired the knowledge and techniques for crafting engaging GIFs for Instagram, it’s time to unleash your creativity and make your mark on the platform. So go ahead, create stunning GIFs that captivate your audience and elevate your Instagram presence.