Introduction
With the rise of social media platforms like Instagram, video content has become an essential part of every marketer’s toolkit. Whether you’re a business owner, influencer, or simply looking to share your creative endeavors, editing videos for Instagram can help you create visually stunning and engaging content.
However, the task of editing videos may seem daunting, especially if you’re new to video editing. But fear not! In this article, we will guide you through the process of editing videos specifically for Instagram. From choosing the right editing software to exporting and sharing your final product, you’ll learn all the necessary steps to create professional-looking videos that will grab the attention of your Instagram audience.
Before we jump into the technical details of video editing, let’s understand why it’s important to have high-quality videos on Instagram. The visual nature of the platform makes it perfect for showcasing your products, services, or creative projects in a captivating way. Engaging videos can not only help you build brand awareness but also drive more traffic and conversions to your website or online store.
When it comes to editing videos for Instagram, it’s crucial to keep in mind the unique aspects of the platform. Instagram supports videos of up to 60 seconds in the main feed, while IGTV allows for longer videos. As a result, you need to optimize your videos to ensure they fit within these constraints and provide a seamless viewing experience for your audience.
Ready to dive into the world of video editing for Instagram? Let’s get started on this exciting journey by exploring the different software options available to you and selecting the one that best suits your needs and skill level.
Choosing the Right Editing Software
When it comes to editing videos for Instagram, one of the first steps is to choose the right editing software for your needs. The market is flooded with various options, ranging from beginner-friendly tools to advanced professional software. Here are a few things to consider when making your decision:
- Skill Level: If you’re new to video editing, it’s best to start with user-friendly software that offers a simple interface and intuitive controls. Some popular beginner-friendly options include iMovie (for Mac users) and Adobe Premiere Elements.
- Features and Flexibility: Depending on the complexity of your project, you may require advanced features such as multi-track editing, color grading, and special effects. Adobe Premiere Pro and Final Cut Pro X are well-known industry-standard software that offer a wide range of advanced editing tools.
- Platform Compatibility: Consider the operating system you’re using as well as the devices you’ll be editing on. Some editing software is exclusive to either Windows or Mac, so it’s important to choose software that’s compatible with your system.
- Cost: Editing software comes in a variety of price ranges, from free options to high-end paid software. Determine your budget and evaluate the features offered by each software to find the best value for your money.
- Support and Learning Resources: Look for software that offers good customer support and a community or online resources where you can find tutorials and troubleshooting guides. This will be helpful as you navigate the learning curve of video editing.
It’s worth mentioning a couple of popular video editing software choices:
- iMovie: For Mac users, iMovie is a great option that comes pre-installed on Mac computers. It offers a user-friendly interface and basic editing features that are perfect for beginners.
- Adobe Premiere Pro: Adobe Premiere Pro is a professional-grade video editing software that provides advanced tools and flexibility for experienced editors. It offers a wide range of features and is compatible with both Windows and Mac.
Ultimately, the choice of video editing software depends on your specific needs, budget, and skill level. Take the time to research and try out different options to find the one that suits you best. Once you have chosen your editing software, you are ready to move on to the next step: importing and organizing your footage.
Importing and Organizing Footage
Now that you’ve chosen the right editing software, it’s time to import and organize your footage before you start the editing process. This step is crucial to ensure a smooth and efficient editing workflow. Here’s how to get started:
- Gather Your Footage: Locate and gather all the video clips, images, and audio files you plan to use in your Instagram video. Make sure they are saved in a folder on your computer for easy access.
- Importing Footage: Open your editing software and locate the import option. Most software allows you to drag and drop files directly into the project library or import them using the file menu. Select the files you want to import and let the software load them into your project.
- Organizing Your Files: Once your footage is imported, it’s essential to organize them systematically. Create folders or bins within your project library and categorize your files based on scenes, locations, or any other relevant criteria. This will make it easier to locate and access specific footage during the editing process.
- File Naming and Labeling: To further streamline your organization, consider renaming your files with descriptive names. This will help you quickly identify the content of each file and make it easier to search for specific footage when needed.
- Creating a Rough Timeline: Before diving into detailed editing, create a rough timeline by arranging your footage in the order you want them to appear in your video. This will give you a better idea of the overall flow and structure of your video.
During the import and organization process, it’s important to remember that you don’t have to use every single piece of footage you have. Be selective and choose the best clips that help convey your message or story effectively.
By taking the time to import and organize your footage, you are setting a strong foundation for a more efficient and productive editing process. Now that you have your content organized, it’s time to move on to understanding the basics of video editing.
Understanding the Basics of Video Editing
Before you start editing your Instagram video, it’s important to familiarize yourself with the basics of video editing. Understanding these fundamental concepts will not only help you create a more polished and cohesive video but also save you time and effort in the editing process. Let’s dive into the key elements of video editing:
- Timeline: The timeline is the foundation of your video editing interface. It represents the progress of your video and allows you to arrange and manipulate your footage in a sequential order.
- Clips: In video editing, a clip refers to a specific section of your footage. Clips can be videos, images, or audio files, and they can be trimmed, cut, or rearranged within your timeline.
- Transitions: Transitions are used to create smooth and seamless connections between different clips. Common types of transitions include fades, dissolves, wipes, and slides. They add visual interest and help maintain the flow of your video.
- Text and Graphics: Adding text and graphics can enhance the storytelling aspect of your video. You can overlay text to provide context, captions, or titles, while graphics, such as logos or icons, can help reinforce your brand identity.
- Color and Light Adjustment: Adjusting the color and light of your footage can significantly impact the overall look and feel of your video. You can make global adjustments to improve the overall color balance or make targeted adjustments to specific clips.
- Filters and Effects: Applying filters and effects can add a creative touch to your video. You can choose from a variety of options to change the mood, style, or visual effects of your footage.
- Audio: Audio is a crucial component of your video. You can adjust the volume, add background music, or incorporate sound effects to enhance the overall audio experience.
- Cropping and Resizing: Sometimes, you may need to crop or resize your footage to fit the desired aspect ratio or create specific visual effects. This can be done within your editing software using cropping tools or by adjusting the scale and position of your clips.
By understanding these basic concepts, you have a solid foundation to embark on your video editing journey. In the next sections, we will explore each of these elements in more detail, providing you with practical tips and techniques to help you create captivating Instagram videos. Let’s start by trimming and cutting clips in our next section.
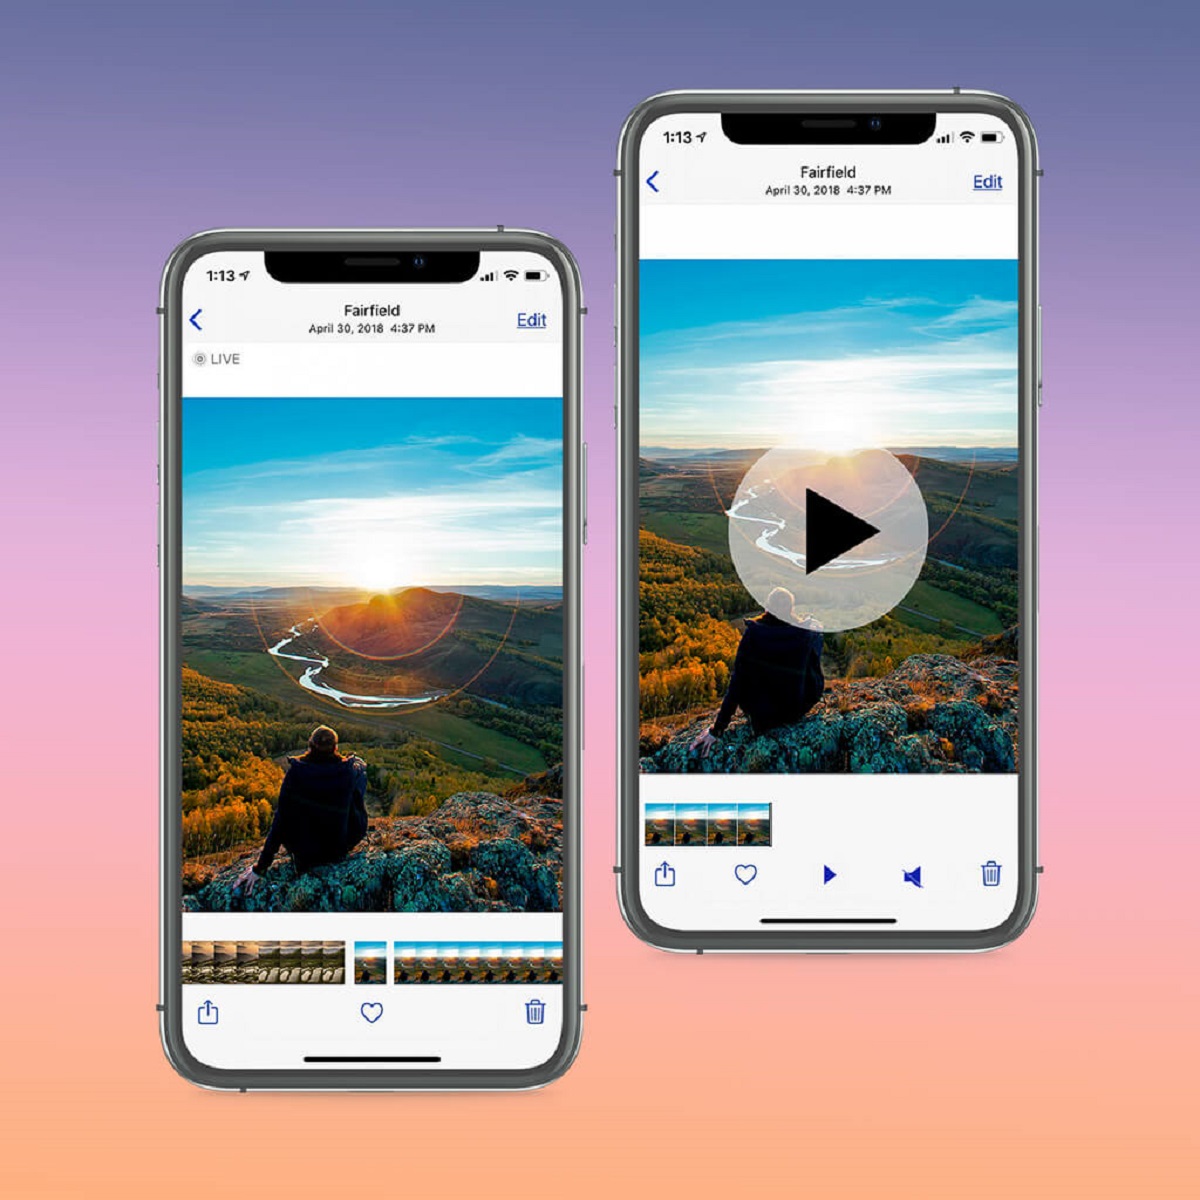
Trimming and Cutting Clips
One of the essential aspects of video editing is the ability to trim and cut clips to remove unwanted portions or create seamless transitions between different footage. By mastering this technique, you can ensure that your Instagram videos are engaging and concise. Here’s how to trim and cut clips effectively:
- Selecting Clips: In your timeline, choose the clip you want to edit by clicking on it. You can also use keyboard shortcuts such as “I” for in-point and “O” for out-point to select the desired portion of the clip.
- Trimming: Once you have selected your clip, look for the trimming tools in your editing software. These tools usually include markers, sliders, or a trim window. Drag the markers or adjust the sliders to trim either the beginning, end, or both ends of the clip.
- Cutting: Cutting clips involves splitting them into smaller sections. This is useful when you want to remove specific parts or rearrange the sequence of your footage. Locate the cutting tool in your editing software and position it at the point where you want to split the clip. Click on the cutting tool to separate the clip into two segments.
- Removing Unwanted Footage: Once you have split a clip, you can easily delete or remove the unwanted portion by selecting it and pressing the delete key or using the software’s delete function. This allows you to keep only the relevant parts of your footage.
- Creating Seamless Transitions: To create smooth transitions between clips, ensure that the end of one clip and the beginning of the next clip align seamlessly. If needed, adjust the trimming of the clips to achieve a more natural and fluid transition.
When trimming and cutting clips, it’s important to maintain the flow and coherence of your video. Avoid abrupt cuts or transitions that may distract or confuse the viewer. Take the time to review your edits and play through the sequence to ensure a seamless and engaging viewing experience.
By mastering the art of trimming and cutting clips, you can effectively control the pacing and timing of your Instagram videos. In the next section, we will explore how to add and adjust transitions to enhance the visual appeal of your videos.
Adding and Adjusting Transitions
Transitions play a crucial role in creating a visually appealing and seamless flow between different clips in your Instagram videos. They help smoothen the transition from one scene to another, enhancing the overall viewing experience. Here’s how you can add and adjust transitions effectively:
- Choose the Right Transition: Depending on the mood and style you want to achieve, select transitions that align with your video’s theme. Popular transition options include fades, dissolves, wipes, slides, and crossfades. Experiment with different transitions to find the ones that best complement your footage.
- Locate the Transition Library: In your editing software, look for the transition library or effects panel. This is where you can find a variety of pre-built transitions that you can apply to your clips.
- Apply the Transition: To apply a transition, select the clip where you want the transition to occur. Then, choose the desired transition from the library and drag it onto the timeline, overlapping it with the edge of the adjacent clip.
- Adjust Transition Duration: Most editing software allows you to adjust the duration of transitions. You can extend or shorten the length of a transition by dragging its edges in the timeline. Ensure that the transition duration matches the desired timing for a smooth and natural transition.
- Experiment with Transition Effects: Some transitions offer additional customization options, such as direction, speed, and style. Explore these settings to add unique effects to your transitions and make them visually engaging.
- Be Mindful of Transition Intensity: While transitions can enhance your video, it’s important not to overuse them. Keep the transitions subtle and avoid using too many flashy or distracting effects that can take away from the content of your video.
Adding and adjusting transitions gives your Instagram videos a professional touch, making them visually appealing and engaging. Smooth transitions contribute to a cohesive narrative and can help keep your audience captivated.
Remember, transitions should serve the purpose of enhancing the overall story or message of your video. Use them strategically and sparingly to create a seamless and visually pleasing viewing experience. In the next section, we will delve into incorporating text and graphics to further elevate your Instagram videos.
Incorporating Text and Graphics
Adding text and graphics to your Instagram videos can greatly enhance the storytelling aspect and help convey your message more effectively. Whether you want to provide context, captions, or reinforce your brand identity, incorporating text and graphics can take your videos to the next level. Here’s how you can do it:
- Select the Text/Graphics Tool: In your editing software, look for the text or graphics feature. It can usually be found in the effects panel or effects library.
- Create Text: Choose the text tool and click on the desired location in the timeline or canvas where you want the text to appear. Type in your desired text and customize its font, size, color, and other formatting options.
- Position and Animate Text: Once you’ve added the text, you can position it anywhere on the screen, such as at the bottom, top, or overlaying a specific part of your footage. Some software also allows you to animate the text, adding movement or transitions to make it more visually engaging.
- Add Graphics: Apart from text, you can also incorporate graphics, such as logos, icons, or images, to enhance your video. Import the graphic file into your editing software, position it in the desired location, and adjust its size and opacity as needed.
- Overlay Text/Graphics with Transparency: To ensure that your text or graphics do not obstruct the view of the underlying footage, you can adjust the transparency or opacity. This allows the text or graphics to blend seamlessly with the video.
- Coordinate Text/Graphics with the Content: When adding text or graphics, consider the timing and content of your video. Ensure that the text appears at the right moment and remains on the screen long enough for viewers to read and understand its message.
- Consistency in Style: Maintain consistency in the style and design of your text and graphics throughout your video. This helps establish a cohesive visual identity and improves the overall look and feel.
Remember, the intention of incorporating text and graphics is to enhance your video and deliver a clear message. Keep them concise, legible, and complementary to the content, ensuring they do not distract or overwhelm the viewer.
By thoughtfully including text and graphics in your Instagram videos, you can create dynamic visuals that captivate your audience and reinforce your brand identity. In the next section, we will explore color and light adjustments to further enhance the visual appeal of your videos.
Adjusting Color and Light
The color and lighting of your Instagram videos can have a significant impact on the overall look and feel. By adjusting color and light, you can enhance the visual appeal, create a specific mood, and evoke emotions in your audience. Here’s how you can make color and light adjustments for your videos:
- Select the Color and Light Adjustment Tools: In your editing software, locate the color correction or color grading feature. This tool allows you to make various adjustments to the color and light settings of your footage.
- White Balance: Adjusting the white balance ensures that the colors in your video appear natural and balanced. Use the white balance tool in your editing software to eliminate any color casts and achieve accurate color representation.
- Brightness and Contrast: Enhance the overall luminosity of your footage by adjusting the brightness and contrast settings. Increase the brightness to make your video appear more vibrant, or decrease it for a more subdued look. Adjust the contrast to add depth and make the colors pop.
- Saturation and Vibrance: Saturation and vibrance adjustments control the intensity and richness of the colors in your video. Increase saturation to make the colors more vivid, or decrease it for a more muted look. Adjust vibrance to selectively boost the intensity of less-saturated colors without over saturating already vibrant hues.
- Color Balance and Tone: Use the color balance or tone tools in your software to refine the color temperature of your video. Adjust the color sliders to achieve warmer or cooler tones, depending on the mood or atmosphere you want to convey.
- Selective Color Adjustments: Some software allows you to make selective color adjustments, enabling you to modify specific colors in your footage. This can be useful for correcting color imbalances or creating specific visual effects.
- Applying Filters: Filters are pre-set adjustments that can instantly transform the overall look of your video. Experiment with different filters in your editing software to find the one that best suits your desired aesthetic.
When adjusting color and light, it’s important to consider the overall tone and atmosphere you want to create. Different color combinations and lighting styles can evoke different emotions and enhance the storytelling aspect of your video.
Remember, subtlety is key when making color and light adjustments. Aim for a natural and balanced look that enhances without overpowering. Regularly review your edits and test them on different screens to ensure consistency across devices and platforms.
By mastering the art of color and light adjustments, you can transform your Instagram videos into visually captivating and engaging content. In the next section, we will explore the application of filters and effects to further enhance the visual appeal of your videos.
Applying Filters and Effects
Applying filters and effects to your Instagram videos is a creative way to enhance the overall visual appeal and evoke specific emotions. Filters can add a unique look and style to your videos, while effects can help create dramatic or artistic visual elements. Here’s how you can effectively apply filters and effects:
- Choose the Right Filter: Most editing software provides a range of pre-built filters that you can apply to your footage. These filters come with different color adjustments and visual styles. Test out various filters to find the one that best suits the mood and aesthetics of your video.
- Customize Filter Intensity: After applying a filter, you can adjust its intensity to achieve the desired effect. Increase the intensity for a more pronounced effect, or decrease it for a more subtle touch. This allows you to strike the right balance between enhancing your video and maintaining its natural look.
- Experiment with Color Grading: Color grading involves manually adjusting the color settings of your footage to create a specific look or atmosphere. It allows you to fine-tune color temperature, contrast, saturation, and other color factors to achieve a unique visual style.
- Apply Visual Effects: Visual effects can add dynamic and artistic elements to your videos. These effects may include overlays, transitions, motion graphics, or even simulated weather conditions. Experiment with different effects to add a touch of creativity and make your videos stand out.
- Consider the Video’s Narrative: When applying filters and effects, always keep the narrative and content of your video in mind. Ensure that the chosen filter or effect enhances the story and message you want to convey rather than detracting from it.
- Be Consistent: Maintain consistency in the application of filters and effects throughout your video to create a cohesive visual experience. Avoid applying too many different effects or using conflicting styles that may distract the viewer or undermine the overall aesthetic.
Filters and effects provide you with the opportunity to unleash your creativity and add a personal touch to your Instagram videos. However, it’s essential to use them judiciously and with intention, ensuring they enhance the overall viewing experience without overpowering the content.
Take the time to experiment with different filters and effects and explore the vast possibilities they offer. By adding visual flair and creativity, you can elevate your Instagram videos and capture the attention of your audience. In the next section, we will explore techniques for enhancing the audio quality of your videos.
Enhancing Audio Quality
Audio quality plays a crucial role in the overall impact and effectiveness of your Instagram videos. Clear, balanced, and immersive audio can significantly enhance the viewer’s experience and reinforce your message. Here are some techniques to enhance the audio quality of your videos:
- Capture High-Quality Audio: The first step to improving audio quality is to record clean and clear audio during the shooting phase. Use a dedicated microphone or an external audio recorder to capture audio separately from your camera’s built-in microphone.
- Remove Unwanted Background Noise: Background noise can be distracting and diminish the overall audio quality of your videos. Use a noise reduction tool in your editing software to remove or minimize unwanted background noise.
- Adjust Volume Levels: Ensure that the audio is well-balanced and consistent throughout your video. Adjust volume levels using audio mixing tools in your editing software to ensure clear and audible dialogue and music.
- Apply Audio Effects: Enhance your audio by applying audio effects such as equalization, compression, and normalization. These effects can improve the clarity, dynamics, and overall quality of your audio.
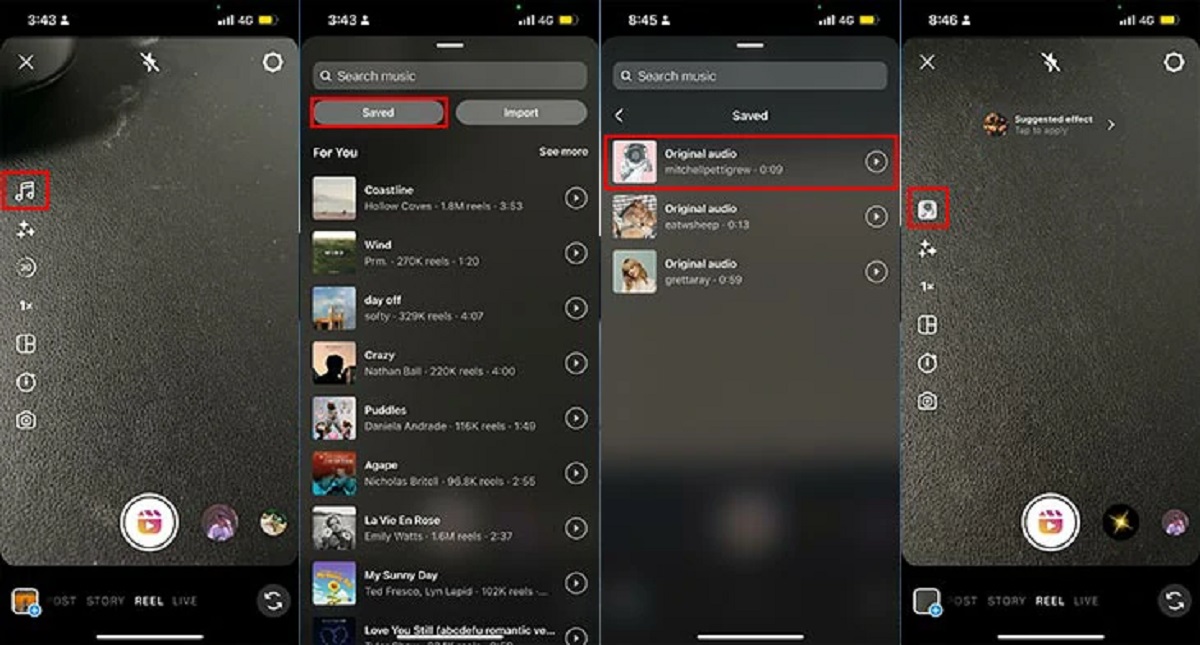
- Add Background Music: Background music can enhance the mood and atmosphere of your videos. Choose music that complements the content and style of your video, and ensure that it’s at an appropriate volume level so that it doesn’t overpower dialogue or other audio elements.
- Balance Audio Elements: If your video includes multiple audio sources, such as voiceovers, dialogue, and music, balance these elements to ensure they work harmoniously together. Use audio mixing tools to adjust the volume and EQ of each audio source until they blend well.
- Utilize Sound Effects: Incorporating sound effects can add depth and realism to your videos. Whether it’s a subtle background ambiance or specific sound effects, choose them thoughtfully to enhance the visual storytelling and create a more immersive experience.
- Ensure Proper Timing: Ensure that your audio elements are synchronized perfectly with the visuals. Pay attention to lip-syncing if applicable, and make sure all audio cues or effects are in sync with the visual actions or transitions in your video.
By applying these techniques, you can significantly enhance the audio quality of your Instagram videos. Clear and immersive audio complements and reinforces the visuals, creating a more engaging and memorable viewing experience for your audience.
Take the time to carefully assess and adjust the audio elements in your videos. By doing so, you can ensure that the audio quality matches the high-quality visuals and effectively delivers your intended message to your audience. In the next section, we will explore techniques for cropping and resizing videos to optimize them for Instagram.
Cropping and Resizing Videos
Optimizing your videos for Instagram’s specific aspect ratio and dimensions is an important step in ensuring that your content looks visually appealing and seamless on the platform. Cropping and resizing videos allows you to adjust the framing and aspect ratio of your footage to fit Instagram’s requirements. Here’s how you can effectively crop and resize videos:
- Understanding Instagram’s Aspect Ratio: Instagram supports different aspect ratios for videos, including 1:1 (square), 4:5 (vertical), and 16:9 (horizontal). Depending on the type of content you’re creating, determine the most suitable aspect ratio for your video.
- Import Your Video: Open your editing software and import the video you want to edit. Ensure that it is placed in the timeline for further adjustments.
- Setting the Desired Aspect Ratio: Locate the cropping or resizing tool in your editing software. Specify the desired aspect ratio for your video, keeping in mind the requirements of Instagram. You can either choose a preset aspect ratio or customize it manually.
- Adjusting the Crop: Use the cropping tool to frame your video correctly within the selected aspect ratio. You can drag and resize the cropping box to include the essential content while removing any unwanted areas.
- Preview and Fine-tuning: Preview your cropped video to ensure that it looks visually pleasing and suits the desired aspect ratio. Make any necessary adjustments, such as repositioning the framing or tweaking the crop to achieve the desired composition.
- Resizing the Video: If needed, you might also need to resize the video to match the resolution and dimensions required by Instagram. Use the resizing options in your editing software to adjust the video’s width and height accordingly.
- Maintaining Video Quality: When cropping or resizing, be mindful of maintaining the video’s quality. Avoid excessive cropping or resizing that might result in pixelation or loss of clarity. Always strive for a balance between desired framing and maintaining video quality.
By cropping and resizing your videos to fit Instagram’s aspect ratio and dimensions, you can ensure that your content appears optimized and visually appealing on the platform. Proper framing and sizing enhance the overall viewing experience and increase the likelihood of viewer engagement.
Take the time to experiment with different framing and aspect ratios to suit your video’s content and intention. By customizing the framing and resizing, you can create visually stunning videos that effectively communicate your message on Instagram. In the next section, we will explore the process of exporting and sharing your edited video.
Exporting and Sharing Your Edited Video
Once you have finished editing your Instagram video, the next step is to export and share it with your audience. It’s essential to ensure that your edited video is optimized for sharing on Instagram while maintaining the highest possible quality. Here’s how you can export and share your video effectively:
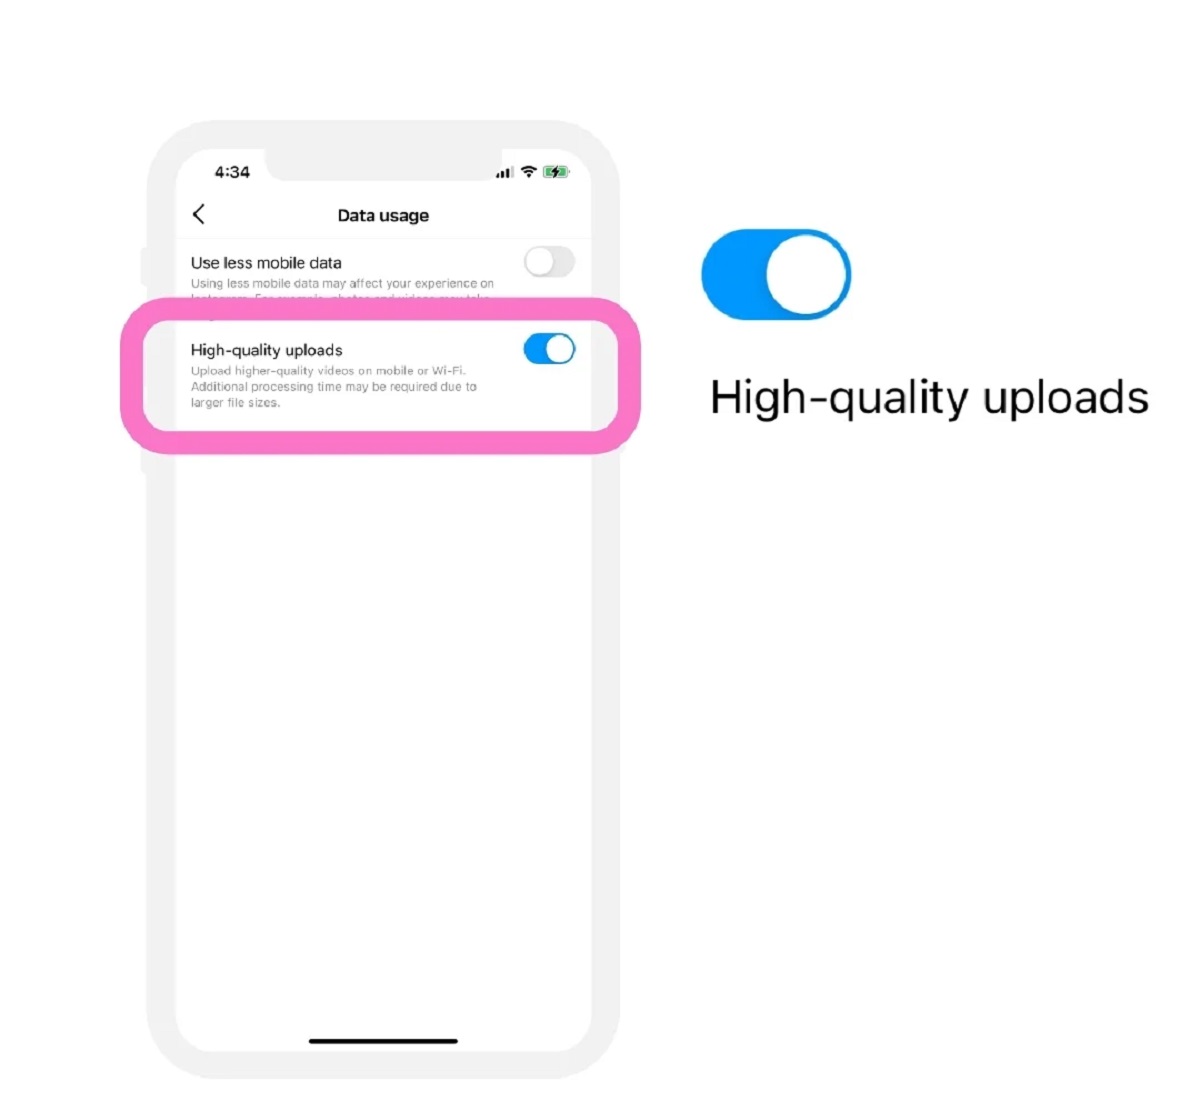
- Choose the Right Export Settings: In your editing software, navigate to the export or render settings. Select the appropriate format, codec, and resolution for Instagram. The recommended settings are typically H.264 or H.265 codecs with a resolution of 1080p (1920×1080) or higher, depending on the aspect ratio you’ve chosen.
- Adjust File Size and Quality: Balance the file size and quality by adjusting the bitrate settings during the export process. Higher bitrates provide better quality but result in larger file sizes, while lower bitrates reduce the file size but may impact video quality. Aim for a balance that maintains a good viewing experience while minimizing the file size.
- Consider Video Length and File Size Limits: Keep in mind that Instagram has certain limitations on video length and file size. Videos in the feed can be up to 60 seconds long, and IGTV allows for longer videos. Ensure that your edited video complies with these limits to avoid any issues during the upload process.
- Add Captions or Subtitles: If necessary, include captions or subtitles in your video to make it more accessible to a wider audience. You can either embed the captions directly into the video or provide a separate subtitle file.
- Preview Your Exported Video: Before sharing your video on Instagram, take the time to preview it on various devices and platforms to ensure that it appears as intended. Check for any visual or audio issues that may have occurred during the exporting process.
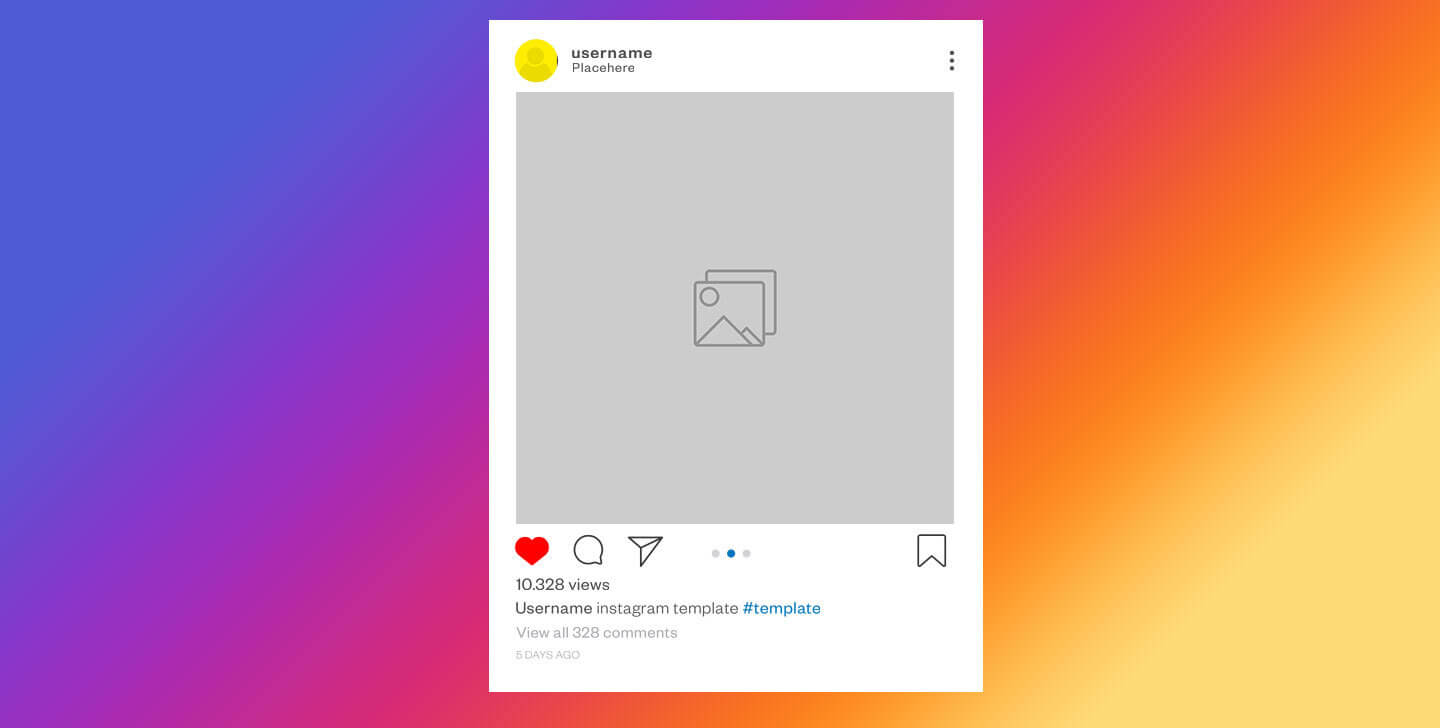
- Choose the Right Sharing Method: There are various ways to share your edited video on Instagram. You can directly upload it through the Instagram app on your mobile device or use third-party tools to schedule posts or upload from your computer. Determine the method that works best for you and your workflow.
- Optimize Video Caption and Hashtags: Craft a compelling caption for your Instagram post that describes your video and encourages engagement. Use relevant hashtags to reach a wider audience and increase the chances of your video being discovered by users interested in your content.
- Engage with Your Audience: After sharing your edited video, don’t forget to actively engage with your audience. Respond to comments, answer questions, and interact with viewers. Building connections and fostering engagement will help you grow your audience and establish a meaningful presence on Instagram.
By following these steps, you can export your edited video and share it effectively on Instagram. Optimizing the export settings and adhering to Instagram’s video length and file size limits will ensure your video looks its best and reaches your intended audience.
Remember to leverage captions, hashtags, and engagement to enhance the discoverability and reach of your video. Consistently sharing high-quality content and actively engaging with your audience will help you cultivate a strong presence and build a community on Instagram.
Congratulations! You are now equipped with the knowledge to edit, optimize, and share captivating videos on Instagram. Start creating and sharing your amazing content to engage and connect with your audience on this visually-focused platform.
Conclusion
Editting videos for Instagram is an exciting and creative process that allows you to showcase your brand, products, or creative endeavors to a wide audience. By following the steps outlined in this guide, you can create visually stunning and engaging videos that stand out on the platform.
Choosing the right editing software, importing and organizing your footage, understanding the basics of video editing, and mastering techniques such as trimming, cutting clips, adding transitions, incorporating text and graphics, adjusting color and light, applying filters and effects, enhancing audio quality, cropping and resizing videos – all of these steps are essential to produce high-quality content that resonates with your Instagram audience.
Remember to always keep the platform’s unique features and requirements in mind throughout the editing process. Instagram supports various aspect ratios and video lengths, so be sure to optimize your videos accordingly. Additionally, engaging with your audience and actively participating in the Instagram community will help increase your visibility and reach.
Now, armed with the knowledge and techniques shared in this guide, it’s time to unleash your creativity and start editing captivating videos for Instagram. Experiment with different styles, effects, and storytelling techniques to find your unique voice and aesthetic. Keep refining your skills through practice, and don’t be afraid to try new things.
By consistently delivering high-quality, engaging content, you can create a strong presence on Instagram and connect with your audience in meaningful ways. So, start editing, sharing, and making an impact with your Instagram videos today!