Introduction
Face ID, the facial recognition technology introduced by Apple, allows users to securely unlock their devices and authenticate various applications. One of the applications that can benefit from the convenience and enhanced security of Face ID is Apple’s Notes app. Face ID for Notes provides an additional layer of protection for your sensitive and private information.
In this article, we will guide you through the process of setting up Face ID for Notes and explain how to use this feature to lock and unlock your notes. We will also explore how you can add Face ID protection to individual notes and troubleshoot any Face ID-related issues that you may encounter.
Whether you use your Notes app to jot down personal thoughts, important reminders, or confidential information, enabling Face ID authentication will help ensure that only you can access this data. So, let’s dive in and explore how Face ID for Notes can elevate the security of your notes and make your note-taking experience even more seamless and convenient.
Setting up Face ID for Notes
Before you can use Face ID to protect your Notes app, you need to ensure that Face ID is set up and enabled on your device. Here’s how to do it:
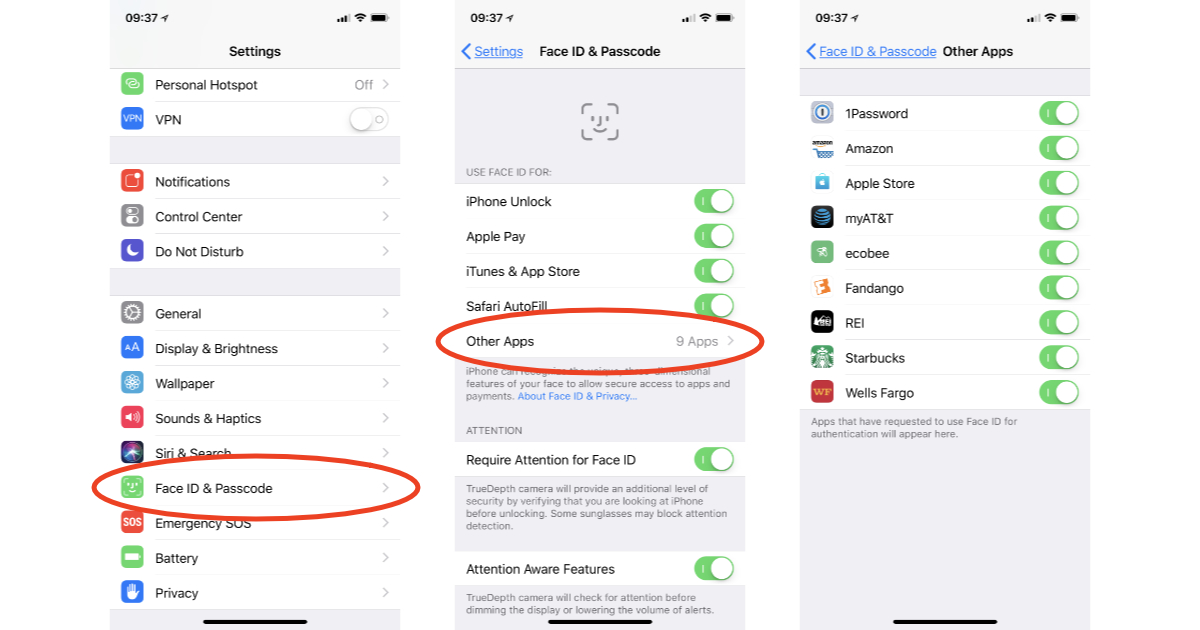
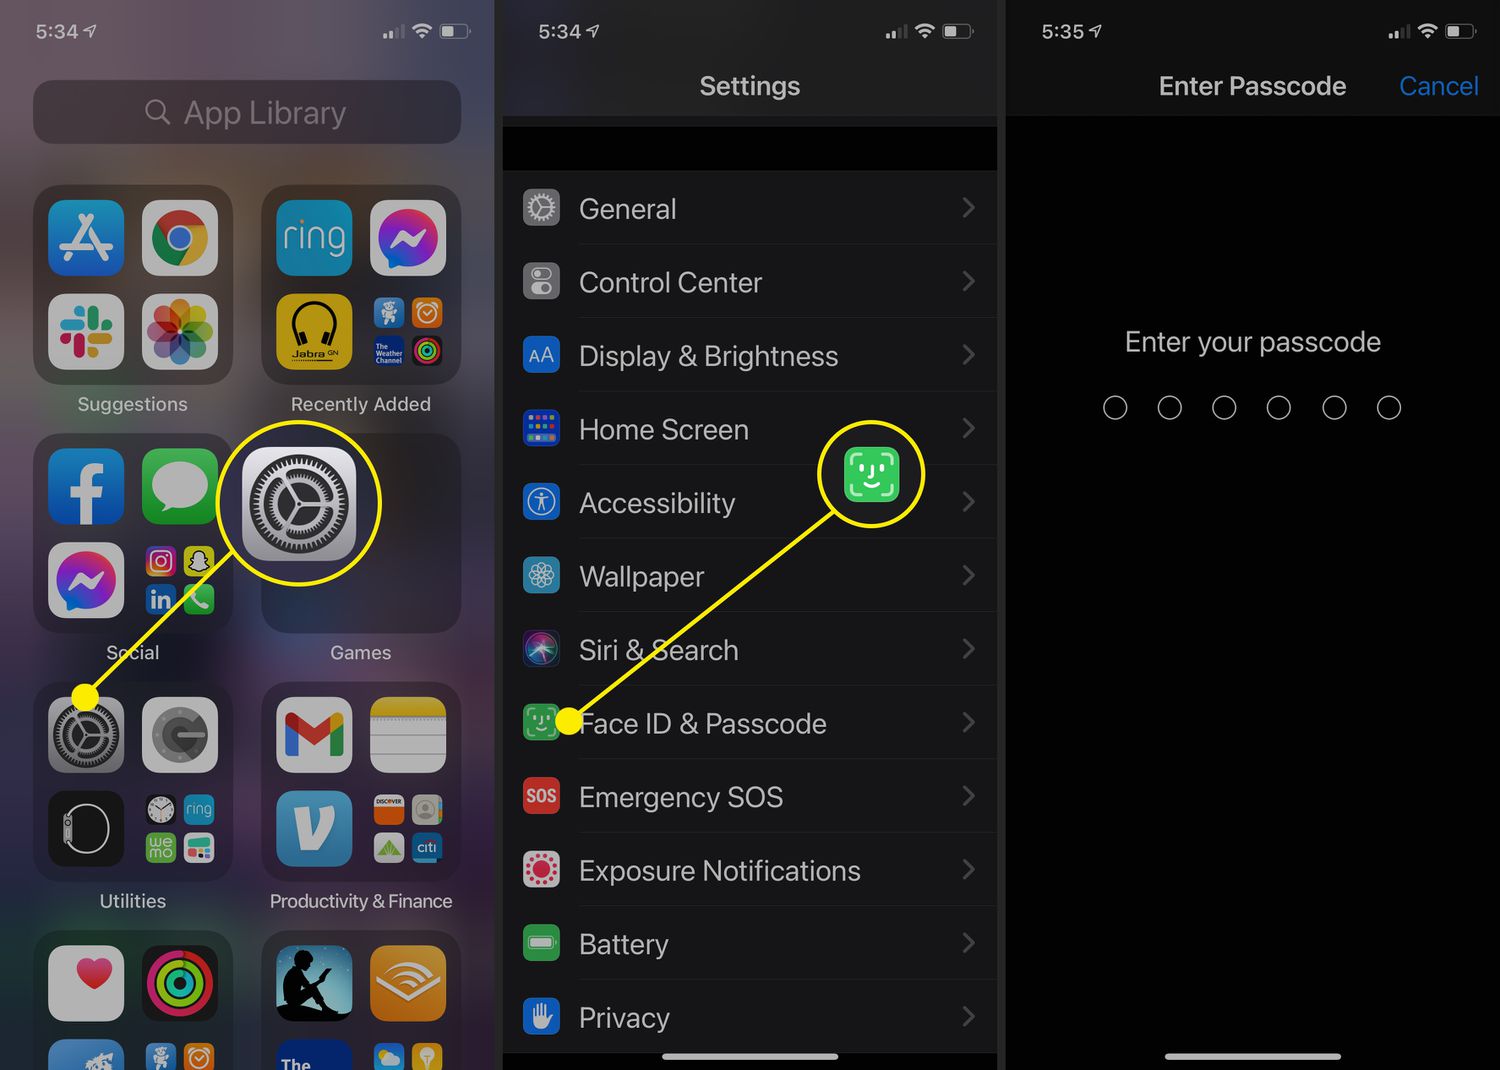
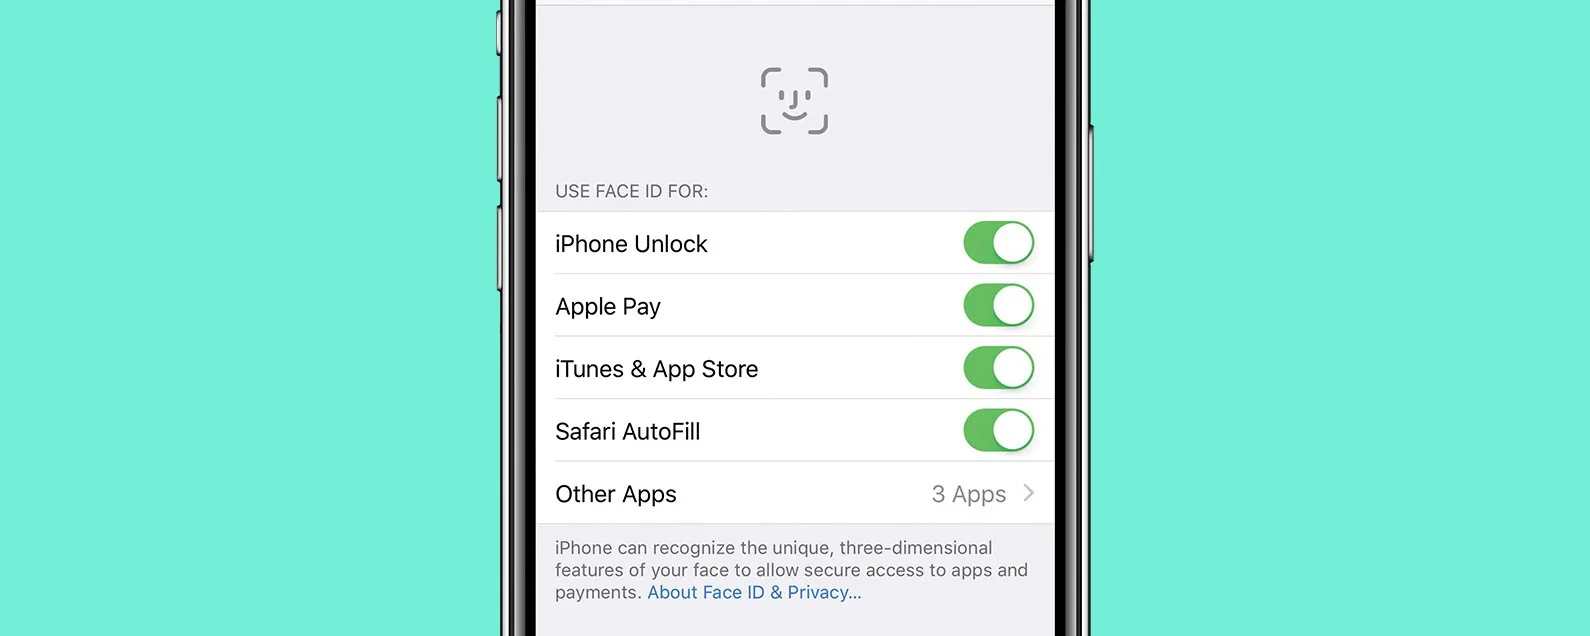
- Go to the “Settings” app on your iPhone or iPad.
- Scroll down and tap on “Face ID & Passcode”. If prompted, enter your passcode.
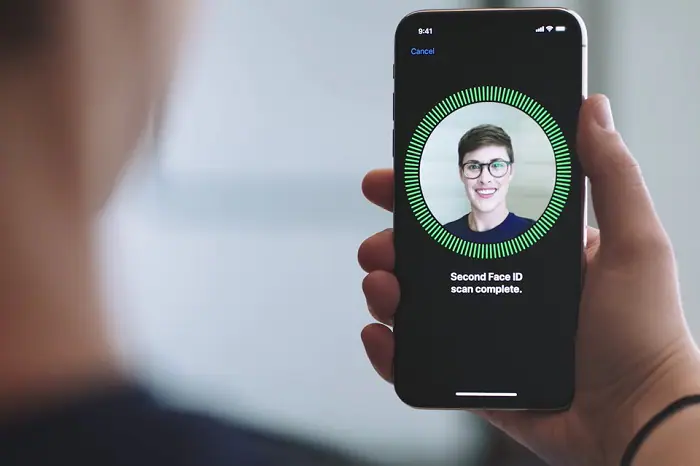
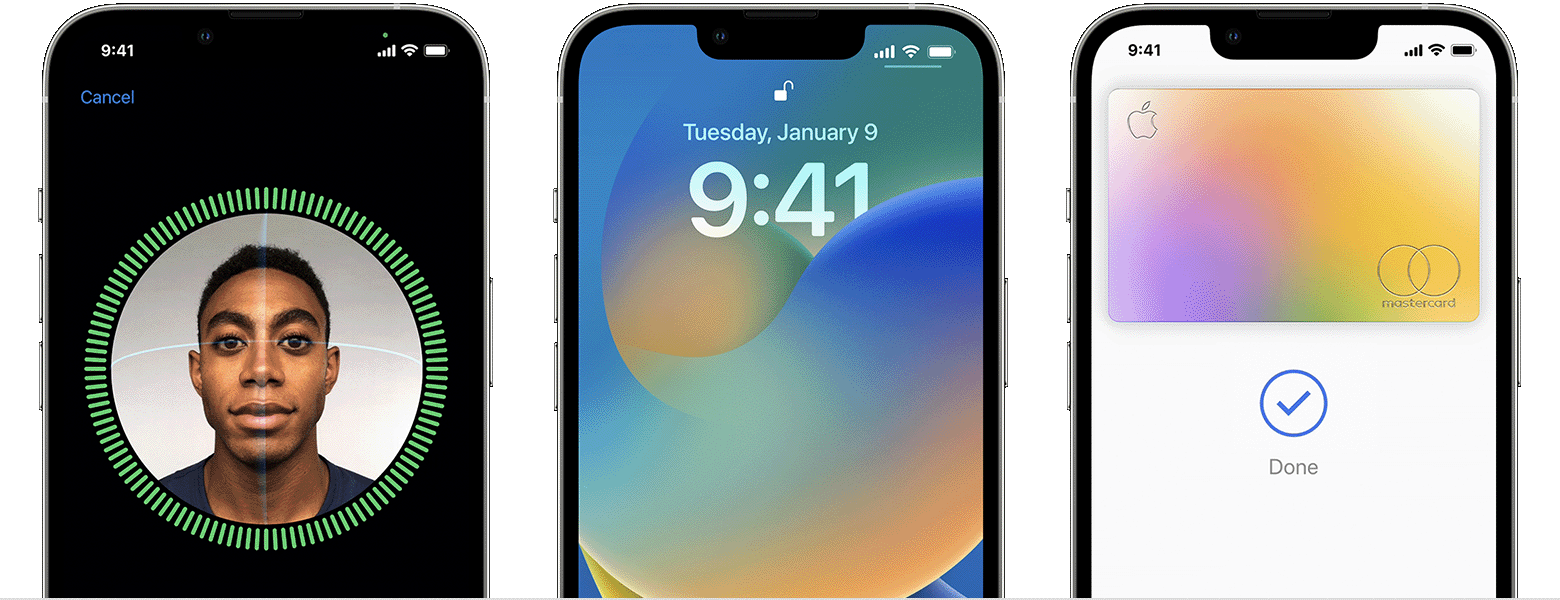
- Tap on “Set Up Face ID” or “Enroll Face”. Follow the on-screen instructions to position your face within the frame and complete the Face ID enrollment process.
- Once Face ID is set up, make sure the toggle next to “Notes” is turned on. This will allow you to use Face ID to lock and unlock your notes.
Congratulations! You have now set up Face ID for Notes. With this feature enabled, you can enjoy the convenience of using your face to authenticate and access your notes securely.
Note: If you have already set up Face ID for your device, you can skip the Face ID setup process and simply ensure that the toggle for “Notes” is turned on under the Face ID & Passcode settings.
Now that Face ID is set up and enabled, let’s move on to the next section to learn how to use Face ID to lock and unlock your notes.
Enabling Face ID authentication
Once you have set up Face ID for your device and enabled it for the Notes app, you can start using Face ID to lock and unlock your notes. Here’s how to enable Face ID authentication:
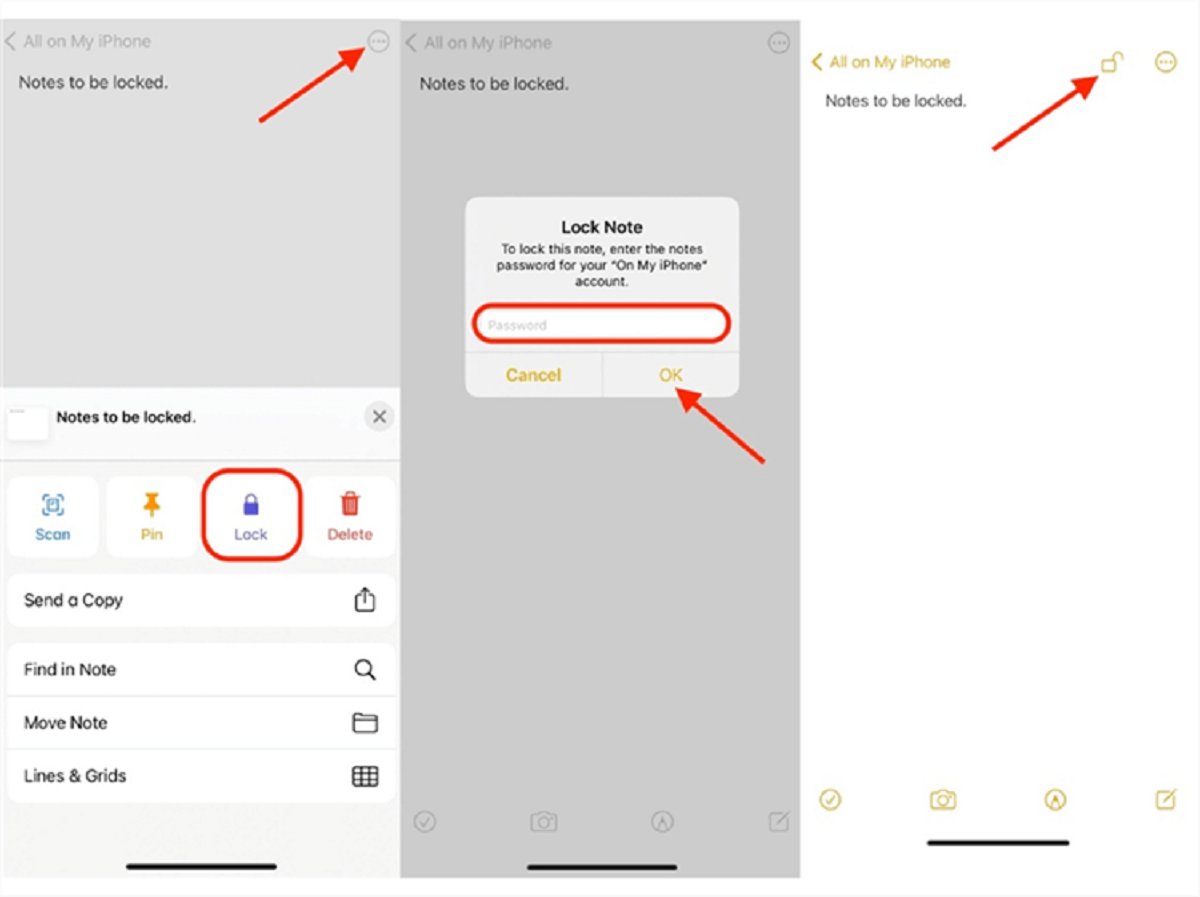
- Open the Notes app on your iPhone or iPad.
- Tap on the note that you want to protect with Face ID authentication.
- In the top-right corner of the note, tap on the lock icon.
- If prompted, enter the password you use to unlock your device. This is necessary for setting up Face ID authentication for the note.
- Next, toggle on the “Use Face ID” option. This enables Face ID authentication specifically for this note.
Once Face ID authentication is enabled for a note, it will be locked and can only be unlocked by using Face ID. This provides an added layer of security, preventing unauthorized access to your sensitive information.
It’s important to note that when you enable Face ID authentication for a note, you will still have the option to manually enter the password if Face ID fails to recognize your face. This ensures that you can always access your notes, even if there are any issues with Face ID.
Now that you have enabled Face ID authentication for your note, let’s move on to the next section to learn how to use Face ID to lock and unlock it.
Using Face ID to lock and unlock Notes
With Face ID enabled for the Notes app, you can easily lock and unlock your notes using your face. Here’s how to use Face ID to lock and unlock your notes:
Locking a Note:
- Open the Notes app on your device.
- Tap on the note that you want to lock.
- In the top-right corner of the note, tap on the lock icon.
- Once locked, the note will be secured with Face ID authentication.
Unlocking a Note:
- Open the Notes app on your device.
- Tap on the locked note that you want to unlock.
- Face ID will recognize your face and automatically unlock the note.
It’s important to note that when using Face ID to unlock a note, ensure that you are looking directly at your device and your face is well-lit to improve recognition accuracy.
Additionally, if you experience any issues with Face ID recognizing your face, you can tap on the “Enter Password” option that appears on the lock screen of a note. This allows you to manually enter your device’s passcode to unlock the note.
By using Face ID to lock and unlock your notes, you can quickly and securely access your sensitive information without the need for manually entering passwords.
Next, let’s explore how you can add Face ID protection to individual notes.
Adding Face ID protection to individual notes
To add an extra layer of security to specific notes, you can individually enable Face ID protection. This ensures that only your face can unlock these specific notes. Here’s how to add Face ID protection to individual notes:
- Open the Notes app on your iPhone or iPad.
- Tap on the note that you want to add Face ID protection to.
- In the top-right corner of the note, tap on the lock icon.
- If prompted, enter your device password to enable Face ID protection for the note.
- Toggle on the “Use Face ID” option. This will apply Face ID authentication specifically to this note.
Once you have enabled Face ID protection for a note, it will be locked and can only be accessed by using Face ID. This adds an extra layer of security, ensuring that even if someone gains access to your device, they won’t be able to view the content of that specific note without your face authentication.
If you want to disable Face ID protection for a specific note, follow the same steps and toggle off the “Use Face ID” option. This will remove Face ID authentication for that particular note.
By individually adding Face ID protection to sensitive or confidential notes, you can have peace of mind knowing that your private information remains secure, even if someone gains access to your device.
Now that you know how to add Face ID protection to individual notes, let’s move on to the next section to learn how to remove Face ID protection from notes.
Removing Face ID protection from notes
If you no longer wish to have Face ID protection for a specific note, you can easily remove it. Here’s how to remove Face ID protection from notes:
- Open the Notes app on your iPhone or iPad.
- Tap on the note from which you want to remove Face ID protection.
- In the top-right corner of the note, tap on the lock icon.
- If prompted, enter your device password to access the note.
- Toggle off the “Use Face ID” option. This will remove Face ID authentication for the note.
By removing Face ID protection, the note will no longer require face authentication to be accessed. It will be unlocked and can be viewed by anyone who has access to your device or the Notes app.
It’s important to note that removing Face ID protection does not delete the note or its contents. It only removes the added layer of security provided by Face ID authentication.
If you decide to re-enable Face ID protection for a note that you had previously removed it from, you can simply follow the steps mentioned earlier in the section on adding Face ID protection to individual notes.
Now that you know how to remove Face ID protection from notes, let’s move on to the next section to troubleshoot any Face ID-related issues you may face.
Troubleshooting Face ID for Notes
Face ID is a reliable and secure authentication method, but you may encounter some issues when using it for Notes. Here are some troubleshooting tips to help you resolve any Face ID-related problems:
Ensure Face ID is set up correctly:
- Make sure you have properly enrolled your face in the Face ID settings of your device.
- Check that Face ID is enabled for the Notes app in the Face ID & Passcode settings.
Make sure the lighting conditions are adequate:
- Ensure that your face is well-illuminated when using Face ID, as poor lighting conditions can affect its accuracy.
- Avoid bright backlighting or direct sunlight, as this can interfere with facial recognition.
Check for obstructions:
- Ensure that there are no objects or obstructions covering your face, such as hats, scarves, or glasses, which may hinder Face ID recognition.
- Remove any debris or dirt from the TrueDepth camera and sensors, as this can also impact Face ID performance.
Reposition your face:
- When using Face ID for Notes, position your face within the designated frame on the screen to improve recognition accuracy.
- Hold your device at a comfortable distance from your face, ensuring it is not too close or too far away.
Try resetting Face ID settings:
- If you continue to experience issues with Face ID for Notes, you can reset the Face ID settings on your device and set it up again.
- Go to the “Settings” app, tap on “Face ID & Passcode,” and select “Reset Face ID.” Then, follow the prompts to set up Face ID once more.
If none of these troubleshooting tips resolve the issue, it’s possible that there might be a software or hardware-related problem. In such cases, it is recommended to contact Apple Support for further assistance.
Now that you have some troubleshooting tips, you can overcome any Face ID-related problems and continue using this convenient and secure method to protect your notes.
Conclusion
Face ID for Notes is a valuable feature that adds an extra layer of security to your important and sensitive information. By setting up Face ID authentication, you can conveniently lock and unlock your notes using the advanced facial recognition capabilities of your device. This provides peace of mind, knowing that your private data is protected from unauthorized access.
In this article, we covered the steps to set up Face ID for Notes, enable Face ID authentication, lock and unlock notes using Face ID, add Face ID protection to individual notes, and remove Face ID protection when needed. We also provided troubleshooting tips to help you overcome any Face ID-related issues.
By utilizing Face ID for Notes, you can streamline your note-taking experience and have confidence that your sensitive information remains secure. Whether you use the Notes app for personal thoughts, important reminders, or confidential details, Face ID ensures that only you have access to your notes.
Remember to keep your device’s Face ID settings up to date, ensure adequate lighting conditions, and remove any obstructions that may hinder Face ID recognition. If you encounter any issues, the troubleshooting tips provided can help you resolve them.
Now, armed with the knowledge and understanding of how to use Face ID for Notes, you can confidently safeguard your notes, protect your privacy, and enjoy the convenience of secure note-taking on your Apple device.