What is Face ID
Face ID is a biometric authentication technology developed by Apple for its newer iPhone and iPad models. It uses advanced facial recognition technology to unlock your device, authenticate purchases, and access secure applications and data. Unlike traditional methods like passcodes or fingerprint scans, Face ID is a seamless and effortless way to secure your device with just a glance.
With Face ID, your device creates a detailed 3D map of your face and stores it securely in the device’s Secure Enclave. This technology combines an infrared camera, flood illuminator, and dot projector to capture over 30,000 invisible dots on your face, resulting in an incredibly accurate and secure facial recognition system. Moreover, it adapts to changes in your appearance, such as wearing a hat, glasses, or growing a beard.
One of the remarkable aspects of Face ID is its ability to work in various lighting conditions, including low light and complete darkness. The infrared camera ensures precise facial recognition, even when there is minimal ambient light. Additionally, Face ID uses machine learning algorithms to continuously adapt and improve its accuracy over time, providing a seamless user experience while maintaining a high level of security.
Face ID also offers enhanced privacy and security features. The facial recognition data is stored locally on the device and remains encrypted, offering robust protection against unauthorized access. Apple has implemented safeguards to prevent the possibility of someone spoofing your face with a photograph, ensuring that Face ID can only be unlocked using your real, live face.
Furthermore, Face ID goes beyond unlocking your device. It can be used to authenticate Apple Pay transactions, securely log into apps and websites, and access sensitive information stored in apps that support the feature. This eliminates the need to remember complex passwords or repeatedly enter them, streamlining the authentication process while maintaining a high level of security.
Overall, Face ID revolutionizes the way we interact with our devices, making it easier and more secure to access our digital lives. By leveraging the power of facial recognition technology, Apple has provided a cutting-edge authentication method that sets the standard for user convenience and device security.
The Benefits of Using Face ID
Face ID offers numerous benefits that make it a preferred authentication method for many iPhone and iPad users. Let’s take a closer look at some of the key advantages of using Face ID:
- Convenience: With Face ID, you no longer need to type in your passcode or use your fingerprint to unlock your device. Simply glance at your phone and let Face ID do the rest. This seamless process saves you time and effort, allowing for a more efficient user experience.
- Enhanced Security: Face ID uses advanced facial recognition technology to accurately identify you and only you. It scans over 30,000 invisible dots on your face to create a detailed 3D map, making it extremely difficult for anyone else to bypass the authentication process. This provides a higher level of security compared to traditional passcodes or fingerprints.
- Adaptive Learning: Face ID incorporates machine learning algorithms that adapt to changes in your appearance. Whether you have a new hairstyle, wear glasses, or grow a beard, Face ID continues to recognize you accurately. This adaptive technology ensures a consistent user experience and reduces the chances of false denials.
- Seamless App and Data Access: Face ID can be used to authenticate app logins, access sensitive data, and authorize transactions securely. This eliminates the need for constantly entering passwords or usernames, streamlining your digital interactions. With a simple glance, you can unlock your favorite apps and seamlessly navigate through your device’s features.
- Intelligent Privacy Protection: Apple has prioritized user privacy with Face ID. The facial recognition data is stored locally on the device and remains encrypted, ensuring that your personal information is not compromised. Additionally, Face ID cannot be fooled by photographs or masks, making it highly secure against unauthorized access attempts.
- Accessibility: Face ID is designed to accommodate diverse users, including those with physical disabilities. It provides an alternative authentication method for individuals who may have difficulty using passcodes or fingerprints, offering an accessible and user-friendly solution.
With its convenience, enhanced security, adaptive learning capabilities, seamless app access, privacy protection, and accessibility, Face ID sets itself apart as a superior authentication method. It not only simplifies the unlocking process but also ensures a high level of security for your personal data and digital interactions.
Checking for Face ID Compatibility
Before setting up Face ID on your device, it’s essential to check whether your iPhone or iPad model supports this feature. Face ID is available on specific models and may vary depending on the device. Here’s how you can check for Face ID compatibility:
- Check the Device Model: Face ID is currently available on iPhone X and later models, including iPhone XS, XS Max, XR, 11, 11 Pro, 11 Pro Max, and the latest generation of iPads – iPad Pro 11-inch (3rd generation) and iPad Pro 12.9-inch (3rd generation) and later. If you have any of these models, you can enjoy the benefits of Face ID.
- Review the Device Specifications: If you are unsure about the model of your iPhone or iPad, you can visit the Apple website and navigate to the product page of your device. Look for the specifications section, where it will state whether the device supports Face ID or not.
- Use Face ID Settings: Another way to check for Face ID compatibility is by accessing the device’s settings. Go to “Settings” on your iPhone or iPad, tap on “Face ID & Passcode” (or “Touch ID & Passcode” on older devices), and check if the option for setting up Face ID is available. If it is, then your device is compatible with Face ID.
- Consult the User Manual or Apple Support: If you are still unsure or have any technical questions, you can always refer to the user manual of your device or reach out to Apple support for assistance. They can provide you with specific information about Face ID compatibility based on your device model.
It’s important to note that older iPhone models, such as the iPhone 8 and earlier, do not support Face ID but may have Touch ID as an alternative authentication method. However, for the most advanced security and convenience, Face ID is the preferred option on compatible devices.
By confirming the compatibility of your device with Face ID, you can ensure a smooth setup process and take advantage of the enhanced security and convenience that this feature offers.
Setting Up Face ID on Your Device
Setting up Face ID on your iPhone or iPad is a straightforward process that ensures you can unlock your device and authenticate various actions with just a glance. Follow these steps to set up Face ID:
- Open Settings: On your device, go to the Settings app. It is typically represented by a gear icon.
- Select Face ID & Passcode: In the Settings menu, tap on “Face ID & Passcode”. If you have an older device without Face ID, it may be labeled as “Touch ID & Passcode”.
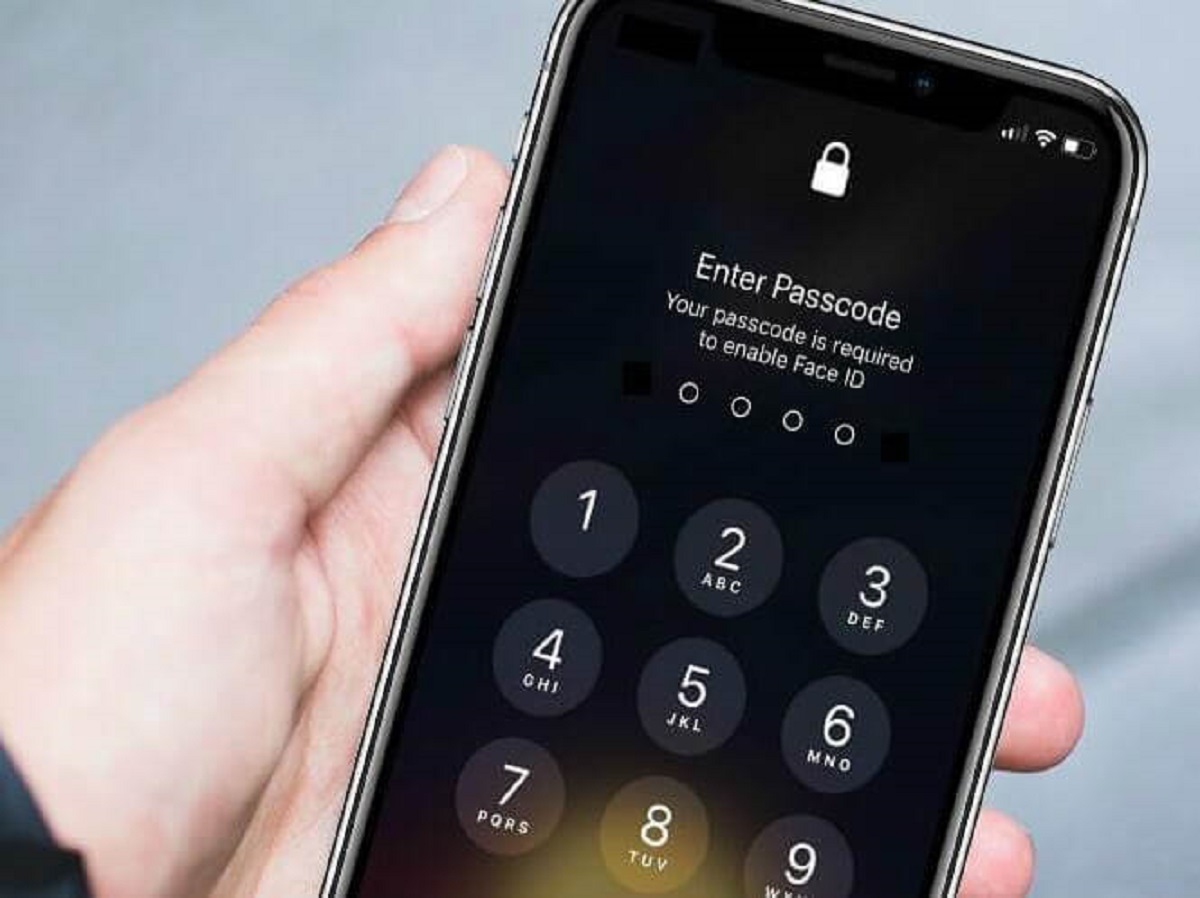
- Enter Your Passcode: You will be prompted to enter your device passcode to proceed. This is a security measure to ensure that only the device owner can set up Face ID.
- Set Up Face ID: In the Face ID & Passcode settings, tap on “Set Up Face ID” (or “Set Up Touch ID” for older devices).
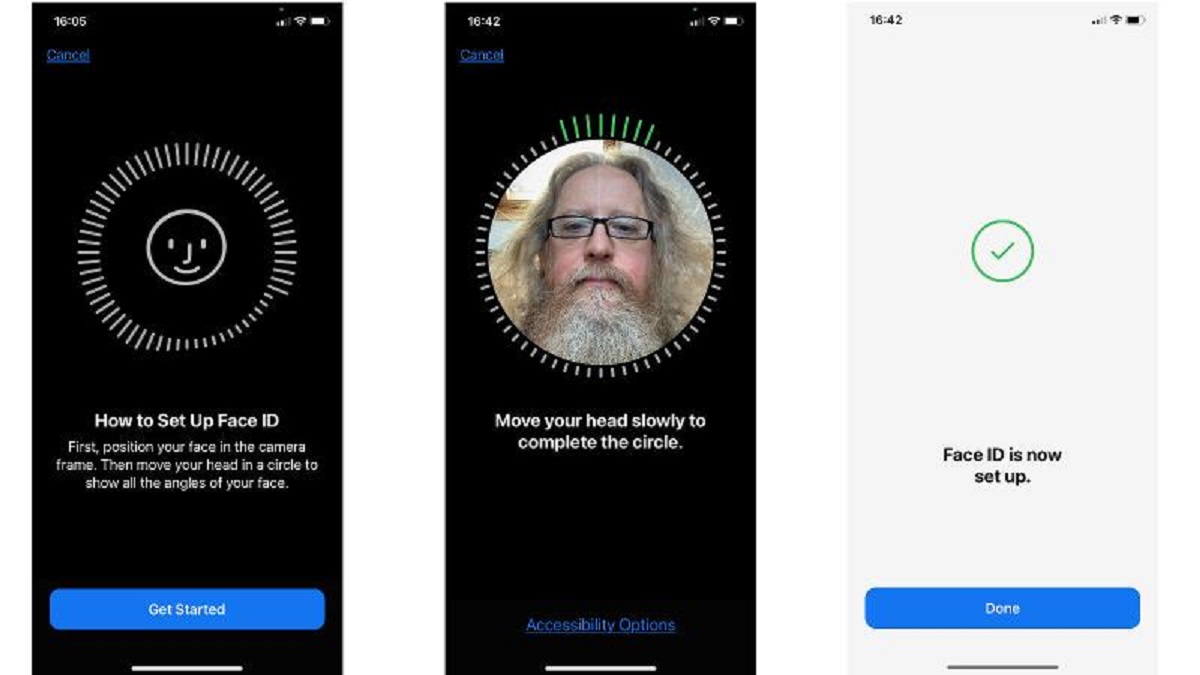
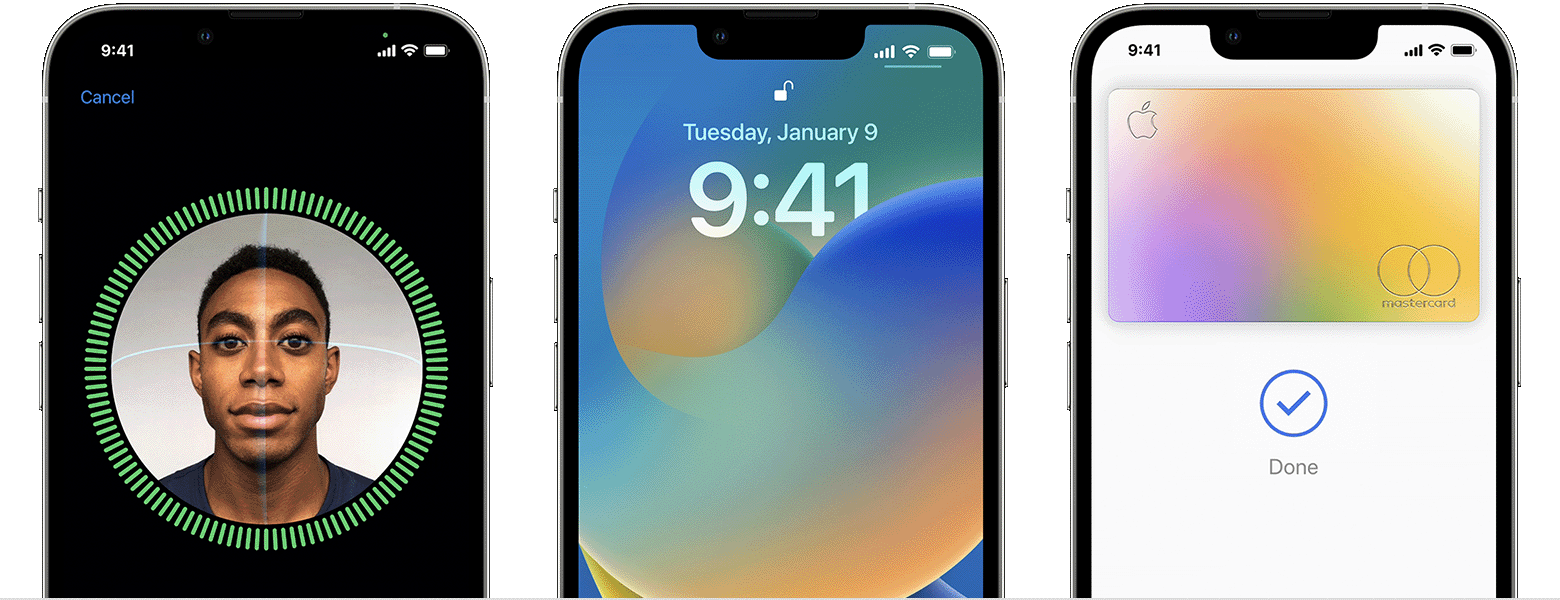
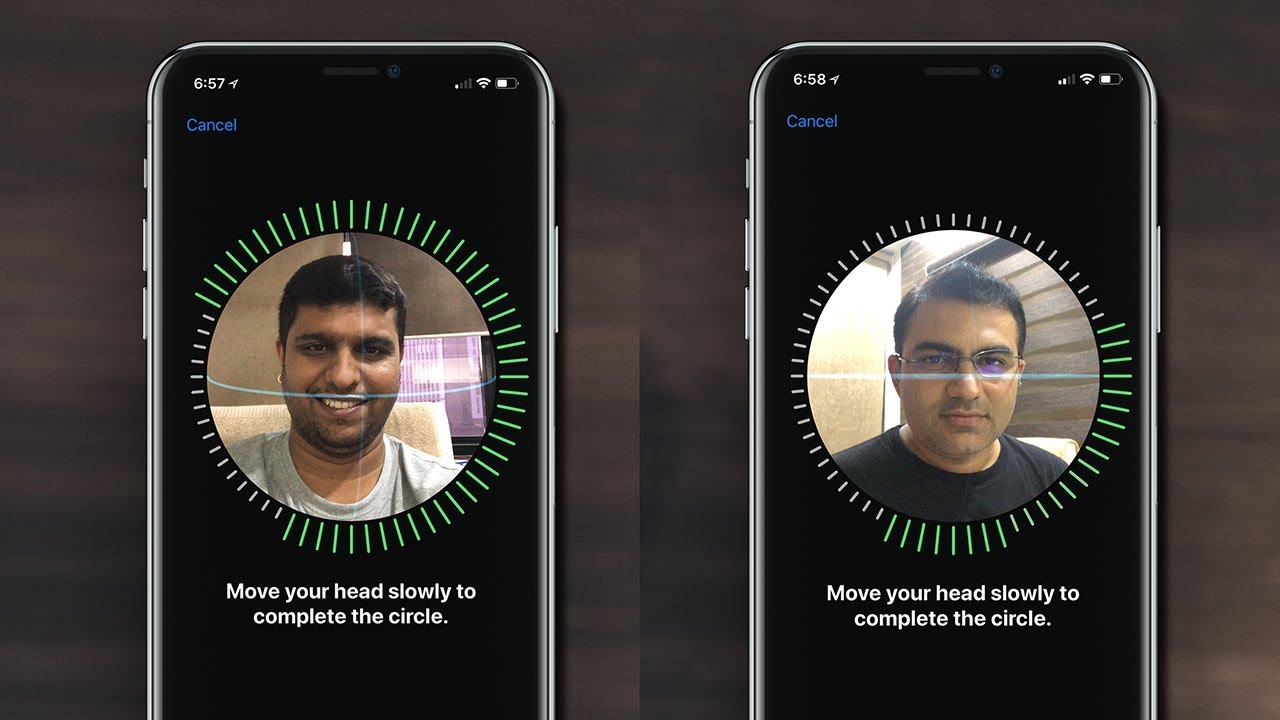
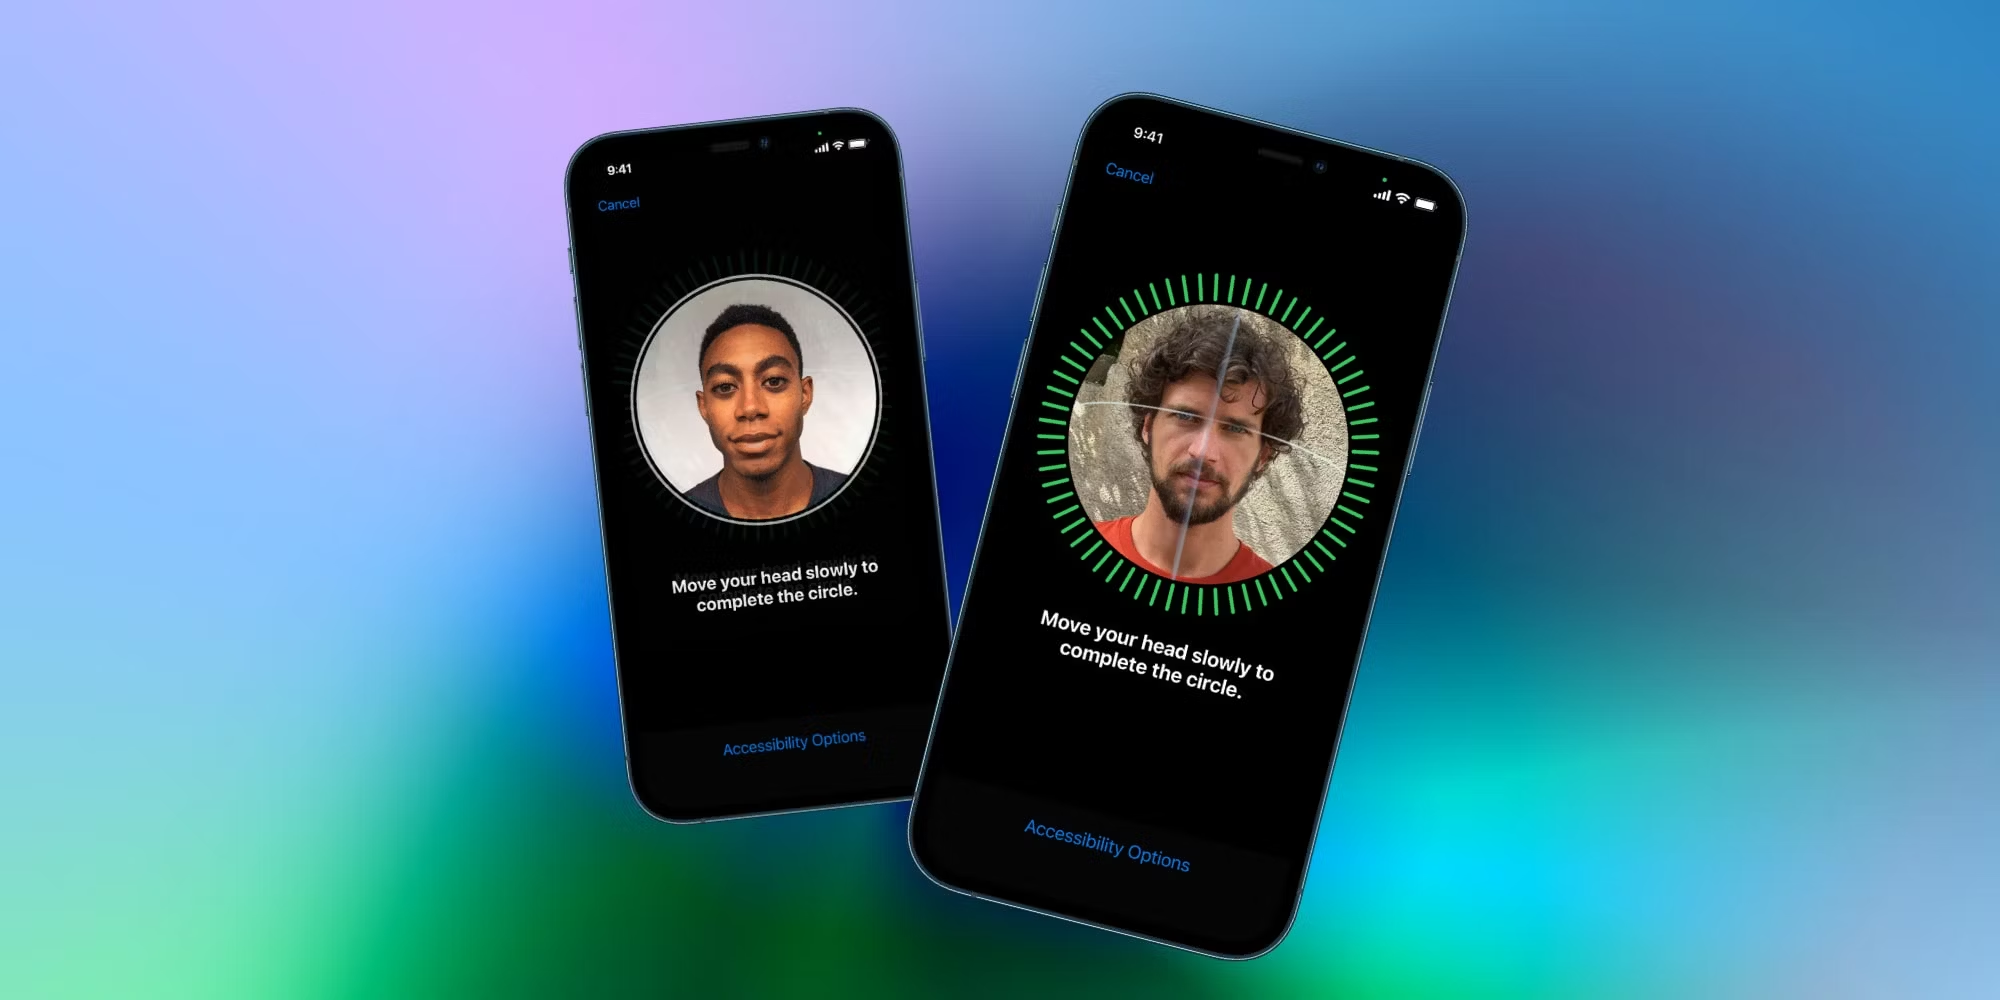
- Follow the On-Screen Instructions: Your device will guide you through the process of setting up Face ID. Hold your device in front of your face, position it within the frame, and follow the prompts to complete the facial recognition process. It is essential to move your head in a circular motion to capture your face from different angles.
- Register Your Face: You will need to register your face by allowing the device to scan and analyze it. This involves gently moving your head in different directions while keeping your eyes open and looking directly at the device’s screen.
- Complete Face ID Setup: Once the scanning is complete, your device will show a message indicating that Face ID has been successfully set up. You can then tap on “Continue” to proceed.
- Adjust Additional Face ID Settings: In the Face ID & Passcode settings, you can customize additional settings related to Face ID, such as whether to use it for unlocking your device, making purchases, or accessing specific apps. Adjust these settings according to your preferences.
Once you have completed these steps, Face ID is now set up on your device. You can now use your face to unlock your device, authorize app logins, authenticate purchases, and enjoy the convenience and security that Face ID offers.
Tips for a Successful Face ID Setup
Setting up Face ID on your device is an important step towards enhancing your device’s security and convenience. To ensure a successful setup and optimal performance of Face ID, consider the following tips:
- Hold Your Device at Eye Level: When setting up Face ID, hold your device at a comfortable eye level, ensuring that your face is fully centered within the frame. This helps the device capture a clear and accurate scan of your face from different angles.
- Remove Any Obstructions: Make sure your face is unobstructed during the Face ID setup process. Remove hats, scarves, sunglasses, or any other object that may cover parts of your face. This allows the device to capture a complete and detailed scan of your facial features.
- Ensure Sufficient Lighting: Face ID works best in well-lit environments. When setting up Face ID, ensure that there is adequate lighting to clearly illuminate your face. Avoid extreme backlighting or extremely dim lighting conditions, as this may affect the accuracy of the facial recognition process.
- Keep a Neutral Facial Expression: Maintaining a neutral facial expression, with your eyes open and looking directly at the device, helps Face ID capture an accurate scan of your face. Avoid squinting, frowning, or any exaggerated facial expressions during the setup process.
- Register Alternate Appearances: If you frequently change your appearance, such as wearing glasses, hats, or different hairstyles, consider registering alternate appearances during the Face ID setup. This ensures that Face ID can recognize you accurately in various scenarios and improves its adaptability to your changing appearance.
- Rescan Your Face Periodically: Over time, slight changes in your appearance may occur, such as aging, growing facial hair, or undergoing cosmetic procedures. To ensure optimal performance, it is recommended to periodically rescan your face in the Face ID settings. This helps Face ID adapt to any gradual changes in your facial features and maintain accurate recognition.
- Test Face ID in Different Conditions: After completing the setup, test Face ID in various conditions to ensure its reliability. Try using Face ID in different lighting conditions, angles, and distances to understand its capabilities and limitations. This way, you can have confidence in Face ID’s performance in real-world scenarios.
- Keep Your Device Software Updated: Apple regularly releases software updates that include enhancements and optimizations for Face ID. To ensure the best performance and security, make sure to keep your device’s software up to date by installing the latest updates from Apple.
By following these tips, you can optimize the setup process and ensure that Face ID performs reliably and accurately on your device. Face ID offers a seamless and secure way to unlock your device and authenticate various actions, contributing to a more convenient and protected user experience.
Adding Additional Faces to Face ID
In addition to setting up Face ID with your primary face, Apple allows you to add additional faces to the authentication system. This feature is especially valuable for users who share their device with family members or want to have a backup face registered. Here’s how you can add additional faces to Face ID:
- Open Settings: On your iPhone or iPad, go to the Settings app.
- Select Face ID & Passcode: In the Settings menu, tap on “Face ID & Passcode”. If you have an older device without Face ID, it may be labeled as “Touch ID & Passcode”.
- Enter Your Passcode: You will be prompted to enter your device passcode to access the Face ID settings. This is a security measure to ensure only authorized users can make changes.
- Add a Face: Scroll down to the “Face ID” section and select the option to add a new face or an alternate appearance. Follow the on-screen instructions to position your face within the frame and complete the scanning process.
- Register the Additional Face: Hold the device in front of the person whose face you want to add to Face ID. Position their face within the frame while following the prompts on the screen. Encourage them to move their head in a circular motion to capture different angles. This helps ensure their face is accurately registered.
- Complete the Face Registration: Once the scanning is complete, the device will display a message indicating that the additional face has been successfully added to Face ID. Tap on “Continue” to proceed.
- Repeat for More Faces: If you want to add more faces, such as those of family members or trusted individuals, repeat the process outlined above. Each person’s face should be registered individually to ensure accurate recognition and personalized access to the device.
By adding additional faces to Face ID, you enable multiple individuals to unlock and access the device using their own faces. This can be particularly useful for shared devices or situations where the primary user may not always be available.
It’s important to note that Face ID is designed to recognize primary and secondary faces separately. This means that if the primary user’s face is detected, the device will unlock for them without requiring the secondary faces to authenticate. However, if a secondary face is detected and the primary face is not present, the device will prompt for authentication from one of the secondary faces registered in Face ID.
Take advantage of this feature to enhance convenience and accessibility while maintaining the security and personalization that Face ID offers.
Managing Face ID Settings
Once you have set up Face ID on your device, you can manage its settings to customize how and where it is used. Apple provides various options to control Face ID’s functionality, allowing you to fine-tune your device’s authentication experience. Here are the key ways to manage Face ID settings:
- Open Settings: Access the Settings app on your iPhone or iPad.
- Select Face ID & Passcode: In the Settings menu, tap on “Face ID & Passcode”. For devices without Face ID, it may be labeled as “Touch ID & Passcode”.
- Enter Your Passcode: Enter your device passcode to proceed. This step ensures that only authorized users can make changes to Face ID settings.
- Manage Face ID Authentication: In the Face ID settings, you will find options to manage various authentication features. You can enable or disable Face ID for unlocking the device, iTunes and App Store purchases, and Safari AutoFill. Toggle these options according to your preferences.
- Add or Remove Alternate Appearances: If you want to add or remove alternate appearances, such as different hairstyles, glasses, or hats, tap on “Set Up an Alternate Appearance” or “Reset Face ID. Follow the prompts to perform the desired action.
- Require Attention for Face ID: By default, Face ID requires that you have your eyes open and focused on the device for authentication. If needed, you can disable this requirement by toggling off the “Require Attention for Face ID” option. Keep in mind that enabling this feature enhances security.
- Reset Face ID: If you encounter issues with Face ID or want to start fresh, you can choose the “Reset Face ID” option. This clears any previously registered faces and prompts you to set up Face ID again from scratch.
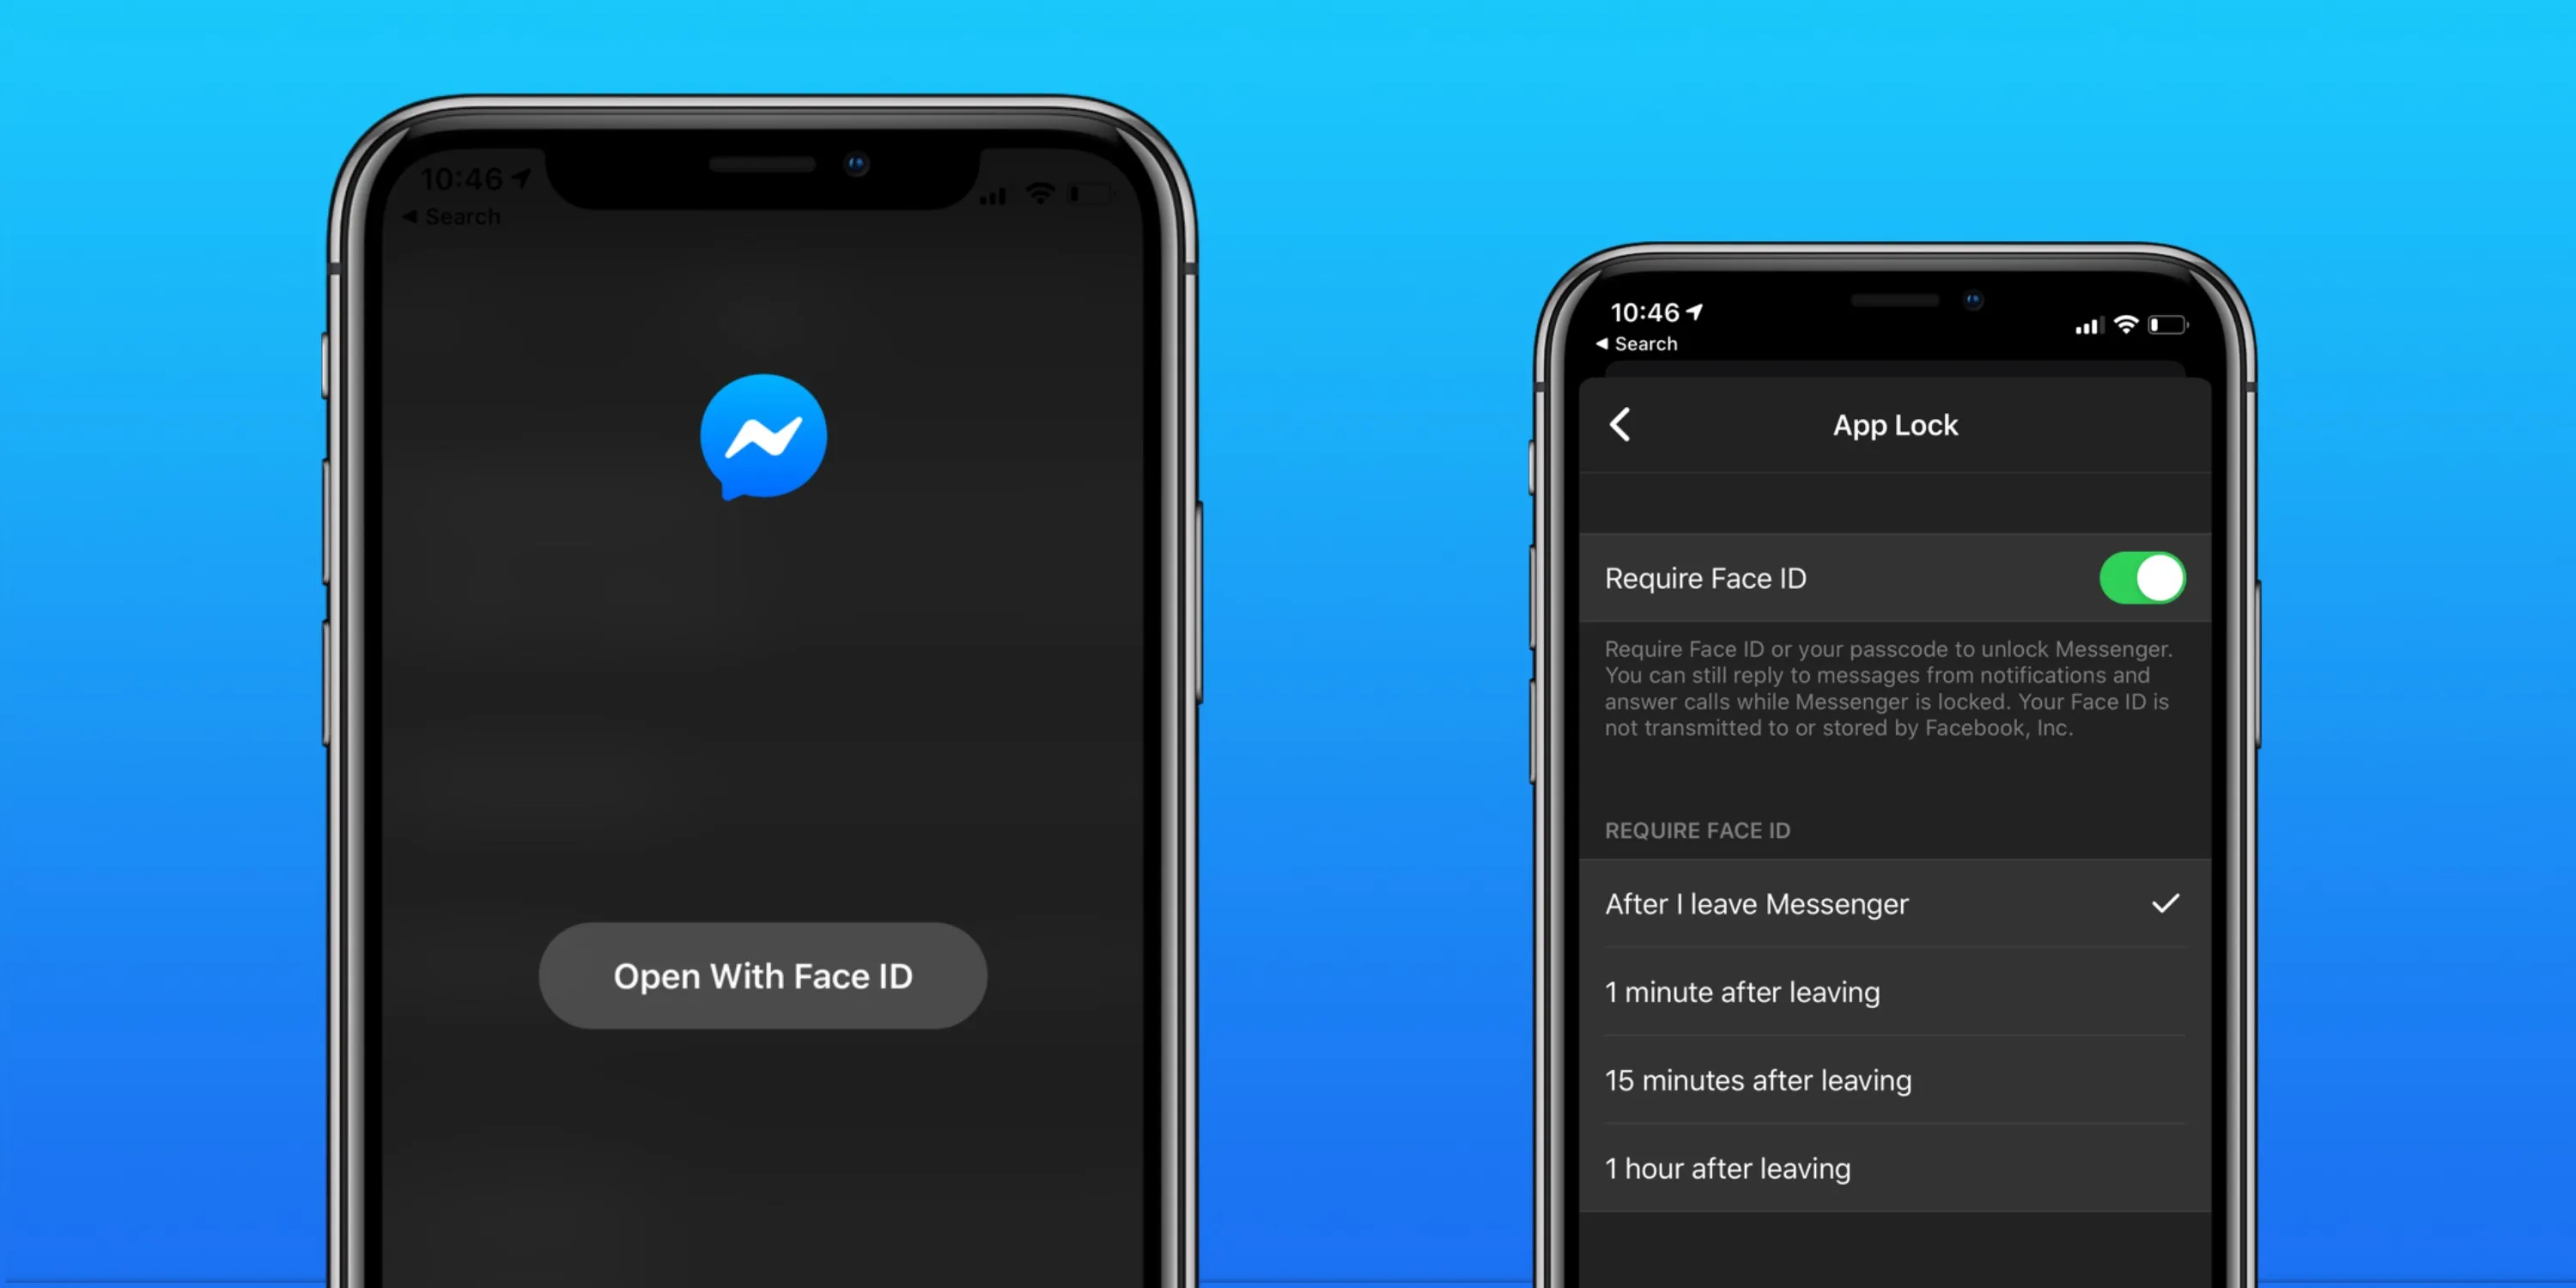
- Manage Other Face ID-Enabled Apps: Some third-party apps may integrate with Face ID for additional security. In the Face ID settings, you can manage the apps that have requested access to use Face ID for authentication. This allows you to enable or disable Face ID for specific apps as per your preference.
By managing Face ID settings, you can customize how and where you use facial recognition as an authentication method on your device. These options give you greater control over your device’s security and privacy while adapting to your specific needs and preferences.
Remember to periodically review and update your Face ID settings to ensure they align with your evolving usage patterns and security requirements.
Troubleshooting Face ID Issues
While Face ID is generally a reliable and convenient authentication method, you may encounter occasional issues or errors. If you experience any problems with Face ID on your device, here are some troubleshooting steps you can take:
- Ensure that Face ID is enabled: Verify that you have enabled Face ID for the specific functions you want to use it for, such as unlocking the device, App Store purchases, or Safari AutoFill. Go to “Settings” > “Face ID & Passcode” and toggle on the relevant options as needed.
- Check for Obstructions: Confirm that there are no objects covering the TrueDepth camera on your device, such as a screen protector or a case that interferes with the camera’s view. Remove any obstructions that may hinder the facial recognition process.
- Ensure Adequate Lighting: Face ID works best in well-lit environments, so make sure there is sufficient lighting when using it. Avoid extreme backlighting or extremely dim lighting conditions, as that may impact Face ID’s performance. Adjust the lighting conditions to optimize the facial recognition process.
- Reset Face ID: If you continue to experience issues, you can try resetting Face ID and setting it up again. Go to “Settings” > “Face ID & Passcode” and choose the “Reset Face ID” option. Then follow the on-screen instructions to set up Face ID anew.
- Remove and Re-register Face: If Face ID is consistently failing to recognize your face, you can remove and re-register your face in the Face ID settings. Go to “Settings” > “Face ID & Passcode” and tap on the option to remove your registered face. Then, proceed to set up Face ID once again.
- Clean the TrueDepth Camera: Dirt, smudges, or residue on the TrueDepth camera can affect Face ID’s accuracy. Gently clean the camera area using a soft, lint-free cloth to ensure there are no obstructions or fingerprints that may interfere with the facial recognition process.
- Stay Still and Face the Camera: Make sure you are holding your device steady and directly facing the TrueDepth camera while attempting to use Face ID. Avoid moving or looking away from the camera until the authentication process is complete.
- Update your Device: Keeping your device’s software up to date is crucial for optimal performance. Check for any available software updates by going to “Settings” > “General” > “Software Update” and install any pending updates. This may include enhancements or bug fixes that can address Face ID-related issues.
If the above troubleshooting steps do not resolve your Face ID problems, consider reaching out to Apple Support for further assistance. They can provide more specialized guidance based on your particular device and situation.
Remember that Face ID is a sophisticated technology, and occasional issues may arise. However, by following these troubleshooting steps and staying updated with software releases, you can maximize the effectiveness and reliability of Face ID on your device.
Conclusion
Face ID offers a convenient and secure way to unlock your device, authenticate purchases, and access sensitive information on iPhone and iPad models that support this feature. By leveraging advanced facial recognition technology, Apple has provided users with a seamless authentication method that enhances device security while providing a user-friendly experience.
Throughout this article, we explored the concept of Face ID, its benefits, and how to set it up on your device. We also covered tips for a successful Face ID setup, adding additional faces, managing Face ID settings, and troubleshooting common issues.
Face ID brings numerous benefits to users, including convenience, enhanced security, adaptive learning, seamless app and data access, intelligent privacy protection, and accessibility. With Face ID, you can unlock your device and authenticate various actions with just a glance, eliminating the need to remember complex passcodes or repeatedly input them.
It’s important to ensure that your device is compatible with Face ID before setting it up. Once enabled, you can manage Face ID settings to customize its functionality to your preferences. Additionally, troubleshooting steps can help resolve any issues that may arise, ensuring a smooth and reliable Face ID experience.
Overall, Face ID revolutionizes the way we interact with our devices, providing a convenient and secure authentication method that adapts to our changing appearance and keeps our personal information encrypted and protected. Embrace the power of Face ID on your compatible device and enjoy the seamless and secure digital experience it offers.