Introduction
Welcome to the new era of secure and convenient payments with Apple Pay and Face ID. With technology constantly evolving, Apple has introduced Face ID as a cutting-edge authentication method for Apple Pay, ensuring a seamless and secure payment experience for iPhone and iPad users. By harnessing the power of facial recognition, Face ID enables users to authorize payments with just a glance, eliminating the need for passwords or PINs. In this article, we will explore how to set up and use Face ID for Apple Pay, as well as troubleshoot any common issues that may arise.
Gone are the days of fumbling for your wallet or signing your name on multiple receipts. Apple Pay, coupled with the convenience of Face ID, allows you to make fast and secure payments both online and at participating brick-and-mortar stores. By simply looking at your device, your face becomes the key to accessing your payment information and authorizing transactions. This innovative technology not only enhances security but also streamlines the checkout process, making it a win-win for users.
In the following sections, we will guide you through the setup process, walk you through adding your credit or debit cards to Apple Pay, and explain how to effortlessly make payments using Face ID. Additionally, we will equip you with troubleshooting tips to address any potential challenges you might encounter along the way. By the end of this article, you will be fully equipped to take advantage of the convenience and security that Apple Pay and Face ID have to offer.
Setting Up Face ID for Apple Pay
Before you can start using Face ID for Apple Pay, you’ll need to set it up on your device. Fortunately, Apple has made the process incredibly straightforward.
To begin, open the “Settings” app on your iPhone or iPad and select “Face ID & Passcode”. You will be prompted to enter your device passcode to proceed. Next, tap on “Set Up Face ID” and follow the on-screen instructions. During this process, make sure you are in a well-lit environment and position your face within the frame displayed on the screen. Move your head in a circular motion to capture your face from different angles.
Once you’ve completed the initial scan, the system will ask you to perform a second scan to ensure accuracy. This step further enhances the security of Face ID by capturing additional details of your face. Follow the instructions on the screen and move your head slowly for a more comprehensive scan.
After completing the scan, Face ID will be set up on your device. You can now use this feature not only to unlock your device but also to authorize payments with Apple Pay.
It’s important to note that Face ID requires your attention to be focused on the device for successful authentication. This means that you need to be looking directly at your device for Face ID to work properly.
If you ever decide to remove your Face ID information, you can do so by navigating to the “Face ID & Passcode” settings and selecting “Reset Face ID. Keep in mind that this will delete your facial data stored in the device’s secure enclave, disabling Face ID for both unlocking your device and authorizing Apple Pay transactions.
Setting up Face ID for Apple Pay takes just a few minutes of your time but provides an extra layer of security and convenience to your daily shopping experiences. With Face ID now activated on your device, let’s move on to adding your credit or debit cards to Apple Pay.
Adding Credit or Debit Cards
Now that you have set up Face ID for Apple Pay, it’s time to add your credit or debit cards to the app. Apple Pay supports a wide range of participating banks and financial institutions, making it simple to link your existing cards.
To add a card, open the Wallet app on your iPhone or iPad and tap the “+” symbol in the top right corner. You can choose to either manually enter your card details or use the device’s camera to capture the information automatically. In many cases, utilizing the camera is the quickest and most accurate method.
If your financial institution is one of the supported providers, the app will recognize the card information and ask you to authenticate it using the necessary security measures, such as a one-time verification code sent to your phone number or email address. Follow the prompts to complete the verification process, and your card will be added to Apple Pay.
If you have multiple cards, you can designate a default payment card by going to “Settings”, then “Wallet & Apple Pay”, and selecting “Default Card”. This ensures that your preferred card is automatically selected when making payments, saving you time and effort at the checkout.
It’s important to note that Apple Pay stores your card information securely within the device’s secure enclave and doesn’t share it with merchants during the payment process. This added layer of security gives you peace of mind when using your cards for online and in-store transactions.
In addition to credit and debit cards, Apple Pay also supports the addition of loyalty and rewards cards from participating retailers. You can simply add these cards by selecting “Add to Wallet” on the retailer’s website or app, or by scanning the physical card using the device’s camera.
Now that you have successfully added your cards to Apple Pay, let’s move on to the exciting part – making payments using Face ID!
Making Payments with Face ID
With Face ID set up and your cards added to Apple Pay, making payments has never been easier or more secure. Whether you’re shopping online or at a physical store, Face ID simplifies the checkout process with just a glance.
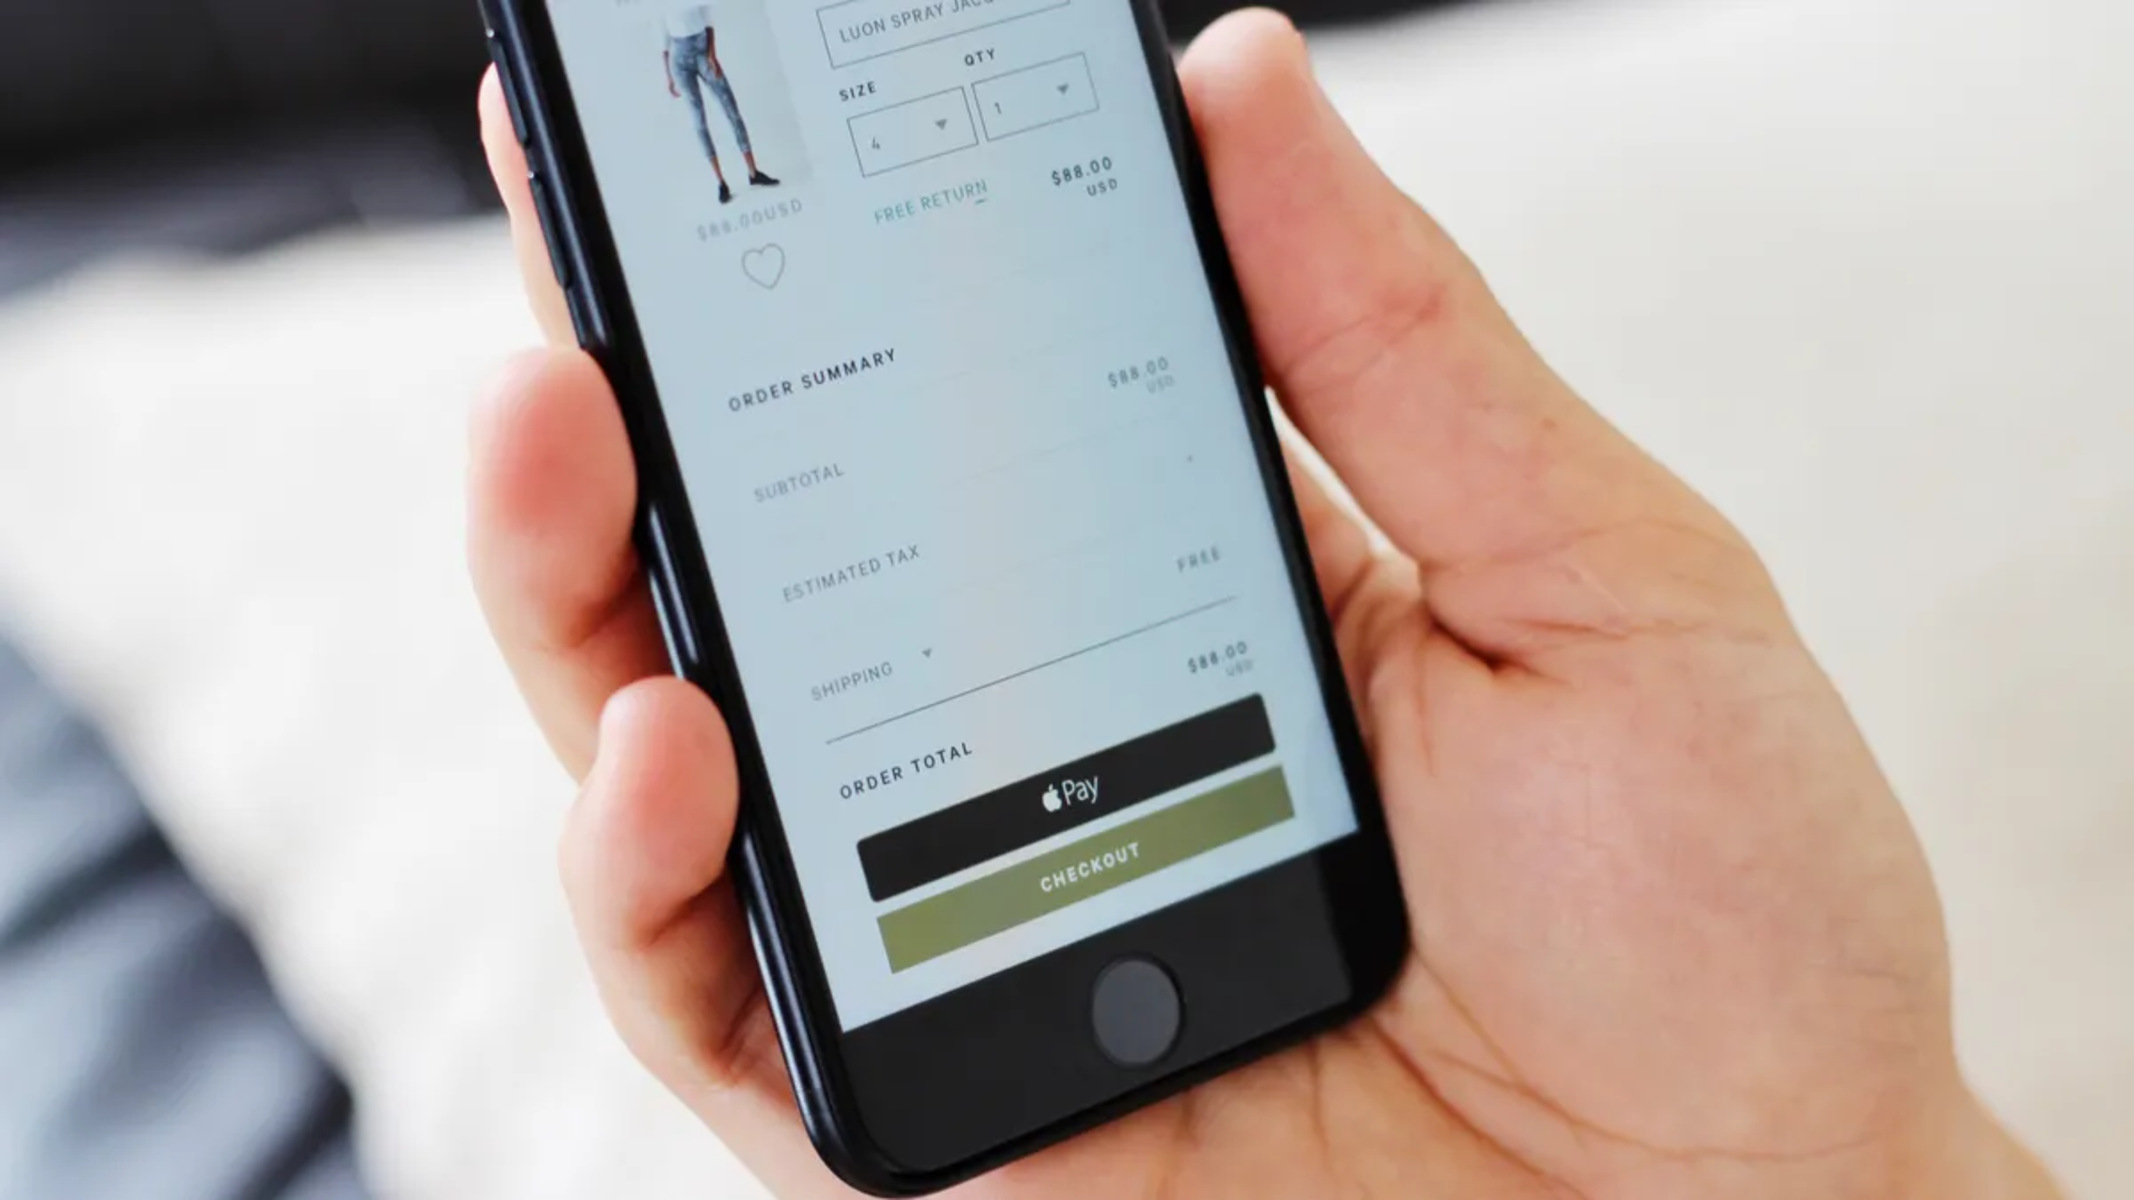
When making an online purchase, look for the Apple Pay option at the checkout page. Once you’ve selected Apple Pay, Face ID will automatically activate on your device. Simply hold your iPhone or iPad up to your face, ensuring that your attention is focused on the screen. Face ID will authenticate your identity and authorize the payment, allowing you to complete the transaction within seconds.
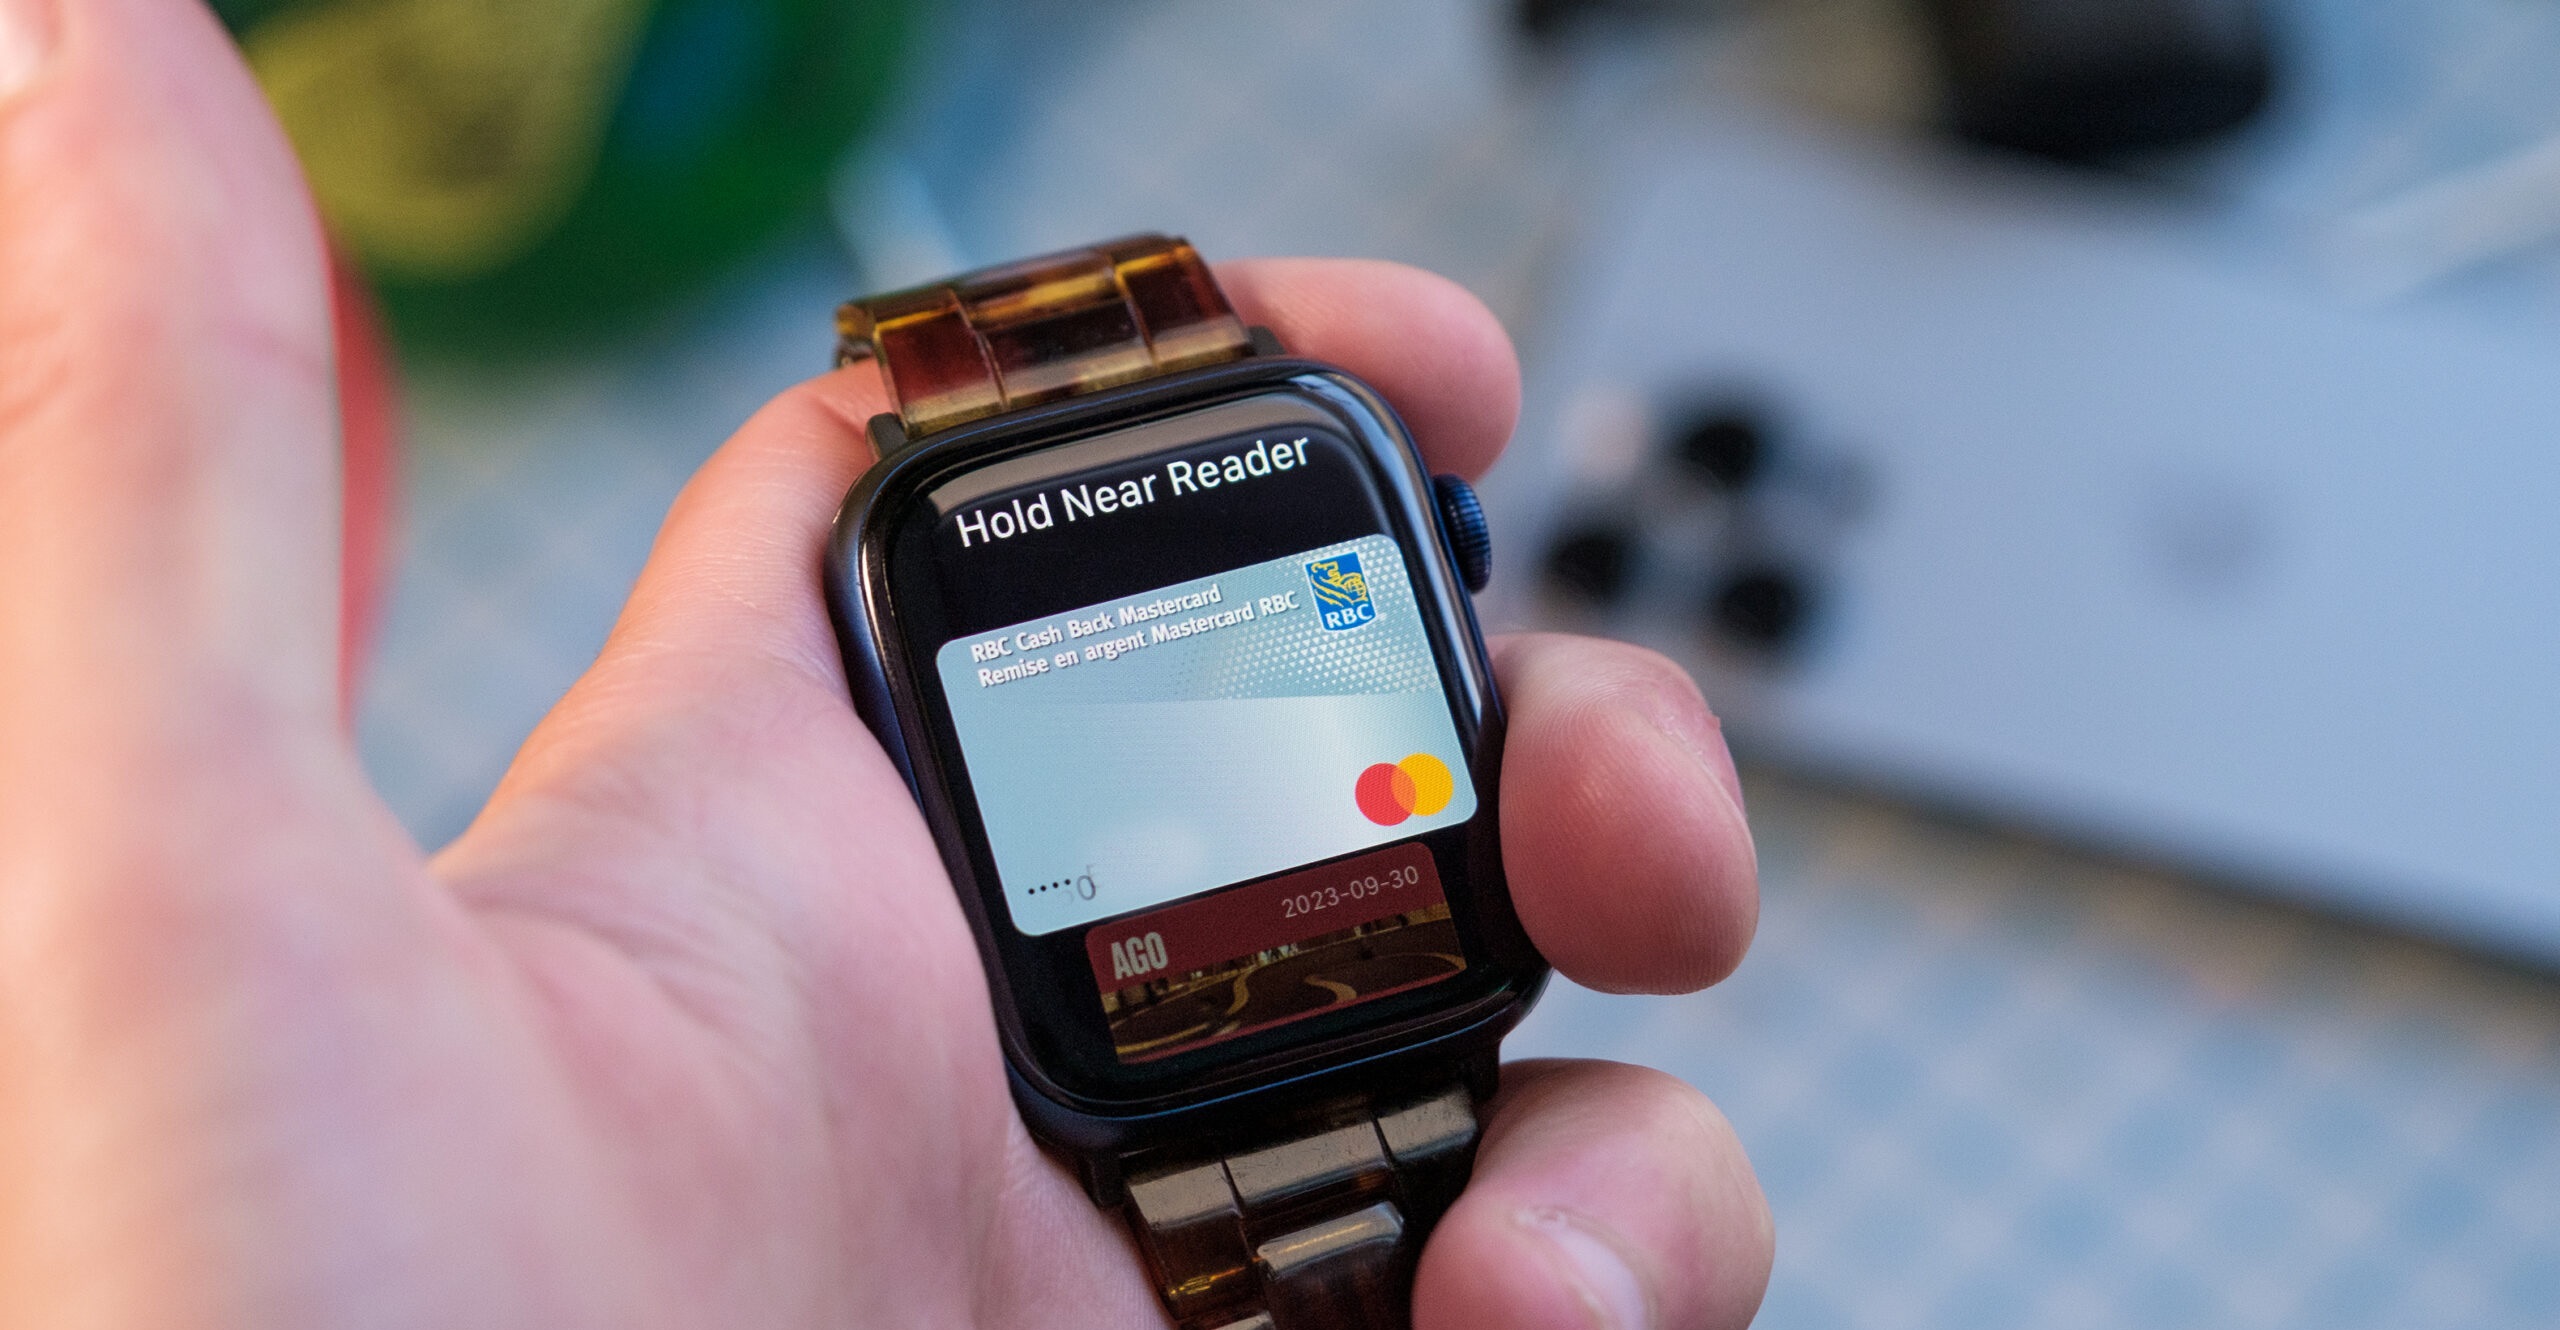
For in-store purchases, the process is just as seamless. Look for the contactless payment symbol at the card reader, typically found near the checkout counter. When prompted, hold your device near the card reader with your finger on the Touch ID or side button, then look at the screen. Face ID will verify your face and authenticate the payment, allowing you to finalize your transaction without the need for physical contact or entering a PIN.
It’s important to remember that Face ID is designed to work even if you’re wearing glasses, a hat, or a face covering. However, in certain circumstances, you may need to enter your device passcode or use an alternate payment method if Face ID cannot verify your identity. For added convenience, you can also use Face ID to authenticate app or website purchases without needing to enter payment or shipping information manually.
Rest assured that Apple Pay and Face ID prioritize security by using advanced encryption and tokenization methods that protect your personal and financial data. This means that your card information isn’t stored on the device or shared with merchants, reducing the risk of fraud and unauthorized access.
Now that you know how easy it is to make payments with Face ID, let’s address any troubleshooting questions or concerns you may have.
Troubleshooting Face ID for Apple Pay
While Face ID for Apple Pay is a reliable and secure feature, there may be instances where you encounter issues or need to troubleshoot any issues that arise. Here are a few common troubleshooting steps to help you resolve potential problems:
1. Ensure that Face ID is enabled for Apple Pay: Go to “Settings” on your device, select “Face ID & Passcode”, and make sure that the toggle for “Apple Pay” is turned on. If it’s already enabled, try toggling it off and then back on to refresh the settings.
2. Check your Face ID settings: Make sure that your face is enrolled correctly and there are no obstructions or changes in your appearance that may affect Face ID detection. Go to “Settings”, select “Face ID & Passcode”, and check that “Use Face ID for” is enabled for Apple Pay.
3. Clean the TrueDepth camera sensors: The TrueDepth camera system, responsible for Face ID recognition, can sometimes be hindered by dirt, dust, or smudges. Use a soft, lint-free cloth to clean the front-facing camera and sensors gently.
4. Adjust the distance and angle: Ensure that you hold your device within the proper range and at a suitable angle for Face ID to capture your face accurately. Hold the device around 10-20 inches away from your face and position it directly in front of you, avoiding extreme angles or tilts.
5. Consider environmental factors: Low light conditions or strong ambient light can affect Face ID recognition. Try adjusting the lighting in the room or reposition yourself to ensure adequate lighting for the best performance.
6. Remove any accessories or coverings: Face ID relies on facial recognition, so any accessories that obscure your face, such as hats, sunglasses, or face coverings, may hinder its functionality. Remove any such items during the Face ID authentication process.
If you have tried the troubleshooting steps above and still experience issues with Face ID for Apple Pay, it may be helpful to update your device’s software to the latest version. Software updates often include bug fixes and improvements that can address known issues.
If all else fails, you can contact Apple Support for further assistance. They have a dedicated team to help resolve technical problems related to Face ID and Apple Pay.
By following these troubleshooting steps and reaching out for additional support if needed, you can ensure that your experience with Face ID for Apple Pay is smooth and hassle-free.
Conclusion
In this article, we have explored the seamless integration of Face ID for Apple Pay, revolutionizing the way we make secure and convenient payments. With Face ID enabled, users can enjoy the simplicity of authorizing transactions with just a glance, eliminating the need for passwords or PINs.
We started by guiding you through the setup process, ensuring that your face is accurately scanned and recognized by Face ID. Then, we discussed how to add your credit or debit cards to Apple Pay, making it effortless to access your payment information when needed.
Next, we explained the convenience of making payments with Face ID, whether it’s online or at participating physical stores. The combination of facial recognition and advanced encryption methods ensures secure transactions while streamlining the checkout process.
Lastly, we provided troubleshooting steps for any challenges you may encounter with Face ID for Apple Pay. From adjusting settings to cleaning the camera sensors, these tips will help you overcome common obstacles and ensure a smooth user experience.
Remember, Face ID for Apple Pay brings together convenience, security, and simplicity in one powerful feature. By incorporating facial recognition technology, Apple has made paying for purchases more effortless and secure than ever before.
So go ahead and embrace the future of payments with Face ID and Apple Pay. Enjoy the convenience of leaving your wallet at home and completing transactions with a simple glance. Say goodbye to the hassles of passwords and PINs, and welcome the simplicity and security of Face ID for Apple Pay!