Introduction
Welcome to the world of digital payments, where convenience and security meet seamlessly. Apple Pay, the popular mobile payment and digital wallet service offered by Apple, has revolutionized the way we make transactions on our iPhones, iPads, and Apple Watches. With its user-friendly interface and advanced security features, Apple Pay has gained immense popularity among millions of users worldwide.
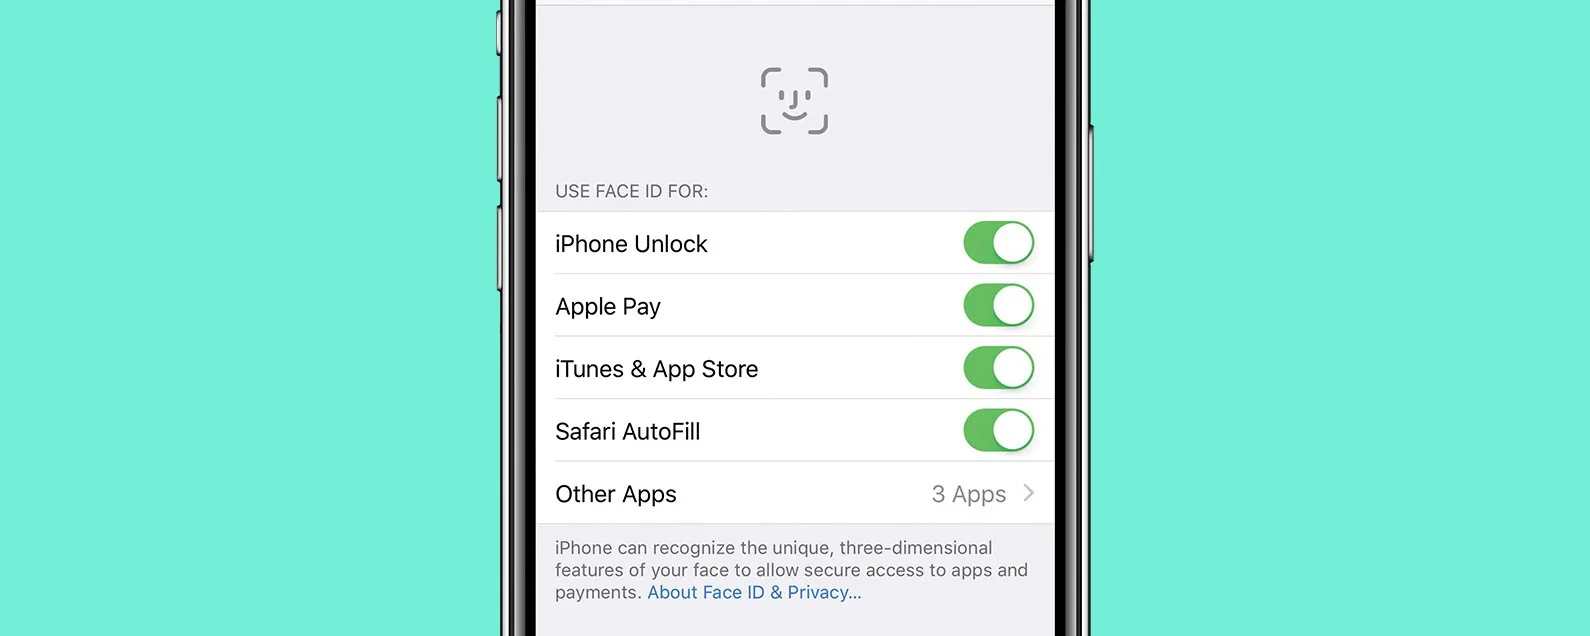
While Apple Pay is commonly associated with the use of Face ID for authentication, you may be wondering if it’s possible to use Apple Pay without Face ID. The good news is, Apple Pay can be set up and used without relying on facial recognition technology. Whether you have an older iPhone without Face ID capabilities or simply prefer an alternative method for authentication, this article will guide you through the process of using Apple Pay without Face ID.
Setting up Apple Pay without Face ID may take a few extra steps compared to using Face ID, but it’s a straightforward process that ensures you can still enjoy the convenience and security of digital payments. In the following sections, we will explore how to set up Apple Pay, add credit or debit cards, make payments, withdraw cash, manage transactions, and troubleshoot any issues that may arise along the way. Let’s dive in!
Setting Up Apple Pay Without Face ID
To set up Apple Pay without Face ID, you’ll need to rely on other authentication methods, such as Touch ID or Passcode. Here’s how you can get started:
- Ensure that your iPhone, iPad, or Apple Watch is updated to the latest iOS or watchOS version that supports Apple Pay.
- Open the “Settings” app on your device and tap on “Wallet & Apple Pay”. If you’re using an iPad, you may find this option under the “Settings” menu.
- Select “Add Credit or Debit Card”.
- Follow the on-screen prompts to add your card details manually or use the device’s camera to capture the card information.
- Once your card information is verified, you’ll need to verify your card with your card issuer. This verification process may vary depending on your card issuer and may involve providing additional information or receiving a verification code.
- Once your card is verified, you can choose to set it as your default payment method or manage multiple cards within the Wallet app.
- If you’re using an Apple Watch, you’ll need to follow similar steps by accessing the “Wallet & Apple Pay” section in the Apple Watch app on your iPhone. Make sure your iPhone is paired with your Apple Watch for seamless integration.
By following these steps, you can easily set up Apple Pay without relying on Face ID. It’s important to note that not all card issuers may support adding cards to Apple Pay without Face ID, so it’s recommended to check with your specific card provider for compatibility.
Adding Credit or Debit Cards
Adding credit or debit cards to Apple Pay without Face ID is a simple process that allows you to securely store your payment information. Here are the steps to add your cards:
- Open the Wallet app on your iPhone or iPad.
- Tap on the “+” icon to add a new card.
- You will be presented with the option to manually enter your card details or use the device’s camera to scan your card.
- If you choose to enter the card details manually, input the card number, expiration date, and security code.
- If you opt to use the camera to scan your card, align the card within the frame and ensure that all the necessary details are captured accurately.
- Follow the on-screen instructions to complete the process, which may include verifying your card with your card issuer.
- Once your card is verified, it will be added to your Apple Pay wallet.
It’s important to note that some card issuers may require additional verification steps to ensure the security of your payment information. This may involve receiving a one-time verification code via SMS or email, or contacting your card issuer directly for further instructions.
You can add multiple credit or debit cards to your Apple Pay wallet by repeating the above steps for each card. This gives you the flexibility to choose which card to use for your payments and easily manage your payment methods within the Wallet app.
Remember, the security of your card details is of utmost importance. Apple Pay utilizes tokenization to secure your information, replacing your actual card details with a unique token for each transaction. This ensures that your sensitive information is never shared with merchants, providing an extra layer of protection against fraud.
Making a Payment with Apple Pay
Once you have set up and added your credit or debit cards to Apple Pay without Face ID, making payments becomes a seamless and convenient process. Here’s how you can make a payment using Apple Pay:
- Look for the contactless payment symbol at participating merchants, both online and in physical stores.
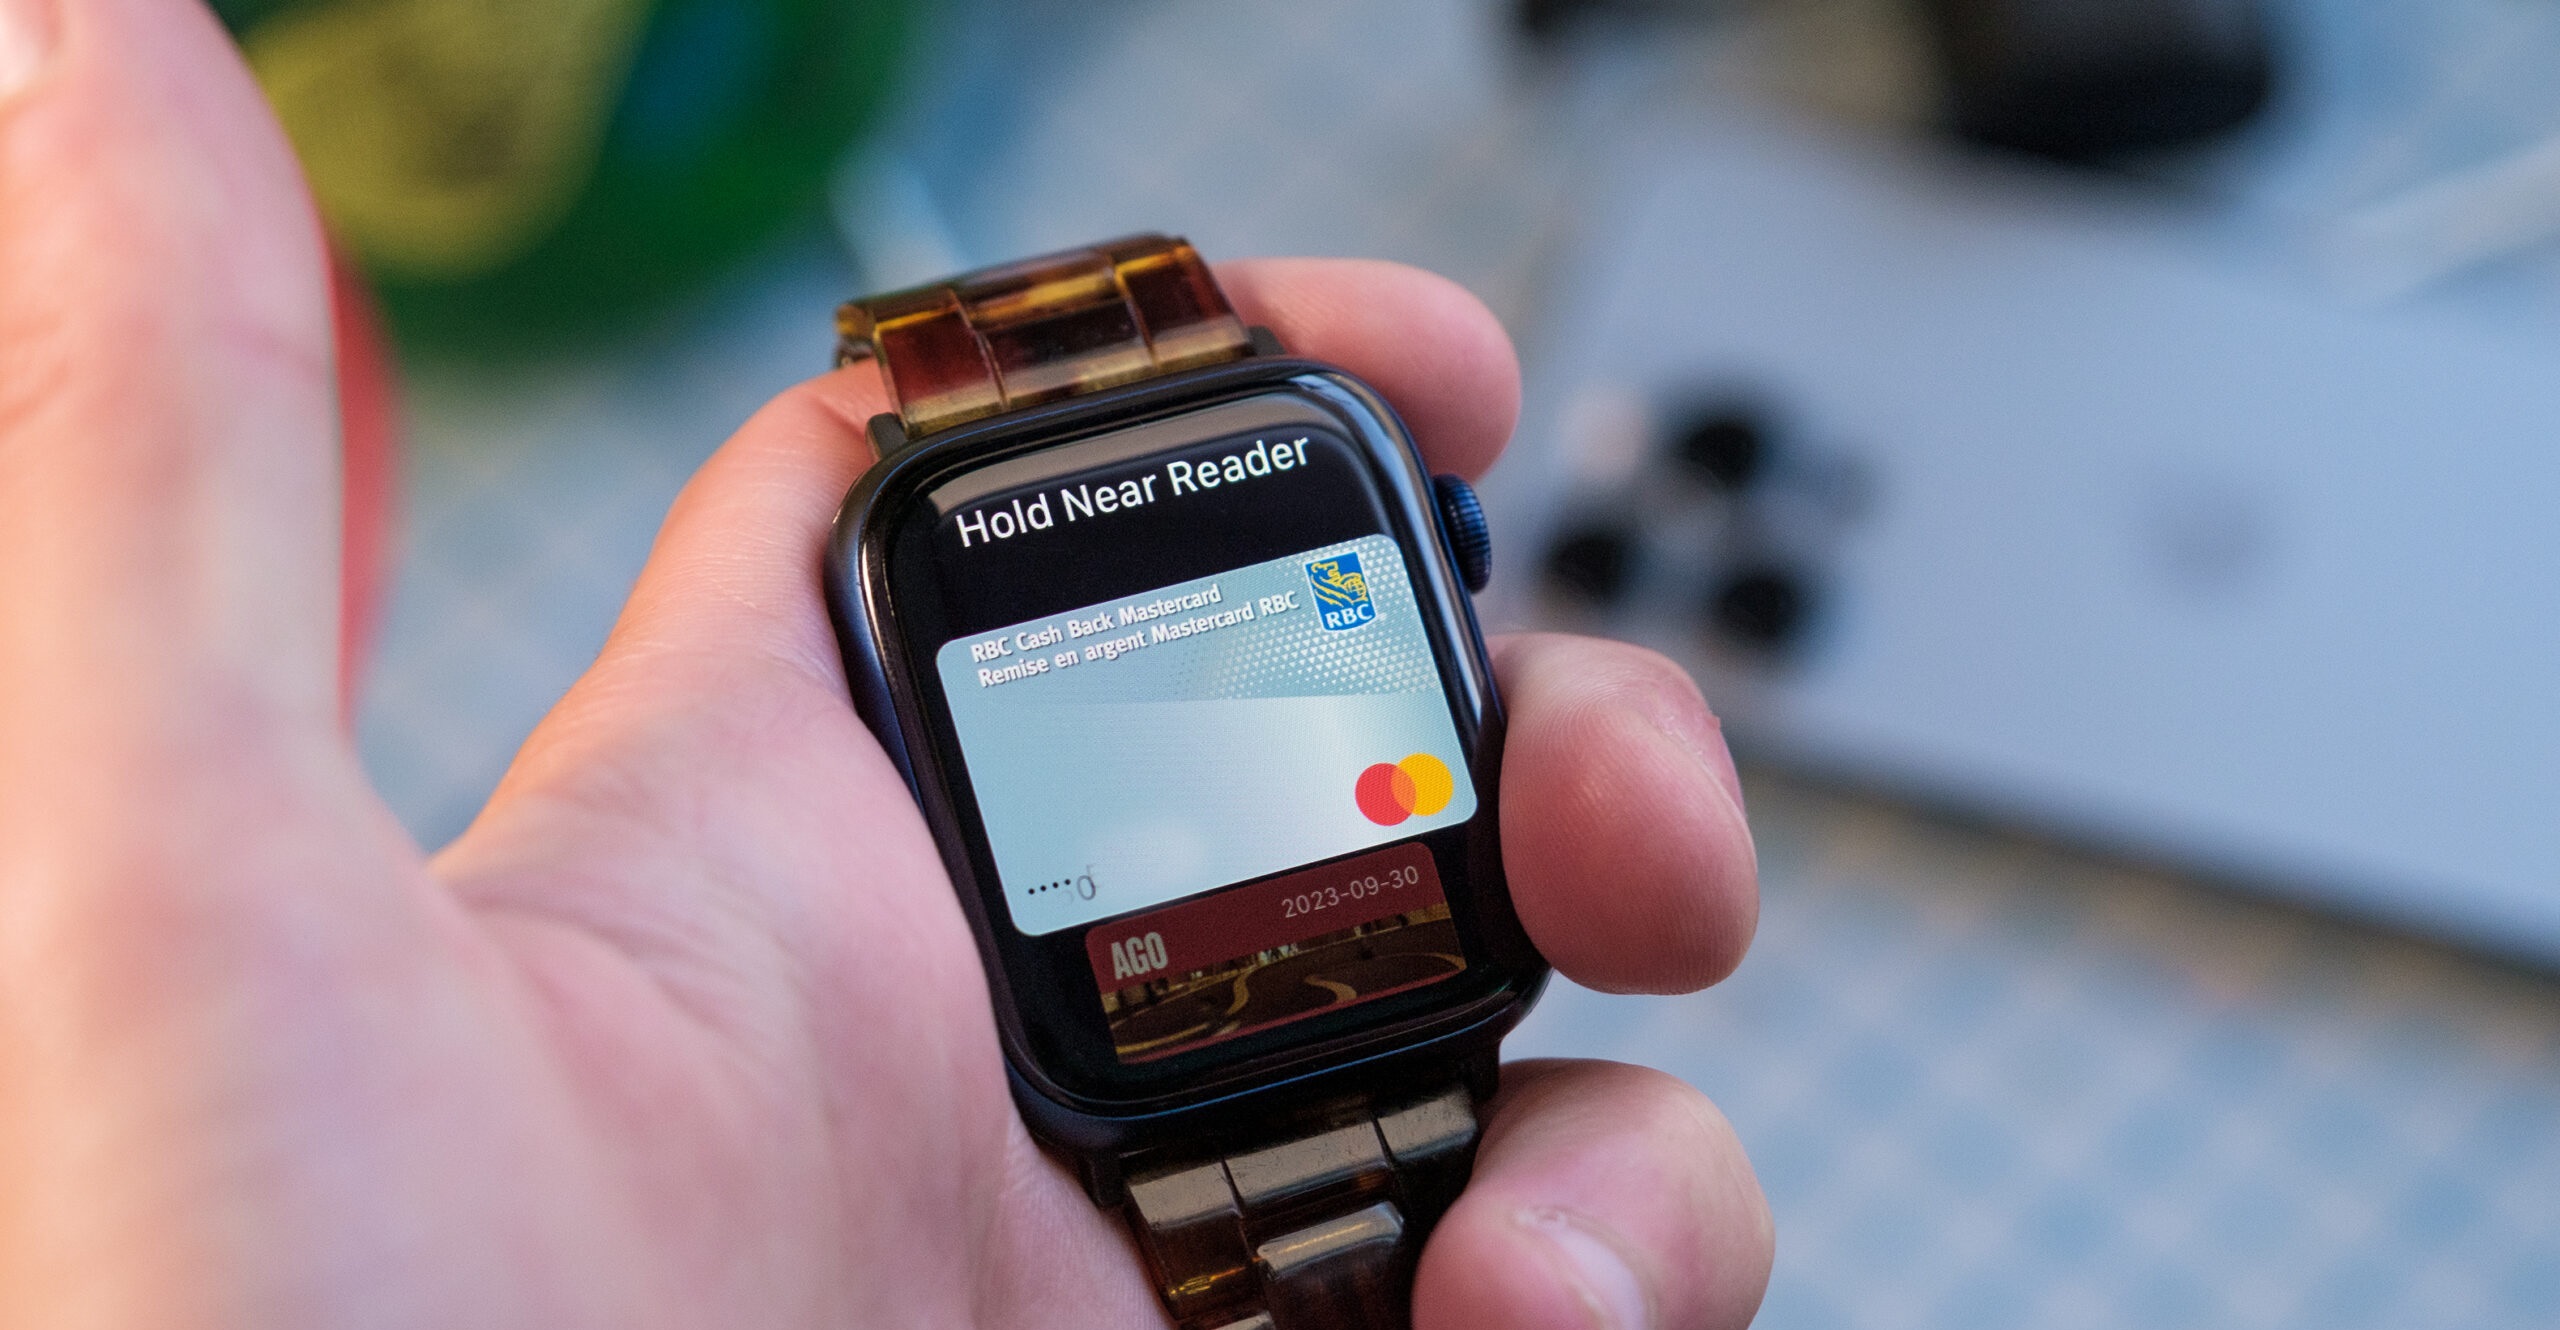
- When making an in-store purchase, simply hold your iPhone or Apple Watch near the payment terminal. On devices with Touch ID, place your finger on the home button to authenticate the transaction. On devices without Touch ID, such as the iPhone X and newer models, double-click the side button and authenticate with your passcode or Face ID (if available).
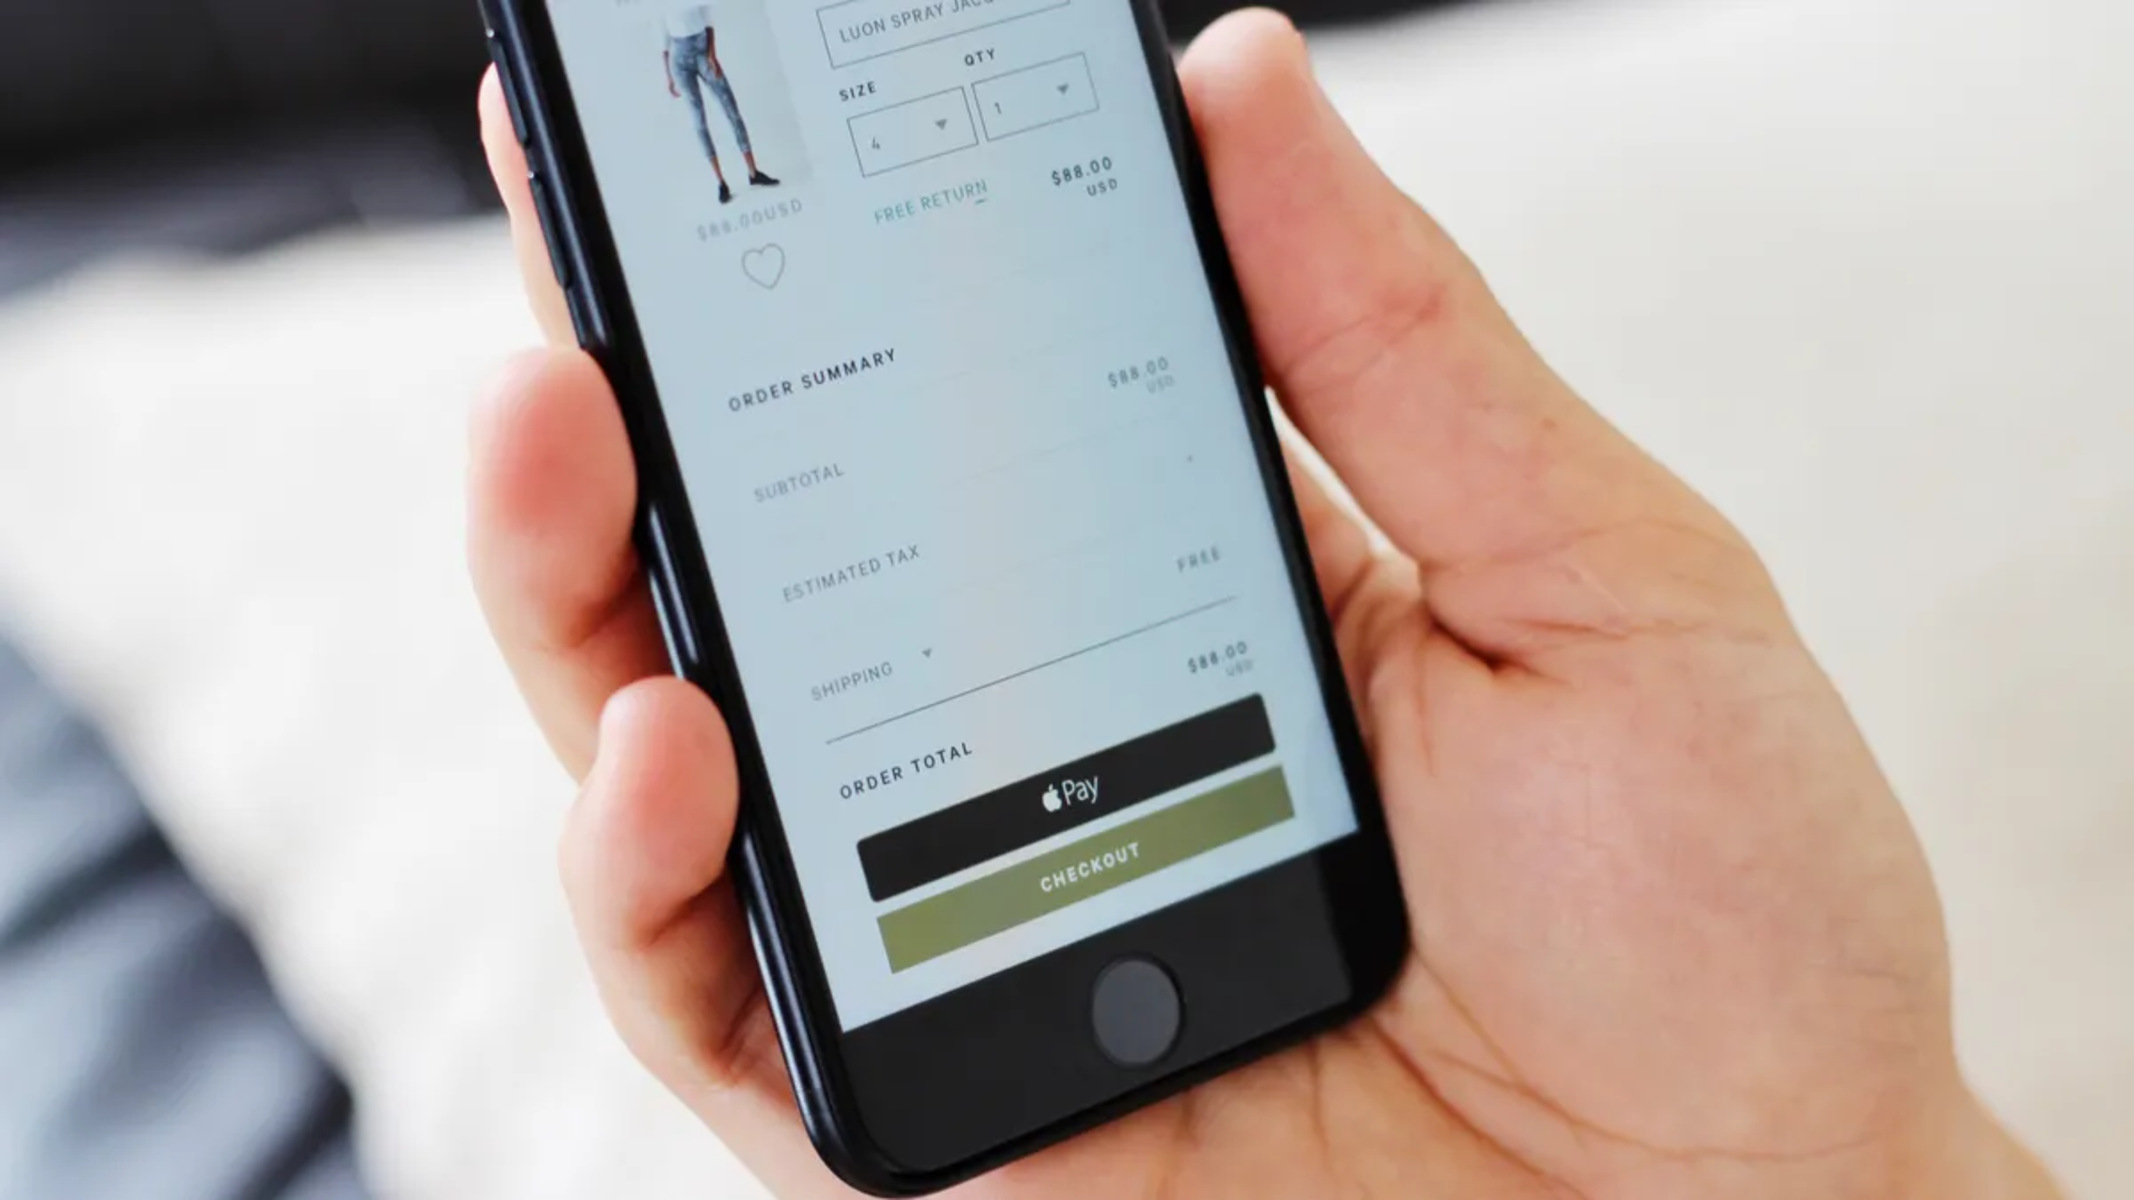
- For online transactions, select the Apple Pay option at checkout. On devices with Touch ID, place your finger on the home button to authorize the payment. On devices without Touch ID, authenticate the payment using your passcode or Face ID (if available).
- Once the payment is authorized, you will receive a confirmation on your device. In stores, you may be required to sign or enter a PIN as an additional verification step, depending on the merchant’s requirements.
Apple Pay provides a secure and private payment experience by using tokenization to protect your card information. Your actual card details are never shared with the merchant, adding an extra layer of security to your transactions.
In addition to making payments in stores and online, Apple Pay can also be used to make payments within certain apps, making the checkout process even more convenient.
It’s important to note that Apple Pay is widely accepted by most major merchants, including retail stores, restaurants, apps, and websites. However, there may still be some smaller or independent businesses that may not support Apple Pay. It’s always a good idea to familiarize yourself with the accepted payment methods at your desired merchants before making a purchase to ensure a smooth payment experience.
Withdrawing Cash using Apple Pay
While Apple Pay is primarily designed for making payments, it is possible to withdraw cash using your Apple Pay balance. Here’s how you can do it:
- Open the Wallet app on your iPhone.
- Locate and select the card associated with your Apple Pay balance.
- Look for the option to withdraw cash, which may be labeled differently depending on your card issuer or banking institution. It could be labeled as “Transfer to Bank” or “Cash Withdrawal”.
- Follow the on-screen prompts to initiate the withdrawal process.
It’s important to note that not all card issuers or banking institutions may support cash withdrawals using Apple Pay. It’s recommended to check with your specific card provider or consult their documentation for more information regarding this feature.
In addition, the availability of ATMs and cash withdrawal using Apple Pay may vary depending on your location. It’s always a good idea to check if the ATMs in your area are compatible with Apple Pay and support cash withdrawals.
Remember to keep your Apple Pay balance secure and monitor your transactions regularly. If you encounter any issues or suspicious activity related to cash withdrawals using Apple Pay, it’s essential to contact your card issuer or banking institution immediately for assistance.
Please note that cash withdrawals using Apple Pay may be subject to additional fees or limits set by your card issuer or banking institution. It’s advisable to review these fees and limits beforehand to ensure you are aware of any potential charges.
Managing Apple Pay Transactions
Managing your Apple Pay transactions allows you to keep track of your payments, review your purchase history, and update your payment information. Here are some ways to manage your Apple Pay transactions:
- To review your recent transactions, open the Wallet app on your iPhone and select the card you want to view. You will see a list of recent transactions, including the date, time, and merchant.
- If you need to dispute a transaction or report any unauthorized charges, contact your card issuer or banking institution immediately. They will guide you through the necessary steps to resolve the issue.
- If you need to update or remove a card from Apple Pay, open the Wallet app and tap on the card you want to manage. Look for the option to edit or remove the card, and follow the on-screen instructions.
- You can also add or update your billing and shipping addresses associated with Apple Pay. This ensures a smooth checkout process when making online payments.
- If you have multiple cards added to Apple Pay, you can set a default card for convenience. This card will be used automatically for transactions unless you choose a different card during the checkout process.
- Consider enabling transaction notifications or alerts for your Apple Pay transactions. This will provide you with instant updates and notifications whenever a transaction is made using Apple Pay.
By managing your Apple Pay transactions, you can keep track of your spending, easily update your payment information, and resolve any issues that may arise. Staying proactive in managing your transactions helps to ensure the security and convenience of using Apple Pay.
Additionally, it’s important to stay vigilant and regularly review your card statements and transaction history to identify any suspicious or unauthorized charges. If you notice any discrepancies, contact your card issuer or banking institution immediately for assistance and to report any fraudulent activity.
Troubleshooting Apple Pay Without Face ID
While Apple Pay is a reliable and convenient payment method, you may encounter occasional issues when using it without Face ID. Here are some common troubleshooting steps to help resolve these issues:
- Ensure that your device is updated to the latest iOS or watchOS version that supports Apple Pay. Software updates often include bug fixes and improvements to enhance the performance of Apple Pay.
- Check that your card issuer supports Apple Pay without Face ID. Some card issuers may have specific requirements or limitations for using Apple Pay, so it’s crucial to verify compatibility with your card provider.
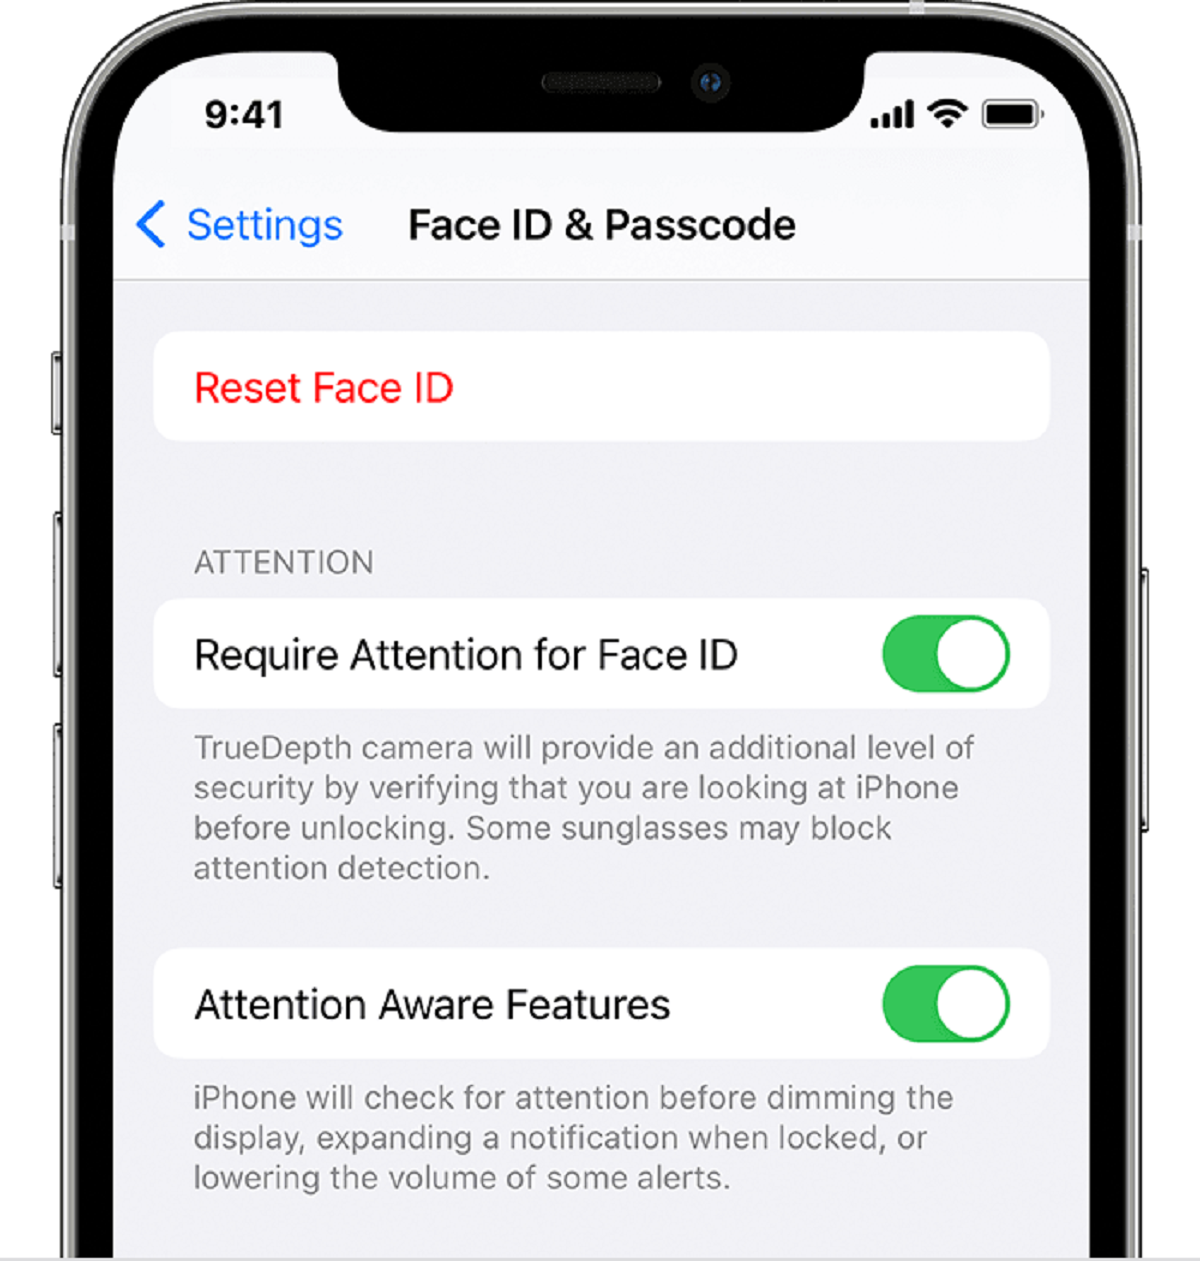
- Make sure that Apple Pay is enabled in your device’s settings. Go to “Settings” and tap on “Wallet & Apple Pay” to verify that the feature is turned on.
- If Apple Pay is not working for a specific card, try removing and re-adding the card. Open the Wallet app, select the card, and choose the option to remove it. Then follow the steps outlined earlier to add the card again.
- Restart your device. Sometimes, a simple restart can resolve temporary software glitches or connectivity issues that may be affecting Apple Pay.
- If you encounter issues when making a payment, ensure that your device’s NFC (Near Field Communication) feature is turned on. This feature allows your device to communicate with payment terminals.
- Check your internet connection. A stable internet connection is essential for the seamless functioning of Apple Pay, especially when making online payments.
- If you’re experiencing issues with a specific merchant, verify that the merchant accepts Apple Pay and that the payment terminal is compatible with Apple Pay.
- Contact Apple Support or your card issuer’s customer service for further assistance if the problem persists or if you suspect any fraudulent activity related to your Apple Pay transactions.
By following these troubleshooting steps and reaching out to the appropriate support channels, you can address most issues encountered when using Apple Pay without Face ID. Remember, Apple Pay is designed to provide a secure and convenient payment experience, and troubleshooting steps may vary depending on the specific circumstances and device you’re using.
Conclusion
Apple Pay is a versatile and secure payment method that can be used without relying on Face ID. Whether you have an older iPhone without Face ID capabilities or simply prefer an alternative authentication method, you can still enjoy the convenience and security of Apple Pay.
In this article, we explored the process of setting up Apple Pay without Face ID, adding credit or debit cards, making payments, withdrawing cash, managing transactions, and troubleshooting any issues that may arise. By following these steps, you can easily navigate through the world of Apple Pay and make seamless transactions.
Remember, when using Apple Pay without Face ID, it’s important to keep your device updated, verify compatibility with your card issuer, and ensure that your settings and payment information are up to date. By staying vigilant and proactive in managing your transactions, you can enjoy a smooth and secure payment experience.
Whether you’re using Apple Pay in stores, online, or within apps, rest assured that the security of your payment information is a top priority. Apple Pay utilizes advanced encryption, tokenization, and secure authentication methods to protect your data and enhance the privacy of your transactions.
So, if you’ve been wondering how to use Apple Pay without Face ID, fear not. You can confidently embrace the world of digital payments and enjoy the convenience of Apple Pay on your iPhone, iPad, or Apple Watch.
Now that you’re equipped with the knowledge and know-how, go ahead and set up Apple Pay without Face ID, add your cards, and make seamless and secure transactions with just a touch or a password. Happy Apple Paying!