Introduction
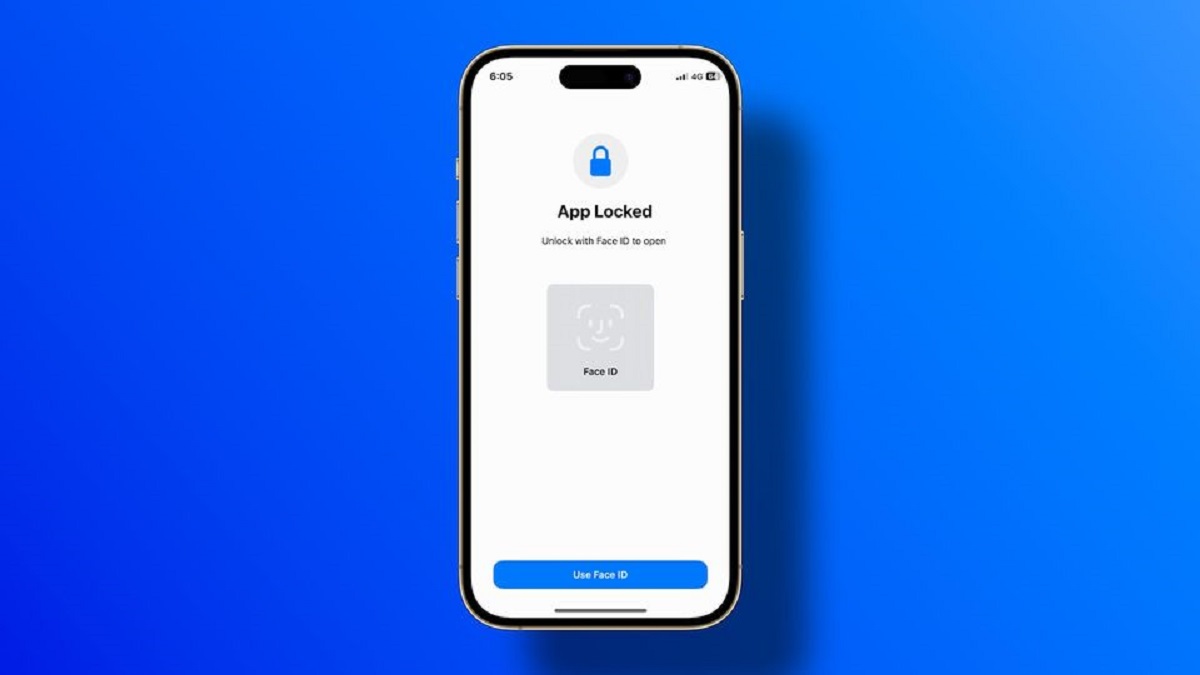
Welcome to this informative guide on how to add another Face ID on an iPhone. Face ID technology has revolutionized the way we secure our devices, providing convenience and security with just a glance. With Face ID, you can unlock your iPhone, authenticate payments, and access sensitive information effortlessly.
However, there may be situations where you would want to add another face to your device’s Face ID recognition system. Whether it’s for easier access for a family member or friend or for a different appearance that you frequently adopt, adding another face to Face ID can be incredibly useful.
Adding another Face ID is a straightforward process and can be done within a few simple steps. In this guide, we will walk you through the process of adding another Face ID on your iPhone, ensuring that you can easily switch between different faces and enjoy the convenience of Face ID with multiple appearances.
Before we dive into the step-by-step instructions, let’s first understand the concept of Face ID and why adding another face might be beneficial for certain individuals.
Understanding Face ID
Face ID is a facial recognition technology developed by Apple and first introduced with the iPhone X. It utilizes the front-facing TrueDepth camera system, which includes an infrared camera, flood illuminator, and dot projector, to create a detailed 3D map of your face for authentication purposes.
When you set up Face ID on your iPhone, it captures and analyzes over 30,000 invisible dots to create a precise depth map of your face. This depth map, combined with machine learning algorithms, enables your device to accurately identify and authenticate your face in various situations, such as when you want to unlock your iPhone or authorize a payment using Apple Pay.
One of the key advantages of Face ID is its convenience. Unlike traditional fingerprint-based authentication methods, you don’t need to physically touch any buttons or sensors. Simply raise your iPhone towards your face, and if your face is recognized, the device will unlock or authenticate the requested action seamlessly.
Face ID also offers advanced security features. The depth map and infrared camera ensure that Face ID is resilient to spoofing attempts using photographs or masks. Additionally, the facial recognition data is securely stored in the iPhone’s Secure Enclave, protecting your biometric information from being accessed by any unauthorized third parties.
It’s important to note that Face ID continuously adapts to changes in your appearance. Whether you grow a beard, wear glasses, or change your hairstyle, Face ID will still recognize and authenticate your face, making it a reliable and versatile method of device security.
Now that we have a basic understanding of Face ID and its capabilities, let’s explore why adding another face to Face ID might be useful.
Why would you want to add another Face ID?
Adding another face to the Face ID recognition system on your iPhone can be beneficial for various reasons. Let’s explore some common scenarios where having multiple faces registered in Face ID can come in handy:
- Shared Device: If you share your iPhone with a family member or friend, adding their face to Face ID allows them to easily unlock the device and access their own personalized settings and apps. This eliminates the need for sharing passcodes or constantly logging in and out of different accounts.
- Alternate Appearance: Adding another face to Face ID can be useful if you frequently adopt a different appearance. For example, if you often wear glasses, a hat, or a different hairstyle that significantly alters your appearance, registering an alternate appearance ensures that Face ID can still recognize and authenticate you in those situations.
- Backup Face: Having an additional face registered in Face ID serves as a backup in case there are any changes to your primary face that prevent successful recognition. This can include situations like facial injuries or surgeries that temporarily alter your appearance.
- Convenience: Adding another face to Face ID can make it more convenient for you to unlock your iPhone in different scenarios. For instance, if your device is on a dock or charging stand, having the option to unlock it using your face from different angles can save you the hassle of physically picking up your iPhone.
By understanding these reasons for adding another Face ID, you can now assess if it would be beneficial for your specific needs. Whether it’s for shared device usage, alternate appearances, backup faces, or simply added convenience, adding another face to Face ID can enhance your overall user experience with your iPhone.
How to add another Face ID on an iPhone
Adding another face to Face ID on your iPhone is a straightforward process. Follow the step-by-step instructions below to set up an additional Face ID:
Step 1: Open Settings
Unlock your iPhone and navigate to the home screen. Locate the “Settings” app, which is represented by a gear icon, and tap on it to open the settings menu.
Step 2: Go to Face ID & Passcode
In the settings menu, scroll down and find the “Face ID & Passcode” option. Tap on it to access the Face ID settings.
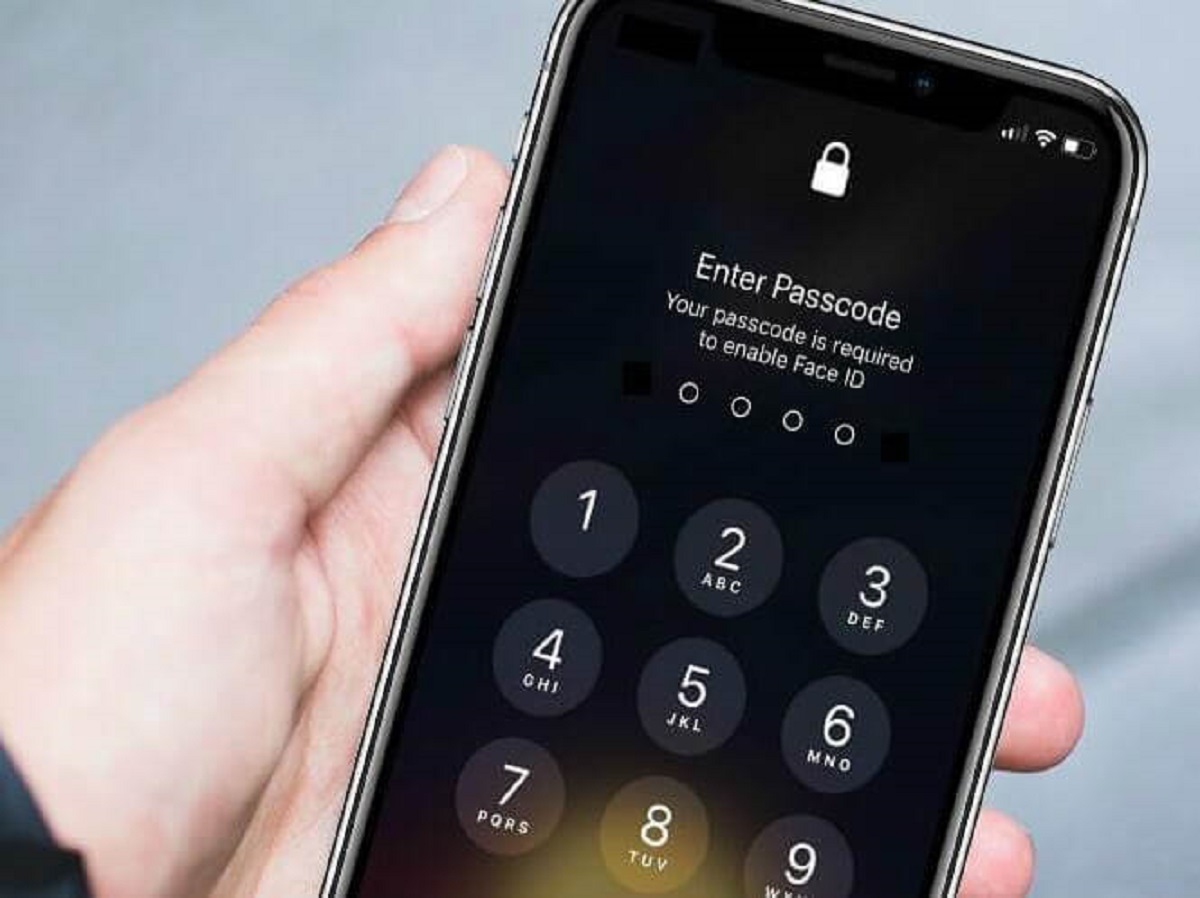
Step 3: Enter your passcode
To make any changes to the Face ID settings, you will be prompted to enter your passcode for security verification. Enter your passcode when prompted.
Step 4: Select “Set Up Alternative Appearance”
In the Face ID settings, you will see an option labeled “Set Up Alternative Appearance”. Tap on this option to begin adding another face to Face ID.
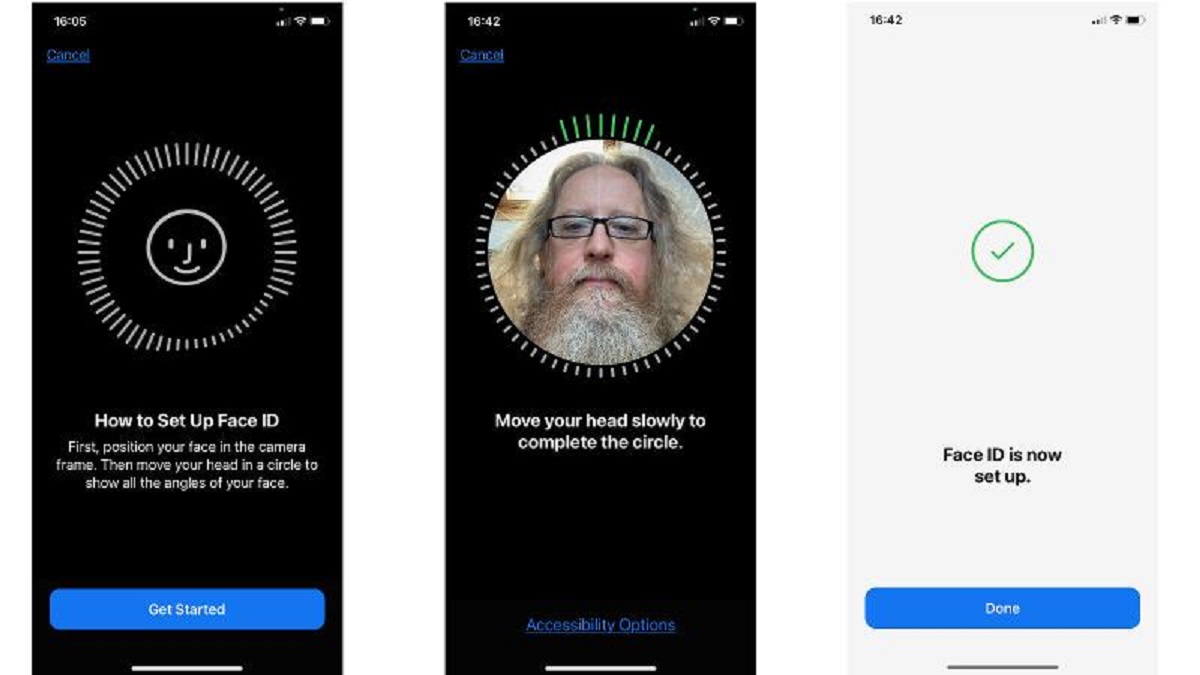
Step 5: Follow the on-screen instructions
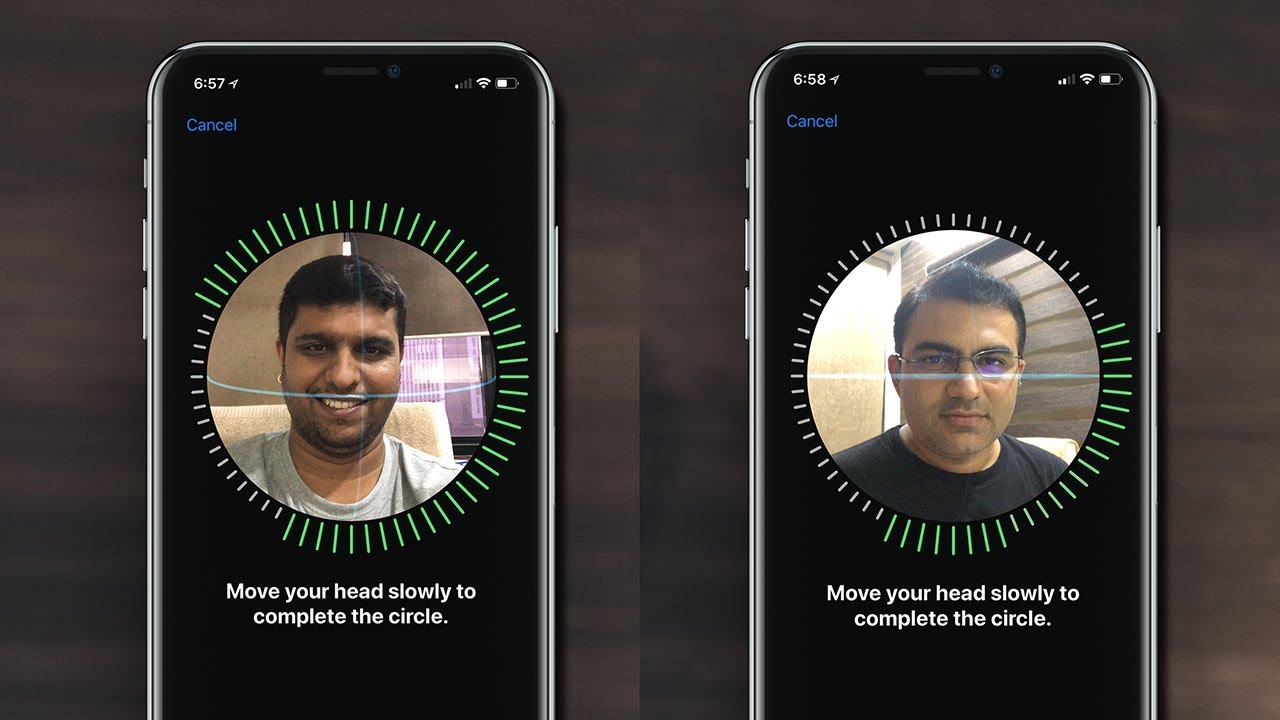
Follow the on-screen instructions provided by your iPhone. These instructions will guide you through the process of capturing your second face using the front-facing TrueDepth camera system. Make sure to position your face properly within the camera frame and follow any prompts to complete the scanning process.
Step 6: Complete the setup process
Once the scanning process is complete, your iPhone will analyze the captured data and create a new Face ID profile for the additional face. This may take a few seconds. Once finished, you will receive a confirmation message indicating that the setup process is complete.
Congratulations! You have successfully added another face to Face ID on your iPhone. You can now use either face to unlock your device, authorize payments, and enjoy the convenience of facial recognition.
It’s important to note that you can have up to two different faces registered in Face ID. If you wish to add more faces or remove existing ones, you can repeat this process or modify the Face ID settings accordingly.
Step 1: Open Settings
To begin the process of adding another face to Face ID on your iPhone, the first step is to open the Settings app. The Settings app is where you can access various settings and customize different aspects of your device.
To open the Settings app, start by unlocking your iPhone. On the home screen, look for the icon that resembles a gear. This is the icon for the Settings app. Tap on the Settings app icon to open it.
Once you tap on the Settings app icon, the app will launch, and you will be taken to the main settings menu. This menu provides access to a wide range of settings and options for your device.
It’s important to note that the appearance and organization of the Settings app may vary slightly depending on the version of iOS running on your iPhone. However, the general steps outlined here should apply across different versions.
By opening the Settings app, you are taking the first step towards adding another face to Face ID on your iPhone. This is where you can access the Face ID & Passcode settings, which will allow you to modify the facial recognition settings and add an additional face.
Now that you have successfully opened the Settings app, you are ready to proceed to the next step: navigating to the Face ID & Passcode settings. Follow the instructions in the upcoming steps to continue with the process of adding another face to Face ID on your iPhone.
Step 2: Go to Face ID & Passcode
Once you have opened the Settings app on your iPhone, you can now navigate to the Face ID & Passcode settings. This is the section where you can manage and customize the Face ID feature, including adding another face to the recognition system.
To go to the Face ID & Passcode settings, follow the instructions below:
- On the main settings menu, scroll down until you see the option labeled “Face ID & Passcode”. This option is usually located below the “Display & Brightness” and “Emergency SOS” settings.
- Tap on the “Face ID & Passcode” option to access the Face ID settings.
By selecting the “Face ID & Passcode” option, you will be taken to a new menu specifically dedicated to managing the Face ID feature on your iPhone.
It’s worth noting that if you haven’t set up Face ID before, you may need to set up a passcode first. This passcode will act as an alternative authentication method in case Face ID fails or if you need to enter your device without using facial recognition.
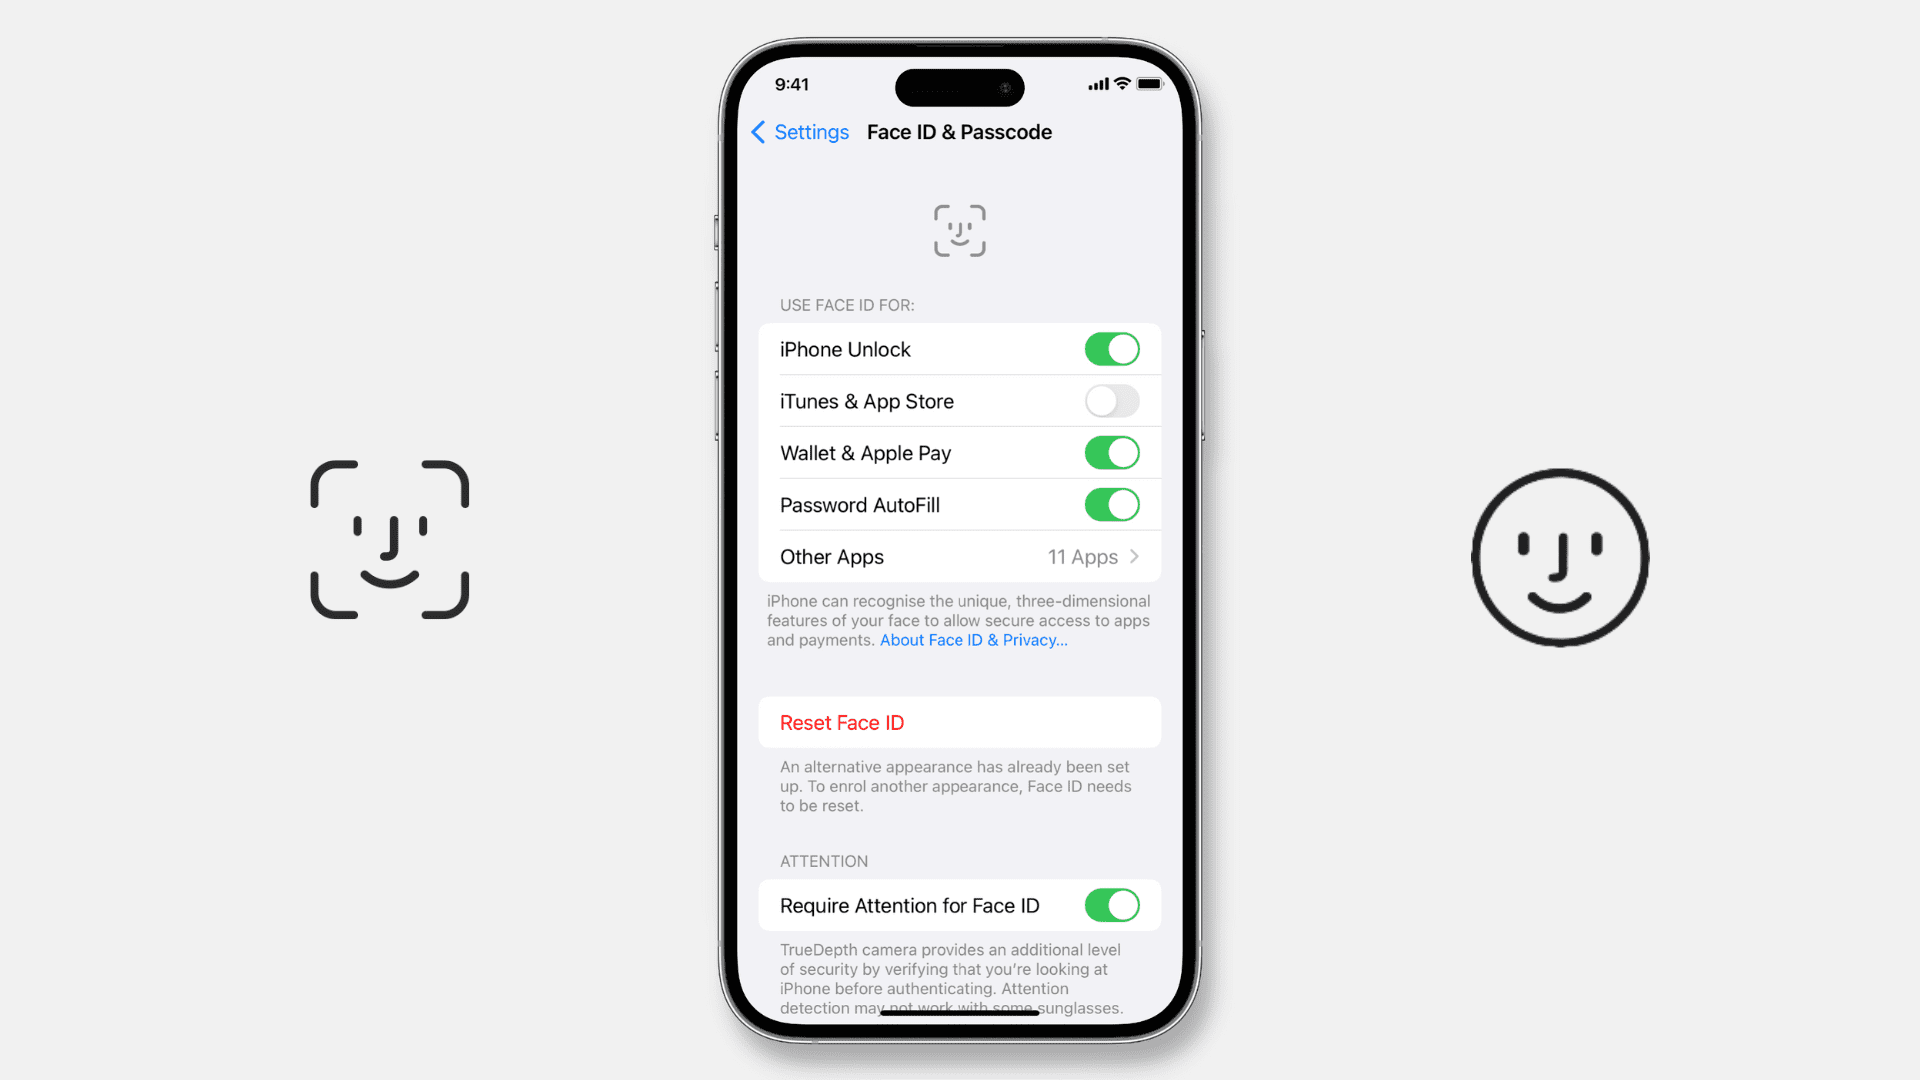
Within the Face ID & Passcode settings, you can not only add another face to the recognition system but also enable or disable Face ID for specific functions such as unlocking your iPhone, Apple Pay, or iTunes & App Store purchases.
Now that you have successfully reached the Face ID & Passcode settings, you are ready to proceed to the next step: entering your passcode to access and modify the Face ID settings. Follow the upcoming instructions to continue adding another face to Face ID on your iPhone.
Step 3: Enter your passcode
After navigating to the Face ID & Passcode settings on your iPhone, the next step is to enter your passcode. This passcode acts as an additional layer of security to access and modify the Face ID settings.
Follow the instructions below to enter your passcode and continue with the process of adding another face to Face ID:
- On the Face ID & Passcode settings page, you will see a section labeled “Unlock with Face ID” or “Face ID Access”. Above this section, you will find an option called “Change Passcode”. Tap on this option to continue.
- Here, you will be prompted to enter your current passcode. Your passcode can be a combination of numbers, letters, or symbols, depending on your personal preferences and device settings.
- Using the on-screen keyboard, enter your passcode carefully to ensure accuracy. If you make a mistake, you can tap the delete button to remove incorrect digits or characters.
- Once you have successfully entered your passcode, tap “OK” or “Done” to confirm.
By entering your passcode, you are verifying your identity and ensuring that only authorized users can access and modify the Face ID settings. This adds an additional layer of security to protect your personal information.
It’s important to use a passcode that is unique and not easily guessable by others. Avoid using common combinations like “123456” or simple patterns. Instead, opt for a memorable yet robust passcode that provides a high level of security.
Now that you have successfully entered your passcode, you’re ready to proceed to the next step: selecting “Set Up Alternative Appearance” to add another face to Face ID. Follow the upcoming instructions to continue with the process on your iPhone.
Step 4: Select “Set Up Alternative Appearance”
Once you have entered your passcode, you can proceed to the next step of adding another face to Face ID by selecting the “Set Up Alternative Appearance” option. This step allows you to register an additional face to be recognized by Face ID on your iPhone.
Follow the instructions below to select “Set Up Alternative Appearance” and continue with the process:
- On the Face ID & Passcode settings page, scroll down to the section labeled “Unlock with Face ID” or “Face ID Access”. Within this section, you will find various options related to Face ID settings.
- Look for the option called “Set Up Alternative Appearance” or a similar phrase. This option is designed specifically for adding another face to Face ID. Tap on it to proceed.
By selecting the “Set Up Alternative Appearance” option, you are indicating to your iPhone that you want to add an additional face to the Face ID recognition system. This is especially useful if you have a different appearance that you frequently adopt, such as wearing glasses or a hat, or if you want to grant access to another trusted individual.
It’s worth noting that the option may be displayed differently depending on the iOS version and device model you have. However, the concept and functionality remain the same – the option allows you to add another face to Face ID.
Now that you have successfully selected the “Set Up Alternative Appearance” option, you’re ready to proceed with the process of adding another face to Face ID. Follow the upcoming instructions to complete the setup on your iPhone.
Step 5: Follow the on-screen instructions
After selecting the “Set Up Alternative Appearance” option in the Face ID & Passcode settings, you will be guided through a series of on-screen instructions to add another face to Face ID on your iPhone. It’s important to carefully follow these instructions to ensure a successful setup process.
Here are the general steps you can expect to encounter during this phase:
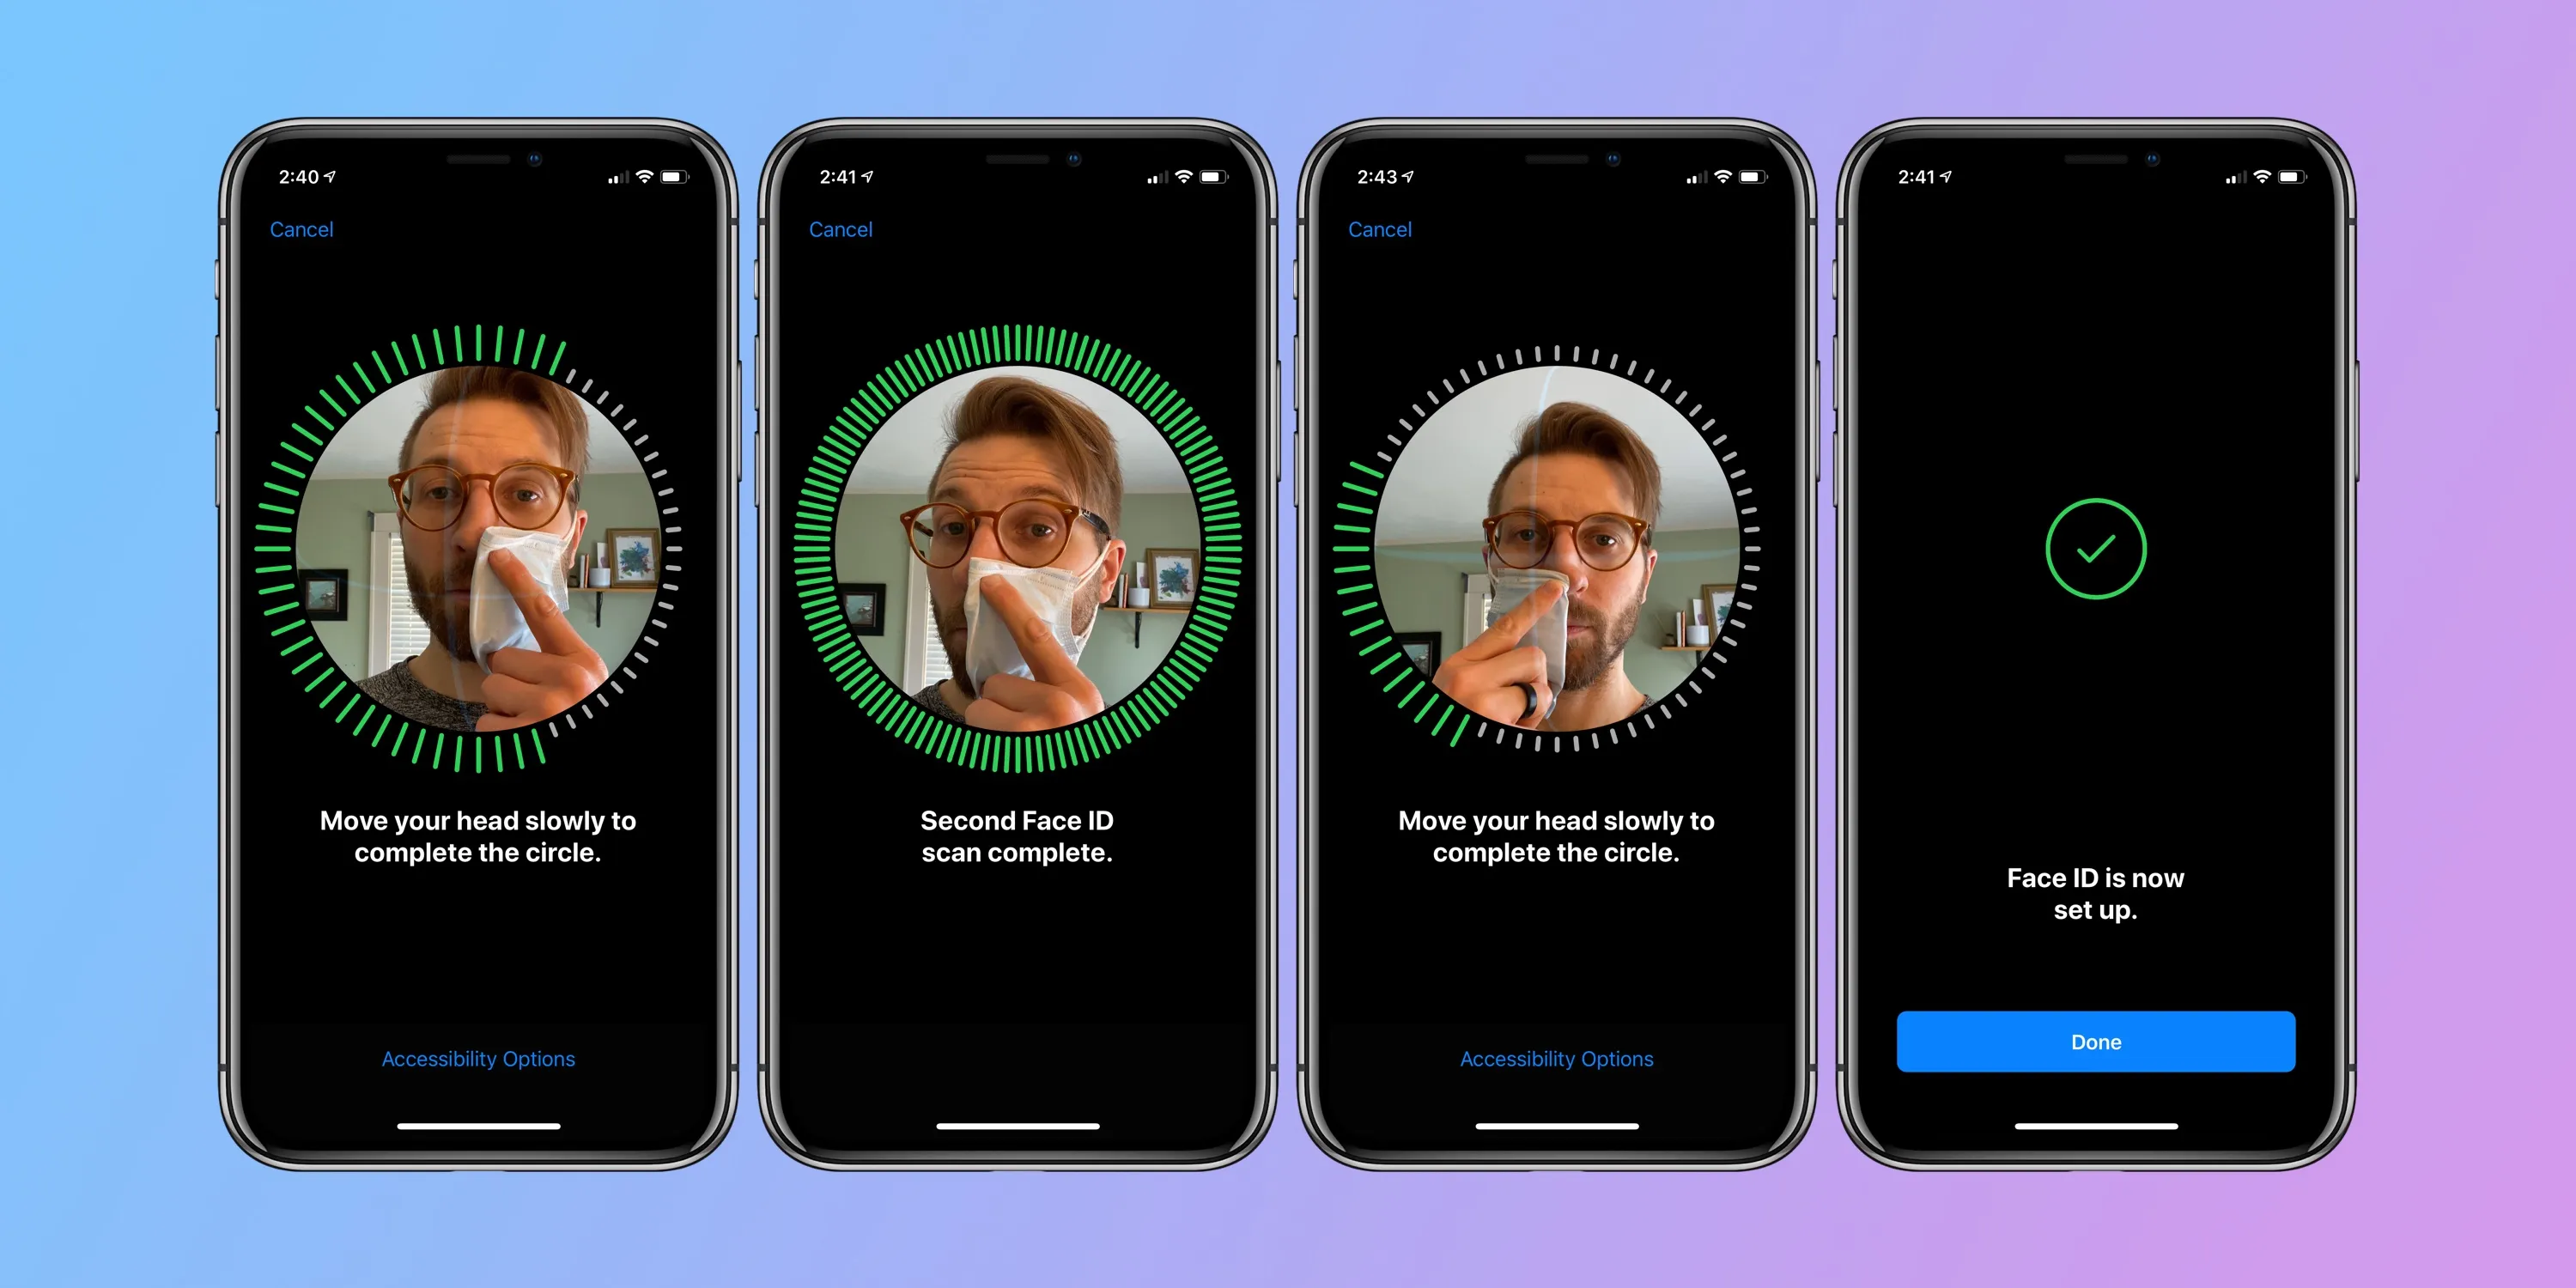
- Your iPhone will display on-screen prompts instructing you on how to position your face within the camera frame. Follow these prompts to ensure that your face is properly aligned and centered within the designated area on the screen.
- Your iPhone will then capture multiple images of your face using the front-facing TrueDepth camera system. The camera will analyze the captured data, including the placement of facial landmarks and facial expressions, to create a comprehensive facial recognition profile.
- During this process, make sure to maintain a steady grip on your iPhone and keep your face well-lit to achieve accurate and reliable scans. If prompted, you may be asked to tilt your head or move it slightly to capture different angles and ensure a robust facial recognition profile.
- Continue following the on-screen prompts until your iPhone informs you that it has successfully captured enough data to establish a new Face ID profile for the alternate appearance.
- Once the setup process is complete, you will receive a confirmation message on your iPhone, indicating that the additional face has been added to the Face ID recognition system.
By following the on-screen instructions, you are ensuring that your iPhone captures the necessary information to accurately recognize and authenticate the alternate appearance you are adding to Face ID. The process is designed to create a comprehensive and reliable facial recognition profile.
It’s important to note that the exact instructions and prompts displayed during this stage may differ slightly depending on your iPhone model and the version of iOS running on your device. However, the general steps outlined above should provide you with a clear understanding of what to expect during the setup process.
Now that you’ve successfully followed the on-screen instructions, you’re ready to proceed to the final step: completing the setup process and having the additional face registered in Face ID. Continue reading to learn how to finalize the setup on your iPhone.
Step 6: Complete the setup process
After following the on-screen instructions to position your face and capture the necessary data, you are now ready to complete the setup process and have the additional face registered in Face ID on your iPhone.
Here are the final steps to complete the setup process:
- Your iPhone will analyze the captured data from the previous step and generate a unique facial recognition profile for the new face you added. This process may take a few seconds as your device processes and stores the information securely.
- Once the analysis is complete, you will receive a confirmation message on your iPhone screen. This message indicates that the setup process for the additional face in Face ID is finished.
- At this point, you can now use either of the registered faces to unlock your iPhone, authorize payments with Apple Pay, and access other supported features that utilize Face ID.
- You can repeat the process if you want to add another face or make any changes to the existing faces registered in Face ID. Simply follow the same steps outlined in this guide.
By completing the setup process, you have successfully added another face to Face ID on your iPhone. Whether it’s for easier access for a family member or friend, an alternate appearance you frequently adopt, or any other purpose, having multiple faces registered in Face ID provides you with flexibility and convenience.
It’s important to note that Face ID continuously adapts to changes in your appearance, so even if you make minor modifications like growing a beard, wearing glasses, or using different hairstyles, it should still recognize and authenticate your face without any issues.
Now that you have completed the setup process, you can enjoy the full benefits of Face ID with multiple faces registered on your iPhone.
Tips for adding another Face ID
Adding another face to Face ID on your iPhone can greatly enhance the flexibility and convenience of using facial recognition. To ensure a smooth and successful setup process, here are some helpful tips to keep in mind:
- Choose a well-lit environment: When adding an additional face to Face ID, it’s important to be in a well-lit environment. Sufficient lighting helps the TrueDepth camera system accurately capture your facial features and enhances the overall scanning process.
- Hold your iPhone at a comfortable angle: Position your iPhone in a way that is comfortable for you and allows your face to be fully captured by the camera. Holding the device too close or at an extreme angle may result in a less accurate scan.
- Follow the on-screen instructions carefully: Pay close attention to the on-screen prompts and instructions during the setup process. These prompts guide you on how to position your face, make necessary movements, and ensure that your face is properly scanned.
- Register alternate appearances: If you frequently adopt a different appearance, such as wearing glasses, hats, or scarves, make sure to register these alternate appearances during the setup process. This ensures that Face ID can recognize and authenticate you accurately in various situations.
- Scan multiple angles: To enhance the accuracy and reliability of Face ID, scan your face from different angles. Tilt your head slightly and rotate your face to ensure that the camera captures your face thoroughly, increasing the chances of successful recognition in various orientations.
- Keep your face within the frame: During the scanning process, make sure your face remains within the frame on the screen. Avoid moving too far away or too close to the camera, as this may affect the quality of the scan.
- Remove any obstructions: If you wear glasses or have any accessories that cover part of your face, consider removing them temporarily during the setup process. This allows Face ID to have a clear view of your facial features and increases the accuracy of recognition.
- Stay patient: Adding another face to Face ID may take a few minutes, especially if you’re trying different angles or appearances. Stay patient and follow the on-screen instructions, allowing the device to capture the necessary data for accurate recognition.
- Review and adjust settings: After setting up the additional face in Face ID, review the Face ID & Passcode settings to ensure that the options are configured according to your preferences. You can enable or disable Face ID for specific functions and customize the behavior to suit your needs.
By following these tips, you can optimize the setup process and ensure that the additional face added to Face ID is recognized effectively. With multiple faces registered, you will enjoy the convenience and flexibility that Face ID provides in various scenarios.
Frequently Asked Questions about Adding Another Face ID
Adding another face to Face ID on your iPhone can raise some questions. Here are answers to some commonly asked questions to help you better understand the process:
1. Can I add more than one additional face to Face ID?
No, currently, Face ID allows you to add up to two different faces to the recognition system. If you want to add more faces, you will need to remove an existing face and replace it with a new one.
2. Can I use Face ID to switch between faces without having to modify settings?
No, Face ID requires you to manually switch faces by accessing the Face ID & Passcode settings and selecting the desired face. Face ID will not automatically switch between faces based on who is using the device.
3. How secure is Face ID with multiple faces registered?
Face ID is designed with security in mind. Each face registered is encrypted and securely stored in the iPhone’s Secure Enclave, ensuring the privacy and protection of your biometric data. The probability of a random person unlocking your iPhone using Face ID is approximately 1 in 1,000,000.
4. Can Face ID differentiate between faces of identical twins or similar-looking individuals?
While Face ID is highly reliable, it may have difficulty differentiating between faces of identical twins or similar-looking individuals. In such cases, it is recommended to use a passcode as an alternative method of authentication.
5. Can I use a photo or a mask to trick Face ID with multiple faces?
No, Face ID is designed to prevent such spoofing attempts. It utilizes infrared and depth mapping technology to create a detailed 3D map of your face, making it difficult for photos or masks to bypass the recognition system.
6. Can I delete an additional face that I have added to Face ID?
Yes, if you want to remove an additional face from Face ID, go to the Face ID & Passcode settings, enter your passcode, and select the face you wish to remove. Choose the option to “Reset Face ID” or “Remove Face. This will delete the selected face from the Face ID recognition system.
7. Do I need an internet connection to add another face to Face ID?
No, the process of adding another face to Face ID does not require an internet connection. The recognition and authentication of faces registered in Face ID are performed directly on the device.
8. Can I add the same face with different appearances to Face ID?
Yes, you can add the same face with different appearances to Face ID. For example, if you frequently wear glasses and sometimes do not, you can register both versions of your appearance to improve recognition accuracy in different scenarios.
These frequently asked questions should give you a better understanding of adding another face to Face ID and its functionality on your iPhone. If you have any other questions or concerns, refer to Apple’s official support resources or reach out to Apple customer support for further assistance.
Conclusion
Adding another face to Face ID on your iPhone provides you with the flexibility and convenience of using facial recognition with multiple appearances or allowing trusted individuals to access your device. With just a few simple steps, you can easily set up an additional face and enjoy the seamless authentication offered by Face ID.
In this guide, we explored the process of adding another Face ID on an iPhone. We discussed the importance of understanding Face ID, the reasons why you may want to add another face, and provided a step-by-step walkthrough of the setup process.
Remember to follow the on-screen instructions carefully during the setup process, ensuring that your face is well-positioned and adequately scanned. Consider registering alternate appearances if you frequently change your look or wear accessories that may affect recognition.
Face ID is a highly secure technology that adapts to changes in your appearance and remains resilient to spoofing attempts. Each additional face you register is securely stored on your device, providing peace of mind and privacy.
We also addressed some frequently asked questions to help you better understand the functionality and capabilities of adding another face to Face ID. If you have further questions, consult official Apple support resources or reach out to Apple customer support for assistance.
By successfully adding an additional face to Face ID, you can seamlessly unlock your iPhone, authorize payments, and enjoy the convenience of facial recognition with multiple faces. Embrace this feature and make the most of your iPhone’s security and accessibility.