Introduction
Welcome to our guide on how to use EXE files on Chromebook! If you’ve recently made the switch from a Windows computer or are considering getting a Chromebook, you may be wondering if it’s possible to run EXE files on this operating system.
An EXE (Executable) file is a common file type used in Windows to install or run software applications. Since Chromebooks use Chrome OS, which is a Linux-based operating system, it doesn’t natively support EXE files. However, that doesn’t mean you’re completely out of luck.
In this article, we will explore different methods to run EXE files on your Chromebook. While the methods may not be as straightforward as on a Windows computer, they still offer workarounds that allow you to utilize certain Windows-only applications.
Before we delve into these methods, it’s important to note that not all EXE files will work on Chromebooks. Some applications rely on specific Windows system components that are not compatible with Chrome OS. Additionally, the performance and functionality of running Windows applications on a Chromebook may vary.
Now that we have set the expectations, let’s explore the different methods you can try to use EXE files on your Chromebook.
What is an EXE file?
An EXE (Executable) file is a file format commonly used in Windows operating systems. It contains instructions that the computer’s processor can directly execute, making it possible to run software applications on a Windows-based system.
When you double-click on an EXE file, it triggers a series of instructions that tell the computer how to load and execute the program. This allows you to install software, launch applications, and perform various tasks on your Windows computer.
EXE files are typically created through a process called compilation, where the source code of a program is translated into machine code that can be executed by the computer. They can contain all the necessary instructions, data, and resources needed for a program to run on a specific operating system.
One advantage of the EXE file format is its versatility. It can support a wide range of applications, from small utilities to complex software programs. Additionally, EXE files can include additional resources such as images, sounds, and libraries, making it easier to distribute and install software on Windows computers.
However, it’s important to exercise caution when downloading and running EXE files from the internet. Since EXE files can execute code directly on your computer, they can potentially contain malicious software or viruses. It’s always a good practice to scan EXE files with antivirus software before running them, especially if they are from unknown or untrusted sources.
Overall, EXE files play a crucial role in the Windows ecosystem, allowing users to run a wide variety of software and applications. While they are not natively supported on Chromebooks due to their different operating system, there are methods available to help you work around this limitation and use certain EXE files on your Chromebook, as we will explore in the following sections.
Can you run EXE files on Chromebook?
Chromebooks, running on Chrome OS, are primarily designed to be lightweight and focused on web applications. As a result, they do not natively support the execution of EXE (Executable) files, which are commonly associated with Windows operating systems.
Chrome OS is based on Linux and uses a different file system and architecture compared to Windows. This fundamental difference means that EXE files cannot be directly launched on a Chromebook without some workarounds or additional software.
However, all hope is not lost. There are a few methods available that can potentially enable you to run certain EXE files on your Chromebook. It’s important to note that not all EXE files will work, and the compatibility and performance may vary depending on the method used.
Let’s explore some of the methods you can try:
- Using Wine: Wine is compatibility software that allows some Windows applications to run on Linux-based systems like Chrome OS. By using Wine, you can install a compatibility layer on your Chromebook and potentially run certain EXE files. However, not all applications will be compatible, and the performance might not be as smooth as on a native Windows system.
- Using CrossOver: CrossOver is a commercial software based on Wine that offers enhanced compatibility and support for running Windows applications on Chromebooks. CrossOver simplifies the installation process for Windows software and provides a more seamless experience compared to Wine.
- Using Chrome Remote Desktop: If you have a Windows computer available, you can use Chrome Remote Desktop to access that computer remotely from your Chromebook. This allows you to use the Windows computer’s applications and run EXE files indirectly. While this method requires two devices and a stable internet connection, it provides a more comprehensive Windows experience.
Keep in mind that these methods may have limitations and may not support all EXE files. It’s important to research and test these methods carefully to determine if they are suitable for your specific needs.
Now that you know you can’t directly run EXE files on a Chromebook, let’s dive into the details of each method to potentially use Windows applications on your Chromebook.
Method 1: Using Wine
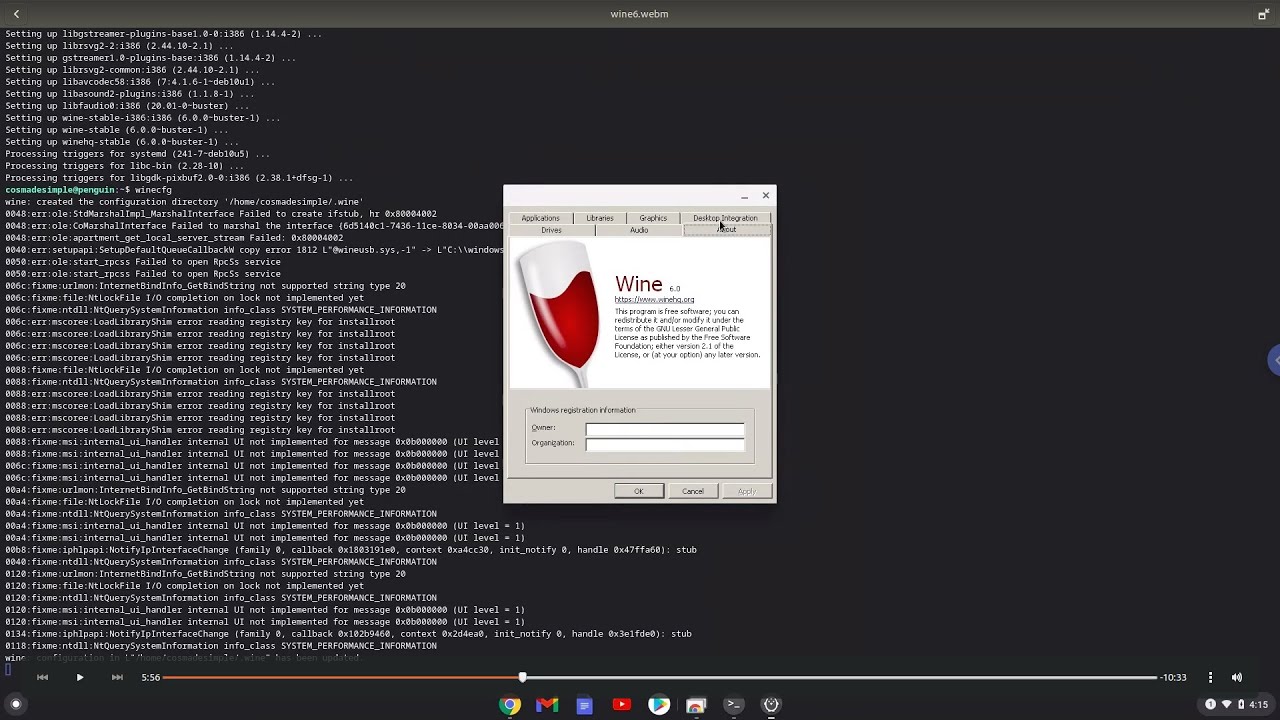
One method to potentially run EXE files on your Chromebook is by using Wine. Wine is a compatibility layer that allows some Windows applications to run on Linux-based systems, including Chrome OS.
Here’s how you can use Wine to run EXE files on your Chromebook:
- Open the Chrome Web Store and search for a Wine app compatible with Chrome OS. One popular option is “Crossover on Chrome OS Beta.” Install the app on your Chromebook.
- Launch the Wine app on your Chromebook. This will initialize Wine and create a Windows environment on your Chromebook.
- Download the EXE file of the application you want to run on your Chromebook. Make sure it’s a compatible version of the application that is known to work with Wine.
- In the Wine app, locate and run the EXE file. The Wine compatibility layer will attempt to execute the file as if it were running in a Windows environment.
- Depending on the application and its compatibility with Wine, you may be able to successfully run the EXE file on your Chromebook. However, keep in mind that not all applications will work perfectly, and the performance may vary.
It’s important to note that Wine is not perfect and may not support all Windows applications. Some applications may have limited functionality or may not work at all. It’s also worth mentioning that the performance of Windows applications running through Wine on a Chromebook may not be as smooth as running them on a native Windows system.
Therefore, if running a specific Windows application is critical for you, it’s advisable to check Wine’s compatibility database or community forums to see if the application you want to use has been tested successfully with Wine on Chrome OS. This will give you a better understanding of whether it’s worth attempting to run the EXE file with Wine on your Chromebook.
Now that you know how to use Wine to potentially run EXE files on your Chromebook, let’s explore another method that offers enhanced compatibility and support.
Method 2: Using CrossOver
If you’re looking for a more streamlined experience to run Windows applications on your Chromebook, you can consider using CrossOver. CrossOver is a commercial software based on Wine that offers enhanced compatibility and support for running Windows applications on Chromebooks.
Here’s how you can use CrossOver to run EXE files on your Chromebook:
- Visit the CodeWeavers website and download the CrossOver application for Chrome OS. You will need to purchase a license or take advantage of the free trial period to use CrossOver.
- Install the CrossOver app on your Chromebook. This will install the necessary components and create a Windows compatibility environment.
- Launch the CrossOver app and follow the setup wizard to configure your Windows compatibility environment.
- Once the setup is complete, you can either search for supported applications within the CrossOver app or manually download the EXE file of the application you want to run on your Chromebook.
- In the CrossOver app, choose the option to “Install a Windows Application” and select the EXE file you downloaded or the supported application from the list.
- Follow the prompts to complete the installation process. CrossOver will handle most of the setup and configuration required to run the application.
- After the installation is complete, you should be able to launch the Windows application through the CrossOver app and use it on your Chromebook.
CrossOver aims to provide a seamless experience when running Windows applications on a Chromebook. It offers optimizations and compatibility improvements over Wine, making it a popular choice for users seeking to run specific Windows software on their Chromebooks.
However, like with any compatibility software, there might still be limitations and application-specific issues. It’s recommended to check the CrossOver website or community forums to see if the application you want to run is officially supported or has been tested successfully by other users.
With CrossOver, you can potentially expand the range of applications you can run on your Chromebook without requiring a separate Windows computer or relying on remote desktop solutions.
Now that you’re familiar with CrossOver, let’s explore another method that allows you to indirectly use Windows application on your Chromebook.
Method 3: Using Chrome Remote Desktop
If you have a Windows computer available, you can leverage the power of Chrome Remote Desktop to access and control that computer remotely from your Chromebook. This method allows you to use the Windows computer’s applications, including running EXE files, indirectly on your Chromebook.
Here’s how you can use Chrome Remote Desktop to run EXE files on your Chromebook:
- On your Windows computer, install the Chrome browser if it’s not already installed.
- Open the Chrome browser on both your Windows computer and your Chromebook.
- On your Windows computer, go to the Chrome Web Store and search for the “Chrome Remote Desktop” extension. Install the extension on your Windows computer.
- Follow the setup process for Chrome Remote Desktop on your Windows computer, which includes granting necessary permissions and creating a PIN for secure authentication.
- After completing the setup, launch the Chrome Remote Desktop app on your Chromebook.
- In the Chrome Remote Desktop app, you should see a list of available computers. Select your Windows computer from the list.
- If prompted, enter the PIN you created during setup to establish a secure connection between your Chromebook and Windows computer.
- Once the connection is established, you can remotely access your Windows computer’s desktop on your Chromebook.
- From your Chromebook, you can open the Windows Start menu, locate the application you want to run (including EXE files), and launch them as you would on a native Windows system.
By using Chrome Remote Desktop, you essentially have access to the Windows environment and can run any Windows application, including EXE files, on your Chromebook. This method offers a more comprehensive Windows experience, as you have access to all the functionality and features of the Windows operating system.
It’s worth mentioning that Chrome Remote Desktop requires a stable internet connection and may experience some latency depending on the connection speed. Additionally, you will need to have your Windows computer turned on and connected to the internet for this method to work.
Using Chrome Remote Desktop eliminates the need for compatibility layers or additional software on your Chromebook. However, it does rely on having a separate Windows computer as the host device.
Now that you know how to use Chrome Remote Desktop, you have another option to indirectly run Windows applications and EXE files on your Chromebook.
Conclusion
While Chromebooks do not natively support the execution of EXE files, there are workarounds and methods available to help you run certain Windows applications on your Chromebook. We explored three different methods in this guide: using Wine, using CrossOver, and using Chrome Remote Desktop.
Using Wine allows you to install a compatibility layer on your Chromebook, but its compatibility and performance may vary. CrossOver, on the other hand, provides enhanced compatibility and support for running Windows applications on Chromebooks, offering a more streamlined experience. Finally, Chrome Remote Desktop allows you to remotely access and control a Windows computer from your Chromebook, giving you access to the Windows environment and the ability to run EXE files indirectly.
Before attempting to use any of these methods, it’s important to keep in mind that not all EXE files will work, and the performance and functionality may not be the same as on a native Windows system. It’s always recommended to research and test the methods with the specific applications you want to run to determine their compatibility and suitability for your needs.
Having access to Windows applications on a Chromebook can significantly expand your productivity and versatility, especially if you rely on specific software that is not available on Chrome OS. However, it’s essential to be mindful of the limitations and trade-offs that come with these methods.
As technology advances and the Chrome OS ecosystem evolves, it’s possible that new solutions and improvements may emerge to make running Windows applications on Chromebooks even easier. It’s always a good idea to stay up to date with the latest developments and explore alternative options as they become available.
We hope this guide has provided you with valuable insights and methods to use EXE files on your Chromebook. Whether you choose to use Wine, CrossOver, or Chrome Remote Desktop, these methods offer opportunities to bridge the gap between the Windows and Chrome OS environments, enabling you to leverage the best of both worlds.


