Introduction
Have you ever wanted to capture a moment on your Dell Chromebook and save it as an image? Whether you’re trying to share a funny meme, document an important error message, or capture a section of a webpage for reference, taking a screenshot is a handy feature that comes in handy in various situations.
In this article, we’ll explore different methods to take a screenshot on your Dell Chromebook. From capturing the entire screen to highlighting a specific portion, we’ll cover a range of techniques that cater to your screenshot needs. Whether you’re a seasoned Chromebook user or new to the platform, you’ll find these methods easy to use and effective in capturing the perfect screenshot.
With a Dell Chromebook, you can take screenshots using built-in features or convenient keyboard shortcuts. Additionally, there are Chrome extensions available that offer even more functionality for capturing and editing screenshots. We’ll cover each option in detail, explaining the steps required to capture the screenshot and save it to your device.
So, if you’re ready to become a screenshot pro on your Dell Chromebook, let’s dive into the various methods and get started on capturing those memorable moments!
Option 1: Taking a Full Screenshot on a Dell Chromebook
If you want to capture the entire screen on your Dell Chromebook, there is a simple built-in method to do so. Here’s how:
- Ensure that the screen you want to capture is visible on your Chromebook.
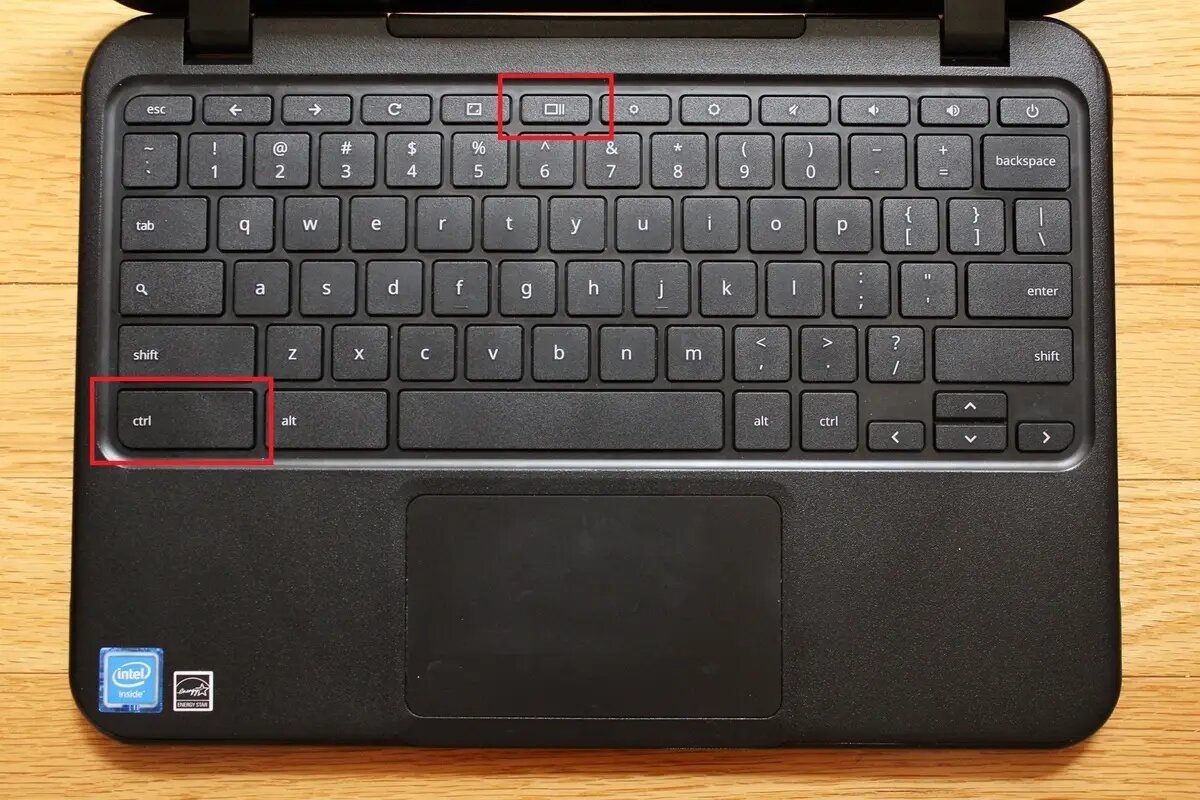
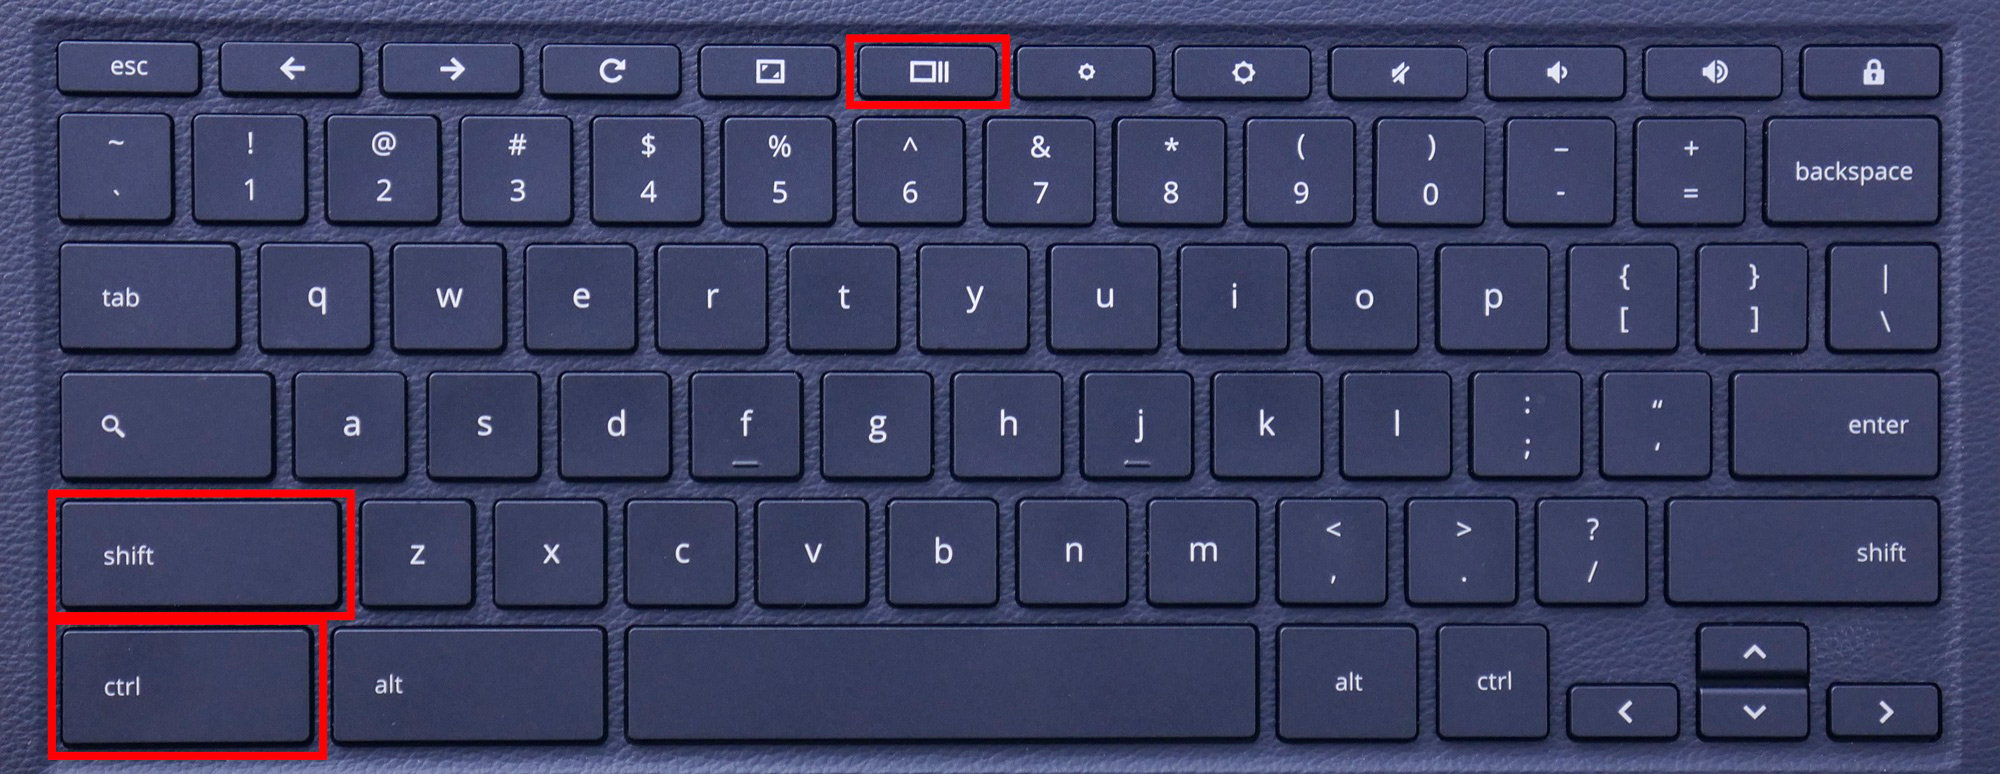
- Locate the “Ctrl” and “Show Windows” keys on your keyboard. The “Show Windows” key is typically represented by a rectangle or square icon.
- Press the “Ctrl” key and simultaneously press the “Show Windows” key.
- A notification will appear at the bottom-right corner of your screen, confirming that the screenshot has been captured.
- To access the captured screenshot, click on the notification. This will open the Files app, where the screenshot will be saved in the “Downloads” folder.
This method allows you to quickly and easily capture the entire screen on your Dell Chromebook. It’s especially useful for capturing full web pages, error messages, or any other content that spans across the entire screen.
Remember to keep in mind that capturing a full screenshot will include everything visible on your screen, including the browser toolbar and any open applications or tabs. If you want to capture a specific section of the screen, you can use the partial screenshot method, which we’ll cover in the next section.
Option 2: Taking a Partial Screenshot on a Dell Chromebook
If you only need to capture a specific portion of your Dell Chromebook’s screen, you can use the built-in method for taking a partial screenshot. Here’s how:
- Ensure that the specific area you want to capture is visible on your Chromebook.
- Locate the “Ctrl” and “Shift” keys on your keyboard.
- Press the “Ctrl” key, the “Shift” key, and simultaneously press the “Show Windows” key. The “Show Windows” key is typically represented by a rectangle or square icon.
- Your cursor will turn into a crosshair.
- Click and drag the crosshair to select the desired portion of the screen that you want to capture.
- Release the mouse button to capture the selected area.
- A notification will appear at the bottom-right corner of your screen, confirming that the screenshot has been captured.
- To access the captured screenshot, click on the notification. This will open the Files app, where the screenshot will be saved in the “Downloads” folder.
This method gives you the flexibility to capture specific sections of the screen, allowing you to focus on the essential content or details you want to share or save. Whether it’s highlighting a specific paragraph in a document or capturing a particular portion of a webpage, the partial screenshot feature on your Dell Chromebook makes it simple and convenient.
Remember to adjust the selected area accordingly to capture only what you need. Once you’ve taken the partial screenshot, you can view and edit it using the screenshot editing tools available on your Chromebook or any third-party image editing software.
Option 3: Taking a Screenshot Using the Keyboard Shortcut on a Dell Chromebook
Taking a screenshot on your Dell Chromebook can be even quicker and more convenient with the help of a keyboard shortcut. Here’s how you can use the keyboard shortcut to capture a screenshot:
- Ensure that the screen or specific area you want to capture is visible on your Chromebook.
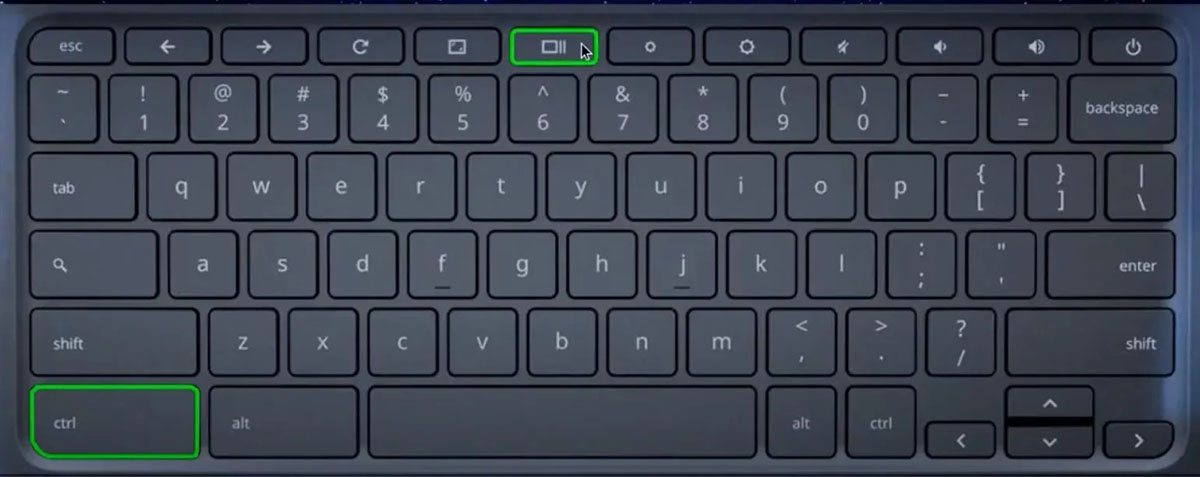
- Locate the “Ctrl” and “Switch Window” keys on your keyboard. The “Switch Window” key is usually represented by a rectangle or square icon with two lines on the right side.
- Press the “Ctrl” key and simultaneously press the “Switch Window” key.
- A notification will appear at the bottom-right corner of your screen, confirming that the screenshot has been captured.
- To access the captured screenshot, click on the notification. This will open the Files app, where the screenshot will be saved in the “Downloads” folder.
The keyboard shortcut method provides a quick and efficient way to capture screenshots on your Dell Chromebook without the need to navigate through menus or use the touchpad. With just a combination of two keys pressed simultaneously, you can capture the screen or specific area you want in an instant.
This keyboard shortcut method is especially useful when you need to capture screenshots quickly and frequently, such as during a presentation, when demonstrating a process, or when troubleshooting an issue. It allows you to capture the moment without any interruption or delay, ensuring that you don’t miss out on any important information.
Remember to save and organize your screenshots in a relevant folder for easy access in the future. You can also utilize the various options available in the Files app to manage, edit, or share your captured screenshots as needed.
Option 4: Taking a Screenshot Using a Chrome Extension on a Dell Chromebook
If you’re looking for additional features and customization options for capturing screenshots on your Dell Chromebook, you can explore the wide range of Chrome extensions available. Here’s how you can use a Chrome extension to take screenshots:
- Open the Chrome Web Store on your Dell Chromebook.
- Search for “screenshot” or “screen capture” extensions.
- Browse through the available extensions and choose the one that suits your needs. Some popular options include “Easy Screenshot,” “Awesome Screenshot,” and “Lightshot.”
- Click on the extension to view its details and reviews.
- Click on the “Add to Chrome” or “Install” button to add the extension to your browser.
- Once the extension is installed, you can access its features and options directly from your Chrome browser toolbar.
- Click on the extension’s icon to initiate a screenshot.
- Depending on the extension, you may have options to capture the whole page, a specific area, or even record a video of your screen.
- After capturing the screenshot, the extension may provide additional editing or annotation tools, allowing you to enhance and personalize your screenshot before saving it.
- Save the screenshot to your desired location on your Dell Chromebook.
Using a Chrome extension for capturing screenshots can offer you more flexibility and advanced features compared to the built-in methods. These extensions often provide options for editing, cropping, adding annotations, and even sharing your screenshots directly from the extension interface.
However, it’s essential to choose a reputable and trustworthy extension from the Chrome Web Store to ensure the safety of your device and personal information. Read user reviews and check the extension’s ratings to make an informed decision.
By exploring the different Chrome extensions available, you can tailor your screenshot capturing experience to meet your specific needs and preferences. Whether you require advanced editing tools, want to capture specific elements on a webpage, or need additional sharing options, the right Chrome extension can provide you with the desired functionality.
Conclusion
Taking screenshots on your Dell Chromebook is a simple and valuable feature that allows you to capture and save important moments, error messages, or interesting content. Whether you need to capture the entire screen, a specific area, or want more advanced features, there are various options available to cater to your screenshot needs.
In this article, we explored four different methods for taking screenshots on your Dell Chromebook. The built-in options allow you to capture the full screen or a specific portion using keyboard shortcuts. Additionally, Chrome extensions provide additional functionality and customization options for capturing, editing, and sharing screenshots.
By using the appropriate method based on your specific requirements, you can efficiently capture and save screenshots on your Dell Chromebook. Whether you’re a casual user who occasionally needs to capture web content or a professional who relies on screenshots for presentations or troubleshooting, these methods will ensure you have the necessary tools at your disposal.
Remember to organize your screenshots in relevant folders and utilize the editing features available to enhance and personalize them. You can crop, annotate, or add text to your screenshots to make them more informative and visually appealing.
Whether you’re a student, professional, or anyone who finds value in visual communication, the ability to capture screenshots on your Dell Chromebook is a powerful tool. With just a few simple steps, you can document, save, and share important information and memorable moments with ease.
So, go ahead and explore the methods outlined in this article to become a pro at taking screenshots on your Dell Chromebook. Start capturing those special moments or important content today!