Introduction
Welcome to the world of remote communication and collaboration with Zoom! In this fast-paced digital era, connecting with others has become easier than ever before, thanks to the power of video conferencing. Whether you’re a professional looking to host virtual meetings, a teacher conducting online classes, or even a family member catching up with loved ones, Zoom provides a seamless and user-friendly platform to bridge the distance.
In this article, we will guide you through the process of setting up a Zoom account, familiarizing yourself with the essential account settings, scheduling and joining meetings, inviting participants, managing participants, sharing your screen, recording meetings, customizing your Zoom profile, and addressing common troubleshooting and FAQs.
With its intuitive interface and powerful features, Zoom has become a leading choice for remote communication worldwide. By following the steps outlined in this guide, you’ll be up and running on Zoom in no time, ready to connect with others from the convenience of your own space.
So, let’s dive in and explore the world of Zoom, empowering you to communicate effectively, collaborate seamlessly, and bridge the virtual divide.
Creating a Zoom Account
To get started with Zoom, the first step is to create your own Zoom account. Follow these simple steps to create your Zoom account:
- Visit the Zoom website at zoom.us and click on the “Sign Up, It’s Free” button.
- Choose your preferred method of signing up. You can sign up with your work email address or your personal email address. If you choose to sign up with your personal email address, make sure to select the “Sign Up with a work email instead” option if you plan to use Zoom for business purposes.
- Enter your email address and click on the “Sign Up” button. If you are signing up with your work email address, make sure to use your official work email.
- Check your email inbox for a verification message from Zoom. Click on the verification link provided in the email to verify your account.
- After verifying your account, you will be prompted to fill in your basic profile information, including your name and password. Fill in the required details and click on the “Continue” button.
- Next, you will be asked to confirm your time zone. Select the appropriate time zone for your location and click on the “Continue” button.
- Now, you have successfully created your Zoom account! You will be redirected to the Zoom dashboard, where you can access your account settings, schedule meetings, and join meetings.
Keep in mind that Zoom also offers the option to sign up using a Google or Facebook account for added convenience. Simply click on the respective buttons on the sign-up page, follow the prompts, and your Zoom account will be linked to your chosen account.
Congratulations! You are now ready to explore the various features and functionalities that Zoom has to offer. In the next section, we will take a closer look at the account settings and how you can personalize your Zoom experience.
Account Settings
Once you have created your Zoom account, it’s essential to familiarize yourself with the account settings to customize your Zoom experience. By accessing the account settings, you can configure various options and preferences to tailor Zoom to your specific needs. Here’s how you can access and modify your account settings:
- Log in to your Zoom account on the Zoom website.
- Click on your profile picture or initials at the top right corner of the page to open the dropdown menu.
- Select “Settings” from the dropdown menu to access your account settings.
- In the settings panel, you will find different tabs to navigate and configure specific settings, such as “Profile,” “Email Notifications,” “Recording,” “Meeting,” “Webinar,” and more. Click on each tab to explore the available options.
- Under the “Profile” tab, you can update your personal information, such as your name, profile picture, and contact details. Keep your profile updated to ensure accurate identification during virtual meetings.
- The “Email Notifications” tab allows you to manage the types of email notifications you receive from Zoom. Customize your notification preferences by toggling the switches according to your preferences.
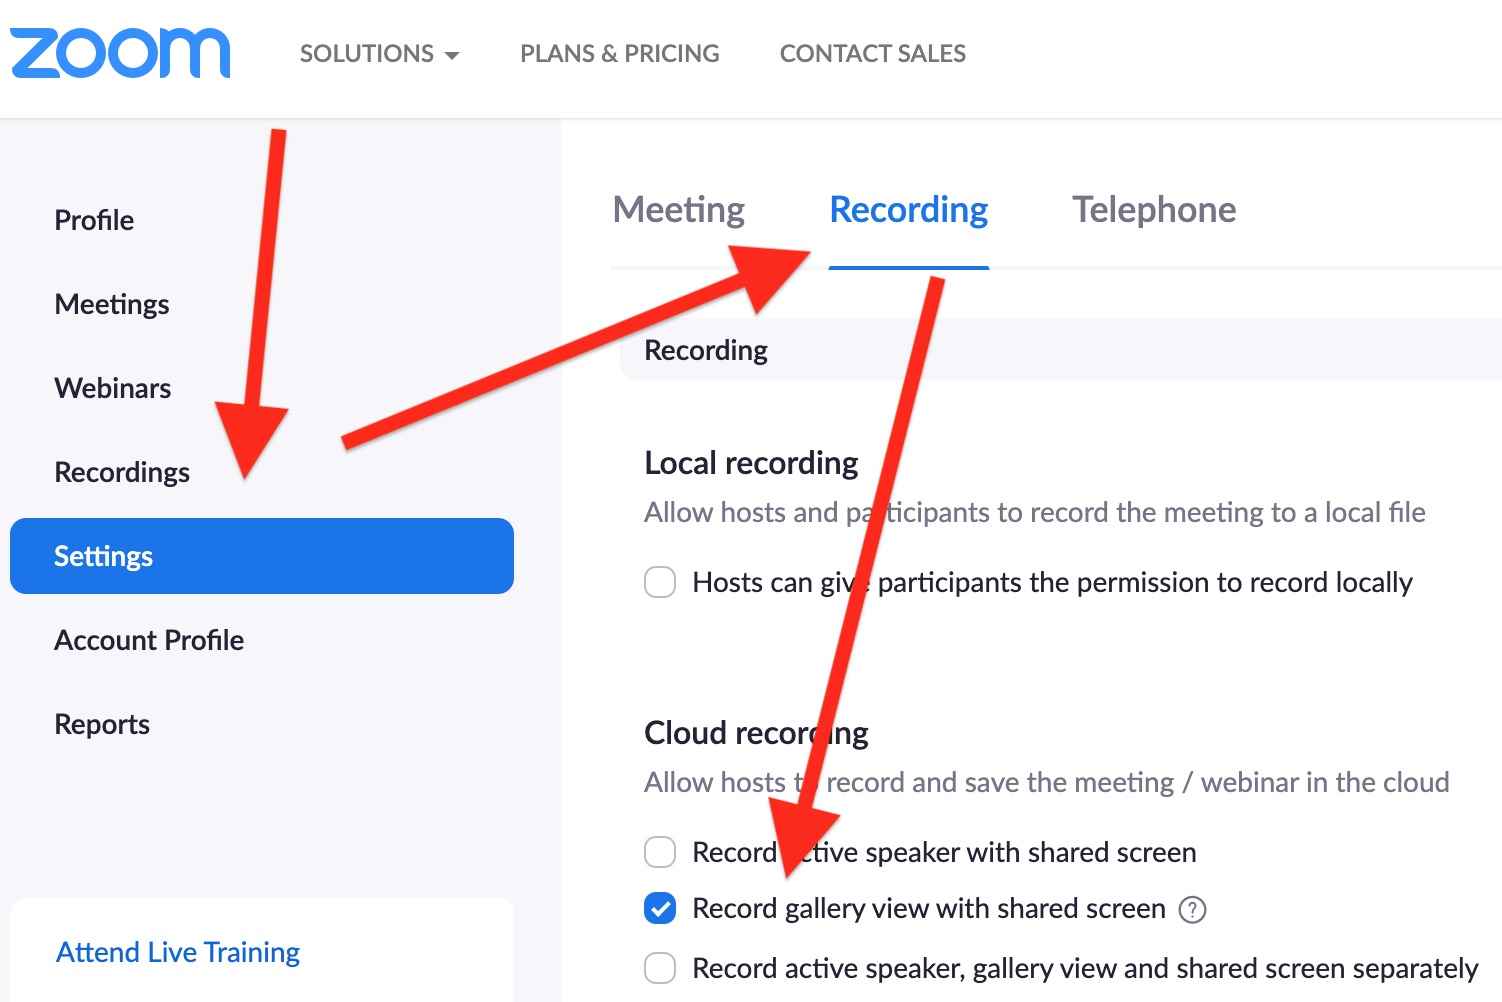
- The “Recording” tab provides options to configure settings related to recording meetings or webinars. You can choose the default recording settings, set automatic recording, and define the storage location for recorded files.
- The “Meeting” tab allows you to modify various meeting-related settings, such as enabling or disabling host video, participant video, and screen sharing. You can also specify whether participants should enter a password to join meetings, control chat settings, and manage other meeting-related options.
- Explore other tabs and settings to customize your Zoom experience further. Take note of any specific options that are relevant to your use case and adjust them accordingly.
Keep in mind that the account settings may vary depending on your specific Zoom subscription plan. Some advanced settings may only be available for paid plans or accounts with certain permissions. Therefore, be sure to review the options that are accessible to you based on your account type.
By exploring and configuring the account settings, you can optimize your Zoom experience to align with your preferences and requirements. Next, we will delve into the process of signing in to your Zoom account, allowing you to access all the features and functionalities at your disposal.
Signing In to Zoom
Once you have created your Zoom account, signing in is a simple process that enables you to access all the features and functionalities of the platform. To sign in to Zoom, follow these steps:
- Visit the Zoom website at zoom.us.
- Click on the “Sign In” button located at the top right corner of the page.
- Enter the email address associated with your Zoom account in the designated field.
- Next, enter your Zoom account password.
- Click on the “Sign In” button to access your Zoom account.
If you have forgotten your password, you can click on the “Forgot password?” link on the sign-in page. Follow the password recovery instructions provided to reset your password and regain access to your account.
If you prefer a more streamlined sign-in process, Zoom also offers the option to sign in using your Google or Facebook account. Simply click on the respective buttons provided on the sign-in page and follow the prompts to authenticate your account.
Once you have successfully signed in, you will be directed to your Zoom dashboard, where you can access your account settings, schedule meetings, join meetings, and explore other features at your convenience.
Remember to sign out of your Zoom account when you have finished using the platform, especially when accessing it from a shared or public device. This helps maintain account security and ensures that your personal settings and information remain private.
Now that you are signed in to your Zoom account, it’s time to explore the process of scheduling meetings. In the next section, we will guide you through the steps to effortlessly schedule and plan your virtual gatherings.
Scheduling a Meeting
Scheduling a meeting in Zoom allows you to plan and organize virtual gatherings with ease. Whether it’s a team meeting, a webinar, or a social gathering, Zoom provides a range of tools to help you schedule and manage your meetings efficiently. Follow these steps to schedule a meeting in Zoom:
- Sign in to your Zoom account on the Zoom website.
- Click on the “Schedule a Meeting” button located on the main dashboard or navigate to the “Meetings” tab and click on the “Schedule a New Meeting” button.
- A scheduling form will appear, allowing you to enter the details of your meeting. Start by providing a topic or title for your meeting.
- Specify the date and time for your meeting. You can choose the duration of the meeting and set it to recur at regular intervals, such as daily, weekly, or monthly, if needed.
- Configure the meeting options according to your requirements. You can choose to enable or disable video for both the host and participants, enable or disable audio options, and define whether the meeting should require a password for participants to join.
- Under the “Meeting ID” section, select the type of Meeting ID you prefer. You can use a unique meeting ID generated by Zoom or your personal meeting ID that remains constant for all your meetings.
- If desired, you can enable additional meeting options, such as joining with computer audio, allowing participants to join before the host, and enabling a waiting room where participants are placed in a virtual waiting area before being admitted to the meeting.
- Scroll down to the “Advanced Options” section to access more settings. Here, you can control features like screen sharing, recording options, and enabling or disabling the chat function during the meeting.
- Once you have filled in all the necessary details and configured the options to your liking, click on the “Save” button to schedule your meeting.
After scheduling your meeting, you will receive a confirmation email from Zoom containing the meeting details and a link to join the meeting. You can also find the scheduled meeting in your Zoom dashboard under the “Meetings” tab.
Scheduling meetings in advance allows participants to plan their time accordingly and ensures that everyone is aware of the meeting details ahead of time. With Zoom’s intuitive scheduling options, you can effortlessly plan and manage your virtual gatherings.
In the next section, we will explore how to join a meeting in Zoom, whether you are the host or a participant.
Joining a Meeting
Whether you’re the host or a participant, joining a meeting in Zoom is a straightforward process that allows you to connect with others virtually. Here’s how you can join a meeting in Zoom:
- Before joining a meeting, make sure you have the meeting ID or the meeting invitation link provided by the host.
- If you have the meeting ID, open the Zoom application or visit the Zoom website.
- Click on the “Join a Meeting” button, which is typically located on the main page or in the top-right corner of the screen.
- In the meeting ID field, enter the unique numerical code associated with the meeting.
- If prompted, enter your display name, which will be visible to other meeting participants.
- Choose whether to join the meeting with or without video by toggling the camera icon. You can also choose to enable or disable your microphone by toggling the microphone icon.
- Click on the “Join” button to enter the meeting.
If you have the meeting invitation link, simply click on the provided link, and it will automatically open the Zoom application or redirect you to the Zoom website, joining the meeting directly.
If the meeting has a password set by the host, you will be prompted to enter the password before joining. Ensure you have the correct password to gain access to the meeting.
Upon joining the meeting, you will enter the virtual meeting room, where you can see the host and other participants, view shared screens, chat with others, and collaborate as required.
It is important to join the meeting on time and respect the agenda set by the host. When joining a meeting, make sure you are in a quiet and well-lit environment, and test your audio and video settings beforehand to ensure a smooth experience.
If you encounter any issues while joining the meeting, such as audio or video problems, you can troubleshoot the problem using the options available within Zoom or by referring to the Zoom Help Center for troubleshooting guides specific to your issue.
Now that you know how to join a meeting, in the next section, we will explore how to invite participants to your Zoom meeting and expand your virtual gathering.
Inviting Participants
One of the key features of Zoom is the ability to invite participants to your meetings, allowing you to collaborate and connect with others easily. Here’s how you can invite participants to your Zoom meeting:
- Open the Zoom application or visit the Zoom website and sign in to your account.
- On the Zoom dashboard, click on the “Meetings” tab to view your scheduled meetings.
- Locate the meeting for which you want to invite participants and click on the “Invite” button next to it.
- A pop-up window will appear, providing multiple options to invite participants. You can choose to invite via email, calendar invites, instant messaging apps, or by copying the meeting URL to share directly.
- If you select “Invite via Email,” you can enter the email addresses of the participants manually or choose from your contacts. You can customize the email message before sending the invitation.
- If you choose to send a calendar invite, Zoom will generate an .ics file that you can download and attach to your calendar invitation.
- If you choose to invite participants via instant messaging apps, Zoom will provide links that you can share in platforms like Slack, Microsoft Teams, or other preferred messaging applications.
- If you select “Copy the Invitation,” the meeting details, including the meeting link, meeting ID, and password (if required), will be copied to your clipboard, allowing you to share it via any preferred method.
- Choose the invitation method that is most convenient for you and the participants, and send out the invites accordingly.
- Participants will receive the invitation and can join the meeting by clicking on the provided link or entering the meeting ID and password.
When inviting participants, it’s important to provide clear instructions on how to join the meeting and any additional information they may need, such as the meeting agenda or any required materials. This ensures that everyone is prepared and can actively participate in the meeting.
Zoom also offers the option to schedule recurring meetings, which allows you to set up a series of meetings with the same participants at regular intervals. This is particularly useful for team meetings or classes that occur at the same time each week.
Now that you have mastered inviting participants to your meetings, in the next section, we will explore how to manage participants in Zoom and ensure a smooth and organized virtual gathering.
Managing Participants
When hosting a Zoom meeting, it’s essential to be able to manage participants effectively to ensure a smooth and organized virtual gathering. Zoom provides several features that allow you to control and interact with meeting participants. Here are some key ways to manage participants in Zoom:
- During a meeting, you can access the participant management options by clicking on the “Participants” button located at the bottom of the Zoom window.
- A panel will appear on the right-hand side of the screen, displaying a list of participants in the meeting.
- As the host, you have the ability to mute or unmute participants’ audio. This can be useful in managing background noise or ensuring that only designated speakers have their audio enabled.
- You can also control participants’ video settings. This includes the ability to turn on or off participants’ video feeds, allowing you to manage the visual aspect of the meeting.
- If there are unruly or disruptive participants, you can choose to remove them from the meeting by clicking on the “More” button next to their name and selecting “Remove.” This ensures that the meeting remains focused and productive.
- Another useful feature is the option to give participants specific privileges, such as the ability to share their screen or annotate during the meeting. This can be done by clicking on the “More” button next to the participant’s name and selecting “Make Host” or “Make Co-Host.”
- If you have a large number of participants, it may be beneficial to use the “Raise Hand” feature. This allows participants to virtually indicate that they have a question or would like to speak, allowing you to manage the flow of the meeting effectively.
- Throughout the meeting, you can also use the chat function to interact with participants. You can send messages to individuals or the entire group, share links or important information, and encourage active participation and engagement.
- At the end of the meeting, you can choose to end the meeting for all participants by clicking on the “End Meeting” button. This ensures that the meeting concludes in an organized manner.
By utilizing these participant management features, you can maintain control and facilitate effective communication and collaboration during your Zoom meetings. Keep in mind that the available options may vary depending on your specific Zoom subscription plan and account privileges.
In the next section, we will explore how to share your screen with participants, allowing you to present slideshows, documents, or demonstrate software seamlessly.
Sharing Your Screen
Sharing your screen in Zoom is a powerful feature that allows you to present information, demonstrate software, or collaborate with participants in a visual and interactive way. Here’s how you can share your screen during a Zoom meeting:
- During a meeting, locate the toolbar at the bottom of the Zoom window.
- Click on the “Share Screen” button to start sharing your screen.
- A selection menu will appear, displaying the various screens or applications you can choose to share. You can share your entire screen, a specific application window, or even a portion of your screen.
- Select the option that best suits your needs. If you choose to share a specific application or portion of your screen, make sure to select the desired window or use the on-screen selector to highlight the area you want to share.
- After selecting the screen or application, click on the “Share” button.
- Your screen will now be shared with the participants in the meeting. They will be able to see what is displayed on your screen in real-time.
- While sharing your screen, you can use the Zoom toolbar at the top of the screen to manage the sharing options. You can pause or stop screen sharing, switch between different applications or screens, and even annotate on the shared content.
- To stop sharing your screen, click on the “Stop Share” button located in the Zoom toolbar or in the top-right corner of the screen.
Sharing your screen in Zoom enables you to enhance communication and collaboration by providing a visual and immersive experience. It allows you to effectively present information, conduct demonstrations, and engage participants in a dynamic manner.
It’s important to note that the screen sharing feature may have certain limitations depending on your specific Zoom plan and account settings. For example, free plans may have time limits on screen sharing, while certain security settings may require additional permissions for screen sharing.
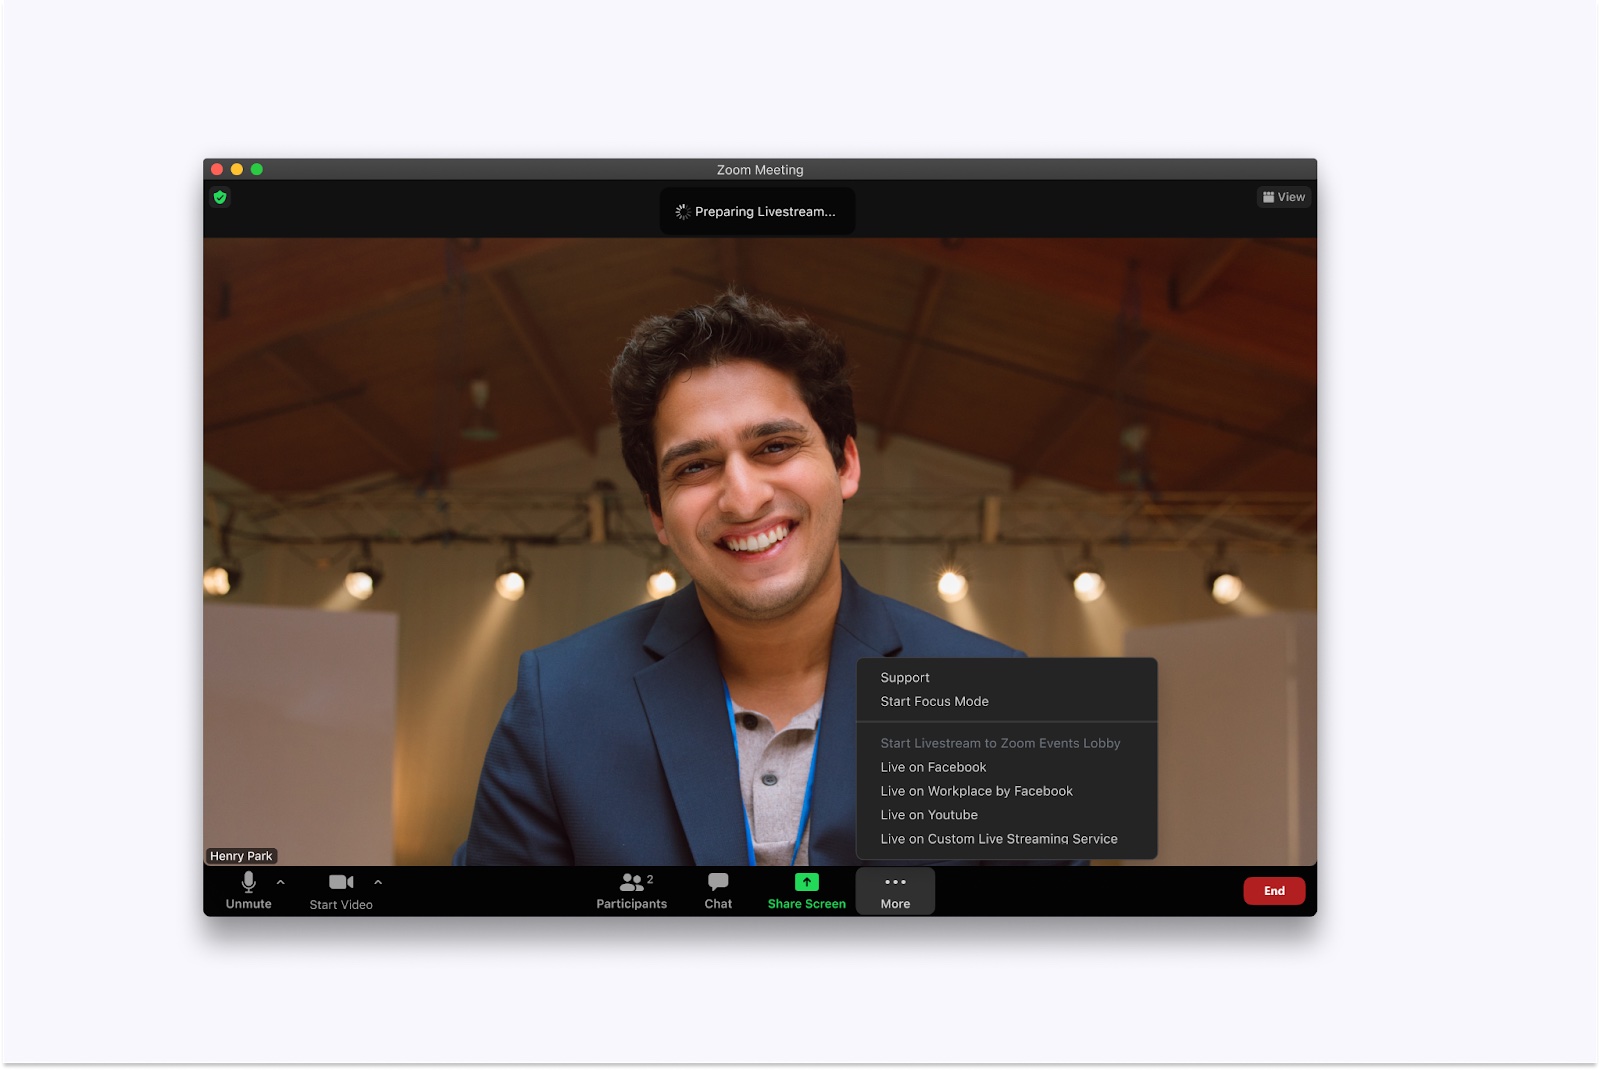
In the next section, we will explore how to record your Zoom meetings, allowing you to capture important discussions, presentations, or training sessions for future reference.
Recording a Meeting
Recording your Zoom meetings can be a valuable tool for documentation, reference, or sharing purposes. Zoom provides a convenient feature that allows you to record your meetings in both audio and video format. Follow these steps to record a meeting in Zoom:
- During a meeting, locate the toolbar at the bottom of the Zoom window.
- Click on the “Record” button to start recording your meeting.
- A menu will appear, giving you the option to choose whether to record the meeting on your computer or to the cloud. Select your preferred recording location.
- If you are recording to the cloud, Zoom will automatically initiate the recording. If you are recording to your computer, a recording indicator will appear, indicating that the meeting is being recorded.
- During the meeting, continue with your agenda as usual, knowing that everything is being captured in real-time.
- While recording, you can still utilize all the features and functionalities of Zoom, such as screen sharing, chat, and participant management.
- When you are ready to stop the recording, click on the “Stop Recording” button located in the Zoom toolbar.
- If you are recording to your computer, the recorded file will be saved in your designated location. If you are recording to the cloud, the file will be processed and made available for access within a short time.
- To locate your cloud recordings, go to your Zoom account on the web and navigate to the “Recordings” tab. From there, you can manage and download your recorded meetings.
Recording your Zoom meetings allows you to capture important discussions, presentations, or training sessions, making them accessible for future reference or for sharing with individuals who were unable to attend the live session.
It’s important to be aware of the privacy and legal considerations when recording meetings, especially if sensitive information or personal data is being discussed. Always get consent from participants and ensure that your recording practices comply with applicable privacy laws and regulations.
In the next section, we will explore how to customize your Zoom profile, allowing you to add a personal touch and make your presence more recognizable during virtual meetings.
Customizing Your Zoom Profile
Customizing your Zoom profile allows you to personalize your presence and make a lasting impression during virtual meetings. By adding a profile picture, updating your display name, and providing relevant information, you can enhance your professional image or make your profile more recognizable. Here’s how to customize your Zoom profile:
- Sign in to your Zoom account on the Zoom website.
- Click on your profile picture or initials in the top-right corner of the screen to access the dropdown menu.
- Select “Profile” from the dropdown menu to open your profile settings.
- In the profile settings, you can upload a profile picture. Click on the camera icon to upload an image from your device.
- Choose a high-quality picture that represents you professionally or reflects your personality. Ideally, use a headshot or a clear and recognizable image.
- Besides adding a profile picture, you can customize your display name. This name will be visible to other participants during meetings and in the participant list.
- Consider using your full name or a professional username to ensure clear identification.
- In the profile settings, you can also provide additional information, such as your job title, organization, or a short bio. This information can help others understand your expertise and background.
- Take advantage of the opportunity to add a personal touch to your profile by including any relevant links or social media handles.
- Once you have customized your profile, click on the “Save” button to apply the changes.
By customizing your Zoom profile, you present yourself in a more professional and engaging manner. It also helps other meeting participants to recognize and connect with you easily.
Keep in mind that Zoom also offers advanced profile settings for users with certain subscription plans or permissions. This may include options for integrating with other platforms, managing account settings, or accessing additional profile customization features.
Now that you have personalized your Zoom profile, in the next section, we will address common troubleshooting issues and provide answers to frequently asked questions to support a smooth Zoom experience.
Troubleshooting and FAQs
While Zoom is a user-friendly platform, you may occasionally encounter technical issues or have questions about its features. Here are some troubleshooting tips and frequently asked questions to help address common concerns:
Troubleshooting:
- If you’re experiencing audio issues, ensure that your microphone is not muted and that the correct audio device is selected in the Zoom settings.
- If your video isn’t working, check that your camera is properly connected and not being used by another application. You can also try restarting your device or reinstalling the camera drivers.
- If you’re having trouble joining a meeting, verify that you’ve entered the correct meeting ID and password (if required). Ensure that your internet connection is stable and try reconnecting or restarting the Zoom application.
- If you’re encountering problems with screen sharing, make sure you’ve granted the necessary permissions to the Zoom application in your device’s settings. Additionally, try closing other applications or restarting your device.
- If you’re experiencing connectivity issues, check your internet connection, and consider switching to a wired connection or moving closer to your Wi-Fi router for a stronger signal. Restarting your router or contacting your internet service provider may also help.
FAQs:
- Does Zoom offer a free version? Yes, Zoom provides a free version with limited features. However, they also offer various paid plans that provide additional functionality and expanded capabilities.
- Can I participate in a Zoom meeting without downloading the application? Yes, Zoom allows participants to join meetings through their web browser, without the need to download the application. However, some features may be limited in the browser version.
- How many participants can join a Zoom meeting? The number of participants you can have in a Zoom meeting depends on your subscription plan. The free version allows for up to 100 participants, while paid plans can support larger numbers, ranging from 500 to 1,000 participants or more.
- Can I record Zoom meetings? Yes, Zoom provides a recording feature that allows you to capture both audio and video during meetings. You can choose to record to your computer or to the cloud, depending on your account settings.
- Is Zoom secure? Zoom has implemented various security features and encryption protocols to ensure the privacy and safety of its users. It is important, however, to take precautions such as using meeting passwords, enabling waiting rooms, and keeping your Zoom application up to date to maintain security.
If you encounter any issues that are not covered here or have specific questions about Zoom’s features or settings, it is recommended to refer to the Zoom Help Center or contact Zoom’s support team for assistance.
Now that you’re equipped with troubleshooting tips and answers to common questions, you can navigate any challenges that may arise. In the concluding section, we will recap the key points covered in this guide.
Conclusion
Congratulations! You’ve reached the end of this guide to setting up and using Zoom. We’ve covered a range of topics, from creating a Zoom account to customizing your profile, managing participants, and troubleshooting common issues. By following the steps and tips outlined in this guide, you can confidently navigate the world of Zoom and make the most of this versatile platform.
Zoom has revolutionized remote communication and collaboration, allowing individuals and teams to connect seamlessly from anywhere in the world. Whether you’re hosting virtual meetings, conducting online classes, or organizing social gatherings, Zoom provides a user-friendly interface and powerful features to enhance your virtual interactions.
Remember to personalize your Zoom profile with a professional picture and relevant information, as this will help create a lasting impression with other meeting participants. Utilize the various participant management features to ensure an organized and productive meeting experience. And don’t forget to explore additional options, such as screen sharing and recording, to enhance collaboration and capture valuable discussions.
In times when remote communication is becoming increasingly important, Zoom offers a reliable and versatile platform for individuals and businesses alike. With its intuitive interface, robust features, and extensive support resources, Zoom has established itself as a leader in the field of video conferencing and collaboration.
As you continue to use Zoom, remember to keep an eye out for updates and new features. Zoom regularly releases enhancements to improve the user experience and address any issues that may arise.
We hope this guide has been helpful in acquainting you with the key aspects of setting up and using Zoom. Now, go forth and connect with others, collaborate effectively, and bridge the virtual divide with Zoom!