Introduction
Welcome to the world of Zoom, a popular video conferencing platform that has become an essential tool for online meetings, webinars, and virtual collaborations. Whether you’re conducting a presentation, showcasing a document, or providing tech support, screen sharing on Zoom is a powerful feature that allows you to share your screen with other participants in real-time.
In this article, we will explore the various methods of screen sharing on Zoom, ranging from sharing your entire screen to specific application windows or even a portion of your screen. We will also discuss how to share your iPhone or iPad screen during a Zoom meeting. By the end of this guide, you’ll be well-equipped with the knowledge to effortlessly share your screen on Zoom and enhance your online communication.
Screen sharing on Zoom is not only limited to traditional desktop or laptop computers. Whether you’re using a Windows PC, Mac, or even a mobile device like an iPhone or iPad, Zoom provides versatile options for sharing your screen on any platform.
So, if you’re ready to dive into the world of screen sharing on Zoom and elevate your virtual meetings to the next level, let’s get started!
How to Share Your Screen on Zoom
Sharing your screen on Zoom is a straightforward process that can be done with just a few clicks. To begin, make sure you have the Zoom desktop client or mobile app installed on your device and have signed in to your Zoom account.
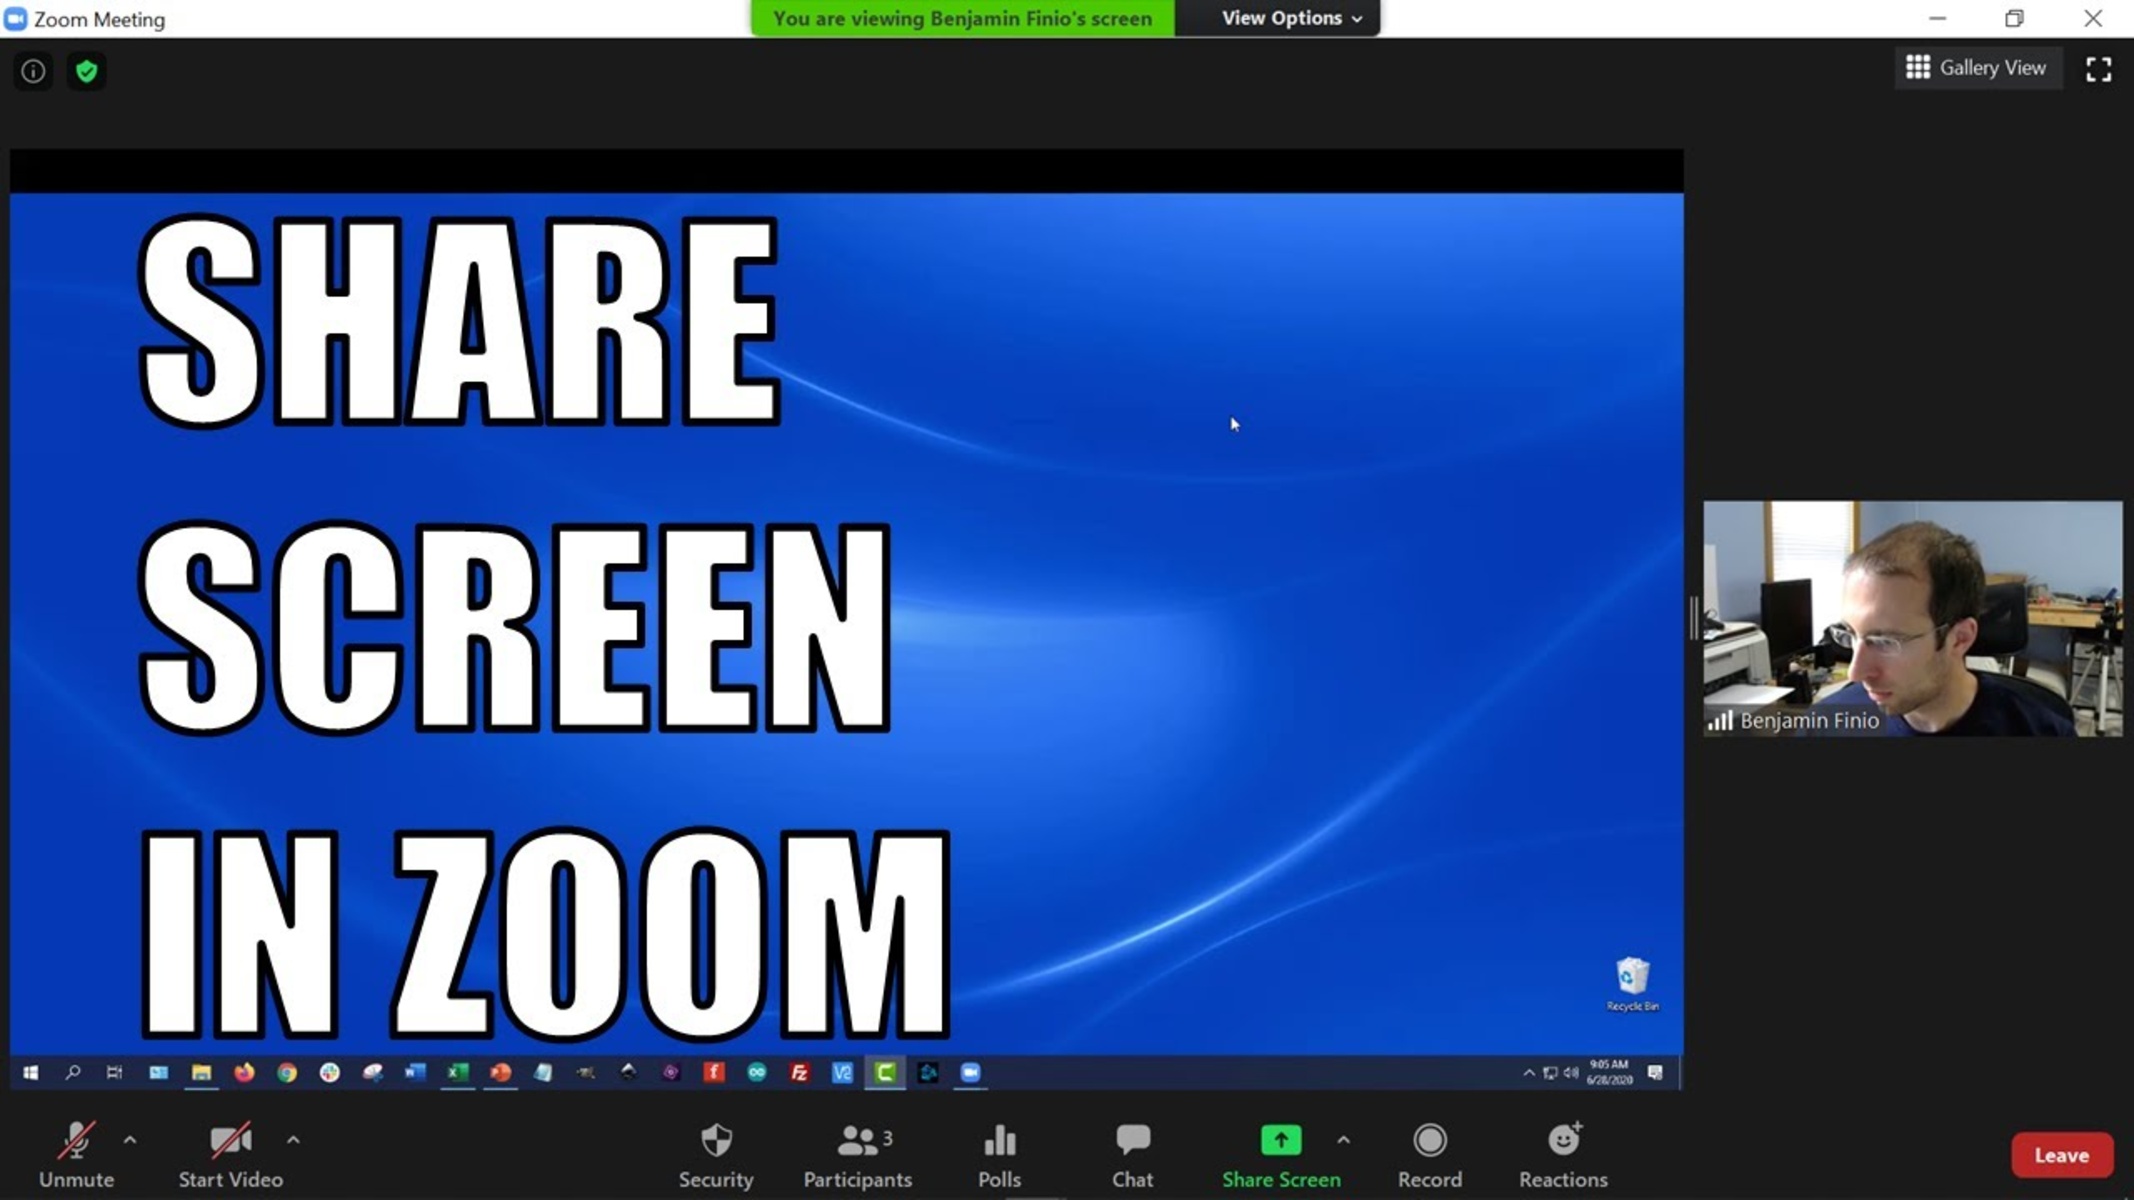
Once you’re in a Zoom meeting, follow these steps to share your screen:
- Locate the control toolbar at the bottom of the Zoom meeting window.
- Click on the green “Share Screen” button.
- A pop-up window will appear, presenting you with different options for screen sharing.
- Select the desired screen or application window you want to share. You can choose to share your entire screen, a specific application, or even a portion of your screen.
- Click on the “Share” button to start sharing your screen.
- To stop screen sharing, click on the “Stop Share” button located in the control toolbar.
That’s it! Now you can seamlessly share your screen with other participants in the Zoom meeting.
It’s important to keep in mind that as the host or co-host of the meeting, you have control over screen sharing permissions for other participants. You can choose to allow them to share their screens or restrict it to yourself only. This can be done by adjusting the meeting settings or by using the “Advanced Sharing Options” during the meeting.
Additionally, Zoom offers various advanced screen sharing features like annotation, remote control, and simultaneous screen sharing from multiple participants. These options can be accessed by clicking on the “More” button in the screen sharing toolbar.
Now that you know how to share your screen on Zoom, let’s explore the different screen sharing options available.
Sharing the Entire Screen
Sharing your entire screen on Zoom allows you to showcase anything and everything that is on your computer screen. This is an ideal option when you want to give a presentation, demonstrate a software application, or share any content that requires participants to see your entire screen.
To share your entire screen on Zoom, follow these steps:
- Open the Zoom desktop client or mobile app and join a meeting.
- Click on the green “Share Screen” button located at the bottom of the meeting window. A pop-up window will appear.
- Select the “Screen” option from the list of options presented.
- Click on the “Share” button to start sharing your entire screen.
Once you start sharing your screen, all participants in the meeting will be able to see everything that is displayed on your computer screen, including open applications, files, and the desktop background.
It’s worth noting that when sharing your entire screen, be mindful of any personal or sensitive information that might be visible. It’s recommended to close any unrelated programs or documents and share only what is relevant to the meeting.
During screen sharing, you can easily switch between different applications or windows by clicking on them. This allows you to navigate through various files, websites, or software interfaces while still sharing your screen with others.
To stop sharing your entire screen, simply click on the “Stop Share” button located in the control toolbar at the bottom of the meeting window.
Now that you know how to share your entire screen on Zoom, let’s explore how to share specific application windows.
Sharing a Specific Application Window
Sharing a specific application window on Zoom allows you to focus the participants’ attention on a particular program or document rather than sharing your entire screen. This is useful when you want to demonstrate a specific application, show a PowerPoint presentation, or collaborate on a document without revealing other potentially sensitive information.
To share a specific application window on Zoom, follow these steps:
- Open the Zoom desktop client or mobile app and join a meeting.
- Click on the green “Share Screen” button located at the bottom of the meeting window. A pop-up window will appear.
- Select the specific application window you want to share from the list of options presented. Only the selected application window will be visible to the participants.
- Click on the “Share” button to start sharing the application window.
Once you start sharing the specific application window, all participants in the meeting will be able to see only that particular application on their screens. This allows for a focused and streamlined viewing experience.
While sharing a specific application window, you can freely work within that application without worrying about exposing any unrelated content to the participants. For example, you can navigate through your PowerPoint slides, make edits to a document, or perform actions within a software application.
To stop sharing the specific application window, simply click on the “Stop Share” button located in the control toolbar at the bottom of the meeting window.
It’s important to note that if you close the shared application window during screen sharing, Zoom will automatically switch to sharing your entire screen instead.
Now that you know how to share a specific application window on Zoom, let’s explore how to share a specific portion of your screen.
Sharing a Specific Portion of the Screen
Sharing a specific portion of your screen on Zoom allows you to focus on a specific section or area and share only that part with the participants. This is particularly useful when you want to highlight a particular document, image, or any other content that requires the participants’ attention.
To share a specific portion of the screen on Zoom, follow these steps:
- Open the Zoom desktop client or mobile app and join a meeting.
- Click on the green “Share Screen” button located at the bottom of the meeting window. A pop-up window will appear.
- Select the “Advanced” tab in the pop-up window.
- Choose the “Portion of Screen” option.
- Click on the “Share” button to start sharing the specific portion of the screen.
Once you start sharing the specific portion of the screen, you’ll be able to select the section you want to share by dragging the green box around the desired area. Only the selected portion will be visible to the participants.
This feature is particularly useful when you want to zoom in on a specific detail in a document, highlight a specific section of a website, or show a specific part of an image or diagram. It allows for precise and focused sharing, enhancing the clarity of the information being presented.
While sharing a specific portion of the screen, you can still navigate through different applications or windows just like when sharing the entire screen. This flexibility allows you to seamlessly transition between different content while keeping the focus on the selected portion.
To stop sharing the specific portion of the screen, simply click on the “Stop Share” button located in the control toolbar at the bottom of the meeting window.
Now that you know how to share a specific portion of the screen on Zoom, let’s explore how to share your iPhone or iPad screen during a Zoom meeting.
Sharing an iPhone or iPad Screen
Zoom not only allows you to share your screen from your computer, but it also provides the option to share your iPhone or iPad screen during a Zoom meeting. This feature is particularly useful when you want to showcase a mobile app, walk through a presentation on your device, or provide live demonstrations from your iOS device.
To share your iPhone or iPad screen on Zoom, follow these steps:
- Ensure that your iPhone or iPad is connected to the same Wi-Fi network as the computer running the Zoom meeting.
- Open the Zoom desktop client on your computer and join a meeting.
- Connect your iPhone or iPad to your computer using a Lightning cable.
- Click on the green “Share Screen” button located at the bottom of the meeting window. A pop-up window will appear.
- Select the “iPhone/iPad via Cable” option from the list of available sharing options.
- Click on the “Share” button to start sharing your iPhone or iPad screen.
Once you start sharing your iPhone or iPad screen, participants in the Zoom meeting will be able to see a live view of your device’s screen. This allows you to demonstrate apps, navigate through different screens, and engage in interactive sessions directly from your iOS device.
While sharing your iPhone or iPad screen, you can perform actions such as opening apps, switching between screens, and interacting with the device just as you would normally. This offers a seamless and immersive experience for both you and the participants.
To stop sharing your iPhone or iPad screen, simply click on the “Stop Share” button located in the control toolbar at the bottom of the meeting window.
It’s important to note that sharing your iPhone or iPad screen via cable provides a stable and reliable connection for screen sharing. However, you can also share wirelessly using AirPlay on Zoom as long as your iOS device and the computer running the Zoom meeting are on the same Wi-Fi network.
Now that you know how to share your iPhone or iPad screen on Zoom, let’s move on to some tips for screen sharing on Zoom.
Tips for Screen Sharing on Zoom
Screen sharing on Zoom is a powerful feature that can greatly enhance your online meetings and presentations. To ensure a smooth and effective screen sharing experience, consider the following tips:
- Prepare your screen: Before starting a screen sharing session, close any unnecessary applications or documents to avoid distractions and ensure that your screen is ready for sharing.
- Share relevant content: Share only the content that is relevant to the meeting or presentation. Avoid sharing personal or sensitive information that is unrelated to the topic.
- Check screen resolution: Make sure that the screen resolution is appropriate for the participants to view. Adjust the screen resolution if needed to ensure clarity and readability.
- Test audio and video: Before starting screen sharing, test your audio and video settings to ensure that participants can hear your voice and see you clearly if you are also sharing video.
- Use annotation tools: Take advantage of Zoom’s built-in annotation tools to highlight important points, draw attention to specific details, or collaborate in real-time with participants.
- Manage participant permissions: As the host or co-host, you have control over participant screen sharing permissions. Use the host controls to allow or restrict participants from sharing their screens during the meeting.
- Prepare for interruptions: In case of interruptions or distractions during the screen sharing session, be ready to address them calmly and professionally. Consider muting notifications and silencing your phone to minimize disruptions.
- Practice beforehand: If you are new to screen sharing or have specific requirements, it’s a good idea to practice screen sharing before the actual meeting to familiarize yourself with the process and address any potential issues.
- Provide clear instructions: When sharing your screen, provide clear instructions to participants on how they can interact with the shared content, ask questions, or provide feedback.
- Monitor participant engagement: Keep an eye on participant reactions and engagement during the screen sharing session. Encourage participants to ask questions or provide feedback to ensure that they are actively involved.
By following these tips, you can optimize your screen sharing experience on Zoom and deliver effective presentations, collaborate with ease, and engage participants in a meaningful way.
Now that you have a solid understanding of how to share your screen on Zoom and some valuable tips, you’re ready to take your online meetings to the next level!
Conclusion
Screen sharing on Zoom is a versatile and indispensable feature that allows you to share your screen with other participants in real-time. Whether you’re presenting a slideshow, demonstrating a software application, or collaborating on a document, screen sharing on Zoom offers a seamless and effective way to communicate and engage with others.
In this article, we explored the different methods of screen sharing on Zoom, including sharing the entire screen, specific application windows, a portion of the screen, and even sharing your iPhone or iPad screen. We discussed the step-by-step process for each method, providing you with the knowledge and confidence to utilize these features in your online meetings.
We also provided valuable tips for enhancing your screen sharing experience on Zoom. By preparing your screen, sharing relevant content, using annotation tools, managing participant permissions, and practicing beforehand, you can optimize your presentations, foster collaboration, and create engaging interactions with participants.
Remember, screen sharing on Zoom is not limited to just traditional computers. Whether you’re using a Windows PC, Mac, or even an iPhone or iPad, Zoom provides flexible options for sharing your screen on any platform.
Now that you have a solid understanding of how to share your screen on Zoom and some valuable tips, you’re well-equipped to deliver compelling presentations, collaborate seamlessly, and enhance the effectiveness of your online meetings.
So, the next time you’re in a Zoom meeting and need to showcase your screen, don’t hesitate to utilize the screen sharing feature and captivate your audience with your presentations and demonstrations.
Happy screen sharing on Zoom!