Introduction
Are you ready to take your Zoom meetings to the next level? Sharing your screen during a Zoom meeting can greatly enhance collaboration and communication, whether you're presenting a slideshow, demonstrating a software application, or simply sharing content from your browser. While many people are familiar with using the Zoom desktop or mobile app to share their screen, did you know that you can also do this directly from your web browser? That's right! Zoom's browser extension allows you to seamlessly share your screen without having to switch to the desktop or mobile app.
In this guide, we'll walk you through the step-by-step process of sharing your screen on Zoom using your web browser. Whether you're using Chrome, Firefox, Safari, or any other supported browser, you'll be able to effortlessly share your screen with your meeting participants. By the end of this tutorial, you'll have a solid understanding of how to initiate and stop screen sharing, empowering you to make the most of your Zoom meetings.
So, if you're ready to become a screen-sharing pro and elevate your virtual meetings, let's dive into the details of how to share your screen on Zoom using your web browser. Whether you're a seasoned Zoom user or just getting started, this guide will equip you with the knowledge and confidence to seamlessly share your screen and engage your audience effectively. Let's get started!
Step 1: Open Zoom in Your Browser
To begin the process of sharing your screen on Zoom using your web browser, the first step is to open the Zoom web client. Whether you prefer using Chrome, Firefox, Safari, or another supported browser, the process remains consistent across different platforms.
-
Launch Your Preferred Browser: Open your web browser of choice on your computer or laptop. This could be Google Chrome, Mozilla Firefox, Apple Safari, or any other browser that you typically use to access the internet.
-
Navigate to the Zoom Website: In the address bar at the top of the browser window, type in "zoom.us" and press Enter. This will take you to the official Zoom website, where you can access the web client.
-
Sign In to Your Zoom Account: If you already have a Zoom account, click on the "Sign In" button located at the top-right corner of the Zoom homepage. Enter your credentials, such as your email address and password, to log in to your Zoom account. If you don't have an account yet, you can sign up for free by clicking on the "Sign Up, It's Free" button and following the prompts to create a new account.
-
Access the Web Client: Once you're signed in, navigate to the "My Account" section or any area where you can start or join a meeting. Look for the option to "Start a New Meeting" or "Join a Meeting" to initiate the screen sharing process.
By following these steps, you'll successfully open Zoom in your web browser and be ready to proceed with starting or joining a meeting, which is the next step in the process of sharing your screen on Zoom. With the web client open, you're just a few clicks away from engaging in productive and interactive screen sharing sessions with your colleagues, clients, or friends.
Step 2: Start or Join a Meeting
Once you have successfully opened the Zoom web client in your browser, the next step is to either start a new meeting or join an existing one. This pivotal step sets the stage for initiating the screen sharing process and allows you to connect with your intended audience in a virtual meeting space.
Starting a New Meeting
If you're the host or organizer of the meeting, initiating a new meeting is straightforward. Look for the "Start a New Meeting" option within the web client interface. Upon clicking this option, you'll be prompted to configure your meeting settings, such as enabling video and audio, setting a meeting password for added security, and choosing whether participants can join before the host. Once you've customized your meeting preferences, simply click "Start Meeting" to launch the virtual meeting room.
Joining an Existing Meeting
On the other hand, if you've been invited to join an existing meeting, you can do so seamlessly through the Zoom web client. Look for the "Join a Meeting" option and enter the unique meeting ID provided by the host. You may also be required to input the meeting password, if one has been set. After entering the necessary details, click "Join" to enter the meeting room and prepare for the upcoming screen sharing session.
Preparing for Screen Sharing
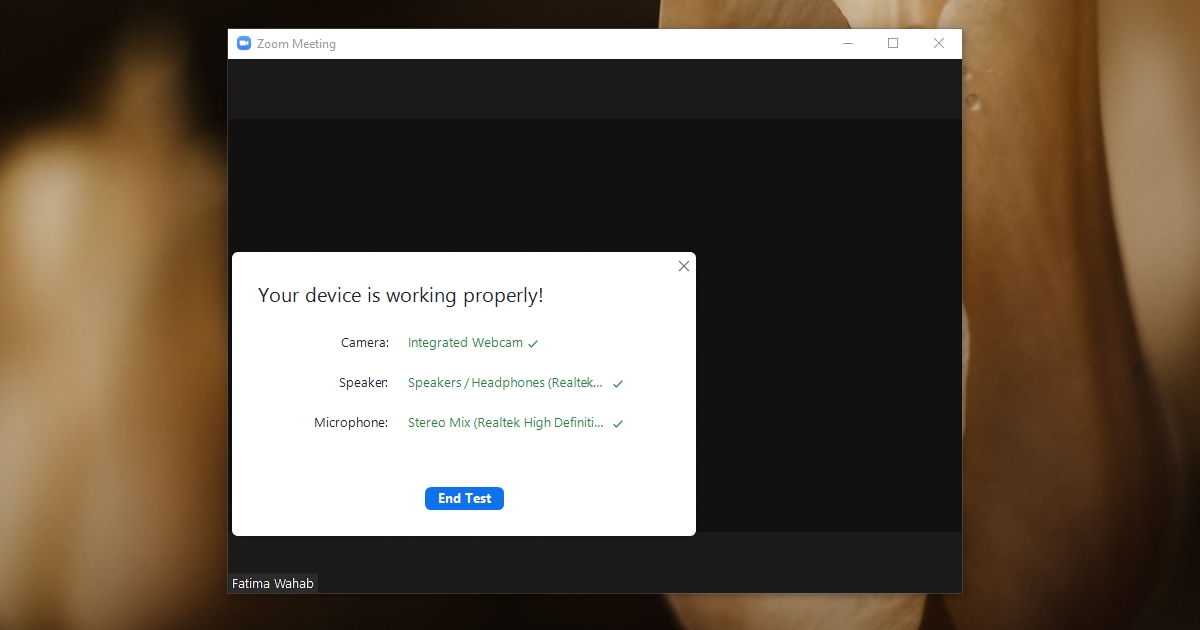
Whether you're starting a new meeting or joining an existing one, it's essential to ensure that your browser settings and permissions are configured to allow screen sharing. Before proceeding to share your screen, take a moment to familiarize yourself with the screen sharing controls within the web client interface. This includes understanding how to select which specific application or browser tab you want to share, as well as how to manage audio settings during screen sharing.
By following these steps to start or join a meeting within the Zoom web client, you'll be primed and ready to seamlessly transition into the screen sharing phase. With the meeting room established and participants gathered, you're now poised to share your screen and deliver impactful presentations, collaborate on projects, or engage in interactive discussions—all within the familiar environment of your web browser.
Step 3: Share Your Screen
Now that you've successfully started or joined a meeting within the Zoom web client, it's time to delve into the process of sharing your screen. This step is pivotal in facilitating effective communication, collaboration, and knowledge sharing during virtual meetings. Whether you're aiming to showcase a presentation, demonstrate a software application, or browse web content with your meeting participants, the screen sharing feature empowers you to convey information visually and engage your audience in a dynamic manner.
To initiate screen sharing from your web browser, follow these steps:
-
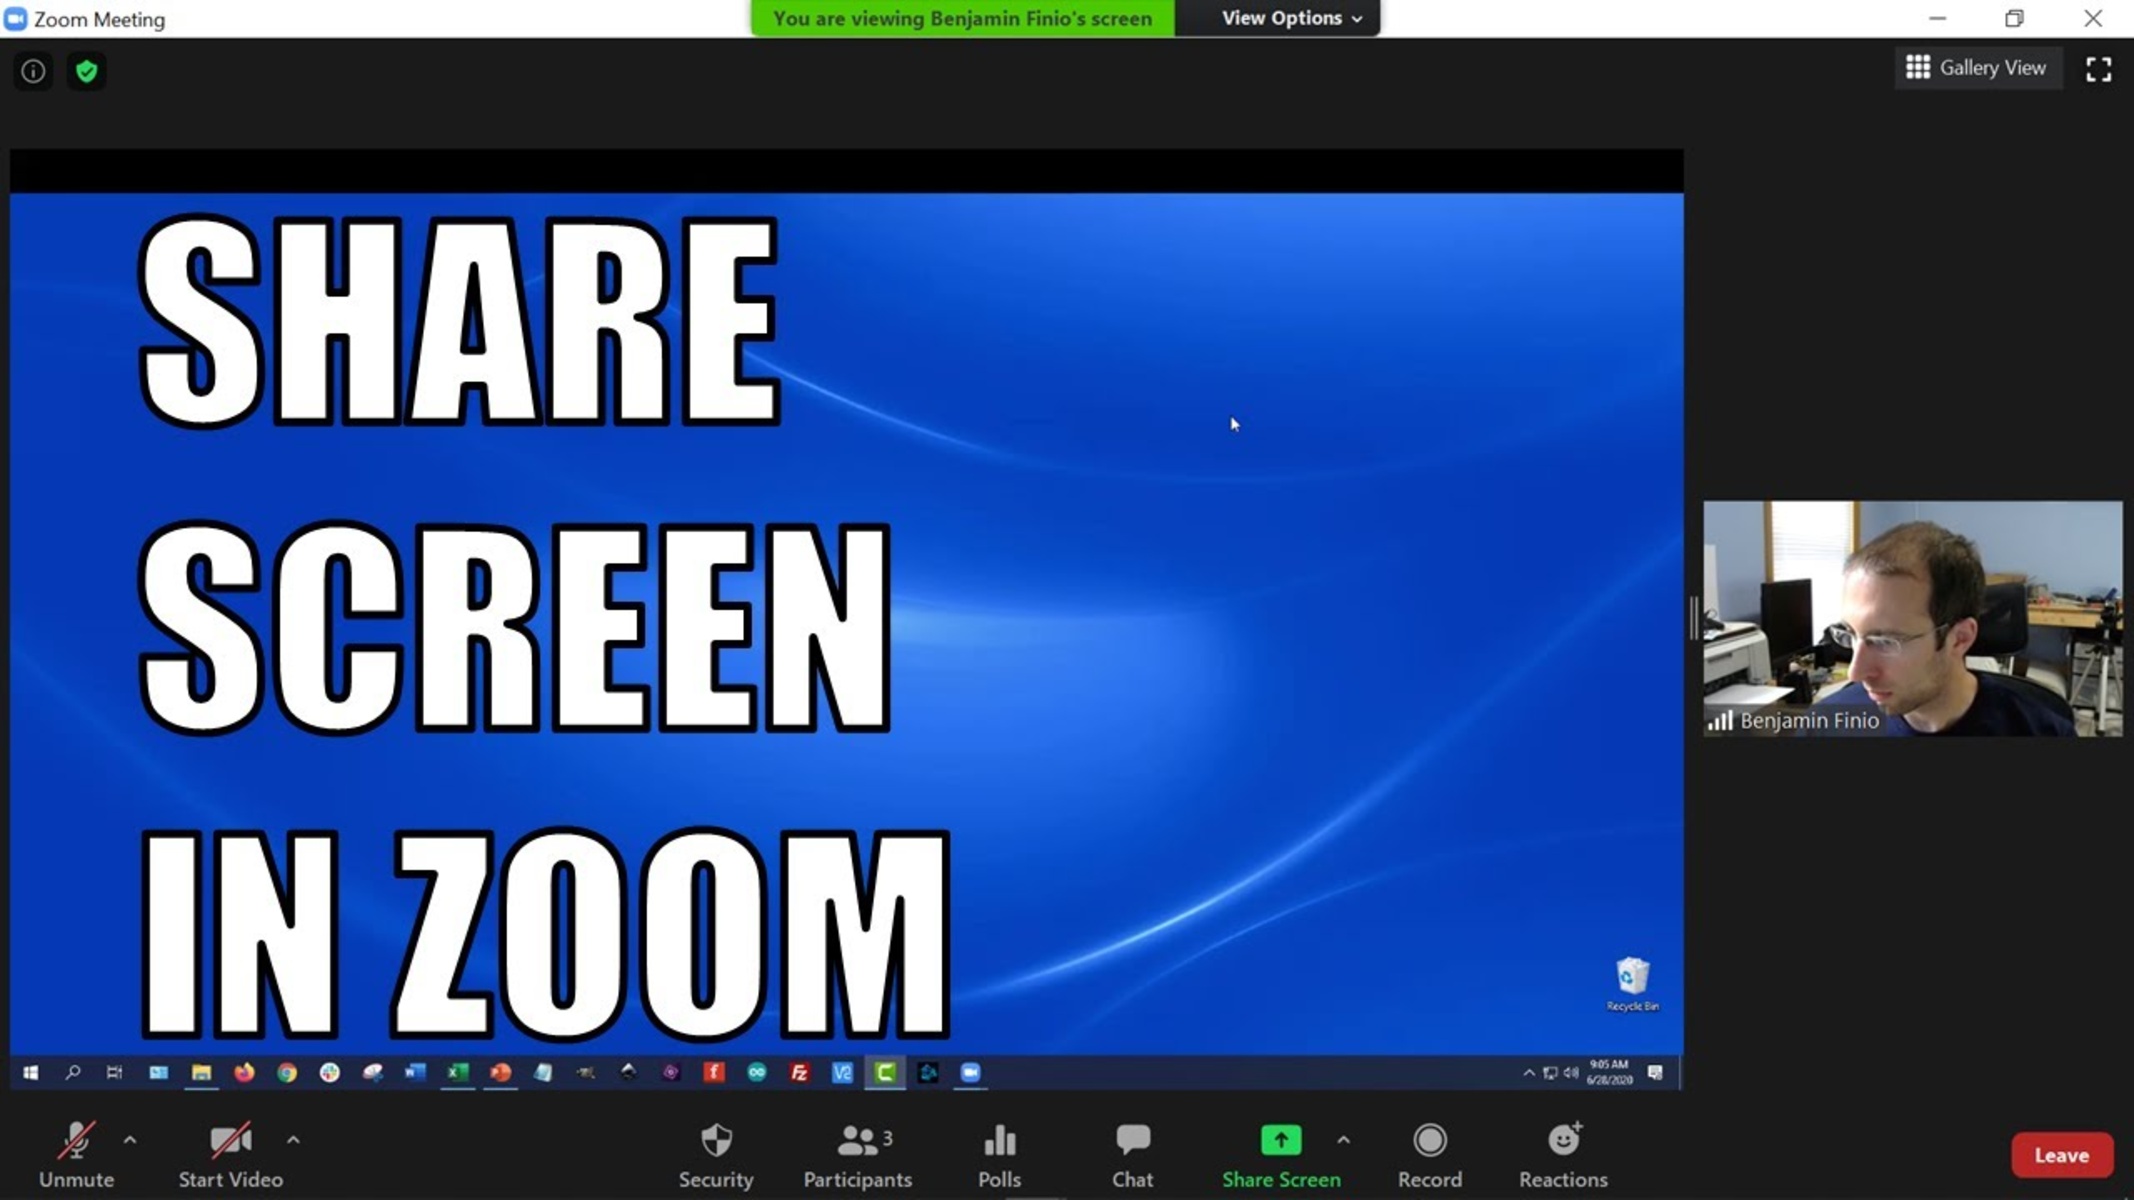
Locate the Screen Share Option: Within the Zoom web client interface, look for the "Share Screen" button or icon. This is typically located in the meeting controls panel at the bottom of the screen. Click on this option to initiate the screen sharing process.
-
Choose Your Sharing Option: Upon clicking the "Share Screen" button, you'll be presented with various sharing options. You can opt to share your entire screen, a specific application window, or a browser tab. Select the option that best aligns with the content you intend to share with your meeting participants.
-
Confirm Your Selection: After choosing your preferred sharing option, confirm your selection to begin sharing your screen. Depending on your browser and operating system, you may be prompted to grant permissions for screen sharing. Follow the on-screen prompts to allow Zoom to access your screen and proceed with sharing.
-
Engage Your Audience: Once your screen is being shared, take advantage of the built-in annotation tools and whiteboard feature to enhance your presentations and make them more interactive. These tools enable you to draw, highlight, and emphasize key points directly on the shared screen, fostering greater engagement and clarity for your audience.
-
Manage Audio Settings: While sharing your screen, consider whether you need to include audio from your computer or microphone. Depending on your presentation or content, you may want to enable audio sharing to ensure that your participants can hear accompanying sound effects, narration, or dialogue.
By following these steps, you'll seamlessly share your screen and captivate your audience with compelling visual content, all within the confines of your web browser. Whether you're conducting a professional meeting, hosting a virtual training session, or simply catching up with friends and family, the screen sharing feature in Zoom's web client empowers you to communicate effectively and leave a lasting impression on your audience.
With your screen shared, you're now equipped to deliver impactful presentations, collaborate on projects, and facilitate engaging discussions—all while harnessing the power of visual communication within the virtual meeting space. As you navigate the screen sharing process, remember to leverage the diverse sharing options and interactive features available to you, enhancing the overall experience for both yourself and your meeting participants.
Step 4: Stop Sharing Your Screen
Knowing how to stop sharing your screen on Zoom is just as important as initiating the sharing process. Once you've effectively conveyed your visual content and completed the intended segment of your presentation or collaboration, it's essential to seamlessly transition out of screen sharing mode. This ensures a smooth and professional flow within your virtual meeting, allowing you to shift focus, facilitate discussions, or transition to the next agenda item without distractions.
To stop sharing your screen within the Zoom web client, follow these straightforward steps:
-
Locate the Screen Sharing Controls: When you're ready to stop sharing your screen, navigate to the meeting controls panel at the bottom of the Zoom web client interface. Look for the "Stop Share" button, which is typically located near the center of the controls panel. Click on this button to initiate the process of stopping your screen sharing session.
-
Confirm Your Decision: Upon clicking the "Stop Share" button, you'll be prompted to confirm your decision to stop sharing your screen. This serves as a final confirmation to ensure that you indeed intend to cease screen sharing. Confirm your choice to proceed with stopping the screen sharing session.
-
Transition Smoothly: As you stop sharing your screen, take a moment to transition smoothly to the next phase of your meeting. Whether you're resuming a discussion, introducing a new speaker, or moving on to the next agenda item, maintaining a seamless flow within your virtual meeting is key. By promptly stopping screen sharing, you demonstrate professionalism and adeptness in managing the meeting dynamics.
By following these steps, you'll effectively stop sharing your screen on Zoom, allowing you to refocus the attention of your meeting participants and proceed with the next steps in your agenda. Whether you're conducting a business presentation, leading a virtual training session, or engaging in collaborative discussions, the ability to seamlessly transition in and out of screen sharing mode enhances the overall efficiency and impact of your virtual meetings.
With the screen sharing session concluded, you're now poised to continue driving productive and engaging interactions within the Zoom web client. As you navigate the process of stopping screen sharing, remember that this action signifies a deliberate shift in focus and serves as a pivotal moment in guiding the flow of your virtual meeting. By mastering the art of stopping screen sharing with finesse, you'll elevate the professionalism and effectiveness of your virtual presentations and collaborations.
Conclusion
In conclusion, mastering the art of screen sharing on Zoom using your web browser opens up a world of possibilities for seamless collaboration, engaging presentations, and interactive discussions. By following the step-by-step process outlined in this guide, you've gained valuable insights into leveraging the power of visual communication within the virtual meeting space.
From opening Zoom in your browser to starting or joining a meeting, and from sharing your screen to gracefully stopping the screen sharing session, each step plays a crucial role in enhancing the overall effectiveness of your virtual interactions. As you navigate these processes, remember that the ability to share your screen directly from your web browser empowers you to seamlessly integrate visual content into your meetings, without the need to switch to the desktop or mobile app.
By harnessing the diverse sharing options, interactive features, and annotation tools available within the Zoom web client, you're well-equipped to captivate your audience, deliver impactful presentations, and foster productive collaborations. Whether you're conducting professional meetings, hosting virtual training sessions, or connecting with friends and family, the screen sharing feature in Zoom's web client serves as a powerful tool for conveying information, sparking discussions, and leaving a lasting impression on your audience.
As you continue to explore the dynamic capabilities of screen sharing within the Zoom web client, remember to embrace creativity, adaptability, and a keen understanding of your audience's needs. Whether you're sharing a slideshow, demonstrating a software application, or browsing web content, the ability to seamlessly transition in and out of screen sharing mode enhances the overall efficiency and impact of your virtual meetings.
In the ever-evolving landscape of virtual communication, the proficiency in sharing your screen on Zoom using your web browser positions you as a confident and effective communicator. Embrace the opportunities that screen sharing presents, and leverage this feature to elevate the quality of your virtual interactions, foster meaningful connections, and drive collaborative success within the digital realm.
With the knowledge and skills acquired from this guide, you're well-prepared to navigate the intricacies of screen sharing on Zoom with finesse and confidence, ultimately enhancing the productivity and engagement of your virtual meetings. So, go ahead, harness the power of screen sharing in your web browser, and make every Zoom meeting an impactful and memorable experience for both yourself and your participants.