Introduction
Screen sharing is a valuable feature in video conferencing platforms that allows participants to share their screens with others during online meetings. This functionality is particularly useful for presentations, collaboration, troubleshooting, and training sessions. In the case of Zoom, one of the most popular video conferencing tools available, enabling screen sharing for participants is easy and can greatly enhance the overall meeting experience.
By default, the host has the sole screen sharing capability in Zoom. However, as a host, you have the option to grant screen sharing privileges to participants as well. Whether you want all participants to have the ability to share their screens or you prefer to selectively allow specific individuals, Zoom provides flexible settings to accommodate different needs.
This article will guide you through the process of enabling screen sharing for participants in Zoom. We will explore both the option to allow screen sharing for all participants and the method to grant screen sharing permissions to specific individuals. Additionally, we will discuss how to revoke screen sharing permission when needed, and provide some tips to ensure a smooth screen sharing experience.
With this knowledge, you can empower your participants to actively engage and collaborate during Zoom meetings by sharing their screens, fostering a more dynamic and productive virtual environment.
Default Settings
By default, screen sharing is only available for the host in Zoom meetings. This means that unless you specifically enable screen sharing for participants, they won’t have the ability to share their screens during the meeting. The host retains full control over the screen sharing feature, allowing them to present their own screen or grant screen sharing permissions to participants as necessary.
While limiting screen sharing to the host provides a level of control and security, there are situations where you may want to allow participants to share their screens. For example, in collaborative meetings or training sessions, participants may need to showcase their work, demonstrate a concept, or troubleshoot an issue. Granting screen sharing privileges to participants can foster a more interactive and engaging meeting environment, promoting teamwork and knowledge sharing.
It’s important to note that even with screen sharing enabled, participants can only share their screens when given permission by the host. As the host, you have the flexibility to determine who can share their screens, whether it’s all participants or specific individuals.
Now that you understand the default settings for screen sharing in Zoom meetings let’s explore how to modify these settings to allow participants to share their screens.
How to Enable Screen Sharing for Participants
To enable screen sharing for participants in your Zoom meetings, you have two options: allowing screen sharing for all participants or granting screen sharing permissions to specific individuals.
Allowing Screen Sharing for All Participants:
- Start by hosting a meeting in Zoom. You can either schedule a new meeting or start an instant meeting.
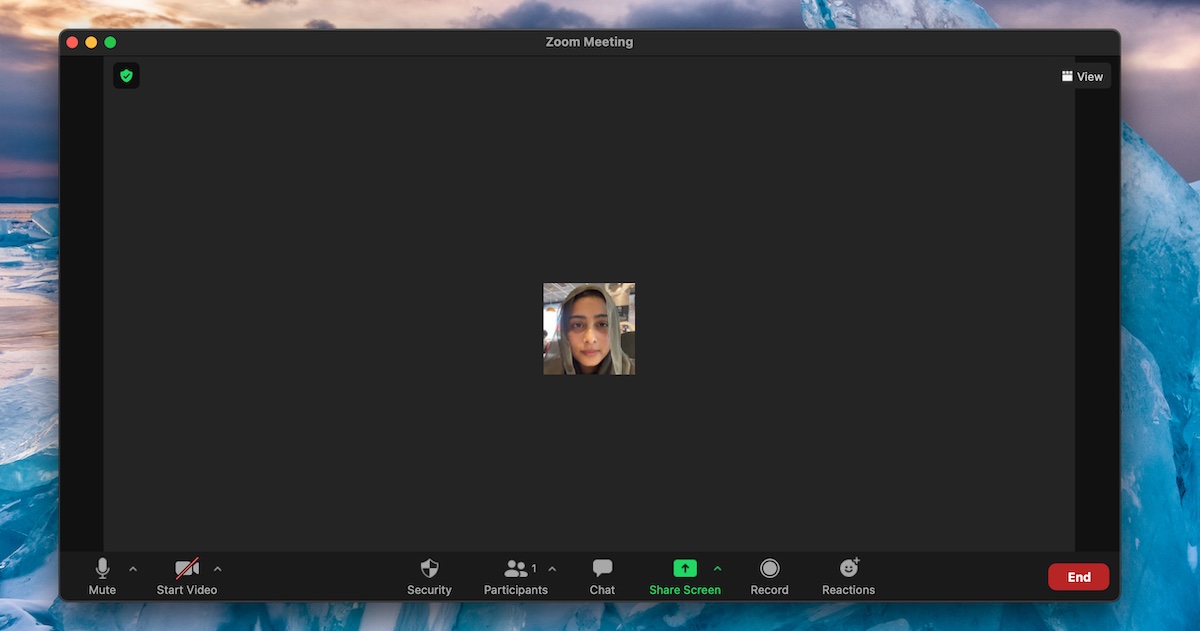
- Once the meeting has started, locate the control panel at the bottom of the Zoom window.
- Look for the “Share Screen” button and click on it. A menu will appear with various screen sharing options.
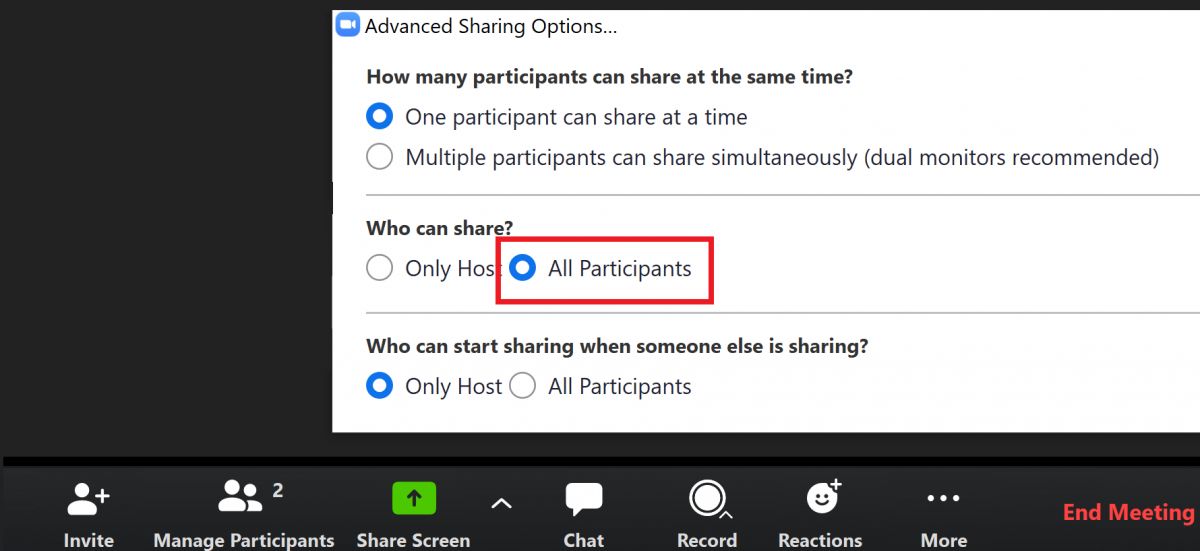
- Choose the option “Advanced Sharing Options” from the menu.
- In the Advanced Sharing Options window, you’ll find the section “Who can share?”. Select the option “All Participants”.
- Click on the “Save” button to apply the changes.
With this setting enabled, all participants in your Zoom meeting will have the ability to share their screens when desired. They can easily initiate screen sharing by clicking on the “Share Screen” button in the control panel.
Allowing Screen Sharing for Specific Participants:
- Start a meeting as the host.
- Once the meeting has started, locate the “Manage Participants” button in the control panel. Click on it to open the participants list.
- In the participants list, locate the participant to whom you want to grant screen sharing permissions.
- Find the participant’s name and hover over it. You will see a “More” button appear next to their name.
- Click on the “More” button, and a menu will appear with various options.
- From the menu, select “Allow Record/Play Files” to enable screen sharing for that specific participant.
By following these steps, you can customize the screen sharing permissions for participants in your Zoom meeting, either allowing it for everyone or granting it selectively to specific individuals.
Allowing Screen Sharing for All Participants
Enabling screen sharing for all participants in your Zoom meetings is a straightforward process that ensures everyone in the meeting has the ability to share their screens when needed. This can be particularly useful for collaborative discussions, presentations, and interactive training sessions. Follow these steps to allow screen sharing for all participants:
- Start by hosting a meeting in Zoom. You can either schedule a new meeting or start an instant meeting.
- Once the meeting has started, locate the control panel at the bottom of the Zoom window.
- Look for the “Share Screen” button and click on it. A menu will appear with various screen sharing options.
- Choose the option “Advanced Sharing Options” from the menu.
- In the Advanced Sharing Options window, you’ll find the section “Who can share?”. Select the option “All Participants”.
- Click on the “Save” button to apply the changes.
With screen sharing enabled for all participants, each person attending the Zoom meeting will have the ability to share their screens at any time. This promotes collaboration and active engagement, as participants can showcase their work, demonstrate concepts, or provide visual illustrations during discussions.
Participants can easily initiate screen sharing by clicking on the “Share Screen” button in the control panel. They will have options to share their entire screen, a specific application window, or even a portion of their screen by selecting the appropriate option from the sharing menu.
It’s worth noting that as the host, you still retain control over the meeting and can manage screen sharing permissions throughout the session. You can stop or pause screen sharing, switch between shared screens, and even temporarily disable screen sharing for specific participants if necessary.
With screen sharing enabled for all participants, you can create a more inclusive and interactive meeting environment where everyone has an opportunity to contribute and collaborate effectively.
Allowing Screen Sharing for Specific Participants
In some cases, you may want to grant screen sharing permissions only to specific participants in your Zoom meetings. This enables you to control who can share their screens and ensures a more focused and organized discussion. Follow these steps to allow screen sharing for specific participants:
- Start a meeting as the host.
- Once the meeting has started, locate the “Manage Participants” button in the control panel. Click on it to open the participants list.
- In the participants list, locate the participant to whom you want to grant screen sharing permissions.
- Find the participant’s name and hover over it. You will see a “More” button appear next to their name.
- Click on the “More” button, and a menu will appear with various options.
- From the menu, select “Allow Record/Play Files” to enable screen sharing for that specific participant.
By following these steps, you can grant screen sharing permissions to selected participants in your Zoom meeting. This allows them to share their screens whenever they need to present, collaborate, or demonstrate something to the rest of the participants.
By granting screen sharing permissions selectively, you have complete control over who can share their screens and ensure that the meeting stays focused and organized. This can be particularly useful in situations where you have designated presenters, panelists, or team members who need to share specific content.
It’s important to note that participants will only see the option to share their screens once you have granted them permission. They can access the screen sharing feature by clicking on the “Share Screen” button in the Zoom control panel. From there, they will have the ability to choose whether to share their entire screen, a specific application window, or a portion of their screen, depending on their needs.
Remember, as the host, you still have the ability to manage screen sharing permissions throughout the meeting. You can revoke screen sharing privileges or grant them to additional participants as the discussion progresses.
By allowing screen sharing for specific participants, you can create a more targeted and efficient meeting experience where only the necessary individuals have the ability to share their screens, facilitating smooth and focused collaboration.
How to Revoke Screen Sharing Permission
As the host of a Zoom meeting, you have the ability to revoke screen sharing permission from participants at any time. Revoke screen sharing when you want to regain control over the meeting or when you no longer want a participant to share their screen. Follow these steps to revoke screen sharing permission:
- During a Zoom meeting, locate the participant who is currently sharing their screen.
- Hover over their name in the participants list until a “More” button appears next to their name.
- Click on the “More” button to reveal a menu of options.
- From the menu, select “Stop Share” or “Revoke Screen Sharing” to end screen sharing for that participant.
By following these steps, you can quickly and easily revoke screen sharing permission from a participant. Once screen sharing is revoked, the participant will no longer be able to share their screen with the rest of the meeting attendees.
Revoking screen sharing permission can be useful in various scenarios. For example, if a participant has completed their presentation or demonstration, you can revoke their screen sharing privilege to maintain focus on the discussion. Additionally, if a participant mistakenly shares sensitive or inappropriate content, you can swiftly revoke their screen sharing permission to mitigate any potential disruptions or concerns.
It’s important to note that while you can revoke screen sharing permission from participants, you still have the option to grant it back to them if needed. This flexibility allows you to adapt to the meeting dynamics and ensure a smooth flow of collaboration.
By taking control of screen sharing permissions and revoking access as necessary, you can manage the meeting environment effectively and ensure that screen sharing remains within the parameters you have set for your Zoom meeting.
Tips for a Smooth Screen Sharing Experience
Screen sharing in Zoom can greatly enhance collaboration and engagement during virtual meetings. To ensure a seamless and effective screen sharing experience, follow these tips:
- Prepare in advance: Before starting the meeting, make sure you have all the necessary documents, presentations, or applications ready for sharing. This prevents unnecessary delays and ensures a smooth transition when it’s time to share your screen.
- Minimize distractions: Close any unnecessary applications, browser tabs, or notifications that may cause distractions during the screen sharing session. This helps maintain focus and ensures that participants can fully engage with the shared content.
- Test your setup: Conduct a test run to ensure that your screen sharing is working properly. Check that all participants can see your shared screen and that the audio is clear. This allows you to troubleshoot any technical issues ahead of time.
- Communicate intentions: Clearly communicate your intentions before sharing your screen. Let participants know what they should expect to see and explain any interactions they may need to perform, such as clicking on specific areas or using certain features.
- Be conscious of bandwidth: Screen sharing can consume a significant amount of bandwidth, so be mindful of the quality of your internet connection. If you notice a lag or poor quality during screen sharing, consider reducing the screen resolution or closing other bandwidth-intensive applications.
- Use annotation tools: Take advantage of Zoom’s built-in annotation tools to enhance collaboration and engagement. Participants can use these tools to draw, highlight, or make notes directly on the shared screen, fostering a more interactive and collaborative environment.
- Secure sensitive information: If you need to share sensitive information, ensure that you are sharing the appropriate screen or application and not inadvertently revealing confidential data. Double-check before initiating screen sharing and be cautious when switching between screens or applications.
- Manage screen sharing permissions: Regularly review and manage screen sharing permissions for participants. Grant or revoke access as necessary to maintain control over the meeting and ensure that screen sharing remains focused and relevant to the discussion.
- Encourage participation: Encourage participants to actively engage during screen sharing sessions. Make space for questions, discussions, and feedback, promoting a collaborative and inclusive environment.
By following these tips, you can ensure a smooth and productive screen sharing experience in your Zoom meetings. Effective screen sharing enhances collaboration, promotes engagement, and facilitates a more dynamic and interactive virtual meeting environment.
Conclusion
Screen sharing is a powerful feature that can greatly enhance the effectiveness of online meetings. In Zoom, enabling screen sharing for participants allows for more interactive collaboration, dynamic presentations, and effective training sessions.
In this article, we discussed two methods to enable screen sharing for participants in Zoom. You can choose to allow screen sharing for all participants or selectively grant screen sharing permissions to specific individuals. Both options provide flexibility and control over the meeting environment.
Additionally, we explored how to revoke screen sharing permission when necessary and provided tips for a smooth screen sharing experience. By following these tips, such as preparing in advance, minimizing distractions, communicating intentions, and managing screen sharing permissions, you can ensure a seamless and productive screen sharing session in your Zoom meetings.
Overall, incorporating screen sharing into your Zoom meetings can foster collaboration, boost engagement, and facilitate effective communication. Whether you are giving a presentation, conducting a training session, or collaborating on a project, screen sharing allows participants to share their work, demonstrate concepts, and troubleshoot issues in a visual and interactive manner.
By utilizing these features and following best practices, you can create a more effective and engaging virtual meeting environment and make the most out of the screen sharing capability that Zoom offers.