Introduction
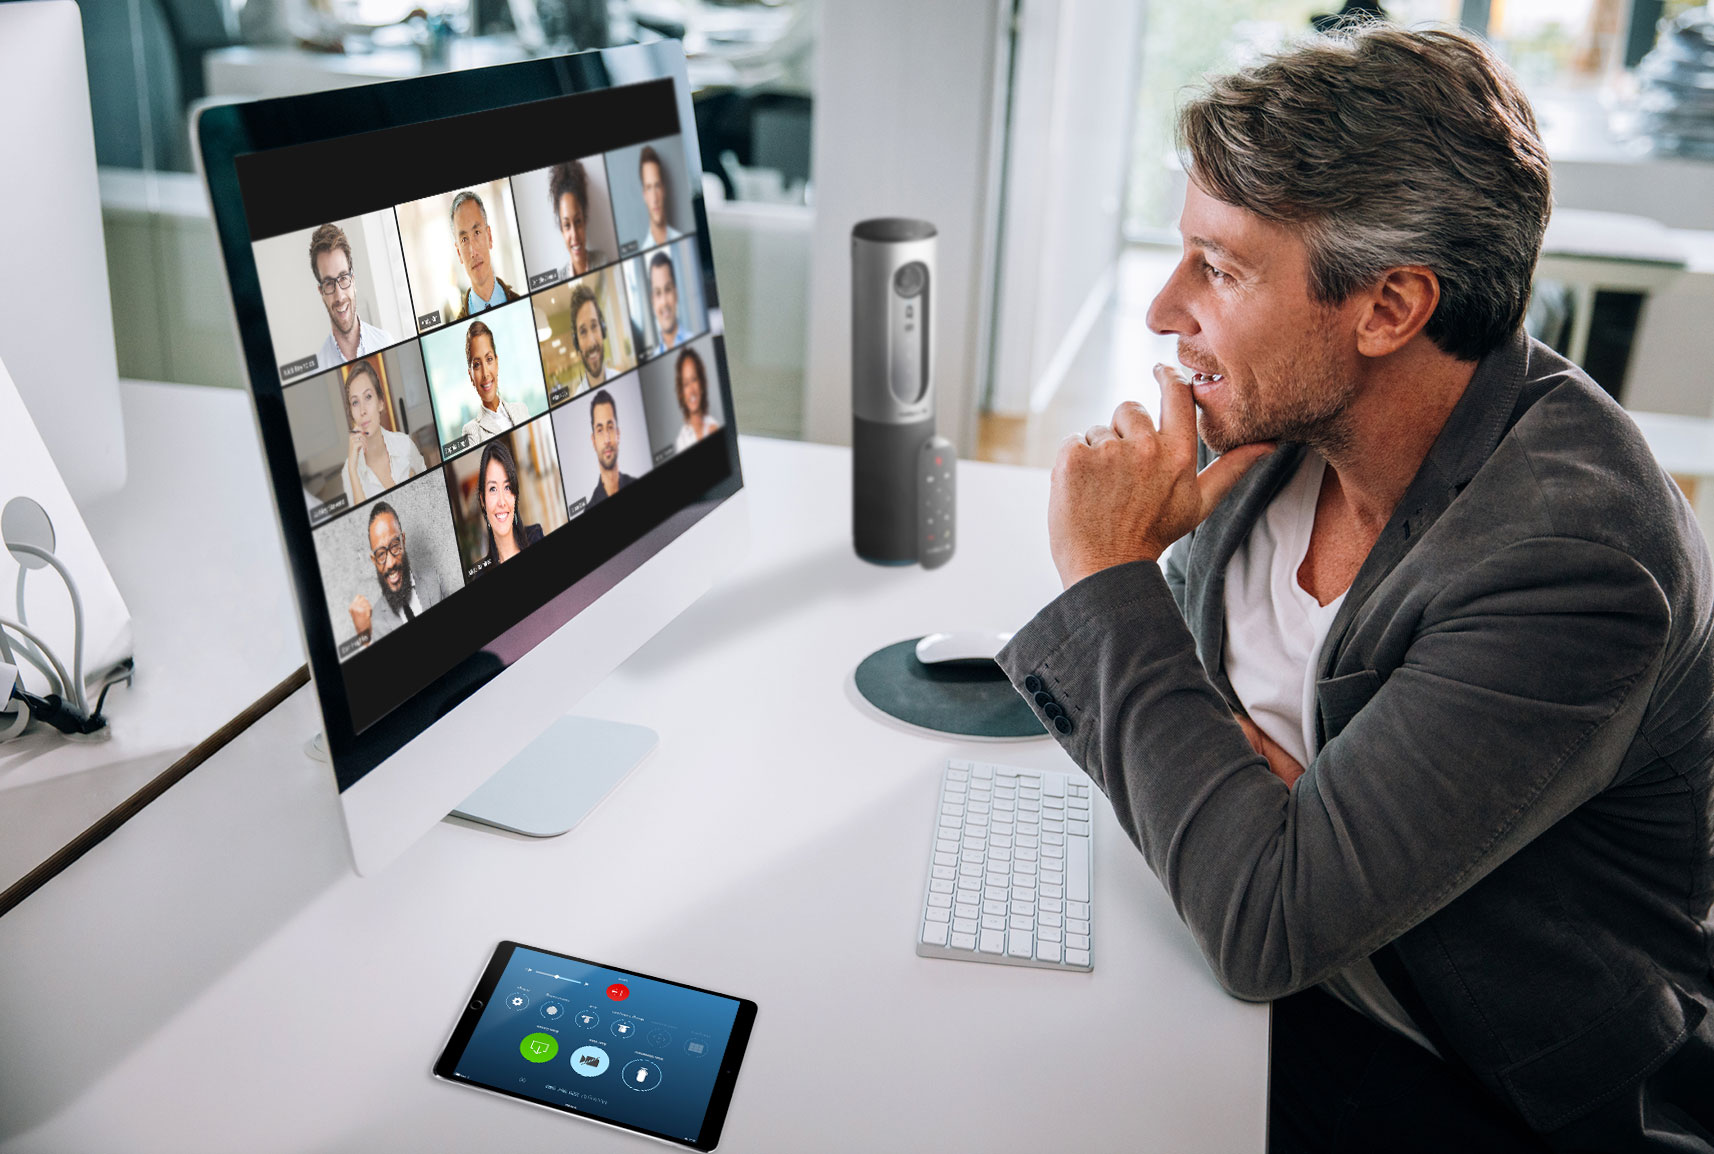
Welcome to this comprehensive guide on how to use Zoom video! In today’s digital age, video conferencing has become an essential tool for both personal and professional communication. Whether you’re working remotely, attending online classes, or simply staying connected with family and friends, Zoom provides a reliable and user-friendly platform for virtual meetings and collaborations.
With its wide range of features and intuitive interface, Zoom has quickly become a go-to video conferencing solution for individuals and businesses alike. This powerful tool allows you to seamlessly connect with people from all around the world, helping you bridge the gap and stay connected, no matter the distance.
In this guide, we will walk you through the basics of Zoom, from getting started to troubleshooting common video issues. We will cover everything you need to know to effectively navigate through Zoom’s features and make the most out of your video conferencing experience.
Whether you’re new to Zoom or looking to enhance your existing knowledge, this guide has got you covered. From scheduling and joining meetings to adjusting video settings and sharing your screen, we’ll provide step-by-step instructions and valuable tips along the way. We’ll also delve into advanced features such as recording meetings, using breakout rooms, and utilizing the chat function.
So, if you’re ready to dive into the world of Zoom and unlock its full potential, let’s get started! By the end of this guide, you’ll have the knowledge and confidence to navigate Zoom like a pro, ensuring that your virtual meetings are seamless, engaging, and productive.
Getting Started with Zoom
Before you can start using Zoom, you’ll need to create an account. Head over to the Zoom website (www.zoom.us) and click on the “Sign Up, It’s Free” button. Fill in the required information, including your email address, and follow the steps to create your account.
Once you’ve created your account, you can download the Zoom application on your device. Zoom is available for Windows, macOS, iOS, and Android, so you can easily use it on your computer, smartphone, or tablet. Visit the Zoom Download Center and select the appropriate version for your device.
After installing the Zoom application, you can sign in using your account credentials. Upon signing in, you’ll be greeted with the Zoom home screen, where you can access all the main features and functions.
One of the first things you’ll want to do is familiarize yourself with the Zoom interface. The main window consists of a toolbar at the bottom, which contains various controls for managing your Zoom meetings. These controls include options to start or join a meeting, schedule a meeting, share your screen, and more. Additionally, you’ll find the chat function, participant list, and various options to manage your audio and video settings.
To make the most out of your Zoom experience, it’s important to have a stable internet connection and ensure that your device meets the system requirements for running Zoom. This will help prevent any connectivity issues or performance lag during your meetings.
Now that you’re familiar with the basics of getting started with Zoom, you’re ready to dive deeper into its features. In the next sections, we will cover everything from scheduling and joining meetings to adjusting video settings, managing audio options, and utilizing more advanced functionalities like breakout rooms and screen sharing.
Remember, practice makes perfect. Don’t be afraid to explore and experiment with the various features that Zoom has to offer. The more you use it, the more comfortable and proficient you will become.
Scheduling a Meeting
Scheduling a meeting in Zoom allows you to plan ahead and invite participants to join at a specific date and time. To schedule a meeting, open the Zoom application and navigate to the home screen. Click on the “Schedule” button located in the toolbar at the bottom of the window.
In the scheduling window, you’ll be prompted to enter relevant details for your meeting. Start by providing a descriptive title for your meeting. This helps participants easily understand the purpose and topic of the meeting.
Next, select the date and time for your meeting. You can choose to start immediately or specify a future date and time. Zoom also allows you to set recurring meetings, which can be useful for regularly scheduled team meetings or classes.
Under the date and time options, you can enable or disable the “Recurring meeting” feature, set the meeting duration, and choose a time zone. Make sure to double-check the time zone to avoid any confusion with participants from different regions.
Zoom offers various options for meeting scheduling. You can choose to require a meeting password for added security, enable or disable participant video and audio upon joining the meeting, and even enable waiting rooms to control participants’ access to the meeting.
Additionally, you can specify if you want the meeting to be recorded automatically or if you want participants to be able to join the meeting before the host. These options can be adjusted based on your needs and preferences.
Once you have filled in the necessary details and configured your desired settings, click on the “Schedule” button to finalize the meeting scheduling process. This will create a unique meeting ID and generate a meeting invitation that you can send to participants via email or copy to your clipboard for sharing.
It’s important to provide clear instructions and include the meeting details, such as the date, time, meeting ID, and any additional instructions, in the invitation. This ensures that participants can easily join your meeting without any confusion.
With the ability to schedule meetings in Zoom, you can effortlessly plan and organize your virtual gatherings. By sending out detailed invitations, you can ensure that everyone is well-informed and prepared for the meeting, leading to a more productive and engaging discussion.
In the next section, we will explore how to join a meeting and make the most out of Zoom’s controls and features once you’re inside a meeting.
Joining a Meeting
Joining a meeting in Zoom is a straightforward process, whether you’re invited as a participant or have the meeting details handy. There are several ways to join a meeting, depending on your preferred method and the information provided by the host.
If you have received an invitation email, simply click on the meeting link or copy and paste the meeting URL into your web browser. This will open the Zoom application or web portal, prompting you to enter your name to join the meeting. Once you’ve entered your name, click on the “Join” button to join the meeting.
Another way to join a meeting is by using a meeting ID and password, if provided. Open the Zoom application and click on the “Join” button located in the toolbar. In the meeting ID field, enter the unique meeting ID provided by the host. If a password is required, enter it in the password field. Then, click on the “Join” button to access the meeting.
If you’re using the Zoom mobile app, you can join a meeting by tapping on the “Join a Meeting” or “Join” button on the app’s home screen. Enter the meeting ID and password if necessary, and tap on the “Join” button to enter the meeting.
Additionally, Zoom allows you to join a meeting by dialing in via phone. This option is especially useful when you don’t have access to an internet connection or prefer to participate in the meeting audio-only. Simply dial the provided phone number and enter the meeting ID and password when prompted. You’ll be connected to the meeting’s audio and can listen and participate using your phone.
Once you’ve successfully joined a meeting, you’ll have access to a variety of controls and features. The toolbar at the bottom of the Zoom window contains options for turning your video and audio on or off, accessing meeting settings, and more. You can also chat with participants, raise your hand to indicate you have a question or comment, and share your screen if needed.
Remember to follow meeting etiquette and guidelines set by the host. Mute your microphone when you’re not speaking to minimize background noise, and be attentive and engaged throughout the meeting. Utilize Zoom’s features to make the most out of your virtual meeting experience and foster productive collaboration with other participants.
In the next section, we will walk you through the Zoom controls overview, providing an in-depth look at the various options available to you during a meeting.
Zoom Controls Overview
Once you’ve joined a meeting in Zoom, you’ll find a range of controls and features at your disposal to enhance your virtual meeting experience. Familiarizing yourself with these Zoom controls will help you navigate the meeting smoothly and take advantage of the various functionalities available.
At the bottom of the Zoom window, you’ll see the toolbar, which houses the primary controls. Let’s take a closer look at each of these controls:
– Mute/Unmute: This button allows you to mute or unmute your microphone. When muted, other participants cannot hear you, and an icon will appear next to your name indicating that your microphone is off.
– Start/Stop Video: Use this button to start or stop your video feed. When your video is off, other participants will see your profile picture or initials instead.
– Participants: Clicking on this button will open a panel on the right side of the screen, displaying a list of all the participants in the meeting. You can also use this panel to manage participants, offer them permission to speak, and more, depending on your host’s settings.
– Chat: The Chat button opens the chat window, where you can send messages to individuals or the entire group. You can also access options to send files, use emojis, and save the chat log at the end of the meeting.
– Raise Hand: The Raise Hand feature allows you to indicate that you have a question or comment. Click on this button, and an indicator will appear next to your name, notifying the meeting host and other participants.
– Share Screen: This button enables you to share your screen with the meeting participants. You can choose to share your entire screen, a specific application window, or a portion of your screen. You can also access advanced screen sharing options, such as optimizing for video or sharing computer audio.
– Record: The Record button allows you to start or stop recording the meeting. If the host has given you permission, you can record the meeting locally or to the cloud. Note that some organizations may have specific policies about meeting recording, so always check with the host beforehand.
– End Meeting: The End Meeting button terminates the meeting for all participants. Only the host or a co-host has access to this button, ensuring that meetings are ended by authorized individuals.
These controls are just a selection of the main features available in Zoom, and depending on the meeting settings and your role (host, co-host, or participant), you may have access to additional options.
Familiarize yourself with these controls before or during the meeting to make seamless adjustments as needed. Remember to be mindful of meeting etiquette and respectful towards other participants to ensure a smooth and productive virtual gathering.
In the next sections, we will explore specific settings and options to optimize your video and audio experience, share your screen, use Zoom chat, and more.
Adjusting Video Settings
Zoom offers a range of video settings that allow you to customize and improve your video conferencing experience. Whether you’re joining a meeting for work, school, or social purposes, adjusting these settings can help enhance the clarity and quality of your video feed.
To access the video settings, click on the arrow next to the “Start/Stop Video” button located in the toolbar at the bottom of the Zoom window. Here are some essential video settings you can adjust:
– Video Settings: Under the “Video Settings” menu, you can select your desired camera device and adjust the video quality. If you have multiple cameras connected to your device, you can switch between them using this menu. You can also check the box for “Touch up my appearance” if you would like Zoom to apply a light skin-smoothing effect during the video call.
– Video Preview: To ensure your camera is correctly set up and your video feed is working as expected, you can click on the “Video Settings” menu and select “Video Preview.” This will open a window where you can see how you appear on camera and make any necessary adjustments.
– Virtual Background: Zoom allows you to set a virtual background, which replaces the actual background behind you during meetings. To access this feature, click on the arrow next to the “Start/Stop Video” button and select “Choose a Virtual Background.” You can choose from Zoom’s preloaded backgrounds or upload your own image or video. Note that using virtual backgrounds requires a relatively new computer and a green screen for optimal results.
– Hide Non-Video Participants: If you find that your screen is becoming crowded with video feeds, you can select the “Hide Non-Video Participants” option under the “Video Settings” menu. This will hide the video feeds of participants who have not turned on their cameras, giving you a cleaner view of the active participants’ videos.
– Touch-Up My Appearance: If you want to appear more polished during your video meetings, you can enable the “Touch up my appearance” setting found within the “Video Settings” menu. This feature applies a gentle skin-smoothing effect to your video feed, giving you a subtle enhancement.
Experiment with these video settings to find the configuration that works best for you. Keep in mind that your device’s hardware capabilities may determine which settings are available to you.
Now that you have adjusted your video settings, let’s explore the various audio options in Zoom. In the next section, we will cover how to manage your audio settings and ensure clear and crisp audio during your meetings.
Managing Audio Options
Clear and consistent audio is essential for effective communication in Zoom meetings. Whether you’re attending a business conference call, participating in an online class, or catching up with friends, Zoom provides several audio options to ensure optimal sound quality and minimize any potential audio issues.
To manage your audio options in Zoom, start by clicking on the arrow next to the microphone icon in the toolbar at the bottom of the Zoom window. This will open a menu where you can adjust various audio settings. Here are some key audio options you can control:
– Microphone Selection: Under the “Select a Microphone” option, you can choose the microphone you wish to use for your audio input. If you have multiple microphones connected to your device, you can select the appropriate one from the drop-down menu.
– Test Speaker and Microphone: To ensure that your speakers and microphone are working correctly, you can click on the “Test Speaker” and “Test Microphone” options within the audio settings menu. This will allow you to adjust the volume and test the audio quality to make sure you can hear and be heard clearly.
– Join Audio by Computer: By default, Zoom joins audio using your computer’s microphone and speakers. If you want to use a different audio device, such as a headset or external speakers, you can select the “Join Audio by Computer” option and choose the desired audio device from the drop-down menu.
– Enable/Disable Audio: If you need to temporarily mute or unmute your audio during a meeting, you can click on the microphone icon in the toolbar. When your microphone is muted, a red slash or crossed-out microphone icon will be displayed. This is useful when you’re not speaking or if you’re in a noisy environment.
– Audio Settings: Clicking on the “Audio Settings” option within the audio menu will open a window with advanced audio settings. Here, you can adjust your speaker volume, microphone volume, and other audio-related options. You can also test your audio devices, enable automatic suppression of background noise, and choose the audio settings for participants who join the meeting using telephones.
Properly managing your audio options in Zoom is crucial for clear and effective communication during meetings. Make sure to test your audio devices, adjust volumes, and select the appropriate input and output devices to ensure optimal sound quality.
Now that you’ve mastered the video and audio settings in Zoom, let’s explore the next section on screen sharing – a valuable feature that allows you to share presentations, documents, and more with meeting participants.
Sharing Your Screen
Screen sharing is a powerful feature in Zoom that allows you to share your screen with meeting participants. Whether you want to present a slide deck, demonstrate a software application, or collaborate on documents, screen sharing enables seamless and real-time collaboration.
To start sharing your screen in Zoom, click on the “Share Screen” button in the toolbar at the bottom of the Zoom window. This will open a menu with different sharing options. Here are the key steps to successfully share your screen:
– 1. Select the Screen: In the “Basic” tab of the screen sharing menu, you can select one of the screens connected to your computer or choose to share a specific application window. You can also opt to share a portion of your screen by selecting the “Whiteboard” option, which allows you to draw, highlight, and annotate on a blank canvas.
– 2. Share Computer Sound: If you want to share audio from your computer while screen sharing, check the box labeled “Share computer sound” found at the bottom-left corner of the sharing menu. This is particularly useful when you want to share video clips or play audio during your presentation.
– 3. Advanced Sharing Options: Clicking on the “Advanced” tab in the screen sharing menu provides additional options. Here, you can enable or disable the option to show the Zoom toolbar when screen sharing, optimize for full-screen video clip sharing, and choose whether to display participant names on shared screens or not.
Once you’ve chosen your screen or application to share and adjusted the necessary settings, click on the “Share” button. Your screen will now be visible to all meeting participants. The toolbar at the top of the shared screen allows you to control your presentation, switch between different shared screens or applications, and pause or stop screen sharing.
While screen sharing, it’s important to be mindful of the content you have visible on your screen. Make sure to close any unrelated applications or documents that you don’t want to share with participants. Also, be aware of your surroundings and ensure there are no sensitive or private information displayed on your screen.
To end screen sharing, click on the “Stop Share” button located on the floating toolbar or go back to the Zoom window and click on the “Stop Share” button at the top of the screen.
Screen sharing in Zoom provides a collaborative platform, enabling effective presentations, smoother discussions, and increased engagement during meetings. By leveraging this feature, you can enhance your communication and make remote collaborations feel more seamless and interactive.
In the next section, we will explore another notable feature in Zoom – recording meetings. We’ll guide you on how to record your meetings and discuss important considerations in utilizing this functionality.
Recording a Zoom Meeting
Recording your Zoom meetings is a valuable feature that allows you to capture important discussions, presentations, or training sessions for future reference or sharing with those who couldn’t attend. Whether you want to review meeting notes, create an archive, or distribute meeting recordings to participants, Zoom provides a straightforward way to record your meetings.
To start recording a meeting, click on the “Record” button located in the toolbar at the bottom of the Zoom window. A menu will appear with recording options. Here are the different recording options you can choose from:
– Record on this Computer: The “Record on this Computer” option allows you to record the meeting directly to your local device. When selected, Zoom will start recording the audio, video, and any shared screens or applications. Once the recording is complete, Zoom will save the file to the specified location on your computer.
– Record to the Cloud: If your Zoom account has cloud recording enabled, you can choose the “Record to the Cloud” option. When selected, the meeting will be recorded on Zoom’s cloud servers. This option is particularly useful when you have limited storage on your local device or if you want to share the recording with others easily. After the meeting, Zoom will process the recording and make it available for download or sharing.
It’s important to note that not all Zoom accounts have cloud recording enabled, so make sure to check your account settings or contact your organization’s Zoom administrator to verify if this option is available.
During the meeting recording, Zoom will display a red dot in the top-left corner of the window to indicate that the session is being recorded. All participants in the meeting will also receive a notification that the meeting is being recorded. Informing participants about the recording is essential to maintain transparency and comply with privacy regulations or organizational policies.
To stop recording, click on the “Stop Recording” button located in the toolbar. Zoom will stop recording and save the file in the designated location based on the chosen recording option.
After the meeting, you can find the recorded file on your local device or access it through the Zoom web portal if you recorded to the cloud. From there, you can play, share, or download the recording as needed.
Remember to always follow guidelines and policies regarding meeting recordings. Be mindful of any confidential or sensitive information discussed during the meeting and ensure that you have proper consent from participants before making the recording available to others.
In the next section, we will explore another essential feature of Zoom – the chat function. We will cover how to use chat effectively during a meeting and discuss its uses and benefits for communication and collaboration.
Using Zoom Chat
Zoom Chat is a versatile feature that allows meeting participants to communicate via text messages during a Zoom meeting. It offers a convenient way to ask questions, share links, make announcements, or have side conversations without interrupting the flow of the meeting.
To access the chat feature in Zoom, click on the “Chat” button located in the toolbar at the bottom of the Zoom window. This will open the chat panel on the right side of the screen. Here are the key steps and features of Zoom Chat:
– Chat Types: Zoom Chat offers two types of chat: the meeting chat and the private chat. The meeting chat is visible to all participants in the meeting, while the private chat allows you to have one-on-one conversations with specific participants.
– Send Messages: To send a message in the chat, simply click on the chat input box at the bottom of the chat panel, type your message, and press Enter to send. Your message will appear in the chat thread, and other participants can read and respond to it.
– Mention Participants: To ensure that a specific participant receives a notification of your message, you can mention them by typing the “@” symbol followed by their name in the chat. This will highlight the message for that participant, ensuring they don’t miss important information.
– File Sharing: Zoom Chat also allows you to share files with participants. To do so, click on the paperclip icon located at the bottom-left corner of the chat input box. You can then select a file from your computer to share with the group or an individual participant.
– Save Chat: If you want to save a record of the chat conversation for future reference, you can click on the ellipsis (…) icon at the top-right corner of the chat panel. From the dropdown menu, select “Save Chat.” This will save the chat log to your computer, making it accessible even after the meeting ends.
Using the chat function in Zoom adds an extra layer of interaction and collaboration during meetings. It allows participants to share important information, ask questions, and contribute to the discussion in real-time, decreasing the need for interruptions or raising hands to speak.
However, it’s important to be mindful of the chat’s usage during meetings. Avoid unrelated or disruptive messages and use the chat responsibly to maintain a focused and productive meeting environment.
In the next section, we will explore an advanced feature in Zoom – breakout rooms. We will cover how to make use of breakout rooms for group discussions, collaborative activities, and more.
Using Zoom Breakout Rooms
Zoom breakout rooms offer a valuable feature for organizing group discussions, collaborative activities, and team-based exercises during a Zoom meeting. They allow participants to work in smaller groups, enhancing engagement, facilitating in-depth conversations, and fostering teamwork.
To use breakout rooms in Zoom, the meeting host needs to enable this feature in the meeting settings before the meeting starts. Once enabled, the host can create, manage, and assign participants to breakout rooms during the meeting. Here are the key steps to using breakout rooms effectively:
– Create Breakout Rooms: While in a meeting as a host, click on the “Breakout Rooms” button located in the toolbar at the bottom of the Zoom window. This will open the breakout room management panel, where you can create the desired number of breakout rooms.
– Assign Participants: After creating the breakout rooms, you can manually assign participants to each room or allow Zoom to automatically distribute participants evenly. You can also choose to pre-assign participants to specific breakout rooms before the meeting.
– Start Breakout Rooms: Once you’ve assigned participants to the breakout rooms, click on the “Open All Rooms” button to start the breakout room session. Participants will be automatically moved into their assigned rooms.
– Joining Breakout Rooms: As a participant, when the host starts the breakout rooms, you will receive a prompt to join a room. Click on the “Join” button to enter your assigned breakout room. If you’re the host, you can join any breakout room at any time to monitor or participate in the discussions.
– Room Activities: In the breakout rooms, participants can engage in discussions, collaborate on projects, share their screens, use the chat function, and work together just like in a physical meeting room. The host can also broadcast messages or join breakout rooms to provide guidance or answer questions.
– Returning to Main Meeting: At any time, the host can close the breakout rooms and bring all participants back to the main meeting. This can be done manually or with an automated timer that ends the breakout session and brings everyone back together.
Zoom breakout rooms are a powerful tool for fostering collaboration, encouraging participation, and creating a dynamic learning or working environment in virtual meetings. They allow for more focused discussions, increased engagement, and the opportunity for participants to build connections with smaller groups.
However, effective management and clear instructions are crucial for successful breakout room sessions. Hosts should provide clear objectives, set time limits, and ensure all participants understand the purpose and expectations of the breakout activity.
In the next section, we will address common troubleshooting tips and solutions for resolving video issues that may arise during Zoom meetings.
Troubleshooting Zoom Video Issues
While Zoom provides a reliable and user-friendly platform for video conferencing, you may occasionally encounter video issues that can disrupt your meeting experience. Here are some common troubleshooting tips and solutions to address video-related problems in Zoom:
– Check your internet connection: Unstable or slow internet connection can result in poor video quality or frozen frames. Ensure that you have a stable internet connection by connecting to a reliable network or troubleshooting any connectivity issues with your internet service provider.
– Adjust your video settings: Click on the arrow next to the “Start/Stop Video” button and access the video settings menu. Check the selected camera and make sure it’s properly connected and working. You can also adjust the video quality or select the option to optimize for low light conditions.
– Update your video drivers: Outdated or incompatible video drivers may cause video issues in Zoom. Visit the website of your device manufacturer and download the latest video drivers for your specific model. Install the updated drivers and restart your device to ensure they take effect.
– Close other applications: Running multiple resource-intensive applications simultaneously may cause performance issues, including video problems in Zoom. Close any unnecessary applications or processes that may be consuming a significant amount of system resources.
– Switch to a wired connection: If you’re experiencing connectivity issues or unstable video during a wireless connection, consider using a wired Ethernet connection. This can provide a more stable and reliable network connection, minimizing video interruptions or lag.
– Test with a different device: If the video issues persist, try using a different device to join the Zoom meeting. This can help identify if the problem is specific to your device or if it’s a broader issue with the Zoom application or network connection.
– Update Zoom: Ensure that you’re using the latest version of the Zoom application. Zoom regularly releases updates that include bug fixes and performance enhancements. Check for updates in the Zoom application settings or download the latest version from the official Zoom website.
– Restart Zoom and your device: Sometimes, simply restarting the Zoom application or your device can resolve minor video issues. Close the Zoom application, restart your device, and launch Zoom again to see if the problem persists.
If none of these troubleshooting steps resolve your video issues, it may be helpful to reach out to Zoom’s technical support team or refer to Zoom’s online knowledge base for further assistance. They can provide more specific guidance based on your unique situation.
By following these troubleshooting tips, you can address common video issues and ensure a smooth and uninterrupted video conferencing experience in Zoom.
Now that you’re equipped with solutions for video issues, let’s conclude this guide by summarizing the key points discussed and encouraging you to explore Zoom’s features further to make the most out of your virtual meetings.
Conclusion
As we conclude this comprehensive guide on using Zoom video, you’ve learned how to navigate the platform and make the most out of its features. From getting started and scheduling meetings to joining, adjusting video settings, managing audio options, sharing your screen, recording meetings, using Zoom chat, utilizing breakout rooms, and troubleshooting video issues, you now have a solid foundation for successful Zoom meetings.
Zoom has become an essential tool for communication and collaboration, particularly in today’s digital landscape. Whether you’re attending virtual meetings for work, online classes, or connecting with friends and family, Zoom offers a versatile platform that brings people together, regardless of physical distance.
Remember to experiment with Zoom’s features and settings to personalize your virtual meeting experience. Familiarize yourself with the controls, adapt the video and audio settings to your preferences, and make full use of breakout rooms, screen sharing, and the chat function to enhance engagement and collaboration.
In addition, be mindful of video and audio etiquette, ensuring a professional and respectful environment during meetings. Mute your microphone when not speaking, focus on active listening, and engage with other participants to create a productive and interactive atmosphere.
Lastly, stay up to date with Zoom updates and best practices to take advantage of new features and security enhancements. Zoom regularly releases updates and provides resources to help users make the most out of the platform, ensuring a seamless and secure experience.
With the knowledge gained from this guide, you can confidently host or participate in Zoom meetings, knowing how to schedule meetings, join seamlessly, adjust video and audio settings, efficiently use features like screen sharing and chat, and troubleshoot common video issues.
As you continue your Zoom journey, continue exploring and leveraging the platform’s potential for communication, collaboration, and connectivity. Zoom has revolutionized the way we connect, work, and learn remotely, and with its comprehensive set of features, it remains an indispensable tool for virtual meetings and beyond.


