Introduction
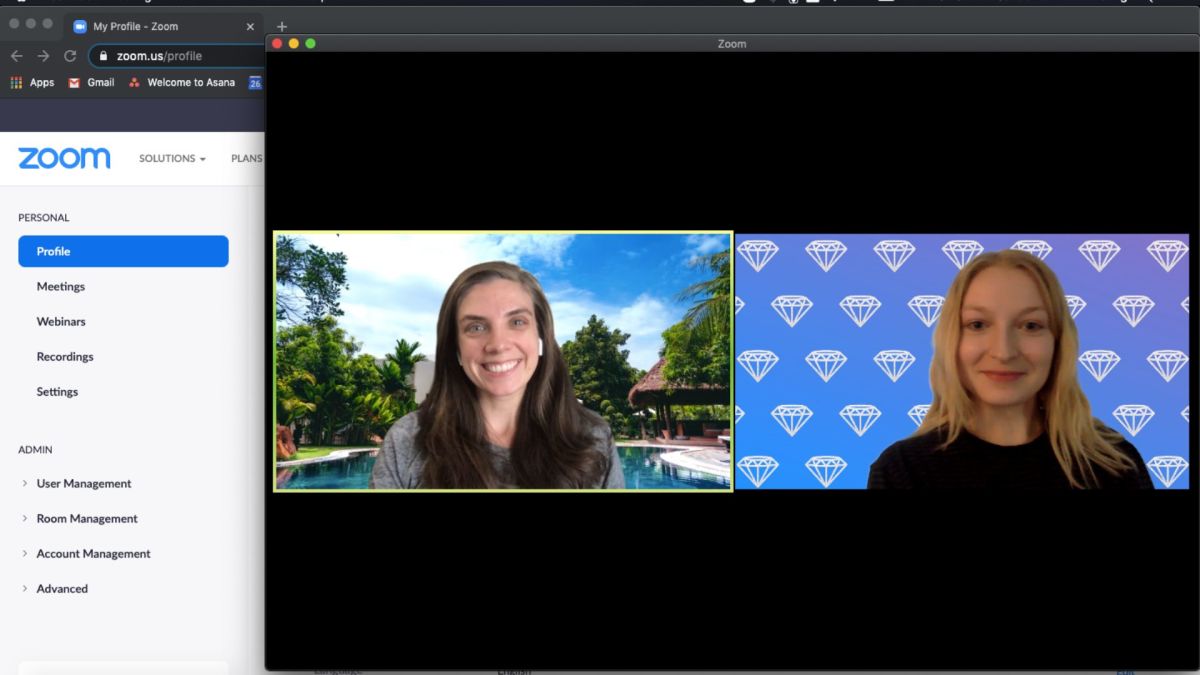
Welcome to the world of virtual backgrounds! With the rise of remote work and video calls, virtual backgrounds have become increasingly popular, offering a fun and creative way to spruce up your Zoom meetings. If you’re tired of the mundane backdrop behind you during virtual meetings, downloading a Zoom background can be a game-changer. Whether you want to transport yourself to stunning landscapes, showcase your favorite movie or TV show, or simply add a touch of personal flair, customizing your Zoom background is a fantastic way to make a lasting impression.
In this guide, we’ll walk you through the step-by-step process of downloading and adding a Zoom background. We’ll cover everything from finding the perfect background image to testing it out in a Zoom meeting. So, grab your creativity and let’s get started!
Before we dive in, it’s important to note that not all devices support the Zoom virtual background feature. To use virtual backgrounds, you need to have a compatible operating system and sufficient system resources. Make sure that your device meets Zoom’s requirements before proceeding. Now, let’s jump into the exciting world of Zoom backgrounds!
Step 1: Find a Zoom Background
The first step in downloading a Zoom background is to find the perfect image that suits your style and preferences. There are several ways you can go about this:
- Zoom Virtual Background Library: Zoom provides a built-in library of virtual backgrounds that you can choose from. Open the Zoom application and navigate to the settings menu. Under the “Virtual Background” tab, you’ll find a selection of pre-loaded backgrounds that you can use. Browse through the library and pick a background that speaks to you.
- Online Image Resources: If you prefer more variety, you can explore online resources that offer a wide range of Zoom backgrounds. Websites like Unsplash, Pexels, and Pixabay provide an extensive collection of high-quality images that are free to use. Simply search for keywords related to your desired background, such as “beach sunset” or “city skyline,” and you’ll be presented with numerous options to choose from.
- Create Your Own Background: For a truly personalized touch, you can create your own Zoom background. Use image editing software like Photoshop or Canva to design a background that reflects your personality, brand, or interests. Consider adding your name or company logo to make it uniquely yours.
- Customize Existing Images: Another option is to modify existing images to fit your preferences. You can take a photo of your favorite spot and enhance it using photo editing tools. Add filters, adjust colors, or resize the image to create a stunning Zoom background that showcases your personal touch.
Remember, the key is to choose a background that aligns with the tone and purpose of your Zoom meetings. Whether you’re aiming for a professional look or a fun and lighthearted atmosphere, finding the right background sets the stage for a successful virtual experience.
Step 2: Download the Background Image
Once you have found the perfect Zoom background, it’s time to download the image to your device. The exact steps may vary slightly depending on the website or source you are using, but the general process remains the same:
- Right-click and Save: If you found the background image through an online resource or search engine, simply right-click on the image, and select “Save Image As” or a similar option. Choose a location on your device where you want to save the image, and click “Save.” The image will now be downloaded to your computer or mobile device.
- Download Button: Some websites have a dedicated download button or icon next to their images. Look for a “Download” button or arrow symbol, click on it, and follow any on-screen instructions. This will initiate the download process and save the image to your specified location.
- Save from Zoom Background Library: If you found the background within Zoom’s virtual background library, you can directly save it to your Zoom settings. Simply click on the image you want to use, and select the “Save” or “Download” option. This will add the background to your saved virtual backgrounds within the Zoom application itself.
- Save from Image Editing Software: If you have created or modified your own Zoom background using image editing software, simply save the final image to your device. Use the “Save” or “Export” function within the software, select your desired format and quality settings, and save the image to a location on your computer or mobile device.
Once the download is complete, make sure to note the location where you saved the image. You’ll need this information in the next steps when adding the Zoom background to your virtual meetings. Now, let’s move on to the exciting part of actually adding the downloaded background to your Zoom sessions!
Step 3: Open the Zoom Application
Before you can add and use your downloaded Zoom background, you need to open the Zoom application on your device. Here’s how you can do it:
- Desktop: If you’re using Zoom on a desktop computer or laptop, you can open the application by double-clicking on the Zoom icon on your desktop or by searching for “Zoom” in your application menu. Once you locate the Zoom application, click on it to launch.
- Mobile: On mobile devices, open your app drawer or home screen and look for the Zoom icon. Tap on the icon to open the Zoom mobile app.
- Web: If you prefer to use Zoom through your web browser, open your preferred browser and navigate to the Zoom website. Sign in to your Zoom account, and you’ll be able to access the necessary settings within the web application.
Make sure you are logged in to your Zoom account before proceeding to the next steps. If you don’t have a Zoom account, you can create one for free by visiting the Zoom website and following the registration process.
Once the Zoom application is open, you’re ready to dive into the virtual background settings and add your downloaded background. In the next step, we’ll guide you through the process of accessing the virtual background settings within the Zoom application, so stay tuned!
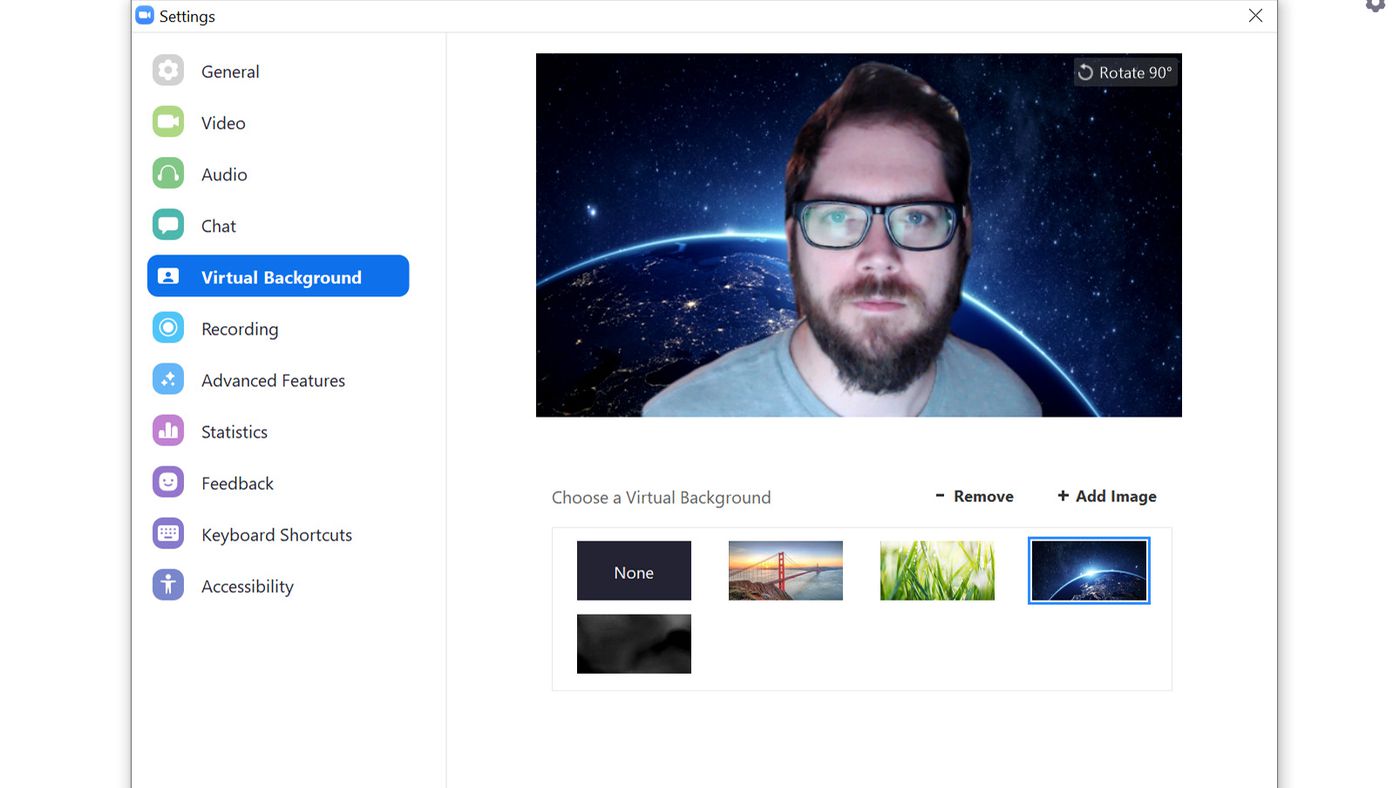
Step 4: Access the Virtual Background Settings
Now that you have the Zoom application open on your device, it’s time to access the virtual background settings. Here’s how you can do it:
- Desktop: If you’re using Zoom on a desktop computer or laptop, click on the “Settings” icon located in the top-right corner of the Zoom application window. A dropdown menu will appear. Select the “Virtual Background” option from the menu.
- Mobile: On mobile devices, tap the three-horizontal-lines menu icon located in the bottom-right corner of the Zoom app. This will open the Zoom menu. From the menu, tap on the “Settings” option, and then select “Virtual Background.”
- Web: If you’re using Zoom through your web browser, click on your profile picture or initials located in the top-right corner of the Zoom web application. From the dropdown menu, select “Settings.” On the left-hand side of the settings page, click on the “Virtual Background” option.
Once you’ve accessed the virtual background settings, you’ll see a window or page dedicated to customizing your Zoom background. This is where you’ll be able to add and manage your downloaded background images. Now, it’s time to move on to the exciting step of adding your downloaded background to the Zoom application!
Keep in mind that the exact layout and appearance of the virtual background settings may vary slightly depending on the version of Zoom you are using. However, the process of adding your background remains the same across all devices and platforms. So, let’s proceed to the next step and bring your Zoom meetings to life with a stunning background!
Step 5: Add the Downloaded Background
With the virtual background settings open in the Zoom application, it’s time to add your downloaded background and make it available for your Zoom meetings. Here’s how you can do it:
- Click on the ‘+’ Icon: Within the virtual background settings, you will find an option to add a new background. Look for a symbol like a plus (+) sign or an “Add Image” button. Click on this icon to open the file selection window.
- Select the Downloaded Image: In the file selection window, navigate to the location where you saved your downloaded background image. Once you find it, click on the image file to select it, and then click on the “Open” or “Choose” button (the exact wording may vary depending on your device).
- Adjust Settings (Optional): Zoom provides some additional settings to fine-tune your virtual background. You can choose to enable or disable the “Mirror my video” option which flips your background horizontally. You can also experiment with the “I have a green screen” option if you have a green screen setup. These settings are optional and can enhance the appearance of your background, but they are not required.
Once you have followed these steps, your downloaded background will be added to your Zoom virtual background collection. You can now select and use this background in your Zoom meetings and video calls.
Remember to preview your background to ensure it looks as intended before joining any important meetings. You can do this by selecting the background within the virtual background settings and observing how it appears in the preview window.
Congratulations! You have successfully added your downloaded background to the Zoom application. Now, let’s move on to the final step where you’ll test out your new background in a Zoom meeting.
Step 6: Test the Background
Now that you have added your downloaded background to the Zoom application, it’s time to test it out and ensure everything looks perfect before your next Zoom meeting. Here’s how you can test your background:
- Join a Test Meeting: Open the Zoom application and click on the “New Meeting” or “Join” button to start a test meeting. This will allow you to check how your background appears in a live video call scenario.
- Enable Video: In the Zoom meeting, make sure your video is enabled. You can do this by clicking on the “Start Video” or “Turn On Video” button located at the bottom of the Zoom meeting window.
- Select the Background: Once your video is enabled, click on the “^” arrow icon located next to the “Stop Video” button. From the dropdown menu, select “Choose Virtual Background” or a similar option.
- Select Your Downloaded Background: In the virtual background settings, choose your downloaded background from the list of available backgrounds. Once you select it, your video feed will now appear with the chosen background.
- Move and Adjust: While testing the background, you can move, resize, and adjust your video frame to ensure the background aligns perfectly. Use the on-screen controls or drag and resize your video feed window as needed.
- Check for Quality and Appearance: Pay attention to the quality and appearance of your background during the test meeting. Make sure it looks crisp, well-aligned, and doesn’t cause any visual artifacts or distractions.
- Test Different Lighting Conditions: Occasionally, the lighting conditions in your room may affect how the background appears. Therefore, it’s a good idea to test your background in different lighting conditions to ensure it maintains its desired look.
By testing your background in a mock meeting, you can quickly identify any issues or adjustments that need to be made. Take this opportunity to make any necessary refinements to achieve the desired result.
Congratulations! You have successfully tested your downloaded background in a Zoom meeting. Now you are ready to impress your colleagues, friends, and family with a professional, fun, or personalized backdrop in your virtual meetings!
Remember to select and apply your background before joining any actual Zoom meetings. You can access the virtual background settings and choose your desired background following the same steps we discussed earlier. Enjoy your new virtual background experience!
Conclusion
Customizing your Zoom background is a simple yet effective way to elevate your video meetings and add a touch of personalization. By following the steps outlined in this guide, you can easily download and add a background that suits your style and preferences. Remember, finding the right background sets the tone for your meetings, whether you want to project a professional image or inject some fun into the conversation.
Start by finding a Zoom background that resonates with you. You can choose from Zoom’s built-in library, explore online image resources, create your own background, or modify existing images to fit your taste. Once you have the perfect background, download it to your device and make note of its location.
Open the Zoom application and access the virtual background settings. Add your downloaded background by clicking on the “+” icon and selecting the image file. Take the time to adjust the settings if needed, such as enabling mirroring or utilizing a green screen setup, to enhance the appearance of your background.
With your background successfully added, test it out in a mock Zoom meeting. Join a test meeting, enable your video, and select your downloaded background from the virtual background settings. Pay close attention to the quality, alignment, and overall appearance of your background to ensure it meets your expectations.
Now that you’ve gone through the process, you’re ready to impress your colleagues, friends, and family with a customized Zoom background. Remember to select and apply your desired background before joining any actual Zoom meetings to create a visually engaging and memorable video call experience. Enjoy exploring the world of virtual backgrounds and make your Zoom meetings truly stand out!