Introduction
Welcome to this tutorial on how to zoom in on iMovie. iMovie is a popular video editing software that offers a range of tools and features to help you create professional-looking videos. One such tool is the zoom functionality, which allows you to magnify specific parts of your video for added emphasis or to highlight important details.
Whether you want to zoom in on a person’s face, a specific object, or a particular section of your video, iMovie’s zoom tool is a simple yet powerful tool that can help you achieve the desired effect. In this guide, we will walk you through the step-by-step process of using the zoom tool in iMovie.
Before we dive into the details, it’s important to note that iMovie is only available for macOS and iOS devices. So, if you’re using a different operating system, you may need to explore alternative video editing software. However, if you have access to iMovie, let’s proceed and learn how to zoom in on your videos with ease.
In the following sections, we will cover everything you need to know, from importing your video clips to iMovie to applying and adjusting the zoom effect. By the end of this tutorial, you will have a thorough understanding of how to use the zoom tool in iMovie and be able to create captivating videos that engage your viewers.
So, without further ado, let’s get started with the first step: importing your video clips into iMovie.
Understanding the Zoom Tool in iMovie
The zoom tool in iMovie allows you to magnify specific parts of your video, creating a visually captivating effect. It is particularly useful when you want to draw attention to a certain area, highlight important details, or add a dramatic touch to your videos.
When you apply the zoom effect in iMovie, the software automatically adjusts the size and position of the video frame to create the zoomed-in effect. This means that you don’t need any additional equipment or advanced editing skills to achieve this effect.
It’s worth mentioning that the zoom tool in iMovie works by enlarging the existing video frame. This means that you may experience a slight reduction in video quality when zooming in too far. To avoid this, it’s recommended to use the zoom tool sparingly and make slight adjustments to enhance the viewing experience without compromising on video clarity.
In addition to zooming in, iMovie also offers the option to zoom out from a specific area. This can be useful if you want to create a dynamic transition or reveal a wider perspective in your video.
By understanding the capabilities and limitations of the zoom tool in iMovie, you’ll be able to use this feature effectively and unleash your creativity in video editing. Now, let’s move on to the practical steps of how to zoom in on your video clips in iMovie.
Step 1: Importing the Video Clips to iMovie
Before you can begin adding the zoom effect to your video clips in iMovie, you need to import the footage into the software. Follow these steps to import your video clips:
- Launch iMovie on your macOS or iOS device.
- Create a new project or open an existing one where you want to add the zoom effect.
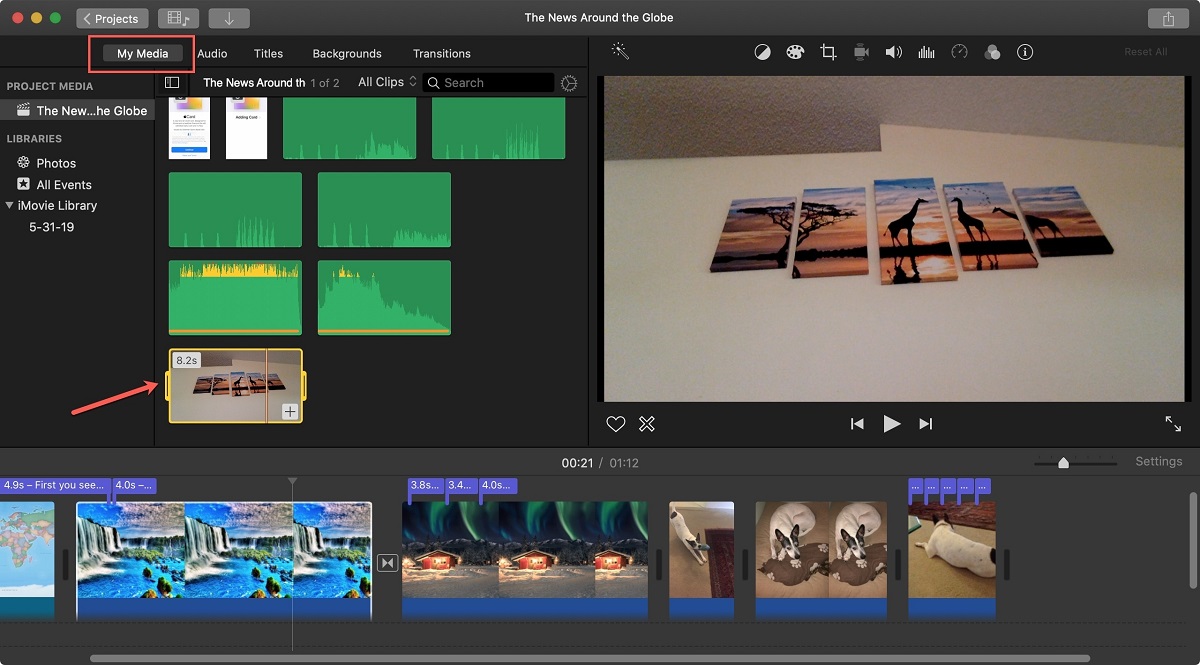
- In the iMovie interface, click on the “Import Media” button to open the import options.
- Select the location where your video clips are stored, such as your computer’s hard drive or an external storage device.
- Browse through the folders and locate the video clips you want to import.
- Select the desired video clips and click on the “Import Selected” button to begin importing them into iMovie.
- Wait for iMovie to finish importing the video clips. The duration of this process may vary depending on the size and number of video clips being imported.
- Once the import is complete, you will see the imported video clips appear in the iMovie project library.
Make sure to organize your video clips in the project library to easily access and work with them during the editing process. You can create folders, rename clips, and rearrange them as needed.
With your video clips successfully imported into iMovie, you’re now ready to proceed to the next step: opening the iMovie project where you want to apply the zoom effect.
Step 2: Opening the iMovie Project
After importing your video clips into iMovie, the next step is to open the iMovie project where you want to apply the zoom effect. Here’s how you can open your project in iMovie:
- Launch iMovie on your macOS or iOS device.
- If you have multiple projects, you will see them listed in the iMovie interface. Click on the project you want to work on, or create a new project if you haven’t done so already.
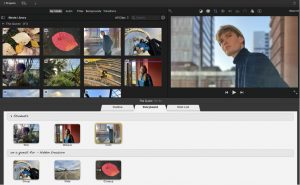
- If you’re opening an existing project, iMovie will load the project, and you will see the timeline editor and preview window.
- If you’re creating a new project, provide a project name and other details as prompted by iMovie.
- Once your project is opened, you can start adding the zoom effect to your video clips.
It’s important to note that iMovie allows you to have multiple projects at the same time. This means you can work on different videos simultaneously and switch between projects using the project library.
If you’re new to iMovie, take some time to explore the various features and options available in the software. Familiarize yourself with the timeline editor, preview window, and other tools that will help you edit your videos effectively.
With your project open and ready to go, let’s move on to the next step: accessing the zoom tool in iMovie.
Step 3: Accessing the Zoom Tool
Now that you have your iMovie project open, it’s time to access the zoom tool, which will allow you to apply the desired zoom effect to your video clips. Follow these steps to access the zoom tool:
- In the iMovie interface, locate the timeline editor at the bottom of the screen. This is where you will see a visual representation of your video clips.
- Select the video clip to which you want to apply the zoom effect. You can do this by clicking on the clip in the timeline editor.
- Once the video clip is selected, you will notice a series of icons and controls appear above the timeline editor.
- Look for the “Cropping” icon, which resembles a square divided into four smaller squares. Click on this icon to access the cropping and zoom options.
- After clicking on the “Cropping” icon, a drop-down menu will appear. Here, you will find various cropping and zooming options.
- Select the “Zoom” option from the drop-down menu to enable the zoom tool for the selected video clip.
By following these steps, you can easily access the zoom tool in iMovie and get ready to apply the zoom effect to your video clips. With the zoom tool enabled, you will have control over how much you want to zoom in or zoom out on specific areas of your video.
Keep in mind that iMovie allows you to apply different zoom settings to different sections of a single video clip. This gives you the flexibility to create dynamic and engaging visual effects throughout your video.
Now that the zoom tool is ready to use, let’s move on to the next step: applying the zoom effect to your selected video clip.
Step 4: Applying the Zoom Effect
With the zoom tool enabled, you can now apply the zoom effect to your selected video clip in iMovie. Follow these steps to apply the zoom effect:
- In the iMovie interface, locate the timeline editor where your selected video clip is displayed.
- Select the video clip by clicking on it in the timeline editor.
- Once the video clip is selected, click on the “Cropping” icon above the timeline editor.
- In the drop-down menu that appears, select the “Zoom” option.
- You will now see a blue box overlay on top of the video clip in the timeline editor.
- Click and drag the blue box to position it over the area of the video clip that you want to zoom in on.
- Resize the blue box by clicking and dragging its edges to adjust the zoom area as desired.
As you adjust the size and position of the blue box, you will see a real-time preview of how the zoom effect will appear on the video clip. This allows you to fine-tune the zoom area and achieve the desired visual effect.
Keep in mind that iMovie allows you to add multiple zoom areas to a single video clip. This means you can apply different zoom settings to different sections of the video, creating engaging and dynamic visual effects.
With the zoom effect applied to the selected video clip, you’re one step closer to creating a visually captivating video in iMovie. In the next step, we will explore how to adjust the zoom effect to achieve the desired result.
Step 5: Adjusting the Zoom Effect
After applying the zoom effect to your video clip in iMovie, you may find the need to adjust the zoom settings to achieve the desired result. iMovie offers a range of options to fine-tune the zoom effect and customize it according to your preferences. Follow these steps to adjust the zoom effect:
- Select the video clip with the applied zoom effect in the timeline editor.
- Click on the “Cropping” icon above the timeline editor to access the zoom and cropping options.
- In the drop-down menu, select the “Zoom” option.
- You will see the blue box overlay on top of the video clip, indicating the zoom area.
- To resize the zoom area, click and drag the edges of the blue box.
- To reposition the zoom area, click and drag the blue box to a different location.
- Use the handles on the corners of the blue box to rotate the zoom area if needed.
- To adjust the zoom level, use the Zoom slider located below the video preview window.
By experimenting with different zoom levels, sizes, and positions, you can achieve the desired effect for your video clip. Keep in mind that the zoom effect should enhance your video and not distract the viewers, so aim for a balance that adds visual interest without overpowering the content.
In addition to adjusting the zoom settings, iMovie also allows you to apply other effects and enhancements to your video clips. You can explore options like color correction, filters, transitions, and more to further enhance your video’s impact.
Once you’re satisfied with the zoom effect and any other adjustments you’ve made, it’s time to preview the zoomed video to ensure that it meets your expectations. This is covered in the next step.
Step 6: Previewing the Zoomed Video
Before finalizing your video project in iMovie, it’s essential to preview the zoomed video to ensure that the applied zoom effect is to your satisfaction. Previewing the video allows you to assess the timing, zoom levels, and overall visual impact of the zoom effect. Follow these steps to preview the zoomed video:
- In the timeline editor, locate the zoomed video clip that you want to preview.
- Position the playhead, represented by a vertical white line, at the beginning of the video clip.
- Click on the play button located above the timeline editor to start playing the video.
- Observe the zoom effect as the video plays, paying attention to the timing and visual impact of the zoomed-in areas.
- If you’re not satisfied with the results, you can make further adjustments to the zoom settings as outlined in Step 5.
- Repeat the process of previewing the video after making any adjustments to ensure the desired outcome.
Previewing the zoomed video allows you to evaluate the overall effect and make any necessary refinements before exporting the final video. It’s crucial to ensure that the zoom effect enhances the visual storytelling and emphasizes the desired elements without compromising the overall quality of the video.
If you notice any issues or inconsistencies during the preview, take the time to make the necessary adjustments to perfect the zoom effect and ensure a visually captivating result.
Once you’re satisfied with the zoomed video and ready to move forward, it’s time to export your final video. We’ll cover this in the next step.
Step 7: Exporting the Final Video
After applying and previewing the zoom effect on your video clip in iMovie, it’s time to export the final video and share it with others. Exporting your video ensures that it can be played on various devices and platforms. Here’s how you can export your final video in iMovie:
- Ensure that you’re in the project view of iMovie and have the desired project open.
- Click on the “File” tab in the top menu and select “Share” from the drop-down menu.
- In the “Share” options, choose the format in which you want to export your video. For example, you can select “File” to save it as a video file.
- Specify the destination folder where you want to save the exported video.
- Select the desired video quality and file settings for the exported video.
- Optionally, you can customize advanced settings such as video codec, resolution, and audio settings if needed.
- Click on the “Next” or “Save” button to start the exporting process.
- Wait for iMovie to export and save the final video file to the specified location.
Once the export process is complete, you will have a video file that can be easily shared or uploaded to various platforms, such as social media, video hosting sites, or your own website.
Keep in mind that the exporting process may take some time, depending on the length and complexity of your video project, as well as your computer’s processing power. It’s recommended to allocate sufficient time and ensure that your computer is connected to a power source during the export process.
Congratulations! You have successfully learned how to zoom in on iMovie and export your final video. Now you can share your creative video with the world and impress your audience with the captivating zoom effects you’ve applied.
Conclusion
Learning how to zoom in on iMovie opens up a world of possibilities for enhancing your videos and adding captivating visual effects. The zoom tool in iMovie allows you to magnify specific areas of your video, drawing attention to important details or creating a dramatic impact. By following the steps outlined in this tutorial, you have gained the knowledge and skills to apply the zoom effect to your video clips in iMovie.
Remember, the key to creating effective zoom effects is to strike a balance. Use the zoom tool sparingly and ensure that it enhances your video rather than overpowering it. Experiment with different zoom levels, sizes, and positions to achieve the desired visual impact. Additionally, take the time to preview your video to fine-tune the zoom effect and make any necessary adjustments.
iMovie offers a range of other features and effects that you can explore to enhance your videos further. Utilize the various tools available, such as color correction, filters, transitions, and more, to take your video editing skills to the next level.
Now that you have successfully applied the zoom effect and completed your video editing in iMovie, it’s time to export the final video and share it with others. Exporting your video ensures that it can be played on different devices and platforms, allowing you to reach a wider audience.
So, go ahead and start creating captivating videos with zoom effects using iMovie. Let your creativity shine through and engage your viewers with visually stunning productions. With each project, you’ll continue to develop your skills and create videos that leave a lasting impact.
Happy editing!