Introduction
Welcome to this tutorial on how to add subtitles in iMovie on your iPhone. Subtitles are a great way to make your videos more accessible to a wider audience by providing a text-based representation of the dialogue or narration. Whether you’re creating educational content, vlogs, or even short films, adding subtitles can greatly enhance the viewing experience and make your videos more inclusive.
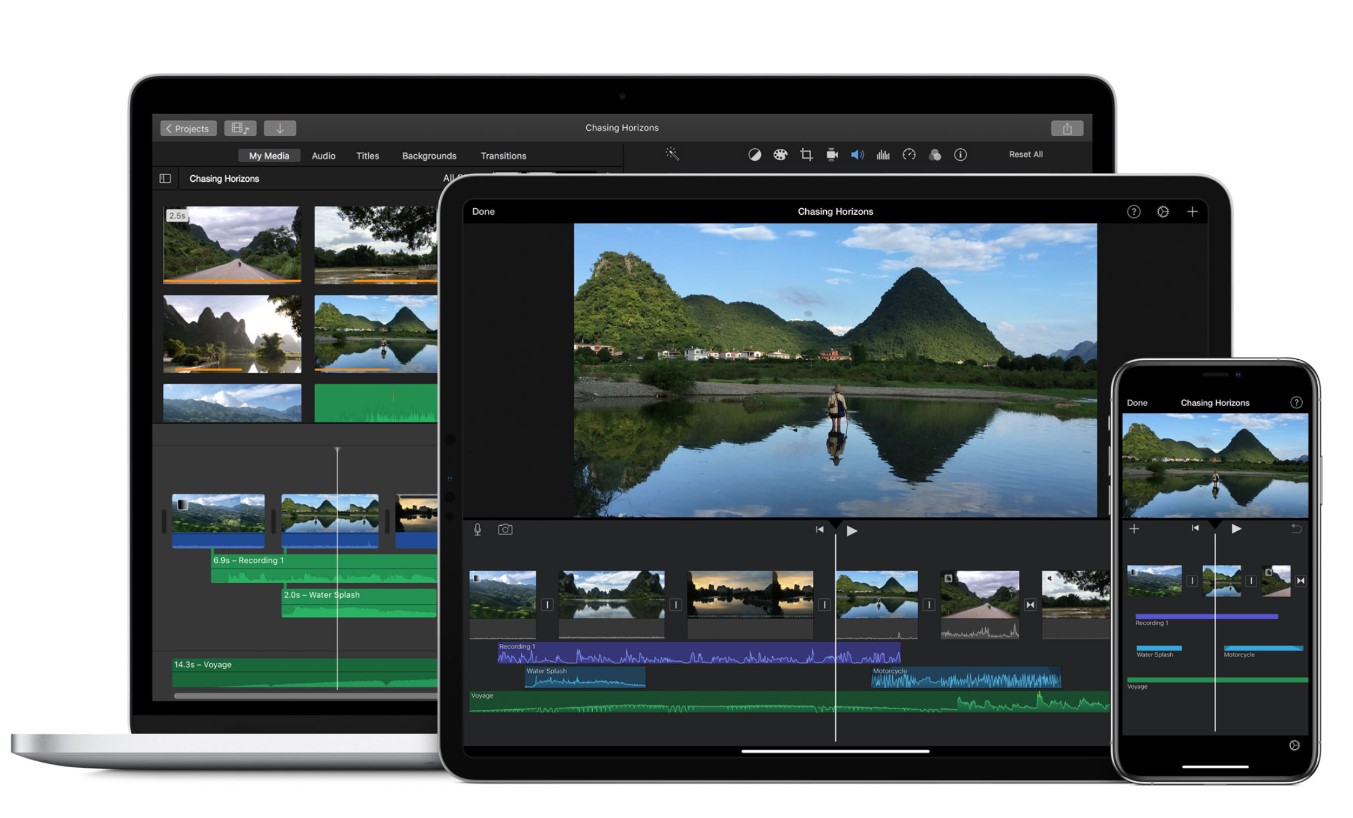
iMovie, Apple’s intuitive and feature-rich video editing app, offers a straightforward way to add subtitles to your videos. With just a few simple steps, you can import your video, choose a subtitle style, add your desired text, customize the appearance, and adjust the timing to synchronize the subtitles with the audio. Whether you want to translate your video into different languages, cater to viewers with hearing impairments, or simply provide subtitles for clarity, iMovie has got you covered.
In this tutorial, we will guide you through the process of adding subtitles in iMovie on your iPhone. Even if you’re new to video editing or iMovie, don’t worry! We’ll provide step-by-step instructions and helpful tips to ensure you can easily follow along and achieve professional-looking results.
Before we delve into the steps, it’s important to note that iMovie is only available for iOS devices. If you’re using an Android device, there are alternative apps and methods you can explore to add subtitles to your videos. Additionally, make sure you have the latest version of iMovie installed on your iPhone to access all the necessary features and functionality.
Now that we’ve covered the basics, let’s dive into the process of adding subtitles in iMovie on your iPhone. Get ready to take your videos to the next level and make them more accessible and engaging for your audience!
Step 1: Open iMovie on your iPhone
The first step to adding subtitles to your video is to open iMovie on your iPhone. If you haven’t already installed the app, you can download it from the App Store. Once iMovie is installed on your device, follow these simple steps to open it:
- Locate the iMovie app icon on your iPhone’s home screen. It’s a clapperboard icon with a star in the center.
- Tap on the iMovie app icon to launch the application.
- Wait for the app to load, and you will be greeted with the iMovie home screen.
Once you’ve successfully opened iMovie, you’re ready to import your video and start adding subtitles to it. iMovie provides a user-friendly interface that makes the process seamless, even for those new to video editing.
Before we proceed to the next step, it’s worth mentioning that iMovie allows you to create new projects as well as work on existing ones. In this tutorial, we’ll assume that you’re starting a new project. However, if you have an existing project you’d like to add subtitles to, make sure to open that project instead.
Now that we have iMovie up and running, let’s move on to the next step, where we’ll import your video into the app.
Step 2: Import your video
Now that you have iMovie open on your iPhone, it’s time to import the video you want to add subtitles to. Whether you’ve recorded a new video using your iPhone’s camera or you have an existing video in your photo library, iMovie makes it easy to import and access your video files. Follow these steps to import your video:
- On the iMovie home screen, tap on the “+” button located at the top-right corner of the screen. This will open the Create Project menu.
- From the Create Project menu, select the “Movie” option. This will create a new project for your video.
- In the New Movie screen, you’ll see two tabs at the top: Media and Projects. Tap on the “Media” tab to access your media library.
- Navigate through your media library to find the video you want to import. You can choose from videos stored in your photo library, iCloud Drive, or other connected storage locations.
- Tap on the video you want to import, and iMovie will automatically add it to your project timeline.
After importing the video, you’ll be taken to the main editing interface in iMovie, where you can perform various editing tasks, including adding subtitles. You’ll also notice that your imported video is represented as a clip on the project timeline, ready for further edits and enhancements.
It’s important to note that iMovie also allows you to capture and import videos directly from within the app. If you want to record a new video using iMovie, simply tap on the camera icon within the Media tab and follow the prompts to start recording. This feature is especially useful if you want to add subtitles while shooting your video.
Now that your video is successfully imported into iMovie, let’s move on to the next step and choose a subtitle style that suits your video’s aesthetic.
Step 3: Choose a subtitle style
Once you have imported your video into iMovie, the next step is to choose a subtitle style that matches your video’s aesthetic and enhances its overall look. iMovie offers a range of pre-designed subtitle styles, each with its own unique typography, color schemes, and animations. Follow these steps to choose a subtitle style:
- Tap on the video clip in your project timeline to select it. This will bring up the Video Settings menu at the bottom of the screen.
- In the Video Settings menu, tap on the “T” icon, which represents the Text tool. This will open the Text toolbar.
- From the Text toolbar, tap on the “Style” button. This will display a list of available subtitle styles.
- Browse through the different styles and select the one that best suits your video. You can tap on each style to preview how it looks on your video clip.
- Once you’ve chosen a style, tap on the checkmark icon to apply it to your video clip.
It’s worth noting that iMovie also allows you to customize the subtitle style further by adjusting the font, size, color, and position of the subtitles. If you want to add your own personal touch or match the subtitles to your video’s branding, you can explore these customization options within the Text toolbar.
Remember, the subtitle style you choose should complement your video’s content and make it easier for viewers to read and understand the subtitles. It’s important to strike a balance between aesthetics and readability to ensure an enjoyable viewing experience for your audience.
Now that you have selected a subtitle style for your video, let’s proceed to the next step and add the desired subtitles to your video clip.
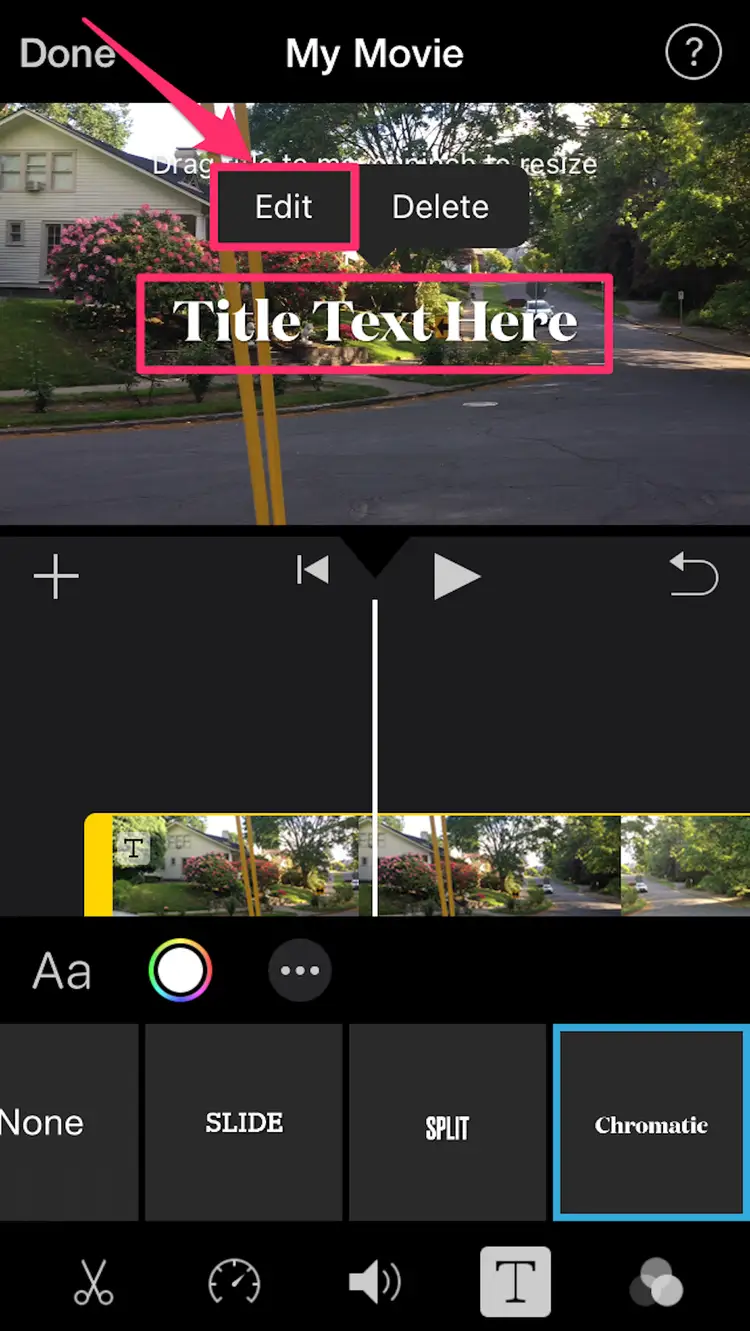
Step 4: Add subtitles to your video
Now that you have chosen a subtitle style for your video, it’s time to add the actual subtitles to your video clip. iMovie provides a user-friendly interface that allows you to easily input and edit the text for your subtitles. Follow these steps to add subtitles to your video:
- Select the video clip in your project timeline by tapping on it.
- Tap on the Text tool icon (“T”) in the Video Settings menu at the bottom of the screen.
- In the Text toolbar, tap on the “+” icon to add a new text box to the video clip.
- Type in the desired text for your subtitle in the text box. You can add multiple text boxes to include different subtitles at different timings.
- Position and resize the text box on the video clip to ensure the subtitle is displayed in the desired location.
It’s important to note that iMovie allows you to add multiple subtitles to your video clip at different timings. This is particularly useful when you have dialogue or narration occurring at various points throughout the video.
As you add subtitles, you may also want to consider the duration and pace of each subtitle. iMovie allows you to adjust the display time of each subtitle to match the audio or video timeline. You can easily extend or shorten the duration of each subtitle by dragging the edges of the text box in the video clip.
Additionally, iMovie offers various text editing options to enhance the subtitles. You can change the font style, size, color, and alignment of the text to ensure readability and visual appeal. Experiment with different options to find the best combination that complements your video’s content and subtitle style.
Now that you have added the desired subtitles to your video clip, it’s time to move on to the next step and customize the appearance of your subtitles to make them visually appealing and engaging.
Step 5: Customize your subtitles
After adding subtitles to your video clip in iMovie, you have the option to customize their appearance to make them visually appealing and ensure they align with the style and theme of your video. iMovie provides a range of customization options to help you achieve the desired look for your subtitles. Follow these steps to customize your subtitles:
- Select the video clip with the subtitles by tapping on it in the project timeline.
- Tap on the Text tool icon (“T”) in the Video Settings menu at the bottom of the screen.
- In the Text toolbar, tap on the text box that contains the subtitle you want to customize.
- Tap on the Style button in the Text toolbar to access various customization options.
- From here, you can adjust the font style, size, color, and alignment of the subtitle text. You can also add effects like drop shadow or outline to make the text stand out.
- Explore the available options and experiment with different combinations to find the style that best suits your video.
Remember, while customizing the appearance of your subtitles, it’s crucial to maintain readability and clarity. Choose a font size and color that contrast well with the video background, ensuring that the subtitles are easily readable by viewers. It’s also recommended to avoid using excessively flashy or distracting styles that might overshadow the main content of the video.
In addition to adjusting the appearance of the subtitles, iMovie allows you to apply animations to make the text dynamically enter or exit the screen. These subtle animations can make the subtitles more engaging and add a polished touch to your video. You can explore the available animation options within the Text toolbar and apply them to each subtitle text box as desired.
By customizing your subtitles, you can create a visually appealing and cohesive look for your video, allowing the subtitles to seamlessly integrate with the overall visual aesthetic.
Now that you have customized the appearance of your subtitles, let’s move on to the next step and adjust the timing to ensure that the subtitles are synchronized correctly with the audio of your video clip.
Step 6: Adjust subtitle timing
After adding and customizing the appearance of your subtitles in iMovie, it’s important to ensure that the timing of the subtitles matches the audio or dialogue in your video clip. Proper synchronization of the subtitles enhances the viewer’s experience and ensures that the text is displayed at the right moment. Follow these steps to adjust the timing of your subtitles:
- Select the video clip with the subtitles by tapping on it in the project timeline.
- Tap on the Text tool icon (“T”) in the Video Settings menu at the bottom of the screen.
- In the Text toolbar, tap on the text box containing the subtitle you want to adjust the timing for.
- Drag the text box along the timeline to the desired position where the subtitle should appear.
- To fine-tune the timing, you can split the video clip at specific points and move the subtitle text boxes accordingly.
iMovie also allows you to adjust the duration of each subtitle by dragging the edges of the text box. This feature can be particularly useful if you need to shorten or extend the display time of a subtitle to match the audio or video timeline more accurately.
While adjusting the subtitle timing, be mindful of the pace and flow of the video. Ensure that the subtitles are displayed long enough for viewers to comfortably read them, but not linger on the screen for an excessive amount of time. The goal is to maintain a natural and seamless viewing experience.
It’s important to preview your video after adjusting the subtitle timing to ensure that the subtitles are synchronized correctly with the audio or dialogue. This step will allow you to make any necessary adjustments or refinements to achieve accurate subtitle placement and timing.
Now that you have adjusted the timing of your subtitles, let’s move on to the final step in the process, previewing and saving your video with subtitles.
Step 7: Preview and save your video with subtitles
After adding, customizing, and adjusting the timing of your subtitles in iMovie, it’s time to preview your video and ensure that the subtitles are displayed correctly and enhance the overall viewing experience. Additionally, you’ll learn how to save your video with the subtitles embedded. Follow these steps to preview and save your video with subtitles:
- Tap on the Play button located at the bottom of the iMovie interface to preview your video with the added subtitles.
- As the video plays, make sure to closely observe the subtitles’ placement, appearance, and timing to ensure they align perfectly with the audio or dialogue. If any adjustments are needed, go back to the relevant steps to make the necessary modifications.
- If you’re satisfied with how the subtitles look and are synchronized with the video, tap on the Done button to exit the preview mode.
- Now, to save your video with the subtitles, tap on the Share button located at the top-right corner of the screen.
- From the Share menu, you have multiple options for saving and sharing your video. Select the desired destination or platform, such as saving it to your iPhone’s Camera Roll, sharing it directly on social media, or sending it via email.
- Follow the prompts or instructions to complete the saving or sharing process. Make sure to choose the appropriate file format and quality settings based on your preferences and requirements.
Once the saving or sharing process is complete, you now have a video with embedded subtitles ready to be viewed by your audience. Whether you’re sharing it on social media platforms, uploading it to a video hosting platform, or simply keeping it for personal use, the subtitles will enhance the accessibility and engagement of your video.
It’s important to note that iMovie allows you to further edit or modify your video even after saving it with subtitles. If you realize that you need to make changes or updates, you can always re-open your project in iMovie and make the necessary adjustments without losing the applied subtitles.
Congratulations! You have successfully added subtitles to your video using iMovie on your iPhone. By following these steps, you’ve made your video more accessible, engaging, and inclusive. Keep exploring and experimenting with different features and techniques to unleash your creativity and create compelling videos.
Conclusion
Adding subtitles to your videos not only enhances accessibility but also improves the overall viewing experience for your audience. With iMovie on your iPhone, the process of adding subtitles has become easier than ever. By following the steps outlined in this tutorial, you can create professional-looking videos with synchronized and visually appealing subtitles.
We started by opening iMovie on your iPhone and importing your video into the app. From there, we moved on to choosing a subtitle style that fits your video’s aesthetic. Next, we added the desired subtitles and customized their appearance to ensure readability and visual appeal. We then adjusted the timing of the subtitles to synchronize them with the audio or dialogue in the video. Finally, we previewed the video with subtitles and saved it with the embedded subtitles.
iMovie provides a user-friendly interface with a range of customization options, allowing you to create subtitles that align with your video’s content and style. Remember to keep the subtitles clear, readable, and visually appealing while maintaining synchronization with the audio or dialogue.
By adding subtitles to your videos, you make them more inclusive and accessible to a wider audience. Subtitles enable viewers with hearing impairments to understand the content and also help non-native speakers follow along. Moreover, subtitles can improve comprehension and engagement even for viewers who prefer reading or have challenges with audio clarity.
Now that you have the knowledge and skills to add subtitles in iMovie on your iPhone, unleash your creativity and experiment with different subtitle styles and techniques. Use subtitles to enhance the storytelling in your videos, deliver tutorial content effectively, or make your vlogs and short films more engaging for viewers.
Remember to practice and refine your subtitle techniques as you gain more experience. With time, you’ll be able to create seamless and captivating videos that cater to a diverse audience. So, go ahead and start adding subtitles to elevate the impact of your videos and leave a lasting impression on your viewers.