Introduction
Subtitles play a vital role in enhancing the accessibility and overall viewing experience of videos. They ensure that individuals with hearing impairments can follow along and understand the content presented. While the default color of subtitles on YouTube is white, some viewers may prefer different colors for better visibility or personal preferences.
This article will explore various methods you can use to change the color of subtitles on YouTube. Whether you want to make the text more prominent or match it with the video’s theme, these methods will help you customize the subtitle color to suit your needs.
The methods we will cover include using YouTube’s caption settings, customizing subtitle color with browser extensions, changing subtitle color with browser developer tools, and editing subtitle color in video editing software. Each method offers its own advantages, depending on your level of technical expertise and the flexibility you desire.
Before we delve into these methods, it’s important to note that not all methods may work on every device or browser. Therefore, we recommend trying different methods to find the one that works best for you.
Let’s dive into the various methods and explore how you can change the color of subtitles on YouTube!
Method 1: Using YouTube Caption Settings
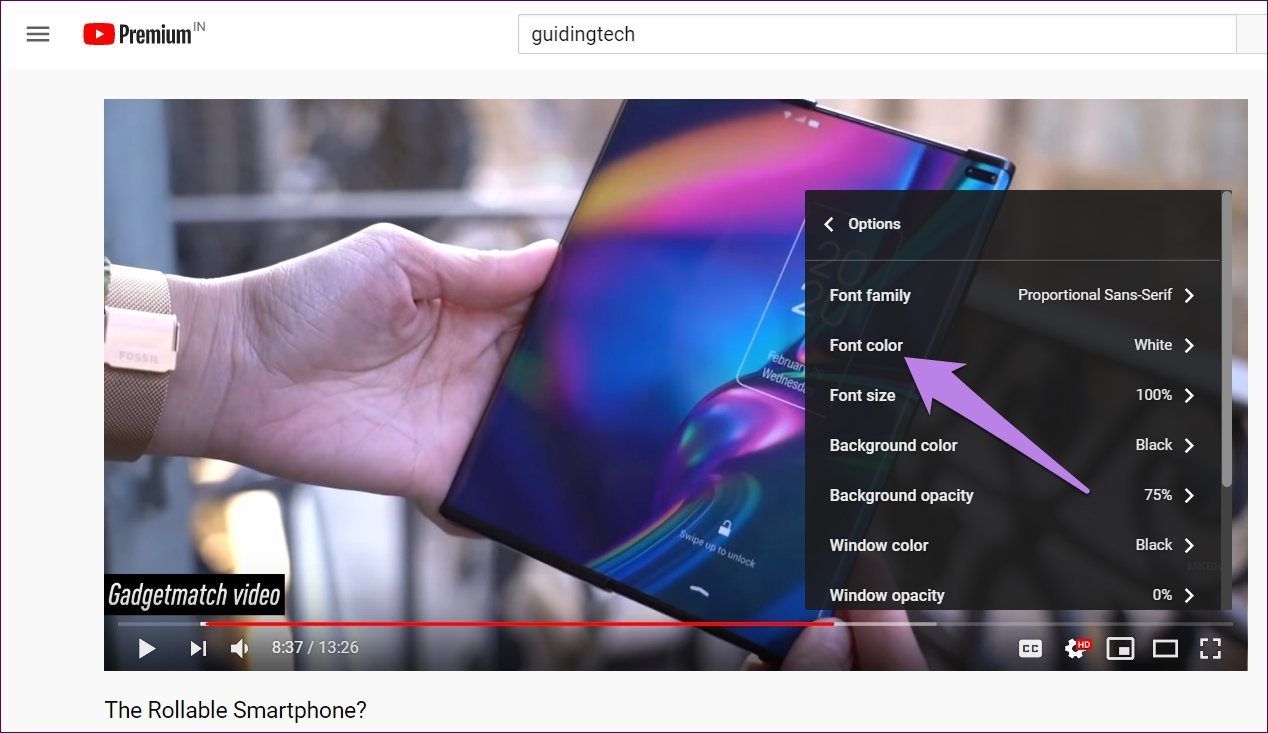
This method is the most straightforward way to customize the color of subtitles on YouTube. Follow these steps to change the subtitle color using YouTube’s built-in caption settings:
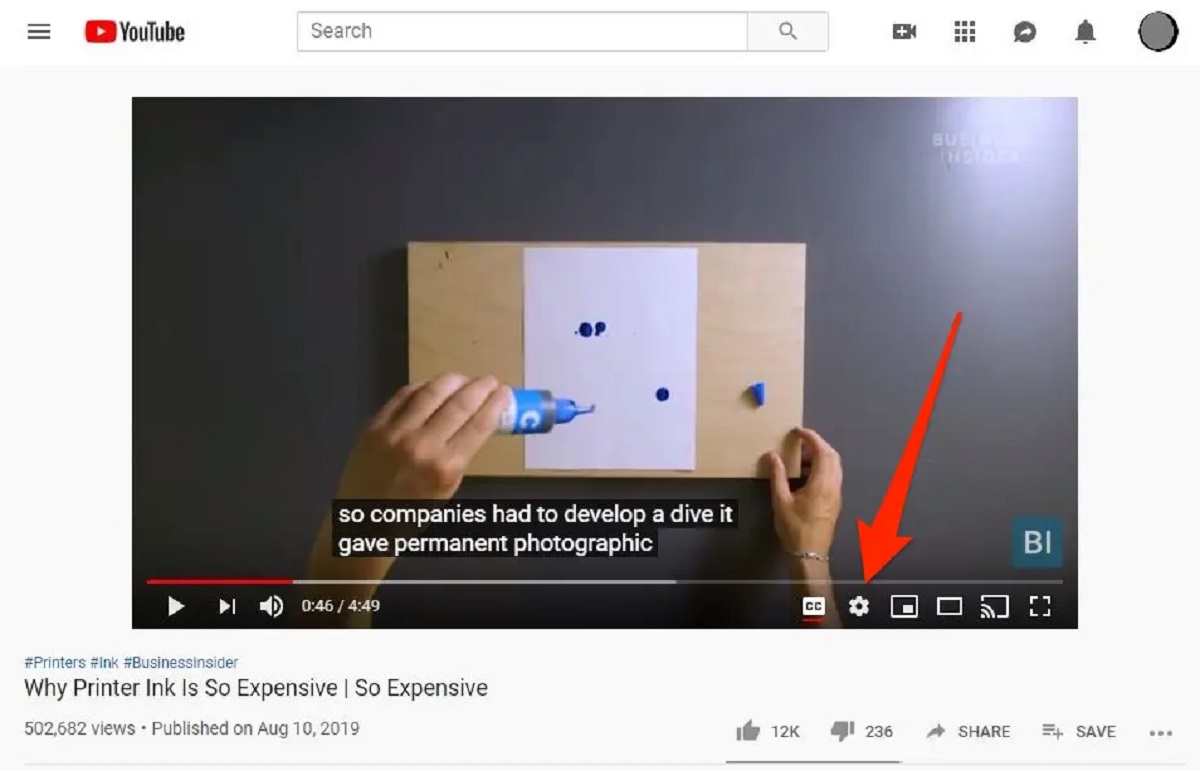
- Open the YouTube video you want to watch.
- Click on the “CC” (Closed Captions) button located at the bottom right corner of the video player. This will enable the captions if they are not already displayed.
- Next, click on the “Settings” icon, represented by a gear symbol, located next to the “CC” button.
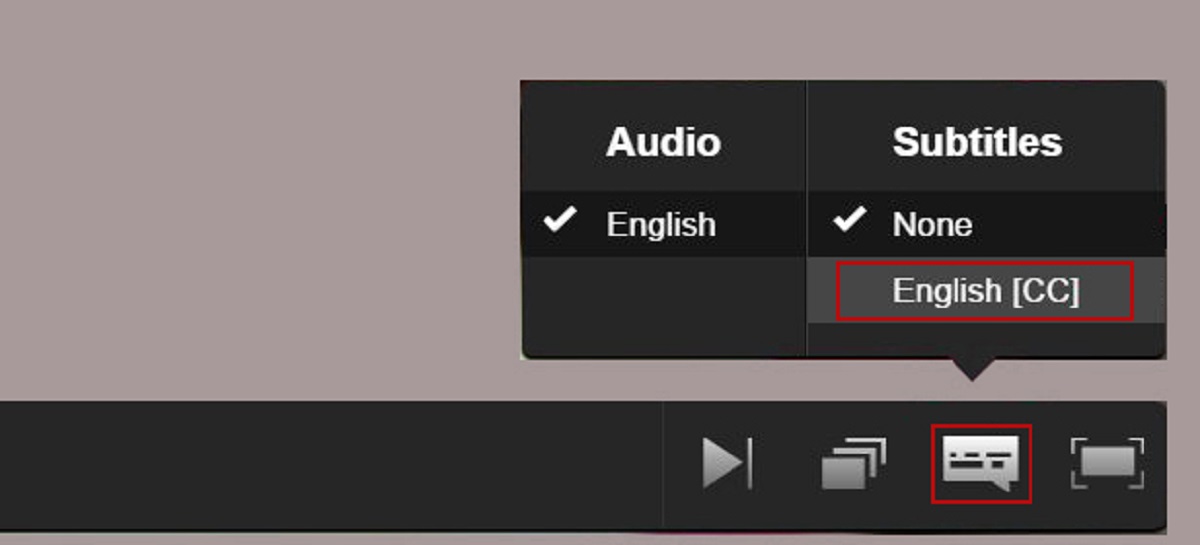
- A menu will appear with multiple options. Click on “Subtitles/CC” to access the subtitle settings.
- In the subtitle settings, you can change the font, font size, and font color. Pick your desired color from the color palette provided.
- Once you have selected the color, it will be applied to the subtitles immediately. You can continue watching the video with the newly customized subtitle color.
It’s important to note that these settings are specific to the YouTube website or app you are using. If you switch to a different device or browser, you may need to adjust the caption settings again.
By using YouTube’s caption settings, you have the ability to change the subtitle color quickly and easily. However, it’s important to check if these settings are available on your chosen device and browser before relying on this method alone.
Now that we’ve covered the first method, let’s move on to exploring another approach for changing the color of subtitles on YouTube.
Method 2: Customizing Subtitle Color with Browser Extensions
If you’re looking for a more flexible and customizable option to change the subtitle color on YouTube, utilizing browser extensions can be a great solution. Here’s how you can do it:
- Start by installing a browser extension that offers subtitle customization features. There are several extensions available for different browsers, such as Stylish for Chrome, Firefox, and Safari, or Stylus for Firefox and Chrome.
- Once the browser extension is installed, navigate to the YouTube website and open a video.
- Click on the browser extension’s icon located in the toolbar, usually displayed as an “S” or a “CSS” symbol.
- A popup window or a new tab will open, providing you with options to customize the webpage’s CSS (Cascading Style Sheets).
- In the CSS editor, locate the section related to subtitle styling. This can vary depending on the extension, but you may find it under headings like “Caption” or “Subtitle”.
- Add CSS code to change the subtitle color. For example, you can use the code:
css
.ytp-caption-segment {
color: #ff0000 !important;
}
Customize the color value to the desired hue by replacing “#ff0000” with the hexadecimal or RGB code for your preferred color.
- Once you’ve added the CSS code for the desired color, save the changes.
- Refresh the YouTube video page, and you should see the subtitles in the newly customized color.
Browser extensions offer more control over the appearance of subtitles on YouTube, allowing you to experiment with different colors and styles. Just ensure that you choose a trusted and reliable extension compatible with your browser.
Now that you know how to customize subtitle color using browser extensions, let’s explore another method involving browser developer tools for even more advanced customization options.
Method 3: Changing Subtitle Color with Browser Developer Tools
If you’re comfortable using browser developer tools and want to have granular control over the subtitle color on YouTube, this method is for you. Follow these steps:
- Open the YouTube video in your preferred browser.
- Right-click on the video player and select “Inspect” or “Inspect Element” from the context menu. This will open the browser’s developer tools panel.
- In the developer tools panel, navigate to the “Elements” or “Inspector” tab. This section displays the HTML and CSS structure of the webpage.
- Locate the HTML element that represents the subtitles. It is usually a or
element with a class or ID related to captions or subtitles.
- Once you’ve found the appropriate HTML element, look for the CSS properties that control the text color. These properties are typically “color” or “fill”.
- Edit the value of the color property to change the subtitle color. You can do this by double-clicking on the property value and entering a new color value, such as a hexadecimal or RGB code.
- As you make changes, you should see the subtitle color update in real-time on the video player.
- Once you’re satisfied with the new subtitle color, you can close the developer tools panel, and the changes will remain active for the duration of your YouTube session.
It’s important to note that this method only changes the subtitle color temporarily within the browser session. If you reload the page or close the browser, the changes will be reset.
Using browser developer tools gives you precise control over the subtitle color, allowing you to experiment with different colors and see the changes immediately. However, this method requires some technical knowledge and may not be suitable for everyone.
Now that you’ve learned how to change the subtitle color using browser developer tools, let’s explore another method that involves using video editing software.
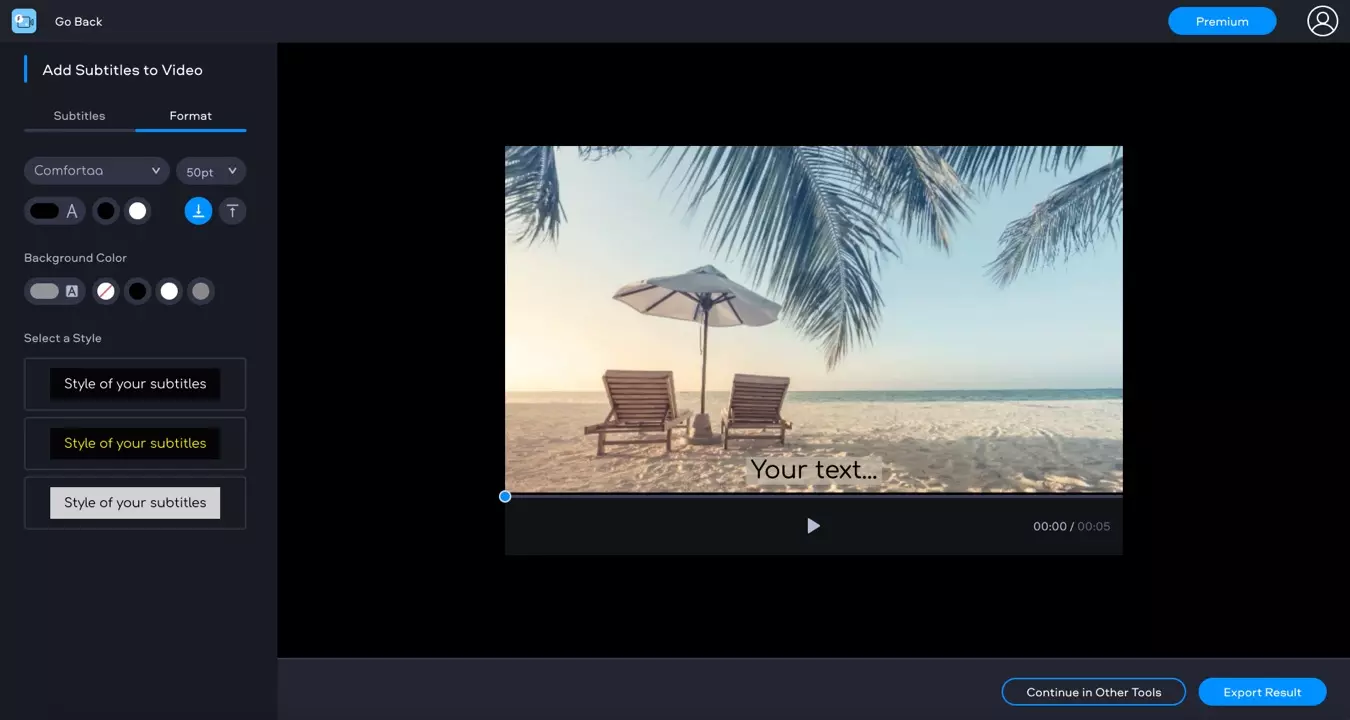
Method 4: Editing Subtitle Color in Video Editing Software
If you want to change the subtitle color permanently for a YouTube video, you can use video editing software to customize the subtitles before uploading the video. This method allows you to have complete control over the appearance of the subtitles. Follow these steps:
- First, obtain the video file that you want to upload to YouTube. Ensure that you have the necessary permissions and rights to edit and modify the video.
- Open your preferred video editing software. Popular options include Adobe Premiere Pro, Final Cut Pro, or iMovie.
- Import the video file into the editing software and locate the subtitle track or caption file associated with the video.
- Access the styling options for subtitles, which may differ depending on the editing software. Look for settings such as font, font size, font color, and background color.
- Customize the subtitle color by selecting the desired color from the color palette within the editing software.
- Make any additional adjustments to the subtitle appearance, such as font size or font style, to complement the new color.
- Ensure that the edited subtitles align properly with the video’s timing and content.
- Export the video with the edited subtitles, keeping the video format compatible with YouTube’s upload requirements.
- Upload the edited video to YouTube and wait for the platform to process and publish it.
By editing the subtitle color in your video editing software, you have complete control over the appearance of the subtitles. This method ensures that the subtitle color remains consistent and permanent within the video itself.
It’s worth noting that this method requires video editing software and some familiarity with the editing process. If you’re not well-versed in video editing, you may need to seek assistance or explore other methods to change the subtitle color on YouTube.
Now that you’ve learned how to change the subtitle color using video editing software, let’s summarize the various methods we’ve discussed:
Conclusion
Customizing the color of subtitles on YouTube can enhance your viewing experience and make the content more accessible and appealing. Throughout this article, we explored four different methods to change the subtitle color on YouTube:
- Using YouTube’s caption settings: This method allows you to easily change the subtitle color directly on the YouTube website or app.
- Customizing subtitle color with browser extensions: By installing browser extensions, you gain more control and flexibility in changing the subtitle color.
- Changing subtitle color with browser developer tools: This method provides precise control over subtitle color by modifying the webpage’s CSS properties.
- Editing subtitle color in video editing software: If you want the subtitle color to be permanent, you can edit it using video editing software before uploading the video to YouTube.
Each method offers its own level of flexibility, convenience, and technical expertise requirements. It’s essential to choose the method that aligns with your preferences and skill level.
Remember to consider the compatibility of these methods with the device and browser you’re using. Some methods may not work universally, so it’s worth exploring different approaches to find what works best for you.
By customizing the subtitle color on YouTube, you can create a more personalized and enjoyable viewing experience. Whether you prefer a vibrant color that stands out or a subtle hue that blends seamlessly with the video, these methods allow you to tailor the subtitles to your liking.
So, go ahead and explore these methods to change the subtitle color on YouTube and make your viewing experience more visually appealing and accessible.