Introduction
Automatic subtitles on YouTube have revolutionized the way we consume video content. These subtitles, also known as closed captions, are synchronized text displays that play along with video content, providing a written transcript of the spoken words. While subtitles were initially created for accessibility purposes, they have now become immensely popular among viewers of all backgrounds.
With the rise of video as a powerful medium for communication and information sharing, YouTube has recognized the importance of making videos accessible to a wider audience. Automatic subtitles help bridge the gap for viewers who are deaf or hard of hearing, as well as those who may not have access to sound while watching videos in public places. Additionally, automatic subtitles have proven to be beneficial for non-native English speakers or individuals with learning disabilities.
Enabling automatic subtitles on YouTube has multiple advantages for both content creators and viewers. From a content creator’s perspective, having subtitles can greatly increase the visibility and accessibility of their videos. It allows them to reach a larger audience and cater to viewers’ diverse preferences.
Viewers also benefit greatly from automatic subtitles. They provide an immersive viewing experience for those who may struggle with understanding spoken language due to various reasons. Subtitles help viewers follow the content more closely, enhancing their comprehension and engagement. Moreover, automatic subtitles improve the overall user experience by allowing viewers to watch videos in noisy environments or situations where audio playback is restricted.
In this comprehensive guide, we will explore different methods to enable automatic subtitles on YouTube. Whether you are a content creator or a viewer, this article will provide you with the necessary steps and best practices to make the most out of this valuable feature. Let’s dive in and discover how you can harness the power of automatic subtitles to enhance your YouTube experience.
What are automatic subtitles?
Automatic subtitles, also known as closed captions, are a feature provided by YouTube that displays synchronized text alongside video content. These subtitles are generated automatically using speech recognition technology. They provide a written transcript of the audio content, making it accessible to viewers who are deaf or hard of hearing, as well as those who prefer or require visual text support.
Automatic subtitles are different from manually created subtitles, which are often added by content creators or professional subtitlers. While manual subtitles offer a higher degree of accuracy and customization, automatic subtitles offer a convenient and quick solution for adding text to videos without extensive manual effort.
The process of generating automatic subtitles involves using automatic speech recognition (ASR) technology to convert the spoken words in the video into text. YouTube’s ASR system analyzes the audio track of the video and matches it with a library of recognized words and phrases. It then generates subtitles based on the detected speech patterns.
Although automatic subtitles are generated using advanced technology, they may not always be perfectly accurate. Various factors such as background noise, accents, or unclear speech can result in errors or inaccuracies. Nevertheless, YouTube’s ASR system continuously improves through machine learning algorithms and user feedback, leading to more accurate and reliable subtitles over time.
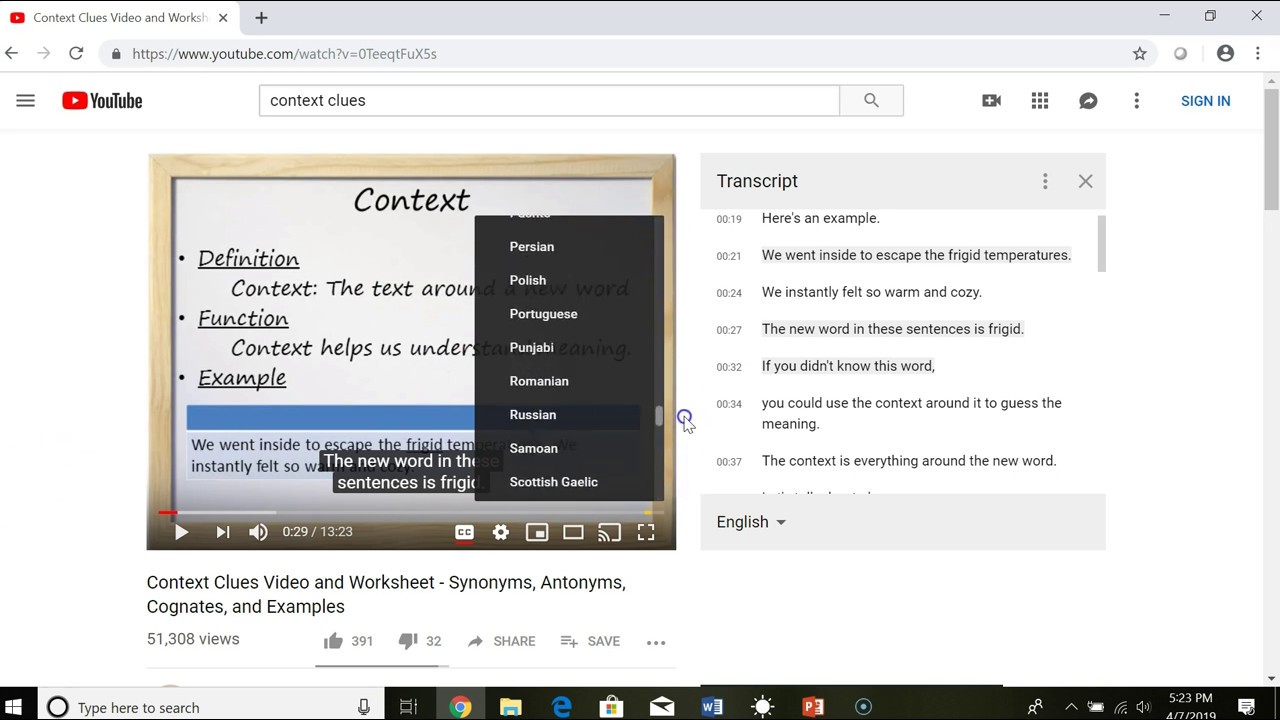
Automatic subtitles are available in multiple languages, allowing viewers from different regions and language backgrounds to enjoy videos in their native language or with translated subtitles. YouTube’s speech recognition technology supports a wide range of languages, making it a valuable tool for global content distribution.
Automatic subtitles can be customized by viewers to suit their preferences. YouTube provides options to change the appearance of subtitles, such as font size, color, and style. Users can also enable or disable subtitles as needed, adjusting them to their specific viewing requirements.
Overall, automatic subtitles serve as an inclusive and accessible feature on YouTube, making video content available to a larger audience. Whether for educational purposes, entertainment, or simply convenience, automatic subtitles play a vital role in enhancing the accessibility and user experience of YouTube videos.
Why should you use automatic subtitles on YouTube?
Using automatic subtitles on YouTube offers numerous benefits for both content creators and viewers. Let’s explore why you should embrace this feature:
Accessibility: Automatic subtitles make your videos accessible to a wider audience, including those who are deaf or hard of hearing. By providing written text alongside the audio, you ensure that everyone can fully understand and engage with your content. It promotes inclusivity and enables viewers with hearing impairments to enjoy your videos equally.
Enhanced comprehension: Automatic subtitles can significantly improve viewer comprehension. Some viewers may struggle with understanding spoken language due to language barriers, accents, or audio quality. By displaying text on screen, subtitles help viewers follow along more closely and grasp the content more effectively.
Improved user experience: Watching videos in noisy environments or situations where audio playback is not possible becomes easier with automatic subtitles. Viewers can simply read the subtitles and still enjoy the video’s full context without relying solely on audio.
Language support: YouTube’s automatic speech recognition technology supports multiple languages. This enables content creators to reach a global audience by providing subtitles in different languages. It also allows viewers who are non-native speakers or prefer to watch videos in their native language to fully engage with the content.
Search engine optimization: Automatic subtitles contribute to improving the search engine optimization (SEO) of your videos. Search engines can index the text in the subtitles, making it easier for users to discover your content. Additionally, subtitles provide additional keywords and context, enhancing the visibility and discoverability of your videos.
Compliance with legal requirements: In some jurisdictions, providing subtitles is mandatory for certain types of content, especially those related to education, government, or public service. By using automatic subtitles, you ensure compliance with these legal obligations and avoid any potential legal issues.
Viewer preference: Many viewers simply prefer watching videos with subtitles. It allows them to follow along more attentively, catch any missed dialogue, or reference specific information. Providing subtitles caters to these viewer preferences and leads to an enhanced overall viewing experience.
Considering the accessibility, comprehension, user experience, language support, SEO benefits, legal compliance, and viewer preferences, using automatic subtitles on YouTube is a wise decision for content creators and a valuable feature for viewers. It not only expands your audience but also enhances the engagement and inclusivity of your videos.
How to enable automatic subtitles on YouTube
Enabling automatic subtitles on YouTube is a straightforward process that can enhance the accessibility and reach of your videos. Here are three methods to enable automatic subtitles:
Method 1: Using YouTube’s built-in automatic captions:
- Upload your video to YouTube and go to the video’s playback page.
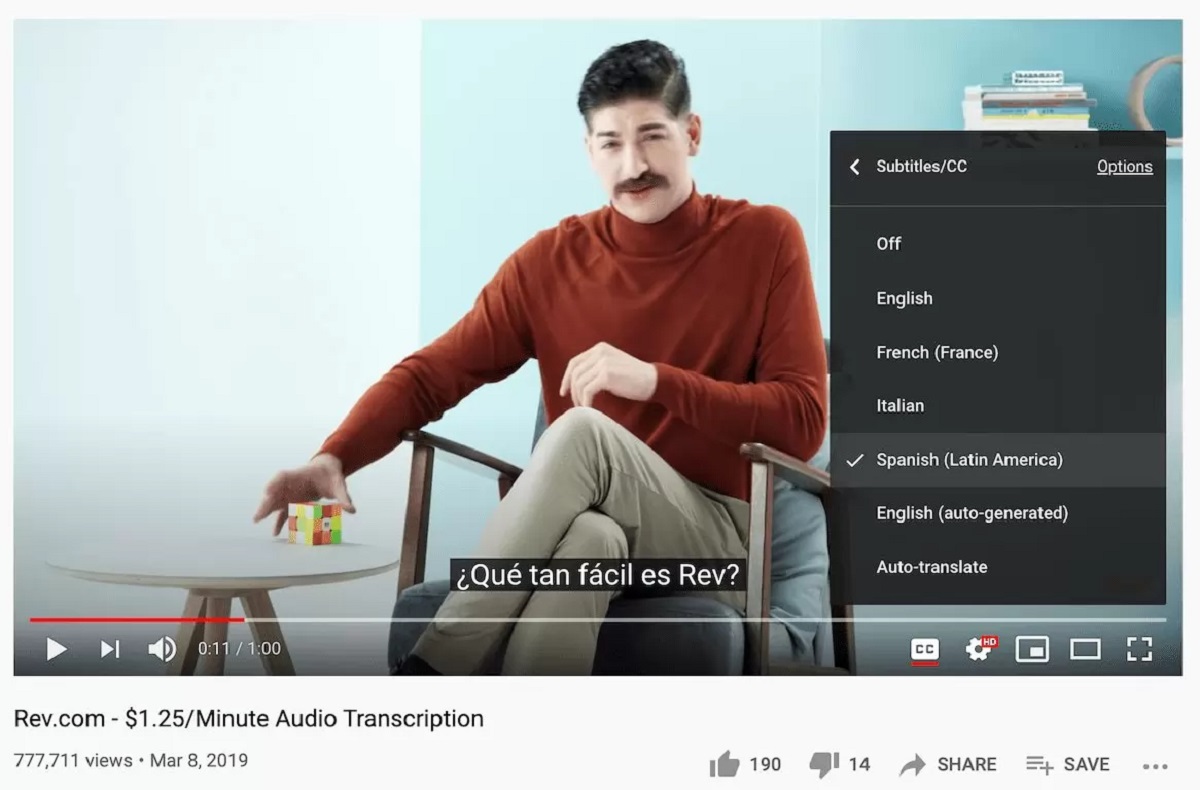
- Click on the “CC” (Closed Captions) button located beneath the video player.
- Click on the “Settings” (gear) icon and select “Subtitles/CC” from the menu.
- Toggle on the “Automatic captions” option to enable automatic subtitles.
- YouTube will automatically generate subtitles based on the audio content of your video. It may take some time for the subtitles to appear, depending on the length of the video.
- Review the generated subtitles and make any necessary edits for accuracy or clarity.
- Save the changes and publish the video with the automatic subtitles.
Method 2: Uploading a transcript file:
- Prepare a transcript file that contains the text of the spoken words in your video. The transcript file should be in plain text or supported subtitle format (e.g., .srt or .vtt).
- Upload your video to YouTube and go to the video’s playback page.
- Click on the “CC” (Closed Captions) button located beneath the video player.
- Click on the “Upload” button and select the transcript file from your computer.
- YouTube will use the uploaded transcript to generate automatic subtitles for your video.
- Review the generated subtitles and make any necessary edits for accuracy or clarity.
- Save the changes and publish the video with the automatic subtitles.
Method 3: Using automatic speech recognition software:
- Create a separate video file with your script or spoken text.
- Use automatic speech recognition (ASR) software or online services to transcribe your audio file into text.
- Generate a subtitle file (e.g., .srt or .vtt) using the transcribed text.
- Upload your video to YouTube and go to the video’s playback page.
- Click on the “CC” (Closed Captions) button located beneath the video player.
- Click on the “Upload” button and select the subtitle file from your computer.
- YouTube will use the uploaded subtitle file to display automatic subtitles for your video.
- Review the generated subtitles and make any necessary edits for accuracy or clarity.
- Save the changes and publish the video with the automatic subtitles.
By following these methods, you can enable automatic subtitles on YouTube and make your videos more accessible and engaging for a wider audience.
Method 1: Using YouTube’s built-in automatic captions
YouTube provides a built-in feature for generating automatic captions, making it easy to enable subtitles for your videos. Here’s how you can utilize YouTube’s built-in automatic captions:
- Upload your video to YouTube by signing in to your YouTube account and clicking on the “Upload” button.
- Once the video is uploaded, navigate to the video’s playback page.
- Beneath the video player, you’ll find the “CC” (Closed Captions) button. Click on it to access the closed captions options.
- In the closed captions menu, click on the “Settings” (gear) icon.
- A drop-down menu will appear. Select “Subtitles/CC” from the menu.
- In the “Subtitles/CC” menu, you’ll find the option for “Automatic captions”. Toggle it on to enable automatic subtitles for your video.
- YouTube’s automatic speech recognition technology will analyze the audio track of your video and generate subtitles based on the detected speech patterns.
- Depending on the length of your video, it may take a few minutes for the automatic subtitles to be generated.
- Once the subtitles are generated, you can review them for accuracy and make any necessary edits to ensure their quality.
- Save the changes and publish the video with the automatic subtitles.
It’s important to note that while YouTube’s automatic captions are convenient, they may not always be 100% accurate. Factors like background noise, accents, or unclear speech can lead to errors or inaccuracies in the generated subtitles. Therefore, it’s recommended to manually review and edit the subtitles to ensure their quality and to provide the best viewing experience for your audience.
Using YouTube’s built-in automatic captions is a quick and convenient way to enable subtitles for your videos. It enhances the accessibility and inclusivity of your content, allowing a wider audience to engage with your videos and improve their comprehension. Don’t forget to review and refine the automatic subtitles to ensure they accurately reflect the spoken words and provide a seamless viewing experience.
Method 2: Uploading a transcript file
If you have a pre-existing transcript for your video, you can easily upload it to YouTube to enable accurate subtitles. Here’s how you can use the transcript file to enable subtitles for your video:
- Prepare a transcript file that contains the text of the spoken words in your video. The transcript file should be in plain text format or in a supported subtitle format like .srt or .vtt.
- Upload your video to YouTube by signing in to your YouTube account and clicking on the “Upload” button.
- Once the video is uploaded, navigate to the video’s playback page.
- Beneath the video player, you’ll find the “CC” (Closed Captions) button. Click on it to access the closed captions options.
- In the closed captions menu, click on the “Upload” button.
- Select the transcript file from your computer and upload it to YouTube.
- YouTube will use the uploaded transcript file to generate accurate subtitles for your video.
- After the subtitles are generated, review them for accuracy and make any necessary edits to ensure their quality.
- Save the changes and publish the video with the uploaded transcript and the generated subtitles.
By uploading a transcript file, you can ensure that the subtitles accurately reflect the spoken words in your video. This method is particularly helpful if you have already prepared a transcript in advance or have access to one.
It’s important to note that even though you are uploading a transcript file, YouTube’s automatic speech recognition technology may still be used to synchronize the subtitles with the video. Therefore, it’s recommended to carefully review the generated subtitles to ensure they are correctly aligned and synchronized with the audio.
Utilizing the option of uploading a transcript file on YouTube provides you with more control over the accuracy and quality of the subtitles. It allows you to make your videos more accessible and inclusive, ensuring that viewers can easily follow along with the content.
Method 3: Using automatic speech recognition software
If you have a separate audio file or video without subtitles, you can use automatic speech recognition (ASR) software or online services to create a transcript and generate subtitles. Here’s how you can utilize automatic speech recognition software to enable subtitles for your YouTube video:
- Create a separate audio file with your script or spoken text. This file should contain only the audio content that you want to transcribe.
- Use automatic speech recognition (ASR) software or an online ASR service to transcribe your audio file into text. There are several reliable ASR tools available, such as Google Cloud Speech-to-Text, IBM Watson Speech to Text, or Microsoft Azure Speech to Text.
- Once you have your transcribed text, generate a subtitle file in a supported format, such as .srt or .vtt.
- Upload your video to YouTube by signing in to your YouTube account and clicking on the “Upload” button.
- Once the video is uploaded, navigate to the video’s playback page.
- Beneath the video player, you’ll find the “CC” (Closed Captions) button. Click on it to access the closed captions options.
- In the closed captions menu, click on the “Upload” button.
- Select the subtitle file that you generated from the transcribed text and upload it to YouTube.
- YouTube will use the uploaded subtitle file to display automatic subtitles for your video.
- Review the generated subtitles and make any necessary edits to ensure their accuracy and quality.
- Save the changes and publish the video with the automatic subtitles.
Using automatic speech recognition software allows you to create accurate subtitles by leveraging powerful speech-to-text capabilities. This method is especially useful if you want precise control over the transcript and prefer to generate subtitles from a separate audio file.
When using automatic speech recognition software, it’s crucial to ensure the accuracy of the transcribed text. Review the generated subtitles carefully, as ASR technology may not provide perfect accuracy, especially in situations with background noise or accents. Making necessary edits and adjustments will ensure that the subtitles match the spoken words and result in a seamless viewing experience for your audience.
By utilizing automatic speech recognition software, you can efficiently generate subtitles for your YouTube videos, making them accessible to a broader audience and enhancing the overall viewer experience.
Best practices for creating accurate automatic subtitles
While automatic subtitles provide a convenient way to add text to your videos, it’s important to ensure their accuracy and quality. Here are some best practices to follow when creating automatic subtitles:
- Proofread and edit: Always review the generated subtitles for accuracy and clarity. Automatic speech recognition technology may not capture every word or phrase correctly, so it’s essential to make necessary edits to ensure the subtitles reflect the spoken content as accurately as possible.
- Segmentation: Divide the subtitles into appropriate segments or chunks that align with the natural flow of the dialogue. Each segment should contain a complete thought or idea, making it easier for viewers to read and follow along.
- Punctuation: Ensure that the subtitles include proper punctuation, including commas, periods, question marks, and exclamation points. Correct punctuation helps convey the tone and meaning of the audio accurately.
- Capitalization: Use proper capitalization for names, titles, and the beginning of sentences. This makes the subtitles easier to read and enhances clarity.
- Formatting: Apply appropriate formatting to the subtitles to ensure readability. This includes using a legible font, appropriate font size, and contrasting colors that don’t blend with the video content.
- Contextual understanding: Consider the context of the dialogue and try to capture nuances, idiomatic expressions, or specific jargon. This helps enhance the overall understanding and engagement for viewers.
- Time synchronization: Ensure that the subtitles are synchronized accurately with the corresponding spoken dialogue. Check that the timing of each subtitle aligns with the audio to provide a seamless viewing experience.
- Simplify complex content: When dealing with technical or complex subject matter, simplify the language in the subtitles to ensure better understanding for viewers. Avoid using jargon or overly technical terms that may confuse the audience.
- Consistency: Maintain consistency in naming conventions, abbreviations, and terminology throughout the subtitles. This helps viewers follow along and prevents confusion or inconsistency in the subtitles.
- Accuracy feedback: Provide feedback to YouTube for any inaccuracies or errors in the automatic speech recognition system. This helps improve the technology and future accuracy of the subtitles.
By following these best practices, you can create automatic subtitles that accurately reflect the spoken content in your videos. Taking the time to review, edit, and ensure the quality of the subtitles will significantly enhance the viewer experience and ensure that your content is accessible to a wider audience.
Tips for optimizing your videos for automatic subtitles
When it comes to optimizing your videos for automatic subtitles, there are several strategies and best practices that can enhance the accuracy and quality of the generated subtitles. Here are some useful tips to consider:
- Speak clearly: Enunciate your words clearly and speak at a moderate pace. Clear pronunciation and articulation of words can help improve the accuracy of automatic speech recognition and produce more accurate subtitles.
- Avoid excessive background noise: Record your videos in a quiet environment to minimize background noise. Background noise can interfere with the accuracy of speech recognition, leading to errors or inaccuracies in the generated subtitles.
- Use quality audio equipment: Invest in a good microphone or audio recording equipment to ensure high-quality audio. Clean and clear audio improves the performance of automatic speech recognition technology and enhances the accuracy of subtitles.
- Provide a script or transcript: When possible, provide a script or transcript of your video’s dialogue to YouTube. This can be done by uploading a transcript file or using ASR software to generate a transcript. A pre-prepared script helps the automatic speech recognition system match the spoken words more accurately.
- Avoid excessive talking over each other: Minimize instances of multiple people speaking simultaneously or talking over each other in your videos. This can confuse the automatic speech recognition system and result in inaccurate subtitles.
- Consider subtitles in editing: If you have the option, consider integrating subtitles into your video editing process. Manually adding subtitles can ensure higher accuracy and more precise synchronization with the audio and visual elements of your videos.
- Review and edit: As mentioned earlier, always review the automatic subtitles and make necessary edits for accuracy, clarity, and synchronization. Take the time to fine-tune the subtitles to provide the best possible viewing experience for your audience.
- Keyword placement: Optimize your video’s script to include relevant keywords and key phrases that are important for Search Engine Optimization (SEO). Including these terms strategically can improve the visibility of your videos in search results and increase the chances of accurate subtitle generation based on those keywords.
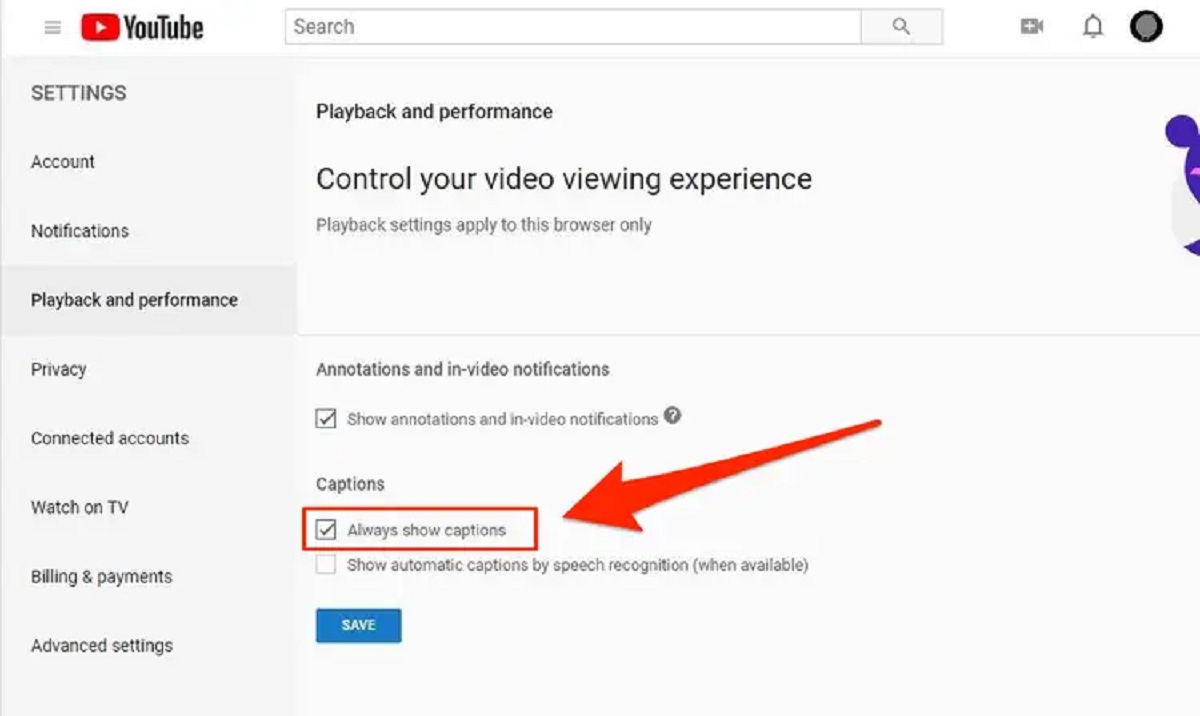
- Enable community contributions: Consider enabling the option for community contributions in your YouTube video settings. This allows viewers to contribute and edit subtitles, improving their accuracy and providing a collaborative effort towards creating high-quality subtitles.
- Encourage feedback: Encourage your viewers to provide feedback on subtitles by reporting any errors or suggesting improvements. This feedback can help you make ongoing adjustments and improvements to the automatic subtitles in your videos.
By following these tips, you can optimize your videos to ensure more accurate and high-quality automatic subtitles. These strategies will enhance the overall accessibility, user experience, and visibility of your content, allowing a wider audience to engage with and enjoy your videos.
Conclusion
Automatic subtitles on YouTube play a significant role in making video content more accessible, inclusive, and engaging for a diverse audience. Enabling automatic subtitles can greatly enhance the viewer experience, improve comprehension, and reach a wider audience. Whether you are a content creator or a viewer, utilizing automatic subtitles offers numerous benefits and opportunities.
In this guide, we explored three methods to enable automatic subtitles on YouTube. You can use YouTube’s built-in automatic captions, upload a transcript file, or utilize automatic speech recognition software. Each method allows you to add accurate subtitles to your videos, ensuring that viewers can follow along and understand the content more effectively.
Furthermore, we discussed best practices for creating accurate automatic subtitles, emphasizing the importance of proofreading, proper segmentation, punctuation, and formatting. Adhering to these practices helps ensure the quality and clarity of subtitles while enhancing the overall viewing experience.
To optimize your videos for automatic subtitles, we provided tips such as speaking clearly, minimizing background noise, using quality audio equipment, and strategically placing keywords. These tips ensure that the automatic speech recognition system can accurately capture the spoken words and generate accurate subtitles.
By embracing automatic subtitles, you improve the accessibility, inclusivity, and searchability of your YouTube videos. Subtitles enable a broader audience to engage with your content, regardless of hearing abilities or language proficiency. They also enhance user experience, improve comprehension, and contribute to better SEO for your videos.
By following the methods, best practices, and tips outlined in this guide, you can harness the power of automatic subtitles to create impactful and accessible video content that resonates with viewers around the world.