Introduction
Subtitles have become an essential component of YouTube videos, enhancing accessibility and making content more engaging for a broader audience. Adding subtitles to your own videos is a straightforward process, but have you ever wondered if it’s possible to add subtitles to other people’s YouTube videos? The good news is that it is indeed possible, and this article will guide you through the steps to achieve just that.
Why would you want to add subtitles to someone else’s YouTube videos? Well, there are several reasons. Firstly, it helps individuals with hearing impairments to enjoy and understand the content. Secondly, it allows non-native English speakers or those unfamiliar with the video’s language to access the information. Lastly, it enhances search engine optimization (SEO) by increasing the video’s visibility and reach.
While adding subtitles to other people’s YouTube videos may seem like a daunting task, it can be done by utilizing the available tools and features provided by YouTube itself. Whether you want to contribute to the accessibility of a viral video, translate content to reach a global audience, or simply enjoy the learning process, we have you covered.
In the following sections, we will explore the step-by-step process of adding subtitles to other people’s YouTube videos. From finding the video to customizing and publishing the subtitles, you’ll gain the knowledge and confidence to make a valuable contribution to the YouTube community and help bridge the language and accessibility gap.
Understanding the Importance of Subtitles in YouTube Videos
Subtitles play a significant role in enhancing the viewing experience of YouTube videos for a wide range of audiences. They provide numerous benefits that extend beyond simply ensuring accessibility for the deaf and hard of hearing community.
One of the key advantages of subtitles is that they make videos more inclusive. By adding subtitles to YouTube videos, content creators can reach a global audience, regardless of linguistic and cultural barriers. Non-native English speakers, as well as those who prefer to read rather than listen, can easily follow along with the video’s content.
In addition to promoting inclusivity, subtitles also have a positive impact on search engine optimization (SEO). Search engines like Google can crawl through the text in subtitles and index them, making the video more discoverable. This means that by adding subtitles, you can optimize your video’s ranking and make it more visible to potential viewers.
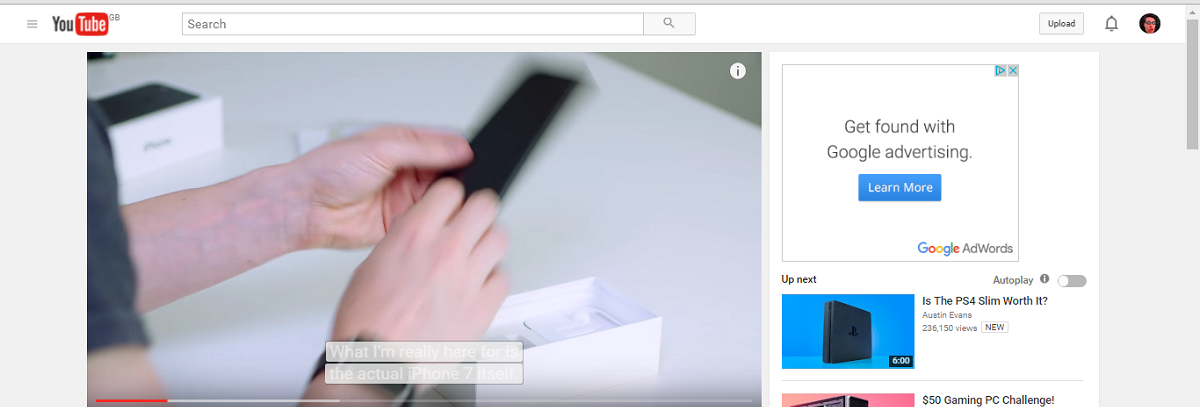
Moreover, subtitles enhance the overall user experience. Viewers can follow the dialogue more accurately and comprehend the video’s message even in situations where they can’t or prefer not to have the sound on – for example, when watching videos in a noisy environment or in public spaces. Subtitles also provide clarity when the audio quality is poor or if certain accents or speech patterns are challenging to understand.
Another advantage of subtitles is that they improve information retention. Research shows that by incorporating both visual and auditory input, viewers are more likely to remember and understand the content presented in a video. This can be especially helpful for educational or instructional videos, where important concepts and details need to be absorbed and retained.
Ultimately, subtitles serve as a powerful tool for communication, accessibility, and inclusivity in the YouTube community. By understanding the importance and benefits of subtitles, you can make an informed decision to add them to other people’s YouTube videos, contributing to a more accessible and engaging online video platform.
Step 1: Find the YouTube Video You Want to Add Subtitles to
The first step in adding subtitles to someone else’s YouTube video is locating the specific video you want to work with. This can be done by using the search function on YouTube or by browsing through channels and playlists.
Start by identifying the video you wish to add subtitles to. It could be a popular video in your niche or a video that you believe would benefit from subtitles. Take note of the video’s title and channel to ensure you are selecting the correct one.
If you already have a specific video in mind, simply head over to YouTube and enter relevant keywords in the search bar. Once you find the video, click on it to open and view its contents.
If you are unsure of which video to choose, consider exploring YouTube’s recommendations based on your interests or using filters like upload date or view count to find suitable candidates.
Another option is to visit the channel directly and browse through their collection of videos. You can do this by clicking on the channel name when viewing a video and accessing their list of uploads. This way, you can select a video from a specific creator whose content you appreciate and find relevant.
Once you have identified the video you want to add subtitles to, make a note of the video’s URL or consider downloading the video for offline editing. Having the video readily available will allow you to proceed seamlessly to the next steps of the subtitle addition process.
Remember to respect copyright and intellectual property rights when choosing a video to subtitle. Ensure you have the necessary permissions or that the video falls under fair use guidelines before proceeding.
Taking the time to find the appropriate YouTube video is crucial to ensure that your efforts in adding subtitles will have the most impact and benefit the intended audience. Let’s move on to the next step and learn how to download the video or extract its URL to continue with the subtitle addition process.
Step 2: Download the Video or Extract the Video URL
Once you have identified the YouTube video you want to add subtitles to, the next step is to download the video or extract its URL. This will allow you to have the video readily available for the subtitle addition process.
Downloading the video is a straightforward process. There are various online tools and software available that enable you to save YouTube videos to your device. One popular option is using a YouTube video downloader, which allows you to choose the desired video quality and download it in a compatible format for editing.
When choosing a YouTube video downloader, ensure that you select a reputable and trustworthy platform to avoid any potential security risks. Take note that downloading YouTube videos may be subject to copyright restrictions, so make sure you have the necessary permissions or that the video falls under fair use guidelines.
If you prefer not to download the video, you can simply extract the video’s URL. To do this, navigate to the YouTube video in your web browser and copy the URL from the address bar at the top. The URL typically starts with “https://www.youtube.com/watch”.
Extracting the video URL allows you to directly access the video from YouTube’s video manager, where you can add subtitles without needing to download the video to your device. This method can be useful when you have limited storage space or prefer a more streamlined subtitle addition process.
Once you have either downloaded the video or extracted its URL, you are now ready to proceed to the next step of the subtitle addition process. In the following section, we will guide you through accessing the YouTube Video Manager, where you can start adding subtitles to the selected YouTube video.
Step 3: Access the YouTube Video Manager
Now that you have the YouTube video you want to add subtitles to ready, it’s time to access the YouTube Video Manager. The Video Manager is a centralized hub where you can manage, edit, and customize your YouTube videos, including adding subtitles.
To access the Video Manager, start by logging into your YouTube account. Once logged in, click on your profile picture or avatar in the top right corner of the YouTube homepage. In the dropdown menu, select the “YouTube Studio” option.
Within the YouTube Studio dashboard, you will find various tabs and options. Locate and click on the “Videos” tab on the left-hand side menu. This will display a list of all your uploaded videos.
Next, find the specific video you want to add subtitles to. You can either scroll through the list or use the search bar at the top to search for the video by title or keywords. Once you have located the video, click on it to open the video details page.
On the video details page, you will find a range of editing options for your video. Look for the “Subtitles” or “Accessibility” option, which allows you to manage and add subtitles to the video.
Clicking on the “Subtitles” or “Accessibility” option will take you to the Subtitle Editor, where you can begin the process of adding subtitles to the selected YouTube video. Here, you will find tools and features to help you create accurate and synchronized subtitles.
Make sure to familiarize yourself with the Subtitle Editor’s interface and functionalities, as this will be your main workspace for adding subtitles. Take some time to explore the available options, such as timing adjustments, formatting, and translation settings, to ensure you create high-quality subtitles that enhance the viewer’s experience.
Now that you have accessed the YouTube Video Manager and located the Subtitle Editor, you are ready to proceed to the next step: navigating to the Subtitles section and adding new subtitles or closed captions to the YouTube video. This will be covered in detail in the upcoming section.
Step 4: Navigate to the Subtitles Section
Once you have accessed the YouTube Video Manager and opened the video details page, the next step is to navigate to the Subtitles section. This is where you can manage and add subtitles or closed captions to the selected YouTube video.
On the video details page, look for the “Subtitles” or “Accessibility” option. This may be located in the top navigation menu or in a sidebar menu, depending on the layout of the YouTube Studio.
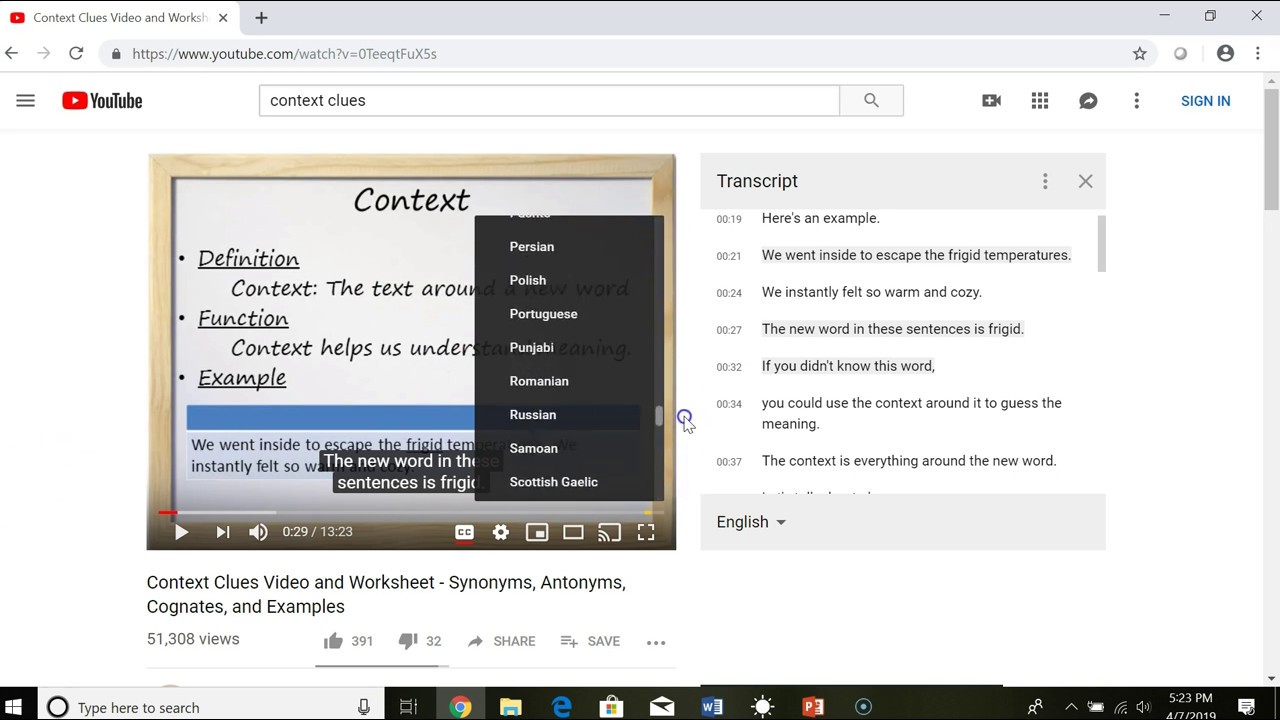
Clicking on the “Subtitles” or “Accessibility” option will take you to the Subtitle Editor. Here, you will find a range of options for managing and organizing your subtitles, including the ability to add and edit multiple language tracks.
In the Subtitle Editor, you will see a timeline representation of your video, along with the text box where you can enter the subtitles. The timeline allows you to navigate through the video and select specific points where subtitles need to be inserted.
Take some time to explore the different controls and features available in the Subtitle Editor. You will find options to adjust the timing and duration of each subtitle, as well as tools for formatting and styling the text.
If there are already existing subtitles or closed captions available for the video, you can select the desired language track and make edits as needed. Alternatively, if there are no existing subtitles, you can proceed to add new subtitles by clicking on the “Add subtitles/CC” or “Create new subtitles or closed captions” button.
It is worth noting that YouTube provides an automatic speech recognition (ASR) feature that can generate subtitles for your videos. While this feature can save time, it’s important to review and edit the generated subtitles for accuracy and clarity.
By navigating to the Subtitles section and familiarizing yourself with the Subtitle Editor’s interface, you are now ready to move on to the next step: adding new subtitles or closed captions to the YouTube video. This process will be covered in detail in the upcoming section.
Step 5: Add New Subtitles or Closed Captions
After navigating to the Subtitles section and accessing the Subtitle Editor in the YouTube Video Manager, the next step is to add new subtitles or closed captions to the selected YouTube video.
If there are no existing subtitles for the video, or if you want to create subtitles in a different language, you can begin by clicking on the “Add subtitles/CC” or “Create new subtitles or closed captions” button.
This will prompt you to select the language for the subtitles. Choose the appropriate language from the available options. If the desired language is not listed, click on the “Create new subtitles or closed captions” button to manually enter the language.
Once you have selected the language, the Subtitle Editor will open, displaying the timeline and text box where you can enter the subtitles. Use the timeline to navigate through the video and pinpoint the exact moments where you want the subtitles to appear.
Begin by typing the transcription of the dialogue or narration in the text box. Ensure that the subtitles accurately represent the spoken words and convey the intended meaning. Split the text into smaller segments if necessary to maintain readability and synchronization with the audio.
As you type, you will notice that the corresponding timestamp is automatically added to the subtitle. This ensures that the subtitles are aligned with the audio and appear at the appropriate moments during playback.
If your video contains multiple speakers or different languages, you can add speaker labels or identify the language for each segment of dialogue. This helps viewers distinguish between speakers or understand when a language switch occurs.
Continue adding subtitles throughout the video, ensuring that the timing is accurate and the text is clear and concise. Take the time to review and edit each subtitle to maintain consistency and readability.
If you prefer, you can use the “Upload a file” option to upload a pre-created subtitle file in the appropriate format, such as .SRT or .VTT. This is especially useful if you have already transcribed and formatted the subtitles externally.
Once you have added and finalized the new subtitles or closed captions, it’s important to save your work to ensure that all your progress is retained. Remember to periodically save your subtitles as you make changes to avoid losing any data.
In the next step, we will explore how to set the language and translation options for the subtitles, allowing you to reach an even wider audience. Let’s proceed to Step 6 and learn how to customize the language settings.
Step 6: Set the Language and Translation Options
Once you have added the new subtitles or closed captions to the YouTube video, the next step is to set the language and translation options. This allows you to specify the primary language for the subtitles and provide translations for viewers around the world.
In the Subtitle Editor, look for the language settings or options. This may be located within the Subtitle Editor itself or in a separate menu within the YouTube Video Manager.
Start by selecting the primary language for the subtitles. This should be the language in which the majority of the dialogue or narration in the video is spoken. Choose the language from the available options or enter a new language if it is not listed.
By setting the primary language, you ensure that viewers who can understand the language can easily access and enable the subtitles while watching the video.
Additionally, if you want to provide translations for viewers who speak different languages, you can enable the automatic translation feature. YouTube’s automatic translation system can generate translations for the subtitles in multiple languages.
To enable automatic translation, click on the “Settings” or “Options” button within the language settings. Look for the translation options and select the desired languages from the available list. You can choose to enable translations for all languages or select specific languages depending on your target audience or video content.
Keep in mind that automatic translations may not always be 100% accurate, so it is recommended to review and edit the translations for clarity and correctness. YouTube provides an interface for manually editing the translations if needed.
Furthermore, if you have created subtitles in multiple languages during the subtitle addition process, you can select and manage each language track individually in the language settings. This allows you to ensure that each language subtitle accurately represents the dialogue or narration.
Once you have set the language and translation options to your satisfaction, be sure to save your choices to apply them to the YouTube video. This ensures that viewers can easily access and engage with the subtitles in their preferred language.
In the next step, we will explore how to fine-tune the timing and duration of the subtitles to ensure that they are perfectly synchronized with the video. Let’s proceed to Step 7 and learn about adjusting the subtitle timing.
Step 7: Begin Adding the Subtitles
With the language and translation options set, it’s time to begin adding the subtitles to the YouTube video. In this step, we will explore the process of entering the subtitles in the Subtitle Editor and ensuring they are accurately synchronized with the video.
In the Subtitle Editor, locate the text box where you can enter the subtitles. Start by typing the dialogue or narration for the first segment of the video. Take note of the timing displayed on the timeline to ensure that the subtitle appears at the right moment.
As you enter the subtitles, make sure they are clear, concise, and accurately reflect the spoken words. Break longer sentences or phrases into smaller captions to improve readability and synchronization with the audio.
Use the timeline to navigate through the video and add subtitles at the appropriate timestamps for each dialogue or narration segment. Ensure that each subtitle aligns with the timing of the corresponding spoken words in the video.
To add a new subtitle, enter the text in the text box and press the “Enter” or “Return” key on your keyboard. This will create a new subtitle with an associated timestamp on the timeline.
If you prefer, you can also copy and paste the text from a separate document or transcription file directly into the subtitle text box. This can save time when working with longer videos or when using pre-existing transcriptions.
Continue adding the subtitles for the entire duration of the video, ensuring that they are synchronized accurately with the audio. Take the time to review and edit each subtitle to correct any typos, improve readability, and maintain consistency in formatting.
If your video contains multiple speakers or scenes with different languages, you can use speaker labels or language identifiers to differentiate and clarify the subtitles. This helps viewers follow along and understand the dialogue more easily.
Remember to save your progress regularly to ensure that all the subtitles you have added are retained. This prevents any loss of data in case of unexpected interruptions or changes.
In the next step, we will explore how to adjust the timing and duration of the subtitles to fine-tune their synchronization with the video. Let’s proceed to Step 8 and learn about editing and formatting the subtitles.
Step 8: Adjusting Timing and Duration of Subtitles
Now that you have added the subtitles to the YouTube video, it’s important to ensure that their timing and duration are accurate and synchronized with the audio. In this step, we will explore how to adjust the timing and duration of the subtitles in the Subtitle Editor.
The Subtitle Editor provides several tools and features to help you fine-tune the timing and duration of the subtitles. These tools allow you to make precise adjustments to ensure that the subtitles appear and disappear at the right moments during video playback.
Start by selecting a subtitle on the timeline that you want to adjust. You can do this by clicking on the subtitle box or the associated timestamp. Once selected, you will see handles or markers that allow you to manipulate the start and end points of the subtitle.
To adjust the timing of a subtitle, click and drag the handles to move the subtitles forward or backward along the timeline. This enables you to align the subtitle with the specific moments when the corresponding words are spoken in the video.
Additionally, you can expand or shrink the duration of a subtitle by dragging its edges. This allows you to control how long the subtitle remains visible on the screen before transitioning to the next subtitle.
As you make adjustments to the timing and duration of the subtitles, ensure that they maintain a natural flow and readability. Avoid making abrupt changes or overlapping subtitles that may confuse viewers.
In cases where the dialogue or narration is fast-paced or there are multiple speakers, you may need to split longer subtitles into smaller segments for better comprehension. This ensures that viewers can comfortably read and understand the subtitles before they transition to the next set of spoken words.
Throughout the adjustment process, use the video preview window in the Subtitle Editor to preview how the subtitles appear in real-time. This allows you to assess their timing and synchronization with the audio.
Take your time to review and refine the subtitle timing and duration for each segment of the video. A well-timed and synchronized subtitle experience enhances the viewer’s understanding and engagement with the content.
Once you are satisfied with the adjustments, be sure to save your work to preserve the updated subtitle timings. This helps ensure that the subtitles appear correctly when the YouTube video is viewed by others.
In the next step, we will explore how to edit and format the subtitles to enhance their readability and visual appeal. Let’s proceed to Step 9 and learn about the editing and formatting options available.
Step 9: Editing and Formatting Subtitles
After adjusting the timing and duration of the subtitles, the next step is to edit and format them to enhance their readability and visual appeal. In this step, we will explore the editing and formatting options available in the Subtitle Editor.
The Subtitle Editor provides various tools and features to help you customize the appearance of the subtitles. These options allow you to improve their readability, adjust the font style and size, and add visual cues to enhance the viewer experience.
Start by selecting a subtitle that you want to edit or format. You can do this by clicking on the subtitle box or the associated timestamp on the timeline.
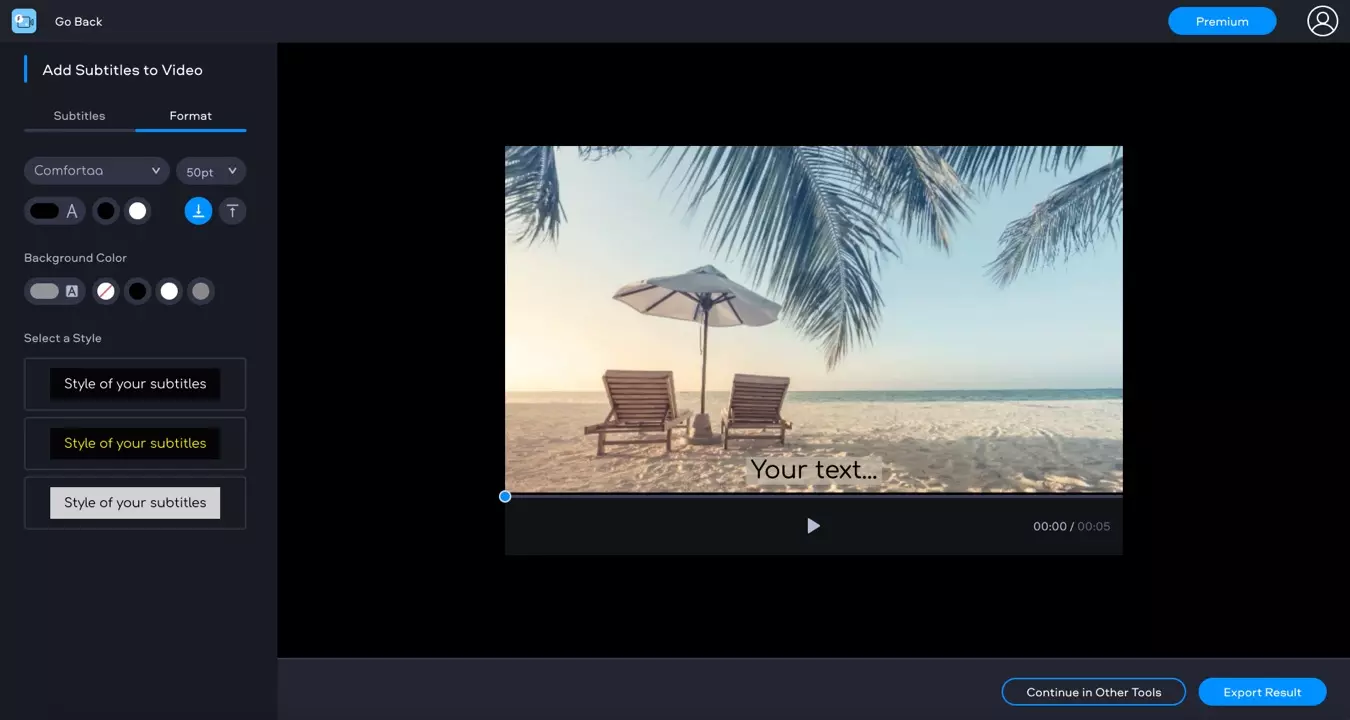
Once selected, you will see options to change the text’s font, size, color, and alignment. Experiment with different combinations to find a formatting style that suits the video’s content and enhances the overall viewing experience.
In addition to adjusting the text’s appearance, you can also add visual cues to the subtitles. For example, you can include speaker labels or differentiate between different types of dialogue or narration using visual indicators like italics or bold text.
If certain words or phrases need emphasis, you can use formatting options like underline or highlighting to draw attention to them. This can be particularly useful for important information or key points in the video.
While formatting the subtitles, ensure that the text remains readable against the video’s background. Choose colors and contrast that make the subtitles stand out without overwhelming the visual experience.
Keep in mind that subtlety and readability are key when formatting subtitles. Avoid using excessive formatting or special effects that may distract viewers or obstruct their view of the video content.
As you edit and format the subtitles, periodically review how they appear in the video preview window. This allows you to assess their readability and make any necessary adjustments to the formatting to improve their overall presentation.
Take the time to review and refine the subtitles’ editing and formatting for each segment of the video. A polished and visually appealing subtitle experience enhances the viewer’s engagement and understanding of the video’s content.
Once you are satisfied with the editing and formatting, be sure to save your work to preserve the changes made to the subtitles. This ensures that the subtitles appear correctly and visually pleasing when the YouTube video is viewed by others.
In the next step, we will explore how to save and publish the subtitles, making them accessible to viewers around the world. Let’s proceed to Step 10 and learn about the final steps in the subtitle addition process.
Step 10: Save and Publish the Subtitles
After completing the editing and formatting of the subtitles, it’s time to save and publish them, making them accessible to viewers worldwide. In this final step, we will learn how to save your work and make the subtitles available for the selected YouTube video.
To save your subtitles, navigate to the Subtitle Editor’s interface and locate the save or publish option. This may be in the form of a button or link, typically located near the top or bottom of the editor.
Click on the save or publish option to finalize and save your subtitles. Ensure that you select the correct video if you have multiple videos open in the editor.
Once saved, your subtitles will become associated with the selected YouTube video. This means that viewers can access and enable the subtitles while watching the video to enhance their understanding and overall experience.
Make sure to review your saved subtitles to ensure that they are appearing correctly with the video. Play the video and enable the subtitles to verify their timing, formatting, and overall synchronization with the audio.
If you need to make any further edits to the subtitles after saving, you can return to the Subtitle Editor and make the necessary adjustments. Simply locate the video in the YouTube Video Manager, navigate to the Subtitles section, and select the subtitle track you want to edit.
It’s important to note that after saving the subtitles, there may be a processing time before the changes appear publicly. This is because YouTube needs to process and sync the subtitles with the video before they become available for viewers.
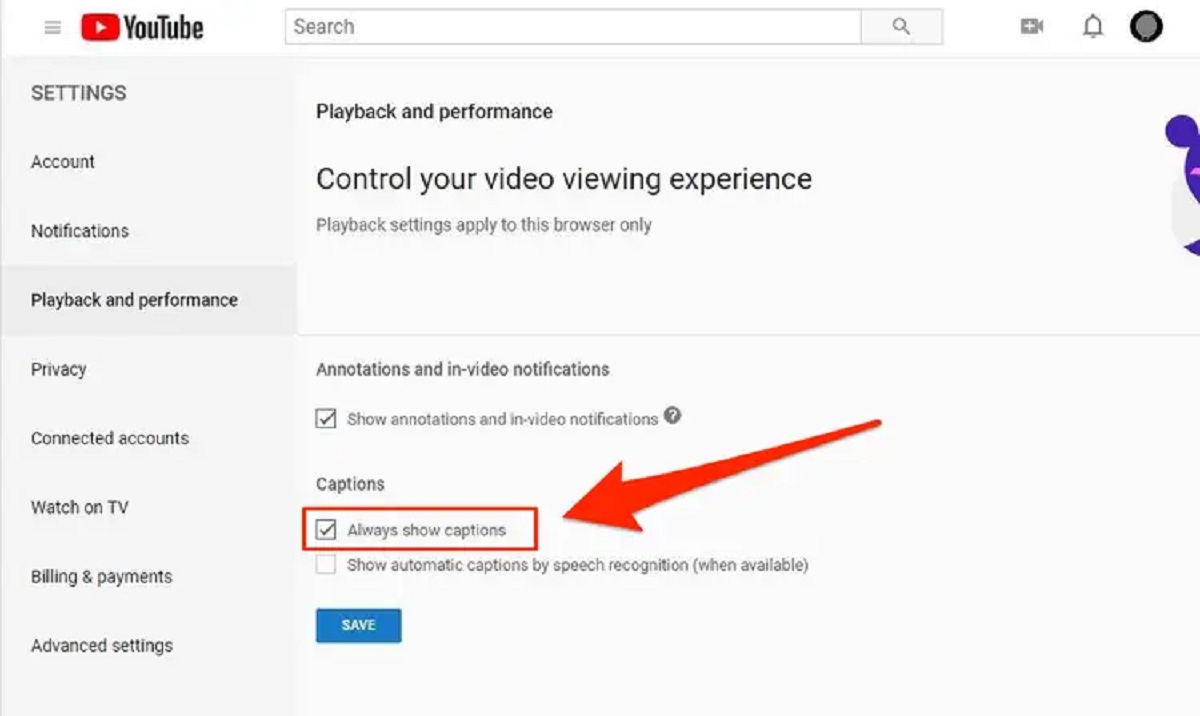
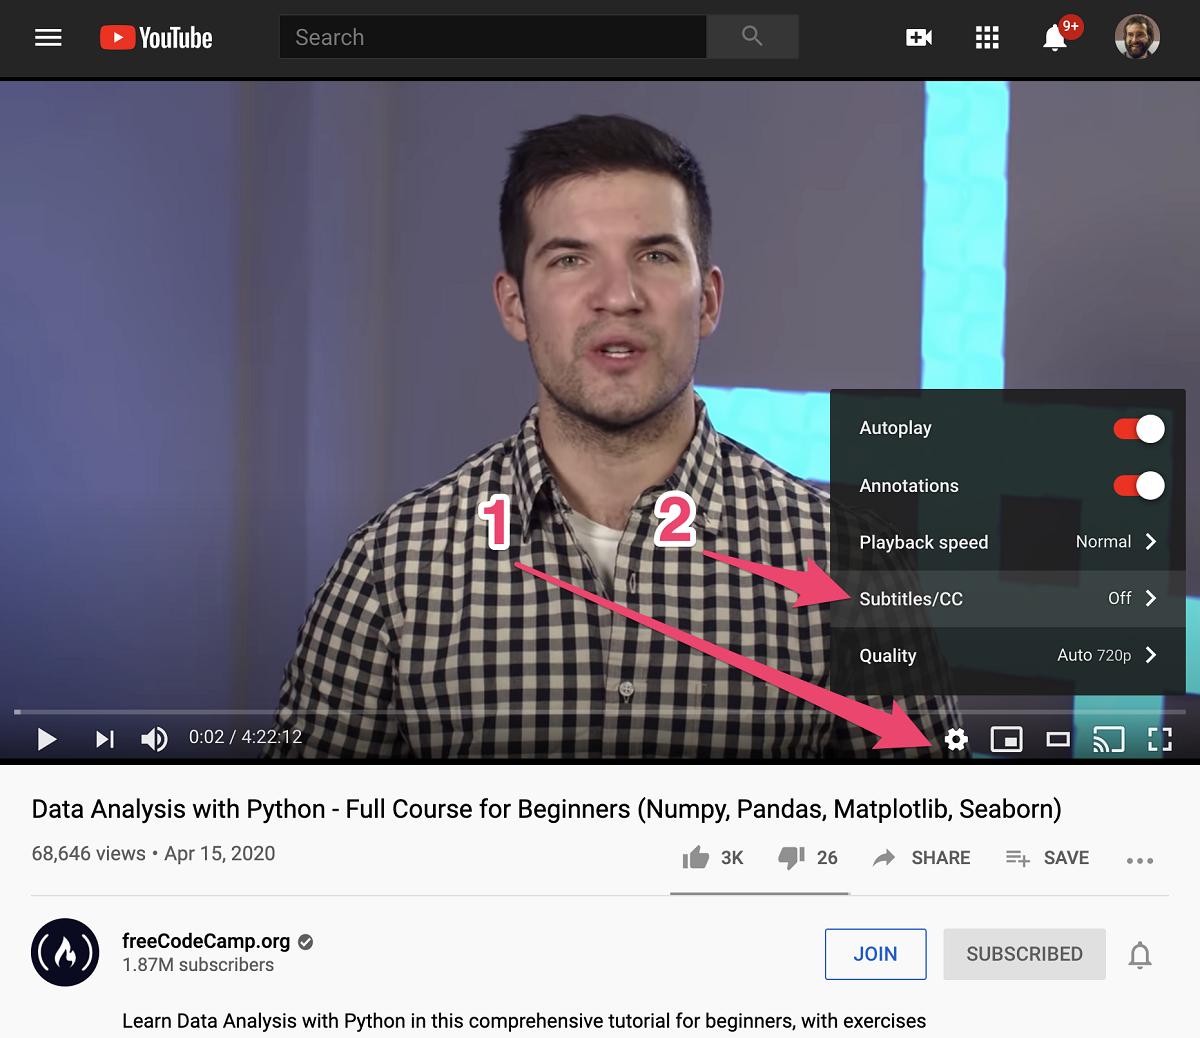
Once the processing is complete, viewers can access the subtitles by clicking on the CC (Closed Captions) button in the video player. They will then have the option to select the appropriate language if multiple language tracks are available.
Remember to inform your viewers about the availability of subtitles in your video. Including a brief mention or reminder about the subtitles in the video description or through verbal cues can help increase awareness and utilization of the feature.
Congratulations! You have successfully saved and published the subtitles for the selected YouTube video. By adding subtitles, you have enhanced the accessibility, reach, and overall viewing experience for a wider audience.
Feel free to continue refining your subtitles, making updates, or adding translations as needed. Subtitles provide a valuable way to engage with viewers from different backgrounds and ensure that your video’s content is accessible to all.
Conclusion
Adding subtitles to other people’s YouTube videos can significantly enhance accessibility, reach, and engagement for a wider audience. Through the step-by-step process outlined in this guide, you can make a valuable contribution to the YouTube community and bridge the language and accessibility gap.
By finding the YouTube video you want to add subtitles to and downloading the video or extracting its URL, you set the stage for further customization in the YouTube Video Manager. Accessing the Subtitles section allows you to add new subtitles or closed captions, set the language and translation options, and fine-tune the timing and duration of the subtitles.
Additionally, editing and formatting the subtitles give you the opportunity to enhance their readability and visual appeal. By adjusting the timing, duration, and formatting of the subtitles, you can create a seamless and enjoyable viewing experience for your audience.
Once you have completed the editing and formatting process, saving and publishing the subtitles is the final step. By making the subtitles available to viewers, you ensure that your video is more accessible and inclusive to people of various backgrounds and abilities.
Remember to periodically review and update your subtitles to maintain accuracy and address any viewer feedback or suggestions. By actively engaging with the subtitle addition process, you contribute to the improvement of YouTube’s accessibility and create an inclusive environment for content consumption.
Adding subtitles to other people’s YouTube videos is an impactful way to make a positive difference. It broadens the reach of valuable content, breaks down language barriers, and provides an inclusive experience for viewers worldwide.
So, why wait? Start exploring the vast world of YouTube and contribute your efforts to make it a more accessible and inclusive platform. Subtitles are just a few clicks away, and with this guide as your companion, you have all the tools you need to successfully add subtitles to other people’s YouTube videos.