Introduction
The use of subtitles in videos has become increasingly popular, revolutionizing the way we consume digital content. Whether you’re watching a movie, tutorial, or a promotional video, subtitles play a crucial role in enhancing the viewing experience for a wide range of audiences. Subtitles provide a written representation of the audio, allowing viewers to follow along with the dialogue even if they have difficulty hearing or understanding the spoken language.
But why exactly should you consider adding subtitles to your videos? Well, the benefits are aplenty. Firstly, subtitles make your content more accessible to a broader audience. They cater to the needs of individuals who are hearing impaired or those who have difficulty comprehending the spoken language. Additionally, subtitles allow viewers to enjoy your videos in noise-sensitive environments or situations where sound cannot be played aloud.
Moreover, adding subtitles to your videos can significantly improve their search engine optimization (SEO) value. Search engines can crawl and index the text within your video subtitles, making your content more discoverable by a wider audience. This can boost your video’s visibility in search engine rankings, driving more organic traffic to your content.
When it comes to adding subtitles to a video, there are different types to consider. Closed captions are synchronized with the video and can be toggled on and off by the viewer. Open captions, on the other hand, are burn-in subtitles that are permanently embedded into the video and cannot be turned off. The choice of subtitle type depends on your specific needs and the platforms you’re using to distribute your videos.
In this article, we will explore various methods of adding subtitles to a video. We’ll discuss using video editing software, online subtitle tools, video hosting platforms, and subtitle file formats. We’ll also delve into the process of adding subtitles using YouTube, one of the most popular video sharing platforms. By the end of this article, you’ll have a comprehensive understanding of the different options available to you and the best practices for creating subtitles that enhance your videos.
Why Use Subtitles in a Video?
Subtitles have become an essential element in video production, providing numerous benefits for both content creators and viewers. Let’s explore why using subtitles in a video is advantageous:
- Improved Accessibility: One of the primary reasons for using subtitles is to make your content accessible to a wider audience. Subtitles cater to individuals who are deaf or hard of hearing, ensuring they can understand and enjoy your videos.
- Enhanced Comprehension: Even for viewers without hearing impairments, subtitles can improve comprehension by providing a visual aid for understanding dialogue. Subtitles can help clarify accents, muffled audio, or fast speech, ensuring that your message resonates with all viewers.
- Inclusive Content: Adding subtitles to your videos demonstrates inclusivity and a commitment to reaching diverse audiences. By offering subtitles in different languages, you can engage international viewers and expand your global reach.
- SEO Benefits: Subtitles can significantly boost your video’s search engine optimization (SEO). Search engines can index the text within subtitles, making your video more discoverable to a wider audience. By including relevant keywords within your subtitles, you can improve your video’s ranking in search engine results pages.
- Increased Engagement: Subtitles can enhance viewer engagement and retention. Research shows that people are more likely to watch a video until the end if it includes subtitles. Subtitles help viewers stay focused, especially in noisy or distracting environments where audio might not be practical.
- Multi-platform Compatibility: Subtitles enable your videos to be shared across various platforms without losing their effectiveness. Whether it’s on social media, video sharing websites, or mobile devices, subtitles ensure that your message remains intact regardless of where your content is viewed.
By utilizing subtitles effectively, you can make your videos more accessible and appealing to a wider audience. Whether it’s for educational, promotional, or entertainment purposes, subtitles can be a game-changer in delivering your message and increasing engagement. In the following sections, we will explore different methods and tools for adding subtitles to your videos, enabling you to select the most suitable option for your specific needs.
Types of Subtitles
When it comes to adding subtitles to your videos, there are different types to consider. Each type offers unique advantages and caters to specific requirements. Let’s explore the most common types of subtitles:
- Closed Captions (CC): Closed captions are synchronized with the video and can be toggled on and off by viewers. They provide a text-based representation of the audio, including dialogue, sound effects, and relevant descriptions. Closed captions are versatile and widely supported on various platforms, making them an ideal choice for reaching a broader audience.
- Open Captions: Open captions, also known as burn-in subtitles, are permanently embedded into the video. They cannot be toggled on or off by viewers and are always displayed. Open captions offer maximum accessibility and ensure that the subtitles are always visible, which is particularly beneficial for viewers who prefer or require subtitles at all times.
- Forced Narrative (FN): Forced narrative subtitles appear only when specific non-English dialogue or text is spoken or displayed on the screen. They are commonly used to translate occasional foreign language phrases or provide contextual information during a video. Forced narrative subtitles offer a seamless viewing experience without the distraction of constant subtitles.
- Interlingual Subtitles: Interlingual subtitles, also known as translated subtitles, are used for videos that cater to international audiences. They provide translations of the original dialogue in different languages, allowing viewers who don’t understand the original language to fully comprehend and enjoy the content.
- Untranslated Subtitles: Untranslated subtitles are often used when a video contains different languages, and only the non-English parts require translation. These subtitles only appear when non-English dialogue is spoken, providing clarity and understanding for viewers who do not understand the specific language being spoken.
The choice of subtitle type depends on various factors, including the nature of your video, the platforms you’re using to distribute it, and the preferences of your target audience. By understanding the different types of subtitles available, you can select the most suitable option that aligns with your goals and effectively conveys your message.
In the next sections, we will explore different methods and tools for preparing and adding subtitles to your videos. Whether you’re using video editing software, online subtitle tools, or video hosting platforms, understanding the various subtitle types will help you make informed decisions in creating an engaging and inclusive video viewing experience.
Preparing the Subtitles
Before you can add subtitles to your videos, it’s essential to properly prepare them. Proper subtitle preparation ensures accuracy, synchronization, and an optimal viewing experience for your audience. Here are some steps to follow when preparing subtitles:
- Transcription and Translation: Start by transcribing the dialogue or spoken content of your video. This involves creating a written version of the audio and can be done manually or using automated transcription tools. If your video includes multiple languages, you may also need to translate the dialogue into the desired languages to cater to a broader audience.
- Timing and Synchronization: Once the dialogue has been transcribed, it’s important to time and synchronize the subtitles with the corresponding audio or video. Each subtitle should appear and disappear at the appropriate moments to ensure seamless integration with the content. This can be done manually or using subtitle editing software that allows for precise timing adjustments.
- Text Formatting: Consider the formatting of your subtitles to enhance readability and visual appeal. Use a legible font with appropriate size and color. Ensure that the subtitles are positioned in a way that doesn’t obstruct important visuals or subtitles. Additionally, use formatting options such as italics or bold text to differentiate sounds, emphasis, or off-screen dialogue.
- Proofreading and Editing: Once the subtitles are synchronized and formatted, it’s crucial to proofread and edit them for accuracy, grammar, and punctuation. Mistakes or inaccuracies in the subtitles can affect the viewer’s comprehension and overall impression of your video. Take the time to review and make necessary edits to ensure a high-quality subtitle experience.
- Testing: Before finalizing your subtitles, conduct thorough testing to ensure they work seamlessly with your video. Test the subtitles on different devices and platforms to ensure compatibility and proper display. Check for any synchronization issues or formatting glitches that may interfere with the viewer’s experience. Make necessary adjustments and retest as needed.
By following these steps, you can ensure that your subtitles are accurate, well-timed, and visually appealing. Properly prepared subtitles enhance the accessibility and overall quality of your video content, making it more enjoyable and inclusive for your diverse audience.
In the next sections, we will explore different options for adding subtitles using video editing software, online subtitle tools, video hosting platforms, and subtitle file formats. Understanding these options will enable you to effectively incorporate your prepared subtitles into your videos, regardless of your chosen method or platform.
Option 1: Adding Subtitles Using Video Editing Software
If you have access to video editing software, adding subtitles to your videos becomes a straightforward task. Many professional video editing tools provide dedicated features and functionalities for creating and incorporating subtitles. Here’s a step-by-step guide on how to add subtitles using video editing software:
- Import Your Video: Start by importing your video file into the video editing software. Familiarize yourself with the editing interface, timeline, and available tools.
- Create Subtitle Tracks: Depending on the software, you can create separate subtitle tracks or text layers where you’ll input your subtitles. This allows for precise control over their placement and timing within the video.
- Enter Subtitles: Begin entering your prepared subtitles into the designated subtitle track or text layer. Ensure that each subtitle is synchronized with the corresponding audio or video segment by aligning their timing on the timeline.
- Format and Customize: Utilize the formatting options available to enhance the appearance and readability of your subtitles. Adjust the font type, size, color, and position to ensure they fit seamlessly with the video content without obstructing important visuals or subtitles.
- Preview and Adjust: Take advantage of the software’s preview feature to review your video with the added subtitles. Make necessary adjustments to the timing, formatting, or positioning of the subtitles as needed to ensure they align perfectly with the video’s pace and visual elements.
- Export the Video: Once you’re satisfied with the placement and appearance of the subtitles, export the video with the embedded subtitles. Choose your desired output format and quality settings according to the intended platform or distribution.
Adding subtitles using video editing software gives you full creative control over the appearance and timing of the subtitles. It allows you to synchronize them precisely with the video content, resulting in a polished and professional viewing experience.
Keep in mind that the process may vary slightly depending on the video editing software you’re using. Familiarize yourself with the specific features and functionalities of your chosen software to make the most of its subtitle capabilities.
In the next sections, we will explore alternative options for adding subtitles using online subtitle tools, video hosting platforms, and subtitle file formats. These options provide flexibility for those without access to video editing software or looking for more convenient methods to add subtitles to their videos.
Option 2: Using Online Subtitle Tools
If you don’t have access to video editing software or prefer a more convenient method for adding subtitles, using online subtitle tools is a great option. There are numerous web-based tools available that offer user-friendly interfaces and efficient subtitle creation features. Here’s a step-by-step guide on how to add subtitles using online subtitle tools:
- Choose an Online Subtitle Tool: Research and select a reputable online subtitle tool that suits your needs. Look for tools that offer easy uploading and editing of your video files, as well as a range of subtitle customization options.
- Upload Your Video File: Once you’ve chosen an online subtitle tool, upload your video file to the tool’s platform. Ensure that the tool supports your video file format and size limitations.
- Create Subtitles: Use the provided interface to create your subtitles. The tool may offer features such as automatic speech recognition (ASR) or manual input for entering your subtitles. Follow the on-screen instructions to input your prepared subtitles into the tool.
- Synchronize Subtitles: Depending on the tool, you may have the option to manually or automatically synchronize your subtitles with the video’s audio. Adjust the timing and placement of each subtitle as needed to ensure accurate synchronization.
- Format and Customize Subtitles: Explore the formatting and customization options of the online subtitle tool to enhance the appearance of your subtitles. Select the desired font style, size, color, and position. Some tools may also offer formatting options for emphasis or styling effects.
- Preview and Adjust: Utilize the preview feature provided by the online subtitle tool to review your video with the added subtitles. Make any necessary adjustments to the timing, formatting, or placement of the subtitles to ensure optimal synchronization and readability.
- Download the Subtitled Video: Once you’re satisfied with the placement and appearance of the subtitles, download the subtitled version of your video from the online subtitle tool. Choose the appropriate output format and quality settings based on your intended use or distribution platforms.
Using online subtitle tools offers convenience and accessibility for adding subtitles to your videos. These tools often have intuitive interfaces and can be used on various devices without the need for software installation. They are particularly useful for those who don’t have access to advanced video editing software.
Remember to choose a reliable and secure online subtitle tool that ensures the privacy and security of your video content. Research user reviews and ratings to select a tool that has a good reputation for accuracy and ease of use.
In the next sections, we will explore additional options for adding subtitles using video hosting platforms and subtitle file formats. These options provide flexibility and compatibility for incorporating subtitles into your videos and reaching a wider audience.
Option 3: Using Video Hosting Platforms for Subtitles
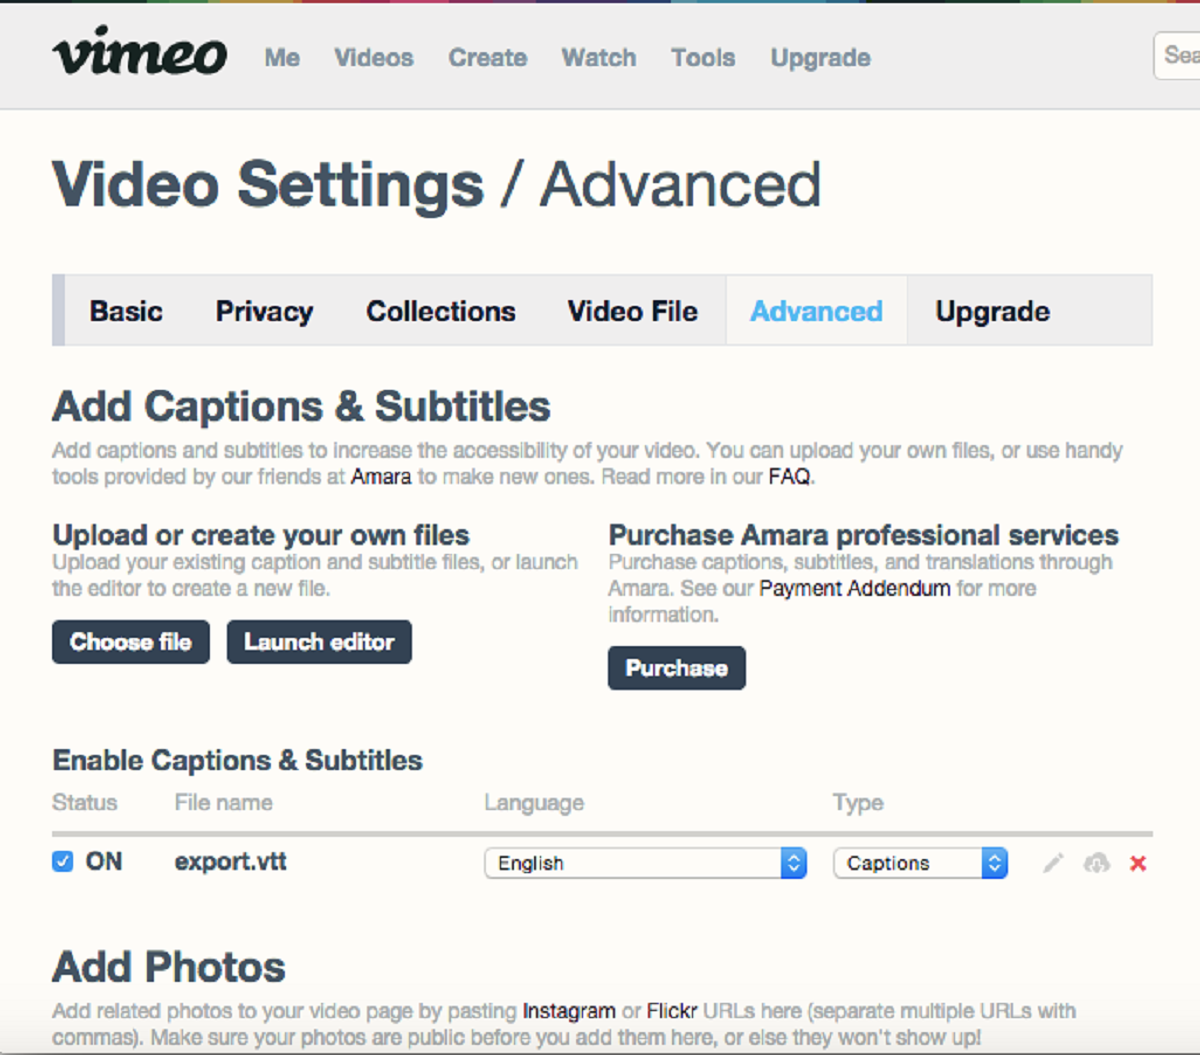
Video hosting platforms, such as YouTube, Vimeo, and Wistia, offer built-in subtitle features that allow you to add subtitles directly to your videos. These platforms provide convenient options for managing and displaying subtitles, making them accessible to a broad audience. Here’s a step-by-step guide on how to add subtitles using video hosting platforms:
- Upload Your Video: Start by uploading your video to the chosen video hosting platform. Familiarize yourself with the platform’s interface, settings, and features for managing your videos.
- Access Subtitle Options: Once your video is uploaded, navigate to the video management page and locate the subtitle options provided by the hosting platform. Look for features like “Subtitles” or “Captions” within the video settings menu.
- Create or Upload Subtitles: Depending on the platform, you’ll have the option to create subtitles directly within the platform or upload a pre-prepared subtitle file. Follow the platform’s guidelines for creating or uploading subtitles.
- Enter Subtitles: Use the provided interface or upload feature to enter your prepared subtitles into the video hosting platform. Ensure that each subtitle is synchronized accurately with the respective audio segments.
- Format and Customize Subtitles: Explore the subtitle formatting options offered by the platform. Adjust the font style, size, color, and position to enhance readability and ensure that the subtitles align well with the video content.
- Preview and Adjust: Take advantage of the platform’s preview feature to review your video with the added subtitles. Make any necessary adjustments to the timing, formatting, or positioning of the subtitles to ensure optimal synchronization and aesthetic appeal.
- Save and Publish: Once you’re satisfied with the placement and appearance of the subtitles, save your changes and publish the video. The subtitles will be embedded in the video and made available to viewers.
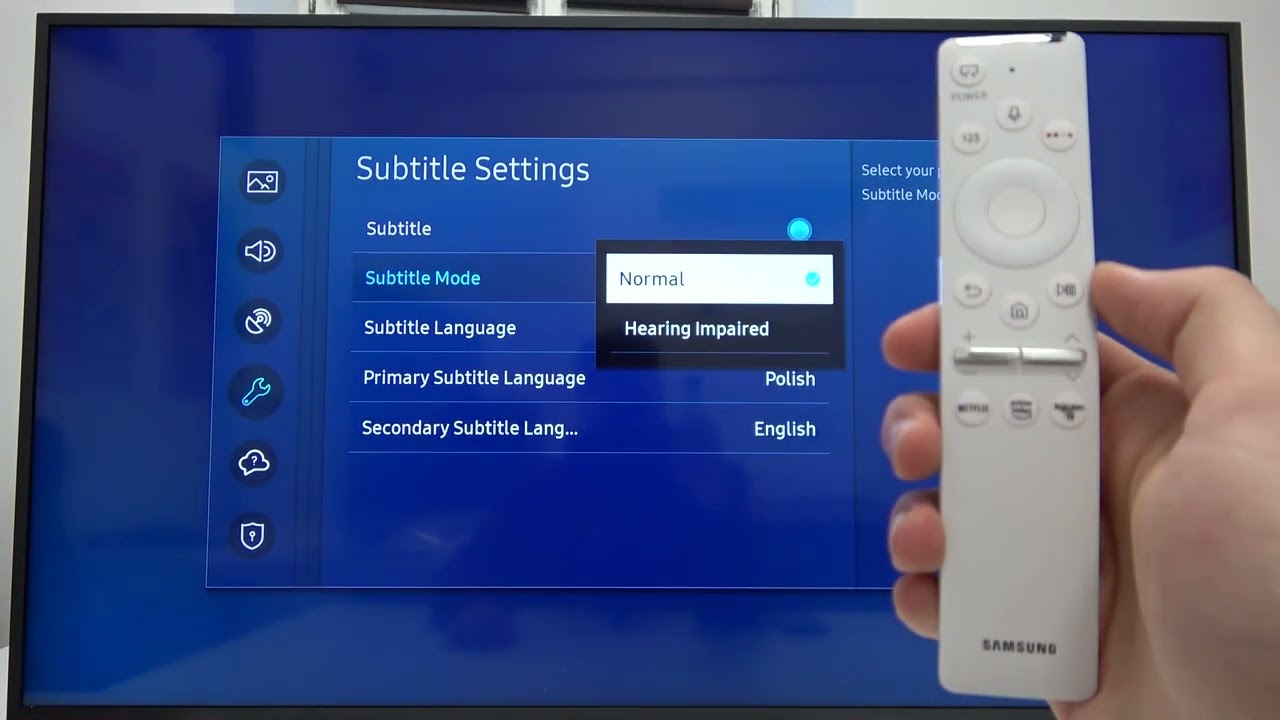
Using video hosting platforms for subtitles offers convenience and accessibility, as the subtitles are directly integrated within the video player of the platform. The platforms also provide options for viewers to toggle subtitles on or off, adjust their appearance, or choose from different subtitle language options.
Remember to consult the specific documentation and guidelines provided by the chosen video hosting platform to ensure that you properly utilize their subtitle features. Different platforms may have unique subtitle settings and requirements.
In the next sections, we will explore the use of subtitle file formats and how to add subtitles to your videos using YouTube’s built-in subtitle feature.
Option 4: Using Subtitle File Formats
Using subtitle file formats provides flexibility and compatibility when it comes to adding subtitles to your videos. Subtitle file formats allow you to create and save subtitles separately from the video file itself, making it easier to switch or share subtitles across different platforms and devices. Here’s how you can use subtitle file formats to add subtitles to your videos:
- Prepare Subtitle File: Start by preparing your subtitles in a compatible file format. Common subtitle file formats include SubRip (.srt), WebVTT (.vtt), and Timed Text Markup Language (.ttml). Ensure that your subtitle file accurately matches the timed dialogue or text of your video.
- Save Subtitle File: Save your prepared subtitles with the appropriate subtitle file extension (.srt, .vtt, .ttml). Pay attention to the formatting requirements and syntax specific to the chosen subtitle file format.
- Upload Your Video: Upload your video to the chosen platform or video editing software. Make sure you’re familiar with the supported subtitle file formats and any platform-specific guidelines for adding subtitles.
- Import Subtitle File: Within the platform or video editing software, locate the option to import or upload a subtitle file. Choose the prepared subtitle file and ensure that it is correctly associated with the video.
- Adjust Subtitle Timing: Depending on the platform or software, you may need to manually adjust the timing of the subtitles to ensure synchronization with the video’s audio or visual cues. Use the provided tools or editing features to fine-tune the timing as necessary.
- Format and Customize Subtitles: Explore the formatting options available within the platform or software to enhance the appearance and readability of your subtitles. Adjust font style, size, color, and position to ensure optimal visibility and integration with the video content.
- Preview and Adjust: Utilize the preview feature within the platform or software to review your video with the added subtitles. Make any necessary adjustments to the timing, formatting, or positioning of the subtitles to ensure they align perfectly with the video.
- Save and Publish: Once you’re satisfied with the placement and appearance of the subtitles, save your changes and publish the video. The subtitles, embedded within the subtitle file, will be displayed when the video is played on compatible devices or platforms.
Using subtitle file formats offers versatility and ease of use when it comes to adding subtitles to your videos. Subtitle files can be easily shared, allowing you to distribute your videos with subtitles across different platforms while maintaining consistency.
Ensure that you comply with the specific requirements and standards of the chosen platform or software regarding subtitle file formats. It’s important to choose a subtitle format that is widely supported and compatible with the target devices and platforms you intend to use.
In the next section, we will explore how to add subtitles to your videos using YouTube’s built-in subtitle feature, focusing on its widespread popularity and comprehensive subtitle management options.
Adding Subtitles with YouTube
YouTube, one of the most popular video sharing platforms, offers a built-in subtitle feature that allows you to easily add subtitles to your videos. YouTube provides comprehensive subtitle management options, making it convenient for content creators to reach a wide audience. Here’s how you can add subtitles to your videos using YouTube:
- Upload Your Video: Start by uploading your video to your YouTube channel. Ensure that you have the necessary permissions and meet the requirements for uploading a video on YouTube.
- Access Subtitle Options: Once your video is uploaded, go to the YouTube Studio and navigate to the video management page. Locate the “Subtitles” or “Captions” option for the specific video you want to add subtitles to.
- Create or Import Subtitles: YouTube provides options for creating subtitles directly within its platform or importing pre-prepared subtitle files. Choose the method that best suits your needs and follow the on-screen instructions for creating or importing subtitles.
- Enter Subtitles: Use the provided subtitle editor within YouTube to enter your prepared subtitles. Ensure that each subtitle is synchronized accurately with the corresponding audio segments of your video.
- Format and Customize Subtitles: YouTube allows you to format and customize the appearance of your subtitles. You can adjust the font style, size, color, and position to enhance readability and ensure seamless integration with your video content.
- Review and Adjust: Utilize the preview feature provided by YouTube to review your video with the added subtitles. Make any necessary adjustments to the timing, formatting, or placement of the subtitles to ensure optimal synchronization and visual appeal.
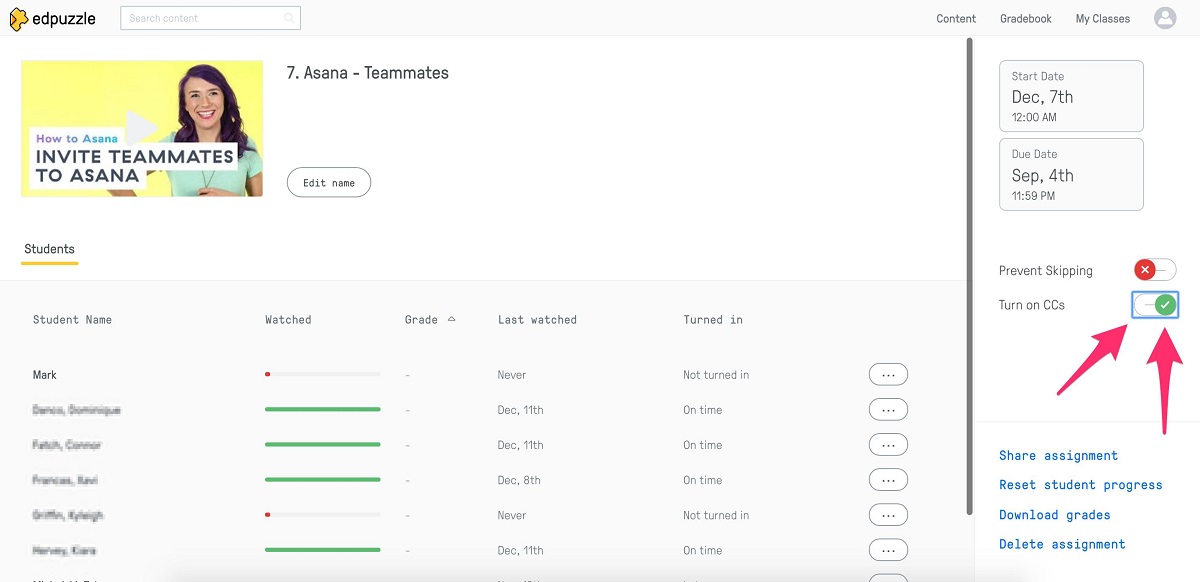
- Publish Subtitles: Once you’re satisfied with the placement and appearance of the subtitles, save your changes and publish the subtitles. YouTube will automatically make the subtitles available to viewers, who can toggle them on or off as desired.
Adding subtitles with YouTube provides an effective way to reach a wider audience and enhance the accessibility of your videos. YouTube’s built-in subtitle feature offers a user-friendly interface and comprehensive management options, ensuring a seamless viewing experience for viewers.
Remember to follow YouTube’s guidelines and policies for adding subtitles, and be sure to provide accurate and well-synchronized subtitles to enhance viewer engagement and inclusivity.
In the next section, we will discuss best practices for creating subtitles that effectively convey your message and provide a pleasant viewing experience for all viewers.
Best Practices for Creating Subtitles
Creating high-quality subtitles requires attention to detail and adherence to best practices. Follow these guidelines to ensure that your subtitles effectively convey your message and provide a pleasant viewing experience for all viewers:
- Accuracy and Synchronization: Ensure that your subtitles accurately reflect the spoken dialogue or text in your video. Pay close attention to timing and synchronization, ensuring that each subtitle appears and disappears at the appropriate moment, aligning accurately with the audio or visual cues.
- Readability: Choose a legible font style and size for your subtitles. Avoid using overly decorative or difficult-to-read fonts. Additionally, use appropriate color contrast between the subtitles and the video background to ensure optimal readability, regardless of the viewer’s device or environment.
- Conciseness: Keep your subtitles concise and to the point. Use clear and concise sentences that convey the essence of the dialogue. Aim for a maximum of two lines per subtitle to ensure readability and avoid overwhelming the viewer with excessive text.
- Punctuation and Grammar: Pay attention to proper punctuation and grammar in your subtitles. Ensure that the subtitles follow grammatical rules and maintain correct sentence structure. Proper punctuation helps with comprehension and gives the subtitles a polished and professional appearance.
- Time on Screen: Consider the appropriate time duration for each subtitle. Give viewers sufficient time to read and comprehend the subtitle without it lingering on-screen for too long. Strive for a balance that allows comfortable reading while maintaining a natural pace for the subtitles.
- Formatting: Use text formatting options, such as italics or bold, to differentiate sounds, emphasis, or off-screen dialogue. This helps viewers better understand the audio elements and adds clarity to the subtitles.
- Consistency: Maintain consistency in style, formatting, and tone throughout your subtitles. Ensure that similar words or phrases are translated consistently, and abide by any established subtitle style guidelines to provide a cohesive viewing experience.
- Preview and Test: Always preview your subtitled video before publishing to ensure that the subtitles are synchronized, the formatting is intact, and the timing is accurate. Test the subtitled video on different devices and platforms to ensure compatibility and optimal display for viewers.
By following these best practices, you can create subtitles that are accurate, clear, and visually appealing. Thoughtful subtitle creation enhances the accessibility, engagement, and overall viewer experience of your videos.
Incorporating subtitles effectively builds an inclusive and accessible digital content portfolio that can be enjoyed by a diverse audience. Whether your aim is to make your videos accessible to the hearing impaired, improve viewer comprehension, or enhance your video’s search engine visibility, subtitles play a crucial role in delivering a seamless and captivating viewing experience.
In the next section, we will conclude our discussion, summarizing the various methods and options available for adding subtitles to your videos.
Conclusion
Adding subtitles to your videos is crucial for enhancing accessibility, improving viewer comprehension, and expanding your audience reach. By utilizing different methods and options, you can effectively incorporate subtitles into your videos, ensuring a seamless and inclusive viewing experience for all viewers.
We explored various approaches for adding subtitles to videos. If you have video editing software, you can take advantage of its features to precisely synchronize and format subtitles within your videos. Online subtitle tools offer convenience and accessibility, allowing you to create and customize subtitles without the need for specialized software. Video hosting platforms provide built-in subtitle features that make it easy to manage and display subtitles directly on their platforms. Additionally, subtitle file formats offer flexibility and compatibility for sharing subtitles across different platforms and devices.
Throughout the process, it’s essential to follow best practices for creating subtitles. Accuracy, readability, concise phrasing, proper punctuation, and consistent formatting contribute to an immersive and engaging viewing experience. Previewing and testing your subtitled videos ensure that the subtitles are synchronized, formatted correctly, and compatible with various devices and platforms.
By incorporating subtitles effectively, you enhance the accessibility of your videos, expand your audience, and improve search engine optimization (SEO) visibility. Subtitles provide equal access to individuals with hearing impairments, help viewers understand content in noisy environments, and cater to non-native speakers. Furthermore, search engines can index the text within subtitles, boosting organic traffic to your videos.
Whether you’re creating educational content, promotional videos, or entertaining vlogs, adding subtitles is a valuable investment. It demonstrates inclusivity, improves viewer engagement, and ultimately enhances the overall quality and impact of your videos.
Choose the method that best suits your needs and resources, whether it’s video editing software, online subtitle tools, video hosting platforms, or subtitle file formats. Consider your specific requirements, target audience, and the platforms you intend to distribute your videos on.
Remember to consistently provide accurate and well-synchronized subtitles that complement the content of your videos. By following these guidelines and implementing best practices, you can create subtitles that significantly improve the viewer’s experience and ensure that your videos reach a wider audience.