Introduction
Subtitles play a crucial role in improving the accessibility and understanding of video content. Whether you’re creating a film, a documentary, or a tutorial, adding subtitles can greatly enhance the viewing experience for a wide range of audiences. Subtitles provide text translations of the spoken dialogue, making it easier for viewers who may have hearing impairments, are learning a new language, or prefer to watch videos in noisy environments.
One of the popular video editing software that allows you to easily add subtitles to your videos is Filmora. Filmora is a user-friendly and feature-rich video editing tool that is perfect for both beginners and professionals. With its intuitive interface and powerful subtitle feature, Filmora simplifies the process of adding subtitles to your video projects.
In this article, we will guide you through the steps of adding subtitles to your video project in Filmora. Whether you want to include subtitles for a single video clip or an entire film, Filmora provides you with all the necessary tools to create visually appealing and precise subtitles. Let’s dive into the process and explore the various options Filmora offers for adding subtitles.
Why Subtitles Are Important
Subtitles are an essential component of video content for several important reasons. They not only enhance accessibility but also improve user experience and engagement. Here’s why subtitles are important:
- Accessibility: Subtitles make videos more accessible to individuals with hearing impairments. By providing a written form of the spoken dialogue, subtitles enable those with hearing difficulties to understand and enjoy the content.
- Language Translation: Subtitles are invaluable for reaching a global audience. They allow viewers who speak different languages to understand the dialogue and follow the storyline. This opens up opportunities for content creators to expand their reach and attract a diverse audience.
- Enhanced Comprehension: Subtitles can help improve comprehension, particularly when dealing with accents, complex terms, or fast-paced dialogue. Viewers can read along while listening, ensuring they don’t miss any important information being conveyed.
- Noisy Environments: Subtitles come in handy when watching videos in noisy environments where it may be challenging to hear the audio clearly. Whether on a crowded train or in a bustling coffee shop, viewers can still understand the content without relying solely on sound.
- Improved SEO: Subtitles can have a positive impact on search engine optimization (SEO) for video content. Including accurate subtitles with relevant keywords allows search engines to index the video more effectively, potentially boosting its visibility in search results.
- Engagement and Retention: Videos with subtitles tend to have higher engagement and viewer retention rates. Subtitles can captivate the attention of viewers, enabling them to stay focused and connected to the content. Subtitles also facilitate multitasking, as viewers can follow along even if they cannot fully dedicate their attention.
With these benefits in mind, it’s clear that adding subtitles to your video content is crucial for accessibility, audience reach, comprehension, and engagement. Now, let’s explore the step-by-step process of adding subtitles in Filmora to make your video projects more inclusive and impactful.
Step 1: Import Your Video Project into Filmora
The first step in adding subtitles to your video project is to import your video into Filmora. With Filmora’s user-friendly interface, importing your video files is a straightforward process. Here’s how to import your video project:
- Launch Filmora and create a new project or open an existing one.
- Click on the “Import Media” button located at the upper-left corner of the interface.
- A file browser window will appear. Navigate to the location where your video file is stored.
- Select the video file and click the “Open” button to import it into your Filmora project.
Once you’ve successfully imported your video project, you’ll see the video thumbnail or timeline displayed in the Filmora workspace. Now you’re ready to add subtitles to your video and make it more accessible and engaging.
It’s worth noting that Filmora supports a wide range of video formats, ensuring compatibility with various file types. This allows you to work with videos captured by different devices or downloaded from different sources, making it convenient for all your subtitle needs.
Now that you have imported your video project into Filmora, let’s move on to the next step and explore how to access the subtitle feature in Filmora.
Step 2: Access the Subtitle Feature in Filmora
After importing your video project into Filmora, the next step is to access the subtitle feature. Filmora provides an easy-to-use interface for adding and customizing subtitles. Follow these steps to access the subtitle feature in Filmora:
- Ensure that your video project is selected in the timeline or the preview window.
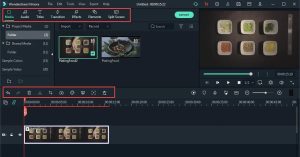
- Click on the “Text/Credit” tab located in the top menu bar of the Filmora interface.
- In the “Text/Credit” tab, you will find various options for adding text to your video project, including the subtitle feature.
- Click on the “Subtitle” option to access the subtitle feature.
Once you have accessed the subtitle feature, you will be able to view the subtitle settings panel, where you can customize the appearance, position, and timing of your subtitles.
Filmora’s subtitle feature offers a range of styles and templates to choose from, allowing you to customize the look and feel of your subtitles to match your video’s aesthetic. Whether you prefer a classic subtitle style or a more creative and modern design, Filmora has options to suit your needs.
Now that you have successfully accessed the subtitle feature in Filmora, let’s proceed to the next step and learn how to choose a subtitle style and customize it according to your preferences.
Step 3: Choose a Subtitle Style and Customize It
After accessing the subtitle feature in Filmora, the next step is to choose a subtitle style and customize it according to your preferences. Filmora offers a variety of styles and customization options that allow you to create visually appealing and unique subtitles. Follow these steps:
- In the subtitle settings panel, you will find a list of subtitle styles available in Filmora. Browse through the styles and choose the one that best fits the mood and theme of your video project.
- Once you have selected a subtitle style, you can further customize it to suit your requirements. Filmora provides options to modify the font, size, color, opacity, and more.
- Experiment with different combinations and settings to create the desired subtitle style. Remember to consider readability and contrast when making your customization choices.
- If you have a specific subtitle style in mind that is not available in the default options, you can create a custom style. Filmora allows you to import your own fonts and use them for subtitles, giving you even more flexibility in customizing the look of your subtitles.
Customizing the subtitle style helps maintain consistency throughout your video and adds a professional touch. It allows you to align the subtitles with the overall visual design and branding of your project.
Now that you have chosen and customized the subtitle style, it’s time to move on to the next step and learn how to type your subtitles into the text box.
Step 4: Type Your Subtitles into the Text Box
Once you have selected and customized the subtitle style in Filmora, it’s time to type your subtitles into the text box. This step involves adding the actual text that will appear as subtitles in your video. Follow these steps:
- In the subtitle settings panel, locate the text box provided for entering your subtitles.
- Click on the text box to activate it and start typing your subtitle text. Filmora allows you to add multiple subtitle lines, making it easy to create subtitles for conversations or longer dialogue sequences.
- Ensure that your subtitle text is concise, clear, and easy to read. Avoid long sentences or paragraphs that may make it difficult for viewers to follow along.
- As you type your subtitles, you can see a real-time preview of how they will appear on the video. This helps you visualize the final result and make necessary adjustments.
- If your video includes different speakers or characters, you can indicate them by adding speaker labels before each line of dialogue. This helps viewers identify who is speaking, especially in scenes with multiple characters.
As you type your subtitles, keep in mind that timing plays a crucial role in ensuring the subtitles appear at the right moment. We will cover timing adjustments in the next step. It’s also important to proofread your subtitles for spelling and grammar errors to maintain professionalism and accuracy.
Now that you have entered your subtitle text, let’s move on to the next step and learn how to adjust the timing of each subtitle.
Step 5: Adjust the Timing of Each Subtitle
After typing your subtitles into the text box in Filmora, the next step is to adjust the timing of each subtitle. Timing is important to ensure that the subtitles appear and disappear at the right moments in your video. Follow these steps to adjust the timing:
- In the subtitle settings panel, you will find options to set the start time and end time for each subtitle line.
- Move the playhead in the Filmora timeline to the specific point in your video where you want a subtitle line to appear.
- In the subtitle settings panel, set the “Start Time” for the corresponding subtitle line to match the current position of the playhead. This indicates when the subtitle should start displaying on the screen.
- Continue moving the playhead to the next desired point in your video and set the “End Time” for the subtitle line accordingly. This determines when the subtitle should disappear from the screen.
- Repeat this process for each subtitle line, adjusting the timing to match the dialogue or action happening in the video.
It’s important to ensure that the timing of the subtitles aligns with the spoken dialogue or any relevant visual cues in your video. This helps viewers accurately follow the storyline and enhances their overall viewing experience.
Filmora provides a timeline where you can visually see the duration of each subtitle line. This allows you to make precise adjustments and fine-tune the timing for optimal synchronization.
Now that you have adjusted the timing of each subtitle, let’s proceed to the next step and learn how to position and format your subtitles in Filmora.
Step 6: Position and Format Your Subtitles
Once you have typed your subtitles and adjusted their timing in Filmora, the next step is to position and format them according to your preferences. Filmora offers various options for customizing the placement, size, and appearance of your subtitles. Follow these steps:
- In the subtitle settings panel, you will find options to adjust the position of your subtitles on the screen. Filmora provides preset positions such as top, bottom, left, or right, as well as the ability to manually drag and position the subtitles anywhere on the video.
- Experiment with different positions and choose the one that doesn’t obstruct important visual elements or interfere with the overall composition of your video.
- Additionally, you can customize the size of your subtitles. Filmora offers resizing options, allowing you to increase or decrease the font size to ensure readability on screens of different sizes.
- To enhance the visual appeal of your subtitles, you can also apply formatting options such as bold, italic, underline, or even add drop shadows. These formatting options help to emphasize certain words or create a visual hierarchy within the subtitles.
- Filmora also provides the flexibility to change the color of your subtitles. You can select from a wide range of colors or even use a custom color to match your video’s theme or branding.
By positioning and formatting your subtitles effectively, you can ensure they are visually appealing, easy to read, and seamlessly integrated into your video project.
Remember to maintain consistency in the positioning and formatting of your subtitles throughout the video to provide a cohesive viewing experience.
Now that you have positioned and formatted your subtitles, let’s move on to the final step and learn how to apply and preview your subtitles in Filmora.
Step 7: Apply and Preview Your Subtitles
After positioning, formatting, and customizing your subtitles in Filmora, the final step is to apply them to your video project and preview the results. This ensures that the subtitles appear correctly and enhance the overall viewing experience. Follow these steps to apply and preview your subtitles:
- Review your subtitle settings and make any final adjustments if needed.
- Click on the “Apply” button in the subtitle settings panel to apply the subtitles to your video project.
- Play your video project within the Filmora interface to see how the subtitles appear in real-time.
- Preview the video to check if the timing, positioning, and formatting of the subtitles align with the dialogue and visuals.
- If you notice any issues or inconsistencies, you can go back and make necessary adjustments to the subtitle settings until you are satisfied with the results.
Previewing your subtitles allows you to ensure that they enhance the overall viewing experience and provide the intended information to your audience. It helps you catch any errors or discrepancies before finalizing your video project.
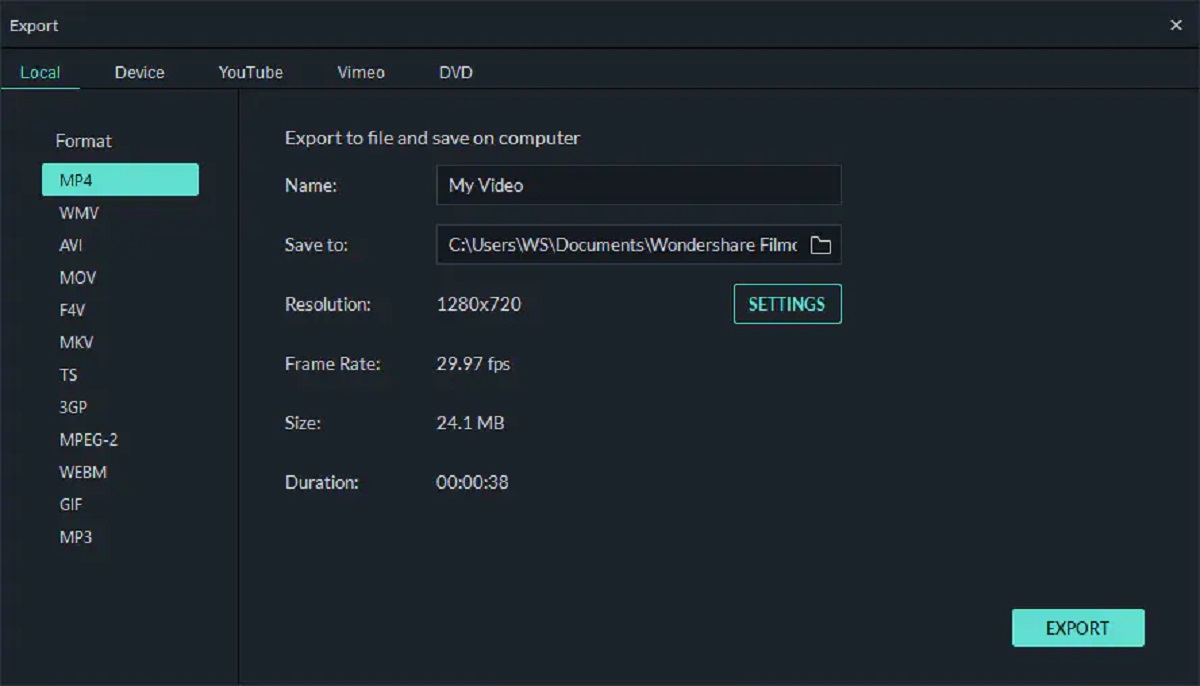
Besides previewing within Filmora, you can also generate a rendered preview of your video with subtitles enabled. This will provide you with a more accurate representation of how the final video will appear after exporting or sharing.
With the ability to apply and preview your subtitles, you can make necessary adjustments to fine-tune your video project and create a seamless and engaging viewing experience for your audience.
Now that you have successfully applied and previewed your subtitles, you are ready to export or share your video project with the subtitles included.
Conclusion
Adding subtitles to your video projects is an essential step in improving accessibility, increasing comprehension, and enhancing the overall viewing experience. Filmora provides an intuitive and feature-rich platform for easily adding and customizing subtitles.
In this article, we walked you through the step-by-step process of adding subtitles in Filmora. We covered importing your video project, accessing the subtitle feature, choosing a subtitle style, typing your subtitles, adjusting the timing, positioning and formatting your subtitles, and applying and previewing the final results.
By following these steps, you can create visually appealing and accurately timed subtitles that enhance the accessibility and engagement of your video content. Whether you’re creating films, documentaries, or educational videos, subtitles play a crucial role in reaching a wider audience and enabling them to fully understand and appreciate your content.
Remember to proofread your subtitles for accuracy and make necessary adjustments to ensure they align with the dialogue and visuals. Maintaining consistency in placement and formatting helps create a professional and cohesive look throughout your video.
With Filmora’s user-friendly interface and powerful subtitle features, you can confidently create subtitles that make your videos more inclusive and accessible to a diverse audience.
Start incorporating subtitles into your video projects with Filmora, and watch as your content reaches new heights of engagement and impact.