Introduction
Subtitles are a valuable addition to movies that provide viewers with an enhanced viewing experience. They display text translations or transcriptions of dialogue on the screen, allowing individuals who are deaf or hard of hearing to follow along with the dialogue, and enabling those who may not understand the language to enjoy foreign films. Moreover, subtitles can also be helpful in noisy environments where it may be difficult to hear the audio clearly.
To fully enjoy the benefits of subtitles, it is important to know how to add them to movies effectively. This process involves selecting the right subtitle file format, obtaining or creating the subtitle file, synchronizing the subtitles with the movie, adjusting their appearance, and potentially even embedding them onto the video file permanently. However, while the technical aspects may seem daunting, understanding the steps involved can make the process much easier.
In this article, we will guide you through the process of adding subtitles to movies, providing you with valuable tips and useful techniques. Whether you are a movie enthusiast, a language learner, or someone looking to make movies more accessible, this guide will equip you with the knowledge to successfully add subtitles to your favorite films.
We will begin by discussing the importance of adding subtitles to movies and how they can enhance the viewing experience. Then, we will delve into each step of the process, offering detailed explanations and instructions. By the end of this article, you will possess the necessary skills to confidently add subtitles to any movie of your choice.
Why Add Subtitles to Movies?
Adding subtitles to movies offers numerous benefits, making the viewing experience more accessible and enjoyable for a wide range of audiences. Here are some compelling reasons to consider adding subtitles:
- Accessibility for the Deaf and Hard of Hearing: Subtitles provide a vital tool for individuals with hearing impairments, allowing them to follow the dialogue and understand the storyline without relying solely on audio cues. By including subtitles, you make your movie inclusive and accessible to a broader audience.
- Language Learning and Comprehension: Watching movies with subtitles is an effective way to improve language skills and comprehension. Subtitles help language learners follow along with the dialogue, understand unfamiliar words or phrases, and reinforce pronunciation. Subtitles can also aid in learning new languages by providing simultaneous translation.
- Enhanced Understanding of Accents and Dialects: Movies set in specific regions or featuring characters with unique accents can sometimes make it challenging to comprehend the dialogue. Subtitles provide textual representation of the spoken words, ensuring the audience understands the dialogue accurately, even when faced with regional accents or dialects.
- Enjoyment of Foreign Films: Foreign films offer a glimpse into different cultures and storytelling styles, but language barriers can often hinder complete comprehension. By adding subtitles in the viewer’s native language, the entire story becomes understandable, allowing for a more immersive and enjoyable experience.
- Watching Movies in Noisy Environments: Subtitles can be highly beneficial when watching movies in noisy environments, such as airplanes, crowded cafes, or public transportation. By having the dialogue displayed on the screen, viewers can still follow the story and catch important details, even if the audio is partially drowned out by external noise.
- Preserving the Director’s Intended Experience: Sometimes, movies are dubbed or translated into different languages, which can result in nuances and cultural references being lost in translation. By adding subtitles in the original language, viewers can have a more authentic experience, understanding the dialogue and intended emotions as intended by the director.
By adding subtitles to movies, you can make your film accessible to a wider audience, facilitate language learning, improve comprehension, and enhance overall enjoyment. It is a small yet significant step towards creating an inclusive and enriching viewing experience.
Step 1: Choose the Right Subtitle File Format
Before adding subtitles to a movie, it is essential to choose the right subtitle file format. The subtitle file format determines how the subtitles are stored and synchronized with the video. Here are some popular subtitle file formats:
- SRT (SubRip): SRT is one of the most widely supported subtitle file formats. It is a simple text file that contains timestamp information and the corresponding subtitle text. SRT files are compatible with most media players and video editing software.
- ASS/SSA (Advanced SubStation Alpha): ASS and SSA are advanced subtitle formats that support various formatting options, such as text styling, fonts, colors, and timed effects. These formats are commonly used for animated subtitles, karaoke-style lyrics, and complex subtitle designs.
- SubIDX/SUB (DVD Subtitle): SubIDX and SUB formats are primarily used for DVD subtitles. These files are stored as image-based subtitles and require optical character recognition (OCR) software to extract the text. They are generally used for DVDs and may not be compatible with all media players.
- PGS (Presentation Graphic Stream): PGS is another subtitle format commonly used for DVDs and Blu-ray discs. It contains graphical subtitles that can support multiple languages and more advanced formatting options.
- VTT (WebVTT): VTT is a subtitle format specifically designed for web videos. It supports simple formatting and is widely supported by web browsers and streaming platforms.
When choosing a subtitle file format, consider factors such as compatibility with your media player or video editing software, the need for advanced formatting options, and the target platform where the movie will be viewed (e.g., DVD, streaming service, website).
Remember, it is important to ensure that the subtitle file format you choose is compatible with your intended playback method to guarantee that the subtitles display correctly alongside the movie.
Step 2: Download or Create the Subtitle File
Once you have chosen the appropriate subtitle file format, the next step is to obtain or create the subtitle file that contains the text for the movie’s dialogue. There are two main methods for acquiring a subtitle file:
- Download from Subtitle Websites: Numerous subtitle websites provide a vast collection of subtitle files for movies and TV shows in various languages. These websites allow you to search for the specific movie and language you need, and then download the corresponding subtitle file. Some popular subtitle websites include OpenSubtitles, Subscene, and Addic7ed.
- Create Your Own Subtitle File: If you cannot find a suitable subtitle file for your movie or want to make custom modifications, you can create your own subtitle file. To do this, you will need a text editor or specialized subtitle editing software. Open the text editor or software and create a new file. Assign timestamps to each subtitle line and enter the corresponding dialogue. Save the file with the appropriate subtitle file extension for your chosen format (e.g., .srt, .ass, .vtt).
When downloading a subtitle file, ensure that it matches the version and release of the movie you have. Sometimes multiple versions of a movie exist, which may have differences in dialogue or timing. To synchronize the subtitles accurately, make sure the subtitle file corresponds to the specific movie file you are using.
If creating your own subtitle file, it is crucial to synchronize the timestamps with the movie’s dialogue properly. Use an online subtitle synchronization tool or specialized software to fine-tune the timing of each subtitle line, ensuring it aligns perfectly with the spoken dialogue on-screen.
Whether you choose to download or create a subtitle file, remember to save it in a location that is easily accessible for the next steps in the subtitle adding process.
Step 3: Rename the Subtitle File to Match the Movie Filename
After obtaining or creating the subtitle file, the next step is to rename it to match the filename of the movie. This step is crucial for ensuring that the media player or video editing software can automatically associate the subtitle file with the correct movie file.
To rename the subtitle file, follow these guidelines:
- Use the Same File Extension: Make sure the subtitle file has the same file extension as the original movie file. For example, if the movie file is named “my_movie.mp4,” the subtitle file should also have the “.mp4” file extension.
- Keep the Filename Consistent: Ensure that the subtitle file has the same filename as the movie file with the addition of the language tag or any other identifiers. For instance, if the movie file is named “my_movie.mp4” and the subtitle is in English, the subtitle file could be named “my_movie_en.srt” or “my_movie.english.srt”.
- Avoid Special Characters: Remove any special characters, spaces, or punctuation marks from the subtitle filename. Stick to alphanumeric characters and underscores if needed. This ensures compatibility and reduces potential issues when loading the subtitles.
- Place the Subtitle File in the Same Directory: Store the renamed subtitle file in the same directory or folder as the movie file. This proximity helps the media player or video editing software detect and load the subtitles automatically.
By renaming the subtitle file to match the movie filename, you establish a clear link between the movie and its corresponding subtitles. This allows the media player or video editing software to recognize and load the subtitles appropriately during playback, eliminating the need for manual association.
Remember to double-check the filename and extension to ensure they match exactly, as even a minor discrepancy may prevent the subtitles from displaying correctly.
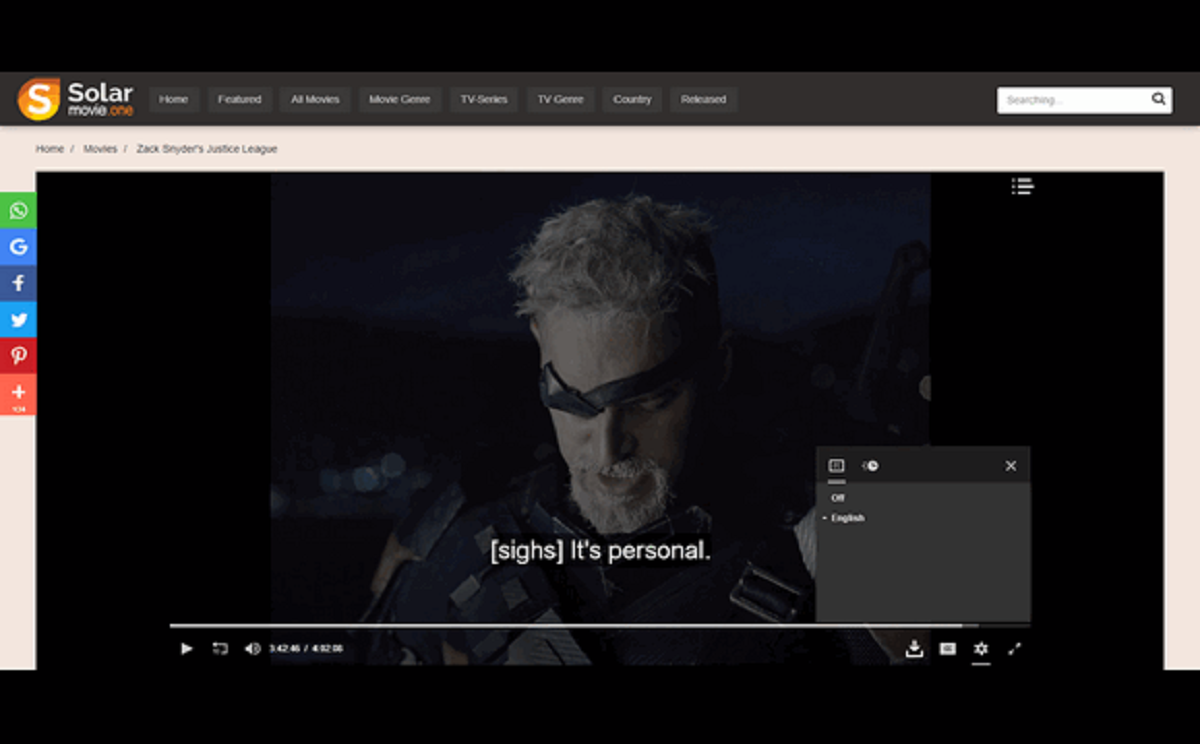
Step 4: Play the Movie with Subtitles on a Media Player
Once you have renamed the subtitle file to match the movie filename, the next step is to play the movie with subtitles on a media player. This allows you to verify that the subtitles are functioning correctly and synchronized with the movie.
Follow these steps to play the movie with subtitles:
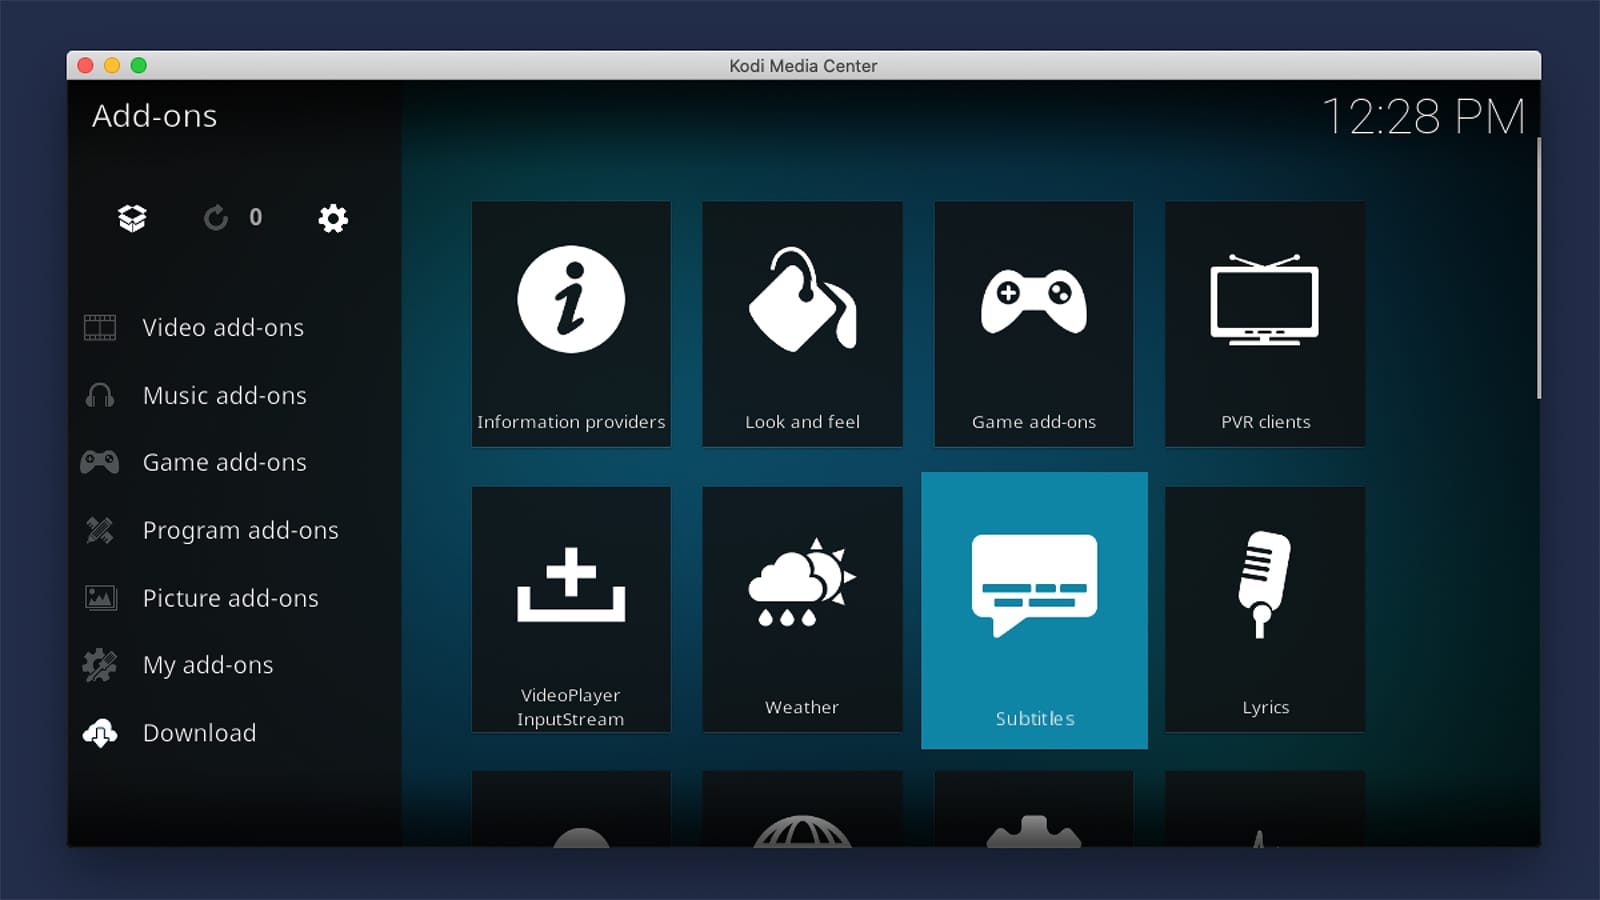
- Choose a Media Player: Select a media player software that supports subtitle playback. Popular options include VLC Media Player, Media Player Classic, PotPlayer, and Kodi. Ensure that the media player you choose is capable of loading the subtitle file format you have selected.
- Open the Movie File: Launch the media player and open the movie file you want to watch with subtitles. Go to the “Open” or “File” menu and browse to the location where you have saved the movie file. Select the file and click “Open” to load it into the media player.
- Load the Subtitle File: In the media player menu, look for options related to subtitles or captions. This could be under “Subtitle,” “CC,” or “Open Subtitle” options. Choose the appropriate option and locate the renamed subtitle file you created in the previous step. Select the file and click “Open” to load the subtitles into the media player.
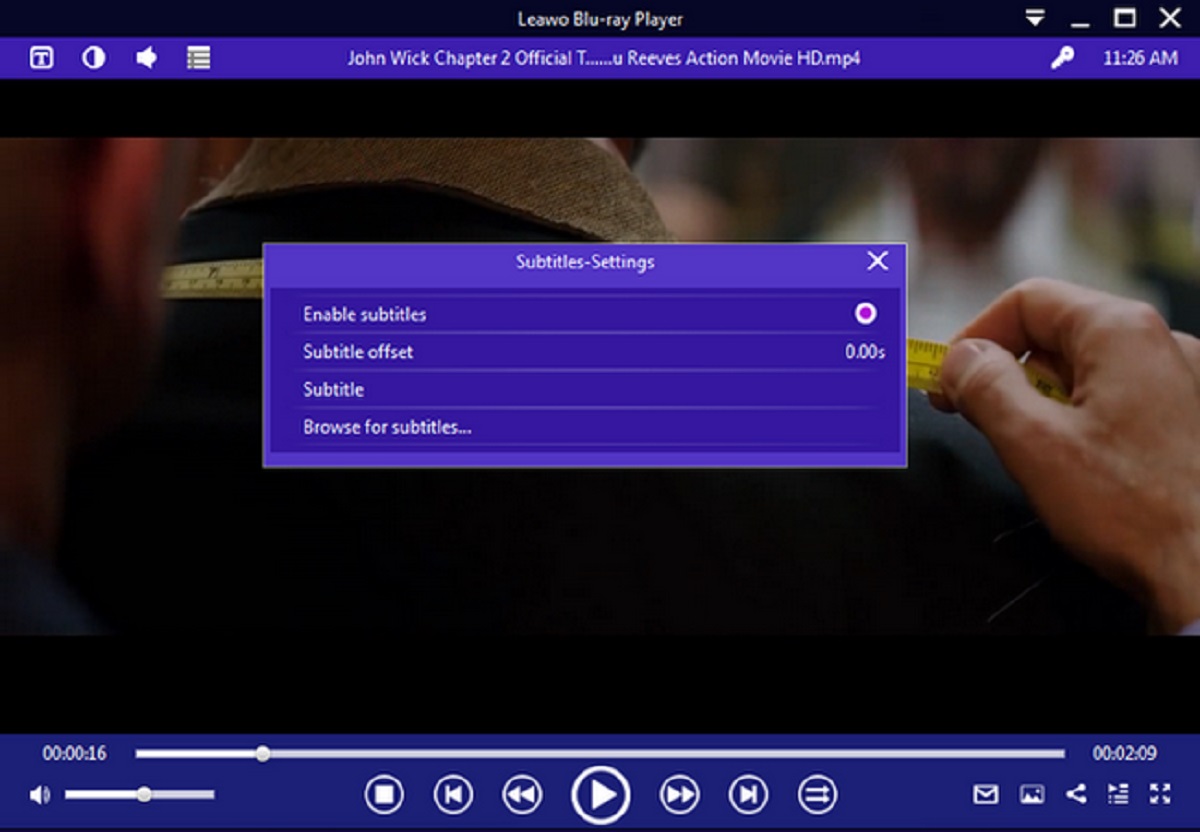
- Adjust Subtitle Settings: Some media players allow you to adjust the appearance or synchronization of the subtitles. If needed, explore the settings menu to modify the font style, size, color, or adjust subtitle delay to ensure perfect synchronization with the movie. These settings can enhance the legibility and overall viewing experience.
- Play the Movie: With the movie file loaded and the subtitles added, click the “Play” or “Start” button to begin playing the movie with subtitles. The media player will display the subtitles at the designated times, allowing you to follow along with the dialogue in sync with the movie.
By playing the movie with subtitles on a media player, you can ensure that the subtitles are properly synchronized, aligned with the dialogue, and displayed correctly. This step gives you the opportunity to make any necessary adjustments to the subtitle settings to ensure an optimal viewing experience.
Remember to use a media player that supports the subtitle file format and provides the necessary options for loading and adjusting subtitles.
Step 5: Adjust the Subtitle Synchronization, if Necessary
After playing the movie with subtitles, you may find that the timing of the subtitles is slightly off, either appearing too early or too late compared to the dialogue on the screen. In such cases, it is important to adjust the subtitle synchronization to ensure that the subtitles align perfectly with the spoken words.
Follow these steps to adjust the subtitle synchronization:
- Identify the Sync Issue: Pay attention to the exact moments where the subtitles are out of sync with the dialogue. Note whether the subtitles appear before or after the corresponding speech on the screen.
- Use Built-in Synchronization Options: Some media players provide built-in options to adjust the subtitle synchronization. Look for options like “Synchronization,” “Offset,” or “Delay” in the subtitle settings menu. Utilize these tools to fine-tune the time offset of the subtitles, so they match the dialogue accurately.
- Manually Edit the Subtitle Timing: If the media player doesn’t offer synchronization settings or the adjustments aren’t sufficient, you can manually edit the subtitle file to correct the timing. Use a specialized subtitle editing software or a text editor to modify the timestamp values in the subtitle file, adjusting them earlier or later as needed. Save the changes and load the modified subtitle file again in the media player to verify the synchronization.
- Preview and Refine: After making adjustments, play the movie again with the modified subtitles to check if the synchronization is now accurate. Repeat the process of identifying any remaining discrepancies and making further adjustments until the subtitles align perfectly with the dialogue.
It is crucial to achieve precise subtitle synchronization to ensure a seamless viewing experience. Incorrect subtitle timing can be distracting and detract from the overall enjoyment of the movie.
Remember, the amount of synchronization adjustment required depends on various factors, such as the delay of the media player, the performance of your computer, and potential inconsistencies in the original subtitle file. Therefore, patience and experimentation may be necessary to achieve the desired synchronization.
Step 6: Customize the Subtitle Appearance (Font, Size, Color, etc.)
Customizing the appearance of subtitles can greatly enhance the viewing experience. Subtitle customization allows you to adjust the font, size, color, and other visual elements to suit your preferences and improve readability. Follow these steps to customize the subtitle appearance:
- Access Subtitle Settings: Look for the subtitle settings menu in your media player. This is typically found under options like “Subtitle,” “CC,” or “Subtitle Settings.”
- Modify Font and Size: Within the subtitle settings, locate the options to change the font face and size. Choose a font that is clear and easy to read, and adjust the font size to ensure it is legible on your screen. Consider the viewing distance and screen size when selecting the appropriate font size.
- Adjust Text Color and Background: Customize the color of the subtitle text to enhance visibility and contrast with the video content. Typically, black or white is used for the text color, but you may choose a different color that suits your preferences or improves legibility. Additionally, you may have the option to modify the subtitle background color or add a semi-transparent background to make the text stand out more.
- Explore Additional Styling Options: Some media players and subtitle formats offer more advanced styling options, such as bold or italic text, underlining, shadow effects, or timed effects. Experiment with these options to create a visually appealing subtitle design that enhances the overall movie-watching experience.
- Preview and Adjust: Play the movie again with the modified subtitle settings to preview the result. Pay attention to the subtitle appearance and make any necessary adjustments to the font, size, color, or other styling options until you are satisfied with the appearance.
Customizing the subtitle appearance allows you to personalize the viewing experience and optimize readability. By adjusting the font, size, color, and style, you can ensure that the subtitles are easy to read and blend seamlessly with the movie.
Remember that subtlety is key – aim for subtitled text that is clear and legible but without overpowering or obstructing the visual content of the movie.
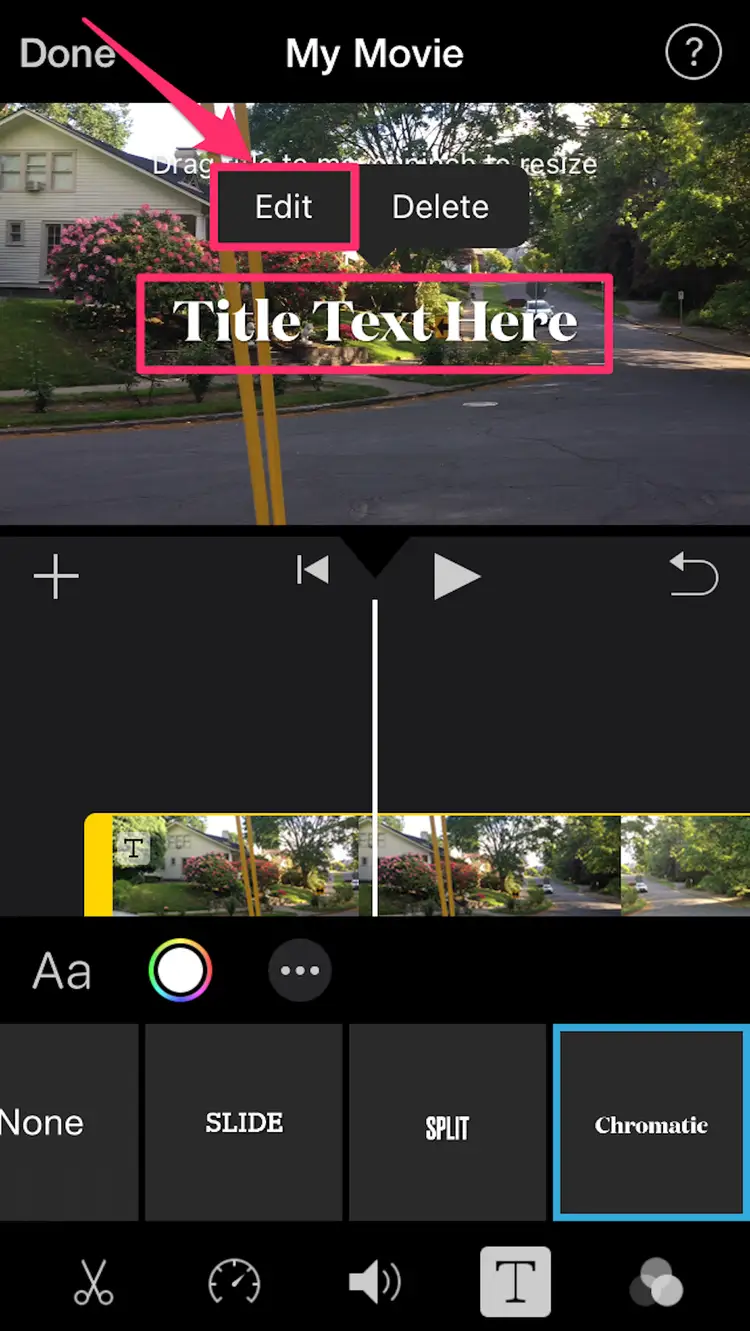
Step 7: Burn Subtitles onto the Video File Using Video Editing Software
If you want to permanently embed the subtitles into the movie, you can achieve this by “burning” the subtitles onto the video file using video editing software. Burning subtitles allows the subtitles to be displayed regardless of the media player or device used for playback. Follow these steps to burn subtitles onto the video:
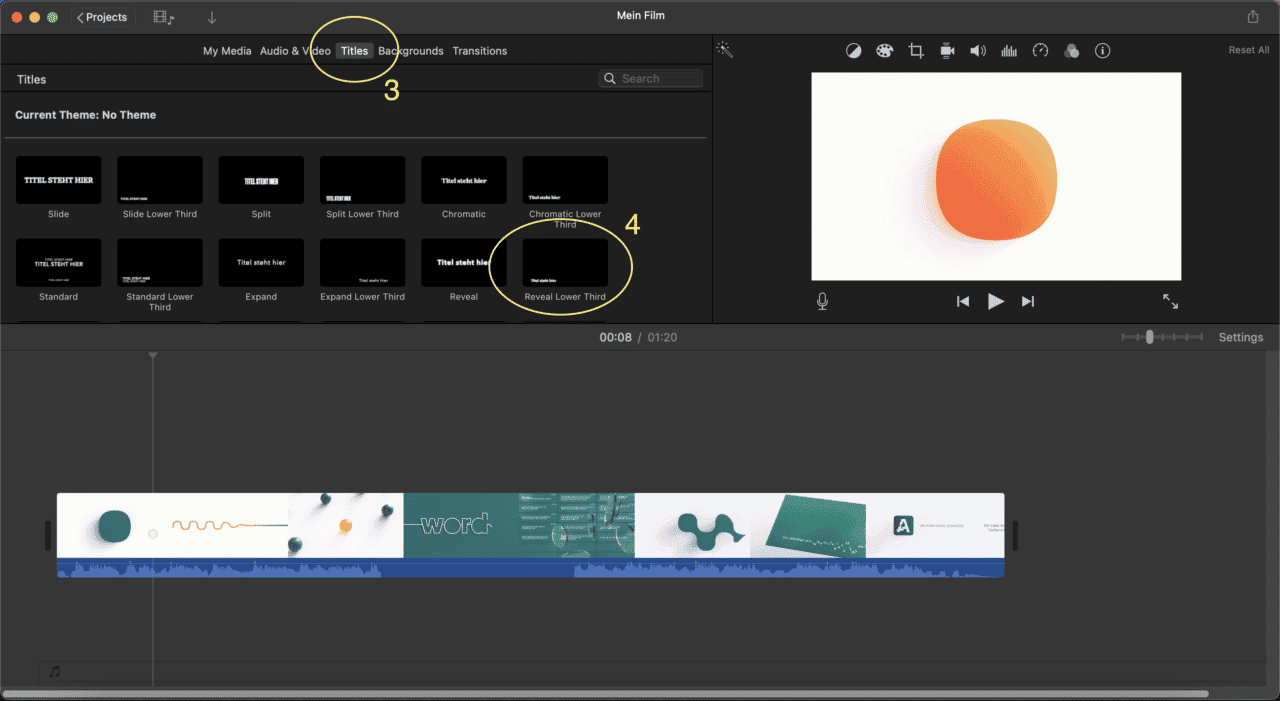
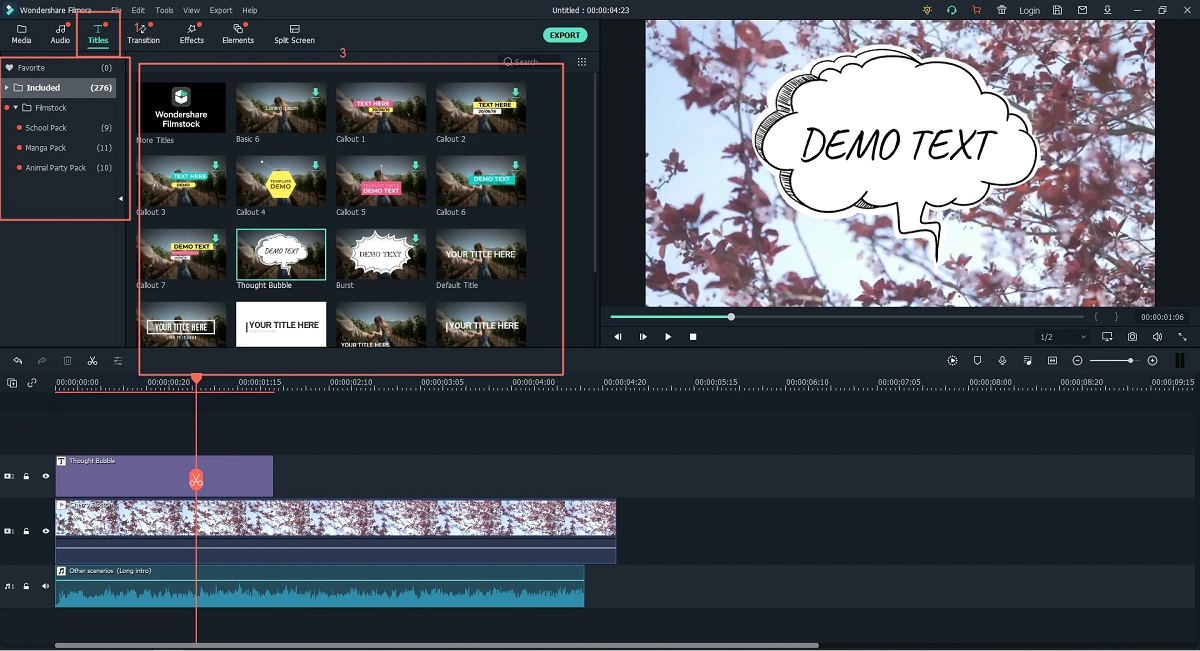
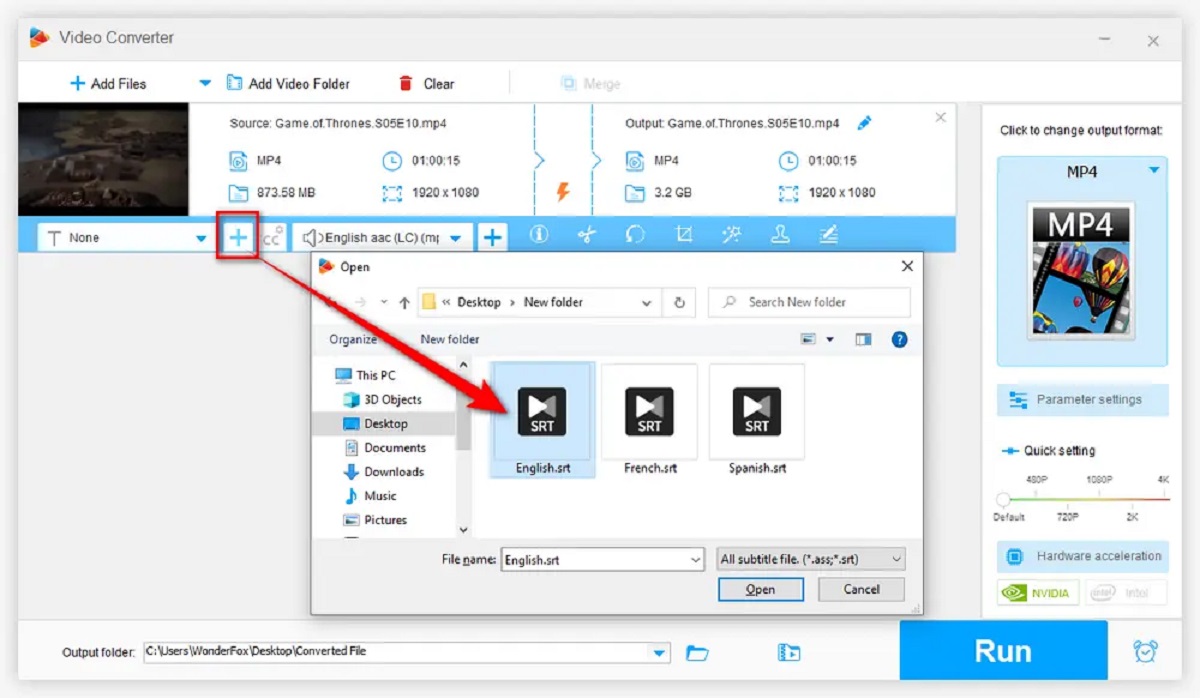
- Select a Video Editing Software: Choose a video editing software that supports subtitle burning. Popular options include Adobe Premiere Pro, Final Cut Pro, and HandBrake. Ensure that the software supports the subtitle file format you have chosen.
- Import the Video and Subtitle Files: Launch the video editing software and import both the movie file and the subtitle file. The exact method will vary depending on the software, but typically, it involves importing the video file first and then importing the subtitle file as a separate layer or track.
- Align the Subtitles: Use the video editing software’s timeline or subtitling tools to align the subtitles with the corresponding dialogue in the movie. Ensure that the timing and positioning of the subtitles are accurate and synchronize with the spoken words of the characters on-screen.
- Customize Subtitle Appearance (Optional): If desired, you can customize the appearance of the subtitles using the video editing software’s text and styling options. Adjust the font, size, color, and other visual attributes to create a visually appealing and harmonious subtitle design.
- Preview and Export the Movie: Preview the movie with the burned subtitles to ensure everything looks and sounds as intended. Make any necessary adjustments if you notice any issues or variations. Once satisfied, export the finalized movie with the embedded subtitles. Choose the appropriate output format and follow the software’s instructions to export the movie.
Burning subtitles onto the video file provides a seamless viewing experience as the subtitles will be permanently displayed, eliminating the need for separate subtitle files. This is particularly useful when sharing the movie with others or playing it on devices that may not support external subtitle files.
Remember to keep a backup of the original video file before burning the subtitles, as the burning process is irreversible.
Conclusion
Adding subtitles to movies is a valuable skill that can greatly enhance the viewing experience for a wide range of audiences. Whether for accessibility purposes, language learning, or simply improved comprehension, subtitles provide an invaluable tool for bringing movies to life. By following the steps outlined in this guide, you can successfully add subtitles to your favorite movies and customize them to match your preferences.
We started by understanding the importance of adding subtitles, considering their benefits for the deaf and hard of hearing, language learners, and fans of foreign films. We then delved into the step-by-step process, beginning with choosing the right subtitle file format and obtaining or creating the subtitle file. Renaming the subtitle file to match the movie filename ensures seamless integration with media players.
Playing the movie with subtitles on a media player allows you to verify their functionality and make any necessary adjustments to synchronize the subtitles with the dialogue. Customizing the appearance of subtitles, such as font, size, and color, can enhance legibility and personalize your viewing experience. Finally, burning subtitles onto the video file using video editing software permanently embeds the subtitles, ensuring they are displayed regardless of the playback device.
With these steps, you now have the knowledge and skills to add subtitles to movies and adapt them to your specific needs. Whether you’re looking to make movies more accessible, learn a new language, or simply enjoy a foreign film with ease, subtitles are a valuable tool in improving the overall movie-watching experience.
So go ahead and explore the world of movies with subtitles, and unlock the full potential of cinematic storytelling!