Introduction
Welcome to the exciting world of drone videography! Drones have revolutionized the way we capture footage, allowing us to effortlessly capture stunning aerial shots. Whether you are a professional filmmaker or an aspiring Instagram influencer, learning how to edit your drone footage is crucial to showcasing your creativity and telling compelling visual stories.
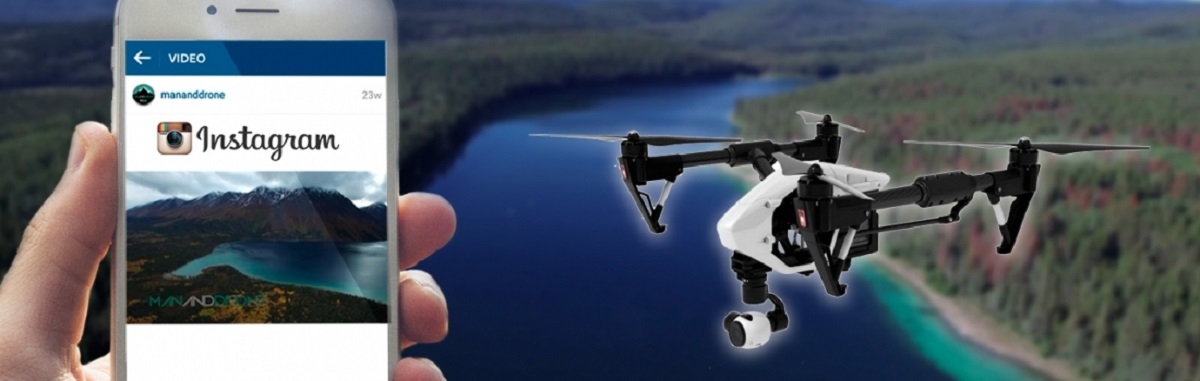
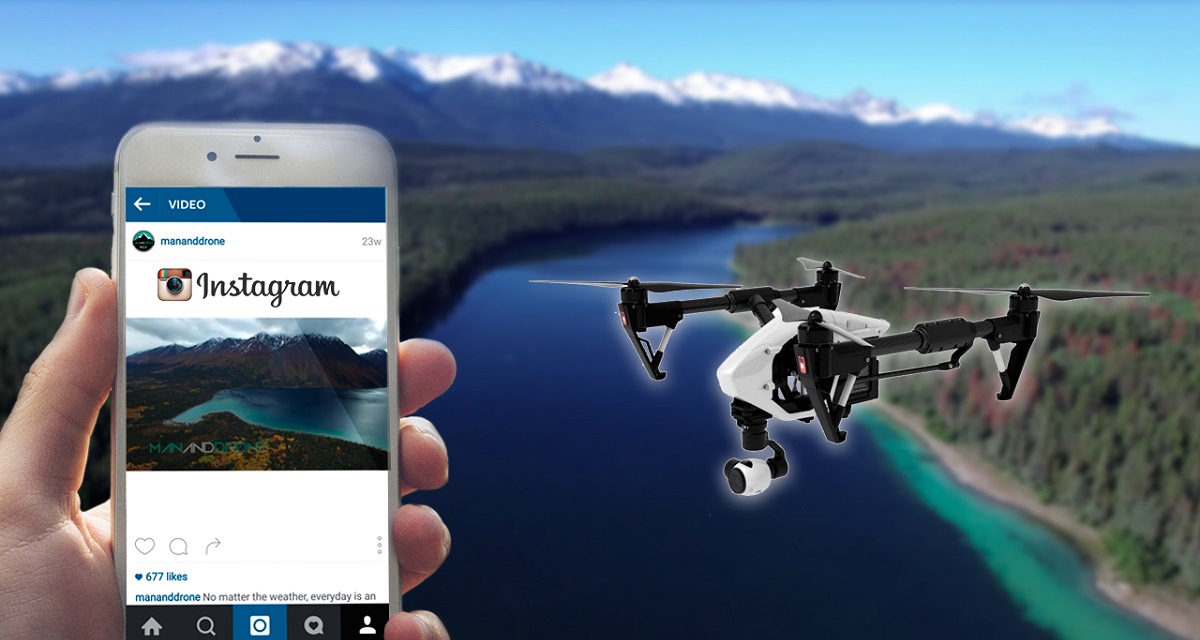
In this guide, we will take you through the step-by-step process of editing your drone footage specifically for Instagram. Instagram is one of the most popular social media platforms for sharing visually appealing content, and with some editing techniques tailored to its requirements, you can make your drone videos stand out from the crowd.
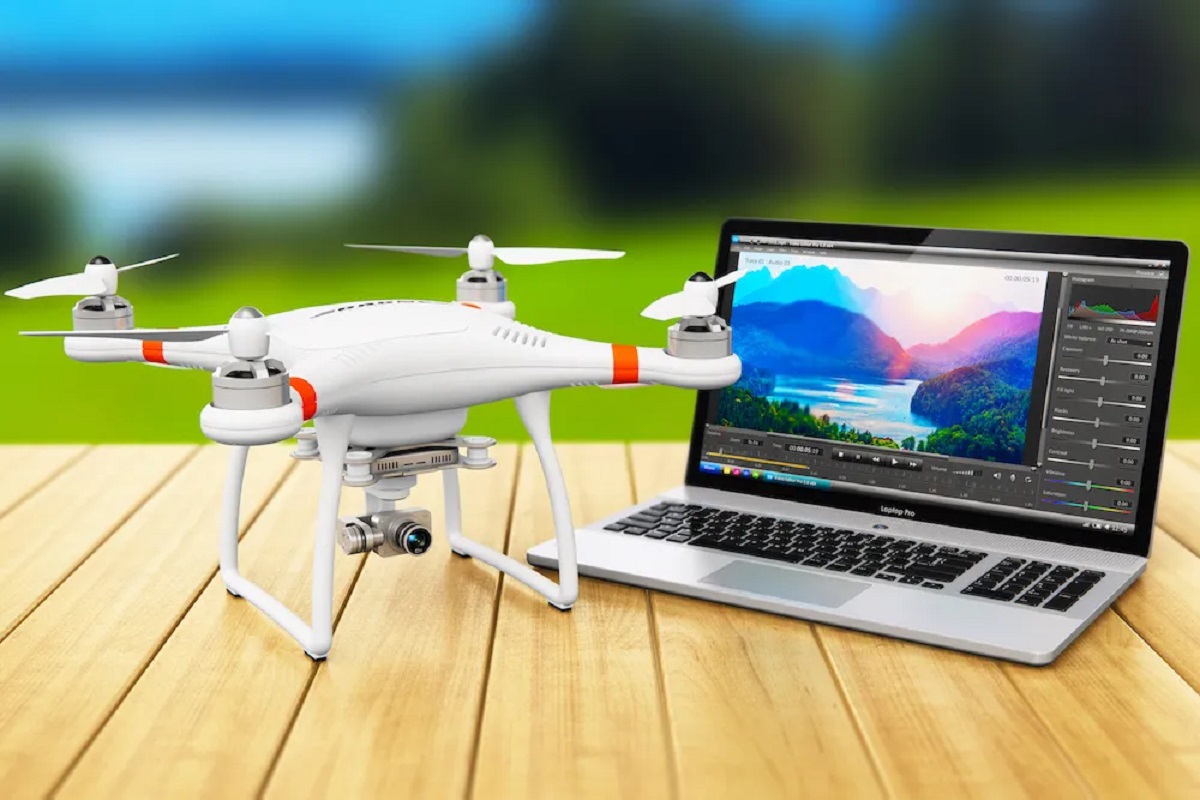
Before we delve into the nitty-gritty of editing, it’s important to have the right tools at your disposal. You will need a computer with editing software capable of handling high-resolution videos. Adobe Premiere Pro and Final Cut Pro are widely used by professionals, but there are also free or more budget-friendly options available, such as iMovie for Mac users or Filmora for Windows.
Once you have your editing software sorted, the next step is to import your drone footage into the program. Most drones store footage on a memory card, so you will need to transfer the files to your computer. Depending on the drone model and your computer’s hardware, you may need to use a memory card adapter or connect the drone directly via USB.
Organizing your files is crucial to maintaining a smooth editing workflow. Create a dedicated folder on your computer for your drone footage and separate it into subfolders based on different projects or locations. This way, you can easily locate and access the specific footage you want to edit.
Now that we have covered the basics, let’s dive into the editing techniques that will enhance your drone footage for Instagram. From color grading and cropping to adding transitions and music, we will guide you through each step of the way to create visually stunning videos that will captivate your Instagram followers.
Now, grab your coffee or tea, and let’s get started on transforming your raw drone footage into engaging Instagram-ready content!
Choosing the Right Editing Software
Choosing the right editing software is crucial for achieving high-quality results when editing your drone footage for Instagram. With so many options available, it can be overwhelming to make a decision. Here are some key factors to consider when selecting your editing software:
1. Compatibility: Ensure that the editing software you choose is compatible with your operating system. Some software options are only available for Mac or Windows, so make sure you select one that works seamlessly with your computer.
2. Feature Set: Look for editing software with a comprehensive set of features that meet your specific needs. Make a list of the essential functionalities you require, such as video trimming, color correction, and transitions, and check if the software offers them.
3. User Interface: A user-friendly interface can significantly impact your editing experience. Look for software that has a clean and intuitive interface, allowing you to easily navigate through the editing process without feeling overwhelmed.
4. Performance: Consider the performance requirements of your editing software and compare them with your computer’s capabilities. Some software may require high processing power and RAM, so ensure your system meets the recommended specifications for smooth editing.
5. Cost: Budget is an important consideration when selecting editing software. Some options are available for free or at a lower cost, while others may have a higher price tag. Evaluate your budget and the value you expect from the software to make an informed decision.
6. Flexibility: Think about your future editing needs as well. Will you be working on other projects aside from drone footage? Consider software that allows you to edit various types of content, such as photos or regular video footage, to maximize your investment.
Once you have considered these factors, you can narrow down your options and choose the editing software that best suits your requirements. Don’t be afraid to try out different software before making a final decision. Many offer trial versions or have free alternatives that allow you to get a feel for the software’s functionality.
Remember, the editing software you choose should empower you to bring your creative vision to life. It should have the tools and capabilities to enhance your drone footage and create captivating videos that will engage and amaze your Instagram audience.
Now that you have chosen your editing software, let’s move on to the next step: importing your drone footage into the program.
Importing Drone Footage to your Editing Software
Now that you have your editing software chosen and installed, it’s time to import your drone footage into the program. Follow these steps to ensure a smooth and efficient import process:
1. Connect your Drone or Transfer Files: Depending on your drone model, you can either connect your drone directly to your computer using a USB cable or remove the memory card from your drone and insert it into your computer’s memory card slot or an external card reader.
2. Create a New Project: Open your editing software and create a new project. This will create a dedicated workspace for your drone footage editing.
3. Import Footage: Look for the “Import” or “Media” option in your editing software’s menu. Select this option and navigate to the location of your drone footage files on your computer. Choose the files you want to import and click “Open”. Depending on the software, you may have the option to import entire folders or select specific files.
4. Organize Footage: Once the footage is imported into your editing software, take some time to organize it in a logical manner. Create folders or bins within the software’s file browser and sort your footage based on different scenes, shots, or locations. This will make it easier to locate and access specific clips during the editing process.
5. Prepare for Optimization: Before you start editing, it’s a good idea to optimize your footage for smooth playback and editing. Some editing software applications have options to automatically optimize or proxy your footage for easier editing, particularly if you are working with high-resolution files. Check the software’s documentation or online tutorials for information on how to optimize your footage.
By following these steps, you can seamlessly import your drone footage into your editing software and start working on your project. It’s crucial to have a well-organized workflow from the beginning to save time and avoid any potential confusion during the editing process.
Now that your footage is imported, organized, and ready to go, it’s time to learn some essential editing techniques to enhance your drone footage for Instagram. Let’s explore these techniques in the next section.
Organizing and Sorting your Files
Organizing and sorting your files is a crucial step in the video editing process, especially when working with drone footage. By implementing an efficient organizing system, you can save time, stay organized, and easily locate specific files during the editing process. Here are some tips for organizing and sorting your drone footage files:
Create Project Folders: Start by creating a dedicated folder for your project on your computer’s hard drive. Give it a clear and descriptive name that reflects the content of your video. Within this main project folder, you can create subfolders to further organize your files.
Sort by Location or Date: Depending on your project’s requirements, you can organize your drone footage by location or date. If you are capturing footage in multiple locations or on different days, creating subfolders based on these factors will streamline your workflow and make it easier to find specific clips later on.
Naming and Numbering: Consider giving your video clips meaningful names or numbers to make them easier to identify. This is particularly useful when you have numerous clips and need to locate specific shots quickly. For example, you can use names like “Landscape_Shot1” or “DroneFlight2” to make the clips more recognizable.
Use Keywords or Tags: Adding keywords or tags to your files can greatly streamline the organization process. Consider adding descriptive tags to each clip, such as “sunset,” “cityscape,” or “aerial view,” based on the content and subject matter. This will allow you to search for clips based on specific keywords later on.
Backup your Files: Always create backup copies of your footage to ensure you have a safe and secure backup in case of accidental deletion or data loss. Consider using external hard drives, cloud storage, or other backup solutions to keep your files protected.
Delete Unnecessary Files: As you organize your footage, take the time to delete any unnecessary clips or files. This will free up storage space and make your editing process more efficient by reducing clutter.
By adopting these practices, you can maintain a well-organized file system and easily locate specific drone footage clips when you need them. This organization will save you valuable time during the editing process and ensure a more streamlined workflow.
Now that your files are organized and ready for editing, let’s move on to learning some basic editing techniques to enhance your drone footage for Instagram. Stay tuned!
Basic Editing Techniques
Now that you have your drone footage organized and sorted, it’s time to dive into the world of basic editing techniques. These techniques will help you refine your footage and create a compelling visual story for your Instagram audience. Here are some essential editing techniques to get you started:
1. Trim and Cut: Use the trim and cut tools in your editing software to remove unwanted parts from your clips and create smooth transitions between shots. Trim the beginning and end of each clip to eliminate any unnecessary footage and keep your video concise and engaging.
2. Sequence and Arrangement: Arrange your video clips in a logical sequence to create a cohesive story. Experiment with different arrangement options to find the most visually appealing flow. Consider using a combination of wide shots, close-ups, and aerial perspectives to add variety and depth to your video.
3. Adjust Exposure and Color: Use the exposure and color correction tools in your editing software to enhance the overall look of your footage. Adjust the exposure to ensure a proper balance between brightness and darkness. Experiment with color grading techniques to create a specific mood or aesthetic that suits the story you want to tell.
4. Smooth Transitions: Add smooth transitions between clips to create a seamless flow. Common transitions include fades, dissolves, and wipes. Experiment with different transition styles and durations to find what works best for your footage.
5. Music and Sound Effects: Incorporate music and sound effects to enhance the overall impact of your video. Choose a soundtrack that complements the mood and style of your footage. Additionally, consider adding subtle sound effects, such as birds chirping or wind rustling, to make the video more immersive.
6. Use Keyframes: Keyframes allow you to add dynamic movement and effects to your footage. Experiment with keyframing options to create smooth transitions, zoom effects, or panning shots. This technique adds a professional touch to your video and helps draw the viewer’s attention to specific elements.
7. Text and Titles: Include text and titles to provide context or highlight important information in your video. Use captions, subtitles, or lower thirds to add relevant details or key messages. Ensure that the text stands out and is legible against the background.
8. Speed Adjustments: Adjusting the speed of certain clips can create dramatic or dynamic effects. Speed up footage to add energy or slow it down for a more serene or cinematic feel. Experiment with different speed adjustments to elevate the storytelling and evoke specific emotions.
Remember, practice makes perfect! Experiment with these basic editing techniques and explore the features of your editing software. Over time, you will develop your unique editing style and become more proficient in transforming your raw drone footage into visually stunning Instagram-ready videos.
Now that you have mastered the basics, let’s move on to more advanced techniques such as color grading and cropping for Instagram in the upcoming sections.
Color Grading and Color Correction
Color grading and color correction are essential steps in the video editing process, allowing you to enhance the visual appeal of your drone footage and create a specific mood or aesthetic. Here are some techniques to help you effectively color grade and correct your footage:
1. White Balance Adjustment: Start by adjusting the white balance to ensure accurate color representation. Use the white balance tool in your editing software to correct any color casts caused by different lighting conditions. Aim for natural-looking colors that best represent the scene you captured.
2. Contrast and Saturation: Adjust the contrast and saturation levels to add depth and vibrancy to your footage. Increase the contrast to make the colors and details pop, while adjusting the saturation can help intensify or desaturate the colors based on the desired aesthetic.
3. Curves and Levels: Utilize curves and levels adjustments to fine-tune the exposure and tonal range of your footage. Adjust the shadows, midtones, and highlights to achieve the desired balance and contrast. This technique can help create a more cinematic look and enhance the overall visual impact.
4. Color Wheels and HSL: Fine-tune the individual color channels using color wheels or HSL (Hue, Saturation, and Lightness) controls. This allows you to selectively boost or tone down specific hues, giving you more control over the overall color palette and mood of your footage.
5. Color LUTs: Consider using color lookup tables (LUTs) to quickly apply predefined color grading presets or achieve a specific cinematic style. Many editing software applications offer a range of LUTs, allowing you to experiment and find a look that best fits your video’s narrative.
6. Consistency across multiple clips: When color grading multiple clips, strive for consistency to ensure a coherent visual flow. Make adjustments to one clip, and then use that as a reference to match the color grading of other clips. This will create a more polished and professional-looking final product.
7. Monitor Calibration: It is crucial to work with a properly calibrated monitor to accurately see the colors and tones in your footage. Calibrating your display ensures that the color adjustments you make during editing are accurately represented in the final output viewed on different screens and devices.
Remember, the goal of color grading and correction is to enhance the visual storytelling of your drone footage. Experiment with different techniques and presets, but make sure to maintain a cohesive and appropriate color palette that complements the mood and theme of your video.
Now that you have mastered the art of color grading and correction, let’s move on to the next step: cropping and rescaling your footage for optimal display on Instagram.
Cropping and Rescaling for Instagram
When editing your drone footage for Instagram, it’s important to consider the platform’s specific aspect ratio and resolution requirements. Here are some tips for cropping and rescaling your footage to ensure optimal display on Instagram:
1. Aspect Ratio: Instagram primarily supports videos with an aspect ratio of 16:9 or 1:1. The 16:9 ratio is ideal for landscape-oriented videos, while the 1:1 ratio works best for square or vertically-oriented videos. Determine the aspect ratio that suits your video and ensures the best visual impact for your chosen shots.
2. Rule of Thirds: Consider using the rule of thirds when cropping your footage. This guideline suggests dividing the frame into a 3×3 grid and aligning important elements along the grid lines or intersections. This composition technique can create a balanced and visually appealing shot.
3. Focus on the Subject: When cropping your footage, prioritize the main subject or point of interest. Eliminate any unnecessary elements or distractions that may detract from the focus of your video. This will help draw your viewers’ attention to the most important aspect of your content.
4. Zoom and Pan: In addition to simply cropping, consider adding movement to your footage by utilizing zoom or pan techniques. This can create a more dynamic and engaging viewing experience. However, be cautious not to overuse these effects, as they should enhance the narrative of your video rather than distract from it.
5. Rescale and Optimize Resolution: Ensure that your video’s resolution meets Instagram’s requirements to prevent any loss of quality when uploading. Instagram recommends a minimum resolution of 720 pixels, but higher resolutions will provide a better viewing experience. Resize your footage accordingly to optimize the resolution while maintaining the desired aspect ratio.
6. Letterboxing or Pillarboxing: If your footage does not fit within the desired aspect ratio, you can choose to add letterboxing (black bars at the top and bottom of the video) or pillarboxing (black bars at the sides of the video) to maintain the correct aspect ratio. This can prevent any cropping of essential elements and preserve the intended framing of your shots.
7. Preview and Test: Before exporting your final video, preview it within the Instagram app or a similar platform to ensure that it looks as intended. Pay attention to any elements that may be cut off or poorly cropped, and make adjustments as necessary to achieve the desired presentation on Instagram.
By following these cropping and rescaling techniques, you can ensure that your drone footage is optimized for display on Instagram. Keep in mind that visual storytelling should guide your decisions when cropping and resizing your footage. Strive for a visually appealing and engaging composition that captivates your audience on this popular social media platform.
Now that your footage is appropriately cropped and resized, let’s explore the next step: adding transitions and effects to further enhance your drone videos for Instagram.
Adding Transitions and Effects
Adding transitions and effects to your drone videos can enhance the visual flow and bring an extra layer of creativity to your Instagram content. Here are some tips for effectively incorporating transitions and effects into your editing process:
1. Consider the Purpose: Before adding any transitions or effects, consider the purpose they serve in your video. Are you aiming to create a seamless transition between shots, add visual interest, or convey a specific mood? Understanding the purpose will guide your selection and placement of transitions and effects.
2. Use Subtle Transitions: Subtle transitions, such as crossfades or dissolves, can create smooth and natural transitions between shots. They help maintain the flow and continuity of your video without drawing attention away from the content itself. Experiment with different durations to find the right balance for your footage.
3. Experiment with Creative Transitions: If you want to add a touch of creativity, explore different transition effects available in your editing software. Effects like wipes, pushes, or flips can add a unique visual flair to your video. However, be cautious not to overuse these transitions, as they can become distracting or overwhelming if used excessively.
4. Blend Clips with Overlays: Overlay effects, such as fades or color washes, can help seamlessly blend clips together or create a specific atmosphere. These effects can be subtle or bold, depending on the desired effect. Experiment with different overlays to find the right balance for your video’s style and tone.
5. Highlight Key Moments with Effects: Use effects strategically to highlight important moments or elements in your footage. For example, adding a zoom effect or a slow-motion effect can draw attention to specific actions or details. These effects can add impact and emphasize the significance of certain shots.
6. Text and Graphics: Incorporate text and graphics into your videos to provide context, convey information, or add a creative touch. Use animated text or graphic overlays to make your content more engaging and visually appealing. Ensure that the text or graphics are legible and do not overpower the visuals.
7. Audio Effects: Don’t forget about adding audio effects to enhance your video. Consider adding sound effects to emphasize actions or transitions, or use audio transitions to smoothly blend clips together. Experiment with different audio effects to create a more immersive experience for your viewers.
Remember, while transitions and effects can enhance your video, it’s important to use them judiciously and tastefully. The goal is to elevate your storytelling and captivate your Instagram audience without overshadowing the content itself.
Now that you have learned the art of adding transitions and effects, let’s move on to the next step: incorporating music and sound effects into your drone videos for Instagram.
Adding Music and Sound Effects
Adding music and sound effects to your drone videos can greatly enhance the overall impact and immerse your viewers in the experience. Here are some tips and considerations for effectively incorporating music and sound effects into your editing process:
1. Selecting the Right Music: Choose music that complements the mood and theme of your video. Consider the emotions you want to evoke in your viewers and select tracks that align with those feelings. Ensure that the music you choose is copyright-free or properly licensed to avoid any legal issues when sharing your video on Instagram.
2. Editing to the Beat: Sync your video cuts and transitions to the beat or rhythm of the music. This can add a dynamic and visually engaging element to your video that resonates with viewers. Pay attention to the tempo and pacing of the music to create seamless transitions and enhance the overall flow.
3. Adjusting Audio Levels: Balance the audio levels between your drone footage’s natural sounds, any recorded dialogue, and the music track. Make sure the music doesn’t overpower the other audio elements, but rather enhances and supports the visuals. Use audio metering tools in your editing software to ensure proper audio levels.
4. Sound Effects: Incorporate sound effects to enhance the realism and impact of specific actions or visuals in your video. For example, adding sound effects for the drone taking off or landing, or for other elements captured in your footage, can make the viewing experience more immersive. Choose sound effects that are relevant and add value to the storytelling.
5. Syncing Audio and Visuals: Ensure that the audio elements are properly synchronized with the visuals. This includes aligning sound effects with specific actions and matching the timing of any audio cuts or transitions with the visual edits. Proper synchronization enhances the overall cohesiveness of your video.
6. Musical Transitions: Use seamless musical transitions to bridge different parts or scenes of your video. This can create a smooth and fluid narrative flow, enhancing the viewer’s engagement. Experiment with crossfades or fade-ins/fade-outs to transition between different music tracks or to transition from music to natural audio seamlessly.
7. Audio Editing: Utilize audio editing tools in your software to improve the quality of your audio. These tools allow you to remove background noise, adjust EQ settings, and apply filters to enhance the clarity of the sound. A clean and well-balanced audio track contributes to the professional feel of your video.
Remember to choose music and sound effects that enhance the storytelling and evoke the desired emotions. The audio should complement and elevate the visuals, creating a captivating experience for your Instagram audience.
Now that you have mastered the art of adding music and sound effects, let’s move on to the final step: exporting and uploading your drone video to Instagram.
Exporting and Uploading to Instagram
Once you have completed the editing process for your drone video, it’s time to export and share your masterpiece on Instagram. Here are some important steps to follow when exporting and uploading your video:
1. Choose the Right Format and Settings: Before exporting, ensure that you select the appropriate format and settings for Instagram. Instagram supports various video formats, but the recommended format is MP4 with H.264 codec. Additionally, make sure to set the correct resolution and aspect ratio based on your video’s intended display (e.g., 1080×1080 pixels for square videos or 1920×1080 pixels for landscape videos).
2. Optimize the File Size: Consider optimizing your video file size without compromising the quality. Large video files may take longer to upload and may result in decreased video quality. Use video compression options available in your editing software to achieve an optimal balance between file size and quality.
3. Save a Master Copy: Before exporting, it’s always a good idea to save a high-quality master copy of your edited video. This will ensure that you have a backup and can easily make any necessary adjustments or create different versions in the future, if needed.
4. Upload to Instagram: You have several options for uploading your video to Instagram. You can transfer the video file to your mobile device using cloud services, email, or direct transfer. Once the video is on your mobile device, open the Instagram app and tap the “+” button to create a new post. Select the video from your device’s gallery, add a caption, hashtags, and any relevant tags, and tap “Share” to publish your video on your Instagram feed.
5. Consider Instagram Stories or IGTV: In addition to uploading to your Instagram feed, you can also leverage the power of Instagram Stories or IGTV. Instagram Stories allow you to share shorter, more informal videos that disappear after 24 hours, while IGTV is a feature for longer-form videos. Consider repurposing your drone footage for these formats to reach a wider audience and engage with your followers more creatively.
6. Monitor Comments and Engagement: After uploading your video, keep an eye on the comments and engagement it receives. Respond to comments, engage with your audience, and analyze the performance of your video. Understand the metrics and insights available on Instagram to gain insights into your video’s reach, engagement, and overall impact.
7. Promote on Other Platforms: To maximize the reach and exposure of your drone video, consider cross-promoting it on other social media platforms or websites. Embed your video on your personal or professional website, share it on platforms like Facebook or Twitter, or collaborate with other content creators for cross-promotion.
By following these steps, you can successfully export and upload your drone video to Instagram, reaching a larger audience and showcasing your creative work.
Now that you have learned the process of exporting and uploading, it’s time to reflect on your journey and the skills you have acquired in editing drone footage for Instagram. Keep experimenting, honing your skills, and creating captivating visual stories to engage and inspire your Instagram followers!
Conclusion
Congratulations on completing this comprehensive guide to editing drone footage for Instagram! You have learned the essential steps and techniques to transform raw drone footage into visually stunning videos that captivate and engage your Instagram audience. Let’s recap the key takeaways:
1. Choosing the Right Editing Software: Select editing software that aligns with your needs, budget, and skill level. Ensure compatibility, a comprehensive feature set, user-friendly interface, and adequate performance.
2. Importing Drone Footage: Transfer your drone footage to your computer and organize it into dedicated folders for easy access and smooth workflow.
3. Basic Editing Techniques: Trim and cut footage, arrange sequences, adjust exposure and color, and use keyframes to add movement and effects.
4. Color Grading and Color Correction: Enhance the visual appeal by adjusting white balance, contrast, saturation, and working with color wheels and LUTs.
5. Cropping and Rescaling: Consider aspect ratios, rule of thirds, and resizing to ensure your videos are optimized for Instagram’s display.
6. Adding Transitions and Effects: Utilize subtle or creative transitions, overlay effects, and text or graphics to create a seamless and visually engaging viewing experience.
7. Adding Music and Sound Effects: Choose music that complements your video’s mood, sync your edits to the beat, and incorporate sound effects to enhance the overall impact.
8. Exporting and Uploading: Choose the appropriate format, optimize file size, save a master copy, and upload your video to Instagram while considering other platform options like Stories or IGTV.
Remember that practice and experimentation are essential for honing your skills and developing your unique editing style. Continuously challenge yourself to create captivating and visually compelling content that stands out on Instagram.
With your newfound knowledge and skills, you are well-equipped to create mesmerizing drone videos that amaze your followers and attract a growing audience on Instagram. Embrace the creative possibilities drone videography offers and push the boundaries of your imagination.
So grab your drone, fly high, capture breathtaking footage, and let your editing expertise shine as you share your incredible visual stories on Instagram.