Introduction
Adding subtitles to a Blu-Ray movie can greatly enhance the viewing experience for individuals who are deaf or hard of hearing, as well as for those who prefer to watch movies in a different language. Subtitles provide a textual representation of the dialogue and sound effects in a movie, ensuring that everyone can follow along with the story and enjoy the film to its fullest.
While Blu-Ray movies often come with pre-encoded subtitles for popular languages, there may be instances when you want to add custom subtitles or subtitles in a less common language. This can be done by following a few simple steps and using the right tools.
In this guide, we will walk you through the process of adding subtitles to a Blu-Ray movie. Whether you want to watch a foreign film with subtitles or create your own custom subtitles, we’ve got you covered. So let’s dive in and discover how to make your Blu-Ray movie experience even more enjoyable!
Step 1: Determine the subtitle format required
Before we can begin adding subtitles to a Blu-Ray movie, it is important to determine the subtitle format that is compatible with your Blu-Ray player or media player software. Different devices and software may support different subtitle formats, so it’s crucial to know what format to use.
The most common subtitle formats for Blu-Ray movies include SRT (SubRip), SUB (MicroDVD), and SUP (Blu-Ray Image format). SRT is the most widely supported format and can be played back on various media players and Blu-Ray players. However, some Blu-Ray players may require SUP format for seamless integration with the movie.
To find out the supported subtitle format, you can refer to the user manual of your Blu-Ray player or media player software. It should provide detailed information about the compatible subtitle formats. Alternatively, you can visit the official website of the manufacturer or perform a quick online search for your specific model.
Once you have determined the subtitle format required, you can proceed to the next step of downloading subtitles that are compatible with your Blu-Ray movie and desired language.
Step 2: Download subtitles
After determining the subtitle format required for your Blu-Ray movie, it’s time to download the appropriate subtitles. There are several websites and online platforms where you can find and download subtitles in various languages.
One popular website for downloading subtitles is OpenSubtitles.org. It hosts a vast collection of subtitles for movies and TV shows in multiple languages. Simply visit the website and search for the title of your Blu-Ray movie. You can then select the desired subtitle file based on the language and subtitle format.
Another option is Subscene.com, which also offers a wide range of subtitles in different languages. Similar to OpenSubtitles, you can search for your movie title and select the preferred subtitle file.
When downloading subtitles, it’s important to ensure that the subtitle file matches the correct video file of your Blu-Ray movie. Check the file name and ensure it corresponds to the correct movie file to avoid any synchronization issues.
Once you have downloaded the subtitle file, remember to save it in a location where you can easily access it in the next steps of the process.
Now that you have successfully downloaded the subtitles, we can move on to the next step of extracting the files from the Blu-Ray movie itself.
Step 3: Extract Blu-ray movie files
In order to add subtitles to a Blu-ray movie, you will first need to extract the movie files from the Blu-ray disc. This step is necessary to access the video file and make changes to it.
There are several software programs available that can help you perform the extraction process. One commonly used tool is MakeMKV, which allows you to rip the Blu-ray disc and extract the movie files onto your computer. Simply insert the Blu-ray disc into your computer’s Blu-ray drive and launch MakeMKV. The software will recognize the Blu-ray disc and present you with a list of titles to choose from. Select the main movie title that corresponds to the film you want to add subtitles to.
Once you have selected the main movie title, choose the destination folder where you want to save the extracted movie files. MakeMKV will begin the extraction process, creating a copy of the video file from the Blu-ray disc and saving it to your specified location on your computer’s hard drive.
After the extraction is complete, you will have a digital copy of the Blu-ray movie file that can be used to add subtitles. Keep in mind that the file size of the extracted movie can be quite large, so ensure that you have enough storage space available on your computer.
Now that you have successfully extracted the Blu-ray movie files, we can proceed to the next step of converting the subtitles to the required format.
Step 4: Convert subtitles to the required format
Now that you have extracted the movie files from the Blu-ray disc, it’s time to convert the downloaded subtitles to the required format. This step ensures that the subtitles will be compatible with the extracted movie file.
To convert the subtitles, you can use a subtitle conversion tool such as Subtitle Edit or Aegisub. These software programs allow you to import the downloaded subtitle file and convert it to the desired format, such as SRT or SUP.
Open the subtitle conversion tool and import the downloaded subtitle file into the program. You may need to specify the original subtitle format in the tool settings to ensure proper conversion. Once the subtitle file is loaded, you can configure the output settings to match the required format for your Blu-ray player or media player software.
After making the necessary changes, proceed with the conversion process. The tool will generate a new subtitle file in the required format, ready to be added to your Blu-ray movie.
Make sure to save the converted subtitle file in a location where you can easily access it in the next step. It’s also a good idea to rename the subtitle file to match the movie file name to avoid any confusion during the subtitle integration process.
With the subtitles successfully converted to the required format, you are now ready to add them to your Blu-ray movie. Let’s move on to the next step!
Step 5: Add subtitles to the Blu-ray movie
Now that you have the extracted movie file and the converted subtitle file, it’s time to add the subtitles to your Blu-ray movie. The process may vary depending on the software or tool you are using, but the general steps are as follows:
- If you are using a Blu-ray authoring software, such as DVDFab or ImgBurn, open the software and create a new project or choose the option to add subtitles to an existing project.
- Import the extracted movie file into the authoring software. This may involve selecting the main movie file or specifying the folder where the movie files are located.
- Add the converted subtitle file to the authoring software. Depending on the software, you may need to select the appropriate subtitle track or import the subtitle file directly.
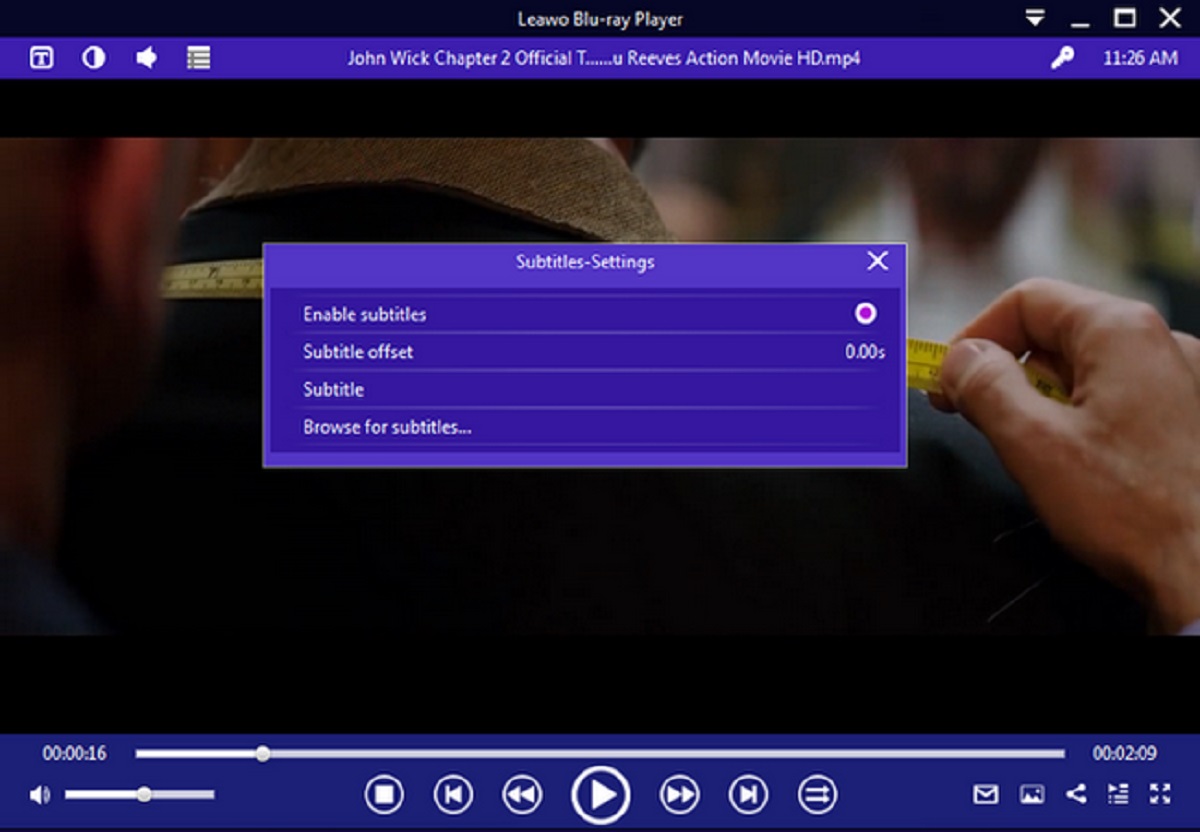
- Configure the subtitle options, such as font style, size, position, and synchronization with the movie’s audio. This can usually be done through the authoring software’s settings or options menu.
- Preview the movie with the added subtitles to ensure they are in sync and properly displayed. Make any necessary adjustments if needed.
- Once you are satisfied with the subtitles, proceed to the final step of the authoring software, which is typically the option to burn the Blu-ray movie. This will create a new Blu-ray disc with the added subtitles embedded.
If you are using media player software or a video editing tool, the process may be slightly different. Refer to the software’s documentation or online tutorials for instructions on how to add subtitles to a video file.
After completing the subtitle integration process, you will have a Blu-ray movie with the subtitles embedded. You can now enjoy the film with the added subtitles, whether it’s in a different language or for improved accessibility.
Congratulations! You have successfully added subtitles to your Blu-ray movie. Now you can sit back, relax, and enjoy the movie with the added subtitles.
Conclusion
Adding subtitles to a Blu-ray movie can greatly enhance the viewing experience, whether you want to watch a foreign film with subtitles or provide accessibility for individuals who are deaf or hard of hearing. Through the simple steps outlined in this guide, you can easily add subtitles to your Blu-ray movie and enjoy it to its fullest.
Remember, the key steps in adding subtitles to a Blu-ray movie are determining the subtitle format required, downloading the appropriate subtitles, extracting the movie files, converting the subtitles to the required format, and finally adding the subtitles to the movie using authoring software or video editing tools.
By following these steps, you can ensure that the subtitles are compatible with your Blu-ray player or media player software, and that they are accurately synchronized with the movie’s audio and properly displayed. Take advantage of the various online platforms and software tools available to easily download and convert subtitles into the desired format.
With subtitles added to your Blu-ray movie, you can now enjoy films in different languages or provide a more inclusive viewing experience for all. So go ahead and bring your movie-watching experience to a new level by adding subtitles to your Blu-ray movies.
Now that you have the knowledge and tools to add subtitles to a Blu-ray movie, you can explore and enjoy a wide range of films from around the world with subtitles tailored to your preferences. Happy movie watching!


