Introduction
YouTube has become a platform where content creators from all over the world can share their videos and connect with a global audience. From educational tutorials to entertaining vlogs, YouTube offers a diverse range of content for viewers to enjoy. However, not everyone can fully experience the content due to various reasons such as hearing impairments, language barriers, or noisy environments. This is where subtitles come into play.
Subtitles provide text versions of the audio in videos, allowing viewers to understand the content even if they can’t hear it or don’t understand the language being spoken. By adding subtitles to your YouTube videos, you can make your content accessible to a wider audience and enhance viewer engagement.
In this article, we will explore the benefits of adding subtitles to your YouTube videos and provide you with a step-by-step guide on how to add subtitles, both automatically generated and manually created, to your YouTube videos.
Whether you’re a content creator looking to make your content more inclusive and accessible or a viewer who wants to enjoy videos in a noisy environment or in a language you’re unfamiliar with, adding subtitles to YouTube videos is a valuable skill to have.
Let’s dive in and discover how you can add subtitles to your YouTube videos and improve the viewing experience for your audience.
Why Add Subtitles to Your YouTube Videos?
Adding subtitles to your YouTube videos offers several advantages and benefits for both content creators and viewers. Let’s explore why you should consider incorporating subtitles into your YouTube content:
- Accessibility: Subtitles make your videos accessible to a wider audience, including those with hearing impairments or language barriers. By providing text versions of the audio, you ensure that everyone can comprehend your content.
- Improved Engagement: Subtitles enhance viewer engagement by providing a multi-modal experience. It allows viewers to follow along with the audio while also reading the text, increasing comprehension and retention of the information.
- Expanded Reach: By adding subtitles to your videos, you can attract viewers from different countries or those who speak different languages. This opens up opportunities for your content to reach a global audience, increasing your visibility and potential for growth.
- SEO Benefits: Subtitles can also improve your video’s search engine optimization (SEO). Search engines can index the text within subtitles, making it easier for your videos to rank higher in search results, increasing their discoverability.
- Enhanced User Experience: Subtitles provide an extra layer of convenience for viewers. They can enable subtitles in noisy environments, watch videos without disturbing others, or follow along with complex content that requires careful attention to detail.
Considering these benefits, it’s clear that adding subtitles to your YouTube videos is a worthwhile investment. Not only does it make your content more accessible, but it also improves engagement, expands your reach, boosts SEO, and enhances the overall user experience.
In the following sections, we will explore different methods to generate and edit subtitles on YouTube, as well as how to upload your own subtitles and enable them on your videos. Let’s get started!
How to Generate Automatic Subtitles on YouTube
YouTube offers a feature that automatically generates subtitles for your videos using speech recognition technology. While these automatic subtitles may not always be 100% accurate, they can serve as a starting point and save you time in the subtitle creation process. Here’s how to generate automatic subtitles on YouTube:
- Login to your YouTube account: Go to the YouTube website and login to your account.
- Navigate to the Creator Studio: Once logged in, click on your profile icon and select “Creator Studio” from the dropdown menu.
- Select the Video Manager: In the Creator Studio, click on “Video Manager” in the left-hand sidebar.
- Choose the video to add subtitles: Find the video you want to add subtitles to and click the dropdown arrow next to the “Edit” button. Then, select “Subtitles/CC” from the dropdown menu.
- Click on “Add new subtitles or CC”: On the Subtitles/CC page, click on the “Add new subtitles or CC” button.
- Click on “English (Automatic)”: From the language options, select “English (Automatic)” or the appropriate language for your video.
- Review and edit the automatic subtitles: YouTube will generate automatic subtitles for your video, displayed as a transcript. Review the subtitles for accuracy and make any necessary edits.
- Save your changes: Once you are satisfied with the subtitles, click the “Publish” button to save your changes.
By following these steps, you can easily generate automatic subtitles for your YouTube videos. Remember to review and edit the subtitles to ensure accuracy before publishing them.
In the next section, we will explore how to edit automatic subtitles on YouTube to further improve their accuracy and quality.
Editing Automatic Subtitles on YouTube
While YouTube’s automatic subtitle feature is convenient, the generated subtitles may not always be perfect. Fortunately, YouTube provides a user-friendly interface that allows you to edit and refine automatic subtitles. Here’s how to edit automatic subtitles on YouTube:
- Login to your YouTube account: Access your YouTube account by visiting the website and signing in.
- Navigate to the Creator Studio: Click on your profile icon and select “Creator Studio” from the dropdown menu.
- Choose the Video Manager: In the Creator Studio, select “Video Manager” in the left-hand sidebar.
- Select the video with automatic subtitles: Find the video you want to edit the subtitles for and click the dropdown arrow next to the “Edit” button. Then, select “Subtitles/CC” from the dropdown menu.
- Click on the pencil icon: Locate the language you wish to edit the subtitles for and click on the pencil icon next to it. This will open the subtitle editor.
- Make necessary edits: The subtitle editor will display the automatically generated subtitles. Watch the video and make any necessary edits to correct inaccuracies or improve the subtitle timing.
- Save your changes: Once you are satisfied with the edits, click the “Save” or “Publish” button to save the changes to your subtitles.
By following these steps, you can easily edit and refine the automatic subtitles generated by YouTube. Take the time to carefully review and make necessary improvements to ensure the subtitle accuracy and quality.
In the next section, we will explore how to upload your own subtitles to YouTube in case you have a pre-created subtitle file.
How to Upload Your Own Subtitles on YouTube
If you have a pre-created subtitle file for your YouTube video, you can upload it directly to YouTube. This allows you to have more control over the subtitle content and ensures accurate transcription. Here’s how to upload your own subtitles on YouTube:
- Login to your YouTube account: Go to the YouTube website and login to your account.
- Navigate to the Creator Studio: Once logged in, click on your profile icon and select “Creator Studio” from the dropdown menu.
- Select the Video Manager: In the Creator Studio, click on “Video Manager” in the left-hand sidebar.
- Choose the video to add subtitles: Find the video you want to add subtitles to and click the dropdown arrow next to the “Edit” button. Then, select “Subtitles/CC” from the dropdown menu.
- Click on “Add new subtitles or CC”: On the Subtitles/CC page, click on the “Add new subtitles or CC” button.
- Choose the subtitle file: Select the language of your subtitle file from the options provided. Then, click on the “Upload a file” button to choose your subtitle file from your computer.
- Specify the subtitle language: Once the file is uploaded, select the language of the subtitles from the provided options.
- Review and save the changes: YouTube will display the uploaded subtitles for review. Make any necessary adjustments or corrections and click the “Save” or “Publish” button to save your changes.
By following these steps, you can easily upload your own subtitles to YouTube and ensure accurate transcription. This allows you to have full control over the content of your subtitles and provides a seamless viewing experience for your audience.
In the next section, we will explore how to add timestamps to your subtitles on YouTube to improve navigation and synchronization.
Adding Timestamps to Your Subtitles on YouTube
Timestamps are a valuable addition to subtitles as they allow viewers to navigate through the video more easily and synchronize the subtitles with specific moments. YouTube provides a straightforward way to add timestamps to your subtitles. Here’s how you can do it:
- Login to your YouTube account: Access your YouTube account by visiting the website and signing in.
- Navigate to the Creator Studio: Click on your profile icon and select “Creator Studio” from the dropdown menu.
- Choose the Video Manager: In the Creator Studio, select “Video Manager” in the left-hand sidebar.
- Select the video with subtitles: Find the video that already has subtitles and click the dropdown arrow next to the “Edit” button. Then, select “Subtitles/CC” from the dropdown menu.
- Click on the pencil icon: Locate the language you wish to add timestamps for and click on the pencil icon next to it. This will open the subtitle editor.
- Click on the timestamp button: In the subtitle editor, navigate to the point in the video where you want to add a timestamp. Then, click on the “Timestamp” button next to the text field where you enter the subtitle.
- Enter the timestamp: You can manually enter the timestamp in the format of hours:minutes:seconds, or you can click on the “Set Start Time” button to automatically set the timestamp at the current video position.
- Continue adding subtitles with timestamps: Repeat the process for any subsequent timestamps you want to add throughout the video.
- Save your changes: Once you have added the desired timestamps, click the “Save” or “Publish” button to save the changes to your subtitles.
By following these steps, you can easily add timestamps to your subtitles on YouTube. This enhances the viewer experience by allowing them to jump to specific moments in the video and stay synchronized with the content.
In the following section, we will discuss how to ensure the accuracy and quality of subtitles on YouTube.
Ensuring Accuracy and Quality of Subtitles on YouTube
When it comes to subtitles on YouTube, ensuring their accuracy and quality is crucial for a positive viewer experience. Here are some tips to help you maintain the highest standard of subtitles:
- Review and Edit: After generating automatic subtitles or uploading your own, take the time to review them for any errors or inconsistencies. Edit the subtitles to correct any inaccuracies and improve overall clarity.
- Proofread for Grammar and Spelling: Pay attention to grammar and spelling in your subtitles. Ensure that the subtitles are free from typographical errors, typos, and grammatical mistakes.
- Check Timing: Subtitles should synchronize accurately with the audio. Make sure that the timing of the subtitles aligns correctly with the corresponding spoken words or sounds in the video.
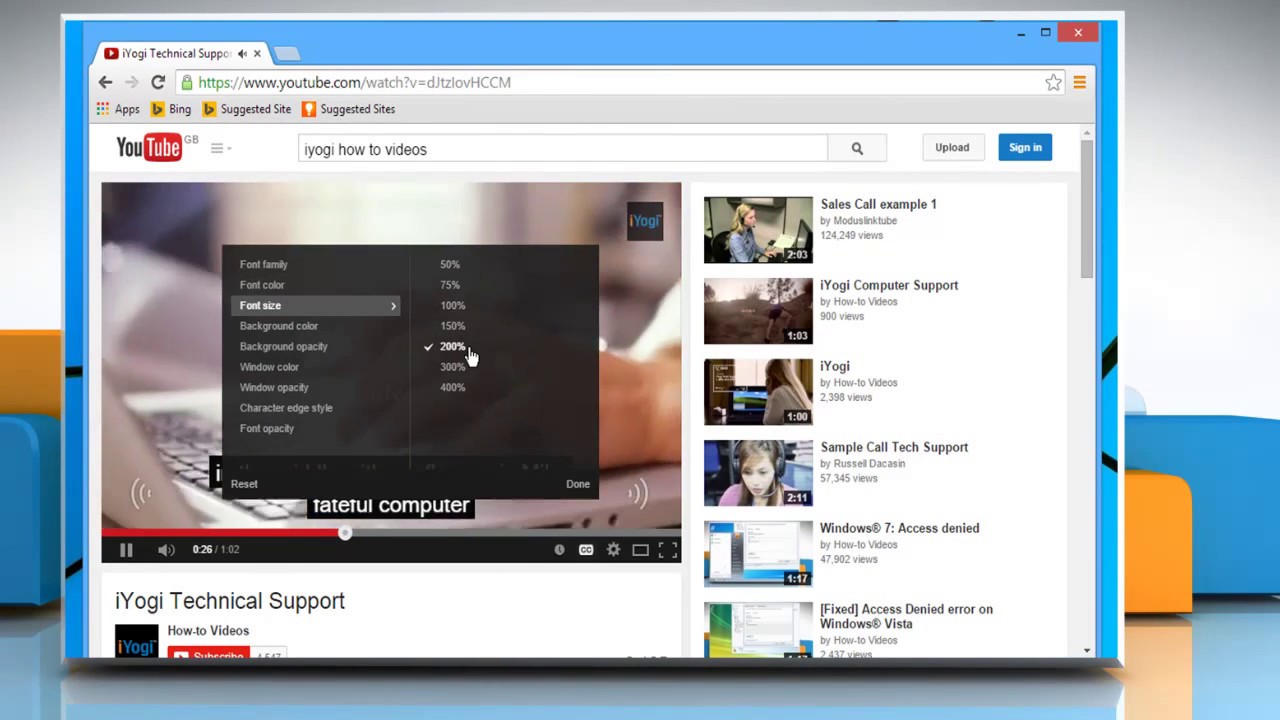
- Ensure Readability: Subtitles should be easy to read and follow. Use clear, legible fonts, and avoid text that is too small or blends into the video background. Additionally, consider the duration of each subtitle to give viewers enough time to read them comfortably.
- Adjust for Speech Rate: If your video contains fast-paced or slow-paced speech, adjust the subtitle timing accordingly to match the natural flow of the conversation. This ensures that viewers can easily follow along with the spoken words.
- Translate and Localize: If you want to reach a global audience, consider translating and localizing your subtitles into different languages. This helps viewers who are not fluent in the video’s original language to understand the content better.
- Test and Review: Before publishing your subtitles, watch the video with the subtitles turned on. Check for any remaining errors or issues in the timing, content, or readability. Ask for feedback from others to ensure the subtitles provide a seamless viewing experience.
By following these tips, you can maintain the accuracy and quality of your subtitles on YouTube. Consistently ensure that your subtitles are error-free, synchronized with the audio, readable, and tailored to different languages and speech rates.
In the next section, we will explore how to enable subtitles on your YouTube videos so that viewers can easily access and engage with them.
How to Enable Subtitles on Your YouTube Videos
Enabling subtitles on your YouTube videos is important to ensure that viewers can easily access and engage with the subtitles. Here’s how you can enable subtitles on your YouTube videos:
- Login to your YouTube account: Go to the YouTube website and login to your account.
- Navigate to the Creator Studio: Once logged in, click on your profile icon and select “Creator Studio” from the dropdown menu.
- Choose the Video Manager: In the Creator Studio, click on “Video Manager” in the left-hand sidebar.
- Select the video to enable subtitles: Find the video you want to enable subtitles for and click the dropdown arrow next to the “Edit” button. Then, select “Subtitles/CC” from the dropdown menu.
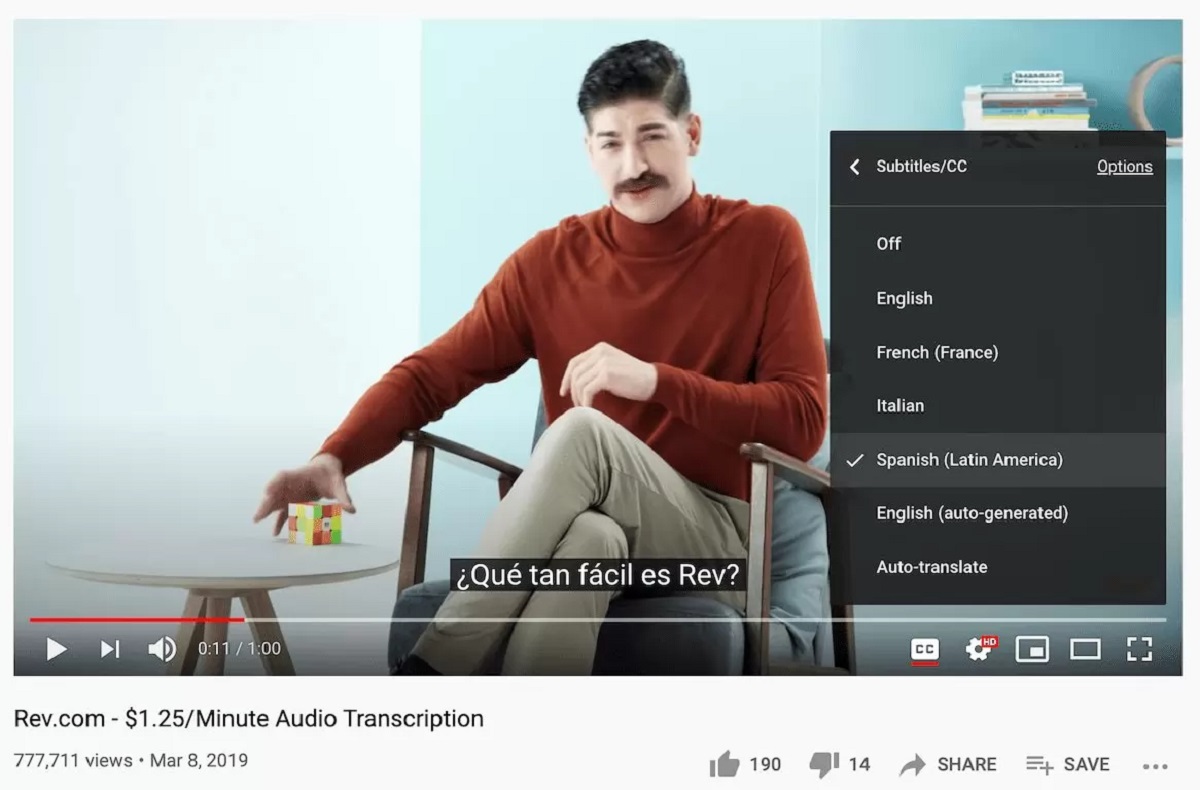
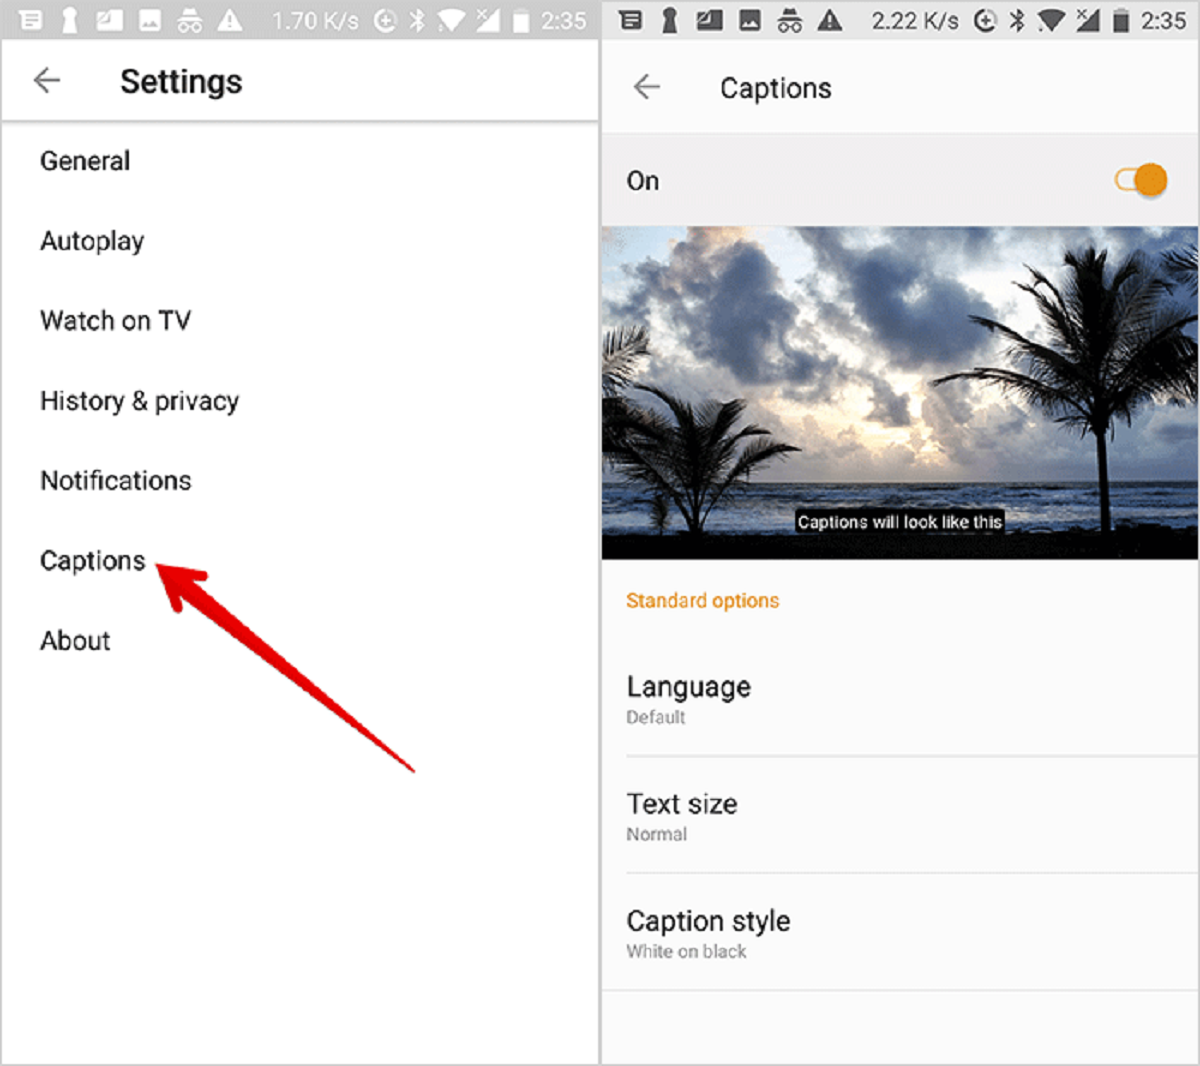
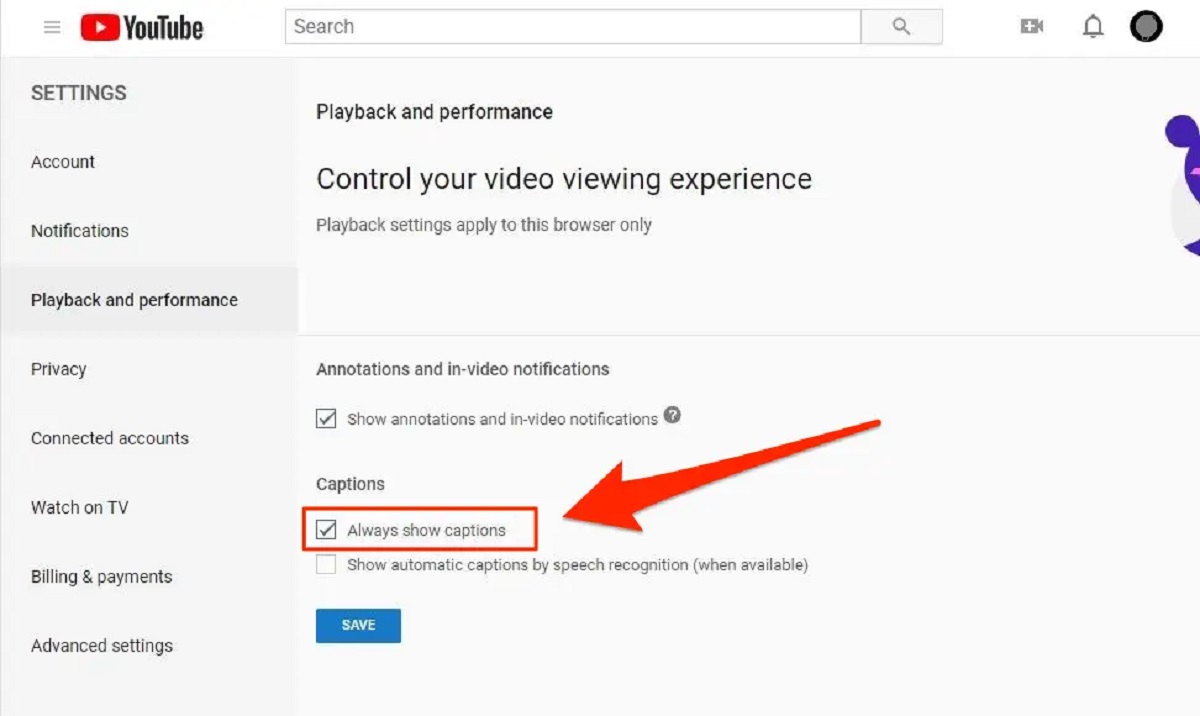
- Click on the language settings: On the Subtitles/CC page, you will see a list of available subtitle languages. Click on the language you want to enable subtitles for.
- Enable subtitles: Toggle the switch to the “On” position to enable subtitles for the selected language. You can also choose to allow automatic translation if you want the subtitles to be automatically translated into other languages.
- Save your changes: Once you have enabled subtitles for the desired language, click the “Save” or “Publish” button to save your changes.
By following these steps, you can easily enable subtitles on your YouTube videos. This ensures that viewers can access the subtitles and engage with your content more effectively, regardless of their language or hearing abilities.
In the next section, we will wrap up our guide and summarize the key points discussed.
Conclusion
Adding subtitles to your YouTube videos is a valuable practice that can greatly enhance the accessibility, engagement, and reach of your content. By providing text versions of the audio, subtitles make your videos inclusive for viewers with hearing impairments and those who speak different languages.
In this article, we explored different methods to add subtitles to your YouTube videos. You learned how to generate automatic subtitles using YouTube’s speech recognition technology, edit the automatic subtitles for accuracy, and upload your own pre-created subtitle files. We also discussed the importance of adding timestamps to your subtitles for improved navigation and synchronization.
To ensure the accuracy and quality of your subtitles, we provided tips on reviewing, proofreading, and adjusting the subtitles. Additionally, we highlighted the importance of translating and localizing subtitles to reach a wider audience.
Enabling subtitles on your YouTube videos is crucial for viewers to easily access and engage with the subtitles. By following the steps outlined in this article, you can enable subtitles for different languages and make your content more accessible to a diverse audience.
So, whether you’re a content creator looking to expand your reach and make your content more inclusive, or a viewer seeking a better viewing experience, adding subtitles to your YouTube videos is a worthwhile endeavor. Start implementing these techniques today and unlock the full potential of your YouTube content.