Introduction
Zoom has quickly become the go-to platform for virtual meetings, whether for work, school, or catching up with friends and family. With its user-friendly interface and robust features, Zoom provides a seamless and reliable video conferencing experience. If you’re new to Zoom and wondering how to make a Zoom meeting, you’ve come to the right place. In this article, we’ll guide you through the process step-by-step, ensuring you have all the information you need to successfully host your first Zoom meeting.
Whether you’re a business professional conducting a remote presentation, a teacher organizing an online class, or a group of friends planning a virtual get-together, creating a Zoom meeting is a simple and straightforward process. It allows you to connect with people from different locations, share screens, collaborate on documents, and even record the session for future reference.
Before we dive into the step-by-step process, it’s important to note that to make a Zoom meeting, you’ll need to have a Zoom account. Don’t worry if you haven’t created one yet – we’ll cover that in the first step. Once you have your account, you’ll be able to access the Zoom desktop or mobile application, which provides a range of features and options to enhance your meeting experience.
In the following sections, we’ll walk you through each step in detail, from creating a Zoom account to scheduling and hosting your first meeting. By the end of this guide, you’ll have the confidence and knowledge to set up and conduct successful Zoom meetings, allowing you to stay connected with your colleagues, students, friends, and loved ones, no matter where they may be located.
So let’s get started on this exciting journey, and soon you’ll be hosting your own Zoom meetings like a pro!
Step 1: Creating a Zoom Account
Before you can start making Zoom meetings, you’ll need to create a Zoom account. Don’t worry, the process is straightforward and can be completed in a few simple steps.
To begin, open your preferred web browser and navigate to the Zoom website. Once you’re on the homepage, look for the “Sign Up, It’s Free” button and click on it. You will be redirected to the Zoom sign-up page.
On the sign-up page, you have the option to sign up using your Google or Facebook account, or you can create a new account using your email address. If you prefer to sign up using your Google or Facebook account, simply select the desired option and follow the prompts to authenticate and authorize Zoom to use your account information.
If you’d like to create a new Zoom account, click on the “Sign Up with Email” tab. Enter your email address in the provided field and click “Sign Up.” You’ll then be asked to provide additional details, such as your first name, last name, and a password for your Zoom account.
Once you’ve filled in the required information, check the box to confirm your agreement with Zoom’s Terms of Service and Privacy Policy. Finally, click on the “Sign Up” button to complete the registration process.
After successfully creating your Zoom account, you’ll receive a confirmation email with a link to activate your account. Click on the link to verify your email address and activate your Zoom account. You will then be able to access your Zoom profile and start utilizing the platform’s features.
It’s important to choose a strong and secure password for your Zoom account to protect your personal information and ensure the integrity of your meetings. Be sure to follow best practices for creating passwords, including using a combination of uppercase and lowercase letters, numbers, and special characters.
Congratulations! You’ve taken the first step towards making Zoom meetings. With your Zoom account in place, you’re ready to move on to the next step: downloading the Zoom application.
Step 2: Downloading the Zoom Application
Once you have created your Zoom account, the next step is to download the Zoom application. The application is available for various platforms, including Windows, macOS, iOS, and Android, ensuring that you can join or host meetings from your preferred device.
To download the Zoom application, open your web browser and navigate back to the Zoom website. Once you’re on the homepage, look for the “Resources” tab at the top menu and click on it. From the dropdown options, select “Download Zoom Client.
On the download page, you will find the different options available based on your device’s operating system. Click on the appropriate download link for your device, and the Zoom application will begin downloading.
If you’re using a desktop or laptop computer, the download will typically save the installation file (.exe for Windows and .dmg for macOS) to your designated download folder. Locate the downloaded file and double-click on it to start the installation process. Follow the on-screen prompts to complete the installation.
For mobile devices, such as smartphones or tablets, the download process will depend on your device’s app store. Search for “Zoom” in the app store and select the official Zoom app. Tap on the “Download” or “Install” button, and the application will be installed on your device.
Once the installation is complete, launch the Zoom application on your device. You will be prompted to sign in to your Zoom account using the credentials you created earlier. Enter your email address and password, and click on the “Sign In” button.
If you prefer to access Zoom meetings without downloading the application, you can join meetings through your web browser. However, note that the web version has limited features compared to the desktop or mobile app, so it’s recommended to use the application for the best user experience.
Congratulations! You have successfully downloaded the Zoom application and are ready to make the most of its features. In the next step, we will guide you through signing in to your Zoom account.
Step 3: Signing in to Your Zoom Account
With the Zoom application downloaded and installed on your device, it’s time to sign in to your Zoom account to access all the features and functionalities.
Launch the Zoom application on your device. You will be presented with the Zoom login screen. To sign in, enter the email address associated with your Zoom account in the provided field.
Next, enter the password you created during the account registration process. Make sure to type it accurately, paying attention to uppercase and lowercase letters as well as any special characters or numbers.
Once you have entered your email address and password, click on the “Sign In” button. If the details you entered are correct, you will be taken to the Zoom dashboard, where you can view your upcoming meetings, schedule new meetings, and access various other Zoom features.
In case you forget your password or are unable to sign in, click on the “Forgot Password?” link. You will then receive instructions via email to reset your password and regain access to your account.
If you’re using a shared computer or device, make sure to uncheck the “Keep me signed in” option before signing in. This ensures that your Zoom account remains secure and prevents unauthorized access to your meetings and personal information.
Additionally, for added security, consider enabling two-factor authentication for your Zoom account. This feature requires users to provide a secondary form of verification, such as a unique code sent to their mobile device, before gaining access to their account.
Signing in to your Zoom account is an essential step in the meeting creation process. It allows you to manage your account settings, schedule and host meetings, and invite participants to join your Zoom meetings. With your account ready, it’s time to move on to the next step: scheduling a Zoom meeting.
Step 4: Scheduling a Zoom Meeting
Now that you’re signed in to your Zoom account, you’re ready to schedule your first Zoom meeting. Scheduling a meeting allows you to set a specific date and time for your virtual gathering, making it easier for participants to plan and join.
To schedule a meeting, click on the “Schedule” button on the Zoom dashboard. You’ll be directed to the meeting scheduling page, where you can fill in the details for your upcoming meeting.
Start by entering a descriptive title for your meeting in the “Topic” field. This could be the purpose of the meeting, the topic to be discussed, or anything that accurately represents the meeting’s focus.
Next, select the date and time for your meeting by choosing the appropriate options in the “Date” and “Time” fields. You can also choose to enable or disable the “Recurring meeting” option if you want the meeting to occur regularly on the same schedule.
Under the “Duration” field, specify the estimated duration of your meeting in hours and minutes. This helps attendees manage their time accordingly and ensures a smooth flow throughout the meeting.
If desired, you can also customize the meeting settings by clicking on the “Advanced Options” section. Here, you can adjust settings such as requiring a password for participants, enabling or disabling video and audio upon entry, and allowing participants to join before the host.
Another useful feature is the “Enable waiting room” option, which allows you to control the entry of participants into the meeting. This can be helpful for managing larger meetings or when you want to ensure that attendees are only admitted at a certain time.
Once you have filled in all the necessary details, click on the “Schedule” button at the bottom of the page to create the meeting. You will then be redirected to a confirmation page where you can find the meeting details and share them with participants.
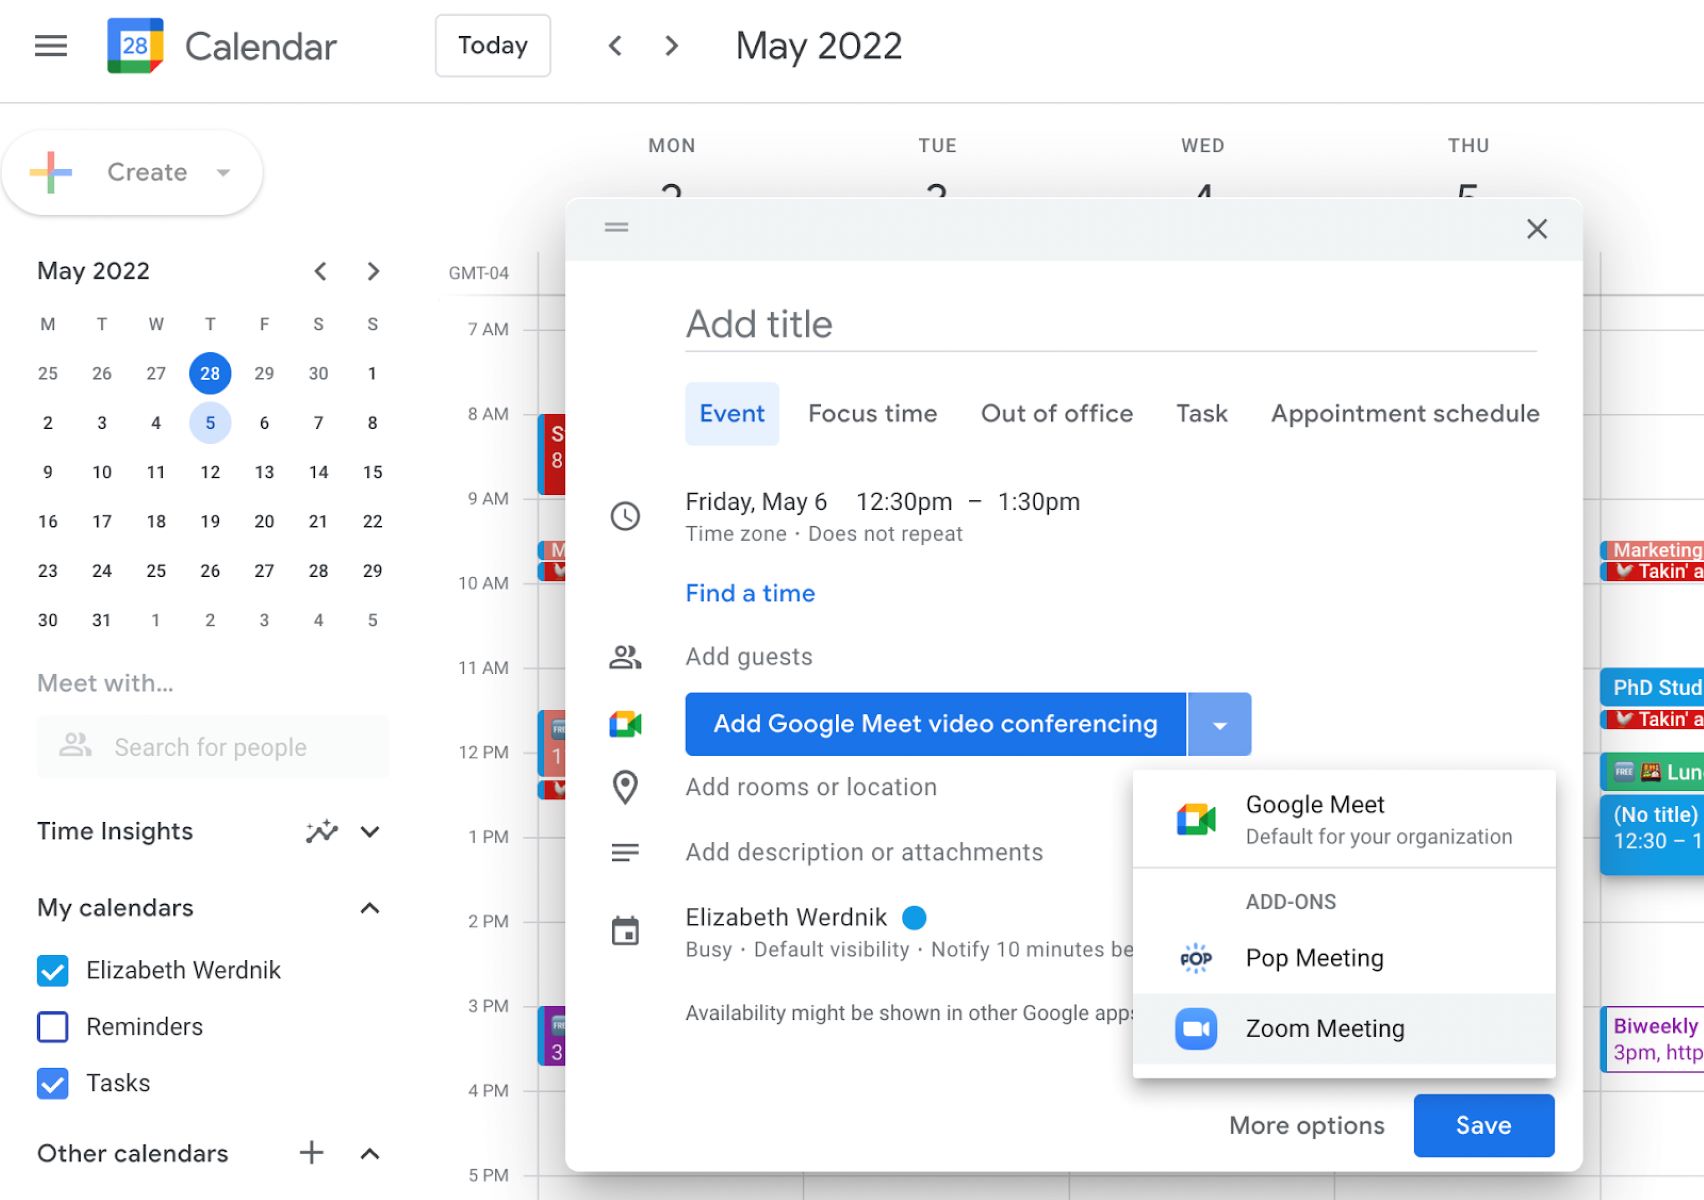
On the confirmation page, you have several options for inviting participants to your Zoom meeting. You can copy the meeting invitation and send it via email or other messaging platforms. You can also add the meeting to your calendar by clicking on the “Add to Calendar” button, which provides an easy way to remember and join the meeting at the appointed time.
Scheduling a Zoom meeting is a crucial step in the process, as it establishes a clear time and structure for your virtual gathering. With your meeting scheduled, it’s time to move on to the next step: setting up the meeting details.
Step 5: Setting Up Meeting Details
After scheduling your Zoom meeting, it’s time to set up the meeting details to ensure a smooth and productive virtual gathering. Setting up the meeting details involves configuring options such as video and audio settings, screen sharing options, and more.
To set up the meeting details, go to the Zoom dashboard and locate the meeting you scheduled. Click on the meeting title to access the meeting details page.
On the meeting details page, you’ll find various settings that you can customize according to your preferences. Let’s explore some important options:
Video Settings: You can choose whether to start the meeting with participants’ video on or off. You can also decide whether to allow participants to turn on their video during the meeting. Adjust these settings based on your meeting’s requirements.
Audio Settings: Determine how participants can connect to audio in the meeting. You can choose to allow participants to join using computer audio, telephone dial-in, or both. Select the option that best suits your participants’ needs.
Meeting Options: Customize settings such as requiring a meeting password, enabling or disabling the waiting room feature, and allowing participants to join before the host. Review these options based on your meeting’s privacy and security requirements.
Screen Sharing: Decide whether to allow participants to share their screen during the meeting. You can choose to let the host only, all participants, or specific individuals share their screen. This feature is useful for presentations, collaborations, and demonstrations.
Recording: Determine whether you want to record the meeting for future reference. Zoom provides options to record the meeting locally on your computer or to the cloud. Choose the appropriate recording option based on your storage and accessibility needs.
Once you have adjusted the meeting details to your liking, click on the “Save” button to apply the changes. The meeting details will be updated, and participants will see the configured settings when they join the meeting.
Remember, it’s crucial to customize the meeting details to enhance the meeting experience and cater to the specific needs of your participants. By setting up clear guidelines and expectations, you’ll create a more efficient and productive virtual gathering.
With the meeting details all set, you’re now ready to move on to the next step: inviting participants to your Zoom meeting.
Step 6: Inviting Participants to the Zoom Meeting
Now that you have scheduled and configured the details for your Zoom meeting, it’s time to invite participants to join the virtual gathering. Inviting participants is crucial to ensure that everyone receives the necessary information and can access the meeting at the scheduled time.
To invite participants to your Zoom meeting, there are several methods you can use:
Email Invitation: One of the most common ways to invite participants is by sending them an email invitation. On the Zoom meeting confirmation page, you’ll find a “Copy the invitation” button. Click on it to copy the meeting invitation, and then paste it into an email. Be sure to include the meeting date, time, and any additional instructions for joining the meeting.
Calendar Invitations: If you added the meeting to your calendar during the scheduling process, you can send calendar invitations directly from the Zoom meeting confirmation page. Click on the “Invite” button, select your preferred calendar application, and follow the prompts to send the invitation. This method is convenient if you want to ensure that participants have the meeting details integrated into their calendars.
Join URL: Another option is to provide participants with the direct join URL for the meeting. This URL can be found on the Zoom meeting confirmation page, and you can easily share it via email, messaging platforms, or even by embedding it on a website. Participants can simply click on the link to join the meeting at the scheduled time.
Meeting ID and Password: Alternatively, you can share the meeting ID and password with participants separately. This is especially useful if you want to provide a more personalized and secure method of joining the meeting. Participants can enter the meeting ID and password in the Zoom application or on the Zoom website to join the meeting.
No matter which method you choose, it’s important to provide clear instructions and any necessary meeting credentials to participants. Give them ample time to join the meeting and inform them about any specific requirements, such as downloading the Zoom application or accessing the meeting through a web browser.
Remember, communication is key when inviting participants to your Zoom meeting. Ensure that everyone receives the necessary information in a timely manner, and be available to answer any questions or concerns they may have.
With the participants invited and informed, you’re now ready to move on to the next step: adjusting additional meeting settings to enhance the meeting experience.
Step 7: Adjusting Additional Meeting Settings
In addition to the basic meeting details and configurations, Zoom provides various additional settings that you can adjust to enhance your meeting experience and ensure a smooth and productive virtual gathering.
To access the additional meeting settings, go to your Zoom dashboard and locate the scheduled meeting. Click on the meeting title to open the meeting details page.
Once on the meeting details page, scroll down to the “Meeting Options” section. Here, you’ll find various settings that you can customize according to your meeting’s requirements and preferences. Let’s explore some of the important additional meeting settings:
Host and Participant Controls: Determine whether the host or participants will have control over certain features during the meeting. This includes options such as allowing participants to chat, allowing participants to share their screen, and enabling or disabling the ability for participants to unmute themselves.
Managing Participants: Decide on the participant management options that are available during the meeting. You can choose to allow participants to rename themselves, raise their hand to ask a question or make a comment, or automatically mute participants upon entry.
Breakout Rooms: If you’re hosting a larger meeting or working on group activities, consider enabling Breakout Rooms. This feature allows you to split participants into smaller rooms for discussions or collaboration. You can specify the number of breakout rooms and automatically assign participants or manually assign them as needed.
Waiting Room: Utilize the waiting room feature to control the entry of participants into the meeting. Participants will be placed in a virtual waiting room until you admit them individually or all at once. This is helpful for managing larger meetings or ensuring that only authorized participants join.
Virtual Background: Add some creativity to your meeting by enabling the virtual background feature. You can choose to upload a custom background image or use one of the pre-existing virtual backgrounds. This feature is especially useful if you want to hide your actual background or add a professional touch to your video feed.
Live Streaming: If you want to broadcast your Zoom meeting to a larger audience, consider enabling live streaming. This feature allows you to stream your meeting to platforms such as YouTube, Facebook Live, or a custom streaming service. It’s a great option for webinars, conferences, or events with a broader audience.
Once you have adjusted the additional meeting settings according to your preferences, click on the “Save” button to apply the changes. These settings will enhance the flow, interactivity, and overall experience of your Zoom meeting.
By customizing these additional meeting settings, you can create a more tailored and engaging environment for your participants. It’s important to strike a balance between providing necessary controls for you as the host and empowering participants to actively participate in the meeting.
With the additional meeting settings configured, you’re now ready to move on to the next step: starting and conducting your Zoom meeting.
Step 8: Starting and Conducting the Zoom Meeting
Now that you have prepared all the necessary details and settings, it’s time to start and conduct your Zoom meeting. In this step, we will guide you through the process of initiating the meeting and navigating the various features and controls available to you as the host.
To begin, open the Zoom application on your computer or device and sign in to your account if you haven’t already done so. Locate the scheduled meeting in your Zoom dashboard and click on the “Start” button next to it.
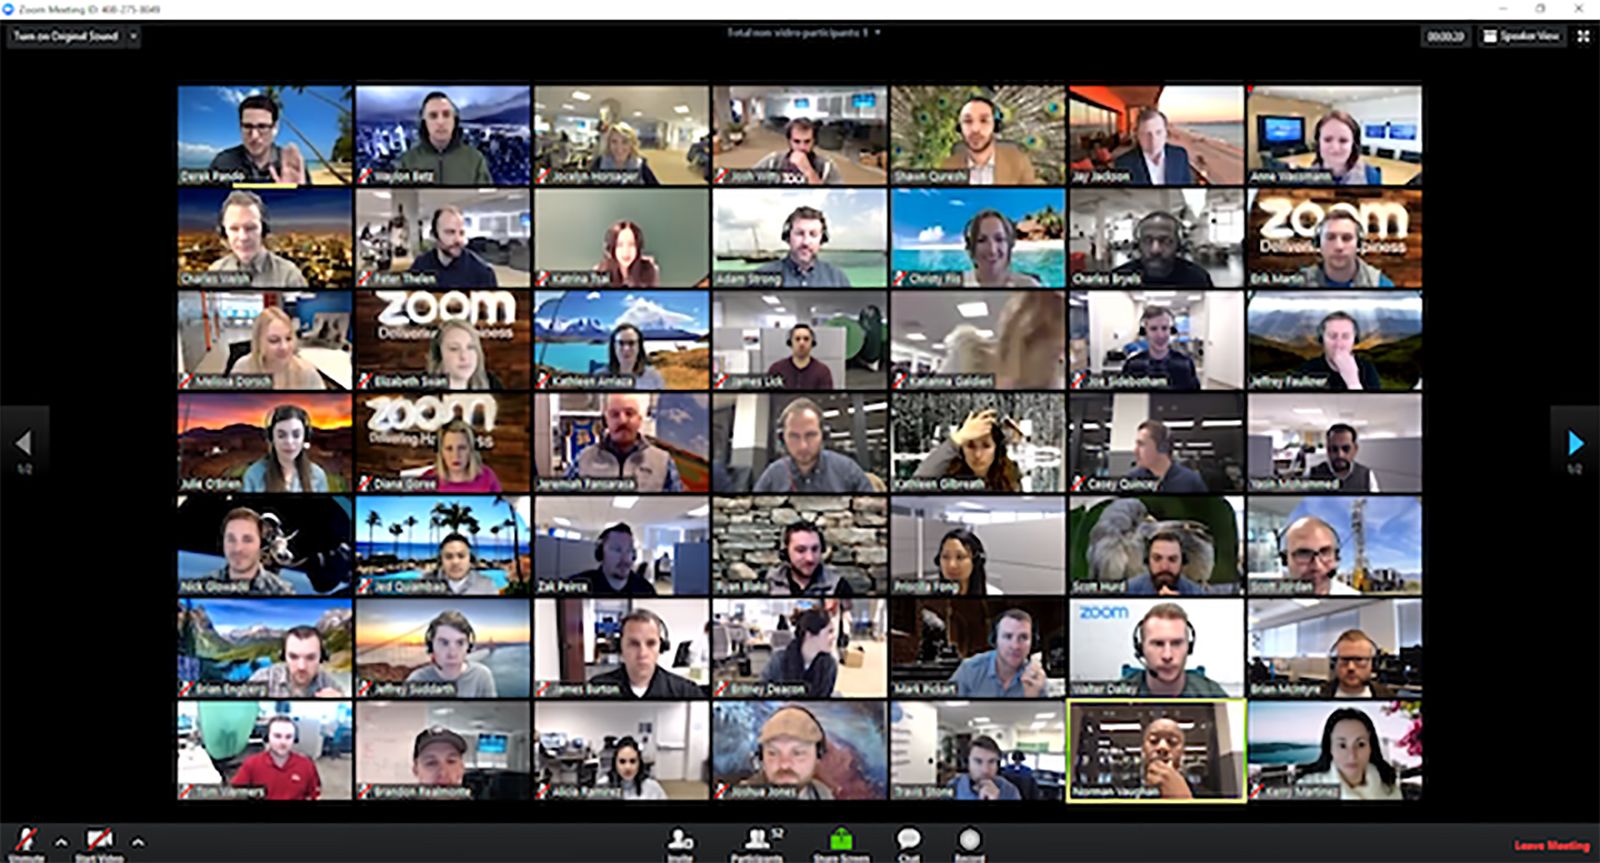
Once you click “Start,” the Zoom meeting window will open, and you will become the host of the meeting. Take a moment to review the controls and options available to you at the bottom of the screen.
Microphone and Camera Controls: Use the microphone icon to mute or unmute your microphone. The camera icon allows you to turn your camera on or off. Ensure that your audio and video settings are adjusted to your preferences before attendees join the meeting.
Share Screen: Click on the “Share Screen” button to share your screen with participants. This is useful for presentations, demonstrations, or collaborating on documents. You can select a specific application or window to share or choose to share your entire screen.
Participants Panel: Click on the “Participants” button to access the participants panel. From here, you can view a list of attendees, manage participant permissions, and interact with participants through options such as muting or unmuting participants, raising hands, and sending chat messages.
Chat feature: The chat icon allows you to open the chat panel, where you can send messages to individual participants or the entire group. Use this feature to communicate important updates, share links or documents, and address any questions or concerns raised by participants.
Recording Options: If you have enabled recording for the meeting, click on the “Record” button to start or stop recording the session. This is useful for capturing important discussions or presentations for later review or for participants who couldn’t attend the meeting.
Throughout the meeting, make sure to maintain a structured and organized flow. Introduce the agenda if applicable and provide clear instructions when transitioning between different topics or activities. Encourage active participation from attendees, allowing time for questions, discussions, or any planned activities.
Utilize the screen sharing feature to display slides, documents, or any visual aids to enhance the understanding of the topic being discussed. Maintain eye contact with the camera as much as possible to ensure participants feel engaged and connected.
Remember to monitor the chat for any questions or comments from participants. Address them in a timely manner to maintain a collaborative and inclusive meeting environment. It’s essential to create a safe and respectful space where all participants feel valued and comfortable expressing their thoughts or concerns.
Before concluding the meeting, provide a summary of the key takeaways or action items discussed. This ensures that participants leave the meeting with a clear understanding of what needs to be done and any follow-up steps that may be required.
Once the meeting objectives have been achieved, click on the “End Meeting” button to conclude the session. You’ll have the option to end the meeting for all participants or leave the meeting open for attendees to continue informal discussions if necessary.
Congratulations! You have successfully started and conducted your Zoom meeting. With practice and experience, you’ll become more comfortable navigating the various features and controls, allowing you to host effective and engaging virtual gatherings.
In the final step, we will guide you through ending the Zoom meeting and wrapping up your virtual interaction.
Step 9: Ending the Zoom Meeting
In the final step of your Zoom meeting journey, it’s time to gracefully end the session and wrap up your virtual interaction. Ending the meeting properly ensures that all participants leave the virtual gathering on a positive note.
To end the Zoom meeting, locate the meeting control toolbar at the bottom of the screen during the session. Click on the red “End Meeting” button.
A confirmation dialog box will appear, asking if you want to end the meeting for all participants. Click on the “End Meeting for All” option to conclude the session.
Before ending the meeting, it’s a good practice to provide a quick summary of the key takeaways and express gratitude to the participants for their time and contributions. This helps reinforce the meeting’s purpose and outcome while fostering a sense of appreciation among attendees.
If there are any follow-up actions or assignments, make sure to communicate them clearly and provide participants with the necessary information or resources to carry them out successfully.
After ending the meeting, take a moment to reflect on the experience. Think about what went well and identify any areas for improvement. This will help you enhance your future Zoom meetings and refine your hosting skills.
Additionally, if you have enabled meeting recording, remember to save and store the recording appropriately for future reference or sharing with participants who couldn’t attend the meeting.
Lastly, consider sending a follow-up email to the participants. Thank them for their attendance and participation, and include any relevant meeting notes, action items, or resources discussed during the session. This helps reinforce the information covered and ensures everyone is on the same page moving forward.
With your Zoom meeting successfully concluded and all necessary follow-up actions taken, you can reflect on the accomplishments of the meeting. By mastering the art of ending a Zoom meeting professionally, you foster meaningful connections, drive productive discussions, and create a positive experience for all participants.
Congratulations on completing all the steps to make a successful Zoom meeting. With practice and experience, you’ll become a confident and effective host of virtual gatherings. Keep honing your skills, embracing new features, and staying connected with others through the power of Zoom.
Conclusion
Navigating the world of Zoom meetings can be both exciting and daunting, but with the steps outlined in this guide, you’re now equipped with the knowledge and skills to successfully create and conduct your own Zoom meetings. From creating a Zoom account to scheduling and inviting participants, adjusting meeting settings, and leading engaging sessions, you’ve learned the essentials of hosting virtual gatherings.
Remember to personalize your meetings by customizing settings, setting an agenda, and providing clear instructions. Leveraging features like screen sharing, chat, and breakout rooms can enhance collaboration and interaction among participants. Prioritize effective communication, active participation, and inclusivity throughout your meetings to create a positive and engaging atmosphere.
As you gain experience and confidence, continue exploring and experimenting with new features and functionalities that Zoom offers. Stay updated on the latest updates and best practices to ensure you make the most out of this powerful video conferencing platform.
Whether you’re conducting business meetings, hosting virtual classrooms, or connecting with loved ones, Zoom provides a convenient and effective way to bridge distances and bring people together. Embrace the flexibility and opportunities that virtual meetings offer, and make the most out of your interactions with others.
By following the steps and tips in this guide, you’ll be able to create meaningful connections, collaborate effectively, and conduct successful Zoom meetings. So, go ahead and start planning your next virtual gathering with confidence, knowing that you have the skills to make it a success.
Thank you for reading, and happy Zoom meeting hosting!