Introduction
Welcome to this guide on how to create a Zoom link! In today’s digital age, Zoom has become an essential tool for virtual meetings, webinars, and online collaborations. Whether you’re a professional conducting remote interviews, a teacher hosting virtual classes, or simply planning a get-together with friends and family, knowing how to create a Zoom link is crucial.
Creating a Zoom link is incredibly easy and convenient. With just a few simple steps, you’ll have a personalized link that you can share with participants to join your meeting. In this guide, we’ll walk you through the process, ensuring that you can start hosting successful Zoom meetings in no time.
If you’re new to Zoom, don’t worry! This guide is designed for all levels of users, from beginners to experienced individuals looking to refresh their skills. So, let’s dive in and discover how to create a Zoom link so you can connect with others, no matter where they are in the world.
Step 1: Sign in to your Zoom account
To create a Zoom link, the first step is signing in to your Zoom account. If you don’t have an account, you can easily create one by visiting the Zoom website and clicking on the “Sign Up, It’s Free” button. Follow the prompts to create your account, and once you’re done, you can proceed to the next step.
If you already have a Zoom account, go to the Zoom website and click on the “Sign In” button located at the top right corner of the page. Enter your login credentials, which typically consist of your email address and password. Once you’ve filled in the required information, click on the “Sign In” button to access your Zoom account.
It’s important to ensure that you have a reliable internet connection before signing in to your Zoom account. This will help prevent any disruptions or connectivity issues during the process of creating your Zoom link.
When signing in, remember to double-check your login credentials to avoid any typing errors. If you have forgotten your password, you can easily reset it by clicking on the “Forgot Password?” link and following the instructions provided.
Once you’ve successfully signed in to your Zoom account, you’re ready to move on to the next step of creating your Zoom link. Let’s proceed to the Meetings tab and start setting up your meeting.
Step 2: Go to the Meetings tab
After signing in to your Zoom account, the next step to create a Zoom link is to navigate to the Meetings tab. The Meetings tab is where you can schedule, view, and manage all your upcoming meetings.
To access the Meetings tab, look for the navigation menu located on the left side of your screen. It typically features icons and labels for various Zoom features and settings. Locate and click on the “Meetings” option in the menu, and it will take you to the Meetings page.
On the Meetings page, you’ll find an overview of all your scheduled meetings. If you haven’t created any meetings yet, the list will be empty. Don’t worry, we’ll fix that in the next steps!
If you use Zoom frequently, you may have a long list of past meetings. To find the option to schedule a new meeting, look for the “+ Schedule a New Meeting” button. This button is usually located at the top-right corner of the Meetings page.
Clicking on the “+ Schedule a New Meeting” button will take you to the meeting scheduling page, where you can enter all the necessary details for your Zoom meeting. This is where you’ll customize your meeting and generate the Zoom link that participants will use to join.
Now that you’ve successfully reached the Meetings tab, let’s proceed to the next step and start creating your Zoom meeting by clicking on the “Schedule a Meeting” button.
Step 3: Click on the Schedule a Meeting button
With the Meetings tab open, the next step in creating your Zoom link is to click on the “Schedule a Meeting” button. This button allows you to set up a new meeting and customize the details according to your requirements.
Locate the “+ Schedule a New Meeting” button, usually positioned at the top-right corner of the Meetings page. Clicking on this button will bring you to the scheduling page, where you can enter all the necessary information for your Zoom meeting.
On the scheduling page, you’ll find various fields and options to customize your meeting. Start by filling in the title for your meeting. Make it descriptive and relevant, so participants know what the meeting is about.
Next, you’ll find the date and time options. Choose the date and time that best suit your meeting schedule. You can set the meeting to occur immediately or select a specific date and time in the future.
Under the date and time options, you’ll see the duration field. Enter the estimated duration of your meeting. This will help participants plan their schedules accordingly.
Beneath the duration, there are additional settings you can configure as per your requirements. These settings include options to enable video and audio for participants, allow participants to join before the host, and more. Customize these settings based on the nature of your meeting.
Additionally, you can set a meeting password to ensure only authorized participants can join. Simply toggle the “Require meeting password” option and enter a secure password.
Once you’ve filled in all the necessary details and customized the settings, you’re ready to move on to the next step: generating the Zoom link for your meeting. Let’s proceed to the next section to complete this process.
Step 4: Complete the meeting details
Now that you’ve opened the scheduling page and entered the basic information for your Zoom meeting, it’s time to complete the meeting details to ensure a smooth and organized session.
On the scheduling page, you’ll find various sections to provide additional information about your meeting. Let’s go over each section:
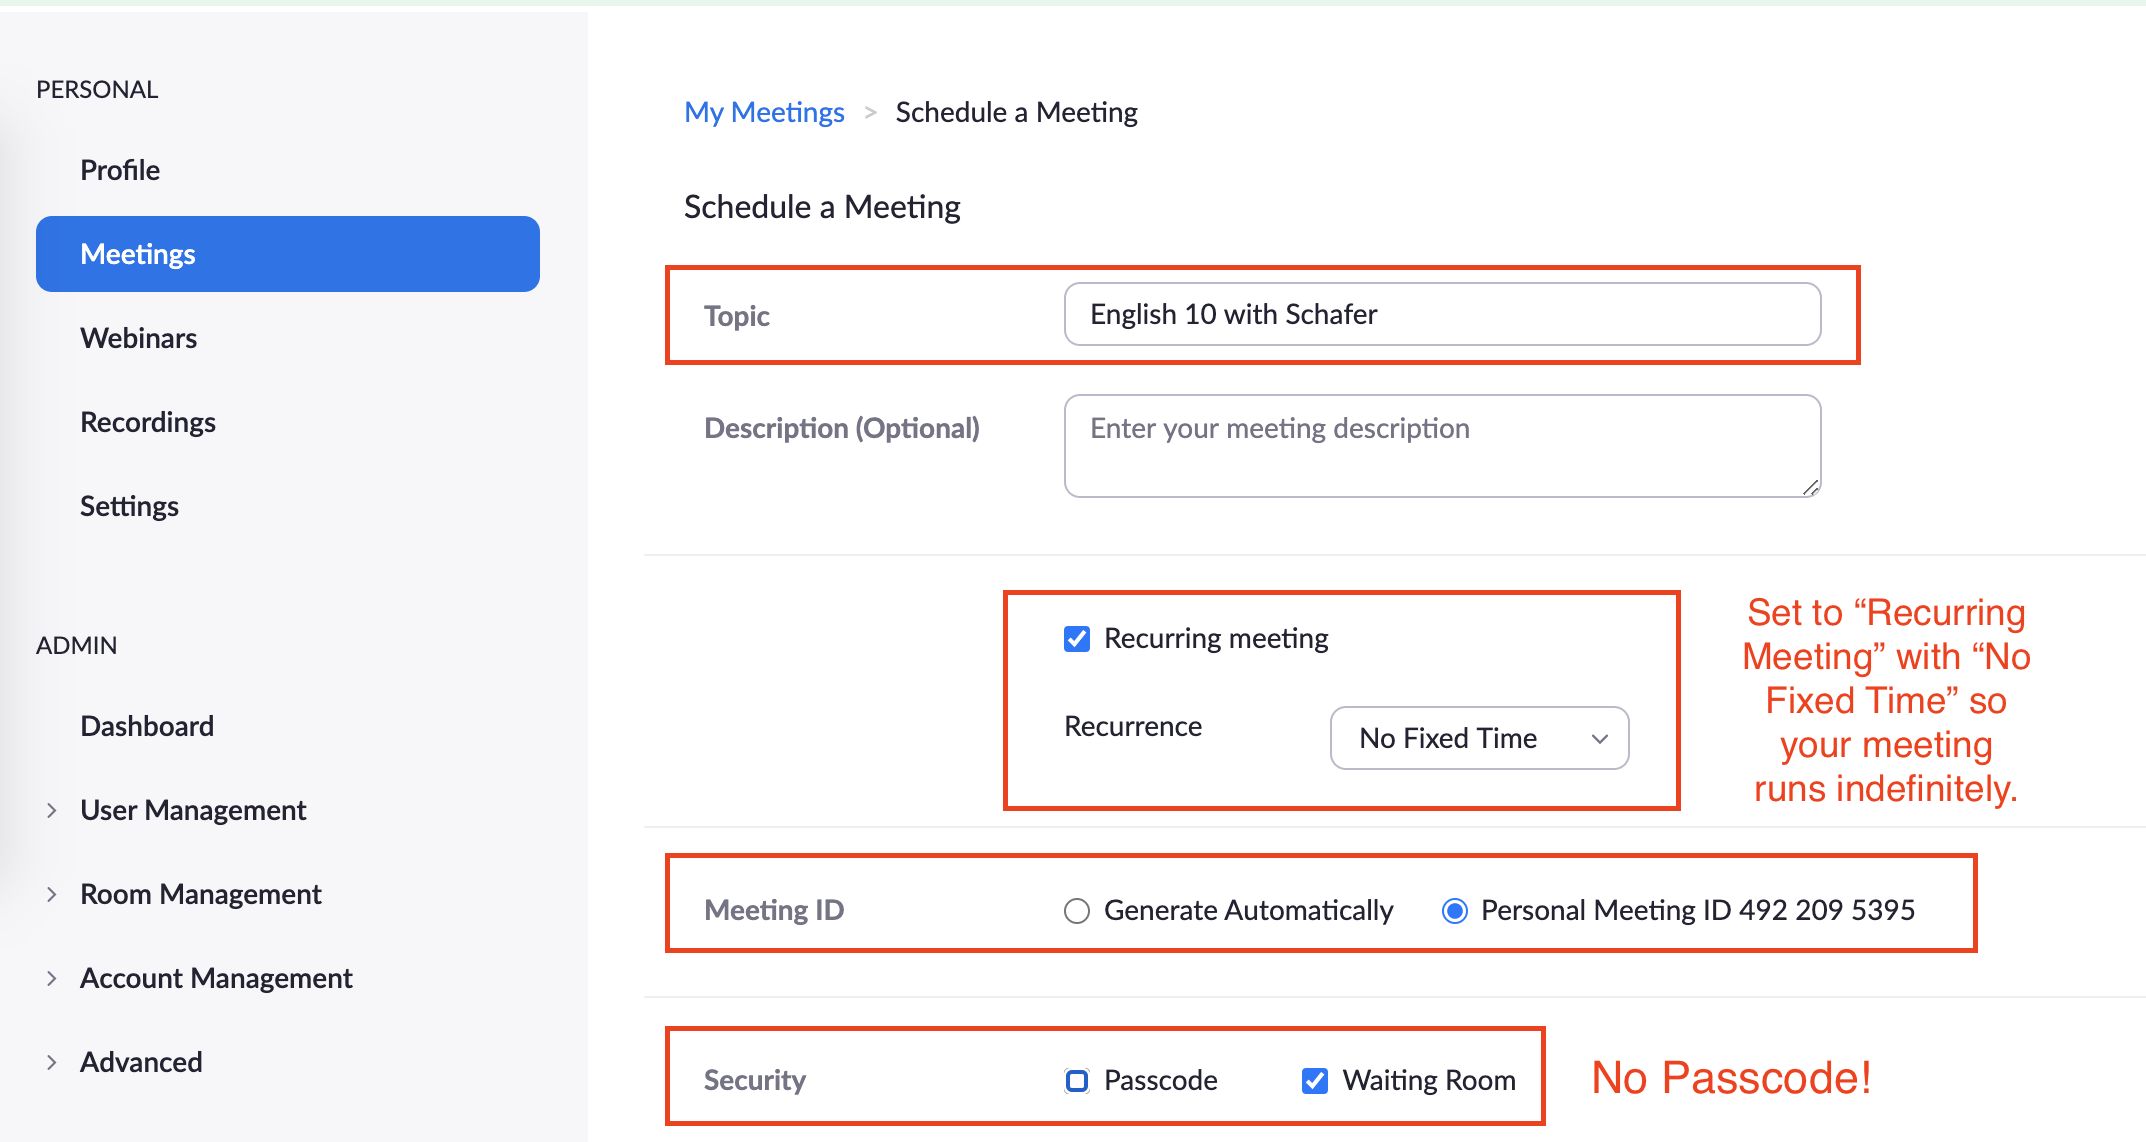
- Meeting Options: This section allows you to further customize your meeting settings. You can choose to enable or disable features such as participant video, participant audio, screen sharing, and more. Adjust these options based on your meeting requirements.
- Meeting ID: By default, Zoom generates a random meeting ID for each scheduled meeting. However, if you prefer to use your Personal Meeting ID (PMI) or create a one-time ID, you can modify this field accordingly. Note that using a Personal Meeting ID allows participants to join your meetings more easily if they have your PMI.
- Meeting Password: As an extra layer of security, you can set a password for your meeting. This ensures that only individuals with the password can join the session. Make sure to use a strong, unique password to prevent any unauthorized access.
- Video: In this section, you have the option to choose whether the host and participants should have their video on or off when joining the meeting. Consider the nature of your meeting and the preference of your participants when making this selection.
- Audio: Similar to video, you can select whether participants should join with computer audio, telephone, or both. Ensure that your participants have the necessary equipment or information to join through their preferred audio method.
Take your time to review each section and provide the necessary details and settings for your meeting. Keep in mind the purpose and goals of your meeting to ensure that the configurations align with your objectives.
Once you’re satisfied with the completed meeting details, you’re ready to move on to the next step and generate the Zoom link that participants will use to join your meeting. Let’s proceed to the next section to complete this process.
Step 5: Generate the Zoom link
After completing the meeting details, the final step to create your Zoom link is to generate it. The Zoom link is a unique URL that participants will use to join your meeting.
On the scheduling page, scroll down until you see the “Save” and “Save and Add Another Meeting” buttons. To generate the Zoom link, you need to click on the “Save” button.
Once you click on the “Save” button, Zoom will create the link for your meeting, and it will be displayed on the confirmation page. This link is unique to your meeting and can be shared with participants via email, messaging apps, or any other preferred communication method.
When sharing the Zoom link, it’s helpful to include additional meeting details such as the date, time, and any specific instructions participants may need to join. This will ensure that everyone has the necessary information to access your meeting successfully.
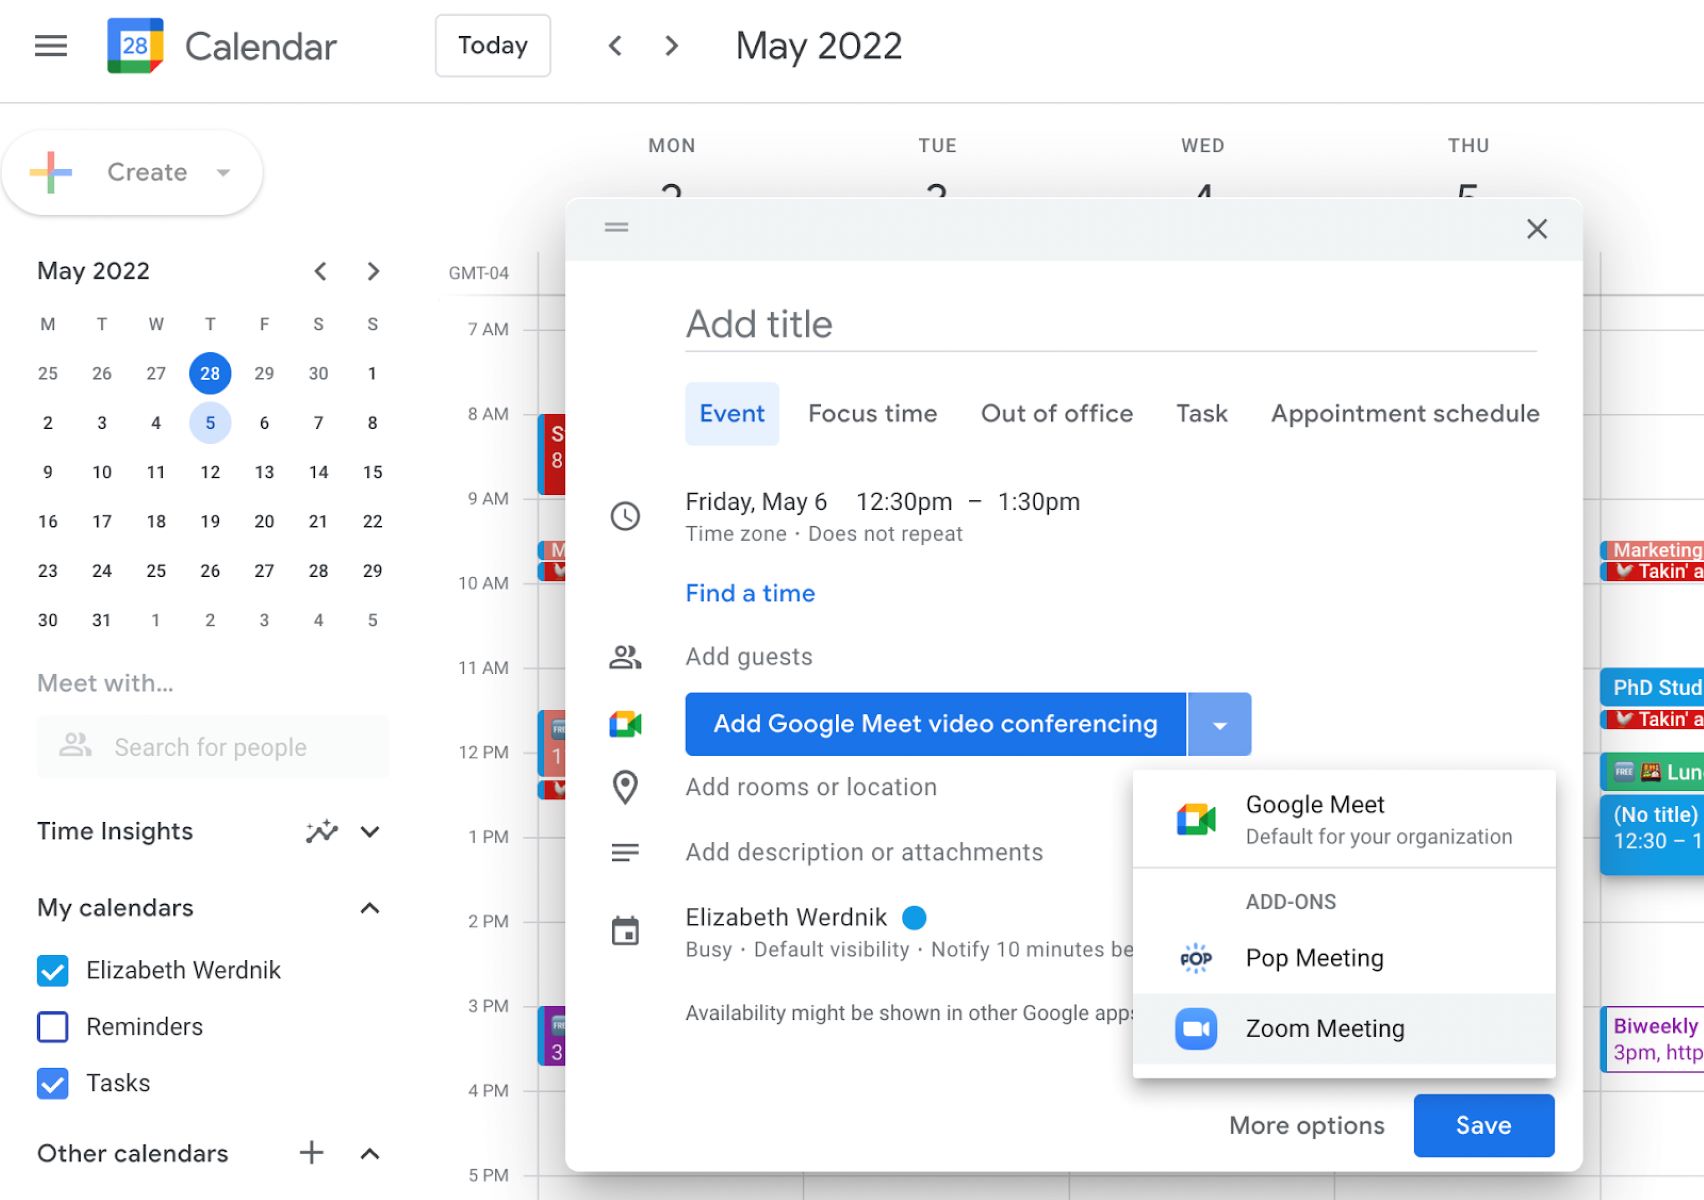
Additionally, you can copy the Zoom link and add it to calendar invites or any other platforms you’re using to manage and organize your meetings.
Remember to validate the Zoom link before sharing it. Open a new browser window or tab and paste the link to ensure that it works correctly. This will help you avoid any last-minute issues or confusion for your participants.
Now that you have successfully generated the Zoom link, you’re ready to share it with your attendees. Congrats! The hard work is done, and you can now focus on hosting a productive and engaging meeting.
Keep in mind that the Zoom link remains active for the scheduled meeting time. Once the meeting ends, the link will no longer be active, ensuring the security and privacy of your sessions.
So go ahead, share the link with your participants, and enjoy the seamless connectivity that Zoom provides. Happy meeting!
Conclusion
Congratulations! You have reached the end of this guide on how to create a Zoom link. By following the steps outlined in this article, you can now confidently schedule and generate your own Zoom links for meetings, webinars, and other virtual collaborations.
Remember, Zoom has become an essential tool for connecting with others, whether it’s for business, education, or personal purposes. Creating a Zoom link allows you to invite participants from across the globe to join your virtual meetings and collaborate seamlessly.
Throughout this guide, we covered the necessary steps to create a Zoom link. We started by signing in to your Zoom account, then explored the Meetings tab, where you can schedule and manage all your meetings. We learned how to fill in the meeting details, customize the settings, and generate the unique Zoom link for participants to join.
Make sure to double-check the accuracy of the meeting details and test the generated Zoom link before sharing it with participants. This will help ensure a smooth and hassle-free experience for everyone involved.
Now that you have the knowledge and skills to create a Zoom link, you can take advantage of this powerful tool to connect with colleagues, students, friends, or family members around the world. Embrace the flexibility and convenience that virtual meetings offer, and make the most out of your Zoom experience.
Thank you for reading this guide. We hope it has been helpful in simplifying the process of creating a Zoom link. So, go ahead, start scheduling your meetings, and enjoy the seamless connectivity and collaboration that Zoom brings!