Introduction
Welcome to the world of Zoom, where virtual meetings and collaboration have become the new normal. One of the key features that makes Zoom a powerful tool for communication and sharing information is the ability to share documents seamlessly during a meeting. Whether you need to present a PowerPoint presentation, share a PDF document, or collaborate on a Word document, Zoom provides easy-to-use features that allow you to share your screen and present your documents to participants in real-time.
In this article, we will explore the different methods of sharing a document on Zoom and provide you with step-by-step instructions to help you navigate through the process. Whether you are a business professional conducting remote meetings, a teacher delivering online lessons, or a team member collaborating on a project, understanding how to share documents on Zoom will enhance your virtual communication and productivity.
Before we dive into the document sharing process, it’s important to ensure that your document is appropriately prepared and ready to be shared. Let’s take a closer look at how to get your document Zoom-ready!
Preparing the Document
Before you share a document on Zoom, it’s crucial to make sure that the document is properly prepared for the best viewing experience by the participants. Here are a few essential steps to follow:
1. Format your document: Ensure that your document is well-formatted and organized for easy readability. Use appropriate fonts, headings, and bullet points to make it visually appealing and structured.
2. Check for compatibility: Make sure that the document format is supported by Zoom. Common document formats such as PDF, PowerPoint, Word, and Excel are generally compatible. If you are unsure, it’s recommended to convert your document to a universal format like PDF.
3. Optimize for screen sharing: Keep in mind that the document will be viewed on various screen sizes. Adjust the font sizes, images, and graphics to ensure they are clear and legible when shared on different devices.
4. Remove unnecessary elements: Remove any unnecessary elements such as annotations, personal comments, or sensitive information that you don’t want to share with others.
5. Test the document: Before the actual Zoom meeting, take some time to test the document on your own computer. Make sure it opens properly, all the slides or pages are correctly displayed, and any embedded media (such as videos or audio) are functioning as intended.
By following these steps, you can ensure that your document is well-prepared and ready to be shared during a Zoom meeting. Taking the time to properly format and optimize your document will enhance the overall presentation experience for you and the participants.
Sharing a Document during a Zoom Meeting
Once your document is prepared and you’re ready to share it during a Zoom meeting, there are a few different methods you can use, depending on your specific needs and the location of the document. Let’s explore them:
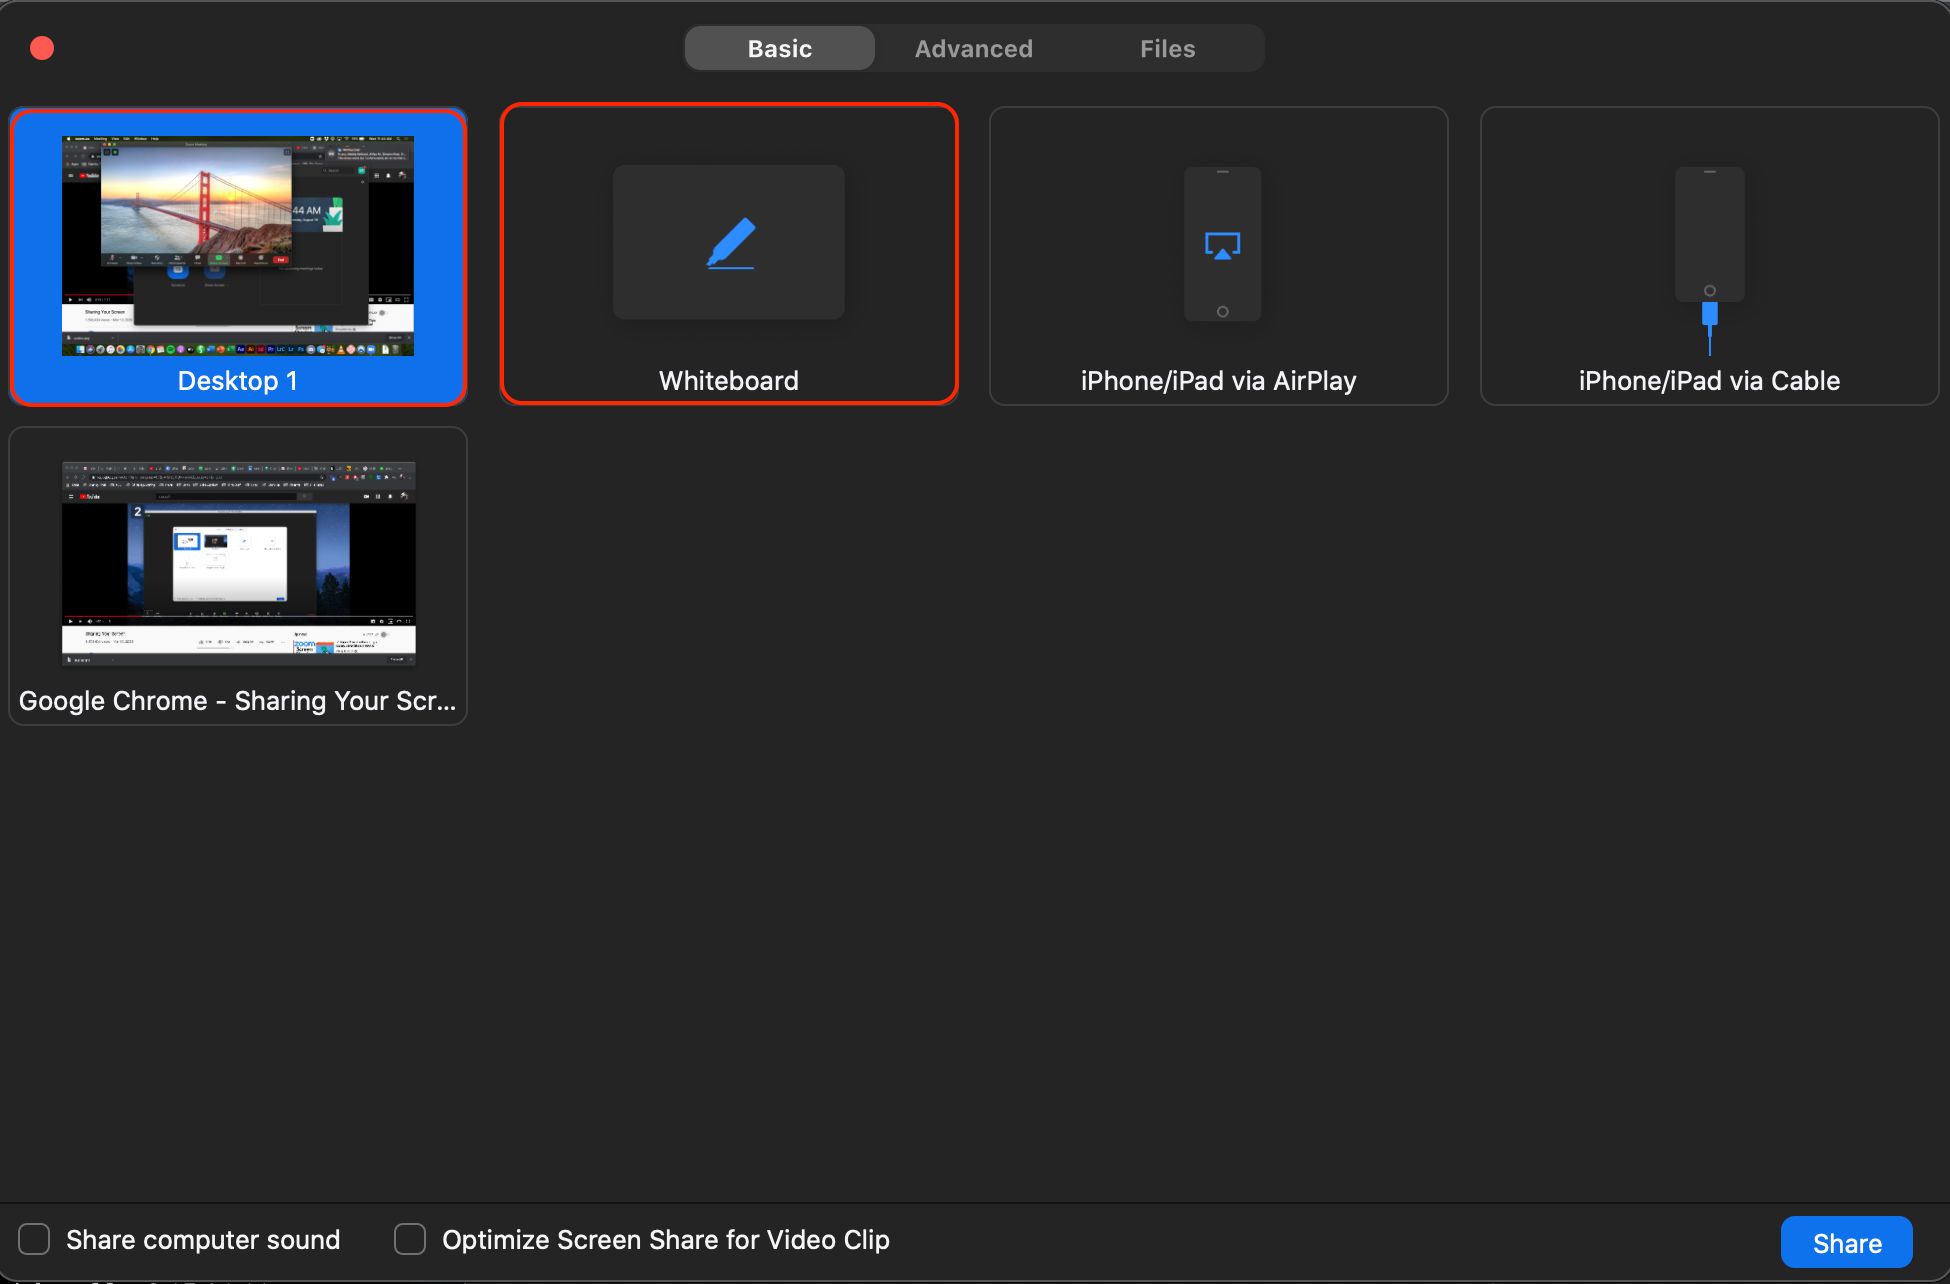
1. Using the Share Screen feature: The Share Screen feature in Zoom allows you to share your entire screen or a specific application window. To share a document using this method, simply open the document on your computer, start the Zoom meeting, and click on the Share Screen button. Select the document or window you want to share, and click on Share. The participants will be able to see your document in real-time.
2. Sharing a document from your computer: If your document is saved on your computer, you can directly share it with the participants by using the Share File button in the Zoom meeting interface. Click on the Share File button, navigate to the location of your document, select it, and click on Open. The document will be shared with the participants, and they will be able to view and download it if necessary.
3. Sharing a document from a cloud storage service: If your document is stored in a cloud storage service like Google Drive or Dropbox, you can easily share it during a Zoom meeting. Click on the Share Screen button, select the application window of your cloud storage service, and navigate to the location of your document. Open the document, and it will be shared with the participants. This method allows for real-time collaboration on the document if multiple users have access to it.
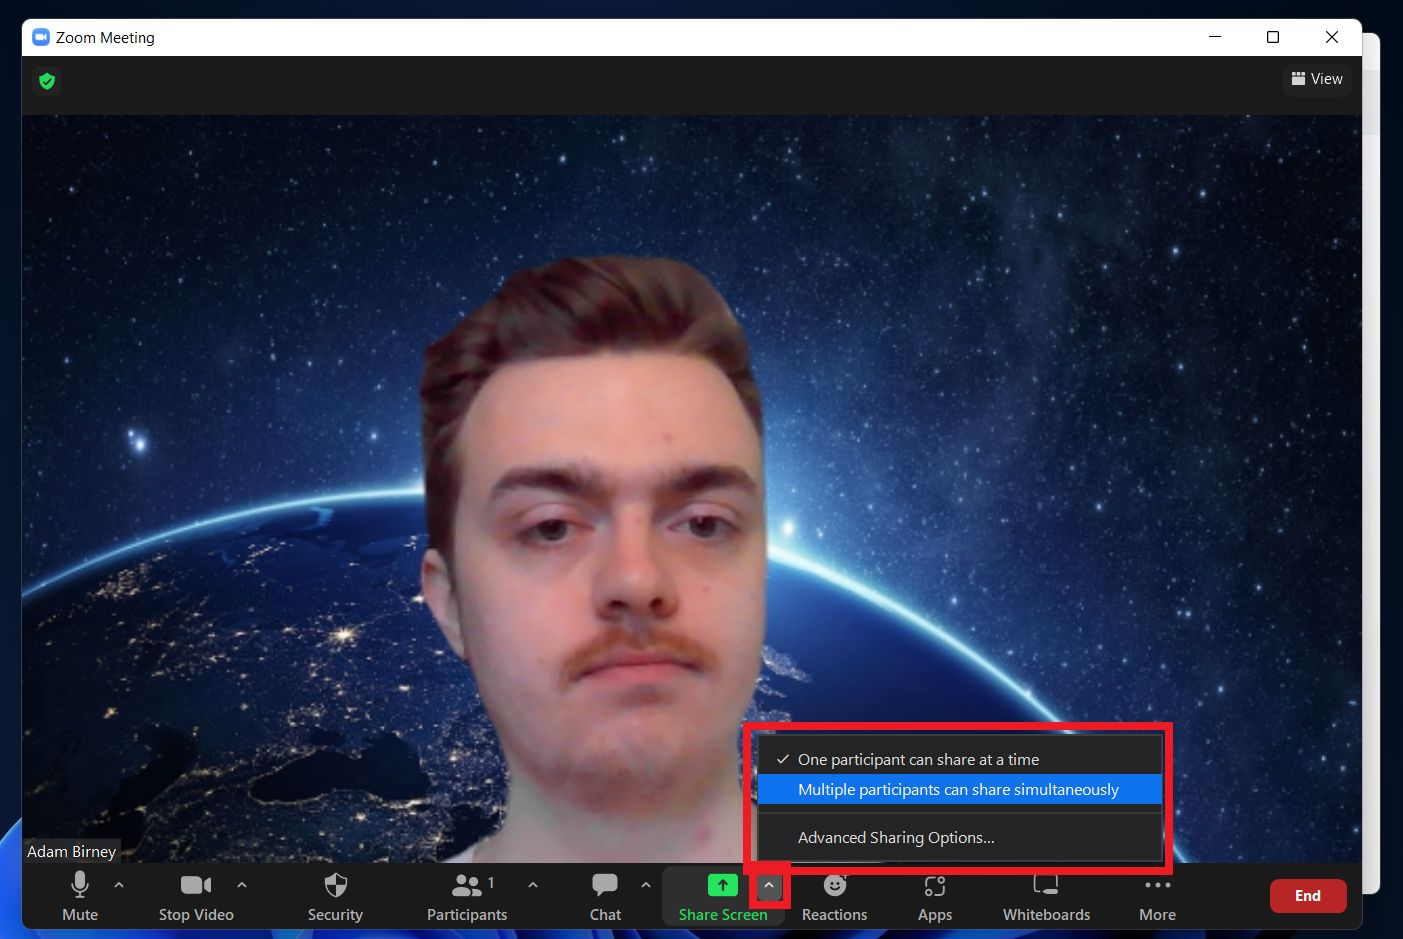
4. Annotating or marking up a shared document: Zoom provides annotation tools that allow you and the participants to mark up or annotate the shared document. You can use features like text boxes, arrows, highlighters, and pens to emphasize specific sections or add comments. This interactive feature enhances collaboration and facilitates discussion during the meeting.
By utilizing these methods, you can seamlessly share your document during a Zoom meeting, whether it’s saved on your computer or stored in the cloud. Experiment with different approaches to find the one that works best for you and your participants.
Using the Share Screen Feature
The Share Screen feature in Zoom is a powerful tool that allows you to share your screen or specific application windows with participants during a meeting. This feature is particularly useful when you want to share a document directly from your computer or show a presentation in real-time. Follow these steps to use the Share Screen feature:
1. Start your Zoom meeting: Launch the Zoom application and start your meeting by clicking on the “Start Meeting” button. You can also join an existing meeting by entering the meeting ID provided by the host.
2. Locate the Share Screen button: Once you’re in the meeting, locate the Share Screen button in the Zoom meeting controls. It is usually located at the bottom of the Zoom interface, in the center of the control panel.
3. Select the screen or application window to share: Click on the Share Screen button, and a pop-up window will appear. You will have the option to share your entire screen or select a specific application window to share. Choose the document you want to share or the application in which your document is open.
4. Start sharing: Once you have selected the screen or application window, click on the “Share” button at the bottom right corner of the pop-up window. Your screen or application window will now be shared with the meeting participants.
5. Manage your shared screen: While sharing your screen, you will see a floating toolbar at the top of your screen with various options. You can choose to pause or stop sharing, enable or disable the option to show your computer audio, and switch between different screens or applications if needed.
6. Stop sharing: To stop sharing your screen, simply click on the “Stop Share” button in the Zoom control panel or directly on the floating toolbar. This will end the screen sharing session and return you to the regular meeting view.
The Share Screen feature in Zoom provides a seamless way to share your document or application with participants, allowing for real-time collaboration and interaction. Whether you’re sharing a presentation, demonstrating a software, or sharing any other document, this feature ensures that everyone in the meeting can see your content clearly and follow along with ease.
Sharing a Document from Your Computer
If your document is saved directly on your computer, you can easily share it with participants in a Zoom meeting. This method allows for quick and seamless document sharing without the need for uploading or accessing cloud storage. Follow these steps to share a document from your computer:
1. Start your Zoom meeting: Launch the Zoom application and start your meeting by clicking on the “Start Meeting” button. If you are joining an existing meeting, enter the meeting ID provided by the host.
2. Locate the Share File button: During the meeting, look for the Share File button on the Zoom meeting control panel. It is usually located at the bottom of the Zoom interface, near the center.
3. Click on the Share File button: Once you locate the Share File button, click on it to open the file selector window. This window allows you to navigate and select the document you want to share.
4. Select the document: In the file selector window, navigate to the location where your document is saved on your computer. Click on the document to select it, and then click on the “Open” button to begin sharing.
5. Share the document: After clicking “Open,” Zoom will start sharing the selected document with the meeting participants. They will be able to view and download the file as necessary.
6. End the document sharing: To stop sharing the document, click on the “Stop Share” button in the Zoom control panel. This will end the document sharing session and take you back to the regular meeting view.
By following these steps, you can easily share a document directly from your computer during a Zoom meeting. It’s a convenient method when you have the document readily available and want to share it without any additional steps. This approach is particularly useful when presenting slideshows, reports, or any other document that is saved on your local machine.
Sharing a Document from a Cloud Storage Service
If your document is stored in a cloud storage service such as Google Drive, Dropbox, or OneDrive, you can easily share it during a Zoom meeting. This method allows for seamless access to the document from any device and enables real-time collaboration. Here’s how to share a document from a cloud storage service:
1. Start your Zoom meeting: Launch the Zoom application and start your meeting by clicking on the “Start Meeting” button. Alternatively, join an existing meeting by entering the given meeting ID.
2. Locate the Share Screen button: Once you are in the meeting, find the Share Screen button located in the Zoom meeting control panel. It is typically located at the bottom of the Zoom interface, in the center.
3. Select the cloud storage app: Click on the Share Screen button and then select the application window of your cloud storage service from the available options. For example, if your document is in Google Drive, select the Google Drive application window.
4. Navigate to your document: Once you have selected the cloud storage app, navigate to the location of your document within the application. For example, if your document is in a specific folder, click on that folder to open it.
5. Open and share the document: Once you have located your document, open it within the cloud storage app. Zoom will share the document with the meeting participants in real-time, allowing them to view and collaborate on it if necessary.
6. End the document sharing: To stop sharing the document, click on the “Stop Share” button in the Zoom control panel. This will end the document sharing session and take you back to the regular meeting view.
By following these steps, you can easily share a document stored in a cloud storage service during a Zoom meeting. This method is ideal when you want to access and collaborate on documents that are stored online, regardless of the device you are using. It streamlines the process of sharing and collaborating on documents with meeting participants, ensuring smooth communication and effective teamwork.
Annotating or Marking up a Shared Document
One of the valuable features of Zoom is the ability to annotate or mark up a shared document during a meeting. This interactive feature allows you and the meeting participants to collaborate, provide feedback, and highlight important sections within the document. Here’s how you can annotate or mark up a shared document:
1. Start sharing a document: Begin by sharing the document using any of the methods mentioned earlier, such as using the Share Screen feature or sharing a document from your computer or cloud storage.
2. Locate the Annotation toolbar: Once the document is being shared, you will see the Annotation toolbar at the top of the screen. It provides various annotation tools that you can use to mark up the document.
3. Use the available annotation tools: The Annotation toolbar offers a range of tools to annotate the shared document. These tools may include shapes, text boxes, highlighters, pens, erasers, and more. Experiment with the different tools to find the ones that suit your needs.
4. Add annotations to the document: Select the desired annotation tool from the toolbar and begin marking up the document. For example, you can draw circles, underline important points, add arrows, highlight text, or write comments using the text box tool.
5. Collaborate and interact: Participants in the meeting can also utilize the annotation tools to contribute to the document marking. This allows for real-time collaboration where everyone can provide input, share ideas, and communicate effectively using the annotation features.
6. Save or discard the annotations: Once you have finished annotating the document, you have the option to save or discard the annotations. Zoom allows you to save the annotated document as a separate file or discard the annotations if you do not need them for future reference.
By utilizing the annotation tools in Zoom, you can engage in a dynamic and interactive discussion around a shared document. This feature enhances communication, encourages collaboration, and ensures that important points are emphasized and understood by all participants during the meeting.
Troubleshooting Document Sharing Issues
While sharing documents on Zoom is generally a straightforward process, there might be instances where you encounter issues or difficulties. Here are some common troubleshooting steps to resolve document sharing issues during a Zoom meeting:
1. Check your internet connection: Poor internet connectivity can affect the sharing of documents. Make sure you have a stable internet connection and consider connecting to a more reliable network if possible.
2. Restart the document sharing: If the document sharing is not working properly, try stopping and restarting the sharing process. Click on the “Stop Share” button and then begin sharing the document again from the beginning.
3. Verify document compatibility: Ensure that the document format you are trying to share is compatible with Zoom. Check if the document is supported, and if necessary, convert it to a compatible format like PDF or PowerPoint.
4. Resize or adjust the document view: If the shared document appears too small or large on participants’ screens, resize or adjust the view of the document to make it more suitable for everyone. This can be done by zooming in or out within the document viewer.
5. Update Zoom to the latest version: It’s important to keep your Zoom application updated to the latest version as newer updates often introduce bug fixes and improvements. Check for any available updates and install them if needed.
6. Ask participants to update their Zoom version: If participants are experiencing issues viewing the shared document, ask them to update their Zoom application to the latest version as well. This can help ensure compatibility and resolve any potential compatibility issues.
7. Seek assistance from IT support: If you have tried troubleshooting the issue on your own and are still unable to share the document successfully, reach out to your IT support team or Zoom support for further assistance. They can provide more advanced troubleshooting solutions tailored to your specific situation.
By following these troubleshooting steps, you can tackle common document sharing issues and ensure a smooth and seamless sharing experience during your Zoom meetings. Remember, technical issues can happen, but with a little troubleshooting and support, you can overcome them and continue with your collaborative efforts.
Conclusion
Sharing documents on Zoom is a valuable feature that enhances collaboration and communication during virtual meetings. Whether you need to present a PowerPoint presentation, share a PDF document, or work collaboratively on a Word document, Zoom provides various methods to share your documents seamlessly.
Before sharing a document, it’s important to ensure that it is properly prepared and formatted for the best viewing experience. Checking for compatibility, optimizing for screen sharing, and removing unnecessary elements are essential steps to ensure your document is Zoom-ready.
During a Zoom meeting, you can share your document using the Share Screen feature, which allows participants to view your entire screen or a specific application window. Alternatively, you can share a document directly from your computer or from a cloud storage service such as Google Drive or Dropbox. This flexibility ensures that you can easily access and share your documents from different sources.
Zoom also offers annotation tools that enable you and the participants to mark up and collaborate on shared documents in real-time. The ability to highlight, underline, add comments, and draw shapes brings a dynamic and interactive element to document sharing, fostering effective communication and engagement.
If you encounter any issues while sharing documents, troubleshooting steps such as checking your internet connection, verifying document compatibility, and updating the Zoom application can help address the problem. Additionally, reaching out to IT support can provide further assistance in resolving any technical difficulties.
In conclusion, mastering the art of sharing documents on Zoom empowers you to effectively communicate your ideas, collaborate with others, and make your virtual meetings more engaging. By following the tips and techniques outlined in this article, you can confidently share your documents and optimize your Zoom experience for seamless collaboration and productivity.