Preparing for the SSD Replacement
Replacing the SSD in your PC can greatly improve its performance and storage capacity. However, before diving into the process, it is crucial to properly prepare for the SSD replacement. This will ensure a smooth and hassle-free installation process. Here are some important steps to take when preparing for the SSD replacement:
- Back up your data: Before you begin any hardware replacement, it is essential to back up all of your important data. This will protect you from the risk of data loss during the SSD replacement process. Consider using an external hard drive, cloud storage service, or another reliable backup method.
- Gather the necessary tools: Ensure you have all the necessary tools ready for the replacement process. This typically includes a screwdriver set, an anti-static wrist strap, and any specific tools required for your PC’s case or SSD model. Having the right tools on hand will make the process much easier and safer.
- Research compatibility: Check the compatibility of the new SSD with your PC. Verify the form factor, interface, and connections of the current SSD to select a suitable replacement. Additionally, ensure that your PC’s motherboard supports the new SSD’s specifications.
- Measure available space: Measure the available space inside your PC to ascertain the maximum allowable dimensions for the new SSD. This will help you choose an SSD that fits properly and avoids any compatibility issues.
- Familiarize yourself with the PC case: Take the time to familiarize yourself with the layout of your PC case. This will make it easier to access and replace the SSD. Refer to the user manual or online resources for guidance on how to open the case and locate the SSD.
By adequately preparing for the SSD replacement, you can minimize any potential risks and ensure a successful installation. The process will be much smoother when you have backed up your data, gathered the necessary tools, researched compatibility, measured available space, and familiarized yourself with the PC case. With these preparations in place, you are now ready to move on to the next steps of shutting down the PC and unplugging all cables.
Shutting Down the PC and Unplugging All Cables
Before beginning the SSD replacement process, it is essential to properly shut down your PC and disconnect all cables. This will ensure your safety and protect the hardware from any damage. Here are the steps to follow:
- Save your work: Before shutting down the PC, make sure to save any open documents or files. This will prevent the loss of any unsaved work during the process.
- Close all applications: Close all running applications and programs to ensure a clean shutdown.
- Shut down the PC: Click on the “Start” menu, then select “Shutdown” or “Restart” depending on your preference. Allow the PC to fully power down before proceeding.
- Unplug the power cable: Once the PC is shut down, unplug the power cable from the back of the PC tower. This will prevent any accidental power supply to the components during the SSD replacement.
- Disconnect all cables: Carefully disconnect all cables connected to the PC, including the display, keyboard, mouse, network, and any other peripherals. Take note of where each cable is connected to ensure easy reconnection later on.
- Take precautions: It is essential to practice good safety precautions during this step. Wear an anti-static wrist strap to prevent static discharge that could damage sensitive components. If you do not have a wrist strap, touch a metal surface to discharge any static electricity before touching the internal parts of the PC.
By following these steps, you have successfully shut down your PC and unplugged all cables. This ensures the safety of both you and the hardware components during the SSD replacement process. With the PC powered down and disconnected, it is now time to move on to the next step of opening the PC case.
Opening the PC Case
Opening the PC case is the next step in replacing the SSD. This will grant you access to the internal components of the PC, including the current SSD. Here’s a step-by-step guide on how to open the PC case:
- Locate the screws: Examine the exterior of the PC case to identify the screws holding it together. Common locations for screws include the back panel and the side panel.
- Refer to the manual: If you’re unsure about the screw locations or the specific method for opening your PC case, consult the user manual or the manufacturer’s website. They will provide detailed instructions tailored to your specific model.
- Prepare the screwdriver: Once you’ve located the screws, prepare the appropriate screwdriver. It may be a standard cross-head (Phillips) or a flat-head (slotted) screwdriver, depending on the case design.
- Remove the screws: Carefully unscrew the screws holding the PC case together. Place them in a safe spot, such as a small container, to avoid misplacing them.
- Slide off the side panel: Gently slide off the side panel of the PC case. Some cases may have latches or buttons that require pressing to release the panel. Refer to the manual if needed.
- Ground yourself: Ground yourself by either using an anti-static wrist strap or by touching a metal surface inside the case. This will help prevent any static electricity from damaging the internal components.
By following these steps, you will successfully open the PC case, allowing access to the internal components. Remember to refer to the manual for case-specific instructions and take precautions to prevent static discharge. With the case open, you can now proceed to the next step of identifying the current SSD.
Identifying the Current SSD
Before replacing the SSD, it’s important to properly identify the current SSD installed in your PC. This will ensure that you select a compatible replacement SSD and avoid any unnecessary complications. Here are the steps to follow in identifying the current SSD:
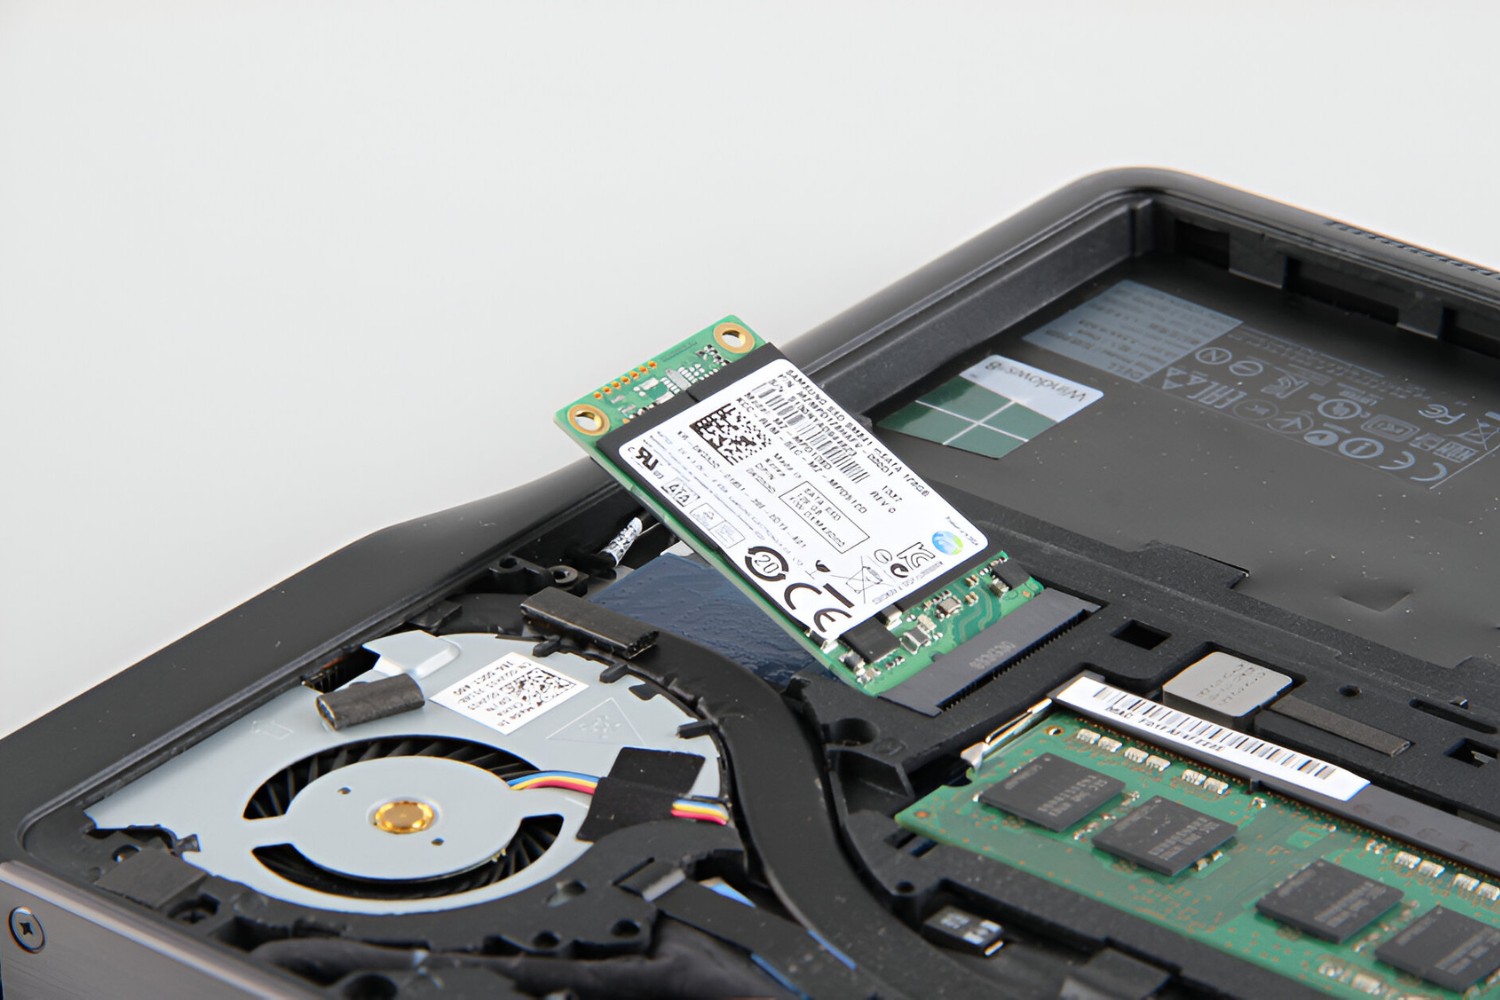
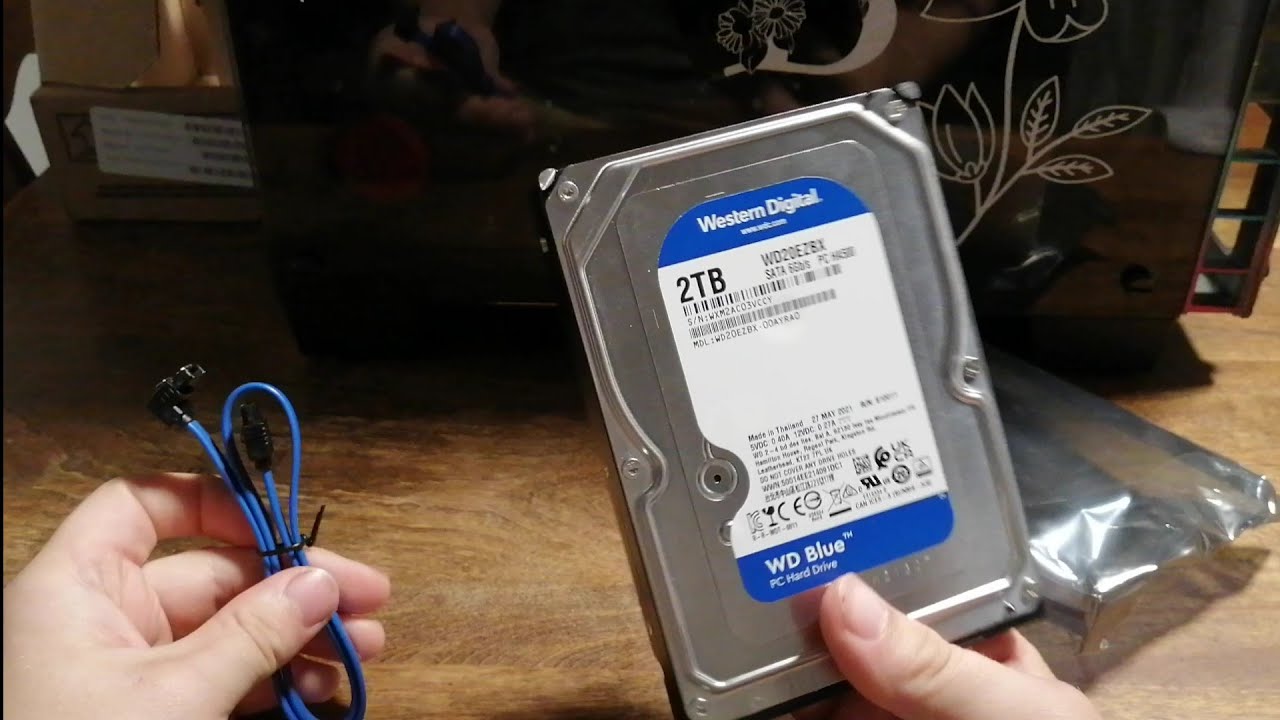
- Visually inspect the SSD: Look inside the PC case and locate the current SSD. It is usually a small rectangular device connected to the motherboard with cables.
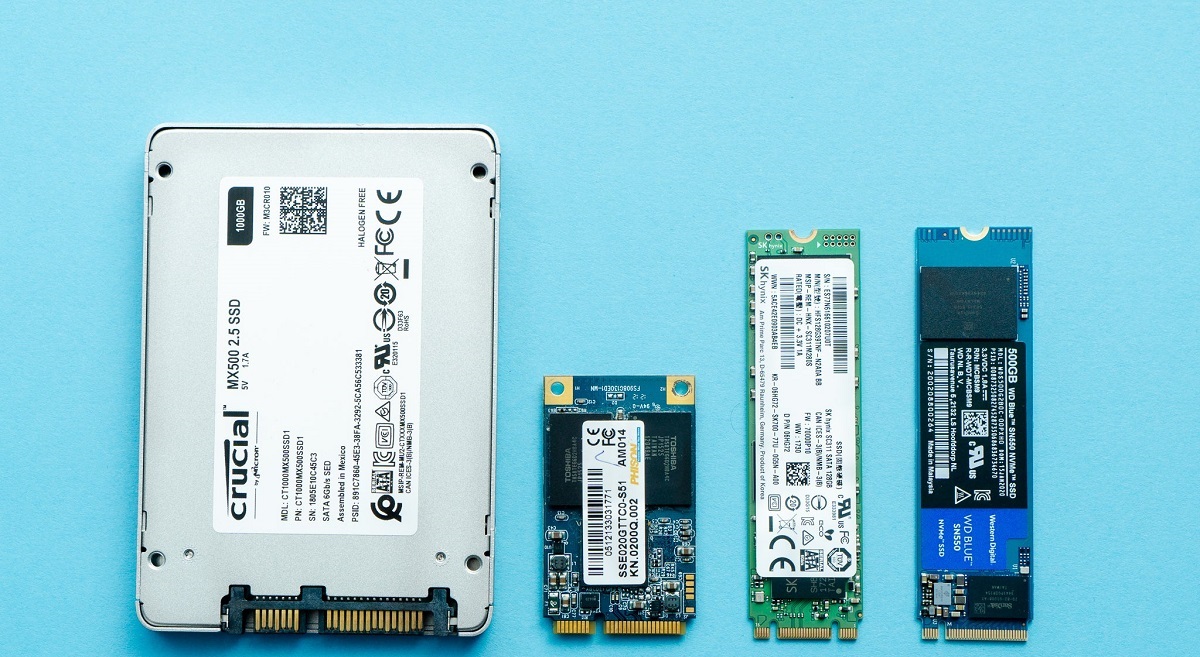
- Take note of the SSD’s form factor: SSDs come in different form factors such as 2.5-inch, M.2, or PCIe. Identify the form factor of the current SSD as this will help you choose a replacement of the correct size and interface type.
- Check for any labels or markings: Look for labels or markings on the SSD that provide information about the brand, model, and capacity. These details can be useful when researching and selecting a compatible replacement.
- Inspect the cables connected to the SSD: Observe how the current SSD is connected to the motherboard and power supply. Note the type of cables used, as this information will be important when connecting the new SSD.
- Take a picture or make a note of the connections: To ensure proper reinstallation of the new SSD, take a picture or make a note of how the cables are connected to the current SSD. This will serve as a reference point during the replacement process.
By correctly identifying the current SSD, you will have a clearer understanding of its specifications and connections. This knowledge will guide you in selecting a suitable replacement SSD and ensure a smooth transition during the installation process. With the current SSD identified, you can now proceed to the next step of disconnecting the cables and removing the current SSD.
Disconnecting the Cables and Removing the Current SSD
Now that you have identified the current SSD, it’s time to disconnect the cables and remove it from your PC. The following steps will guide you through the process:
- Turn off your PC: If your PC is still powered on, make sure to shut it down properly before proceeding.
- Disconnect the power cable: Unplug the power cable from the back of your PC to ensure safety and avoid any electrical accidents.
- Ground yourself: Protect the sensitive electronic components by grounding yourself. You can use an anti-static wrist strap or touch any metal surface inside the case to discharge any static electricity.
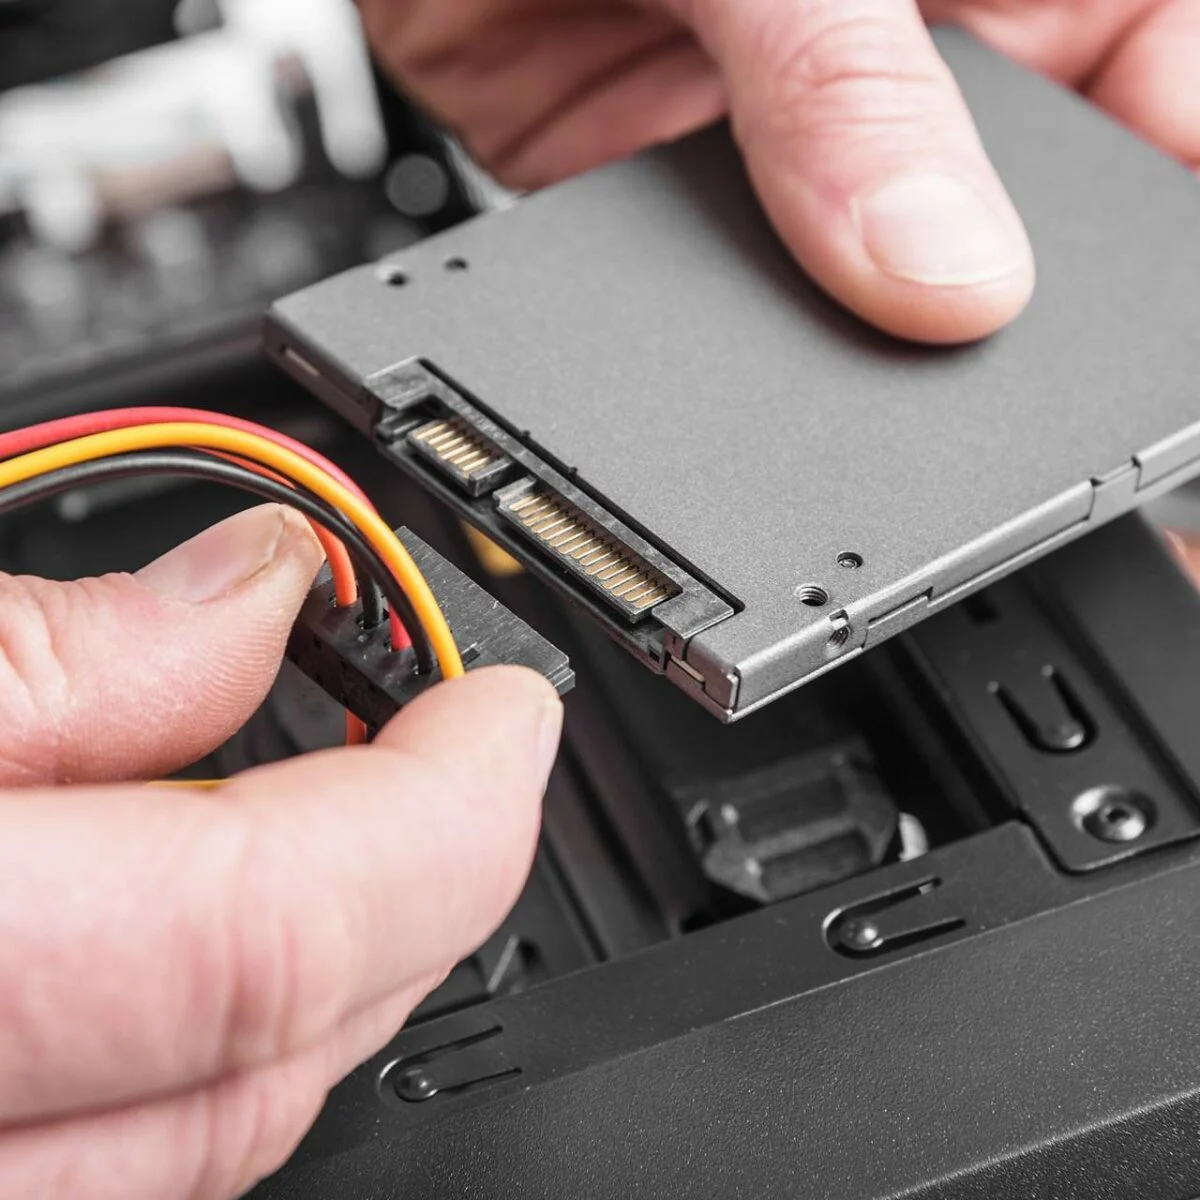
- Locate the cables: Identify the cables connected to the current SSD. These may include SATA cables for data transfer and power cables for providing power to the SSD.
- Disconnect the SATA cables: Gently unplug the SATA cables from the current SSD. Be careful not to damage the connectors or cables during this process.
- Remove the power cables: Disconnect the power cables from the current SSD. Depending on your PC setup, these cables may be directly connected to the power supply or routed through a separate cable management system.
- Detach the SSD from the mounting brackets: If the current SSD is secured in place using mounting brackets or screws, carefully remove them to free the SSD from its position. Take note of any installation methods to assist with the installation of the new SSD.
- Slide out the current SSD: With the cables disconnected and mounting brackets removed, gently slide the current SSD out of its slot.
- Set aside the current SSD: Safely place the current SSD in an anti-static bag or on a non-conductive surface.
Once you’ve completed these steps, you have successfully disconnected the cables and removed the current SSD from your PC. Take a moment to ensure that everything is neatly organized and secured. Now, you’re ready to proceed to the next step of choosing a new SSD.
Choosing a New SSD
When replacing your SSD, it’s important to choose a new one that meets your specific needs in terms of performance, capacity, and compatibility. Here are some factors to consider when selecting a new SSD:
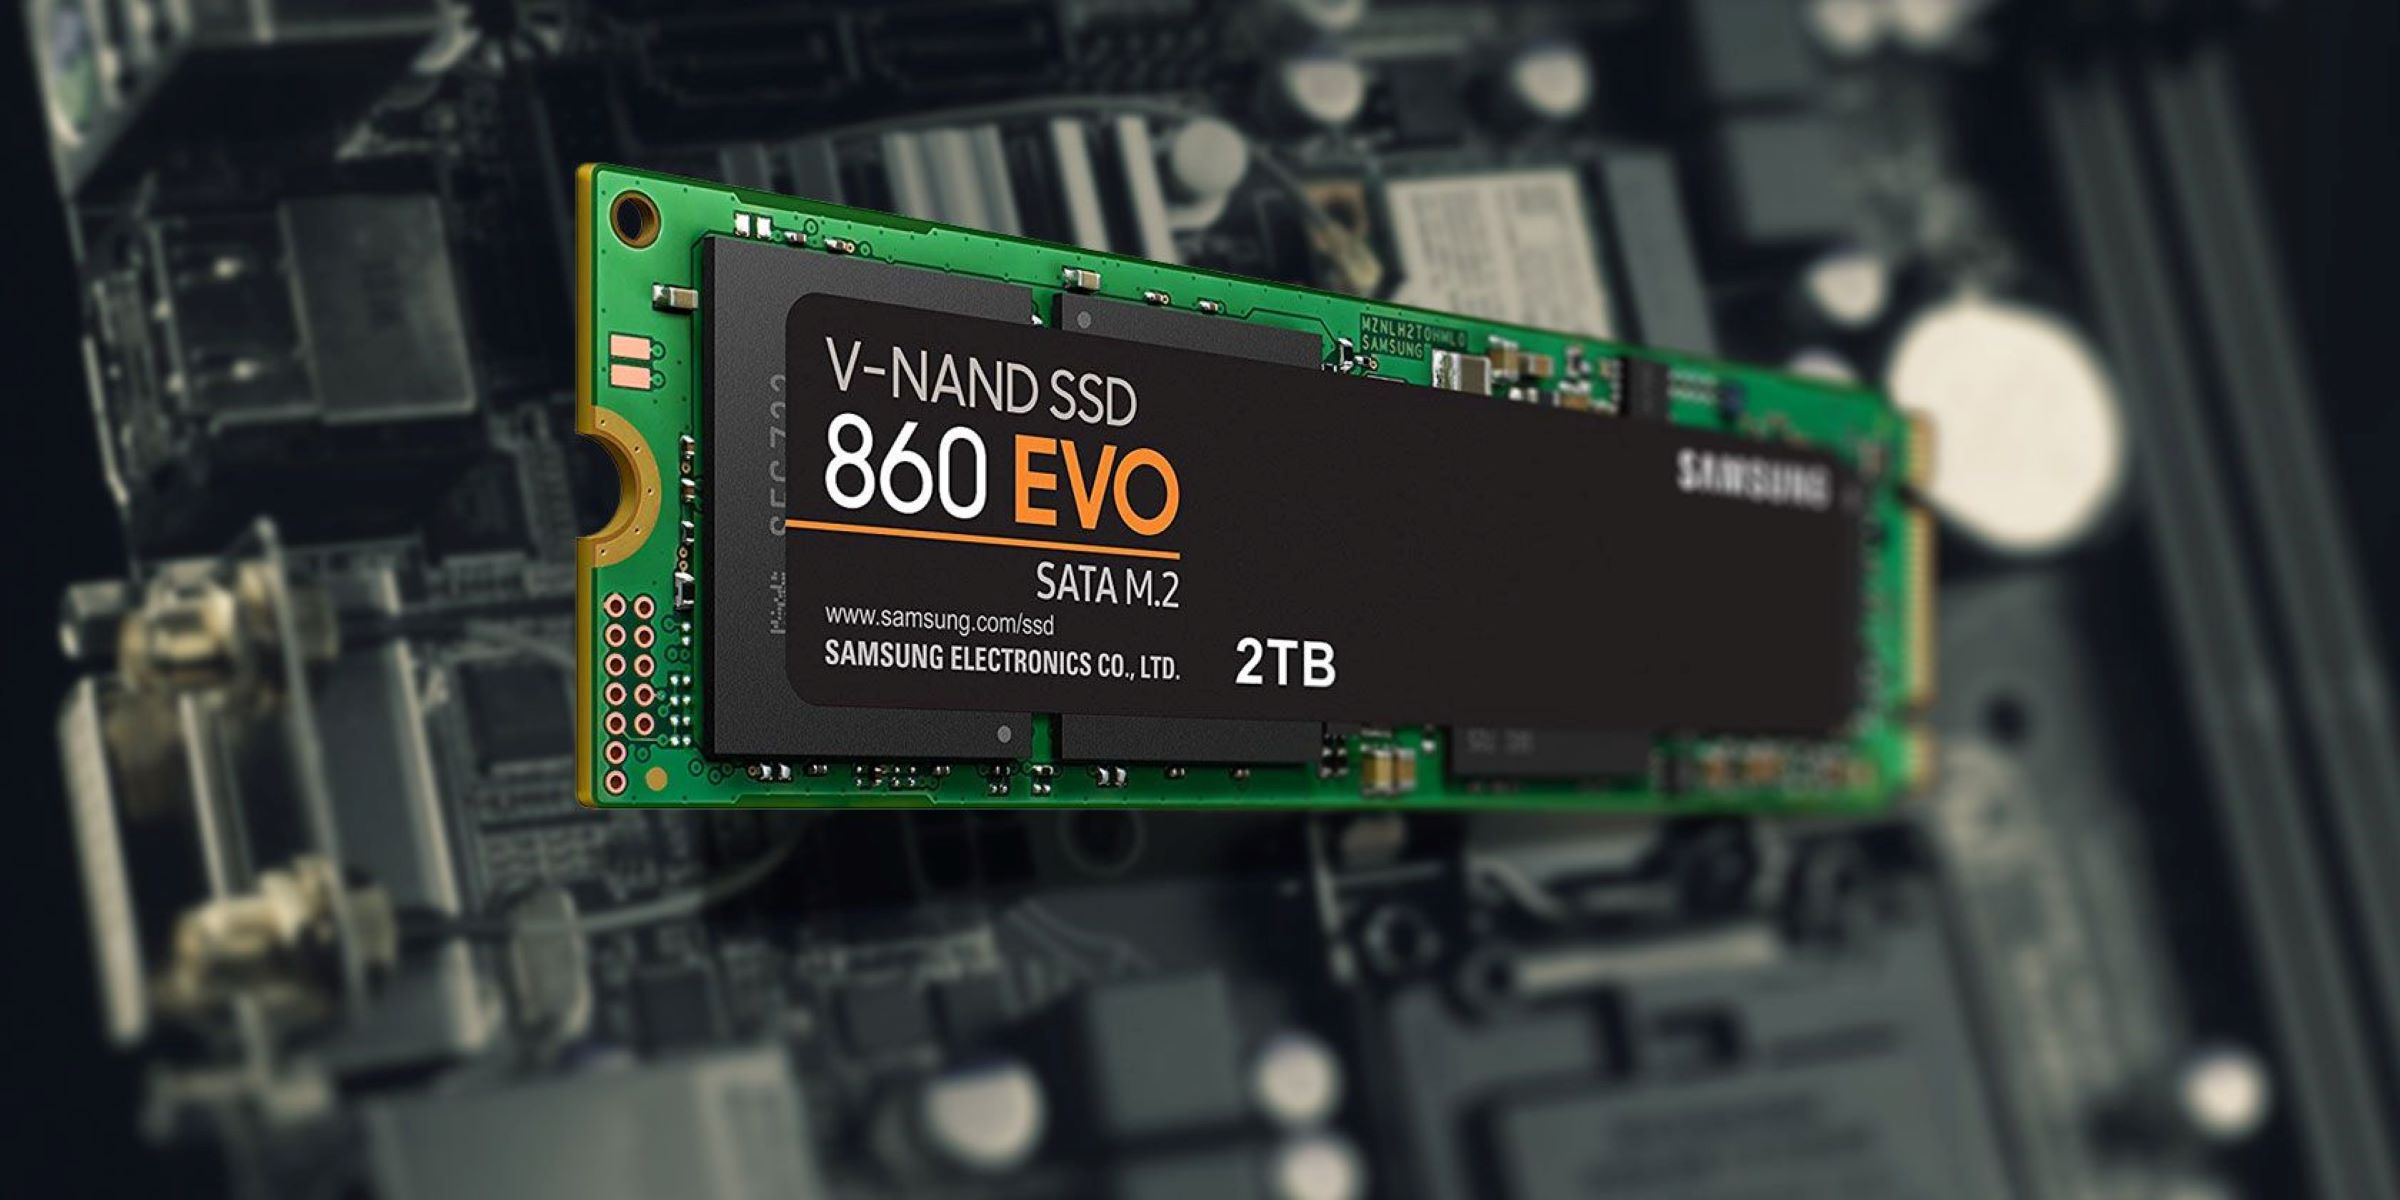
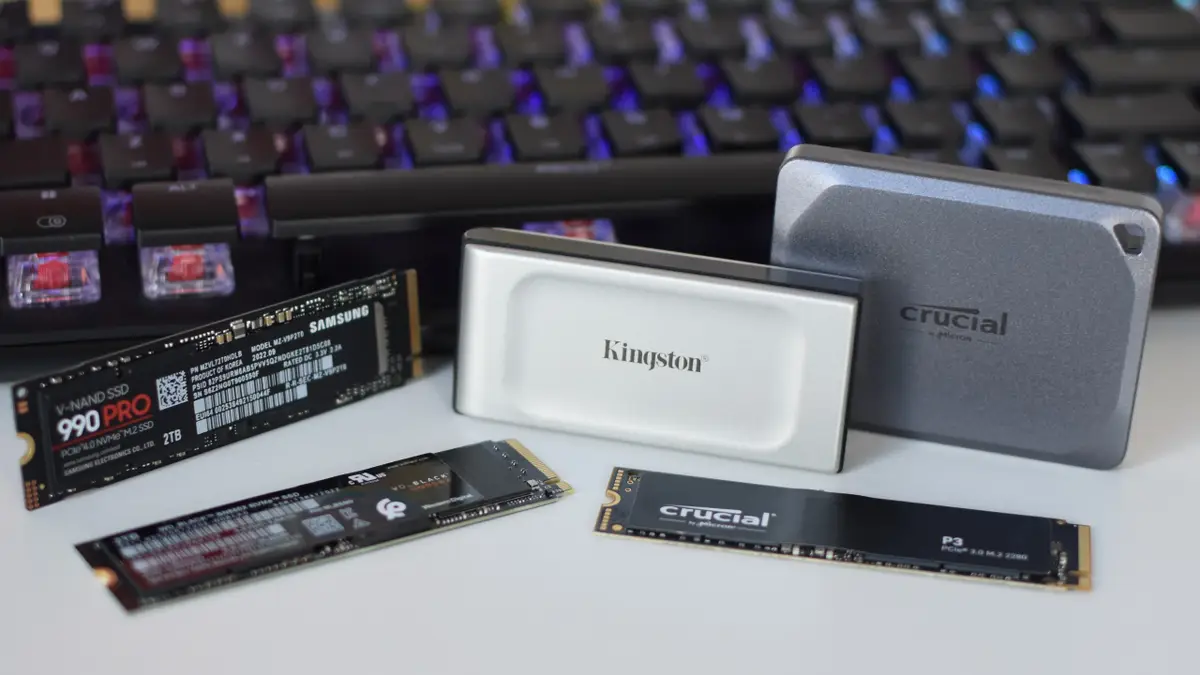
- Form factor: Determine the form factor of the new SSD that will fit your PC. The most common form factors are 2.5-inch, M.2, and PCIe.
- Interface: Identify the interface that your PC supports, such as SATA or NVMe. Make sure the new SSD is compatible with the available interface to ensure optimal performance.
- Capacity: Assess your storage needs and choose the appropriate capacity for the new SSD. Consider the amount of data you currently have and the future storage requirements.
- Speed: Look for an SSD with faster read and write speeds to enhance overall system performance. Higher speed SSDs will offer quicker boot times and faster data transfers.
- Reliability: Consider the reliability and endurance of the new SSD. Look for models from reputable brands known for their durability and longevity.
- Budget: Set a budget for your new SSD and search for options that fall within your price range. Compare prices and features to find the best value for your money.
- Reviews and recommendations: Read reviews and seek recommendations from trusted sources or PC enthusiasts to ensure that you’re selecting a reliable and well-performing SSD.
Consider all these factors and analyze your requirements before making a decision. Research different models and compare their specifications to find the SSD that best fits your needs. Once you’ve chosen a new SSD, you’re ready to move on to the next step of preparing the new SSD for installation.
Preparing the New SSD for Installation
Before installing the new SSD into your PC, it’s important to properly prepare it for a smooth and successful installation. Here are the steps to follow when preparing the new SSD:
- Read the manufacturer’s instructions: Carefully read the manufacturer’s instructions that come with the new SSD. This will provide specific guidelines and any important information for preparing the SSD.
- Inspect the new SSD: Examine the new SSD for any visible damage or defects. Check for any loose connections or pins that may affect its functionality during installation.
- Handle with care: Treat the new SSD with care and avoid touching the connectors or delicate components. Handle it by its edges to prevent any accidental damage or electrostatic discharge.
- Configure the new SSD, if necessary: Some SSDs may require firmware updates or specific configurations before installation. Check the manufacturer’s instructions or website for any necessary steps.
- Format or clone the new SSD: If you are using the new SSD as a replacement for the current one, you can choose to either format it or clone the data from the old SSD onto the new one. This process will depend on the specific software or tools you’re using.
- Set aside necessary tools and accessories: Gather any tools or accessories that may be required for installing the new SSD, such as screws, a mounting bracket, or an adapter, depending on your PC’s configuration.
- Organize the work area: Ensure that your work area is clean and organized. Clear any debris and create a clutter-free space to avoid unnecessary complications during the installation process.
- Keep the packaging and manuals: Store the packaging and manuals of the new SSD in a safe place. They may be useful for future reference or in case you need to contact customer support.
Following these steps will ensure that your new SSD is properly prepared for installation. By carefully inspecting the SSD, handling it with care, and completing any necessary configurations or formatting, you are setting the stage for a seamless installation process. With the new SSD ready, you can now move on to the next step of installing it into your PC.
Installing the New SSD into the PC
Now that you have prepared the new SSD, it’s time to install it into your PC. Follow these steps to ensure a successful installation:
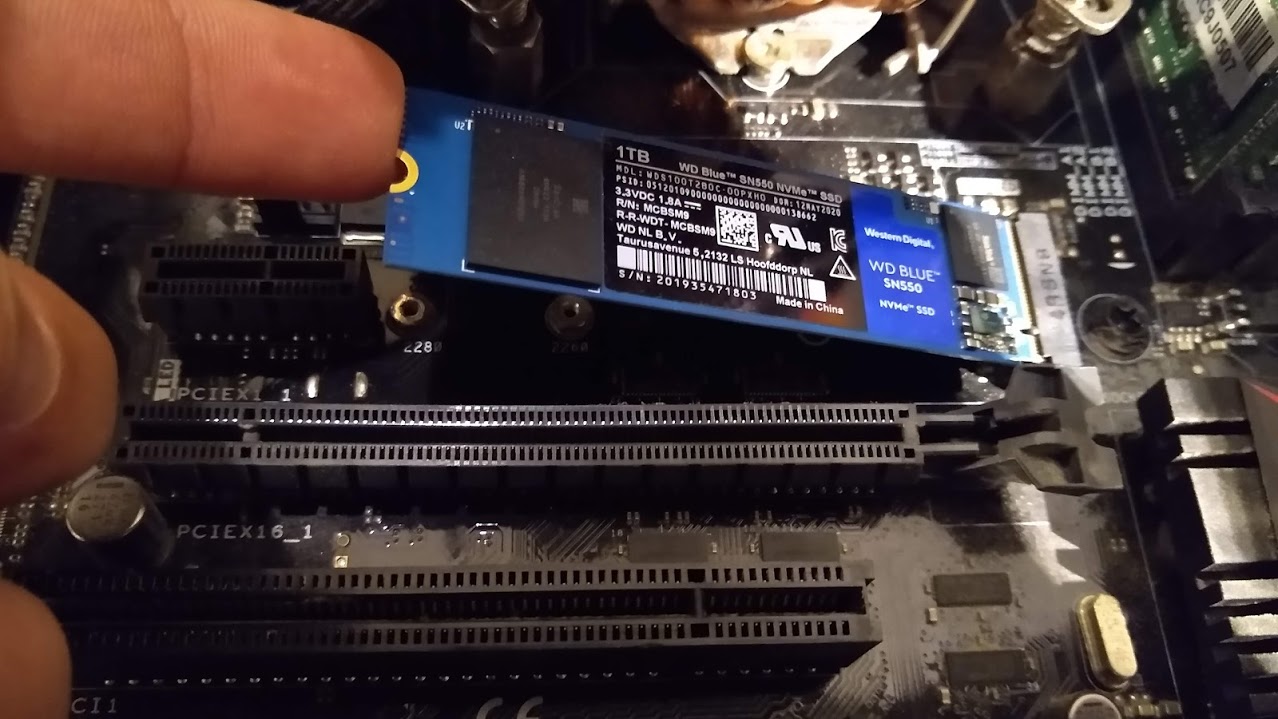
- Locate the SSD slot: Identify the slot where the new SSD will be installed. Check the PC’s manual or refer to online resources if you’re unsure.
- Place the SSD into the slot: Gently insert the new SSD into the slot, aligning it with the connector pins. Apply gentle pressure until it is securely seated in the slot.
- Secure the SSD: If necessary, use the provided screws or mounting bracket to secure the new SSD in place. Make sure it is firmly attached to prevent any movement or dislodging of the SSD.
- Connect the cables: Connect the appropriate cables to the new SSD. This typically includes a SATA data cable to the motherboard and a power cable to the power supply.
- Ensure proper alignment: Double-check that the cables are properly aligned and secure. A loose or misaligned connection can cause issues with data transfer or power supply.
- Close the PC case: Carefully slide the side panel of the PC case back into place. Align it with the case and secure it using the screws that were removed earlier.
- Plug in the power cable and other peripherals: Reconnect the power cable to the back of the PC and plug in any other peripherals that were disconnected earlier, such as the keyboard, mouse, and monitor.
- Power on the PC: Turn on the PC and wait for it to boot up. The new SSD should be detected by the system, and you can proceed with the necessary setup and configuration.
- Verify the installation: Once the PC has booted up, verify that the new SSD is recognized by checking the BIOS settings or the operating system’s storage management utility. Ensure that the correct capacity and details are displayed.
By following these steps, you have successfully installed the new SSD into your PC. Take a moment to ensure all connections are secure and that the SSD is properly detected by the system. With the installation complete, you can now move on to the next step of reconnecting the cables and closing the PC case.
Reconnecting the Cables and Closing the PC Case
After installing the new SSD into your PC, the next step is to reconnect the cables and close the PC case. Ensuring proper cable connections and securing the case are important for the overall functionality and safety of your PC. Follow these steps to reconnect the cables and close the PC case:
- Reconnect the cables: Start by reconnecting the cables that were disconnected earlier. This includes the display, keyboard, mouse, network, and any other peripherals. Refer to your notes or pictures to ensure they are connected to the correct ports.
- Check cable connections: Verify that all cable connections are secure and properly aligned. Make sure they are plugged in firmly to provide stable and reliable connections.
- Plug in the power cable: Connect the power cable to the back of the PC and the power outlet. Double-check that it is securely plugged in.
- Select the proper power source: If your PC has a switch on the power supply unit, ensure it is set to the correct voltage for your region.
- Close the PC case: Slide the side panel back into place and secure it with the screws. Ensure that the panel aligns properly with the case to maintain its integrity.
- Perform a final check: Inspect the exterior of the PC case to ensure that all cables are neatly organized and properly connected. Check for any loose or dangling cables that may interfere with the functioning of the PC.
- Power on the PC: Once you are satisfied with the cable connections and the closing of the PC case, you can power on the PC and proceed with the system startup.
- Monitor the boot process: Observe the boot process of the PC to ensure it starts up smoothly. Check if the new SSD is detected and if the system recognizes it correctly.
- Perform necessary configurations: If required, follow the instructions provided by the SSD manufacturer or the operating system to configure the new SSD and optimize its performance.
By following these steps, you have successfully reconnected the cables and closed the PC case. Take a moment to ensure all connections are secure and verify that the PC boots up properly. With the cables reconnected and the case closed, your PC is now ready for use with the new SSD installed.
Powering on the PC and Verifying the New SSD
After reconnecting the cables and closing the PC case, it’s time to power on the PC and ensure that the new SSD is properly recognized. Follow these steps to power on the PC and verify the new SSD:
- Double-check all connections: Before powering on the PC, take a final moment to double-check that all cables and connections are securely in place.
- Power on the PC: Press the power button on the front of the PC to start it up. Allow it a few moments to boot up.
- Watch the boot-up process: Observe the screen as the PC boots up. You may see the manufacturer’s logo initially, followed by the operating system loading.
- Enter the BIOS (if required): If the PC prompts you to enter the BIOS setup, press the designated key (such as DEL or F2) to access the BIOS settings.
- Check the SSD in the BIOS: Inside the BIOS settings, navigate to the storage or drive configuration section. Ensure that the new SSD is detected and listed correctly with the appropriate capacity.
- Exit the BIOS: If everything looks correct in the BIOS settings, exit the BIOS setup and allow the PC to boot into the operating system.
- Verify the SSD in the operating system: Once the operating system has loaded, open the Disk Management utility (Windows) or Disk Utility (Mac) to confirm that the new SSD is recognized as a usable drive.
- Format or partition the SSD (if necessary): If the new SSD is not formatted or partitioned, follow the on-screen instructions to complete this process and make it usable for storing data.
- Perform speed and performance tests (optional): If you wish, you can perform speed and performance tests on the new SSD using benchmarking tools to ensure it is performing optimally.
- Transfer data (if required): If you have cloned your old SSD onto the new one, verify that all of your data and files are intact and accessible on the new SSD.
By following these steps, you have successfully powered on the PC and verified the new SSD. Ensure that the SSD is recognized in the BIOS or operating system and perform any necessary formatting or partitioning. With everything properly configured, your PC is now ready to enjoy the improved performance and storage capacity of the new SSD.