Introduction
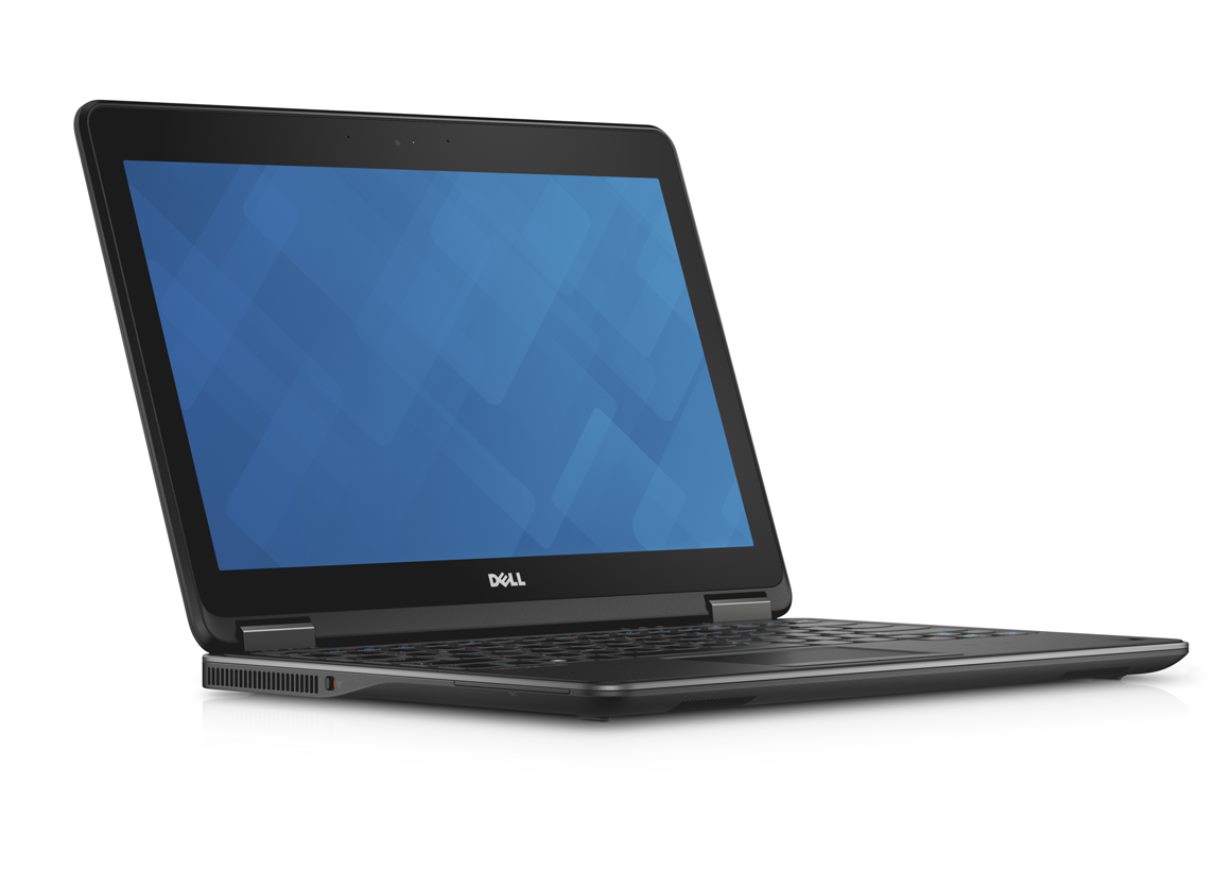
Welcome to our comprehensive guide on how to expand the SSD (Solid State Drive) on your Dell Latitude E7240 Ultrabook PC. The SSD in your laptop plays a crucial role in storing and accessing your data, and upgrading its capacity can significantly improve your system’s performance and storage capabilities.
The Dell Latitude E7240 Ultrabook PC is known for its sleek design, portability, and powerful performance. However, the default SSD capacity may not always be sufficient for your needs, especially if you work with large files, multimedia, or intensive applications. Fortunately, upgrading the SSD is a relatively straightforward process that can be accomplished with a few simple steps.
In this guide, we will walk you through each step of expanding the SSD on your Dell Latitude E7240 Ultrabook PC. Whether you are a tech enthusiast looking to optimize your laptop or a professional seeking ample storage space, this guide is designed to help you make the most of your device.
Before we delve into the details, please note that opening your laptop and replacing the SSD may void the warranty. If your laptop is still under warranty, it is advisable to contact Dell’s customer support or consult a professional technician to perform the upgrade.
Now, let’s get started with the first step: checking the current SSD capacity on your Dell Latitude E7240 Ultrabook PC.
Step 1: Check the current SSD capacity
The first step in expanding the SSD on your Dell Latitude E7240 Ultrabook PC is to determine the current capacity of your existing SSD. This will help you assess whether an upgrade is necessary and identify the appropriate size for your new SSD.
To check the current SSD capacity, follow these steps:
- Power on your Dell Latitude E7240 Ultrabook PC and log in to your operating system.
- Open the “File Explorer” or navigate to “This PC” or “My Computer” (depending on your operating system).
- Locate the SSD drive in the list of drives. It is commonly labeled as “C:” or “Local Disk (C:)”.
- Right-click on the SSD drive and select “Properties” from the context menu.
- A dialog box will appear with information about the SSD, including its capacity.
Take note of the current SSD capacity, which is usually expressed in gigabytes (GB) or terabytes (TB). This will serve as a reference when selecting a suitable replacement SSD.
Keep in mind that some of the capacity is typically occupied by the operating system and pre-installed software. Therefore, the available storage space may be slightly lower than the stated capacity. If you are running out of free space, experiencing slow performance, or frequently dealing with storage-related issues, it may be a good time to consider expanding your SSD.
Now that you have determined the current SSD capacity, the next step is to find the suitable SSD size for your needs. This will ensure that you have ample storage space for your files, applications, and future usage.
Step 2: Find the suitable SSD size for your needs
After determining the current SSD capacity, it’s time to evaluate your storage requirements and find the appropriate size for your new SSD. Selecting the right size is crucial to ensure you have enough space for your data and future expansion.
Consider the following factors when determining the suitable SSD size:
- Usage: Assess your typical usage patterns and the type of files you work with. If you primarily use your Dell Latitude E7240 Ultrabook PC for light tasks, such as web browsing and document editing, a smaller capacity SSD may suffice. However, if you frequently work with large multimedia files, databases, or run resource-intensive applications, a larger capacity SSD would be advantageous.
- Future needs: Anticipate your future storage needs. As technology advances and file sizes increase, it’s essential to have ample space for storing files and applications. Allocate additional capacity for future usage to avoid running out of storage in the long run.
- Budget: Consider your budget for the SSD upgrade. SSD prices vary based on capacity, and generally, larger capacity drives are more expensive. Set a budget that aligns with your needs and prioritize storage requirements accordingly.
Popular SSD capacity options typically range from 128GB to 2TB. However, it’s important to note that the internal storage of your Dell Latitude E7240 Ultrabook PC may have limitations on the maximum supported capacity. To verify the maximum supported capacity, you can refer to the laptop’s technical specifications or consult the manufacturer’s website.
Once you have a clear understanding of your storage requirements and budget, you can confidently select the suitable SSD size for your needs. The next step is to purchase the new SSD, which we will discuss in the following step.
Step 3: Purchase the new SSD
After determining the suitable size for your new SSD, it’s time to make the purchase. There are several factors to consider when selecting the SSD, such as brand, performance, and price.
Follow these steps to purchase the new SSD for your Dell Latitude E7240 Ultrabook PC:
- Research SSD options: Look for reputable SSD brands that offer reliable performance and good customer reviews. Consider factors such as read and write speeds, endurance, and warranty.
- Check compatibility: Ensure that the SSD you choose is compatible with your Dell Latitude E7240 Ultrabook PC. Check the laptop’s technical specifications or consult the manufacturer’s website for the supported SSD types, interface (e.g., SATA or PCIe), and maximum capacity.
- Consider your budget: Determine your budget for the new SSD. SSD prices can vary based on capacity, brand, and performance. Find an SSD that fits within your budget and offers the desired features.
- Compare prices: Compare prices of the shortlisted SSDs from various retailers or online marketplaces. Look out for any ongoing deals, discounts, or promotions that can help you save money.
- Make the purchase: Once you’ve selected the SSD that meets your requirements, proceed to make the purchase. Follow the seller’s instructions for online purchases or visit a physical store if you prefer an in-person buying experience.
It is important to note that SSD installation and compatibility may vary based on the specific model and year of the Dell Latitude E7240 Ultrabook PC. Therefore, it is recommended to double-check the compatibility and installation process by referring to the laptop’s user manual or consulting the manufacturer’s website for detailed instructions.
Now that you have purchased the new SSD, the next step is to back up your data to ensure you don’t lose any important files during the upgrade process. We’ll cover this in detail in the following step.
Step 4: Back up your data
Before you proceed with replacing the SSD in your Dell Latitude E7240 Ultrabook PC, it’s crucial to back up your data to prevent any potential loss. This step is essential as it ensures that all your important files and documents are safely stored and can be restored after the SSD installation.
Here’s how you can back up your data:
- Select a backup method: Decide on a backup method that suits your needs. There are several options available, including external hard drives, cloud storage services, or disk imaging software. Choose a method that is convenient and secure for your data.
- Identify important files: Determine which files and folders are crucial for you to back up. These may include documents, photos, videos, music, and any other personal or work-related files.
- Organize your data: Create folders and subfolders to organize your files, making it easier to locate and restore them after the SSD upgrade.
- Transfer files to the backup location: Depending on your chosen backup method, transfer your important files to the designated backup location. If you are using an external hard drive, simply drag and drop the files to the drive. For cloud storage services, follow their instructions on uploading your files.
- Verify the backup: Double-check that all your important files and folders have been successfully backed up before proceeding to the SSD installation. You can do this by comparing the file sizes and ensuring that all files have been transferred.
Backing up your data ensures that even if something goes wrong during the SSD installation process, you can easily restore your files and continue working without any significant loss. It provides peace of mind and safeguards your valuable information.
Once you have successfully backed up your data, you are ready to move on to the next step: preparing for the hardware installation. We will guide you through this process in the following step.
Step 5: Prepare for the hardware installation
Before you start replacing the SSD in your Dell Latitude E7240 Ultrabook PC, it’s important to prepare for the hardware installation. Taking the necessary precautions and being organized will help ensure a smooth and successful upgrade process.
Follow these steps to prepare for the hardware installation:
- Gather the necessary tools: Make sure you have all the tools required for the SSD installation. Typically, you will need a screwdriver (usually a small Phillips or Torx screwdriver) that matches the screws on your laptop.
- Choose a suitable workspace: Find a clean, well-lit, and spacious workspace where you can comfortably work on your laptop. Make sure the area is static-free to prevent any damage to the sensitive components.
- Power off and disconnect your laptop: Shut down your Dell Latitude E7240 Ultrabook PC and unplug it from the power source. Disconnect any peripheral devices such as external monitors, USB drives, or headphones.
- Remove the laptop battery (if applicable): If your laptop has a removable battery, carefully remove it from the laptop to prevent any accidental power supply during the installation process.
- Ground yourself: Ground yourself by wearing an anti-static wristband or by frequently touching a grounded metal surface. This helps to discharge any static electricity in your body, protecting your laptop from potential damage caused by electrostatic discharge.
- Organize your workspace: Keep track of the screws and small components by using a magnetic mat, small containers, or a notepad to label and store them. This will make the reassembly process easier and prevent any loss or confusion.
By following these preparation steps, you ensure that you have the necessary tools, a suitable workspace, and a safe environment to work on your laptop. Taking precautions and staying organized will help streamline the installation process and reduce the chances of any mishaps.
With the preparations complete, you are now ready to move on to the next step, which involves opening your Dell Latitude E7240 Ultrabook PC. We will guide you through this process in the following step.
Step 6: Open the Dell Latitude E7240 Ultrabook PC
In this step, we will guide you through the process of opening your Dell Latitude E7240 Ultrabook PC in preparation for replacing the SSD. Opening your laptop requires careful handling to avoid damaging any components or cables, so make sure to follow the instructions closely.
Follow these steps to open your Dell Latitude E7240 Ultrabook PC:
- Place your laptop upside down on a clean and stable surface. It’s recommended to use a soft cloth or a non-slip mat to prevent any scratches or slippage.
- Locate the screws that secure the bottom cover of your laptop. Depending on the model, there may be screws located on the bottom or hidden under rubber feet or small plastic covers.
- Use the appropriate screwdriver to carefully remove the screws. Keep the screws organized and set them aside in a safe place.
- Gently pry open the bottom cover using a plastic prying tool or a flathead screwdriver. Start at one corner and gradually work your way around, applying gentle pressure to release the clips that hold the cover in place.
- Once the clips are released, carefully lift off the bottom cover. Be cautious of any attached cables or ribbon connectors.
- If you encounter ribbon connectors, use your fingernails or a pair of plastic tweezers to carefully disconnect them. Grasp the connector’s tab and gently pull it away from its socket.
- Set aside the bottom cover in a safe place along with the screws you removed. This will ensure that you don’t misplace any parts and have them readily available for reassembly later.
With the bottom cover removed, you have successfully opened your Dell Latitude E7240 Ultrabook PC. You can now proceed to the next step, which involves removing the old SSD from your laptop. We will guide you through this process in the following step.
Step 7: Remove the old SSD
In this step, we will guide you through the process of removing the old SSD from your Dell Latitude E7240 Ultrabook PC. Removing the old SSD requires caution to avoid damaging any components, so please follow the instructions carefully.
Follow these steps to remove the old SSD:
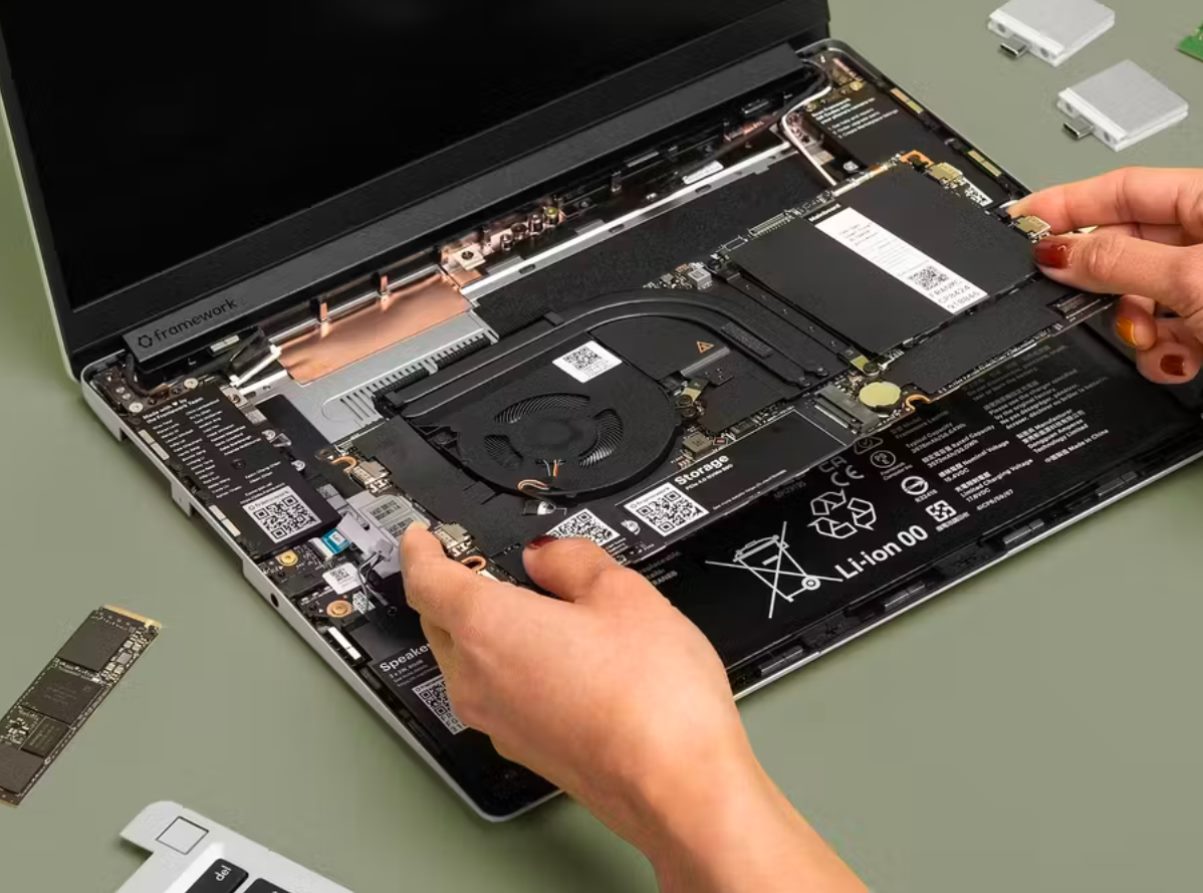
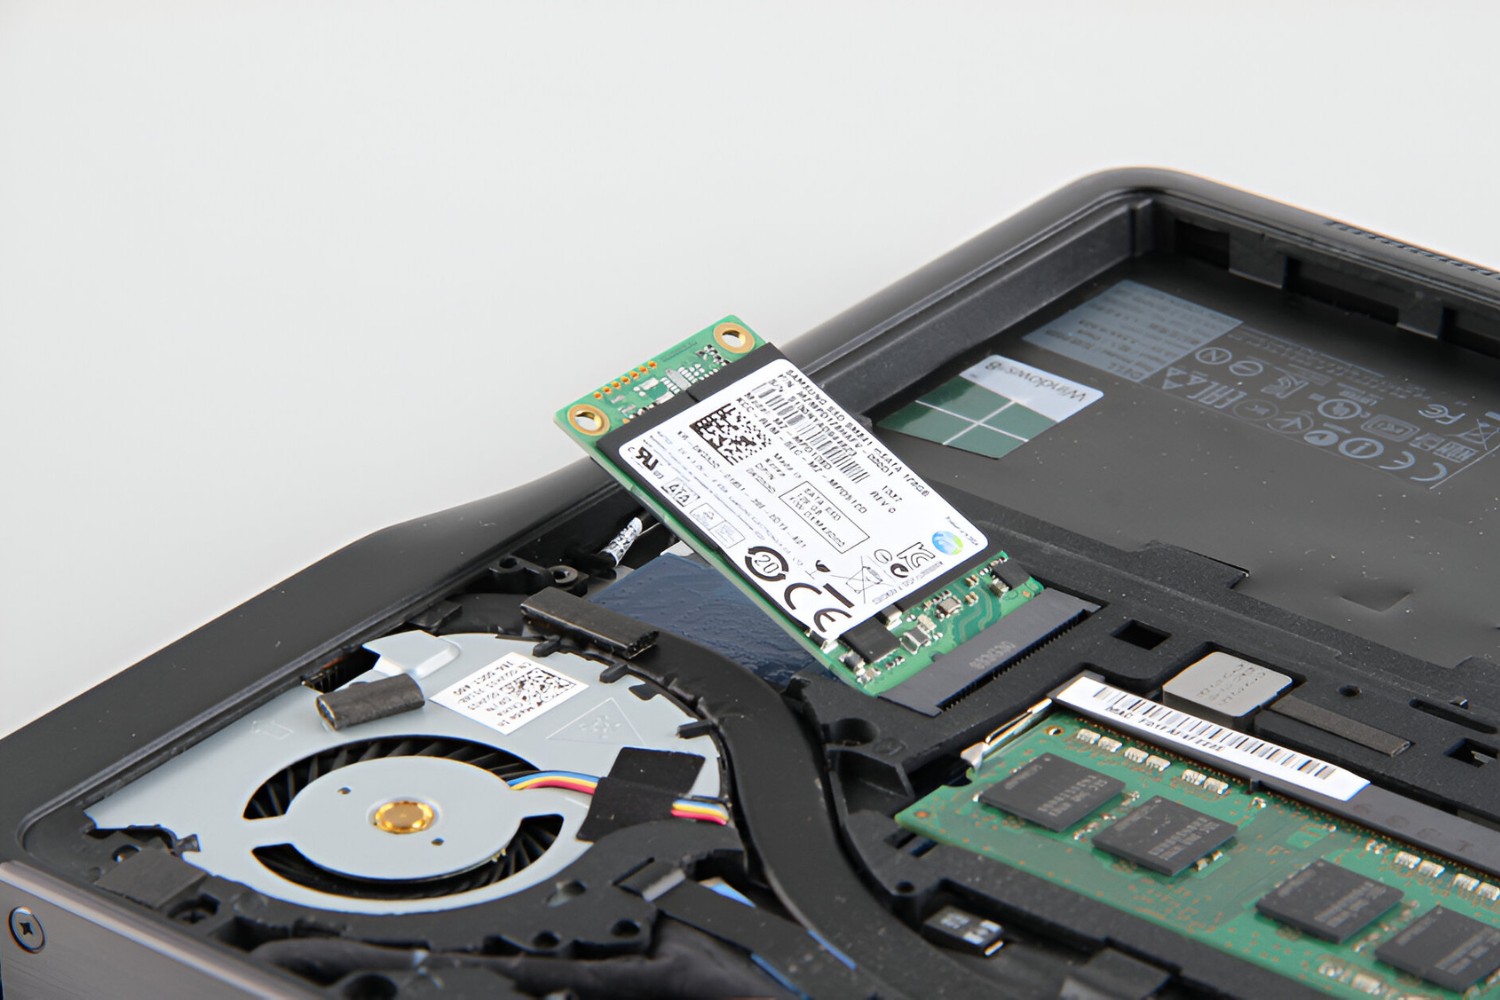
- Locate the existing SSD: Identify the old SSD inside your laptop. It is typically a small rectangular component connected to the motherboard.
- Identify the connectors: Take note of the connectors attached to the old SSD. It is usually connected by a SATA cable and power cable.
- Carefully disconnect the connectors: Gently unplug the SATA and power cables from the old SSD. Hold the connectors firmly and pull them straight out to disconnect.
- Remove any screws or brackets: If there are any screws or brackets securing the old SSD in place, use the appropriate screwdriver to remove them.
- Take out the old SSD: Once the cables and screws are disconnected, carefully lift the old SSD out of its slot. Hold it by the edges to avoid touching any sensitive components or connectors.
- Set aside the old SSD: Place the old SSD in a safe and static-free area. You may choose to keep it as a backup or properly dispose of it according to environmental regulations.
It’s important to handle the old SSD and components with care to prevent any damage or static discharge. By following these steps, you have successfully removed the old SSD from your Dell Latitude E7240 Ultrabook PC.
In the next step, we will guide you through the process of installing the new SSD in your laptop. Stay tuned for the detailed instructions.
Step 8: Install the new SSD
In this step, we will guide you through the process of installing the new SSD into your Dell Latitude E7240 Ultrabook PC. Installing the new SSD will enhance your laptop’s storage capacity and improve overall performance. Please follow the instructions carefully to ensure a successful installation.
Here’s how you can install the new SSD:
- Position the new SSD: Take the new SSD and align it with the slot in your laptop. Ensure that the connectors on the SSD line up with the corresponding connectors in the slot.
- Insert the SSD carefully: Gently slide the new SSD into the slot, applying even pressure until it is fully inserted. Be cautious not to force it or bend any connectors.
- Secure the SSD with screws or brackets: If there are screws or brackets provided with your new SSD, use them to secure the SSD in place. Tighten the screws firmly but cautiously, ensuring they do not damage the SSD or the laptop.
- Connect the cables: Attach the SATA cable and power cable to the corresponding connectors on the new SSD. Make sure they are securely connected and properly seated.
- Carefully route the cables: Organize the cables neatly to ensure they do not interfere with other components or impede the laptop’s functionality.
It’s vital to handle the new SSD and components with care to prevent any damage or static discharge. Ensure that the connectors are aligned properly and inserted gently to avoid any mishaps.
With the new SSD successfully installed, you are one step closer to enjoying enhanced storage capacity and improved performance on your Dell Latitude E7240 Ultrabook PC. In the next step, we will guide you through reassembling your laptop. Stay tuned for the detailed instructions.
Step 9: Reassemble the Dell Latitude E7240 Ultrabook PC
Now that you have successfully installed the new SSD in your Dell Latitude E7240 Ultrabook PC, it’s time to reassemble the laptop. Reassembling the laptop involves putting everything back in place and securing all the components to ensure proper functioning. Follow these steps carefully to complete the reassembly process:
- Retrieve the bottom cover: Take the bottom cover that was set aside during the SSD installation.
- Align the bottom cover: Carefully align the bottom cover with the laptop’s body, ensuring that all the clips line up with their respective slots.
- Press down gently: Apply gentle pressure to the bottom cover, pressing it firmly to engage the clips. Work your way around the edges to ensure a secure fit.
- Reinsert screws: Use the appropriate screwdriver to reinsert the screws into their respective holes. Tighten the screws but avoid overtightening to prevent any damage.
- Reattach any ribbon connectors: If you had disconnected any ribbon connectors during the disassembly process, carefully reconnect them by gently inserting them into their respective sockets.
- Replace the laptop battery (if applicable): If you removed the laptop battery earlier, carefully reinsert it into its compartment and secure it in place.
Take your time when reassembling the laptop to ensure that all components are properly aligned and securely fastened. Avoid rushing or exerting excessive force.
Once you have completed the reassembly process, your Dell Latitude E7240 Ultrabook PC should be fully functional with the new SSD installed. You are now ready for the final step: restoring your data to the new SSD. We’ll guide you through this process in the following step.
Step 10: Restore your data
After successfully reassembling your Dell Latitude E7240 Ultrabook PC with the new SSD, the final step is to restore your data. Restoring your data ensures that all your files, applications, and settings are transferred from your backup to the newly installed SSD.
Follow these steps to restore your data:
- Connect your backup device: If you used an external hard drive or any other backup storage, connect it to your laptop.
- Select the backup method: Depending on the backup method used, follow the appropriate steps to restore your data. If you backed up to an external hard drive or cloud storage, use the respective software or service to restore your files.
- Choose the location for the restored files: Select the location on the new SSD where you want to restore your data. You can create a specific folder for organization purposes.
- Initiate the restore process: Start the restore process using the backup software or service. Follow the prompts and select the files or folders you wish to restore.
- Wait for the restore to complete: Depending on the size and number of files, the restore process may take some time. Be patient and allow the process to complete without interruption.
- Verify the restored data: Once the restore process finishes, check that all your files and folders have been successfully restored to the new SSD. Go through a few files to ensure they are accessible and intact.
After restoring your data, double-check that everything is functioning as expected. Open your applications, browse through your files, and ensure that all your settings are in place. This final step ensures that you can seamlessly resume your work on your Dell Latitude E7240 Ultrabook PC with your new SSD.
Congratulations! You have successfully expanded the SSD on your Dell Latitude E7240 Ultrabook PC and restored your data. Enjoy the increased storage capacity and improved performance of your laptop.
Conclusion
Congratulations on successfully expanding the SSD on your Dell Latitude E7240 Ultrabook PC! By following the step-by-step guide outlined in this article, you have significantly enhanced the storage capacity and performance of your laptop. With the new SSD installed, you can enjoy improved speed, faster boot times, and ample space for your files and applications.
Throughout this guide, we covered important steps such as checking the current SSD capacity, finding the suitable SSD size, purchasing the new SSD, backing up your data, preparing for the hardware installation, opening the laptop, removing the old SSD, installing the new SSD, reassembling the laptop, and finally, restoring your data.
Remember to exercise caution and follow the instructions carefully while handling the laptop components. It is always a good practice to consult the laptop’s user manual or the manufacturer’s website for any specific instructions related to your model.
Expanding the SSD on your Dell Latitude E7240 Ultrabook PC not only boosts its performance but also provides you with the flexibility and storage space to handle your work, media, and personal files more effectively. With the increased capacity, you can store larger files, run resource-intensive applications, and enjoy a more responsive computing experience.
We hope this guide has been helpful in guiding you through the process of expanding your SSD. If you encounter any difficulties or have further questions, it is recommended to seek assistance from Dell’s customer support or consult a professional technician.
Thank you for choosing this guide, and we wish you all the best in your SSD expansion journey. Enjoy the enhanced performance and storage capabilities of your Dell Latitude E7240 Ultrabook PC!