Introduction
With the advancing technology and the ever-increasing amount of data we accumulate, it’s no surprise that our need for storage space is constantly growing. Whether you use your PC for work, gaming, or personal use, running out of storage can be a frustrating experience. However, the good news is that there are several options available to add more storage to your PC, ensuring that you have enough space to store your files, programs, and multimedia content.
In this article, we will explore different methods of expanding your PC’s storage capacity, both internally and externally. We’ll discuss how to assess your storage needs and weigh the available options based on your requirements. Whether you’re a tech enthusiast looking to upgrade your gaming rig or a professional needing extra space for your files, we’ve got you covered.
Before diving into the various solutions, it’s important to note that adding storage to your PC can significantly improve performance and productivity. Not only does it allow you to store more data, but it also reduces the strain on your existing storage devices, leading to smoother operations and faster access times.
While the specific steps can vary depending on your PC’s make and model, the principles outlined in this article can be applied to most systems.
So, if you’re ready to expand your storage and unleash the full potential of your PC, let’s get started!
Assessing the Need for More Storage
Before deciding on how to add more storage to your PC, it’s essential to assess your specific storage needs. This evaluation will help you determine the amount of additional storage required and the best method to meet those needs.
Start by taking stock of your current usage. How much storage space do you have, and how much of it is already occupied? Are you constantly deleting files to make room for new ones? Do you find yourself relying heavily on external storage devices to store your data?
Consider the types of files you commonly work with. If you regularly handle large media files, such as videos or high-resolution images, you’ll likely need more storage compared to someone who primarily deals with documents or spreadsheets.
Next, think about your future storage needs. Are you planning to install resource-intensive software or games? Do you expect your media library to continue growing? Anticipating your future storage requirements can help ensure that the solution you choose is scalable and can accommodate future expansion.
Another factor to evaluate is your budget. How much are you willing to invest in upgrading your storage? Different methods come with varying costs, so it’s essential to find a solution that meets your needs without breaking the bank.
Lastly, consider the convenience and accessibility of the storage solution. Do you need portability, or will the additional storage be mainly for your PC? If you require mobility, external storage options may be more suitable. If you prefer everything to be integrated into your PC, internal storage upgrades might be the better choice.
By carefully assessing your storage needs, taking into account your current usage, future requirements, budget, and convenience, you’ll be able to determine the optimal method to add more storage to your PC. With this information in hand, you can move forward with confidence in selecting the right solution for your needs.
External Storage Options
If you’re looking for a simple and versatile way to add more storage to your PC, external storage options are worth considering. These devices connect to your PC via USB, making them portable and easy to use with multiple devices. Here are some popular external storage options:
- External Hard Drives: External hard drives offer a significant amount of storage space, ranging from a few hundred gigabytes to several terabytes. They are ideal for storing large files, media libraries, and backups. Simply connect the drive to your PC’s USB port, and you’re ready to go. External hard drives are affordable and widely available, making them a popular choice.
- SSD Portable Drives: SSD portable drives provide the same convenience as external hard drives but with the added benefit of faster data transfer speeds. Solid-state drives (SSDs) are more reliable and compact than traditional hard drives, making them perfect for users who prioritize speed and durability. While SSD portable drives offer less storage space compared to external hard drives, they make up for it with their superior performance.
- Network Attached Storage (NAS): NAS devices are essentially tiny servers dedicated to storage. They connect to your home network, enabling multiple devices to access the storage simultaneously. NAS devices provide a centralized and scalable solution for storing and sharing files, making them an excellent choice for households or small businesses with multiple devices. With the ability to install multiple hard drives and support advanced features like RAID, NAS devices offer excellent flexibility and data redundancy.
- Cloud Storage Solutions: Cloud storage services such as Dropbox, Google Drive, or Microsoft OneDrive offer an offsite solution for storing and backing up your data. These services provide a certain amount of free storage, with the option to upgrade to larger plans for a monthly fee. Cloud storage is convenient for accessing files from any device with an internet connection and provides an extra layer of security in case of hardware failure or loss.
When choosing an external storage option, consider factors such as storage capacity, data transfer speeds, portability, and price. Determine which features are most important to you and select a solution that aligns with your specific needs.
While external storage options offer flexibility and convenience, keep in mind that they require additional hardware and may be slower compared to internal storage solutions. For users requiring high-speed storage for demanding applications, internal storage upgrades may be more suitable, which we’ll explore in the next section.
Internal Storage Options
If you’re looking to enhance your PC’s storage capabilities from within, there are various internal storage options to consider. These options involve physically installing additional storage components directly into your PC. Here are some popular internal storage solutions:
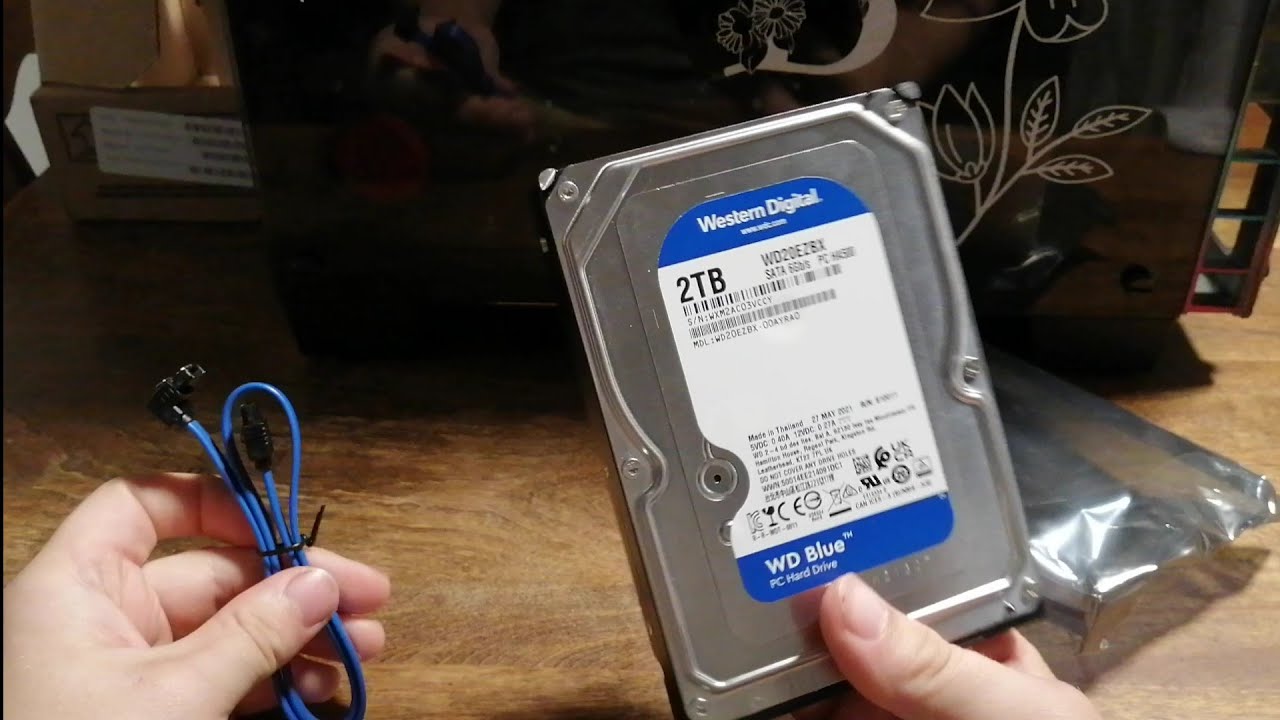
- Installing a Hard Drive: One of the simplest ways to add internal storage is by installing a conventional hard disk drive (HDD). HDDs offer a cost-effective solution with large storage capacities. They are suitable for storing a vast amount of data and are commonly used for mass storage requirements. Installing an HDD involves connecting it to your PC’s motherboard and power supply using appropriate cables.
- Upgrading the Solid State Drive (SSD): If your PC already has an SSD and you’re looking for more storage space with faster performance, upgrading the SSD is an excellent choice. SSDs use flash memory to store data, resulting in significantly faster read and write speeds compared to HDDs. Upgrading the SSD involves replacing the existing drive with a larger capacity one, providing ample space for your files, programs, and operating system.
- Adding a Second Hard Drive/SSD: If your PC has sufficient empty drive bays or connectors, you can add a second hard drive or SSD alongside your existing storage devices. This allows you to expand your storage capacity without replacing any existing drives. Adding a second drive involves connecting the drive to an available SATA port on your motherboard and powering it through the PSU.
- Converting Optical Drive Bay into a Storage Bay: If you no longer use the optical drive on your PC, you can repurpose the optical drive bay as a storage bay. This involves removing the optical drive and installing a drive caddy or adapter that allows you to mount a hard drive or SSD in its place. It’s an excellent option for maximizing storage capacity if you have limited drive bays.
When considering internal storage options, factors such as storage capacity, data transfer speeds, compatibility with your PC’s motherboard and power supply, and your budget should be taken into account. Additionally, it’s important to note that some PC models may have restrictions on the number of internal drives that can be installed, so it’s crucial to check your PC’s specifications before making any hardware purchases.
By selecting an internal storage option, you can take advantage of faster data transfer speeds, increased reliability, and seamless integration with your PC. These solutions are particularly beneficial for professionals or gamers who require high-performance storage to handle demanding tasks efficiently.
Installing a Hard Drive
Installing a hard drive is a popular method of adding more storage to your PC. Hard drives (HDDs) offer ample storage space at an affordable price point, making them a reliable choice for mass storage. Here’s a step-by-step guide to help you through the installation process:
- Gather the necessary tools: Before you begin, make sure you have the required tools, such as a screwdriver (typically a Phillips-head), and any additional cables that may be needed, such as SATA cables.
- Power down your PC: Shut down your computer completely and disconnect the power cable. This is crucial to ensure your safety and prevent any damage to your PC during the installation process.
- Locate an empty drive bay: Open your PC case and identify an empty drive bay where you’ll install the new hard drive. Most PC cases have multiple drive bays, so choose one that is easily accessible and has enough space to accommodate the drive.
- Prepare the hard drive: If the drive is brand new, you’ll need to remove it from the packaging. Ensure you handle the drive carefully and avoid touching the exposed circuit board or any sensitive components. If there are any protective caps or covers on the connectors, remove them as well.
- Mount the hard drive: Once the drive is prepared, align it with the empty drive bay and secure it in place using the provided screws. Make sure the drive is firmly fixed and doesn’t have any loose connections that could lead to vibrations or physical damage.
- Connect the cables: Locate the SATA ports on your motherboard and connect one end of a SATA data cable to an available port. Then, connect the other end of the cable to the corresponding port on the hard drive. Next, connect the power cable from your power supply unit (PSU) to the power port on the hard drive.
- Secure and close the case: Once all the necessary connections are made, double-check that everything is properly secured and that there are no loose cables obstructing any fans or other components. Close the PC case, ensuring that all screws are tightened securely.
- Power up your PC: Reconnect the power cable and turn on your computer. The new hard drive should be recognized automatically by your operating system. If not, you may need to go into the BIOS settings and manually detect the drive.
- Format and partition the drive: After the hard drive is recognized, you’ll need to format and partition it. This process may vary depending on your operating system, but it typically involves accessing the Disk Management utility or using third-party software to create partitions and assign drive letters.
- Transfer and organize data: Once the formatting and partitioning are complete, you can start transferring data to your new hard drive. Organize your files in a logical manner to ensure easy access and efficient management of your stored data.
With the hard drive successfully installed, you now have additional storage space to store files, programs, and other data on your PC. Adding a hard drive is a cost-effective solution for expanding your storage capacity and is relatively straightforward, making it accessible to users with moderate technical knowledge.
Upgrading the Solid State Drive (SSD)
Upgrading the solid-state drive (SSD) is a great way to enhance both the storage capacity and performance of your PC. SSDs offer faster data transfer speeds and improved reliability compared to traditional hard disk drives (HDDs). If you’re looking to increase your storage space while enjoying snappier system responsiveness, here’s a step-by-step guide to help you upgrade your SSD:
- Determine the compatible SSD: Check your PC’s specifications to identify the type of SSD and the interface it supports. Common interfaces include SATA, M.2, or PCIe. Knowing the compatible SSD type will ensure that you select the appropriate drive for your upgrade.
- Gather the necessary tools: Before you begin, gather the necessary tools such as a screwdriver and any required cables. Some SSDs may come with a cloning kit or adapter that simplifies the migration process.
- Back up your data: Before replacing your existing SSD, it’s essential to back up all your important data. This ensures that no data is lost during the migration process.
- Power down your PC: Shut down your computer completely and disconnect the power cable to prevent any electrical accidents or damage during the upgrade process.
- Access the existing SSD: Open your PC case and locate the existing SSD. Remove any screws or brackets securing it in place and carefully disconnect the cables connected to the drive.
- Install the new SSD: Align the new SSD with the appropriate slot or connector and firmly insert it into place. Secure it using any screws or brackets that came with your PC or the SSD itself.
- Connect the cables: Connect the appropriate cables to the new SSD. This typically includes connecting the data cable to the SSD and the motherboard’s SATA or M.2 port, as well as connecting the power cable from your power supply unit (PSU) to the new SSD.
- Close the case and power up: Once all the connections are secure, close the PC case, ensuring that all screws and brackets are properly tightened. Reconnect the power cable and power on your computer to allow the new SSD to be recognized by your operating system.
- Migrate your data: You have a few options to migrate your data to the new SSD. One option is to use cloning software that allows you to replicate your existing SSD’s data onto the new drive. Another option is to reinstall your operating system and software onto the new SSD manually. Choose the method that works best for you.
- Verify and optimize: Once the migration process is complete, verify that all your data transferred successfully. Ensure that your new SSD is detected and functioning properly. Additionally, you may want to optimize your new SSD by enabling features such as TRIM and updating its firmware.
By upgrading your SSD, you’ll not only gain more storage space but also experience faster boot times, quicker program launches, and improved overall system performance. SSD upgrades are ideal for users who value speed and responsiveness, particularly for tasks that involve accessing and transferring large amounts of data.
Adding a Second Hard Drive/SSD
If you have available drive bays or connectors in your PC, adding a second hard drive or solid-state drive (SSD) is an excellent way to increase your storage capacity without replacing your existing drive. Here’s a step-by-step guide to help you add a second hard drive or SSD:
- Gather the necessary tools: Before you begin, gather the necessary tools, such as a screwdriver, and ensure you have the necessary cables, such as SATA cables and power cables.
- Determine the available space and type of drive: Identify the available drive bays in your PC case or the additional connectors on your motherboard. Consider the type of drive you want to add, whether it’s a conventional hard disk drive (HDD) or a solid-state drive (SSD).
- Power down your PC: Fully shut down your computer and disconnect the power cable to avoid any electrical accidents or damage during the installation process.
- Choose the drive bay: Select an available drive bay to install the second drive. Ensure that there is sufficient space and appropriate connections for the drive.
- Prepare the new drive: If the second drive is new, remove it from its packaging, being cautious not to touch any sensitive components. Remove any protective caps or covers from the connectors, if present.
- Mount the drive: Align the second drive with the chosen drive bay and secure it using the provided screws. Ensure that the drive is securely fixed and has no loose connections that could cause vibrations or physical damage.
- Connect the cables: Locate a SATA port on your motherboard and connect one end of a SATA data cable to the port. Connect the other end of the cable to the corresponding port on the second drive. Next, connect a power cable from your power supply unit (PSU) to the power port on the drive.
- Secure and close the case: Double-check that all connections are secure and that no loose cables are obstructing any fans or components. Close the PC case and tighten all screws to ensure everything is properly secured.
- Power up your PC: Reconnect the power cable and turn on your computer. Your operating system should automatically detect the new drive. If it doesn’t, you may need to access the BIOS settings to manually detect the drive or ensure that the appropriate BIOS settings are enabled.
- Format and partition the second drive: Once the drive is recognized by your operating system, you’ll need to format and partition it to make it usable. Depending on your operating system, you can use the Disk Management utility or third-party software to format and partition the drive according to your requirements.
- Utilize the new drive: With the second drive successfully installed and formatted, you can now start using it to store files, applications, or as an additional backup solution. Organize your data as needed for easy access and efficient management of your stored content.
Adding a second hard drive or SSD provides you with extra storage space, allowing you to keep your files organized and readily accessible. It’s a cost-effective solution for expanding your PC’s storage capacity without replacing your primary drive and is particularly advantageous for users who require separate storage for different types of files, such as multimedia, backups, or gaming libraries.
Converting Optical Drive Bay into a Storage Bay
If you no longer use the optical drive on your PC and need additional storage space, repurposing the optical drive bay is a clever solution. By converting the optical drive bay into a storage bay, you can install a hard drive or solid-state drive (SSD) and increase your storage capacity without sacrificing another component. Here’s a step-by-step guide on how to convert the optical drive bay into a storage bay:
- Power down your PC: Fully shut down your computer and disconnect the power cable to ensure safety during the conversion process.
- Gather the necessary tools: Gather the necessary tools, such as a screwdriver, that you’ll need to open your PC’s case and work with the caddy or adapter required for the conversion.
- Identify the optical drive bay: Open your PC case and locate the optical drive bay where the CD/DVD drive is currently installed.
- Remove the optical drive: Remove any screws or brackets securing the optical drive in place. Carefully disconnect any cables connected to the optical drive, such as the SATA data cable and power cable.
- Prepare the caddy or adapter: Depending on the specific model of your PC or the caddy/adapter you’re using, you may need to prepare it before installing the drive. Follow the manufacturer’s instructions to ensure a proper fit and secure installation.
- Mount the drive: Insert the storage drive (HDD or SSD) into the caddy or adapter that will fit into the optical drive bay. Secure the drive in place using the provided screws or brackets.
- Install the caddy or adapter: Insert the caddy or adapter with the drive into the vacant optical drive bay, aligning it with the screw holes or connectors. Secure it in place using screws or brackets, ensuring a tight and secure fit.
- Connect the cables: Connect the appropriate cables to the newly installed drive. This typically involves connecting the SATA data cable to the drive and the motherboard’s SATA port, as well as connecting the power cable from your power supply unit (PSU) to the drive.
- Close the case and power up: Once all the connections are complete, close the PC case, ensuring that all screws and brackets are tightened. Reconnect the power cable and power on your computer to allow the newly installed drive to be recognized by your operating system.
- Format and partition the drive: After the drive is recognized, you’ll need to format and partition it to make it usable. Use the Disk Management utility or third-party software to format and partition the drive according to your needs.
- Utilize the new storage bay: With the conversion complete, you can now use the newly converted storage bay to store files, applications, backups, or any other data you need. Organize your data for easy access and efficient management.
Converting the optical drive bay into a storage bay is an effective way to repurpose an unused component of your PC and maximize your storage capacity. It’s a cost-efficient solution that allows you to make use of the available space while keeping your existing drives intact. This conversion is particularly beneficial for users who rarely use optical drives and need additional storage for files, programs, or multimedia content.
Network Attached Storage (NAS)
If you’re looking for a centralized and scalable solution to expand your storage capacity, Network Attached Storage (NAS) is an excellent option. NAS devices are essentially small servers dedicated to storage, connected to your home network. They offer several advantages and functionalities that make them an attractive choice for individuals and small businesses alike.
Here are some key features and benefits of using a NAS:
- Centralized storage: NAS devices provide a centralized storage solution accessible from multiple devices on your network. It allows you to store, organize, and access files from different computers, laptops, smartphones, and other devices without the need for physical data transfers or local storage constraints.
- Redundancy and data protection: NAS devices typically support various RAID configurations (e.g., RAID 0, 1, 5, 10) that provide data redundancy and protection against drive failures. By combining multiple hard drives or SSDs, NAS devices can ensure that your data remains intact even if one drive fails. This is particularly important for businesses or individuals with critical data storage needs.
- Scalability: NAS devices are highly scalable, allowing you to add more storage capacity as needed. They often support hot-swappable drive bays, enabling you to easily add or replace drives without disrupting operations. This makes NAS an ideal solution for rapidly growing businesses or individuals with expanding storage requirements.
- Backup and synchronization: NAS devices can function as a dedicated backup solution for your data. You can set up automatic backups from your computers and laptops directly to the NAS, ensuring that your valuable information is protected. Additionally, many NAS devices offer synchronization features that keep your files updated across multiple devices and locations.
- Advanced features: NAS devices come equipped with various advanced features, such as remote access, user management, media streaming, and hosting services, among others. These features enhance productivity and convenience, allowing you to access your files and services from anywhere with an internet connection.
- Energy efficiency: NAS devices are designed to be energy-efficient, consuming less power compared to running multiple individual PCs as storage servers. This not only reduces electricity costs but also contributes to a greener and more sustainable environment.
When considering a NAS device, factors to keep in mind include storage capacity, the number of drive bays, supported RAID configurations, connectivity options (Ethernet, Wi-Fi), and the overall performance of the device. Moreover, it’s essential to choose a NAS device that aligns with your budget and has the necessary features and functionalities for your specific storage needs.
Whether you’re a professional needing a central storage solution for your business or a family wanting to organize and access media files across multiple devices, a NAS device can provide the ideal storage and data management solution.
Cloud Storage Solutions
Cloud storage solutions offer a convenient and secure way to store and access your data over the internet. With cloud storage, your files are stored on remote servers maintained by cloud service providers. Here are some key aspects and benefits of using cloud storage:
- Accessibility: One of the primary advantages of cloud storage is the ability to access your files from anywhere with an internet connection. Whether you’re using a computer, smartphone, or tablet, you can easily retrieve and manage your data on the go.
- Scalability: Cloud storage services offer scalability by allowing you to choose from various storage plans to meet your needs. Starting with a free storage plan, you can upgrade to larger storage capacities as your requirements grow, ensuring you have sufficient space to store all your files.
- Data security and backup: Cloud storage providers employ robust security measures to protect your data, including encryption during transmission and at rest. Additionally, cloud storage serves as a backup solution, ensuring that your files are safely stored offsite in case of hardware failures or accidents.
- Collaboration: Many cloud storage services offer collaboration features, allowing you to share files and folders with others for seamless teamwork. You can grant specific permissions and control access levels to ensure that everyone in your team stays on the same page.
- Syncing and file versioning: Cloud storage solutions provide automatic syncing across devices. Any changes or modifications made to a file on one device are reflected on all synchronized devices, ensuring that you’re always working with the most up-to-date version.
- Integration with other services: Cloud storage seamlessly integrates with other tools and applications, making it easy to access and sync your files across different platforms and services. Many cloud storage providers offer integrations with productivity software, email providers, and content management systems to enhance workflow efficiency.
- Cost-effectiveness: Cloud storage typically offers cost-effective solutions, with various pricing plans to suit different budgets. Many providers offer free storage options with limited capacity, while paid plans offer more storage and additional features for a reasonable monthly or annual fee.
When considering a cloud storage solution, factors to consider include storage capacity, ease of use, security features, compatibility with your devices and operating systems, integration options, and the reputation and reliability of the cloud storage provider.
Popular cloud storage providers include Dropbox, Google Drive, Microsoft OneDrive, and iCloud. Each provider has its unique features and offerings, so it’s essential to evaluate and choose the one that best fits your storage needs and preferences.
Cloud storage solutions provide a flexible and accessible way to store and manage your files securely. Whether you’re a professional needing to access files on the go or an individual wanting to back up personal data, cloud storage offers the flexibility and convenience you need to keep your files safe and accessible from anywhere.
Conclusion
Expanding your PC’s storage capacity is crucial to accommodate the increasing amount of data we generate and accumulate. Whether you choose external storage options like external hard drives or SSD portable drives, internal storage upgrades such as adding a second hard drive or upgrading the SSD, repurposing the optical drive bay, or investing in a network attached storage (NAS) or cloud storage solution, it ultimately depends on your specific needs, budget, and convenience.
Assessing your storage requirements, considering factors like current usage, future needs, and mobility preferences, is a crucial first step. This evaluation helps you determine the best method for increasing your storage space. While external storage options are versatile and easy to use, internal storage upgrades offer better performance and integration. Converting the optical drive bay or investing in a NAS provides centralized and scalable storage solutions for larger capacities and enhanced data security.
Cloud storage solutions, on the other hand, offer accessibility, scalability, collaboration features, and data backup, making them a popular choice for individuals and businesses. With cloud storage, you can store, access, and sync your files across multiple devices while enjoying the added benefits of data security and ease of collaboration.
Whichever method you choose, it’s essential to follow the appropriate installation procedures and consider compatibility with your PC’s specifications. Additionally, organizing and managing your files efficiently can optimize your storage space and make it easier to find and access your data.
Ultimately, the goal of adding more storage to your PC is to enhance productivity, improve data management, and provide a seamless user experience. By evaluating your needs and selecting the most suitable storage option, you can ensure that your PC has enough space to accommodate your files, applications, and multimedia content, enabling you to make the most out of your device.