Introduction
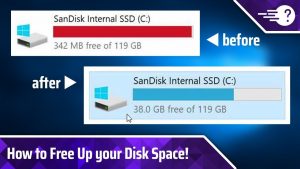
Welcome to this guide on how to get more disk space on your PC. As we rely more and more on our computers for work, entertainment, and storing important files, it’s crucial to maintain enough free space on our hard drives to ensure optimal performance. Running out of disk space can lead to sluggishness, errors, and even system crashes.
In this article, we’ll explore various methods to free up disk space, helping you reclaim valuable storage on your PC. These methods range from simple housekeeping tasks to advanced optimization techniques, so you can choose the ones that best suit your needs and expertise.
By the end of this guide, you’ll have a clear understanding of how to identify and eliminate unnecessary files, programs, and system settings that might be taking up precious disk space. Not only will this help you maintain a cleaner and more organized computer, but it can also result in improved overall performance and faster system operation.
Before diving into the specific techniques, it’s important to note that getting more disk space is not just about deleting files. Optimization also involves managing your files and programs more efficiently, ensuring that you have the necessary space without sacrificing functionality. So, let’s get started and explore the various methods that will help you regain valuable disk space on your PC.
Clean up Temporary Files
One of the quickest and easiest ways to free up disk space on your PC is to clean up temporary files. Temporary files are created by various programs and processes on your computer, and over time, they can accumulate and take up a significant amount of space.
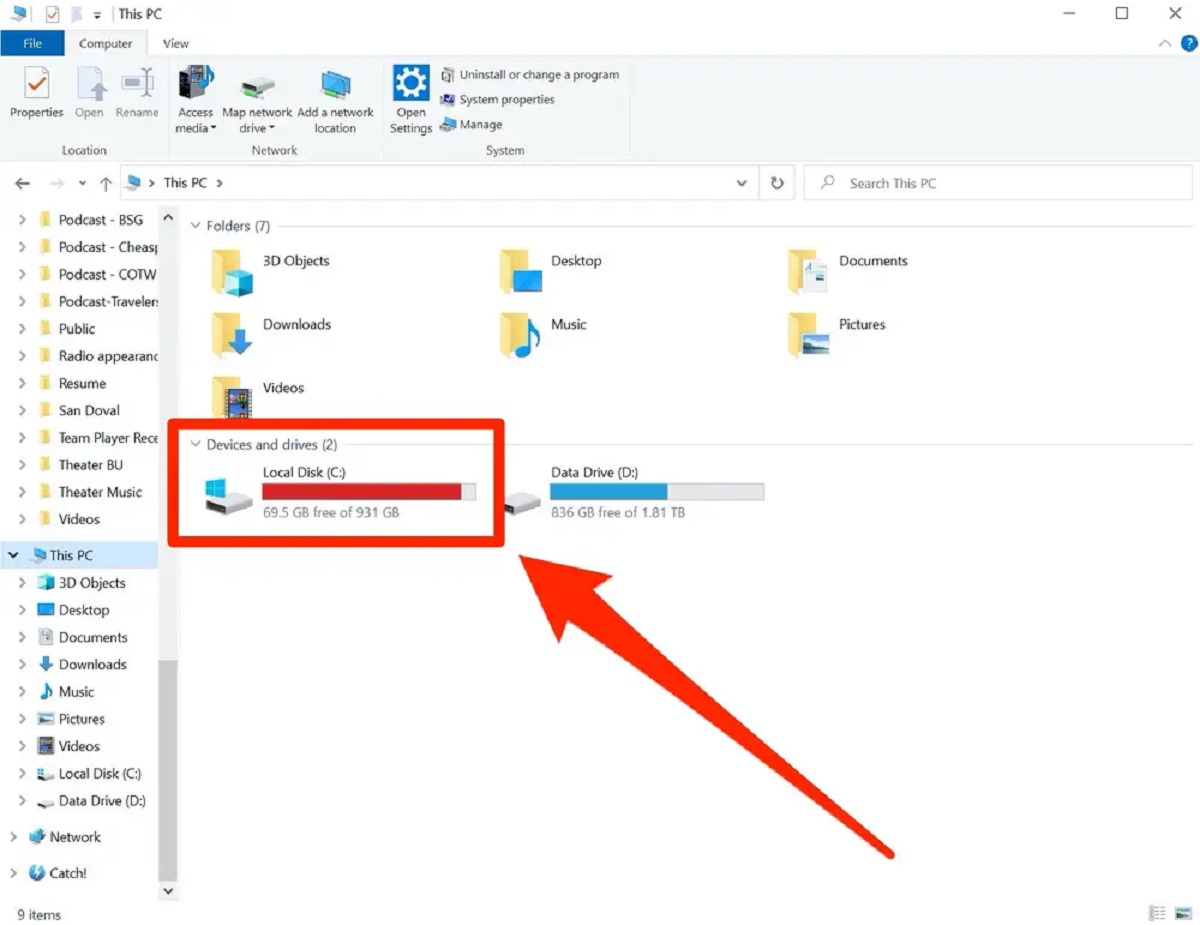
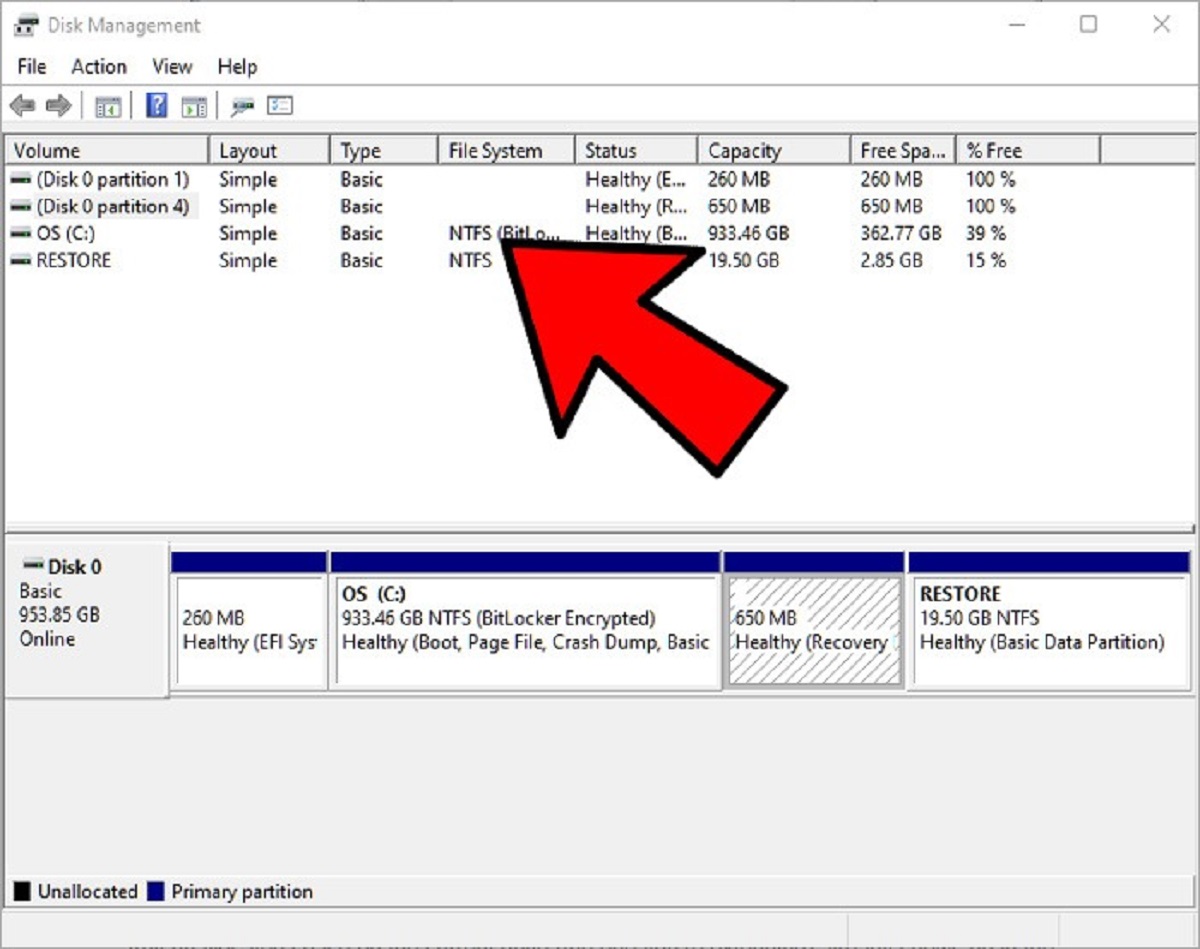
To clean up temporary files, you can start by using the built-in Disk Cleanup utility on Windows. Simply search for “Disk Cleanup” in the Start menu, and open the utility. Select the drive that you want to clean up, usually the C: drive, and click “OK.” The utility will scan for temporary files and present you with a list of options to delete. You can select the categories you want to clean, such as temporary internet files, system files, and more. Once you’ve made your selections, click “OK” and let the utility clean up the files for you.
Another method to clean up temporary files is by manually deleting them. Open File Explorer and navigate to the following location: C:\Users\YourUsername\AppData\Local\Temp. In this folder, you’ll find various temporary files that you can delete. Select all the files using Ctrl+A and press the Delete key on your keyboard. Keep in mind that some files may be in use by running programs and cannot be deleted. You can safely skip those files.
Additionally, you can use third-party cleanup tools like CCleaner, which can scan your system for temporary files, internet history, cookies, and more. These tools provide a more comprehensive cleanup and can help you identify and remove even more unnecessary files from your PC.
Regularly cleaning up temporary files not only frees up disk space, but it can also improve system performance and reduce clutter. By removing these temporary files, you’re removing unwanted data that serves no purpose and can slow down your computer.
Uninstall Unneeded Programs
Another effective way to free up disk space on your PC is by uninstalling unneeded programs. Over time, you may accumulate a list of programs that you no longer use or need, and these programs can take up a significant amount of storage space on your hard drive.
To uninstall programs on Windows, you can use the “Add or Remove Programs” feature in the Control Panel. Simply open the Control Panel, navigate to “Programs” or “Programs and Features,” and you’ll find a list of installed programs. Scroll through the list and identify the programs that you no longer use or need.
Click on the program you want to uninstall and select the “Uninstall” or “Remove” option. Follow the on-screen prompts to complete the uninstallation process. It’s important to note that some programs may require a restart after the uninstallation, so be sure to save any important work before proceeding.
In addition to the built-in uninstallation feature, you may also consider using third-party uninstaller tools. These tools offer more advanced features and can help you completely remove leftover files and registry entries associated with the uninstalled programs.
When deciding which programs to uninstall, consider removing software that you haven’t used in a long time, duplicate programs that serve the same purpose, or programs that came preinstalled on your PC but are not essential to your needs. By removing these unneeded programs, you can not only free up disk space but also declutter your system and streamline its performance.
Remember to exercise caution when uninstalling programs, as some may be necessary for certain functions or might be required by other programs. If you’re unsure about a particular program, it’s always a good idea to do some research online or consult with a knowledgeable source before uninstalling.
By regularly reviewing and uninstalling unneeded programs, you can keep your PC running smoothly and maximize your available disk space for the applications and files that truly matter to you.
Delete Duplicate Files
Deleting duplicate files is another effective strategy to free up disk space on your PC. Duplicate files can accumulate over time, especially when you download, copy, or create multiple versions of the same file. These duplicates not only occupy unnecessary space but can also make it difficult to locate and manage your files.
To identify and delete duplicate files, you can use specialized software that scans your computer for duplicates based on file name, size, and content. One popular tool is Auslogics Duplicate File Finder, which is free to download and easy to use. Simply install the software, select the drives or folders you want to scan, and let it analyze your files. The software will provide you with a list of duplicate files and give you the option to delete them.
Another method to find and delete duplicate files is by using the built-in search feature on your operating system. For Windows users, you can open File Explorer and navigate to the folder you want to search within. In the search bar, type a search term that will filter your files, such as “*.docx” for Word documents. Once the search results appear, click on the “Search” tab and select “Size” to sort the files by size. This will help you identify potential duplicates with similar file sizes. You can then manually review these files and delete the duplicates.
When deleting duplicate files, exercise caution and make sure you’re deleting the correct files. It’s always a good idea to back up your important data before performing any deletion tasks. Be mindful that some files may have identical names but are stored in different locations for a specific reason.
Regularly checking for and deleting duplicate files not only helps you reclaim disk space but also improves your file organization and makes it easier to find and manage your files. By eliminating unnecessary duplicates, you can optimize your storage and ensure that you’re only keeping the files you actually need.
Compress Files and Folders
If you’re looking for a way to free up disk space without permanently removing files, compressing them can be a viable solution. Compressing files and folders reduces their size, allowing you to save storage space while still keeping your files accessible and intact.
Windows users have the option to compress files and folders using the built-in compression feature. To compress a file or folder, right-click on it, select “Send to,” and then choose “Compressed (zipped) folder.” Windows will create a compressed version of the file or folder, which you can then move or store wherever you prefer. Compressed files retain their original contents, but they take up less space on your hard drive.
It’s important to note that not all files are suitable for compression. Some file types, such as already compressed media files like JPEG or MP3, may not significantly reduce in size when compressed further. On the other hand, text-based documents, spreadsheets, and other non-compressed file types can benefit more from compression.
In addition to using the built-in compression feature, you can also consider using third-party compression tools such as WinRAR or 7-Zip. These tools offer more advanced compression options and support a wider range of file formats.
Compressing files and folders is especially useful when you need to free up space temporarily or when you want to transfer large files over the internet or on external storage devices with limited capacity. However, keep in mind that accessing the contents of a compressed file or folder may take slightly longer than accessing uncompressed files, as they need to be decompressed first.
Remember to keep track of your compressed files and folders, as it’s easy to forget about them over time. If you no longer need the compressed versions, you can always decompress them and revert them to their original state.
By compressing files and folders, you can effectively reduce their size and reclaim valuable disk space without permanently removing your files. It’s a practical approach to managing your storage and ensuring you have ample space for your important data.
Move Files to an External Storage Device
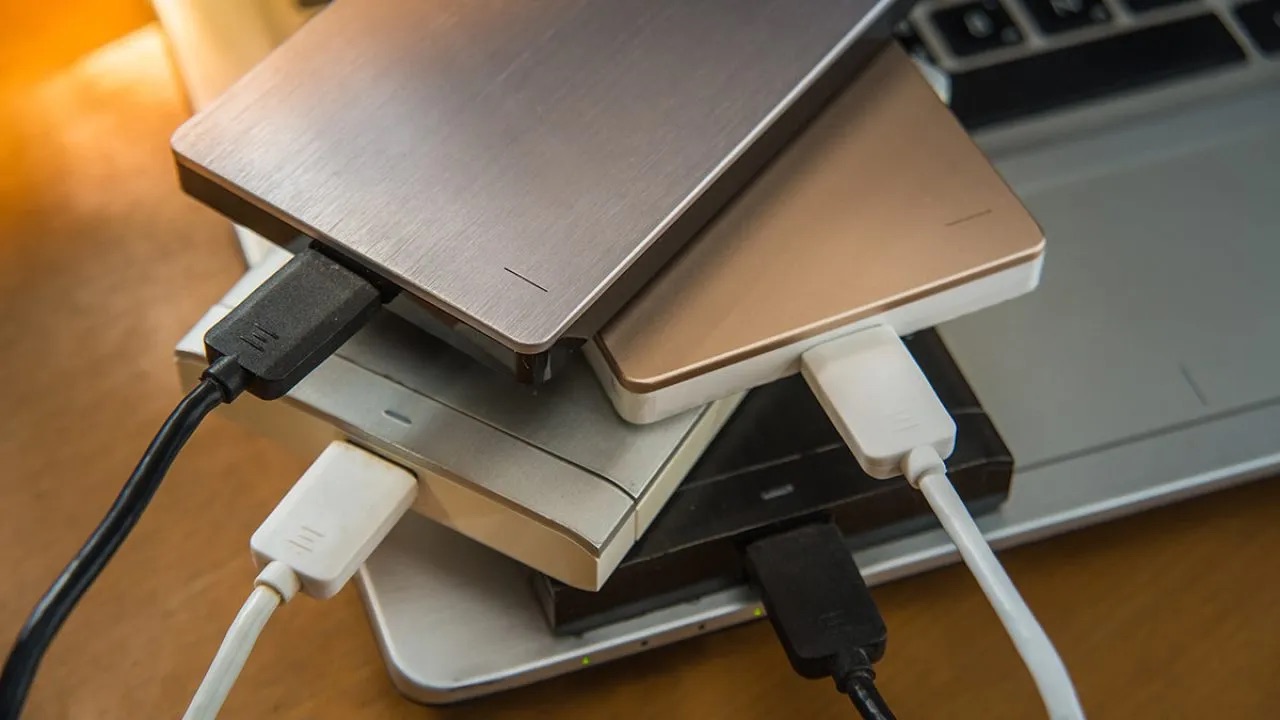
If you’re running out of disk space on your PC, one practical solution is to move files to an external storage device. External storage devices, such as external hard drives or USB flash drives, provide an additional space to store your files without affecting the storage capacity of your computer’s internal hard drive.
To move files to an external storage device, simply connect the device to your computer using the appropriate cable or USB port. Once the device is recognized by your operating system, you can open File Explorer or the Finder (for Mac users) and navigate to the files or folders you want to move.
Select the desired files or folders, right-click, and choose “Cut” or “Copy.” Then, navigate to the external storage device and paste the files or folders into the desired location on the device.
When moving files to an external storage device, it’s important to organize and categorize your files in a way that makes sense to you. Create folders and subfolders that reflect the structure of your files for easy retrieval later on.
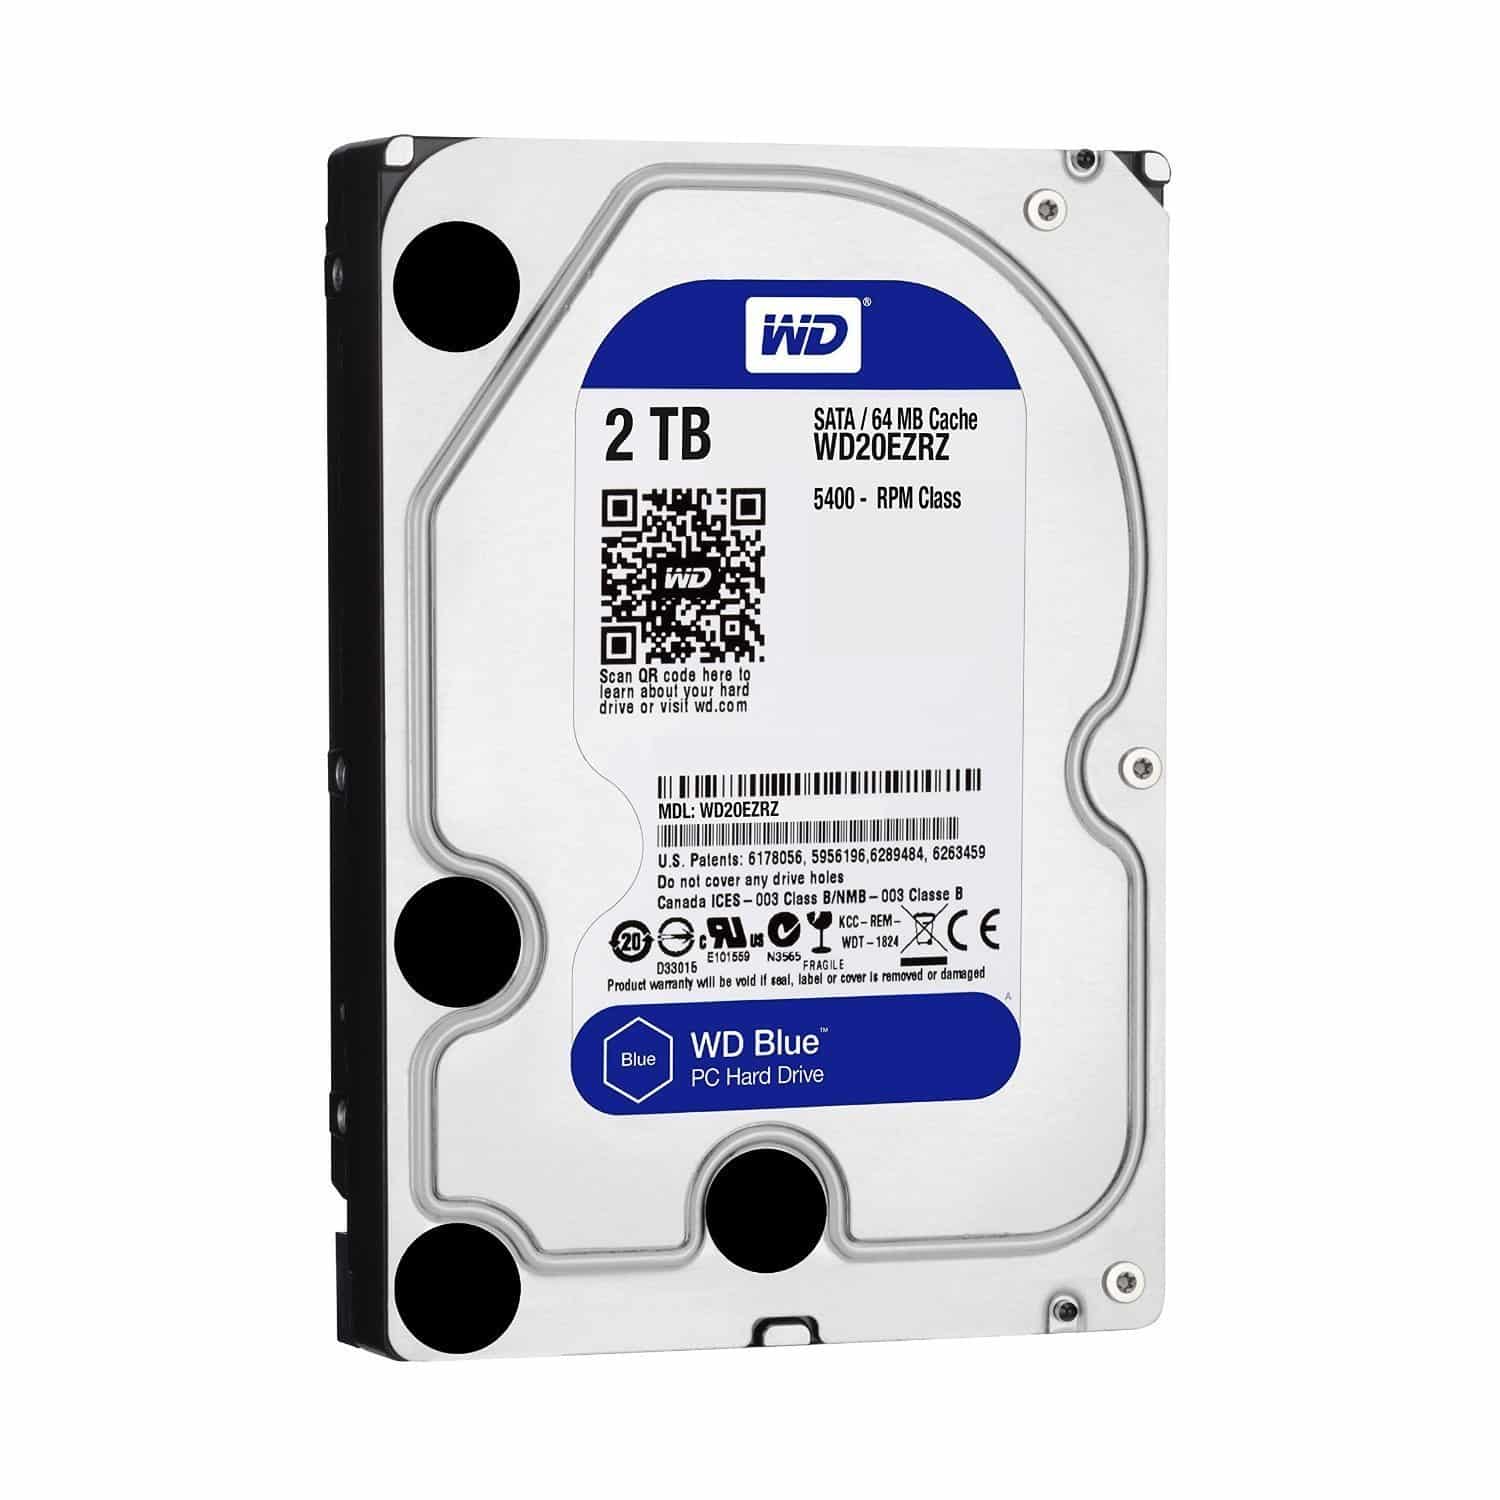
External storage devices come in various storage capacities, so choose a device that can accommodate your needs. If you anticipate needing more storage in the future, consider investing in a larger capacity device to avoid running out of space again.
Once you have moved your files to an external storage device, it’s a good practice to regularly back up the contents of the device to an additional backup source. This could be another external storage device, cloud storage, or a network-attached storage (NAS) device. By maintaining multiple copies of your important files, you can protect yourself against data loss due to hardware failure or other unforeseen circumstances.
Moving files to an external storage device not only helps free up disk space on your PC but also provides a reliable backup solution and allows for easy mobility of your files. It’s a convenient method to expand your storage capacity and keep your files accessible while maintaining the performance of your computer.
Use Cloud Storage Solutions
One increasingly popular and convenient way to free up disk space on your PC is to utilize cloud storage solutions. Cloud storage allows you to store your files and access them from any device with an internet connection. By moving your files to the cloud, you can free up space on your local hard drive while still maintaining easy access to your files whenever you need them.
There are several cloud storage providers to choose from, including well-known options like Dropbox, Google Drive, Microsoft OneDrive, and iCloud. These services offer a certain amount of free storage and additional storage options for a fee.
To get started with cloud storage, sign up for an account with the provider of your choice. Install the desktop client or mobile app, which will create a special folder on your computer that syncs with the cloud storage. You can then move files from your local hard drive to the cloud storage folder. These files will then be uploaded and stored securely in the cloud.
Cloud storage solutions offer numerous benefits beyond just freeing up disk space. First and foremost, your files are securely backed up in the cloud, protecting them from data loss due to hardware failure, theft, or other unforeseen events. Additionally, cloud storage allows you to easily share files and collaborate with others, making it ideal for both personal and professional use.
When using cloud storage, it’s important to be mindful of storage limits and data usage. Most providers offer tiered storage plans, so choose a plan that aligns with your storage needs. You may also want to consider enabling selective sync, which allows you to choose which folders to synchronize between your computer and the cloud. This ensures that you only have the necessary files stored locally while the rest remain in the cloud.
Using cloud storage solutions can significantly reduce the files stored on your local hard drive, freeing up disk space without sacrificing accessibility or security. It’s a modern and flexible way to manage your files, making them available across multiple devices and protecting them from potential data loss.
Use Disk Cleanup Tool
A built-in feature in Windows, the Disk Cleanup tool is a simple yet effective way to free up disk space on your PC. This tool helps you identify and clean up unnecessary files and system components that are taking up valuable storage space.
To access the Disk Cleanup tool, type “Disk Cleanup” in the search bar of the Start menu and open the application. It will prompt you to choose the drive you want to clean up, usually the C: drive, which is where your operating system is installed.
Once you select the drive, the Disk Cleanup tool will scan the selected drive and present you with a list of files that can be safely deleted. These files can include temporary internet files, system files, previous Windows installations, and more.
You can check the categories you want to clean up or click on the “Clean up system files” button to access additional options, such as removing Windows update files or clearing the hibernation file.
It’s important to note that the Disk Cleanup tool calculates the amount of disk space that can be freed up based on your selections. Take a moment to review the estimated amount of disk space you can reclaim before proceeding with the cleanup.
Once you’ve made your selections, click on the “OK” button to start the cleanup process. Depending on the amount of data to be deleted, the process may take a few moments to complete. Be patient and let the tool carry out the necessary operations.
The Disk Cleanup tool is a convenient and straightforward way to remove unnecessary files and free up disk space on your PC. By regularly using this tool, you can maintain a cleaner and more organized system, which can result in improved performance and faster operation.
However, exercise caution when using the Disk Cleanup tool, as some files may be necessary for certain functions or applications. If you’re unsure about deleting certain files, it’s best to leave them unchecked or do some research before proceeding.
In summary, the Disk Cleanup tool is a valuable utility provided by Windows that helps you identify and delete unnecessary files, freeing up disk space on your PC and improving system performance.
Disable Hibernation
Disabling hibernation on your PC can free up valuable disk space, especially if you have limited storage available. Hibernation is a feature that allows your computer to save all your open programs and files to the hard drive before powering off, so when you power it back on, you can resume where you left off. While hibernation can be useful, it requires a significant amount of disk space to store the hibernation file.
To disable hibernation on a Windows computer, open the Command Prompt as an administrator. You can do this by typing “Command Prompt” in the search bar, right-clicking on it, and selecting “Run as administrator.”
In the Command Prompt window, type the following command and hit Enter: powercfg.exe /hibernate off. This command will disable the hibernation feature on your computer.
By disabling hibernation, you can potentially free up several gigabytes of disk space. However, keep in mind that this means you will no longer be able to use the hibernation feature, and your computer will take longer to boot up from a shutdown state.
If you prefer to keep the hibernation feature but want to reduce the size of the hibernation file, you can use the powercfg utility to adjust its size. In the Command Prompt window, type the following command and hit Enter: powercfg.exe /hibernate /size . Replace
Remember to weigh the benefits and drawbacks of disabling or adjusting the hibernation feature based on your specific needs and available disk space. If you rarely use the hibernation feature and need more storage space, disabling it can be a practical solution. However, if you frequently use hibernation or prefer to have the option available, consider adjusting the size of the hibernation file instead.
In summary, disabling hibernation on your computer can help free up disk space, but it comes with the trade-off of losing the ability to use the hibernation feature. Choose the option that best suits your needs and storage requirements.
Clear Browser Caches and History
Clearing your browser caches and history is an effective way to free up disk space on your PC, especially if you frequently surf the internet. Browsers store temporary files, cookies, and a history of your browsing activity, which can accumulate and take up significant storage space over time.
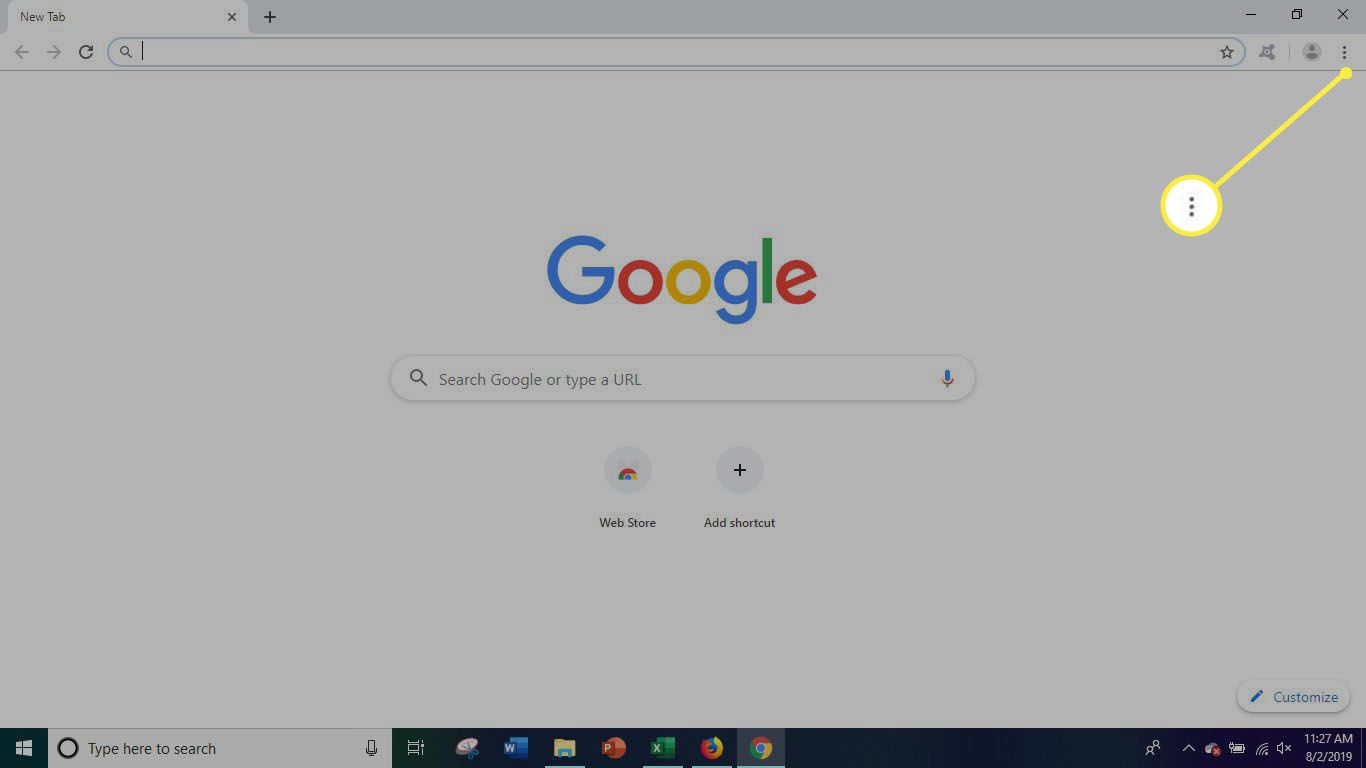
To clear browser caches and history, each browser has its own specific steps, but the general process is similar across different browsers. In most cases, you can access the browser’s settings or preferences and find the option to clear browsing data or history.
When clearing browser caches, you’re essentially deleting the temporary files that your browser stores when you visit websites. These files are stored to improve website performance and load times, but they can consume a substantial amount of disk space, especially if you visit numerous websites frequently.
In addition to clearing caches, clearing your browser history removes the record of websites you’ve visited in the past. This can further free up storage space and provide some privacy if you’re concerned about others accessing your browsing history.
Keep in mind that by clearing caches and history, you may lose saved website data, such as login credentials or website preferences. It’s a good idea to make a note of any important information or export bookmarks before clearing these data.
Regularly clearing your browser caches and history is a good practice to ensure your browsing experience remains seamless and your storage space is optimized. It can also help improve online privacy and security by removing traces of your internet activity.
Remember to note that clearing caches and history is specific to your browser and may need to be done for each browser you use on your PC, such as Chrome, Firefox, Safari, or Edge.
In summary, clearing browser caches and history is a simple yet effective method to reclaim disk space on your PC. By removing temporary files and deleting browsing history, you can optimize your browser’s performance and ensure that your disk space is efficiently utilized.
Empty the Recycle Bin
Emptying the Recycle Bin is a quick and straightforward method to free up disk space on your PC. When you delete files on Windows, they are moved to the Recycle Bin instead of being permanently deleted. This allows you to recover files if needed, but it also means that the deleted files continue to take up space on your hard drive.
To empty the Recycle Bin, simply locate its icon on your desktop or open File Explorer and locate it in the left-hand panel. Right-click on the Recycle Bin icon and select “Empty Recycle Bin.” A confirmation message will appear, asking if you want to permanently delete all the files. Click “Yes” to proceed with emptying the bin.
It’s important to note that once you empty the Recycle Bin, the deleted files cannot be recovered. Therefore, make sure you have checked the contents of the bin and that you no longer need any of the files before emptying it.
Keep in mind that the Recycle Bin has a separate storage limit, which can be adjusted. By default, it can take up to 5% of your disk space. If you frequently delete large files and want to optimize your storage, you can adjust the Recycle Bin’s storage limit to a smaller size.
The Recycle Bin acts as a safety net, allowing you to restore files you may have accidentally deleted. However, if you’re confident that you no longer need the files in the bin, emptying it can provide you with additional disk space.
It’s recommended to periodically empty the Recycle Bin, especially if you frequently delete large files or have limited disk space. Regularly freeing up space in the Recycle Bin ensures that you have more room for new files and helps maintain the overall performance of your PC.
In summary, emptying the Recycle Bin is a simple and effective way to free up disk space on your PC. By permanently deleting the files in the bin, you can reclaim valuable storage and optimize your computer’s performance.
Disable System Restore
Disabling the System Restore feature on your PC can help free up disk space by eliminating the storage used by restore points. System Restore is a built-in feature in Windows that creates checkpoints or restore points periodically, allowing you to revert your system to a previous state if issues arise.
While System Restore can be helpful for recovering your system in case of problems, it consumes a significant amount of disk space. Each restore point takes up storage space and accumulates over time, especially if you have system protection enabled on multiple drives.
To disable System Restore, open the System Properties window by searching for “System” in the Start menu and selecting “System” or “System Properties” from the results. In the System Properties window, click on the “System Protection” tab.
Under the “Protection Settings” section, you’ll see a list of the available drives and their corresponding protection status. Select the drive(s) for which you want to disable System Restore and click on the “Configure” button.
In the new window, select the option to “Disable system protection.” This will turn off System Restore for the selected drive(s). You can also adjust the amount of disk space allocated to System Restore by dragging the slider or setting it to 0% to free up all allocated space.
Keep in mind that by disabling System Restore, you won’t be able to restore your system to previous checkpoints. However, there are alternative backup and recovery options available, such as regularly creating system images or using third-party backup software, which can provide similar functionality while consuming less disk space.
If you decide to disable System Restore, it’s important to note that existing restore points will still take up disk space until they are manually deleted or until the automatic deletion process removes them based on system limitations.
Disabling System Restore is a trade-off between disk space and the ability to restore your system to a previous state. Evaluate your needs and the available disk space to determine if disabling System Restore is the right choice for you.
In summary, disabling System Restore can help free up disk space by eliminating the storage used by restore points. However, consider alternative backup and recovery methods to ensure you have a fallback option if problems arise.
Remove Unnecessary Language Packs
If you have multiple language packs installed on your PC but only use one or a few of them, removing the unnecessary language packs can help free up valuable disk space. Language packs contain resources for displaying the user interface and translating the operating system and applications into different languages. Having multiple language packs installed can consume a substantial amount of storage.
To remove unnecessary language packs on Windows, open the Control Panel and navigate to the “Clock and Region” or “Region and Language” section. From there, click on “Language” or “Language preferences.”
In the language settings, you’ll see a list of installed languages and the option to add or remove languages. Select the languages you no longer need or use and click on the “Remove” or “Uninstall” button. Confirm the action when prompted.
Windows may prompt you to log out and log back in for the changes to take effect. Once you have removed the unnecessary language packs, Windows will delete the associated language files, reclaiming storage space on your hard drive.
Removing unnecessary language packs not only saves disk space but can also streamline your system’s performance, as it reduces the number of resources needed to load and display language-specific elements.
However, be cautious when removing language packs. If you’re unsure whether a language pack is necessary, consider keeping it to ensure proper functionality of certain applications or in case you need it in the future. It’s advisable to conduct thorough research or seek expert advice if you are uncertain about the effects of removing specific language packs.
In addition to removing language packs, you can also adjust your system settings to prevent automatic installation of additional language packs in the future. This ensures that your storage space is not unnecessarily allocated to languages you do not require.
If you need to reinstall a language pack in the future, you can follow the same steps to add it back. Windows allows you to download and install additional language packs as needed, enabling you to customize your language preferences whenever necessary.
In summary, removing unnecessary language packs can free up disk space and optimize your system’s performance. However, exercise caution and ensure you keep languages that are vital to your needs or if you are unsure about the implications of removing specific language packs.
Disable Unnecessary Startup Programs
Disabling unnecessary startup programs can significantly improve the startup time and performance of your PC. Startup programs are applications that automatically launch when you start your computer, consuming valuable system resources and potentially slowing down your system.
To manage startup programs on Windows, you can use the built-in Task Manager. To open Task Manager, right-click on the taskbar and select “Task Manager” from the menu. In the Task Manager window, click on the “Startup” tab.
This tab displays a list of programs that launch automatically when you start your computer. Evaluate the list and identify programs that you don’t need to launch at startup. Right-click on each unnecessary program and choose “Disable.”
Disabling a program will prevent it from automatically starting up when you log in to your computer. However, it doesn’t uninstall the program or remove it from your system entirely; it only prevents it from launching at startup.
It’s important to exercise caution when disabling startup programs. Some programs are essential for your computer’s functionality or required by specific applications. If you’re unsure about the necessity of a program, it’s recommended to leave it enabled or do some research to determine its purpose.
By disabling unnecessary startup programs, you can reduce the number of processes running in the background and free up system resources. This, in turn, leads to a faster startup and improved overall performance of your PC.
In addition to using Task Manager, you may also find options within individual programs to disable their startup behavior. Check the settings or preferences of each program to see if there’s an option to prevent it from launching at startup.
To ensure optimal performance, periodically review your startup programs and disable any newly installed applications that might have set themselves to launch automatically. This helps maintain a lean startup process and avoids unnecessary resource consumption.
In summary, disabling unnecessary startup programs is an effective way to improve your PC’s startup time and system performance. By selectively disabling programs that are not essential, you can optimize your computer’s resources and enjoy a smoother user experience.
Delete Large Unused Files
If you’re running low on disk space and need to free up storage quickly, deleting large unused files is an effective strategy. These files can take up a significant amount of space on your hard drive, and removing them can provide you with ample storage for your essential files and applications.
To identify large unused files on your PC, you can utilize various methods. One way is to use the built-in search feature in your operating system. Open File Explorer or the Finder (for Mac users), navigate to the drive or folder you want to search within, and enter a search command to filter files by size.
For example, in Windows, you can enter “size:gigantic” in the search bar to display files larger than 128 MB. In Mac, you can use the “larger” keyword followed by a file size, such as “larger:1GB,” to find files larger than 1 GB.
Once you have generated a list of large files, review them to identify any that are no longer needed. These files could be old backups, software installations, media files, or downloads that have outlived their purpose. Carefully decide which files you can safely delete to free up disk space.
Before deleting any files, it’s always advisable to back up important data. Mistakes can happen, and having a backup ensures that you can recover any unintentionally deleted files.
After performing a backup, you can proceed to delete the identified large unused files. You can simply select the files, right-click, and choose “Delete” or drag them to the Recycle Bin or Trash. Once deleted, the files will no longer take up space on your hard drive.
In addition to manually searching for large files, you can also use third-party disk cleanup utilities that provide an overview of the largest files on your system or analyze specific folders for large files. These tools can help you identify and remove large files more efficiently.
Regularly deleting large unused files not only frees up disk space but also improves the overall organization and performance of your PC. By keeping your storage clean and optimized, you ensure that your computer operates smoothly and efficiently.
Remember to periodically perform this task to prevent large files from accumulating and taking up unnecessary space. By doing so, you can avoid running into storage constraints and maintain a well-organized file system on your PC.
In summary, deleting large unused files is an effective way to quickly free up disk space on your PC. By identifying and removing files that are no longer needed, you can optimize your storage and make room for essential files and applications.
Disable Windows Update Notifications
Windows updates are essential for keeping your operating system secure and up to date. However, the frequent notifications that accompany these updates can be disruptive and distracting, especially when you are in the middle of important tasks. Disabling Windows update notifications can help you regain control over your PC and minimize interruptions.
To disable Windows update notifications, you can make changes to the Windows Update settings. Open the Settings app by pressing Win + I and navigate to “Update & Security.” In the Windows Update section, click on “Advanced options”.
Under the “Advanced options”, you’ll find various settings related to Windows updates. Locate the “Receive updates for other Microsoft products when you update Windows” option and toggle it off. This will prevent Windows from displaying notifications about non-Windows updates.
Next, you can pause automatic updates for a specified period. Scroll to the “Pause updates” section and click on the “Pause until” drop-down menu. Select the desired date from the calendar to pause updates temporarily.
Keep in mind that it’s crucial to regularly install Windows updates to maintain system security, so ensure that you periodically check for updates manually or disable the pause once your temporary pause period expires.
Disabling Windows update notifications can help improve productivity and minimize disturbances. However, it’s important to consider the security implications of disabling notifications entirely. If you choose to do so, it’s essential to stay proactive in manually checking and installing Windows updates to maintain the security of your system.
In addition to disabling notifications, you can modify other Windows Update settings to have more control over the update process. For example, you can schedule updates to occur during non-working hours or set your connection as a metered connection to prevent automatic updates when using a limited data plan.
It’s worth noting that certain editions and versions of Windows may have slightly different settings or options for managing Windows update notifications. If you encounter any difficulties or are uncertain about the steps involved, consult official Windows documentation or seek assistance from Microsoft support.
Ultimately, the decision to disable Windows update notifications depends on your preferences and requirements. If you find the frequent notifications disruptive, disabling them can provide a more uninterrupted computing experience. Just remember to balance this with the importance of regularly installing Windows updates for system security.
Conclusion
Managing disk space on your PC is essential for maintaining optimal performance and ensuring you have enough storage for your important files and applications. By implementing the strategies outlined in this guide, you can free up disk space and streamline your system’s functionality.
Cleaning up temporary files, uninstalling unneeded programs, deleting duplicate files, compressing files and folders, moving files to an external storage device, using cloud storage solutions, and using the disk cleanup tool are effective methods to reclaim disk space and optimize storage utilization.
Disabling hibernation, clearing browser caches and history, emptying the Recycle Bin, disabling system restore, removing unnecessary language packs, disabling unnecessary startup programs, deleting large unused files, and disabling Windows update notifications are additional steps that can further help you maximize your available disk space and improve system performance.
Keep in mind that disk space management is an ongoing process. Regularly reviewing and maintaining your storage ensures that your PC operates efficiently and that you have enough space for new files and applications.
Remember to exercise caution when deleting files or disabling system features. Always back up important data and do thorough research or seek guidance if you are uncertain about the consequences of deleting or disabling specific files or features.
By implementing these strategies and maintaining good storage habits, you can ensure your PC runs smoothly, with adequate storage resources and optimal performance for your computing needs.

![How to Fix 0x80300024 Error on Windows 10 [Easy Guide]](https://robots.net/wp-content/uploads/2022/06/0x80300024-featured-300x175.jpg)