Introduction
Welcome to our guide on how to make your PC run faster! As technology continues to advance, our reliance on computers has become more prevalent than ever. Whether you use your PC for work, gaming, or simply browsing the internet, a slow and sluggish performance can be frustrating and hinder productivity. Fortunately, there are several effective methods to optimize your computer’s speed and improve its overall performance.
In this article, we will explore various techniques and tips to help you boost your PC’s speed and get it running at its peak performance. From cleaning up your hard drive to upgrading your hardware, each step will contribute to a faster and smoother computing experience. By implementing these strategies, you will not only enhance your PC’s speed but also optimize its efficiency and longevity.
Keep in mind that different factors can contribute to a slow PC, including excessive files, unnecessary programs running in the background, outdated hardware or software, and more. By addressing these issues, you can effectively improve your PC’s performance and ensure a responsive and enjoyable user experience.
Regardless of your level of technical expertise, the steps outlined in this guide are user-friendly and can be easily followed by anyone. So if you’re ready to revitalize your PC and make it run faster, let’s dive into the details and get started!
Clean Up Your Hard Drive
One of the first steps in optimizing your PC’s speed is to clean up your hard drive. Over time, your hard drive accumulates unnecessary files, temporary data, and duplicate documents, which can take up valuable storage space and slow down your computer. Follow these simple steps to clean up your hard drive and free up space:
- Delete Unnecessary Files: Start by removing files that you no longer need. Go through your documents, downloads folder, and desktop and delete any files that are no longer necessary. This will not only free up storage space but also make it easier to find important files when you need them.
- Empty the Recycle Bin: Whenever you delete files, they are moved to the Recycle Bin. Emptying the Recycle Bin permanently removes these files from your hard drive, freeing up even more space.
- Clear Temporary Files: Temporary files are created by various applications and can accumulate over time. They serve no purpose once the application is closed and can be safely deleted. To clear temporary files, type “%temp%” in the Windows search bar, select “Temp” folder, and delete its contents.
- Uninstall Unused Programs: Assess the programs installed on your PC and uninstall any that you no longer use. Unused programs take up space on your hard drive and can run in the background, slowing down your computer’s performance.
- Remove Duplicate Files: Duplicate files, such as photos, music, or documents, can quickly eat up storage space. Use a duplicate file finder tool to identify and remove duplicate files.
By regularly cleaning up your hard drive and removing unnecessary files, you can free up valuable storage space and improve your PC’s performance. Not only will this help your computer run faster, but it will also enhance its overall efficiency and responsiveness.
Uninstall Unused Programs
When it comes to optimizing your PC’s speed, one effective approach is to uninstall unused programs. Over time, we tend to accumulate a variety of applications on our computers, many of which we no longer use or need. These unused programs not only occupy valuable storage space but can also run in the background, consuming system resources and slowing down your computer. Here are some steps to help you uninstall unused programs:
- Assess Installed Programs: Take some time to go through the list of installed programs on your PC. You can do this by going to the Control Panel and selecting “Programs” or “Programs and Features” to view the list of installed applications.
- Determine Usage: Evaluate each installed program and determine whether or not you actively use it. If you haven’t used a program in months or if it serves no purpose in your workflow, it’s a good candidate for uninstallation.
- Uninstall: To uninstall a program, simply select it from the list and click on the “Uninstall” button. Follow the on-screen prompts to complete the uninstallation process. Some programs may require you to restart your computer after uninstallation.
- Use Uninstaller Software: In some cases, built-in uninstallation methods may not remove all traces of a program. In such instances, consider using third-party uninstaller software to thoroughly remove all associated files and registry entries.
By uninstalling unused programs, you can not only reclaim valuable storage space but also improve your PC’s overall performance. Removing clutter from your system will reduce the strain on system resources, resulting in a faster and more responsive computer.
Remember to periodically review your installed programs and uninstall any that you no longer use. This will ensure that your PC remains optimized and allows for a smoother computing experience.
Disable Startup Programs
One common reason for a slow PC startup is the presence of too many unnecessary programs running in the background. These programs often configure themselves to start automatically when you boot up your computer, consuming valuable system resources and slowing down the startup process. By disabling startup programs, you can significantly improve your PC’s boot time and overall performance. Here’s how you can do it:
- Open Task Manager: Press Ctrl + Shift + Esc to open the Task Manager. Alternatively, you can right-click on the taskbar and select “Task Manager” from the context menu.
- Navigate to the Startup Tab: In the Task Manager, click on the “Startup” tab to view the list of programs that are configured to start automatically when your PC boots up.
- Disable Unnecessary Programs: Review the list of programs and identify the ones that you don’t need to start with your PC. Right-click on the program and select “Disable” to prevent it from starting automatically during bootup.
- Research the Programs: If you’re unsure about the purpose of a particular program, consider doing some research before disabling it. Some programs may be essential for your PC’s functionality.
Disabling unnecessary startup programs can significantly improve your PC’s startup speed and overall performance. By reducing the load on system resources during bootup, you’ll experience a faster and more responsive computer right from the moment you turn it on.
Keep in mind that certain programs, such as antivirus software or critical system utilities, are necessary and should not be disabled. However, non-essential programs that you rarely use can safely be disabled from the startup list without affecting your PC’s functionality.
Regularly reviewing and disabling startup programs is a great practice to optimize your PC’s performance and ensure a smoother computing experience.
Disable Visual Effects
Visual effects, such as animations and transparency, can enhance the aesthetics of your operating system. However, these visual enhancements require additional system resources to render, which can impact your PC’s performance. By disabling or reducing visual effects, you can free up valuable system resources and improve the overall speed and responsiveness of your computer. Here’s how you can do it:
- Open System Properties: Right-click on the “This PC” icon on your desktop or File Explorer and select “Properties.” In the System window, click on “Advanced system settings” located in the left sidebar.
- Access Performance Options: In the System Properties window, click on the “Settings” button under the “Performance” section. This will open the Performance Options dialog box.
- Adjust Visual Effects: In the Performance Options dialog box, you have two options: “Let Windows choose what’s best for my computer” or “Adjust for best performance.” The first option allows Windows to automatically optimize visual effects based on your system specifications. The latter option disables all visual effects, providing maximum performance.
- Select Custom Settings: If you prefer a balance between aesthetics and performance, you can choose the “Custom” option. Here, you can manually select which visual effects you want to enable or disable. This allows you to tailor the visual experience to your preferences while still reducing the strain on system resources.
By disabling or reducing visual effects, you can significantly improve your PC’s performance and responsiveness. This is especially beneficial for users with older hardware or computers that struggle with resource-intensive tasks.
Keep in mind that turning off visual effects may make your operating system appear less visually appealing, as some animation and transparency effects will be disabled. However, the trade-off is a faster and more efficient computer, particularly during resource-intensive tasks such as gaming or video editing.
Experiment with different visual effect settings to find the right balance between aesthetics and performance that suits your needs. Regularly reviewing and adjusting these settings can help keep your PC running smoothly and optimize its overall performance.
Update Your Operating System and Drivers
Keeping your operating system and drivers up to date is crucial for maintaining optimal performance and security on your PC. Updates often include bug fixes, performance improvements, and security patches that can greatly enhance your computer’s performance and protect it from vulnerabilities. Here’s how you can update your operating system and drivers:
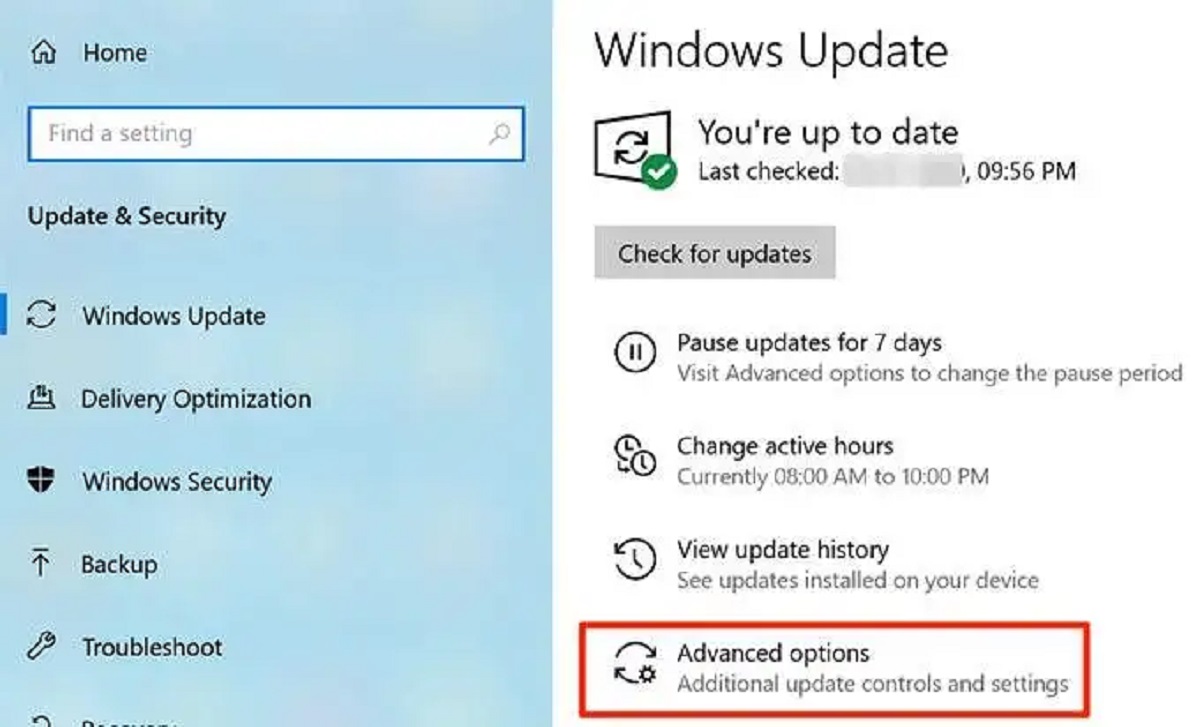
- Windows Updates: For Windows users, regularly checking for and installing Windows Updates is essential. You can do this by going to the Start Menu, clicking on “Settings,” and selecting “Update & Security.” From there, click on “Check for updates” to see if any updates are available, and follow the prompts to install them.
- Automatic Updates: To ensure that your operating system stays up to date automatically, you can enable automatic updates in the Windows Update settings. This way, you won’t have to manually check for updates every time.
- Driver Updates: Drivers are software that allow your hardware devices to communicate effectively with your operating system. Outdated drivers can cause performance issues or even hardware malfunctions. To update your drivers, you can visit the manufacturer’s website for each device and search for the latest drivers compatible with your operating system. Alternatively, you can use driver update software that automates the process for you.
- Device Manager: Another way to update drivers is through the Device Manager. Right-click on the Start button, select “Device Manager,” and expand the categories to find the device you want to update. Right-click on the device, select “Update driver,” and follow the on-screen instructions.
Regularly updating your operating system and drivers is crucial for ensuring optimal performance, stability, and security for your PC. By keeping up with the latest updates, you can take advantage of new features, improvements, and bug fixes that can significantly enhance your computing experience.
Remember to check for updates regularly or enable automatic updates to ensure that your operating system and drivers are always up to date. This proactive approach will help you maintain a fast, secure, and efficient PC.
Remove Unnecessary Browser Extensions and Plugins
Browser extensions and plugins can enhance your browsing experience by adding functionality and features to your web browser. However, having too many unnecessary or outdated extensions and plugins can slow down your browser’s performance and even pose security risks. Therefore, it’s essential to regularly review and remove any extensions and plugins that you no longer need. Here’s how you can do it:
- Access Browser Settings: Open your web browser and navigate to the settings menu. The location of the settings may vary depending on the browser you are using. Typically, you can find it by clicking on the three-dot menu icon in the top-right corner of the browser window.
- Manage Extensions: Look for the “Extensions” or “Add-ons” option in the settings menu. Click on it to access the list of installed extensions and plugins.
- Review Installed Extensions: Go through the list of installed extensions and plugins and assess their usefulness. Consider disabling or removing any extensions that you no longer use or are unfamiliar with.
- Disable or Remove Extensions: To disable or remove an extension, click on the respective buttons next to each extension in the list. Disabling an extension will temporarily stop it from running, while removing it will completely uninstall it from your browser.
- Update Extensions: If you decide to keep certain extensions, ensure that they are up to date. Outdated extensions can be a source of security vulnerabilities or compatibility issues, potentially slowing down your browser. Check for updates within the extension settings or visit the developer’s website for the latest version.
By removing unnecessary browser extensions and plugins, you can improve your browser’s performance, responsiveness, and security. With a leaner and more streamlined browser, you’ll experience faster page load times and smoother browsing sessions.
Remember to periodically review your installed extensions and plugins to keep your browser clutter-free. Be mindful of the permissions that extensions request and only install reputable and trusted ones from reliable sources.
By optimizing your browser through the removal of unnecessary extensions and plugins, you’ll enjoy a more efficient and enjoyable browsing experience.
Delete Temporary Files
Temporary files are created by various applications and processes on your computer. While these files serve a purpose in the short term, they can accumulate over time and take up valuable storage space. Deleting temporary files not only frees up disk space but also improves your PC’s performance. Here’s how you can remove temporary files:
- Windows Disk Cleanup: Windows provides a built-in tool called Disk Cleanup that can help you delete temporary files. Simply search for “Disk Cleanup” in the Windows search bar and select the tool from the results. Choose the drive you want to clean up (usually the C: drive) and tick the “Temporary files” option. Click “OK” to begin the cleanup process.
- Manually Delete Temporary Files: If you prefer a more hands-on approach, you can manually delete temporary files. Press Windows + R to open the Run dialog box, type “%temp%”, and hit Enter. This will open the folder containing temporary files. Select all the files and folders within this directory and permanently delete them.
- Browser Temporary Files: Web browsers also accumulate temporary files, such as cache and cookies, which can affect performance. Clearing these files will not only free up space but also ensure that you have the latest versions of websites. Access your browser’s settings, search for cache or temporary files, and follow the instructions to delete them.
- Third-Party Cleanup Tools: If you prefer a more comprehensive cleanup, you can use third-party cleanup tools that automatically detect and remove temporary files from various locations on your computer. Some popular options include CCleaner, BleachBit, and Glary Utilities.
Regularly deleting temporary files is an essential maintenance task that helps keep your computer running smoothly. By freeing up disk space and removing unnecessary files, you can improve performance, reduce clutter, and optimize storage usage.
Remember to perform regular cleanup sessions to keep your PC in top shape. By keeping temporary files in check, you’ll notice an improvement in your computer’s speed and responsiveness.
Run a Disk Cleanup and Disk Defragmenter
To further optimize your PC’s performance, it’s important to regularly run disk cleanup and disk defragmentation. These maintenance tasks can help improve the efficiency and organization of your hard drive, resulting in faster data access and overall system performance. Here’s how you can perform these tasks:
- Disk Cleanup: Disk Cleanup is a built-in Windows utility that helps you remove unnecessary files from your hard drive. To access it, search for “Disk Cleanup” in the Windows search bar and select the tool from the results. Choose the drive you want to clean up (usually the C: drive) and select the types of files you wish to remove, such as temporary files, system files, and recycle bin items. Click “OK” to begin the cleanup process, and follow the on-screen prompts.
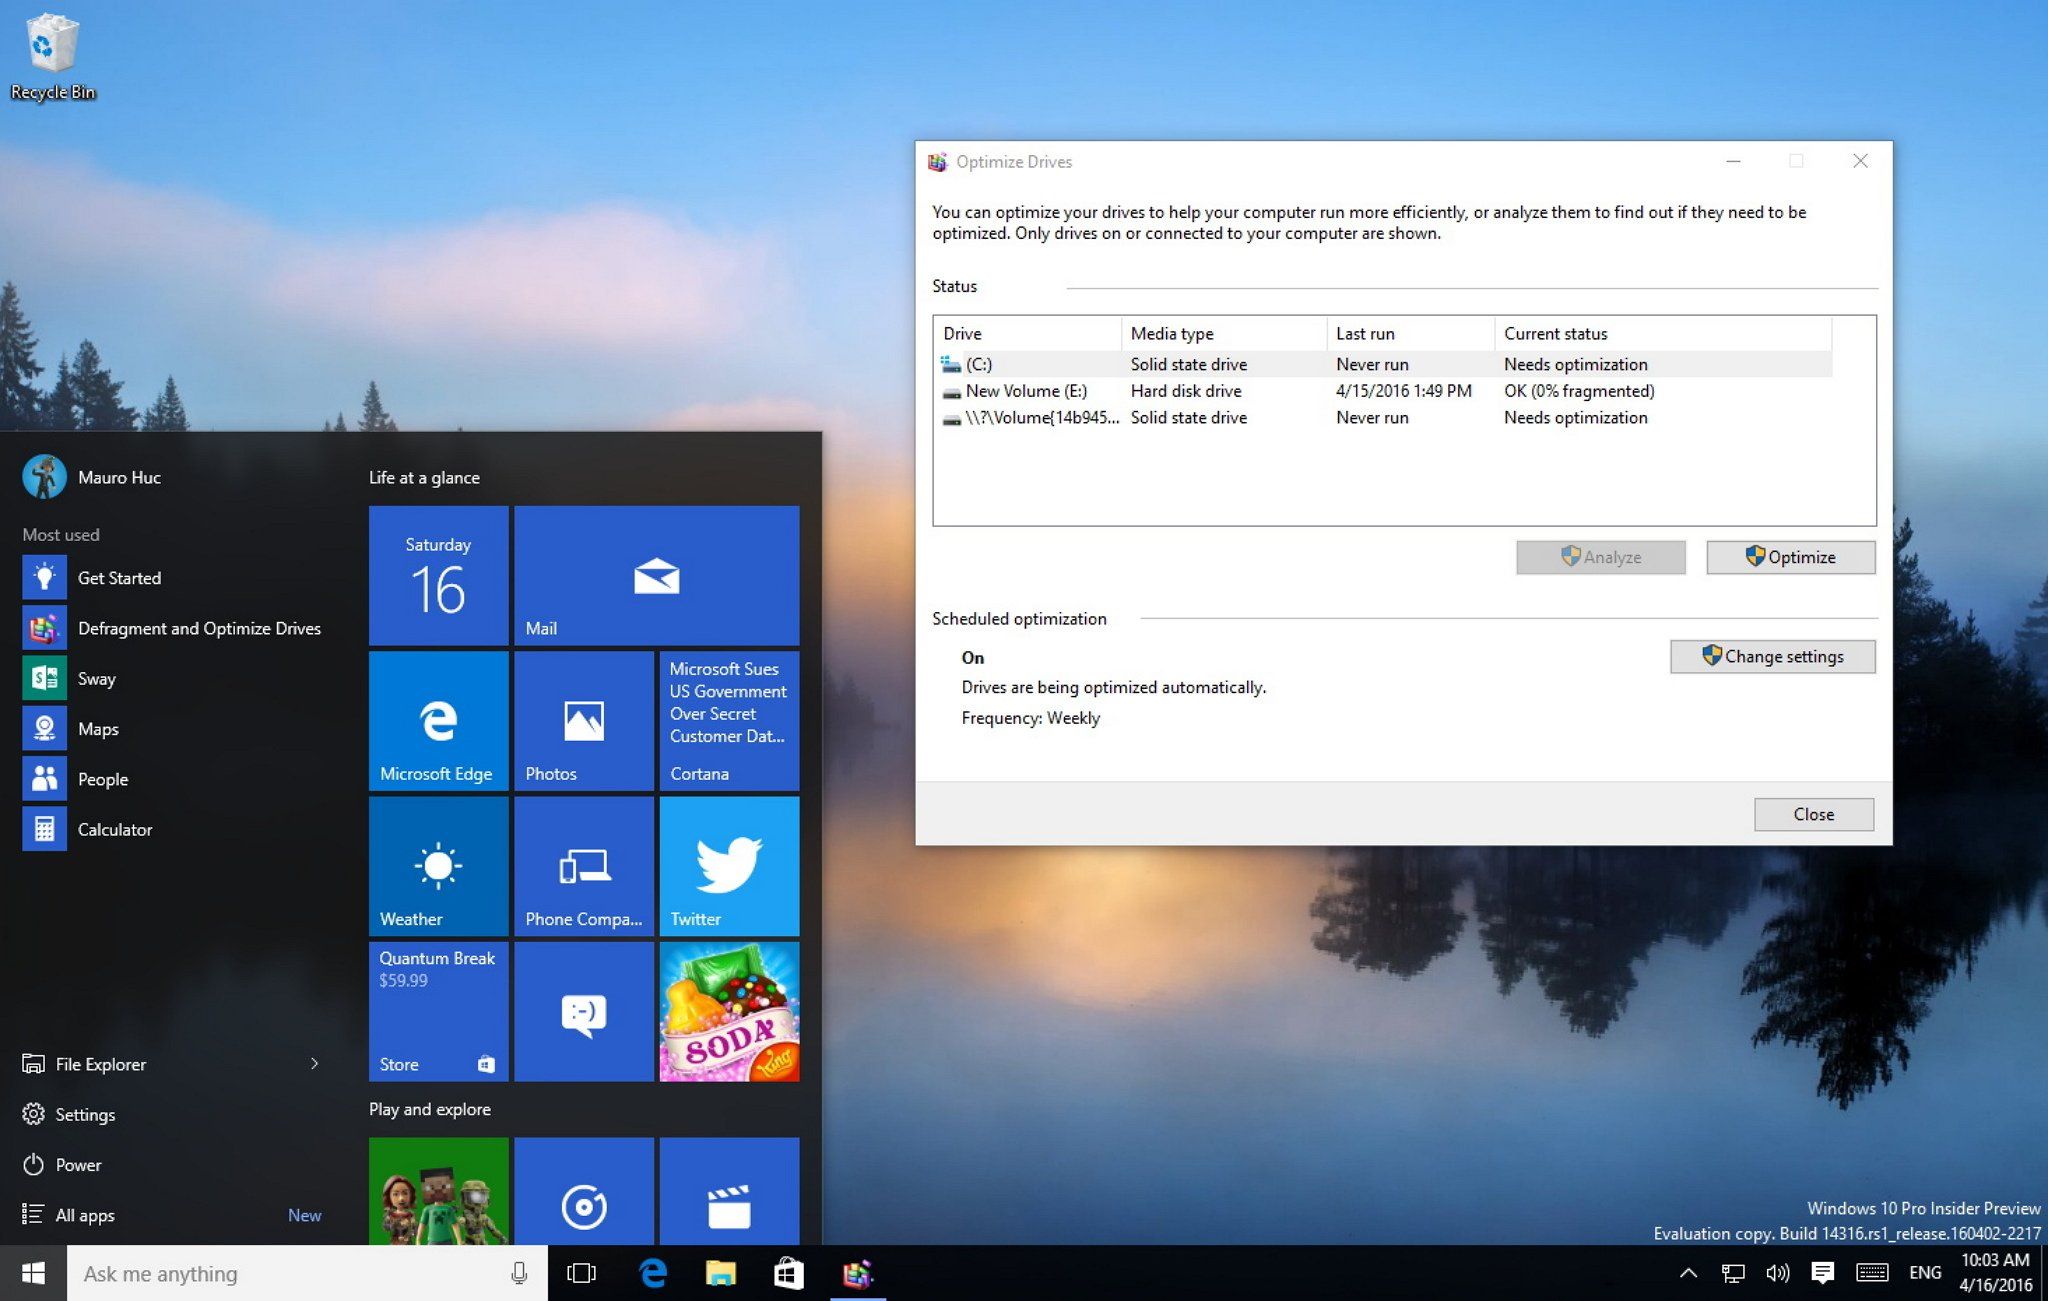
- Disk Defragmenter: Disk fragmentation occurs when files on your hard drive are not stored contiguously, leading to slower data access. Running a disk defragmentation process helps reorganize files and optimize their placement on the hard drive. To access the Disk Defragmenter tool, search for “Defragment and Optimize Drives” in the Windows search bar and select the tool from the results. Choose the drive you want to defragment (usually the C: drive) and click “Analyze” to check the fragmentation level. If significant fragmentation is detected, click “Optimize” to begin the defragmentation process.
- Scheduled Tasks: You can also schedule regular disk cleanup and disk defragmentation tasks to ensure they are performed automatically. In the Disk Cleanup and Disk Defragmenter tools, click on the “Configure schedule” option to set the frequency and timing of these tasks.
- Third-Party Tools: Alternatively, you can use third-party disk optimization and cleaning tools that provide more in-depth analysis and optimization options. Some popular tools include Auslogics Disk Defrag, Defraggler, and Wise Disk Cleaner.
Running disk cleanup and disk defragmentation are essential steps in maintaining a well-optimized and high-performing hard drive. By regularly performing these tasks, you can improve data access times, reduce file fragmentation, and ensure that your computer runs at its best.
Keep in mind that the frequency at which you perform disk cleanup and disk defragmentation may vary depending on your usage patterns and the size of your hard drive. However, a general rule of thumb is to perform these tasks at least once every few months to maintain optimal system performance.
Upgrade Your Hardware
If you’ve tried various software optimizations and your PC continues to run slowly, it may be time to consider upgrading your hardware. Upgrading specific components can significantly enhance your computer’s performance and allow it to handle more demanding tasks. Here are some hardware upgrades to consider:
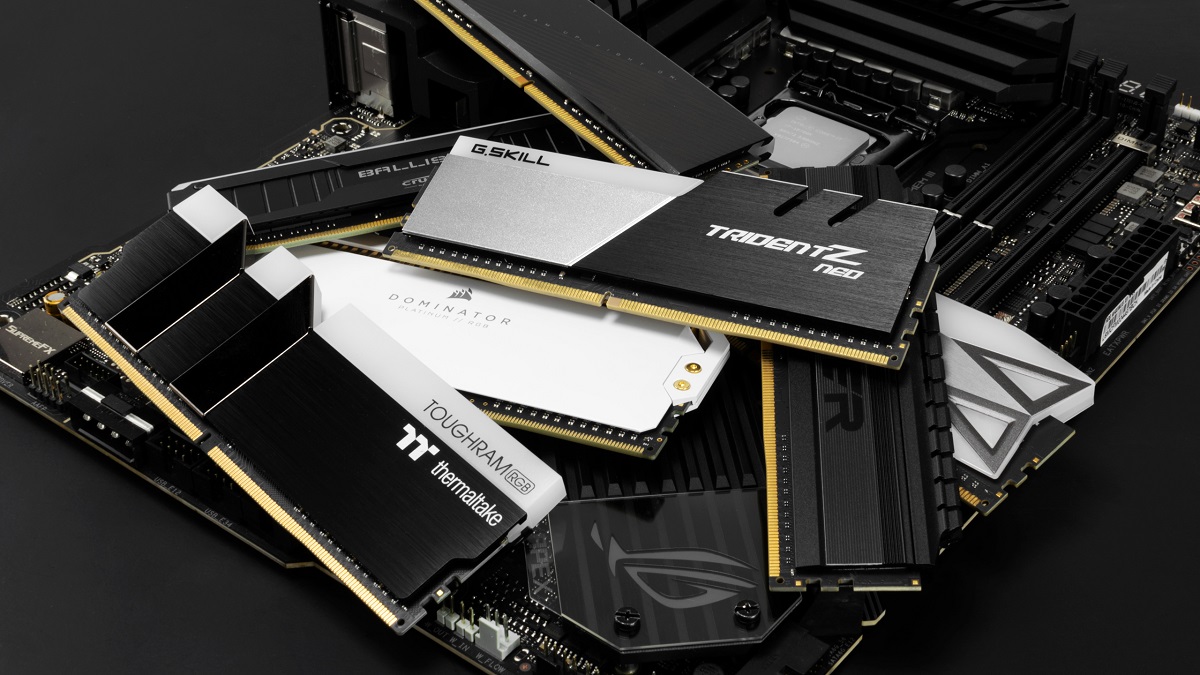
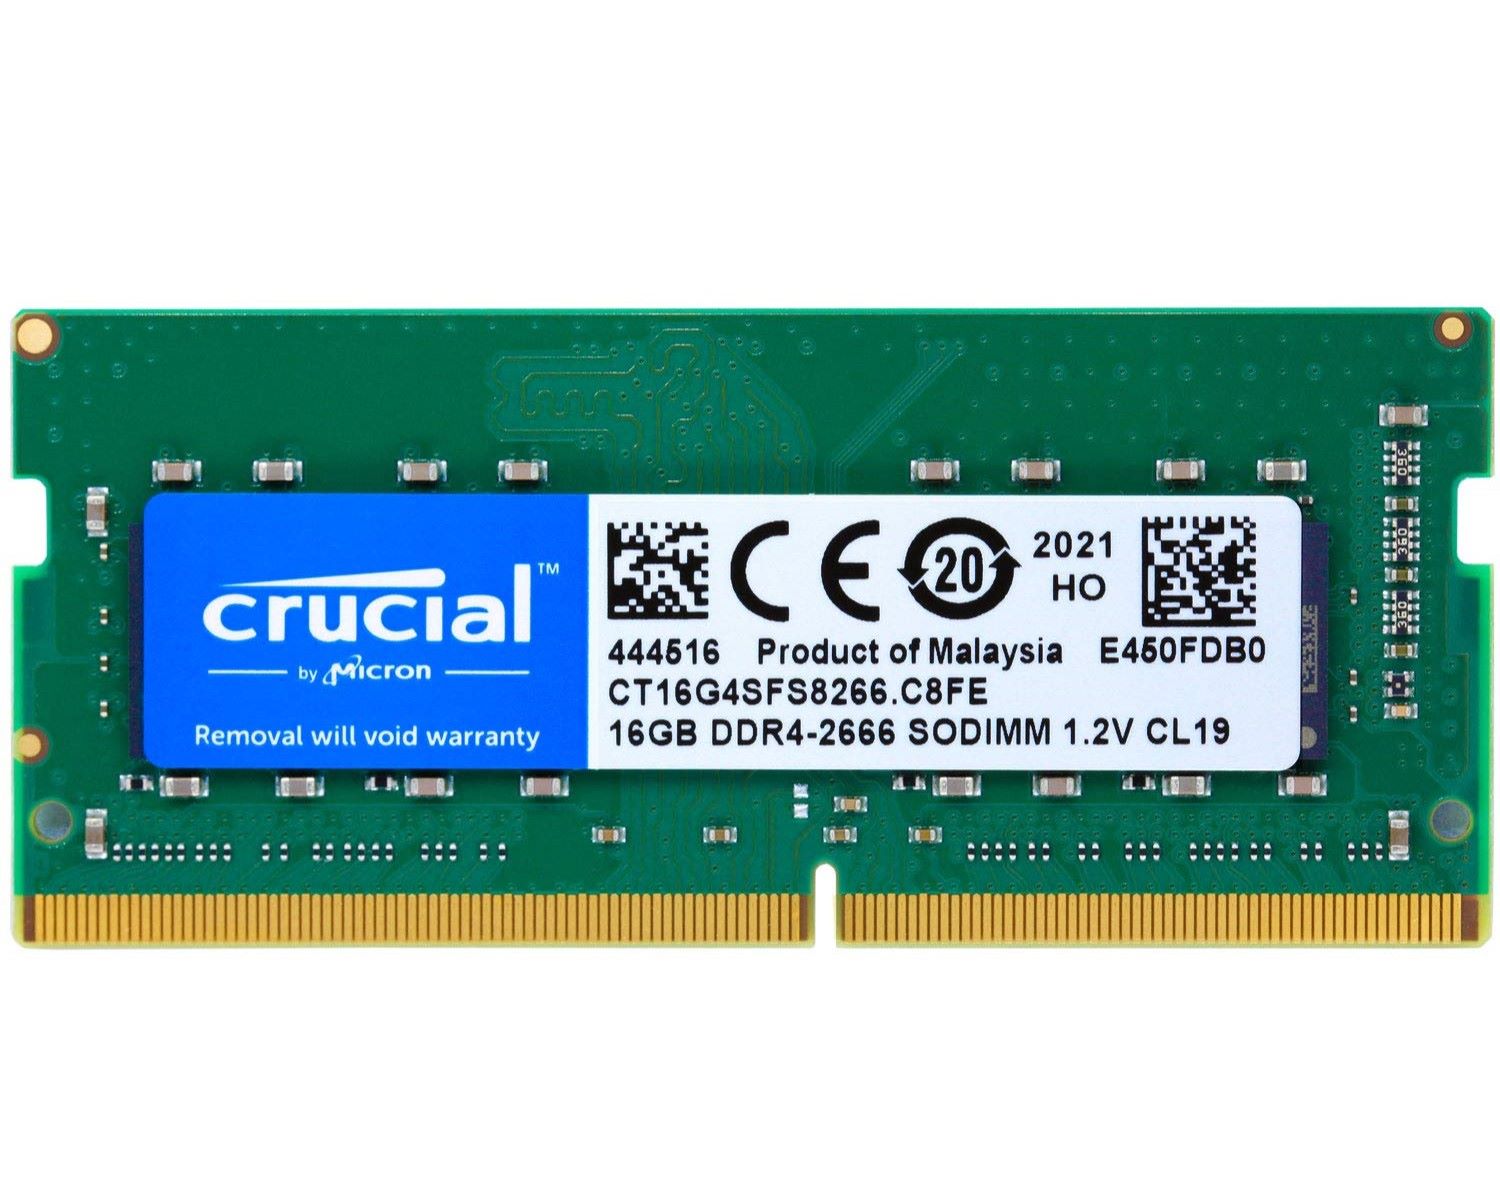
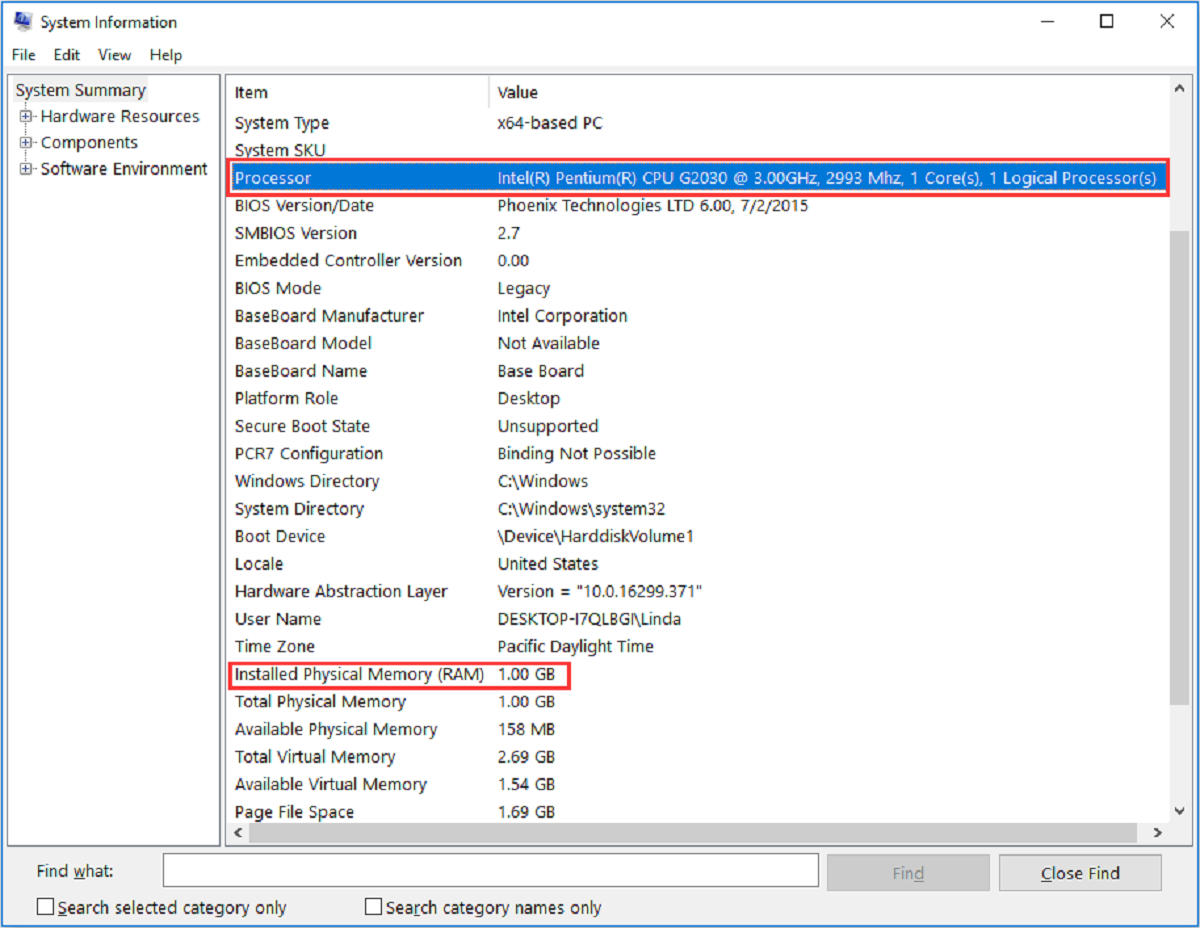
- RAM (Random Access Memory): Increasing the amount of RAM in your computer can significantly improve its multitasking capabilities and overall speed. With more RAM, your PC can store and access more data simultaneously, resulting in smoother performance when running multiple applications or resource-intensive tasks.
- Storage Drive: If your computer still uses a traditional hard disk drive (HDD), upgrading to a solid-state drive (SSD) can have a dramatic impact on performance. SSDs offer faster data access times, quicker boot-ups, and reduced loading times for applications and files.
- Graphics Card: For gamers or those who work with graphic-intensive applications, upgrading your graphics card can enhance the visual experience and improve performance. A more powerful graphics card can handle complex visuals and render high-resolution graphics with ease.
- Processor (CPU): The CPU is the brain of your computer and plays a crucial role in its overall performance. Upgrading to a faster and more efficient processor can boost your PC’s speed, responsiveness, and multitasking capabilities.
- Additional Components: Depending on your specific needs, you may also consider upgrading other components such as the motherboard, power supply unit (PSU), or adding additional cooling solutions to optimize performance and support hardware upgrades.
Before upgrading any hardware components, it’s important to research and ensure compatibility with your existing system. Consider factors such as your computer’s specifications, power requirements, and budget.
Upgrading your hardware can breathe new life into an aging PC, allowing it to handle modern applications and tasks more efficiently. However, it’s important to weigh the cost of upgrading against the potential performance gains to determine if it’s the right investment for your needs.
If you’re unsure about the hardware upgrade process, consulting with a professional or an experienced technician can provide valuable guidance and ensure a smooth transition to the improved hardware configuration.
Conclusion
In conclusion,
We’ve explored various methods to optimize the speed and performance of your PC. By implementing these strategies, you can make your computer run faster, improve responsiveness, and enhance your overall computing experience.
Start by cleaning up your hard drive, removing unnecessary files, and uninstalling unused programs. This will free up valuable storage space and reduce the strain on your system resources. Additionally, disabling startup programs and visual effects can further streamline your PC’s performance.
Regularly updating your operating system and drivers is crucial for maintaining optimal performance and security. Keep in mind that outdated software can lead to compatibility issues and potential vulnerabilities.
Don’t forget about your web browser – removing unnecessary extensions and plugins can help improve browsing speed and reduce clutter.
An often overlooked aspect of PC performance is the maintenance of your hard drive. Running disk cleanup and defragmentation can optimize data access and organization, further enhancing overall speed.
If you find that these software optimizations are not enough, upgrading your hardware components can provide a significant boost. Consider upgrading your RAM, storage drive, graphics card, or processor based on your specific needs and budget.
It’s important to note that these steps can differ depending on your operating system and hardware configuration. Always research and ensure compatibility before making any changes or upgrades.
Remember, taking a proactive approach to optimizing your PC’s performance and regularly maintaining it can help ensure that it runs efficiently and smoothly for years to come.