Introduction
Capturing screenshots is an essential skill for PC users, whether you need to share important information, demonstrate a software issue, or simply save a moment from your digital life. Fortunately, taking screenshots on a PC is a straightforward process, and there are several methods to choose from depending on your specific needs. In this article, we will explore various ways to take screenshots on a PC, ranging from basic keyboard shortcuts to advanced tools.
With these screenshot techniques at your disposal, you’ll be able to effortlessly capture images of your desktop, individual windows, or specific areas of the screen. Whether you’re a casual user or a professional in need of regular screenshots, understanding these methods will save you time and effort.
In the following sections, we’ll cover different techniques for capturing screenshots on your PC. We’ll start with the simplest method using the Print Screen (PrtScn) key, which is available on virtually all keyboards. Then, we’ll explore alternative shortcuts like Alt + Print Screen (Alt + PrtScn) and Windows Key + Shift + S. Additionally, we’ll introduce you to the Snipping Tool, Snip & Sketch Tool, and Game Bar, which provide additional functionalities and convenience.
Once you’ve captured a screenshot, you may also need to save or edit it. We’ll guide you through the process of saving and organizing your screenshots, as well as basic editing techniques to enhance your images. By the end of this article, you’ll be well-versed in the art of taking screenshots on your PC and confident in your ability to capture and modify images to suit your needs.
Different Methods to Take Screenshots on PC
Taking screenshots on a PC can be done in several ways, depending on your preferences and the specific features available on your system. Here, we will discuss various methods, from basic keyboard shortcuts to specialized tools, that you can use to capture screenshots on your PC.
One of the most straightforward methods is using the Print Screen (PrtScn) key. This key is typically located in the top-right section of your keyboard, and pressing it captures an image of the entire screen. You can then paste the screenshot into an image-editing program like Paint or save it directly to your clipboard for future use.
If you wish to capture only the active window and not the entire screen, you can use the Alt + Print Screen (Alt + PrtScn) key combination. This captures the contents of the currently active window and allows you to paste it into an image editor or other applications.
Windows Key + Shift + S is another useful shortcut for taking screenshots on a PC. Pressing this combination allows you to select a specific area of the screen to capture. After selecting the area, the screenshot is then saved to your clipboard, allowing you to easily paste it into an image editor or any other desired application.
If you need more advanced screenshot capabilities, you can use the Snipping Tool, a built-in Windows utility. The Snipping Tool lets you capture screenshots of specific areas on your screen, including rectangular or free-form selections, windows, or the entire screen. It also provides options for adding annotations and highlights to your screenshots before saving them.
An alternative to the Snipping Tool is the Snip & Sketch Tool, which is available in Windows 10. This tool offers similar features to the Snipping Tool but with a more modern interface and additional functionalities. It allows you to capture screenshots, make annotations, and save or share the images effortlessly.
If you’re a gamer, the Game Bar feature in Windows 10 enables you to capture screenshots while playing games. By pressing Windows Key + G, you can access the Game Bar overlay, which provides a variety of gaming options, including the ability to take screenshots and record gameplay videos.
These are just a few of the different methods available for taking screenshots on a PC. Each offers its own advantages and capabilities, allowing you to select the method that best suits your needs and preferences. Experiment with these options to find the method that is most convenient and efficient for your screenshot-taking requirements.
Using the Print Screen (PrtScn) Key
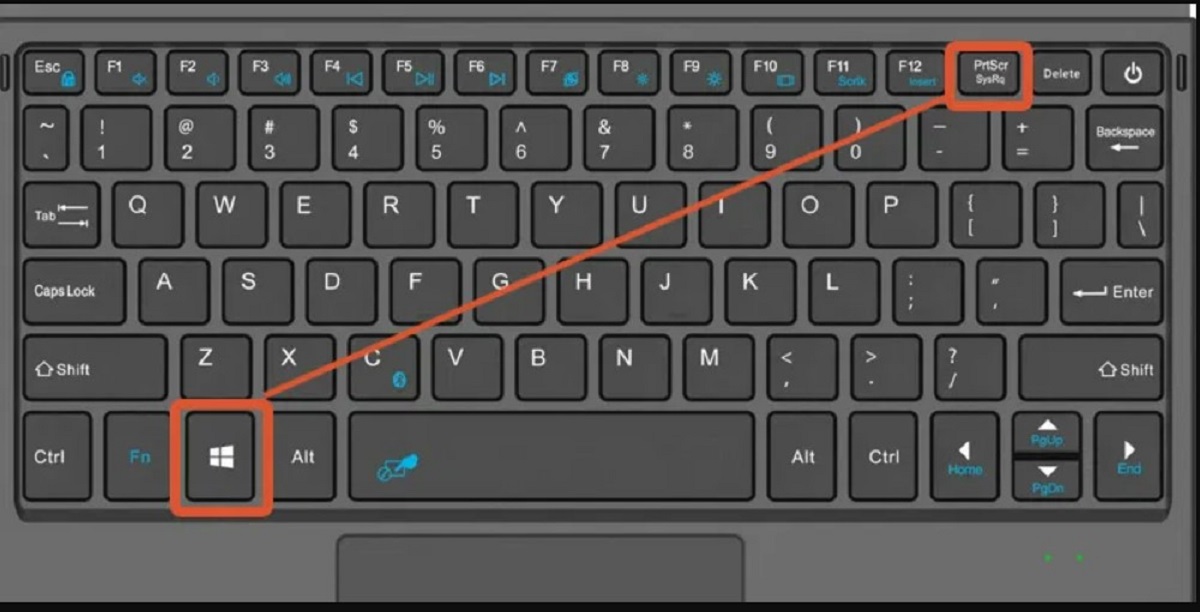
One of the simplest and most widely used methods to capture a screenshot on a PC is by using the Print Screen (PrtScn) key. This key is typically located in the top-right section of your keyboard, often abbreviated as “PrtScn” or “PrtSc”. When you press this key, it captures an image of the entire screen and stores it in your computer’s clipboard.
To capture a screenshot using the Print Screen key, follow these steps:
- Make sure the content you want to capture is visible on your screen.
- Locate the Print Screen (PrtScn) key on your keyboard. It may be labeled differently depending on your keyboard layout.
- Press the Print Screen key. You won’t receive any visual feedback indicating that the screenshot has been taken, but rest assured, it’s been saved to your clipboard.
Once you’ve captured the screenshot, you can paste it into an image-editing program like Paint or a document-processing application like Microsoft Word or Google Docs using the Ctrl + V keyboard shortcut. You can then save or further edit the screenshot as needed.
Please note that when using the Print Screen key, you only capture a static image of your entire screen. It does not allow you to select a specific area or a particular window. If you want to capture a specific window, you’ll need to use alternate methods like the Alt + Print Screen (Alt + PrtScn) key combination.
The Print Screen method is convenient and works on all versions of Windows. However, keep in mind that it captures the entire screen, including multiple monitors if you have them connected. If you only need a portion of the screen or want to capture a specific window, consider using one of the other methods we’ll explore further in this article.
Take advantage of the simplicity and effectiveness of the Print Screen key to quickly capture screenshots of your entire screen. It’s a versatile method that can be used in various situations, whether you want to share information, illustrate a point, or troubleshoot technical problems.
Using the Alt + Print Screen (Alt + PrtScn) Key Combination
In situations where you want to capture a screenshot of a specific window instead of the entire screen, you can use the Alt + Print Screen (Alt + PrtScn) key combination. This convenient shortcut captures only the contents of the currently active window, allowing you to capture a specific application or program without capturing unnecessary elements from the rest of your screen.
To capture a screenshot of the active window using the Alt + Print Screen key combination, follow these steps:
- Ensure that the window you want to capture is active and in focus.
- Locate the Alt and Print Screen (PrtScn) keys on your keyboard.
- Press and hold the Alt key, then press the Print Screen key.
Similar to using the Print Screen key alone, you won’t receive any visual feedback to indicate that the screenshot has been taken. However, rest assured that the screenshot has been saved to your clipboard. You can then paste it into an image-editing program or other applications using the Ctrl + V keyboard shortcut.
It is important to note that the Alt + Print Screen method captures the active window only, making it ideal for capturing specific program windows or dialog boxes. This method is particularly useful when you want to highlight a specific aspect of an application or demonstrate a software issue to others.
Keep in mind that the Alt + Print Screen key combination captures the window as it appears on your screen. This means that if the window is not fully visible or has a popup menu or tooltip obscuring part of it, those elements will also be captured in the screenshot. Therefore, it is essential to position and size the window accordingly before using this method to ensure a clean and accurate screenshot.
By utilizing the Alt + Print Screen key combination, you have the flexibility to capture specific windows or dialog boxes with ease. This method saves time and eliminates the need for cropping or editing screenshots later, allowing you to quickly share important information or troubleshoot software-related issues.
Using Windows Key + Shift + S Shortcut
Windows 10 introduced a powerful and convenient shortcut for capturing screenshots called Windows Key + Shift + S. This shortcut allows you to quickly select and capture a specific area of the screen, providing more flexibility than the traditional Print Screen method. With this feature, you can easily capture rectangular or free-form selections without capturing unnecessary elements from your screen.
To capture a screenshot using the Windows Key + Shift + S shortcut, follow these steps:
- Make sure the content you want to capture is visible on your screen.
- Press the Windows Key + Shift + S combination simultaneously.
- Your screen will fade and display a cursor that can be used to drag and select the desired area to capture.
- Click and drag the cursor to select a rectangular or free-form area. As you drag, you can see the dimensions of the selected area.
- Release the mouse button to capture the selected area.
After capturing the screenshot, it will be automatically saved to your clipboard. You can then paste it into an image-editing program or other applications using the Ctrl + V keyboard shortcut. Alternatively, you can annotate or share the screenshot directly using the notification that appears in the lower-right corner of your screen.
The Windows Key + Shift + S shortcut is especially useful when you only need to capture a specific portion of the screen or when you want to capture irregular shapes or specific details within an application or webpage. This feature is also helpful for capturing screenshots of multi-monitor setups, as it allows you to select the specific area you want to capture, regardless of which monitor it is on.
It’s worth noting that the Windows Key + Shift + S shortcut is available on Windows 10 and later versions. If you’re using an older version of Windows, you may need to rely on alternative methods for capturing specific areas of the screen, such as using specialized software or the built-in Snipping Tool.
By leveraging the Windows Key + Shift + S shortcut, you can quickly and precisely capture the exact areas of your screen that you need. This method offers enhanced flexibility and control, making it a valuable tool for capturing screenshots in various scenarios.
Using the Snipping Tool
The Snipping Tool is a built-in utility in Windows that offers more advanced screenshot-taking options compared to the basic Print Screen method. It allows you to capture screenshots of specific areas on your screen, such as rectangular or free-form selections, windows, or the entire screen. Additionally, the Snipping Tool provides basic annotation features to highlight or draw on your screenshots before saving or sharing them.
To use the Snipping Tool to capture screenshots on a PC, follow these steps:
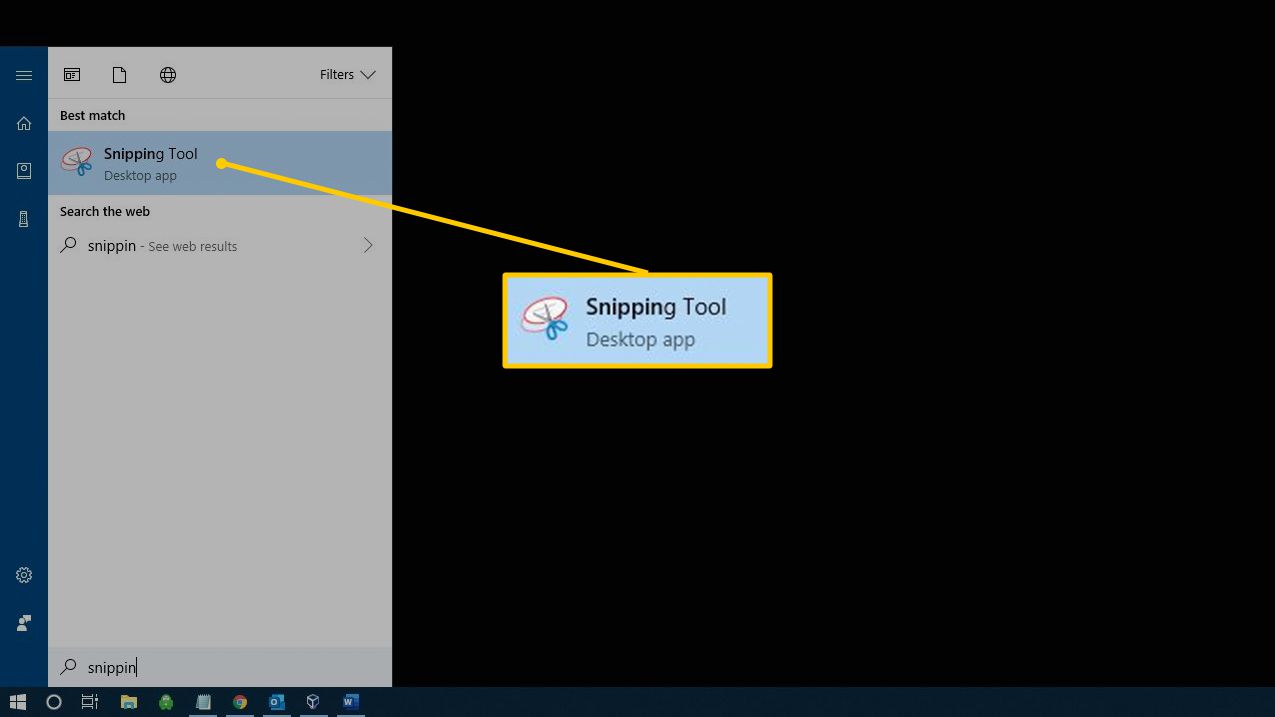
- Open the Snipping Tool by either searching for it in the Start menu or accessing it through the Windows Accessories folder in the Start menu.
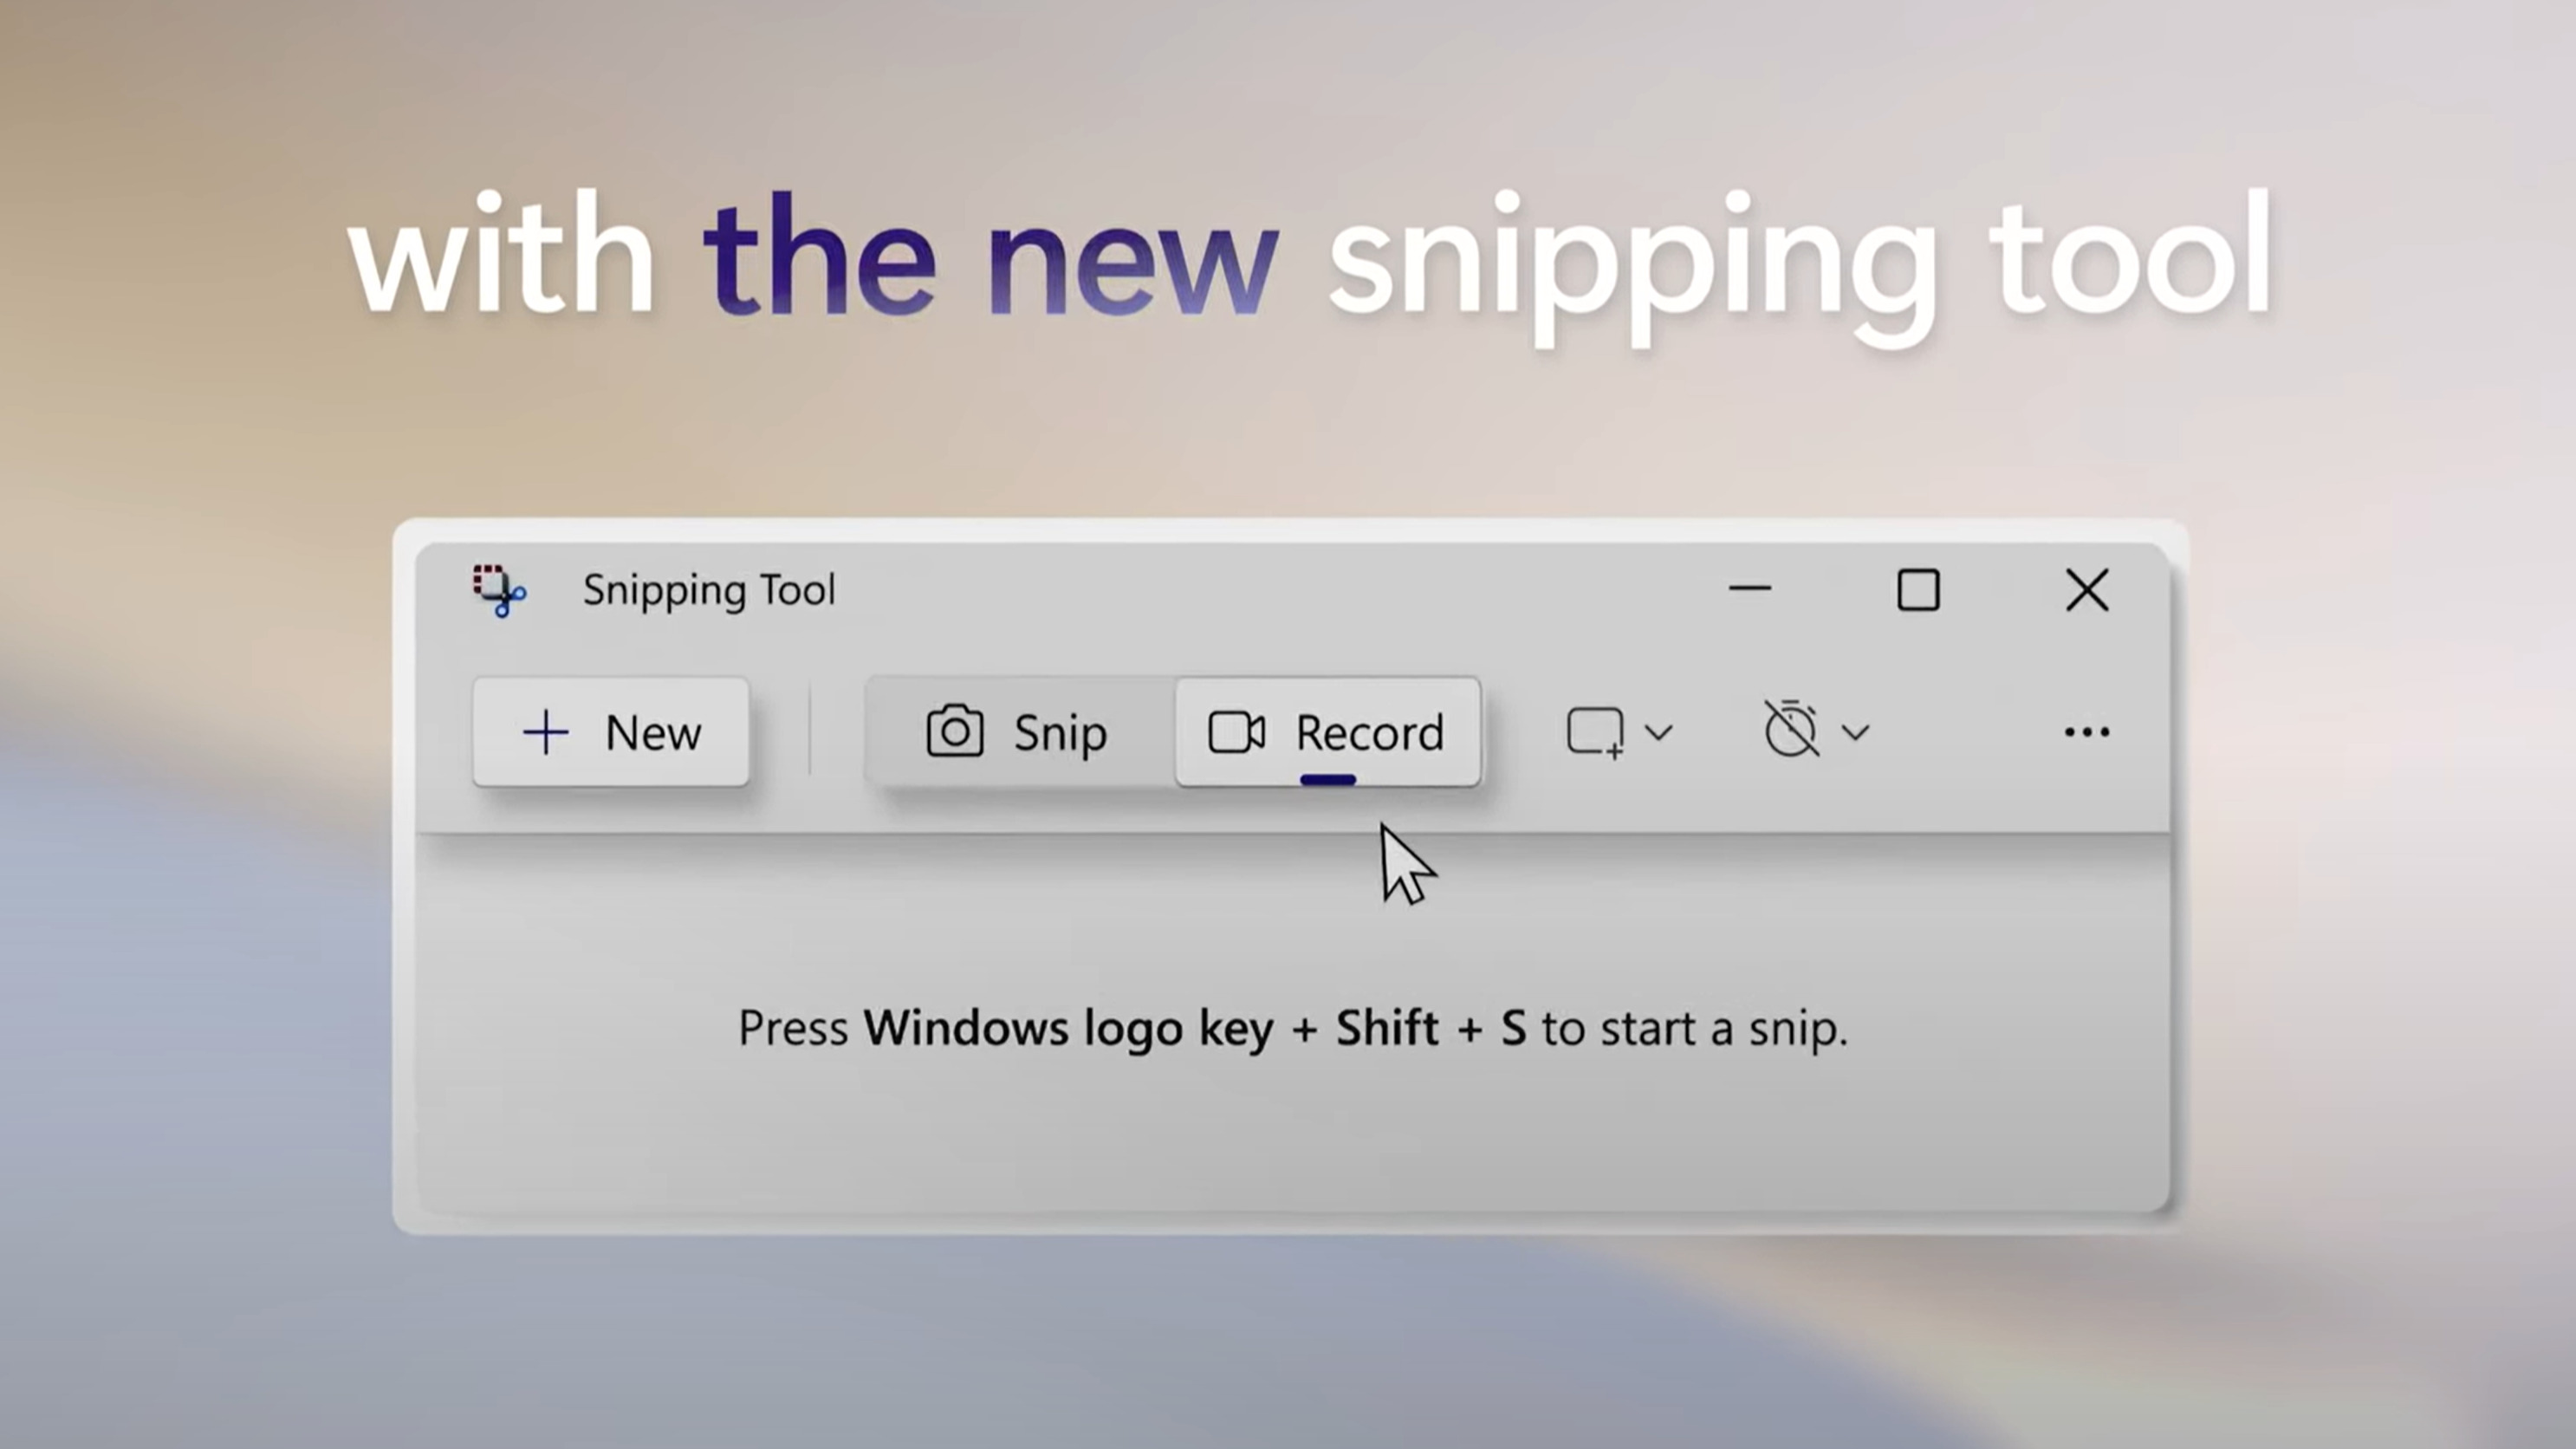
- Click on the “New” button in the Snipping Tool window.
- Once you click “New,” your screen will fade, and the Snipping Tool overlay will appear.
- Choose from the four available snip options: Free-form Snip, Rectangular Snip, Window Snip, or Full-screen Snip.
- Click and drag to select the area you want to capture.
- Release the mouse button to capture the selected area.
- After capturing the screenshot, the Snipping Tool window will open, displaying your screenshot.
- Use the available editing tools, such as the pen or highlighter, to annotate or draw on your screenshot if desired.
- Click on the “File” menu and choose “Save As” to save the screenshot to your desired location.
The Snipping Tool provides a convenient way to capture and edit screenshots on your PC. Its versatility allows you to capture specific portions of your screen with precision, making it ideal for showcasing particular details, cropping out unnecessary elements, or illustrating software issues.
In addition to capturing screenshots, the Snipping Tool offers various editing options. You can use the pen or highlighter tool to draw attention to specific areas, add text annotations, or erase unwanted elements from your screenshot. These basic editing features provide the ability to customize and enhance your screenshots directly within the Snipping Tool.
Please note that the Snipping Tool is available in Windows 7, Windows 8, and Windows 10. However, in Windows 10, Microsoft has introduced the Snip & Sketch tool, which offers similar features and an enhanced interface. If you’re using Windows 10, you may prefer using the Snip & Sketch tool instead of the Snipping Tool.
By utilizing the Snipping Tool, you can capture specific portions of your screen with ease and make simple annotations to highlight important details or troubleshoot software-related issues. Take advantage of the versatility and functionality offered by the Snipping Tool to enhance your screenshot-taking process.
Using the Snip & Sketch Tool
The Snip & Sketch tool is a screenshot utility introduced in Windows 10 that provides an improved interface and enhanced features compared to the traditional Snipping Tool. With Snip & Sketch, you can capture screenshots of specific areas on your screen, annotate them with various tools, and easily save or share the screenshots.
To use the Snip & Sketch tool to capture screenshots on your PC, follow these steps:
- Open the Snip & Sketch tool by either searching for it in the Start menu or using the Windows Key + Shift + S shortcut. Alternatively, you can find it in the notification center by clicking on the “Screen snip” button.
- Once the Snip & Sketch tool is open, a white overlay will appear on your screen with various options at the top.
- Choose from the available snip options: Rectangular Snip, Freeform Snip, Window Snip, or Fullscreen Snip. Alternatively, you can use the “Delay” option to create a time delay before capturing the screenshot.
- Click and drag to capture the desired area or window, or simply click for a full-screen capture, depending on your chosen snip option.
- After capturing the screenshot, the Snip & Sketch editor will open, allowing you to annotate or edit the screenshot using tools like a pen, highlighter, or text box.
- Once you have finished editing your screenshot, click on the “Save” or “Copy” button to save or copy the screenshot to your desired location.
The Snip & Sketch tool offers several advantages over the traditional Snipping Tool. Its improved interface and ease of use make it more intuitive for capturing, editing, and saving screenshots. The ability to select specific areas or windows, along with the added annotation tools, allows you to customize and enhance your screenshots directly within the Snip & Sketch tool itself.
In addition to basic editing tools, the Snip & Sketch tool also provides options for cropping, resizing, and rotating your screenshots. These features enable you to fine-tune your screenshots and make them more visually appealing or suitable for specific purposes.
Furthermore, the Snip & Sketch tool integrates seamlessly with other Windows apps and features. For example, you can use the Windows Ink Workspace or the built-in sharing functionality to quickly share your screenshots via email or social media platforms.
The Snip & Sketch tool is a valuable addition to Windows 10, catering to users who frequently capture and share screenshots. Its user-friendly interface and extensive editing options make it a versatile tool for various screenshot-taking scenarios, whether you’re highlighting specific details, documenting software issues, or sharing information with others.
Using the Game Bar
Windows 10 offers a built-in Game Bar feature that not only allows users to capture gameplay footage but also enables them to take screenshots while playing games or using other applications. The Game Bar provides a convenient way to capture screenshots without interrupting your gameplay or switching to another window.
To use the Game Bar to capture screenshots on your PC, follow these steps:
- While running a game or any application, press Windows Key + G to open the Game Bar overlay.
- Click on the “Camera” icon on the Game Bar, which represents the screenshot capture feature.
- The screen will briefly dim, indicating that a screenshot has been taken.
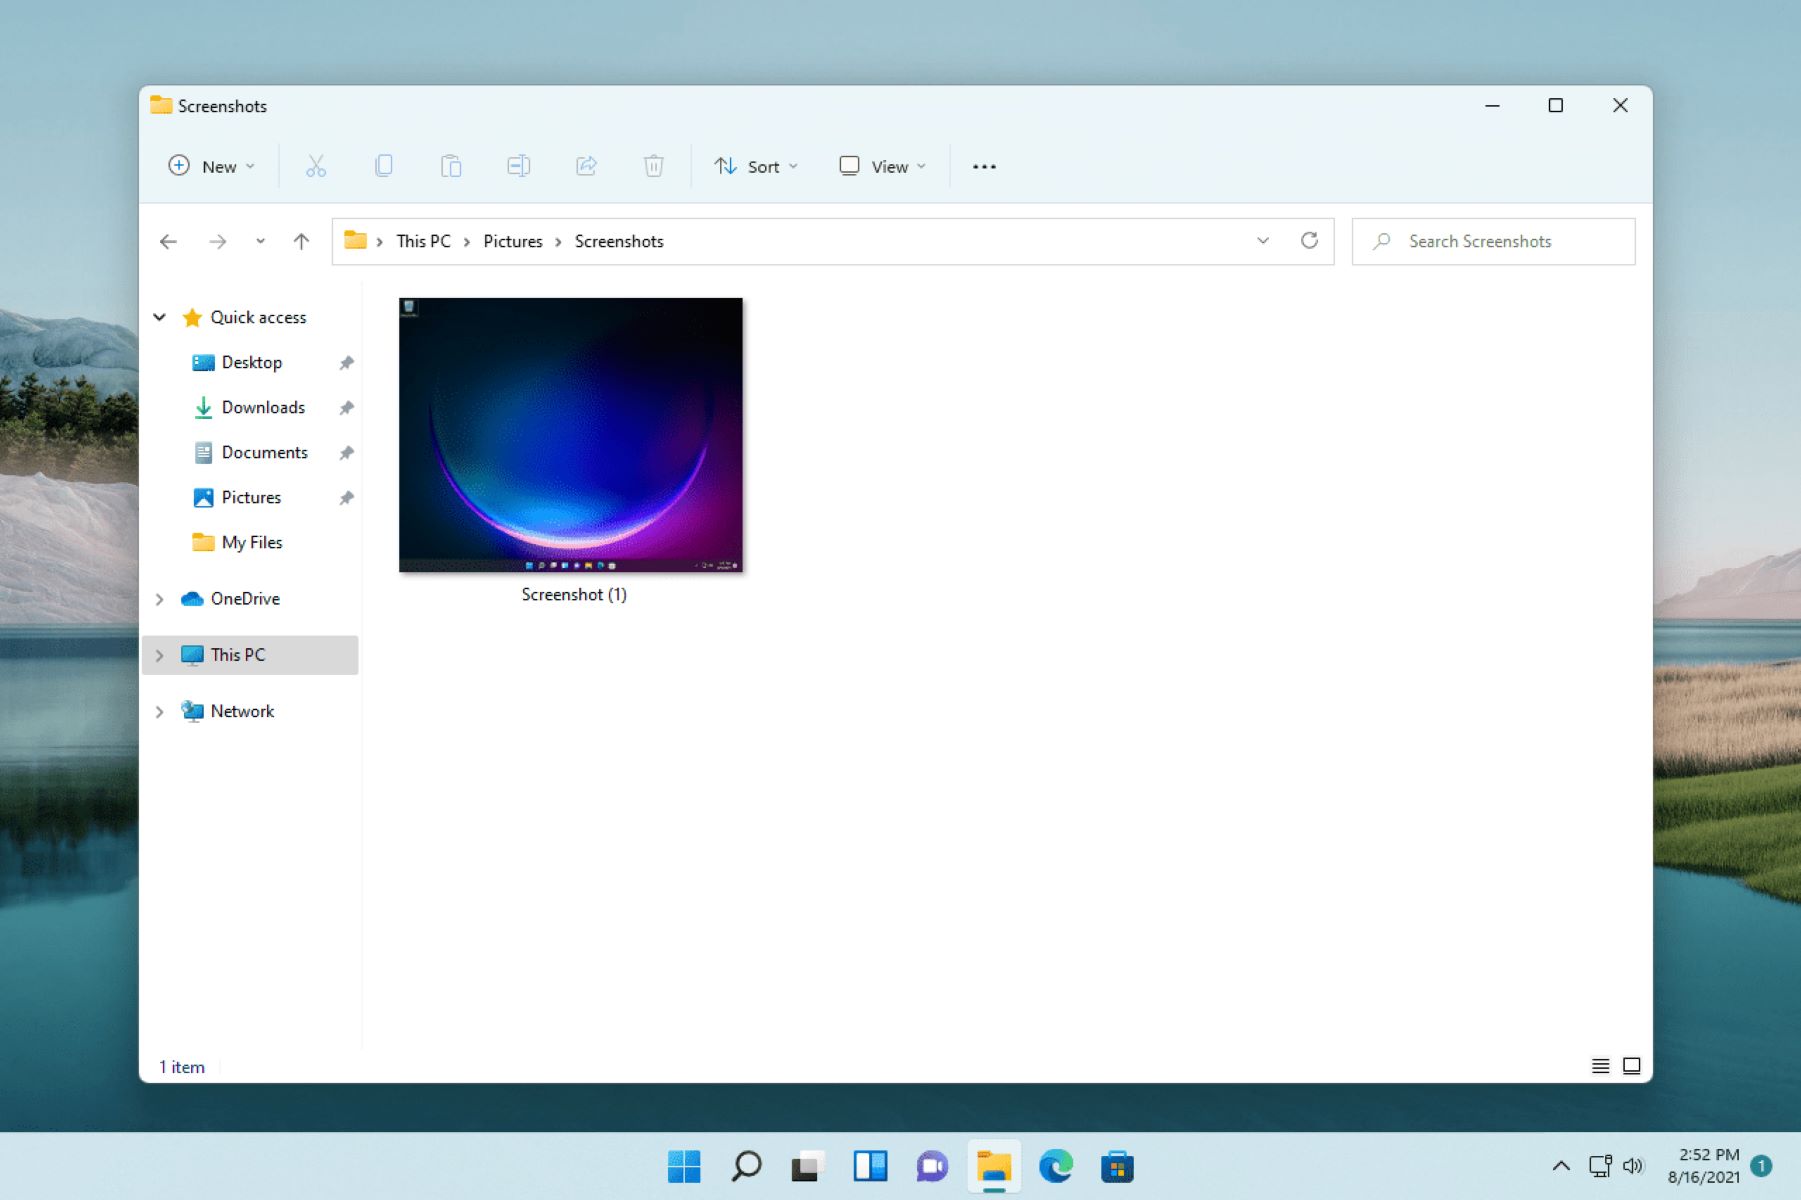
- The screenshot will be automatically saved in the “Captures” folder within the “Videos” folder in your user profile directory.
- You can access the saved screenshots by opening the “File Explorer” and navigating to the “Videos” folder, then accessing the “Captures” subfolder.
The Game Bar also offers additional features such as recording gameplay videos and broadcasting to streaming platforms, making it a versatile tool for gamers. It provides various customization options, allowing you to define the preferred settings for screenshots, such as the folder location and hotkey bindings.
While the Game Bar is primarily known for its gaming-related features, it can also capture screenshots of non-gaming applications or your desktop. This makes it useful for anyone needing to quickly capture and save screenshots without having to rely on external software or complex keyboard shortcuts.
Please note that the Game Bar is available by default in Windows 10, but sometimes it may not be enabled. In such cases, you can enable it by going to “Settings,” selecting “Gaming,” and then enabling the “Record game clips, screenshots, and broadcast using Game Bar” option.
From recording gameplay highlights to capturing important moments in non-gaming applications, the Game Bar offers a convenient way to capture screenshots on your PC. Its integration with Windows 10 and ease of use make it a valuable tool for capturing and saving screenshots without interrupting your workflow or gameplay.
Saving and Editing Screenshots
Once you’ve captured a screenshot on your PC, there are several options available for saving and editing the image to suit your needs. Whether you want to organize your screenshots, make adjustments, or add annotations, these steps will guide you through the process.
After capturing a screenshot using any of the methods discussed earlier, you can easily save it to your preferred location. When pasting a screenshot into an image-editing program like Paint, you can simply click on “File” and then choose “Save” to save the screenshot as an image file (e.g., PNG or JPEG) on your computer.
If you’re using the Snipping Tool, Snip & Sketch Tool, or Game Bar, you’ll have the option to save the screenshot directly from their interfaces. These tools typically provide a “Save” or “Save As” option to choose the file format and location for saving the screenshot.
Once your screenshot is saved, you can then proceed to edit it using image-editing software. Windows offers basic editing functionalities through programs like Paint, allowing you to crop, resize, apply filters, or make other adjustments to your screenshot. However, if you require more advanced editing capabilities, you may want to consider third-party graphic design software.
In addition to basic editing, you may also need to annotate or highlight specific areas of your screenshot. The Snipping Tool, Snip & Sketch Tool, and some third-party editing software provide built-in annotation tools such as text boxes, drawing tools, and highlighting functions. These features allow you to add arrows, shapes, text, or any other visual elements to emphasize or explain elements within the screenshot.
Moreover, some image-editing software allows you to apply additional effects, adjust colors, or retouch the image if necessary. These advanced editing options can help enhance the visual appeal or clarity of your screenshot.
Once you’ve finished editing and annotating your screenshot, remember to save the changes to ensure that your modifications are preserved. It’s a good practice to save both the original and edited versions of your screenshots in case you need to refer back to them later.
Organizing your screenshots is also essential, particularly if you frequently capture and save multiple images. Consider creating dedicated folders to keep your screenshots organized and easily accessible. This way, you can quickly find and retrieve specific screenshots when needed.
By utilizing the various saving and editing options available, you can ensure that your screenshots are tailored to your requirements and effectively communicate the information you want to convey.
Conclusion
Capturing screenshots on your PC is a valuable skill that allows you to share information, troubleshoot issues, and document important moments. Throughout this article, we’ve explored different methods for taking screenshots on a PC, from using keyboard shortcuts like Print Screen (PrtScn) and Alt + Print Screen (Alt + PrtScn) to utilizing specialized tools like the Snipping Tool, Snip & Sketch Tool, and Game Bar.
The Print Screen method is a straightforward option for capturing the entire screen, while the Alt + Print Screen combination allows you to focus on specific windows. The Windows Key + Shift + S shortcut provides the flexibility to select and capture specific areas, while the Snipping Tool and Snip & Sketch Tool offer more advanced features like annotation and editing capabilities.
For gamers, the Game Bar serves as a convenient way to capture screenshots while playing games, ensuring that you never miss a memorable moment. It also offers additional features for recording gameplay and broadcasting to streaming platforms.
Once you’ve captured a screenshot, you can save it to your preferred location and edit it using image-editing software. Basic editing options such as cropping, resizing, and adding annotations allow you to customize your screenshots, while more advanced software provides additional editing capabilities to enhance image quality or apply special effects.
Remember to save and organize your screenshots in dedicated folders to keep them easily accessible and retrievable. This ensures that you can quickly find and utilize the screenshots as needed, whether for personal or professional purposes.
With these various methods and tools at your disposal, you now have the knowledge and skills to capture screenshots effectively on your PC. Experiment with different techniques and find the method that works best for you based on your specific needs and preferences.
Capturing screenshots is not only a practical skill but also an enjoyable way to preserve moments and share information with others. Use your newfound expertise to capture and utilize screenshots in various aspects of your digital life, whether for work, education, or personal projects.