Introduction
Snipping is a popular method used on PCs to capture screenshots or specific parts of the screen. It allows users to quickly save and share images or information from their computer screens. Whether you want to capture an error message, an interesting article, or a funny meme, snipping on a PC is a convenient way to do so.
Snipping saves you the hassle of manually cropping or editing a full-screen screenshot. With different snipping methods available, you can easily customize the portion of the screen you want to capture and save it as an image file. This can be incredibly useful for various purposes, such as creating tutorials, reporting issues to software developers, or simply sharing something interesting with friends and colleagues.
In this article, we will explore different methods to snip on a PC. These methods include using the Snip & Sketch tool, utilizing the Print Screen key, using the Windows + Shift + S shortcut, and utilizing snipping tool software. By the end of this article, you will have a clear understanding of how to snip on your PC and be able to choose the method that works best for your needs.
What is Snipping?
Snipping is the process of capturing a portion of the computer screen and saving it as an image file. It enables users to take customized screenshots by selecting specific areas, rather than capturing the entire screen. Snipping is a convenient way to capture and save information, images, or error messages that you want to reference or share.
Snipping comes in handy in various scenarios. For example, if you come across an interesting article or webpage, you can quickly capture the relevant portion instead of saving the entire page. Snipping is also useful for creating step-by-step tutorials or documenting issues you encounter on your computer.
One of the main benefits of snipping is its ability to improve communication and collaboration. Instead of describing a specific error message or graphic element, you can simply snip it and share the image with others. This makes troubleshooting and problem-solving more efficient, as the visual representation allows others to understand the issue clearly.
Furthermore, snipping provides a visual record of important information that you may need to reference later. Whether it’s a contact detail, a piece of code, or a specific image, snipping allows you to capture and save it for future use. This prevents the need to search through pages of text or web content when the information is readily available as an image.
Snipping can be done through various methods and tools, depending on your operating system and personal preferences. In the following sections, we will explore different ways to snip on a PC using built-in tools and external software. By learning these methods, you can choose the one that suits your needs and improve your efficiency in capturing and sharing screen content.
Ways to Snip on PC
When it comes to snipping on a PC, there are several methods and tools available. Let’s explore the different ways you can snip on your computer:
Method 1: Using the Snip & Sketch Tool
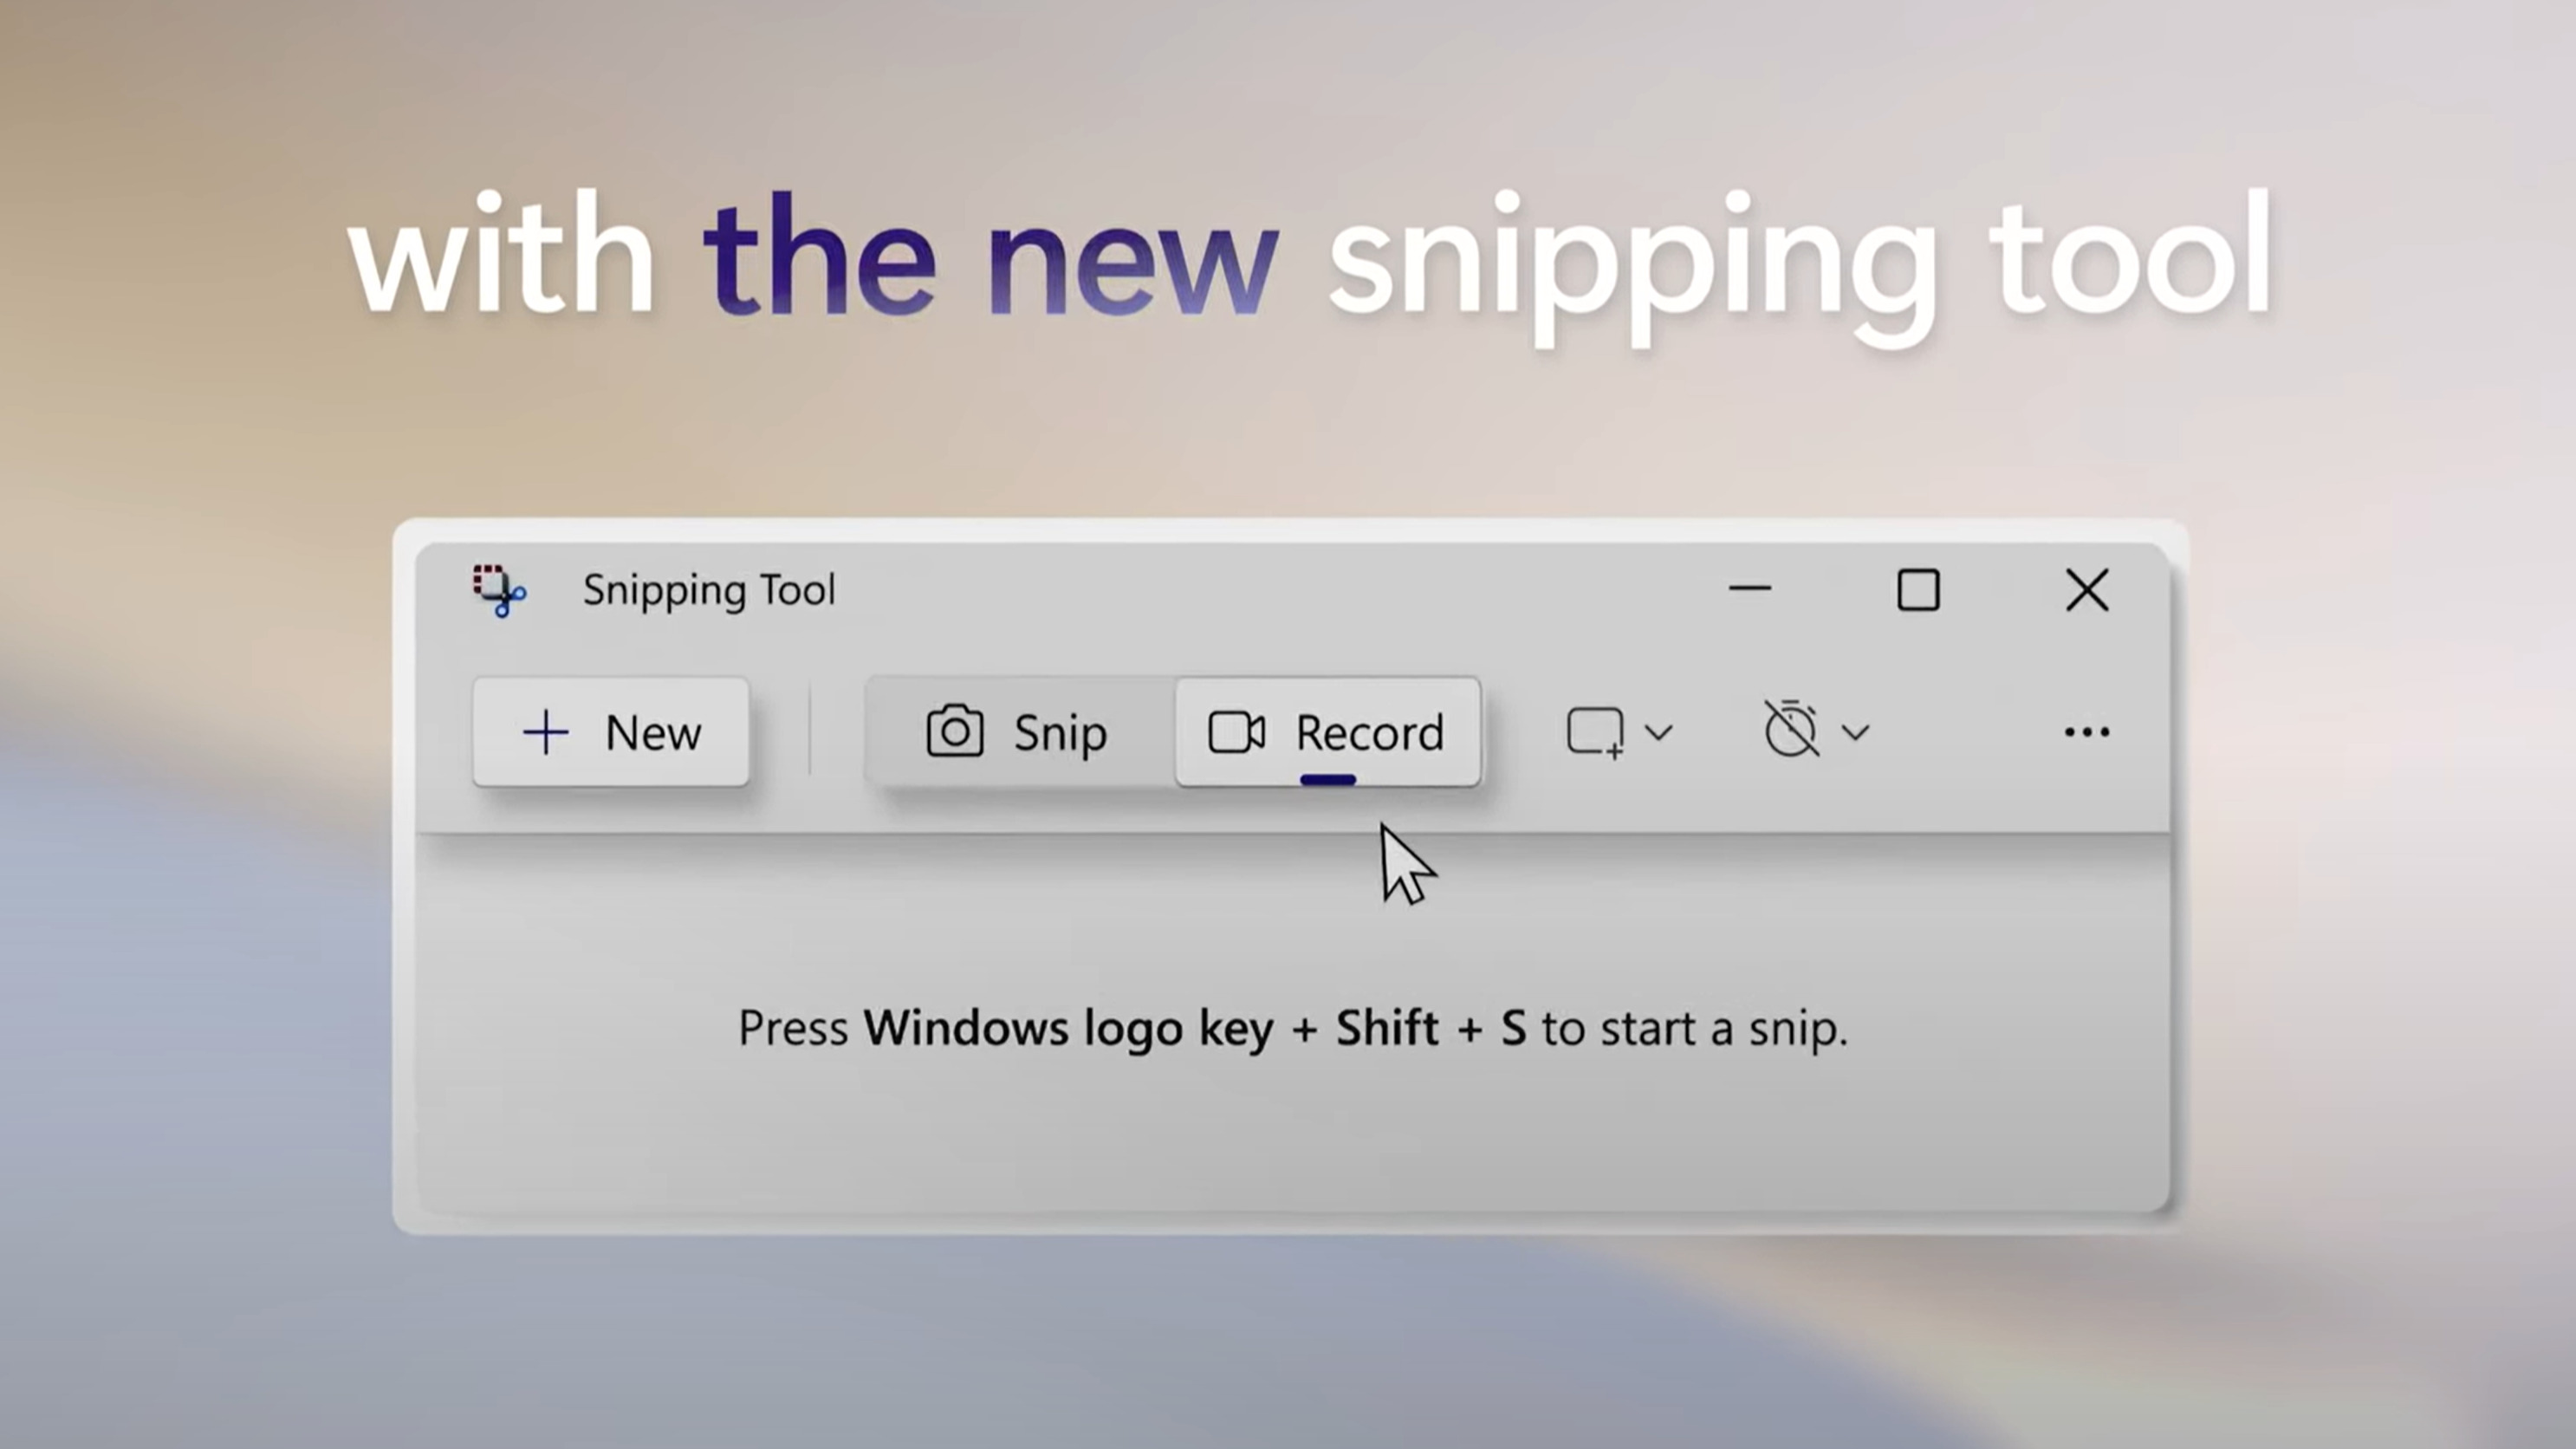
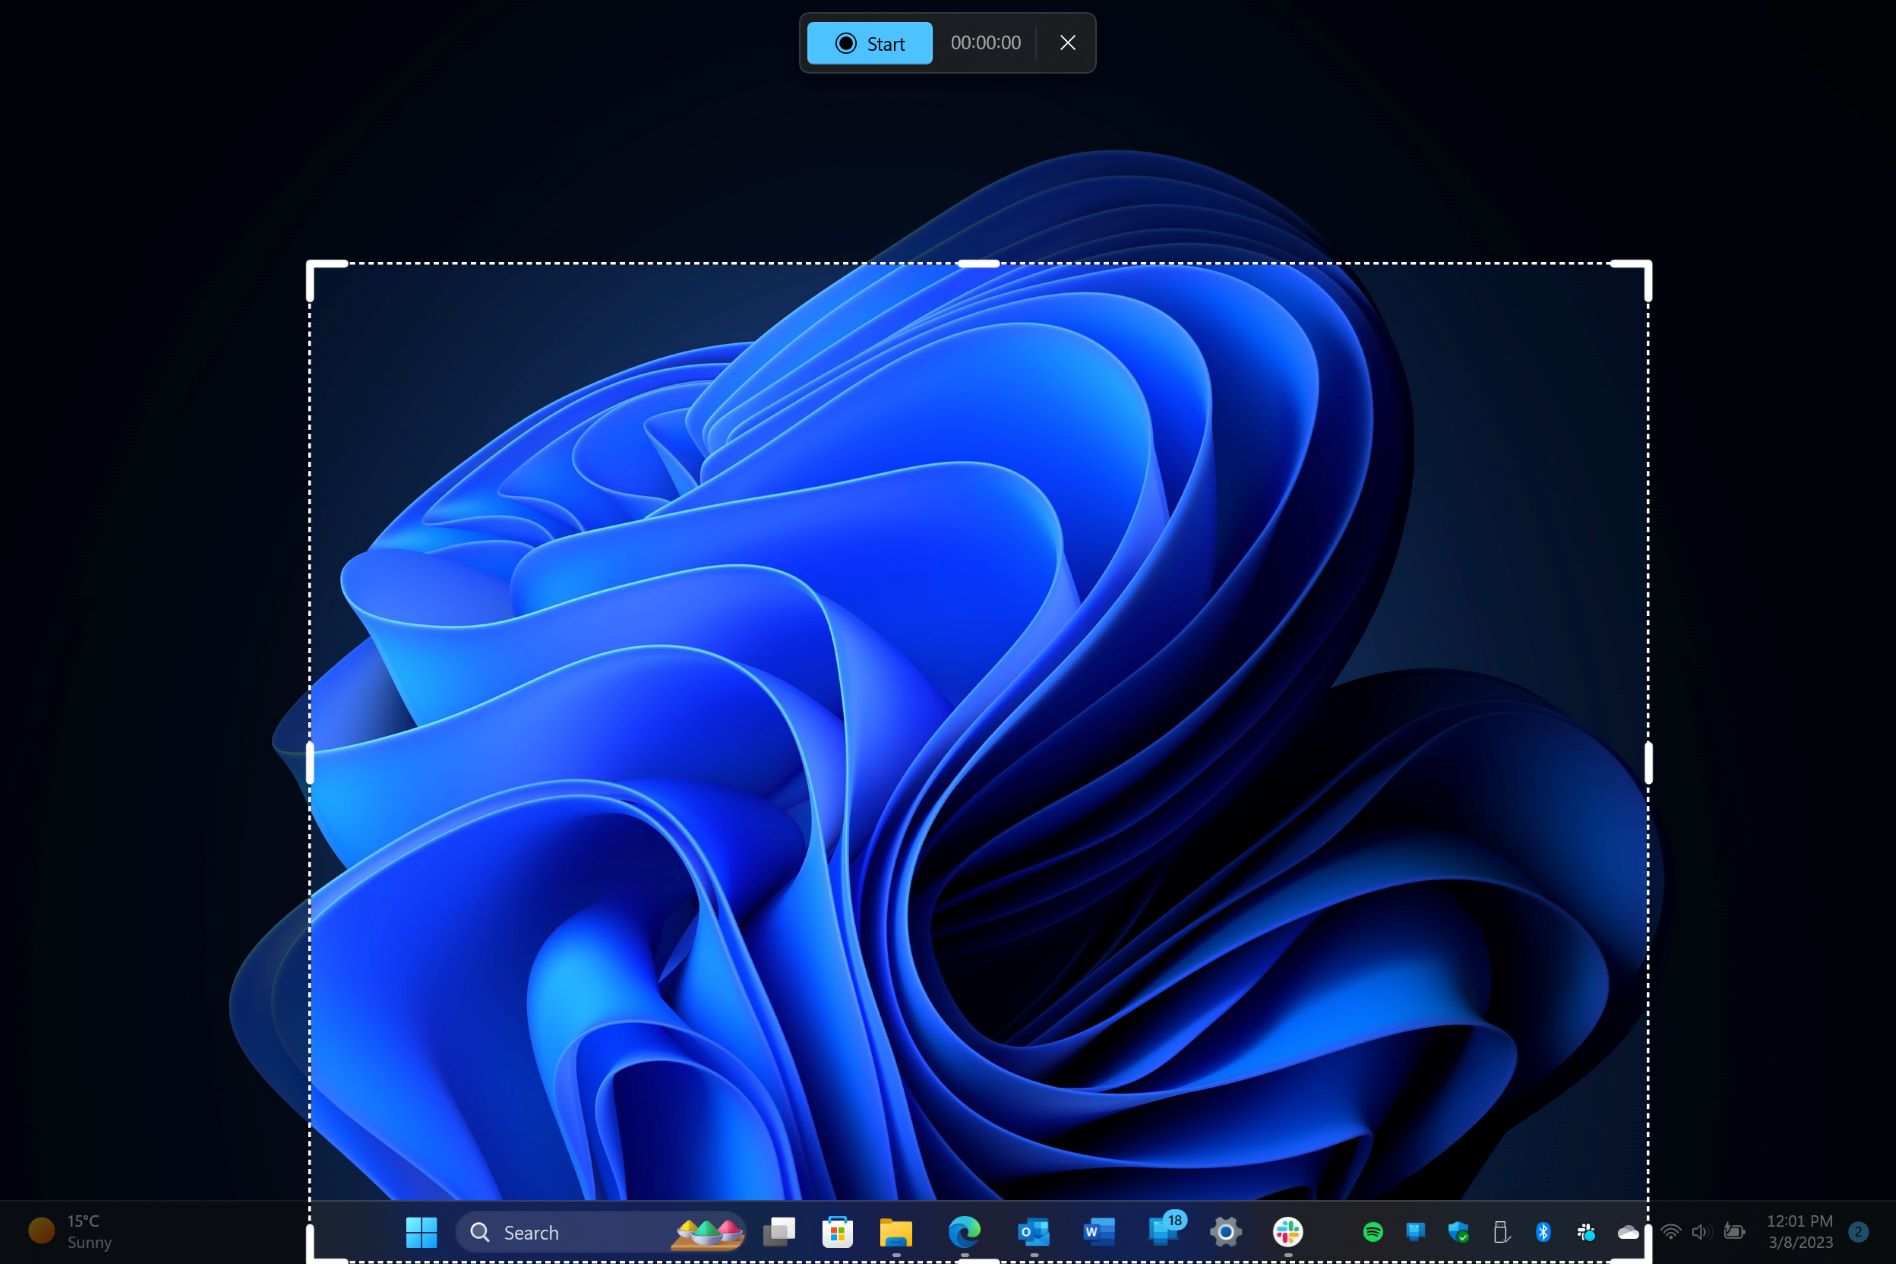
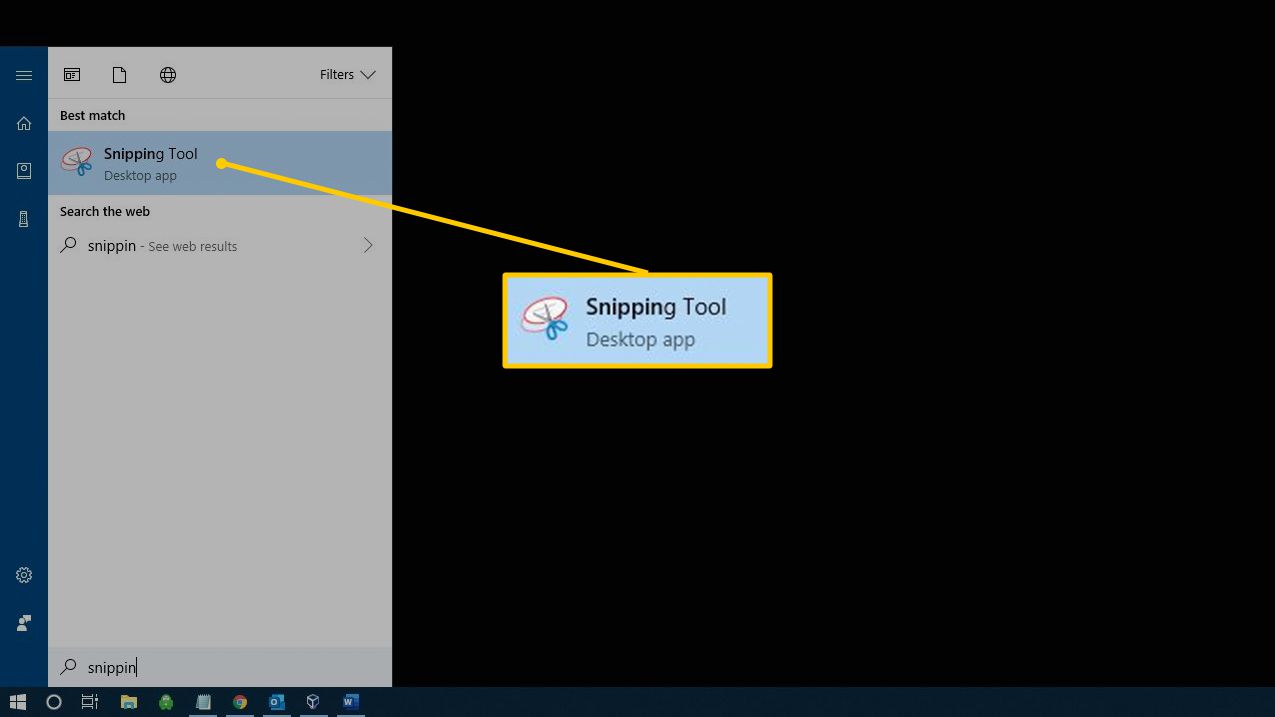
Windows 10 introduced the Snip & Sketch tool, which provides a quick and easy way to snip on your PC. You can access this tool by pressing the “Windows key + Shift + S” shortcut or by searching for “Snip & Sketch” in the Start menu. With the Snip & Sketch tool, you can capture a full screen, a specific window, or a custom snip of any shape.
Method 2: Using the Print Screen Key
The Print Screen (PrtScn) key is a simple yet effective way to capture the entire screen. By pressing the Print Screen key, a screenshot of your entire screen is copied to the clipboard. You can then paste it into an image editing program, such as Paint or Photoshop, to save or edit the screenshot as needed.
Method 3: Using the Windows + Shift + S Shortcut
If you’re looking for a quick way to capture a specific area of your screen, the Windows + Shift + S shortcut is a handy option. When you press this shortcut, a snipping toolbar will appear, allowing you to select the desired area. The captured snip is then copied to your clipboard, ready for pasting into an image editing program or document.
Method 4: Using a Snipping Tool Software
There are also third-party snipping tool software available that offer additional features and customization options. These tools often include functionalities like the ability to capture specific shapes, annotate the snips, or automatically save the screenshot to a specific folder. Some popular examples of snipping tool software include Snagit, Greenshot, and Lightshot.
With these different snipping methods at your disposal, you can choose the one that best fits your needs and preferences. Whether you need to capture the entire screen, a specific window, or a custom-defined area, snipping on your PC allows you to conveniently share information, troubleshoot issues, and document important details.
Method 1: Using the Snip & Sketch Tool
The Snip & Sketch tool is a built-in feature in Windows 10 that makes snipping on your PC a breeze. With this tool, you can easily capture screenshots of your entire screen, specific windows, or custom-defined areas. Here’s how you can use the Snip & Sketch tool:
- Launch the Snip & Sketch tool by pressing the “Windows key + Shift + S” shortcut or searching for “Snip & Sketch” in the Start menu.
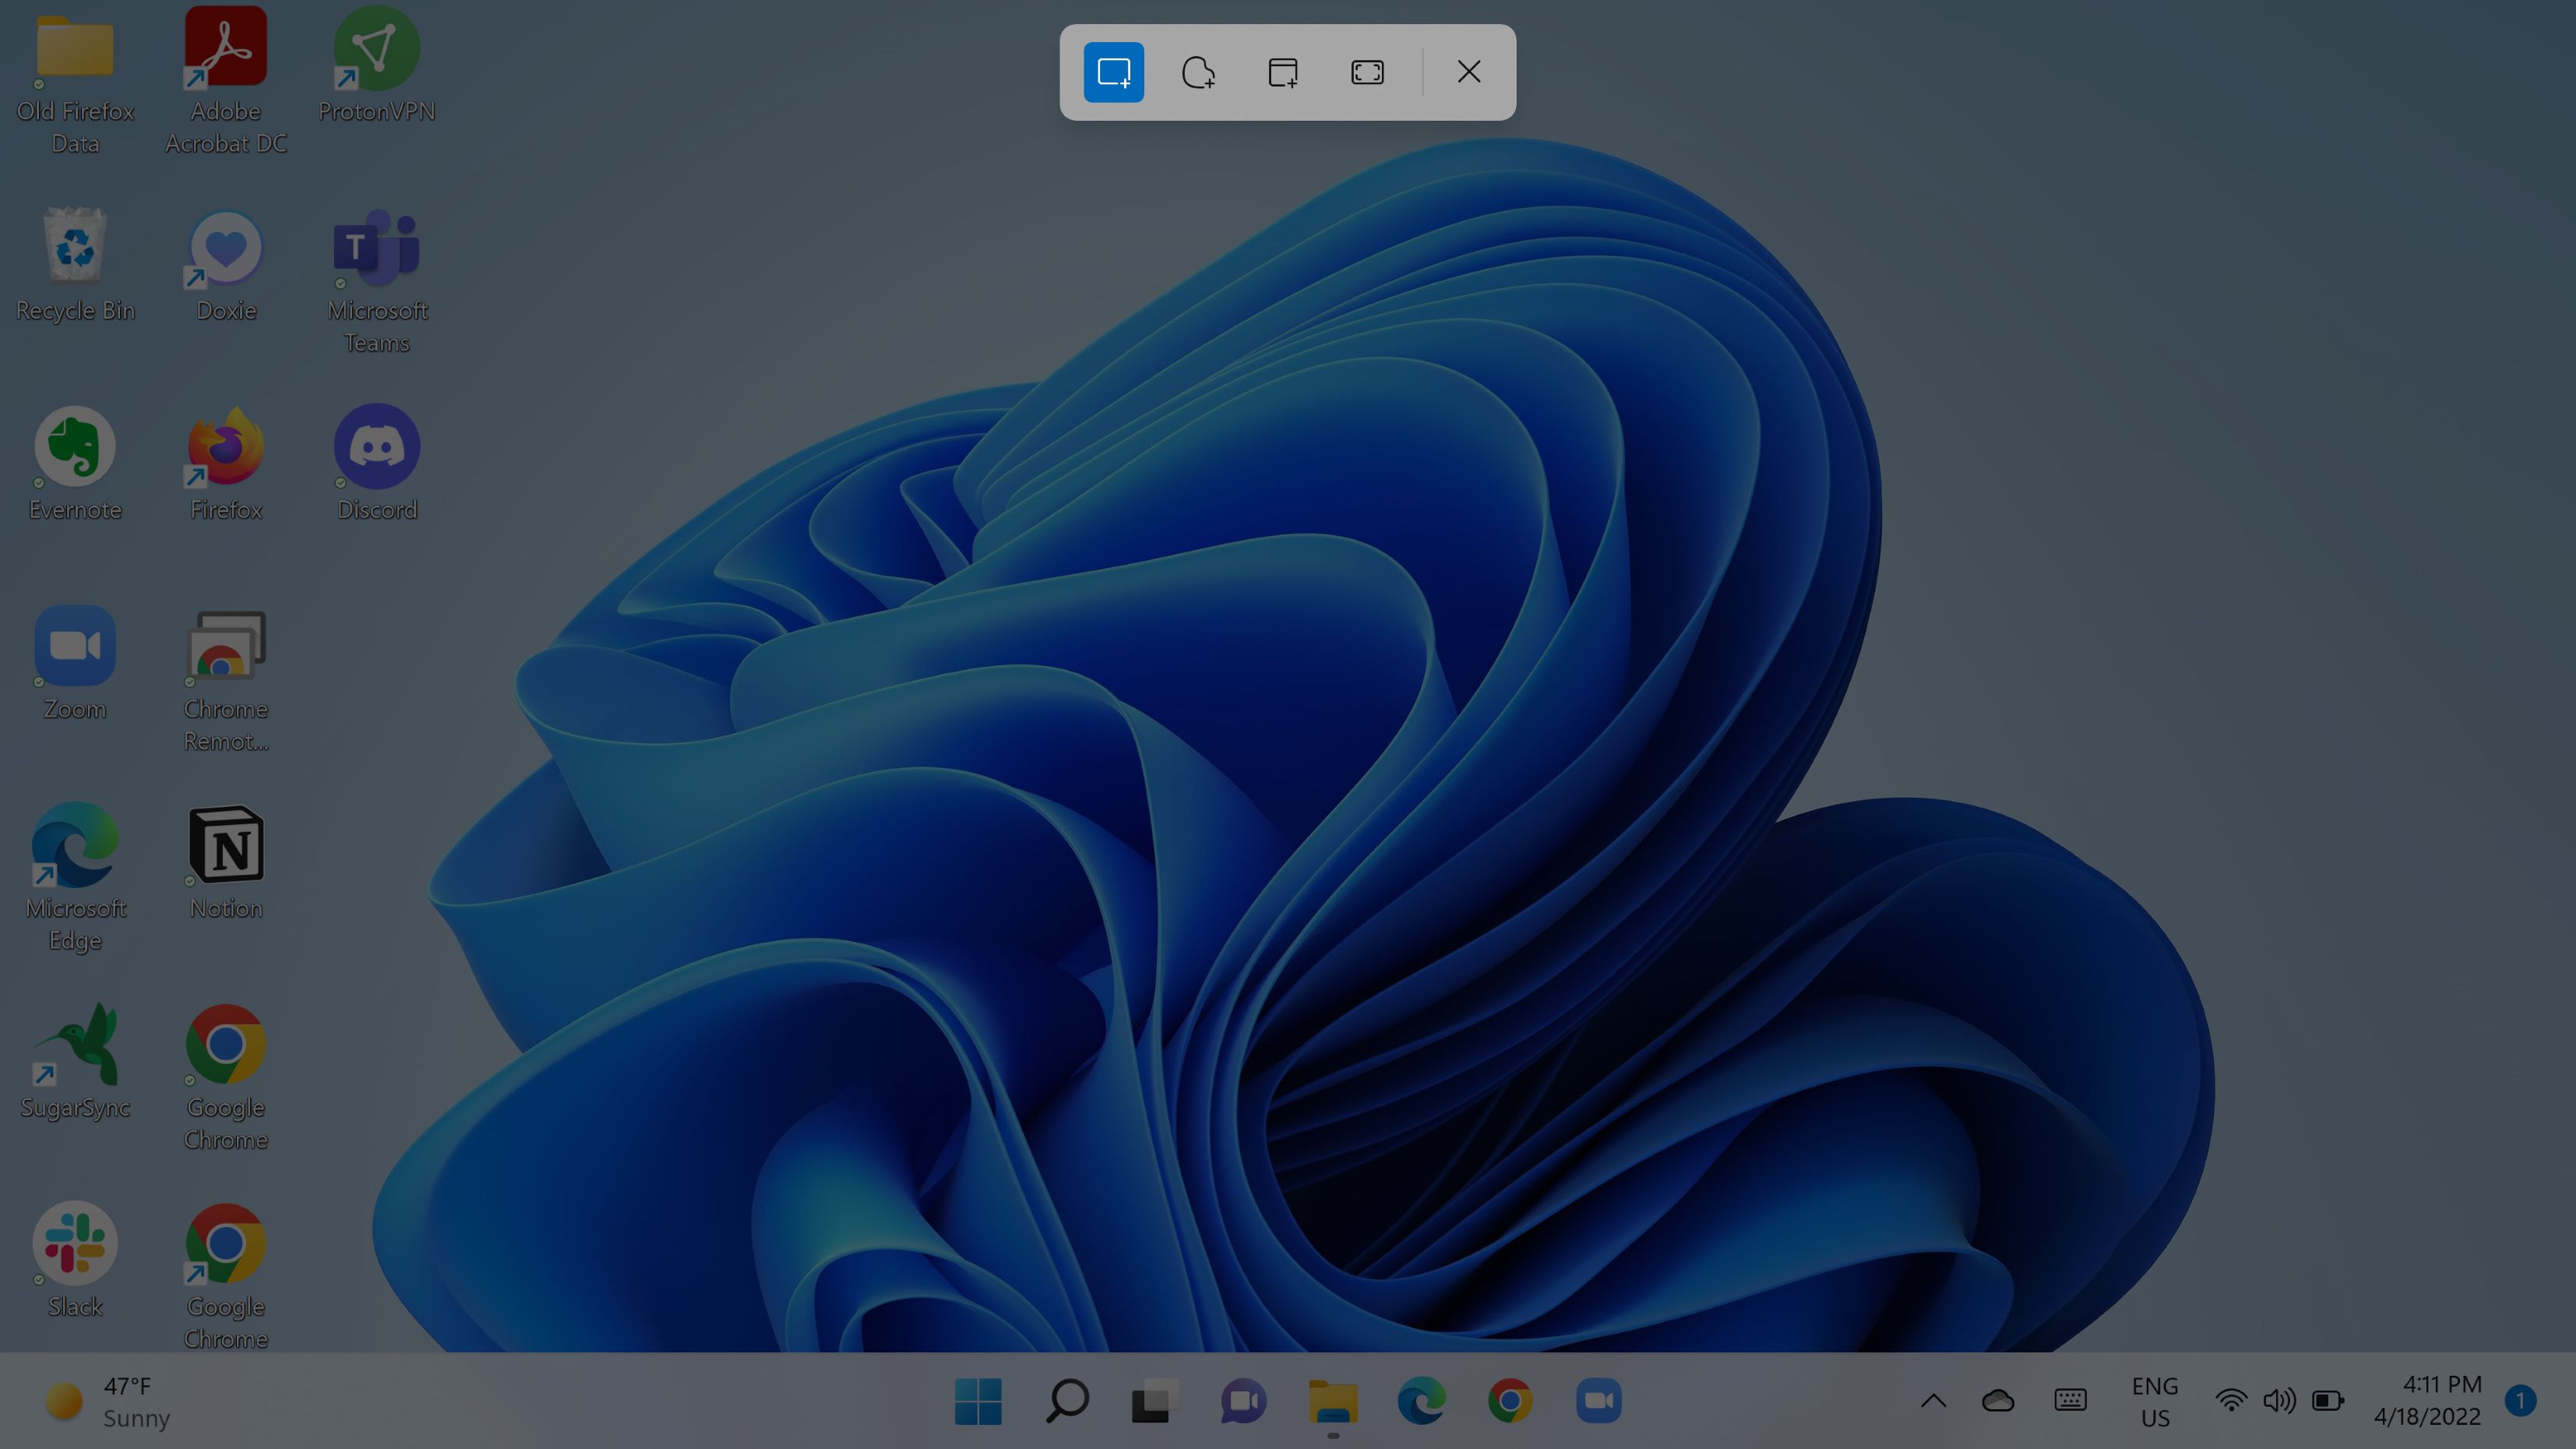
- The Snip & Sketch toolbar will appear at the top of your screen, offering different snipping options.
- Select the type of snip you want to capture: a rectangular snip, a freeform snip, a window snip, or a full-screen snip.
- If you choose the rectangular or freeform snip, drag the cursor to select the desired area. For the window snip, click on the window you want to capture. And for the full-screen snip, simply click anywhere on the screen.
- After snipping, the captured image will open in the Snip & Sketch editor. From here, you can annotate the image, crop or resize it, and save it to your desired location.
The Snip & Sketch tool also offers several useful features to enhance your snipping experience. For example, you can use the pen tool to draw on your snips, highlight important sections, or add text annotations. Additionally, you can use the eraser tool to remove any unwanted markings. The Snip & Sketch tool saves your snips automatically, allowing you to easily refer back to them or share them with others.
With the Snip & Sketch tool, snipping on your PC becomes a seamless and efficient process. You no longer need to rely on external software or complex methods to capture specific parts of your screen. Whether you need to capture a portion of a website, share an error message with technical support, or save an interesting image, the Snip & Sketch tool provides a user-friendly solution.
Method 2: Using the Print Screen Key
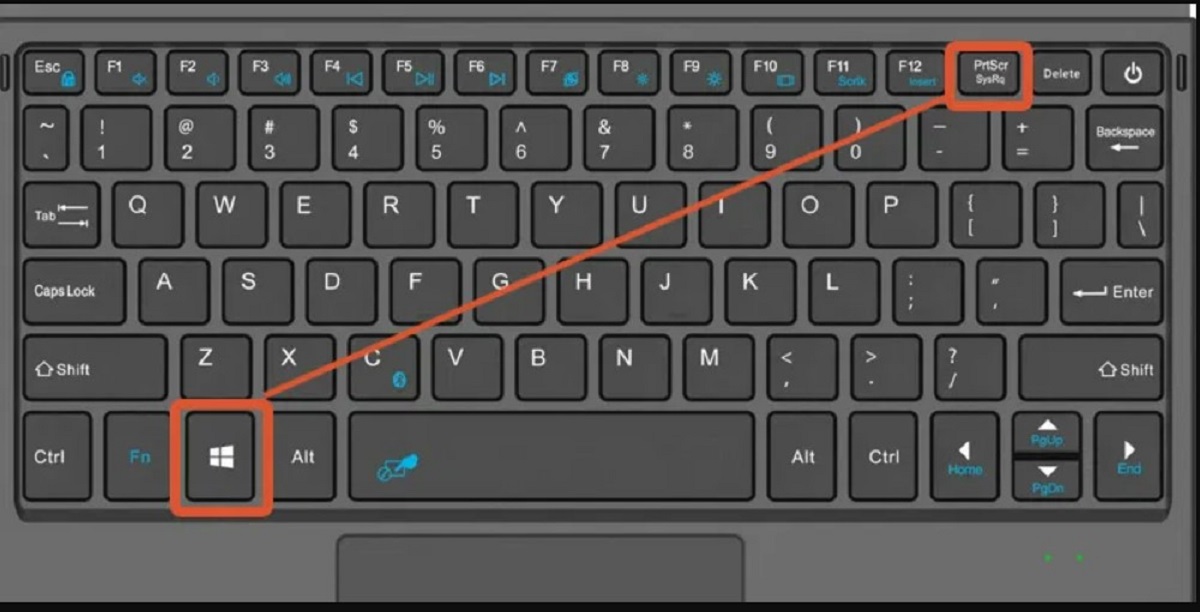
The Print Screen (PrtScn) key is a straightforward and commonly used method to capture the entire screen on your PC. By pressing the PrtScn key, a screenshot of your entire screen is copied to the clipboard, allowing you to save or edit the image as needed. Here’s how you can use the Print Screen key:
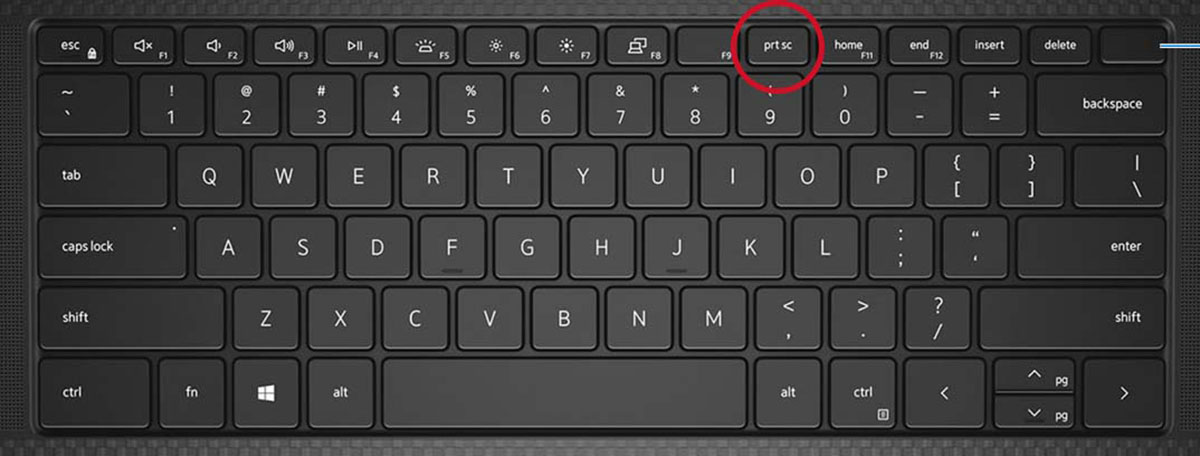
- Locate the PrtScn key on your keyboard. It is typically found in the upper-right corner, often labeled as “Print Screen”, “PrtScn”, or a similar variation.
- Press the PrtScn key to capture a screenshot of your entire screen.
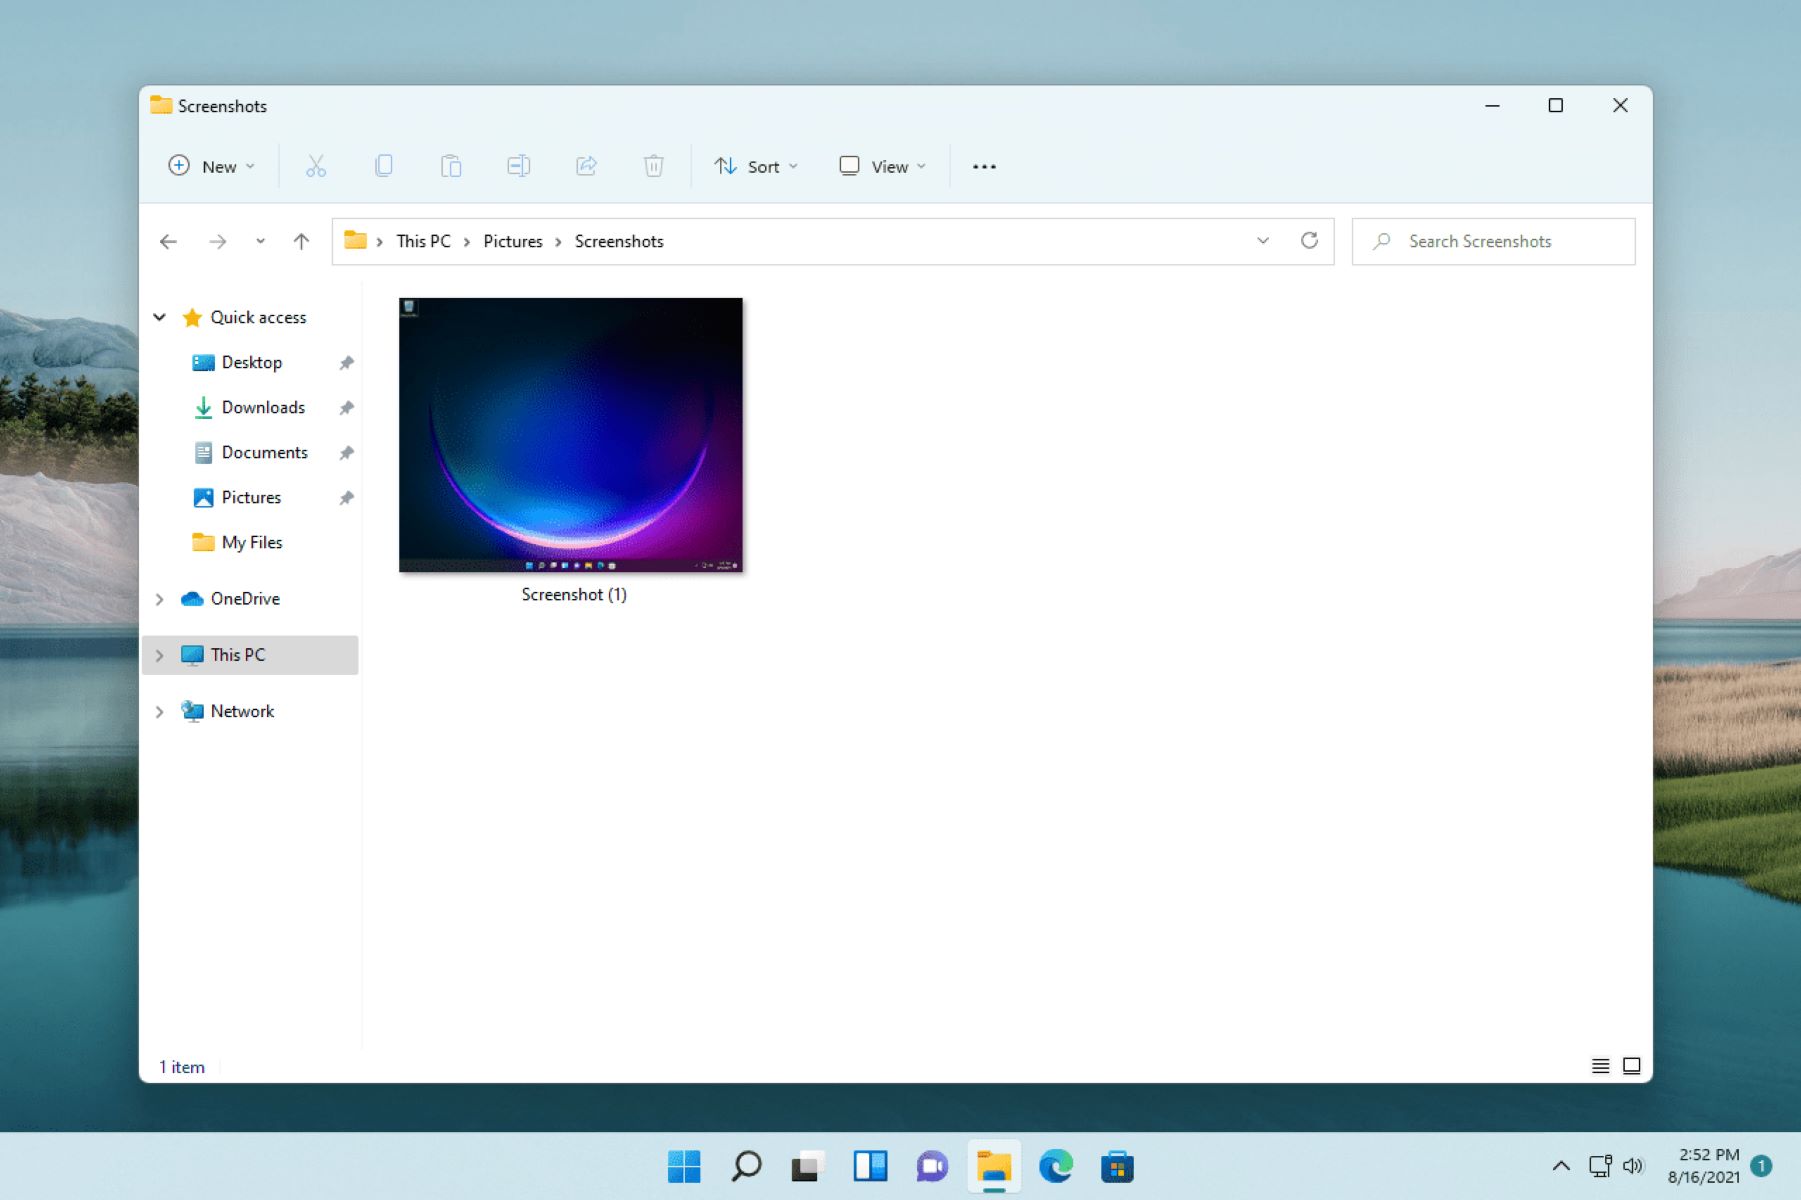
- Open an image editing program such as Paint, Photoshop, or even Microsoft Word.
- Paste the screenshot from the clipboard by pressing “Ctrl + V” or right-clicking and selecting “Paste”.
- Once the screenshot is pasted, you can save it as an image file in your desired format and location.
Using the Print Screen key is a quick and straightforward method to capture your entire screen without the need for additional software or settings. However, it’s important to note that the captured image includes everything on your screen, including taskbars, open windows, and desktop icons.
If you want to capture a specific window rather than the entire screen, you can use the “Alt + PrtScn” shortcut instead. This allows you to capture just the active window and copy it to the clipboard, which you can then paste into an image editing program for further manipulation or saving.
Although the Print Screen key captures the screen in its entirety, it doesn’t provide the flexibility to snip and capture specific areas. However, with the captured image in an editing program, you can easily crop, resize, or annotate the screenshot to focus on the specific content you want to highlight.
Overall, using the Print Screen key is a simple and effective way to capture the entire screen on your PC. Whether you need to capture an error message, document the appearance of a webpage, or share the contents of your screen with others, the Print Screen key allows you to quickly capture an image for further use or reference.
Method 3: Using the Windows + Shift + S Shortcut
The Windows + Shift + S shortcut is a convenient and efficient way to snip a specific area of your screen on a PC. This shortcut opens the Snip & Sketch toolbar, allowing you to select and capture a custom snip without the need for additional software. Here’s how you can use the Windows + Shift + S shortcut:
- Position your cursor in the area you want to capture.
- Press the Windows + Shift + S keys simultaneously. The screen will dim, and a snipping toolbar will appear at the top of the screen.
- Using your mouse or trackpad, click and drag the cursor to select the desired area to snip.
- Release the mouse button to capture the snip.
- The captured snip is automatically copied to the clipboard.
Once you have captured the snip using the Windows + Shift + S shortcut, you can easily paste it into an image editing program, a document, or any other desired location. This enables you to quickly share or save the custom snip without any additional steps.
The Windows + Shift + S shortcut is particularly useful when you need to capture a specific part of your screen, such as an error message, a section of a webpage, or an image. It provides more precision compared to capturing the entire screen, allowing you to focus on and share the most relevant information.
It’s important to note that the Windows + Shift + S shortcut is only available on Windows 10 (version 1809 or later). If you are using an older version of Windows, you can use alternative methods such as the Snipping Tool or the Print Screen key to achieve similar results.
By utilizing the Windows + Shift + S shortcut, you can easily snip and capture specific areas of your screen without the need for third-party software. This feature is a valuable tool for various purposes, including sharing important information, reporting issues, or simply capturing interesting content that you come across on your PC.
Method 4: Using a Snipping Tool Software
In addition to the built-in snipping tools available on your PC, there are also various third-party snipping tool software options that offer additional features and functionalities. These software applications provide more flexibility and customization when it comes to snipping on your PC. Here’s how you can use a snipping tool software:
- Choose a snipping tool software that suits your needs. Some popular options include Snagit, Greenshot, Lightshot, and ShareX. These tools can be downloaded and installed from their respective websites.
- Once the software is installed, launch it on your PC.
- Explore the features and options provided by the snipping tool software. These may include different snipping modes (rectangular, freeform, window, or full-screen), annotation tools, automatic saving options, and cloud integration.
- Depending on the software, you will typically have a toolbar or a menu with various snipping options.
- Select the desired snipping mode and drag the cursor to capture the specific area or window you want to snip.
- The snipped image will be saved automatically to a designated location or prompt you to save it to the desired location on your PC.
Snipping tool software offers additional features beyond basic snipping functionalities. For example, they often provide options to annotate the captured snips with text, arrows, shapes, or highlights. These tools also support various image file formats and offer easy sharing options, allowing you to quickly send your snips via email or upload them to cloud storage.
By using a snipping tool software, you can have more control over your snips and customize them to meet your specific requirements. Whether you need to capture a specific shape, highlight a particular area, or add annotations for clarity, these tools provide a range of options to enhance your snipped images.
It’s worth noting that while the built-in snipping tools on your PC are usually sufficient for most users, snipping tool software can be a great alternative if you require advanced features or frequently work with screenshots and snips.
With a variety of snipping tool software options available, you can choose the one that best fits your needs and preferences. These tools can significantly enhance your snipping experience, allowing you to capture, edit, and share snipped images with ease.
Conclusion
Snipping on a PC is a convenient and efficient way to capture screenshots or specific parts of your screen. Whether you’re using the built-in snipping tools or third-party software, there are multiple methods available to suit your needs and preferences.
In this article, we explored four different methods to snip on a PC. We learned about using the Snip & Sketch tool, which offers a user-friendly interface and various snipping options. We also discussed using the Print Screen key to capture the entire screen with a simple keystroke. Additionally, we explored the Windows + Shift + S shortcut, which allows for snipping custom areas of the screen. Lastly, we delved into the use of snipping tool software for more advanced features and customization options.
Each method has its own advantages and suitability for different scenarios. The choice ultimately depends on your specific requirements and personal preference. Whether you need to capture an error message, highlight a specific portion of a webpage, or share an interesting image with others, snipping on your PC empowers you to capture and share information efficiently.
By mastering the art of snipping, you can enhance your productivity, streamline communication, and easily document important information. Snipping tools provide a valuable and versatile resource that allows you to capture and share screen content with precision and ease.
So, the next time you come across something worth capturing on your PC, take advantage of the snipping methods discussed in this article. Whether you choose the built-in tools or opt for third-party software, snipping on your PC will be an invaluable skill that enhances your ability to capture, save, and share visual information.