Introduction
Welcome to the world of solid state drives (SSDs), a revolutionary technology that offers faster data access, improved performance, and enhanced durability compared to traditional hard disk drives. Whether you’re looking to upgrade your computer’s SSD or replace a faulty one, this guide will walk you through the process of replacing a solid state drive without losing your operating system.
SSDs have become increasingly popular due to their lightning-fast read and write speeds, making them a favorite among gamers, creative professionals, and everyday users who value speed and efficiency. However, like any storage device, SSDs are not immune to failure or obsolescence. That’s why it’s important to know how to replace an SSD without losing your operating system.
In this guide, we will take you through each step of the process, from understanding SSDs to creating a backup of your operating system, removing the old SSD, installing the new one, and finally restoring the operating system. We will also provide tips for optimizing your new SSD and ensuring that it performs at its best.
Before we dive into the technicalities, it’s important to note that replacing an SSD requires some level of computer knowledge and expertise. If you feel unsure or uncomfortable with the process, we recommend seeking assistance from a professional technician to ensure a smooth and successful SSD replacement.
Now, let’s get started on our journey to replace your solid state drive without losing your operating system. By the end of this guide, you’ll be equipped with the necessary knowledge to confidently tackle this task and enjoy the benefits of a faster and more efficient storage solution.
Understanding Solid State Drives
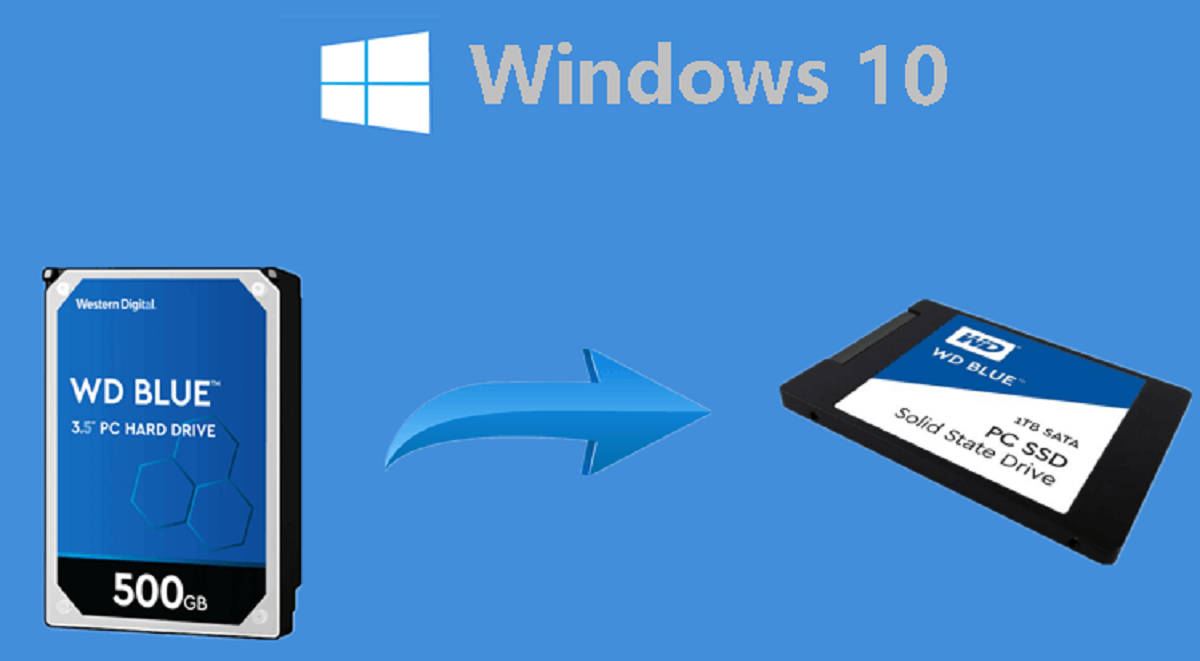
Before we proceed with replacing a solid state drive, it’s essential to have a clear understanding of what an SSD is and how it differs from traditional hard disk drives (HDDs).
Unlike HDDs, which use spinning magnetic disks and mechanical read/write heads to access and store data, SSDs utilize NAND flash memory. This flash memory allows for faster data transfer speeds, lower latency, and increased durability.
SSDs have no moving parts, which means they are less prone to mechanical failure and physical damage. This makes them more reliable and resilient in portable devices, such as laptops, where they can withstand shocks and vibrations better than HDDs.
One of the key advantages of SSDs is their significantly faster read and write speeds. This means that accessing files and loading programs will be much quicker, resulting in faster boot times and improved overall system performance. SSDs are particularly beneficial for resource-intensive tasks like video editing, gaming, and running multiple applications simultaneously.
In addition to speed, SSDs are silent, produce less heat, and consume less power compared to HDDs. This makes them more energy-efficient, leading to longer battery life in laptops and lower electricity bills for desktop users.
When it comes to storage capacity, SSDs typically offer a range of options, but they can be more expensive per gigabyte compared to HDDs. However, the price of SSDs has been steadily decreasing over the years, making them increasingly affordable and accessible to a wider audience.
It’s worth noting that the lifespan of an SSD is determined by its program erase cycles, also known as P/E cycles. As data is written and erased from the SSD over time, the number of P/E cycles consumed increases, eventually leading to the wear-out of individual memory cells. However, modern SSDs have advanced wear-leveling algorithms and overprovisioning techniques to maximize lifespan and maintain performance.
Now that you have a basic understanding of SSDs, you’re better equipped to appreciate their advantages and be prepared for the process of replacing a solid state drive without losing your operating system.
Preparations before Replacing a Solid State Drive
Before diving into the process of replacing a solid state drive (SSD), it’s important to make a few preparations to ensure a smooth and successful upgrade. By following these steps, you can minimize the risk of data loss and ensure a seamless transition to your new SSD.
1. Research and compatibility: Start by researching the specifications and compatibility requirements of your current and new SSD. Look for information such as form factor, interface (SATA, NVMe), and storage capacity to ensure that the new SSD is compatible with your system. Additionally, check if any firmware updates are required for optimal performance with your operating system.
2. Backup your data: It’s crucial to create a backup of all your important files and data before replacing the SSD. This includes documents, photos, videos, and any other files you want to preserve. You can use an external hard drive, cloud storage, or backup software to save your data. A backup ensures that even if something goes wrong during the SSD replacement process, you can restore your files and continue where you left off.
3. Take inventory of software and licenses: Make a list of all the applications and software installed on your current SSD. This includes productivity tools, games, antivirus software, and any other programs you regularly use. Take note of their license keys or login details as you may need them during the reinstallation process.
4. Gather necessary tools: Depending on your computer model, you may require specific tools to access and replace the SSD. Commonly used tools include a screwdriver, pry tool, and anti-static wrist strap. Consult your computer’s user manual or online resources to determine the tools needed for your particular model.
5. Create a recovery USB drive: In case of any complications during the SSD replacement, having a recovery USB drive can be a lifesaver. It allows you to boot into a recovery environment and troubleshoot or restore your operating system. Most operating systems have built-in tools or third-party software that can help you create a recovery USB drive.
6. Disable encryption and secure boot: If your current SSD has encryption or secure boot features enabled, it’s essential to disable them before replacing the drive. Encryption can complicate the data migration process, and secure boot may prevent the computer from recognizing the new SSD as a trusted device. Consult your operating system’s documentation or online resources for instructions on disabling these features.
By taking these preparatory steps, you’ll be well-prepared and ready to proceed with replacing your solid-state drive without the risk of losing data or encountering compatibility issues.
Creating a Backup of the Operating System
Before replacing a solid-state drive (SSD), it is highly recommended to create a backup of your operating system. This ensures that you have a copy of your system files, settings, and applications, allowing for a seamless restoration onto the newly installed SSD. Follow these steps to create a backup of your operating system:
1. Use built-in backup tools: Most operating systems, such as Windows and macOS, provide built-in backup and recovery tools. Windows users can utilize the Windows Backup and Restore feature or the newer Windows File History feature. Mac users can make use of the built-in Time Machine utility. These tools offer various options for creating a system backup, including full system image backups or selective file backups.
2. Choose an external storage device: Connect an external storage device with sufficient storage capacity to support the system backup. This can be an external hard drive, USB flash drive, or a network-attached storage (NAS) device. Ensure that the drive is formatted and compatible with your operating system.
3. Start the backup process: Launch the backup tool of your chosen operating system and follow the on-screen instructions. Select the option to create a system or full image backup. You may also have the option to include or exclude specific folders, files, or applications. Choose your external storage device as the backup location.
4. Wait for the backup to complete: Depending on the size of your operating system and the speed of your computer and external storage device, the backup process may take some time. It is important to allow the process to complete without interruptions to ensure a successful and reliable backup.
5. Verify the backup: Once the backup process finishes, go through the backup files and verify that all necessary system files and data are included. Check that important folders, such as Documents, Pictures, and Desktop, are backed up. This will give you peace of mind knowing that you have a complete backup of the operating system.
In case of data loss or any issues during the SSD replacement process, you can use the backup you created to restore your operating system, files, and applications onto the new SSD. Make sure to keep the backup device in a safe and secure location until you complete the replacement process.
Creating a backup of your operating system is an essential step in ensuring a smooth and trouble-free SSD replacement, allowing you to seamlessly transition to the new drive without losing any data or system functionality.
Removing the Old Solid State Drive
Once you have created a backup of your operating system, it’s time to proceed with removing the old solid-state drive (SSD) from your computer. Follow the steps below to ensure a safe and proper removal:
1. Shut down your computer: Before making any hardware changes, make sure to power off your computer completely. This will prevent any potential damage to the SSD or other components during the removal process.
2. Ground yourself: To prevent electrostatic discharge (ESD) that can damage sensitive components, ground yourself by touching a grounded metal object, such as the computer case. Alternatively, you can use an anti-static wrist strap to discharge any static electricity.
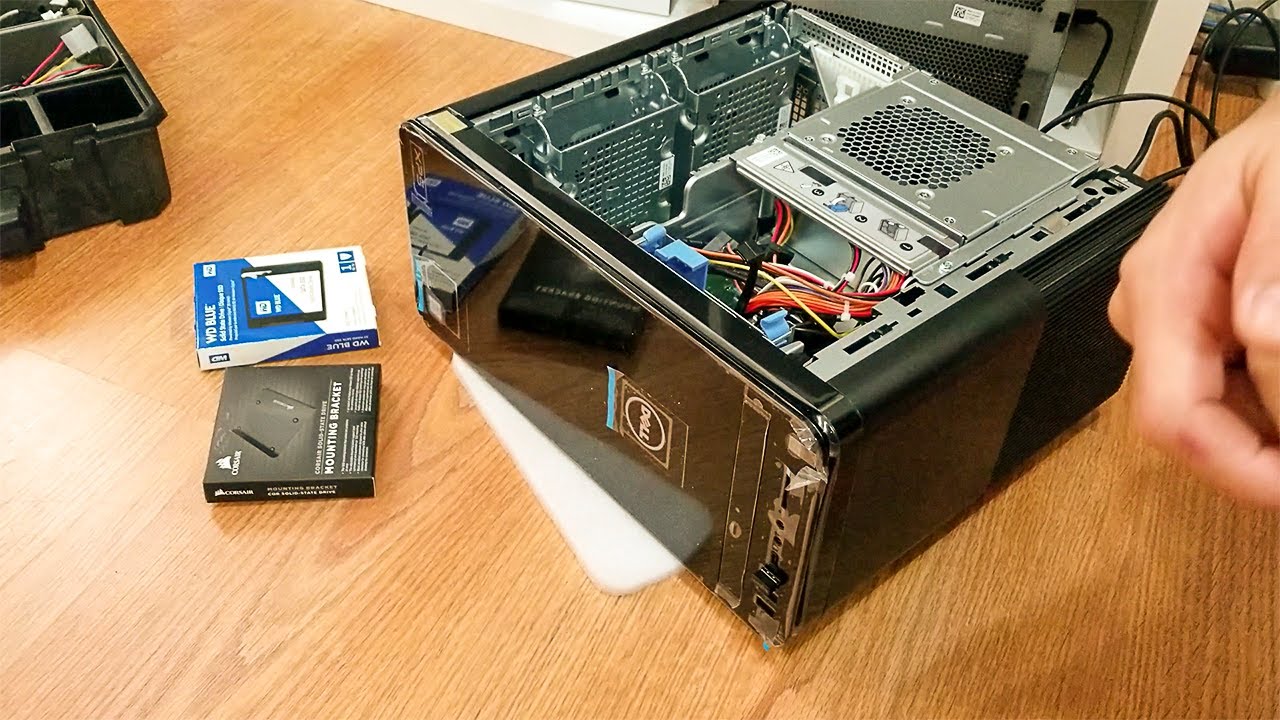
3. Open your computer case: Depending on your computer model, you may need to remove a side panel or access a specific compartment to reach the SSD. Refer to your computer’s manual or manufacturer’s instructions for guidance on how to open the case.
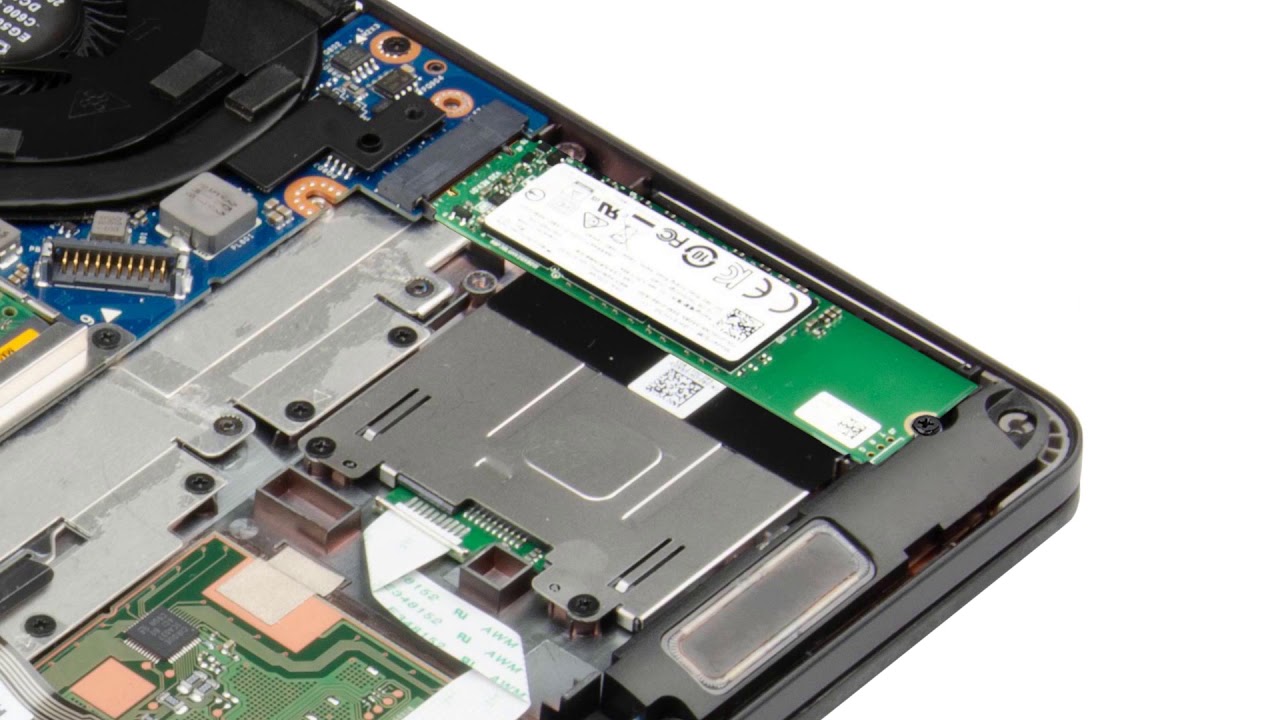
4. Locate the old SSD: Inside your computer, locate the current SSD. It is typically a rectangular-shaped device connected to the motherboard via a SATA or NVMe interface. Note the connectors and cables attached to the SSD for reference when installing the new drive.
5. Disconnect cables: Carefully disconnect the SATA or NVMe cable from the SSD. These connectors are often secured with small latches, so gently press them down or to the side to release the cable. Take note of the cable and how it was connected as you will need to connect it to the new SSD later.
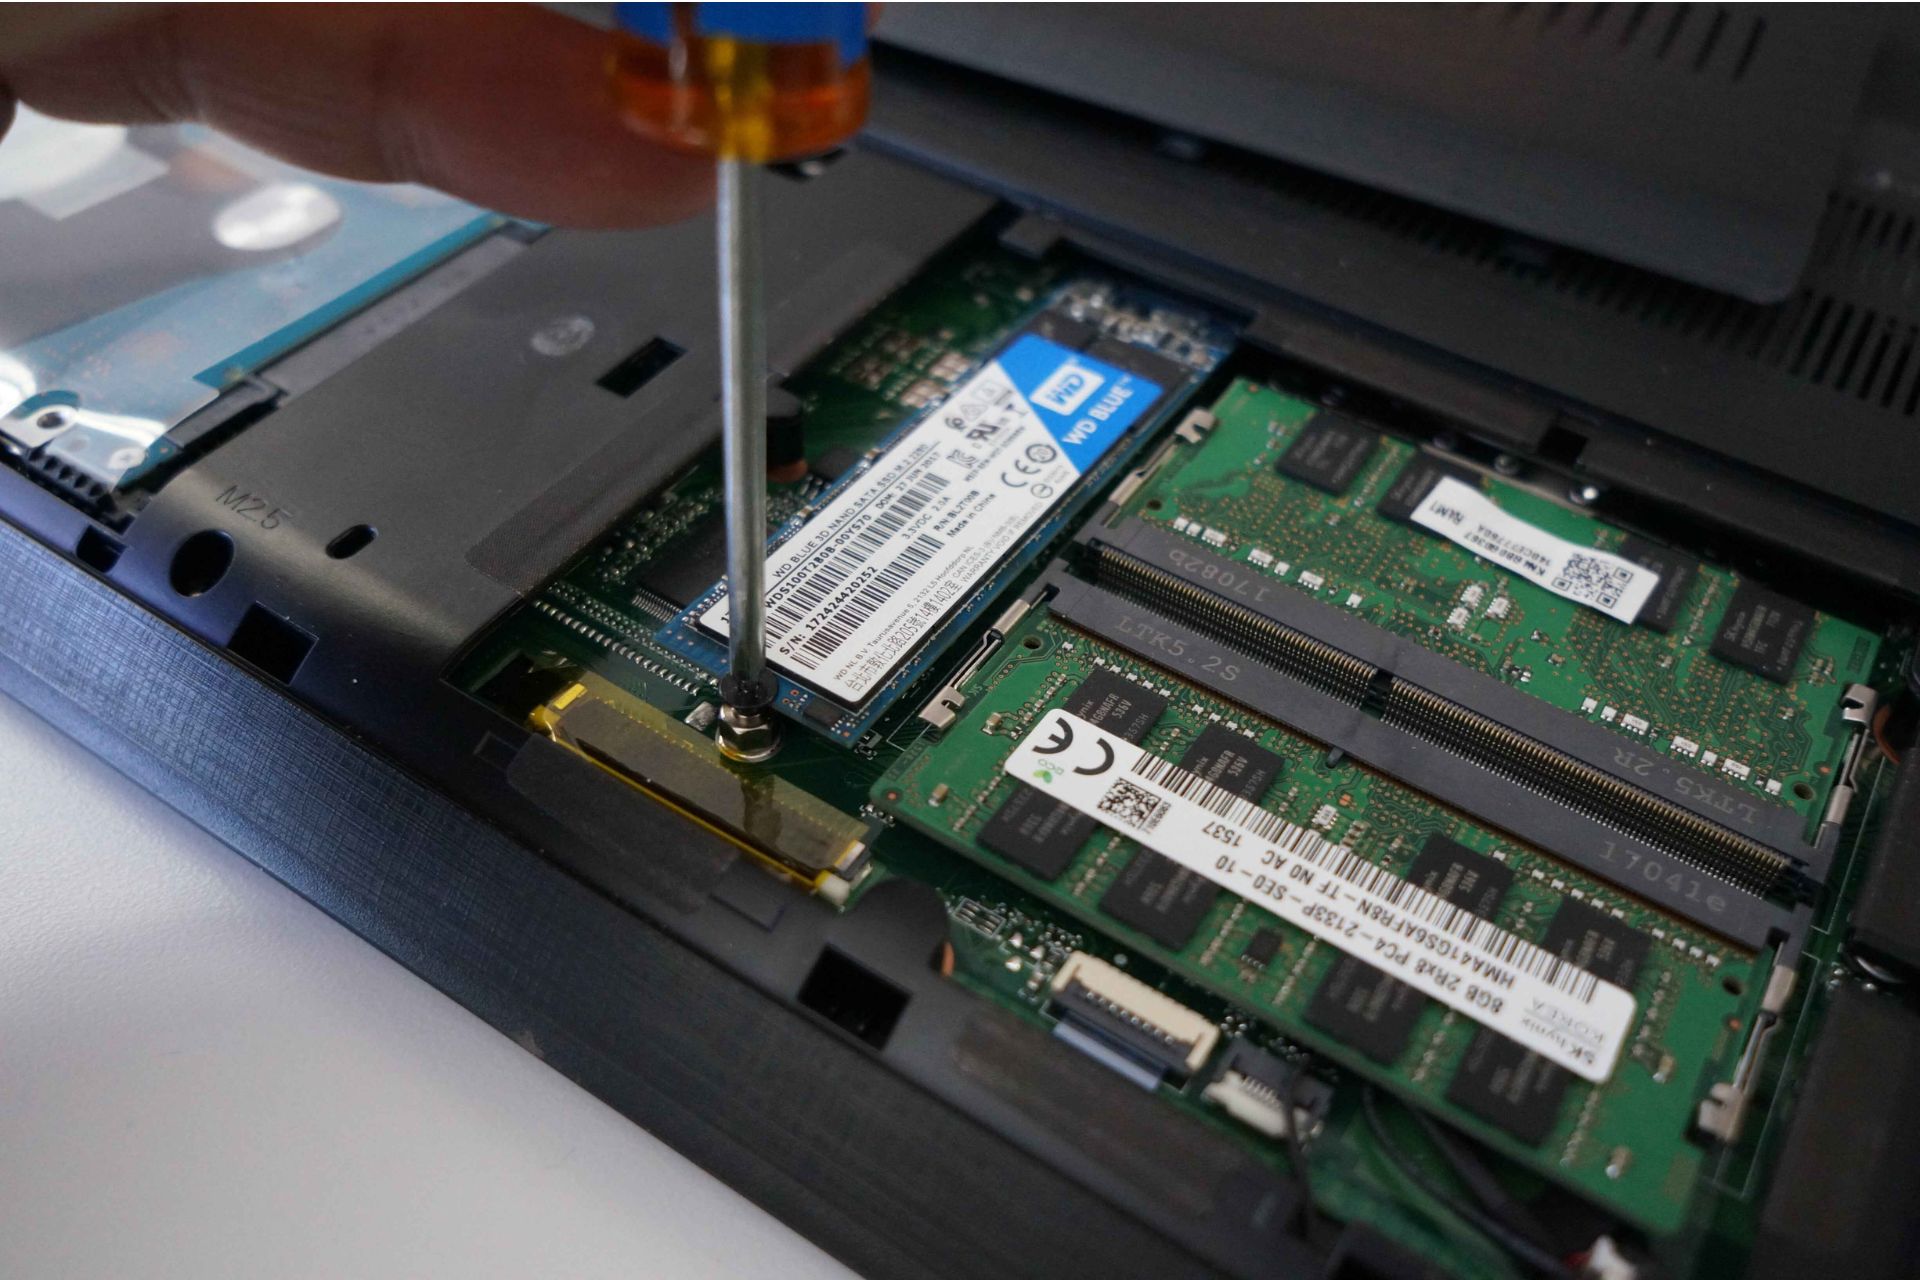
6. Remove mounting brackets or screws: Depending on your computer model, the SSD may be secured using mounting brackets or screws. Use a screwdriver, if necessary, to remove the screws or release any brackets holding the SSD in place. Keep these screws and brackets in a safe place, as they may be needed when installing the new SSD.
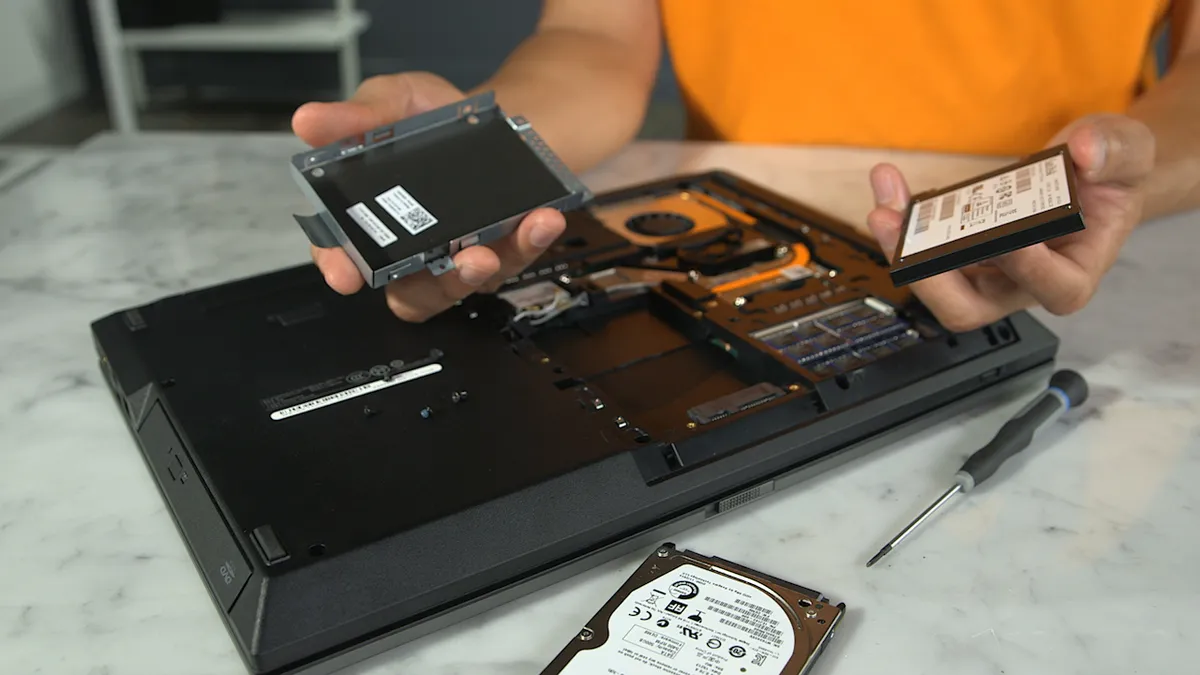
7. Take out the old SSD: With the cables and mounting hardware detached, carefully remove the old SSD from its slot. Take note of the direction and orientation of the SSD as a guide for installing the new SSD later.
8. Inspect for any damage: Before discarding or storing the old SSD, inspect it for any signs of damage or wear. If you notice any physical damage or defects, it’s advisable to contact the manufacturer for further assistance or to properly dispose of the old drive.
With the old SSD successfully removed from your computer, you are now ready to proceed with installing the new SSD. Ensure that you follow the manufacturer’s instructions and consult your computer’s manual for any specific details or compatibility requirements.
Installing the New Solid State Drive
With the old solid-state drive (SSD) successfully removed from your computer, it’s time to proceed with installing the new SSD. Follow these steps to ensure a proper and secure installation:
1. Review manufacturer instructions: Before proceeding, carefully read the manufacturer’s instructions and guidelines specific to your new SSD. Familiarize yourself with any specific requirements or recommendations for installation.
2. Prepare the new SSD: If necessary, attach any mounting brackets or screws to the new SSD as per the manufacturer’s instructions. Ensure that the brackets or screws are compatible with your computer model and will securely hold the SSD in place.
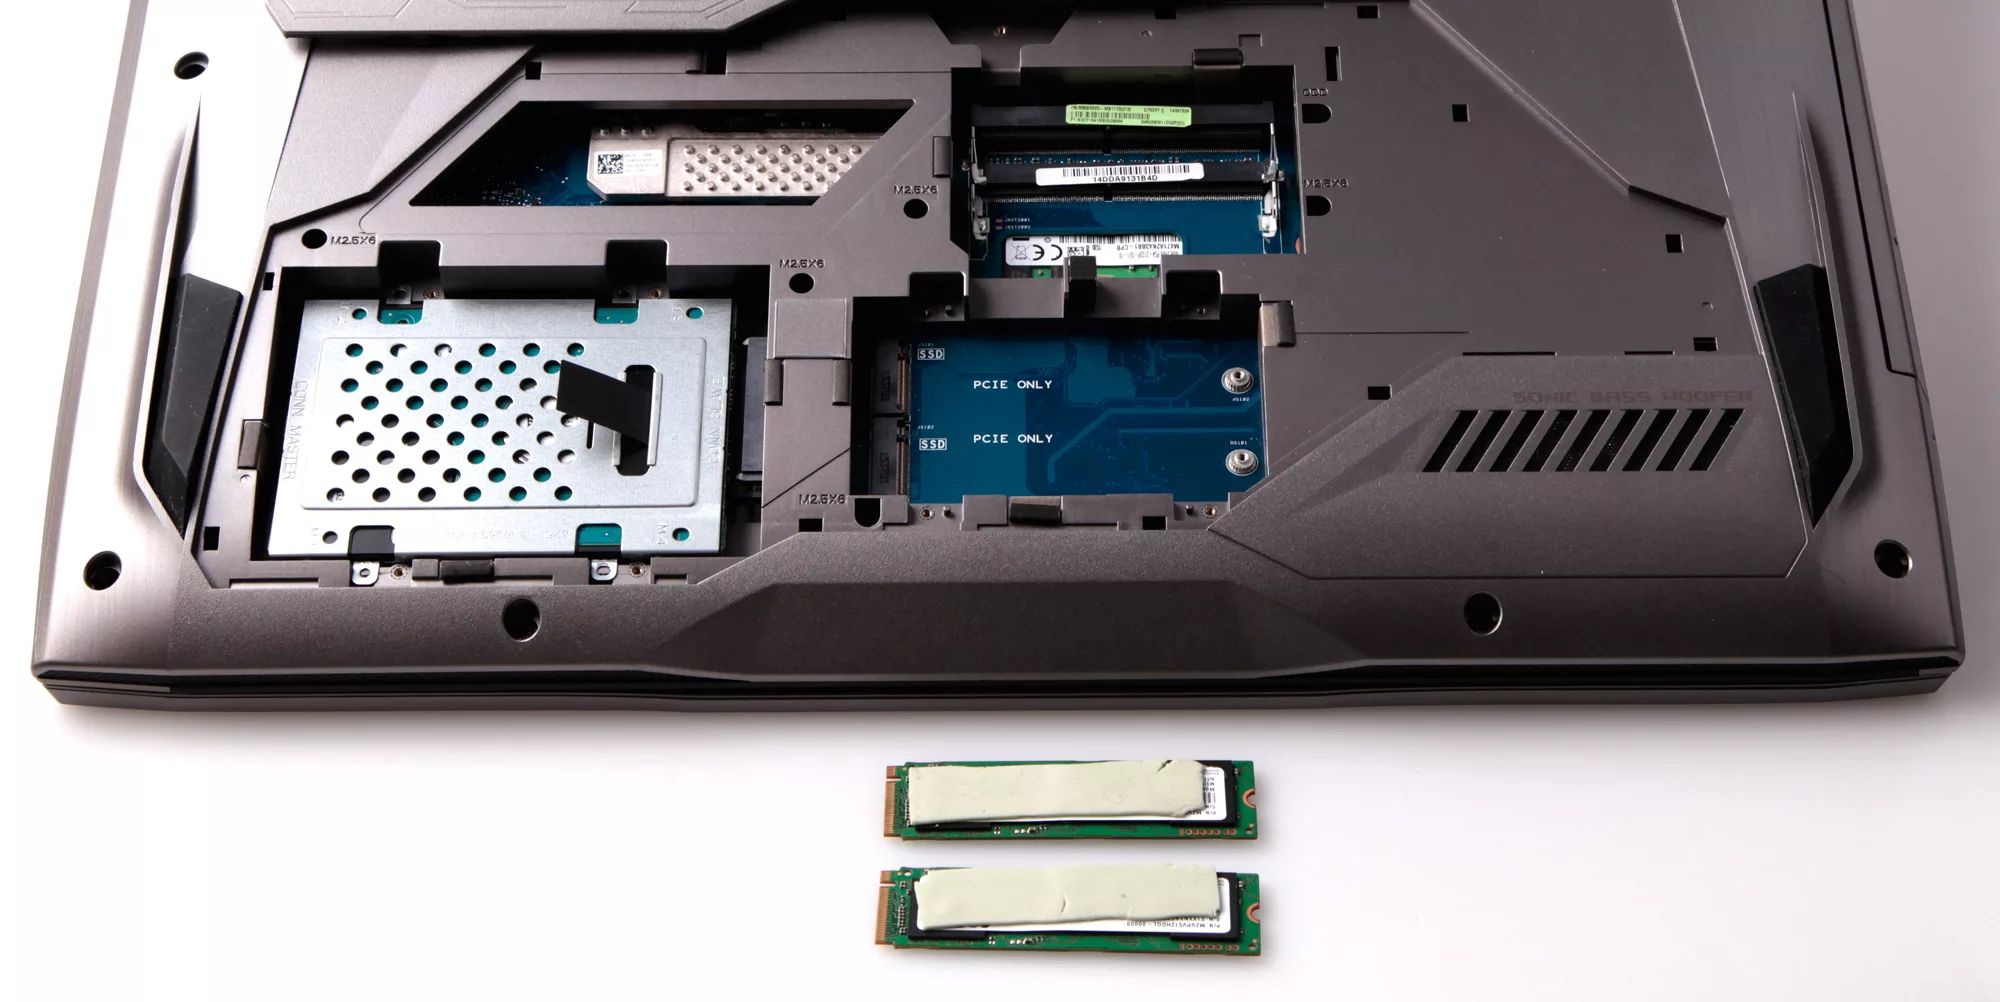
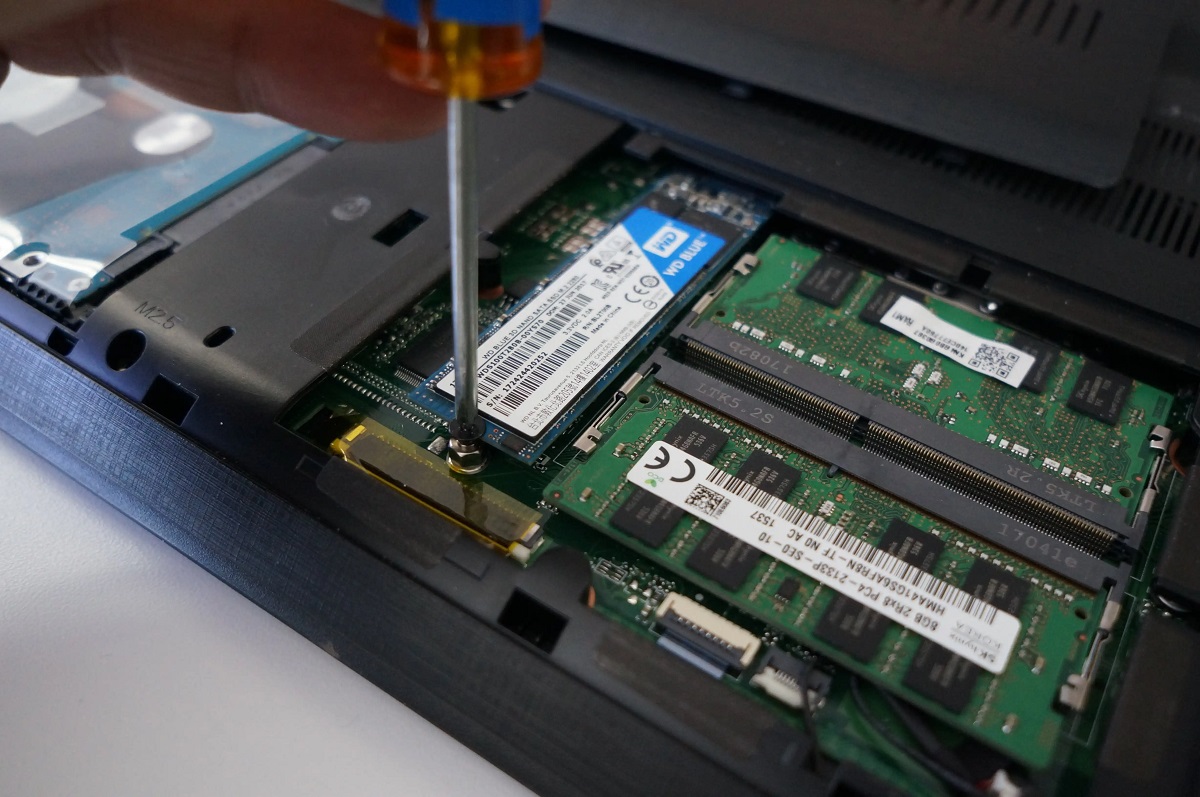
3. Locate the SSD slot: Identify the slot or bay where the SSD will be installed. This may vary depending on your computer model and form factor (2.5-inch, M.2, etc.). Refer to your computer’s manual or manufacturer’s instructions for the exact location of the SSD slot.
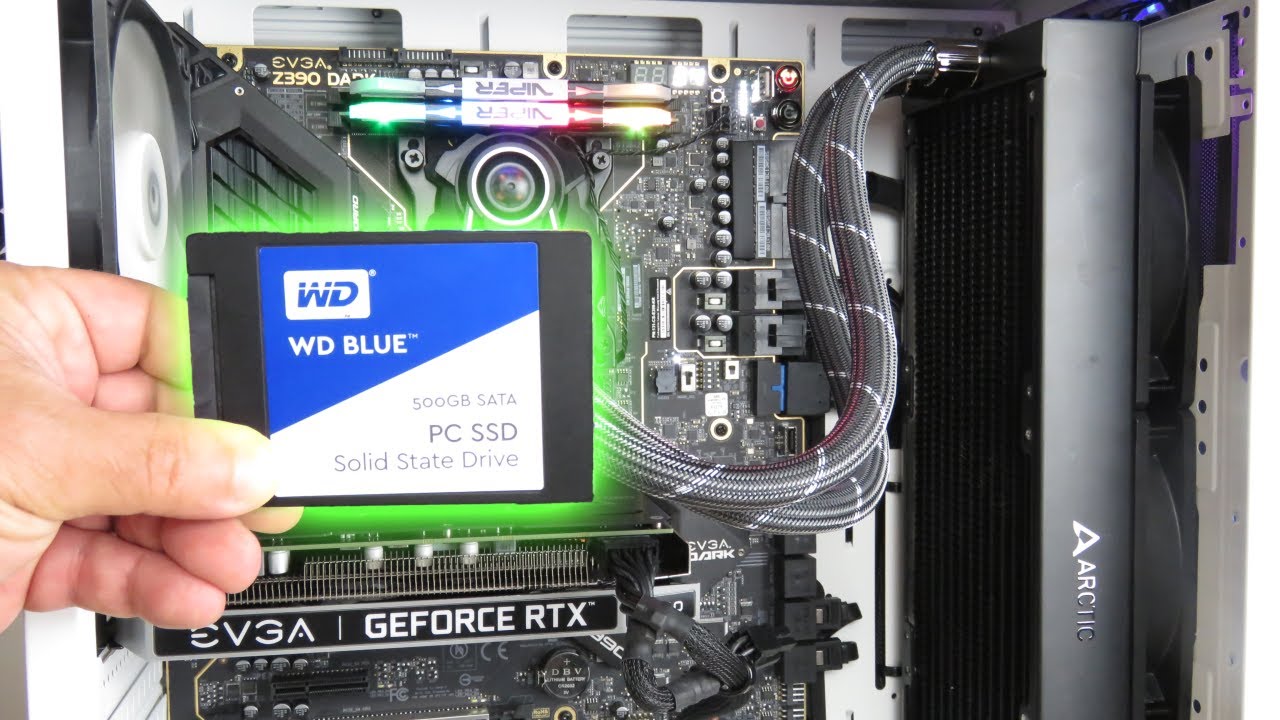
4. Insert the new SSD: Carefully align the new SSD with the slot and gently insert it. If it is an M.2 SSD, insert it at a slight angle and then press it down until it is securely in place. For a 2.5-inch SSD, slide it into the drive bay and ensure that the connectors align with the appropriate ports.
5. Secure the SSD: Depending on your computer model, you may need to secure the SSD using mounting brackets or screws. Follow the manufacturer’s instructions to securely fasten the SSD in place, ensuring it does not move or shift during operation.
6. Connect the cables: Attach the SATA or NVMe cable to the newly installed SSD, ensuring a secure connection. Pay attention to the orientation and alignment of the connectors to guarantee proper communication between the SSD and the motherboard. Use the same SATA or NVMe port that was used for the old SSD.
7. Close the computer case: Once the new SSD is securely installed and connected, carefully close and secure the computer case. Ensure that all screws, latches, or clips are properly fastened to prevent any accidental damage or disconnection of the newly installed SSD.
8. Power on your computer and configure the SSD: Power on your computer and enter the BIOS or UEFI settings to verify that the new SSD is recognized by the system. Some systems may require you to manually select the new SSD as the boot device. Follow your computer’s manual or manufacturer’s instructions for guidance on configuring the SSD.
With the new SSD successfully installed and recognized by your computer, you’re one step closer to enjoying faster speeds, improved performance, and increased storage capacity. However, before you can start using your operating system and files on the new SSD, you’ll need to restore them from the backup you created earlier.
Restoring the Operating System from the Backup
With the new solid-state drive (SSD) successfully installed in your computer, it’s time to restore your operating system from the backup you created earlier. Follow these steps to ensure a smooth and successful restoration:
1. Boot into the recovery environment: Start your computer and access the recovery environment. The method to access the recovery environment varies depending on your operating system. For Windows, you can usually access it by pressing a specific key combination during startup, such as F8 or Shift+F8. For macOS, you can boot into recovery mode by holding down Command + R.
2. Choose the restore option: Within the recovery environment, select the option to restore or recover your operating system. Windows users may have options like “System Restore” or “System Image Recovery,” while macOS users can choose “Restore from Time Machine Backup” or similar options.
3. Select the backup: From the available backups, choose the one you created before replacing the SSD. This should be the most recent backup that contains your operating system, files, and applications. If you stored the backup on an external storage device, make sure it is connected to your computer.
4. Follow the on-screen prompts: Follow the prompts provided by the recovery environment to begin the restoration process. You may be asked to confirm the backup selection and choose the drive where you want to restore the operating system. Select your new SSD as the destination drive.
5. Start the restore process: Once you have confirmed the backup selection and destination drive, start the restore process. This may take some time, depending on the size of your backup and the speed of your computer and the new SSD. Ensure that the process completes without any interruptions.
6. Reboot your computer: Once the restoration is complete, restart your computer. It should now boot into the newly restored operating system on the new SSD. Take this opportunity to verify that everything is functioning properly and that your files, settings, and applications have been restored.
7. Update drivers and software: After restoring the operating system, it’s recommended to update your drivers and software to ensure compatibility, stability, and security. Install the latest updates from your computer manufacturer’s website, as well as updates for your applications and drivers.
By following these steps, you can successfully restore your operating system from the backup onto your new SSD. Enjoy the improved speed and performance that come with the combination of a new SSD and a fresh operating system installation.
Updating Drivers and Software
After restoring the operating system on your new solid-state drive (SSD), it’s essential to update your drivers and software to ensure optimal performance, compatibility, and security. Follow these steps to update your drivers and software:
1. Identify outdated drivers: Start by identifying which drivers need updating. You can check the device manager in Windows or the system information utility on macOS to see a list of installed devices and their associated drivers. Look for any devices or components that have a yellow exclamation mark or question mark, as these indicate outdated or missing drivers.
2. Visit manufacturer websites: Go to the websites of your computer’s manufacturer (for system drivers) and the manufacturers of any individual hardware components. Look for the “Support” or “Downloads” section, where you can find the latest driver updates specific to your computer model or hardware. Download the most recent drivers for each device.
3. Install driver updates: Once you’ve downloaded the updated drivers, open the installation files and follow the on-screen instructions to install them. It’s generally recommended to install one driver at a time to ensure a smooth installation process and to allow for any necessary system restarts between driver installations.
4. Update software applications: Next, turn your attention to updating your software applications. Open each application and navigate to the “Help” or “About” section. Look for an option to check for updates or an automatically update feature. Follow the prompts to update your software to the latest version.
5. Consider driver update utilities: If manually updating drivers seems overwhelming or time-consuming, you can consider using driver update utilities. These tools scan your system, identify outdated drivers, and automatically download and install the latest versions for you. Be cautious and research trustworthy driver update utilities before using them.
6. Check for firmware updates: In addition to drivers, it’s also a good idea to check for firmware updates for your SSD. SSD manufacturers often release firmware updates that can improve performance, stability, and compatibility. Visit the manufacturer’s website or use their provided software to check for and apply any firmware updates specifically designed for your SSD model.
7. Restart your computer: Once all driver and software updates are complete, restart your computer to ensure that all changes take effect. Restarting your system allows the updated drivers and software to fully integrate and function optimally.
By updating your drivers and software, you enhance the performance, stability, and security of your system. Regularly checking for updates and installing them as necessary ensures that your computer and its components are running smoothly and efficiently on your new SSD.
Tips for Optimizing the New Solid State Drive
Now that you have successfully replaced your old storage device with a new solid-state drive (SSD), it’s time to optimize its performance and ensure longevity. Follow these tips to maximize the benefits of your new SSD:
1. Enable TRIM: TRIM is a command that helps optimize SSD performance by allowing the drive to efficiently manage and erase data. Ensure that TRIM is enabled on your operating system. For Windows, open the Command Prompt as an administrator and type “fsutil behavior query DisableDeleteNotify” to check the TRIM status. If it is disabled, type “fsutil behavior set DisableDeleteNotify 0” to enable it.
2. Disable disk defragmentation: SSDs do not benefit from traditional defragmentation techniques like HDDs do. In fact, excessive defragmentation can reduce the lifespan of your SSD. Disable automatic disk defragmentation in your operating system to prevent any unnecessary wear on the SSD. Most modern operating systems automatically detect SSDs and disable defragmentation by default.
3. Adjust power settings: SSDs consume less power compared to traditional hard drives. Customize your power settings to take advantage of the energy-efficient nature of SSDs. In Windows, go to the Control Panel and navigate to “Power Options.” Choose a balanced or power-saving plan to optimize energy usage on your SSD.
4. Update firmware: Check for firmware updates specific to your SSD model on the manufacturer’s website. Firmware updates often address compatibility issues, enhance drive performance, and improve reliability. Regularly updating firmware ensures that your SSD benefits from the latest advancements and optimizations.
5. Optimize operating system settings: Fine-tuning a few operating system settings can further enhance your SSD’s performance. Disable unnecessary system services and startup programs to minimize background processes that can utilize system resources. Adjust your virtual memory settings to prevent excessive read/write operations on the SSD.
6. Keep your SSD cool: Temperature can impact the performance and lifespan of an SSD. Ensure adequate airflow and cooling in your computer case to prevent the SSD from overheating. Installing additional case fans or using liquid cooling solutions can help maintain lower temperatures and improve overall SSD performance.
7. Regularly update your system: Keep your operating system and software applications up to date with the latest updates and security patches. These updates often include performance improvements and bug fixes that can benefit your SSD’s overall performance.
8. Backup regularly: As with any storage device, it’s crucial to regularly back up your data, including your operating system and important files. This ensures that in the event of any unforeseen issues or failures with your SSD, you have a recent backup to rely on for recovery.
Optimizing your new SSD not only improves its performance but also extends its lifespan. By following these tips, you can make the most out of your investment and enjoy the full potential of your new solid-state drive.
Conclusion
Congratulations! You have successfully replaced your old storage device with a new solid-state drive (SSD) without losing your operating system. By following the steps outlined in this guide, you have navigated the process of understanding SSD technology, preparing for the replacement, creating a backup of your operating system, removing the old SSD, installing the new SSD, restoring the operating system, and optimizing the performance of your new SSD.
With the new SSD in place, you can now experience lightning-fast read and write speeds, improved system performance, and enhanced durability. The speed and efficiency of your computer will be noticeably improved, making resource-intensive tasks such as gaming, video editing, and multitasking a breeze.
Remember to regularly update your drivers, firmware, and software to ensure compatibility, stability, and security. Implementing power-saving settings, enabling TRIM, and optimizing your operating system can further enhance the performance and lifespan of your SSD.
As you enjoy the benefits of your new SSD, it is crucial to maintain regular backups to safeguard your data, including the operating system and important files. This ensures that you are prepared for any potential issues that may arise in the future.
Replacing a solid-state drive can be an intimidating task, but with the right knowledge and preparation, you have successfully accomplished it. The rewards are well worth the effort, as you now have a faster, more efficient, and more reliable storage solution powering your computer.
We hope this guide has provided you with the necessary information and confidence to embark on the journey of replacing your solid-state drive. Remember, if you feel overwhelmed or unsure at any point during the process, it is always a good idea to seek assistance from a professional technician.
Thank you for following along with this guide. We wish you success and satisfaction as you enjoy the speed and improved performance of your new solid-state drive!