Introduction
Welcome to the world of high-performance computing! If you’re looking to give your PC a serious speed boost, installing a Samsung Solid State Drive (SSD) is a wise choice. With their lightning-fast read and write speeds, SSDs can significantly improve your computer’s overall performance and reduce loading times for applications, games, and files.
In this comprehensive guide, we will walk you through the step-by-step process of installing a Samsung SSD on your PC. You don’t need to be a computer expert to follow this guide as we will provide easy-to-understand instructions. Just make sure you have the necessary tools, a compatible Samsung SSD, and a bit of patience.
But before we dive into the installation process, let’s take a quick look at why you should consider upgrading to a Samsung SSD for your PC.
Samsung has long been a trusted name in the technology industry, and their SSDs are no exception. They are known for their reliability, speed, and excellent performance. By installing a Samsung SSD, you can experience faster boot times, quicker application launches, and smoother overall system performance. Plus, with their advanced data security features, you can rest assured that your valuable data will be safe and protected.
Additionally, Samsung SSDs are built with durability in mind. Unlike traditional hard drives, SSDs have no moving parts, making them resistant to shock, vibration, and temperature changes. This means that your data will be kept safe even in challenging environments, making Samsung SSDs an excellent choice for both desktop and laptop PCs.
Now that you have a better understanding of the benefits of upgrading to a Samsung SSD, it’s time to get started with the installation process. Let’s dive in and transform your PC into a speed demon!
Prepare your PC for installation
Before diving into the installation process, it’s crucial to prepare your PC to ensure a smooth and successful SSD installation. Taking a few moments to perform these preparatory steps will help minimize any potential issues that may arise during the installation process.
1. Backup your data: It’s always a good idea to back up your important files and documents before making any hardware changes to your computer. This ensures that even if something goes wrong during the installation process, you won’t lose any critical data. You can use an external hard drive, cloud storage, or a USB flash drive to create a backup of your files.
2. Identify your PC’s compatibility: Before purchasing a Samsung SSD, make sure that it is compatible with your PC. Check the manufacturer’s website or your PC’s user manual to determine the type of SSD your PC supports. You’ll want to ensure that you have an available storage bay and that your PC supports the necessary SATA connections for the SSD.
3. Gather the necessary tools: To install the Samsung SSD, you’ll need a few basic tools. Make sure you have a screwdriver, preferably a small Phillips-head screwdriver, to open and secure the PC case. Having an antistatic wristband or working on an antistatic mat is also recommended to protect your components from static electricity.
4. Create a clean workspace: Find a clean and well-lit workspace to carry out the installation process. Ensure that you have enough space to lay out the PC case and to move around comfortably as you work. This will help prevent any accidents and ensure that you can work with precision.
By following these preparatory steps, you are putting yourself in the best position for a successful SSD installation. Taking the time to backup your data and gather the necessary tools will give you peace of mind and help protect your PC during the process. Now that you’re prepared, it’s time to move on to choosing the right SSD for your PC.
Choose the right SSD for your PC
Choosing the right Solid State Drive (SSD) for your PC is crucial to ensure optimal performance and compatibility. With a wide range of options available on the market, it’s essential to consider a few key factors when selecting an SSD for your specific needs. Let’s dive into the important considerations to keep in mind:
1. Capacity: Determine the amount of storage space you require. SSDs come in various capacities, ranging from 120GB to several terabytes. Consider the size of your operating system, applications, and files you plan to store on the SSD. It’s recommended to allocate enough space for your current needs while leaving room for future growth.
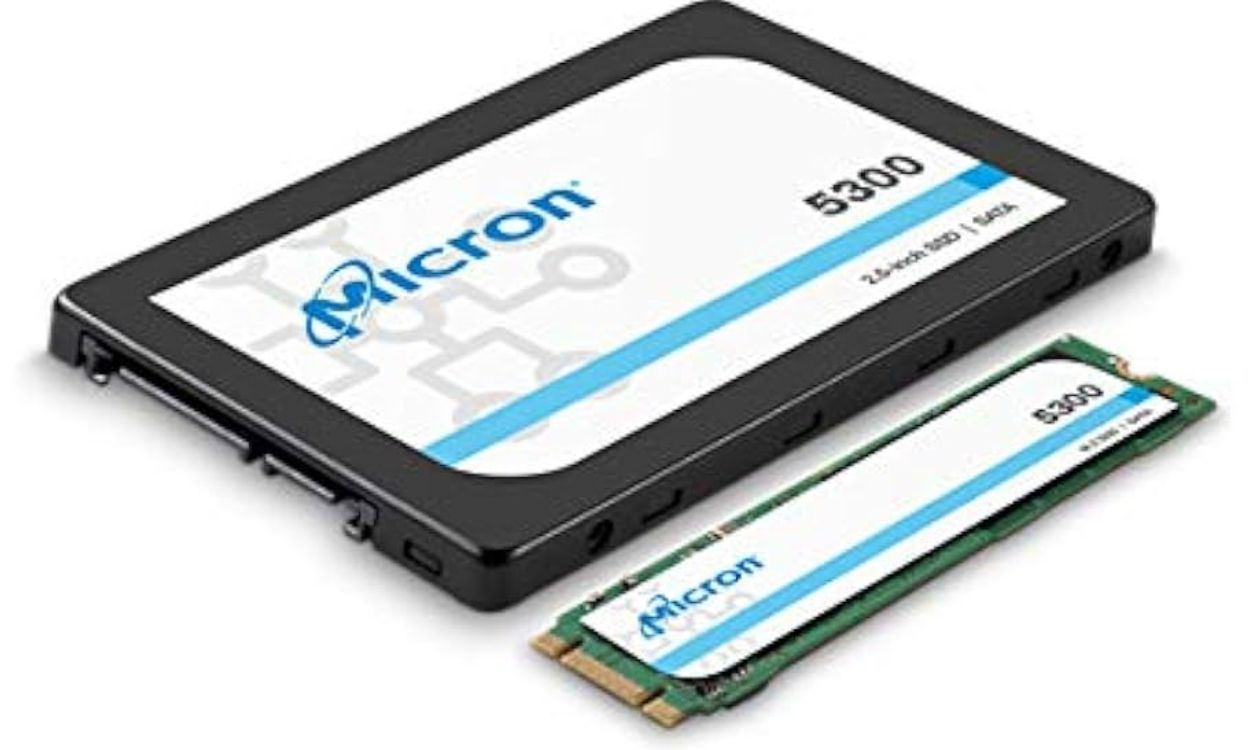
2. Form Factor: Check the form factor supported by your PC. Most SSDs use the 2.5-inch form factor, but newer PCs may support the smaller M.2 form factor. Ensure that the SSD you choose is compatible with the available storage bay in your PC.
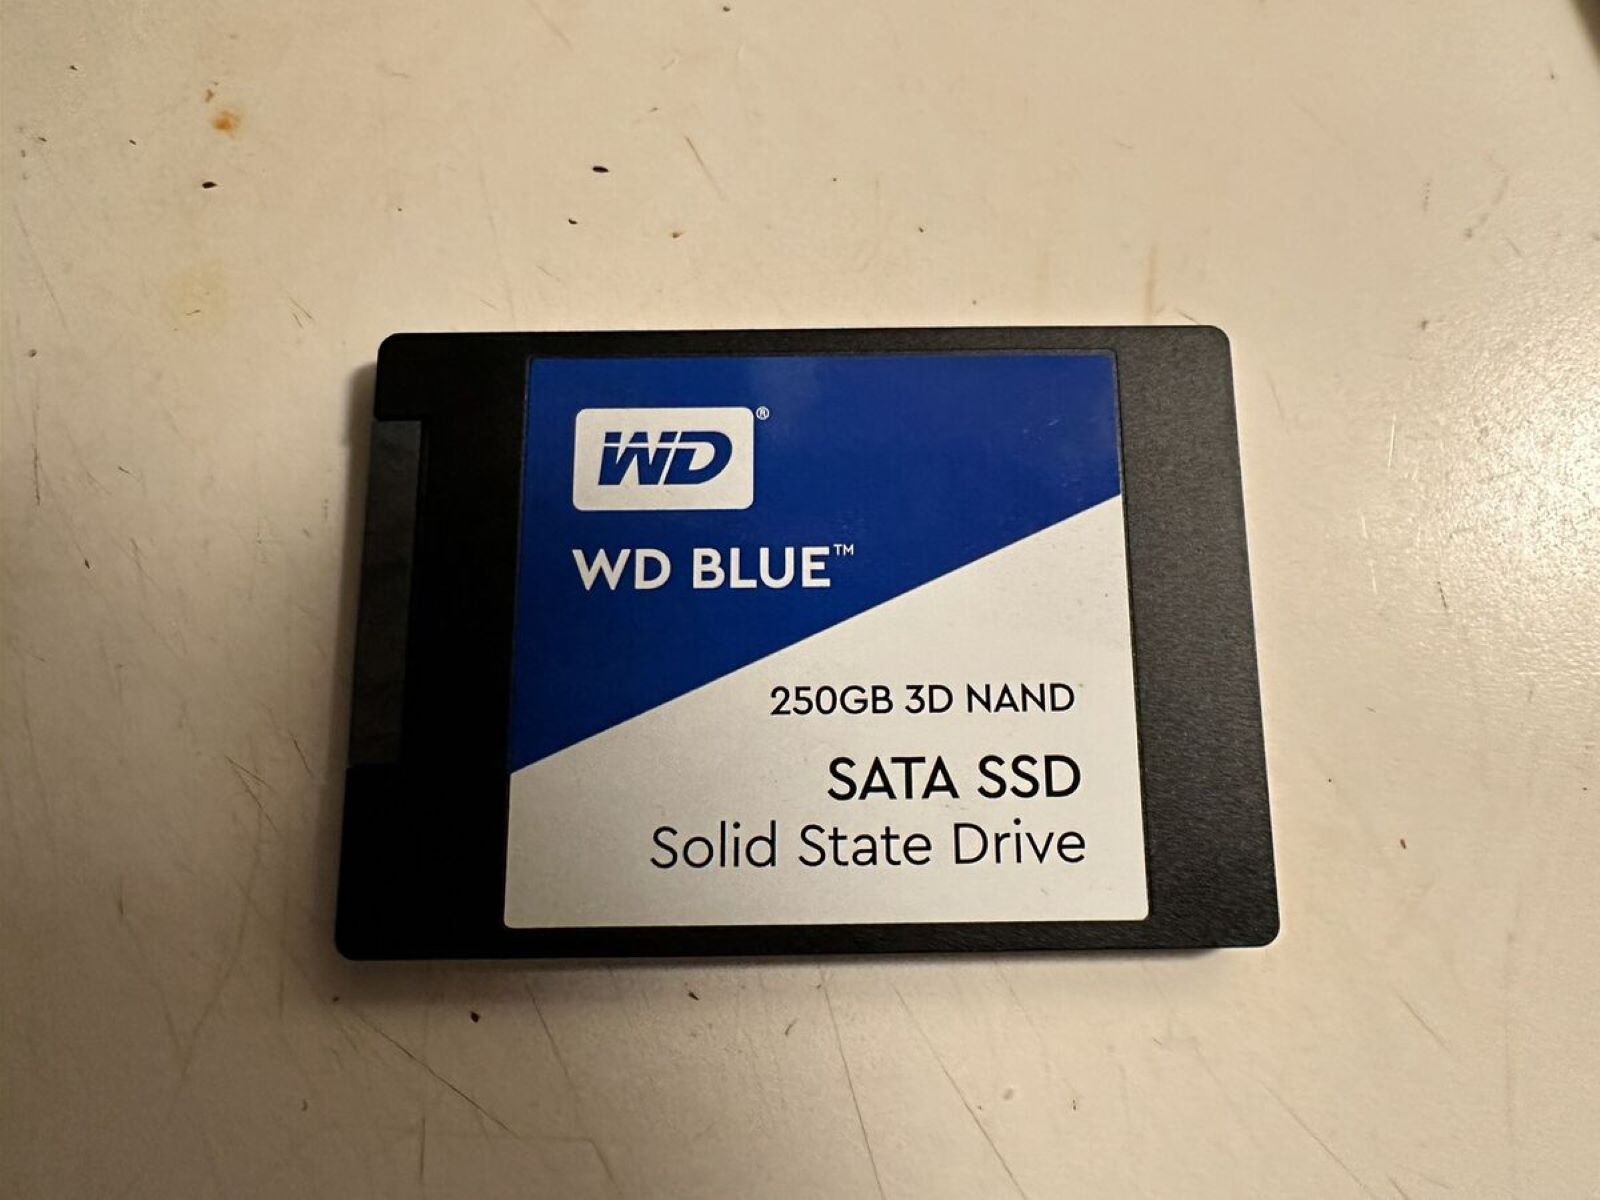
3. Interface: Check the interface compatibility of your PC’s motherboard. Most modern PCs support the SATA III interface, which offers faster transfer speeds compared to SATA II. Also, consider newer options like PCIe for even higher performance if your motherboard supports it.
4. Performance: Consider the read and write speeds of the SSD. Higher speeds mean faster data transfer, resulting in quicker boot times and faster application launches. Check the specifications of different SSD models to understand their performance capabilities.
5. Endurance: SSD endurance refers to the amount of data that can be written to the drive before it reaches its maximum lifetime. It’s crucial to choose an SSD with sufficient endurance for your usage patterns, especially if you anticipate heavy read and write workloads.
6. Price: Set a budget for your SSD purchase. SSD prices vary based on capacity, performance, and brand. Consider your requirements and find the right balance between cost and performance.
7. Brand and Reliability: Stick to reputable brands known for their reliability, such as Samsung. These brands often offer warranties and provide regular firmware updates, ensuring long-term support for your SSD.
By considering these factors, you can make an informed decision and choose an SSD that best fits your PC’s requirements. Now that you’ve selected the right SSD, it’s time to move on to the next step: backing up your data before installation.
Backup your data
Before proceeding with the installation of your new Samsung Solid State Drive (SSD), it is essential to back up your data to ensure its safety. While the installation process is typically straightforward, there is always a small risk of data loss or corruption. By taking a few moments to create a backup, you can have peace of mind knowing that your valuable files are protected.
There are several methods you can use to backup your data, depending on your preferences and the amount of data you need to back up:
1. External hard drive: One of the most common ways to back up data is by using an external hard drive. Simply connect the external drive to your computer and copy the necessary files and folders onto it. This method is especially useful if you have a large amount of data to back up.
2. Cloud storage: Cloud storage services like Google Drive, Dropbox, or OneDrive offer the convenience of backing up your files online. Upload your important documents, photos, and other files to the cloud, ensuring they are stored securely and accessible from anywhere with an internet connection.
3. USB flash drive: If you only have a small amount of data to back up, using a USB flash drive can be a quick and easy option. Simply copy the necessary files onto the flash drive, and you’ll have a portable backup solution.
4. Network-attached storage (NAS): If you have a NAS device connected to your home network, you can back up your data directly to it. This allows for easy access to your files from multiple devices and provides an additional layer of data redundancy.
5. Online backup services: There are numerous online backup services available that provide automated backup solutions. These services continuously back up your files in the background, ensuring that you have the most up-to-date copies of your data.
Regardless of the method you choose, ensure that your backup is complete and successfully stored before proceeding with the SSD installation. Take the time to verify that all your important files, documents, photos, and any other necessary data are safely backed up.
By backing up your data, you’re taking a proactive step to protect your files from any potential mishaps during the installation process. This precautionary measure ensures that even in the unlikely event of data loss, you’ll have a copy readily available for recovery. Now that your data is safely backed up, you’re ready to move on to the next step: disconnecting all power sources from your PC.
Disconnect all power sources
Before proceeding with any hardware installation, it’s crucial to ensure your safety by disconnecting all power sources from your PC. This step not only protects you from electric shock but also prevents any accidental damage to your computer components during the installation process. Follow these steps to disconnect the power sources:
1. Shut down your PC: Begin by shutting down your computer properly. Save any open files and close all applications before initiating the shutdown process. This ensures that your operating system and applications are safely closed before disconnecting the power.
2. Unplug the power cord: Locate the power cord connected to your PC and unplug it from the power outlet. It is usually at the back of the computer case. This action will cut off the main power supply to your PC, ensuring that no electricity is flowing through the system.
3. Remove any external connectors: Disconnect any peripherals and external devices connected to your PC, such as USB devices, headphones, or speakers. This step ensures that no stray electrical currents can affect the installation process or potentially damage your PC components.
4. Press the power button: Once you have removed all external connectors and unplugged the power cord, press the power button on your PC for a few seconds. This action discharges any residual power from the system, ensuring a safe environment for the internal hardware installation.
5. Use an antistatic wristband: Consider wearing an antistatic wristband while working inside your PC. An antistatic wristband helps discharge any static electricity you may have accumulated, protecting delicate computer components from damage caused by electrostatic discharge.
By following these steps to disconnect all power sources, you minimize the risk of electrical shock and protect your PC from accidental damage. Take a moment to ensure that all power sources are properly disconnected before proceeding with the next installation step. Once all power sources have been disconnected, you are ready to move on to opening the PC case.
Open the PC case
Now that you have taken the necessary precautions and disconnected all power sources, it’s time to open your PC case. Opening the case will grant you access to the internal components, allowing you to install the Samsung Solid State Drive (SSD) effectively. Follow these steps to open the PC case:
1. Ground yourself: Before touching any internal components, it’s important to ground yourself to discharge any static electricity. You can do this by touching a metal surface such as the PC case or using an antistatic wristband.
2. Locate the screws or latches: Examine the exterior of your PC case to find the screws or latches that secure the side panel. Different cases have different mechanisms for opening, such as thumbscrews or release latches. Refer to your PC case’s manual or manufacturer’s website if you are unsure about the specific method for your case.
3. Unscrew or unlatch the side panel: Use the appropriate tool, such as a Phillips screwdriver, to remove the screws that secure the side panel. If your case has latches, release them by pressing or sliding them in the designated direction. Carefully slide off the side panel once it is unrestricted.
4. Set aside the side panel: Place the side panel in a safe location, such as a clean and flat surface, to prevent it from being damaged during the installation process. Make sure it is within reach for easy reattachment after installing the SSD.
5. Grounding yourself periodically: It’s essential to ground yourself periodically throughout the installation process to release any static electricity that may have built up. By doing this, you minimize the risk of damaging sensitive components due to electrostatic discharge.
Once you have successfully opened the PC case, you are ready to move on to the next step: locating the storage bays inside your computer.
Locate the storage bays
After opening the PC case, the next step in installing your Samsung Solid State Drive (SSD) is to locate the storage bays within your computer. These bays are where your current hard drive or SSD is installed, and it’s where you will be inserting your new Samsung SSD. Here’s how to find the storage bays:
1. Identify the drive cages: Look for the drive cages inside your PC case. These cages are typically metal frames or brackets that securely hold the storage drives in place. They are often located towards the front or bottom of the case.
2. Check for existing drives: Take a look inside the drive cages to see if there are any existing drives installed. Commonly, there may be a traditional hard drive or another SSD already present. Take note of the available slots and assess which one you would like to use for your new Samsung SSD.
3. Determine the mounting method: Observe how the existing drives are mounted in the drive cages. There are typically two common methods: tool-less or screw-mounted. Tool-less mounting systems use plastic brackets or trays to slide the drive into place, while screw-mounted systems require screws to secure the drive in the bay.
4. Check for additional storage bays: Some PC cases may have additional storage bays in different areas. These could be hidden behind the motherboard tray, in the top or side compartments, or even in removable drive caddies. Explore the case to identify any available storage bays that can accommodate your new SSD.
5. Refer to the PC case manual: If you are unsure about the location of the storage bays or the mounting methods used in your specific PC case, refer to the case manual or the manufacturer’s website. These resources will provide detailed information on the internal layout and drive installation methods.
Once you have located the storage bays and determined the mounting method, you are ready to insert your Samsung SSD. The next step is to carefully insert the SSD into the chosen storage bay and secure it in place. We will cover this installation process in the next step of the guide.
Insert the SSD into the storage bay
Now that you have located the storage bay, it’s time to insert your Samsung Solid State Drive (SSD) into the bay. The process of inserting the SSD may vary depending on your PC case and the mounting system used. Follow these general steps to insert your SSD:
1. Remove the SSD from its packaging: Carefully remove the Samsung SSD from its anti-static bag or packaging, taking care not to touch the connectors or any sensitive components.
2. Align the SSD with the storage bay: Orient the SSD so that the connectors on the back of the drive line up with the corresponding connectors in the storage bay. Ensure that the SATA connectors are aligned, and if using a tool-less mounting system, align the screw holes or slots with the mounting points.
3. Slide or insert the SSD into the bay: With the SSD properly aligned, gently slide it into the storage bay or insert it into the tool-less mounting system. Apply gentle and even pressure to ensure the SSD is fully inserted and properly seated in the bay.
4. Secure the SSD if necessary: If you are using a screw-mounted system, use the appropriate screws to secure the SSD in place. Insert the screws into the designated screw holes on the sides or bottom of the drive cage and tighten them until the SSD is firmly secured.
5. Double-check the alignment and connections: Once the SSD is inserted and secured, double-check the alignment and make sure that the SATA connectors are snugly attached. Additionally, ensure that the power connector is properly seated in the power port of the SSD.
It’s important to handle the SSD with care throughout this process, avoiding excessive force or bending. Take your time to ensure proper alignment and connection to prevent any damage to the SSD or other components in your PC.
With the SSD successfully inserted and secured in the storage bay, you’re now ready to move on to the next step: connecting the necessary SATA and power cables to the SSD to power and enable data transfer.
Secure the SSD with screws
After inserting your Samsung Solid State Drive (SSD) into the storage bay, it’s important to secure it in place using screws. This step ensures that the SSD remains stable and does not come loose during usage or movement of your PC. Follow these steps to securely fasten the SSD with screws:
1. Choose the appropriate screws: Depending on your PC case, you might have different types of screws available. Look for screws specifically designed for securing drives, commonly labeled as HDD/SSD screws. These screws are typically small and have a flat or recessed head.
2. Position the screws: Locate the screw holes on the sides or bottom of the drive cage where the SSD is inserted. Align the screw holes on the SSD with the corresponding holes on the drive cage. Ensure that the holes line up correctly before proceeding.
3. Insert the screws: Take one screw at a time and carefully insert it into the aligned screw hole. Use a screwdriver, preferably a small Phillips-head screwdriver, to turn the screw clockwise gently. Apply just enough pressure to secure the SSD without overtightening, as overtightening can potentially damage the SSD or the drive cage.
4. Repeat for multiple screws: If your SSD requires multiple screws for secure attachment, repeat step 3 for each additional screw hole. Ensure that all screws are properly aligned and tightened to secure the SSD effectively.
5. Check the stability: Once all screws are in place, check the stability of the SSD by slightly shaking the drive or gently nudging it with your hand. The SSD should remain firmly in place without any noticeable movement. If the SSD seems loose, double-check the alignment and tightness of the screws.
By securely fastening the SSD with screws, you ensure that the drive remains stable and properly connected inside the PC case. This step is crucial for maintaining proper data transfer and preventing any physical damage to the SSD during usage.
Now that the SSD is securely fastened, it’s time to move on to connecting the necessary SATA and power cables to the SSD, which will provide power and enable data transfer for the drive.
Connect the SATA and power cables to the SSD
After securely fastening your Samsung Solid State Drive (SSD) in the storage bay, the next step is to connect the necessary cables to the SSD. These cables provide power and enable data transfer, allowing your PC to recognize and utilize the SSD. Follow these steps to connect the SATA and power cables to the SSD:
1. Locate the SATA ports: Identify the SATA ports on your motherboard. These ports are usually labeled SATA 1, SATA 2, and so on. They are typically rectangular in shape with small pinholes for the connectors.
2. Locate the SATA cable: Take the SATA cable that came with your motherboard or SSD. It has two connectors—one for the motherboard and one for the SSD. These connectors are usually L-shaped, allowing for easy insertion.
3. Connect the SATA cable to the motherboard: Align the SATA cable’s motherboard connector with the corresponding SATA port on the motherboard. Insert the connector into the port, making sure it is securely connected. Apply gentle pressure until you hear a click, indicating a proper connection.
4. Connect the SATA cable to the SSD: Locate the SATA connector on the SSD. Align the SSD’s SATA power connector with the SATA cable’s SSD connector. Insert the connector and ensure a firm connection, taking care not to exert too much force that may damage the connectors or the SSD itself.
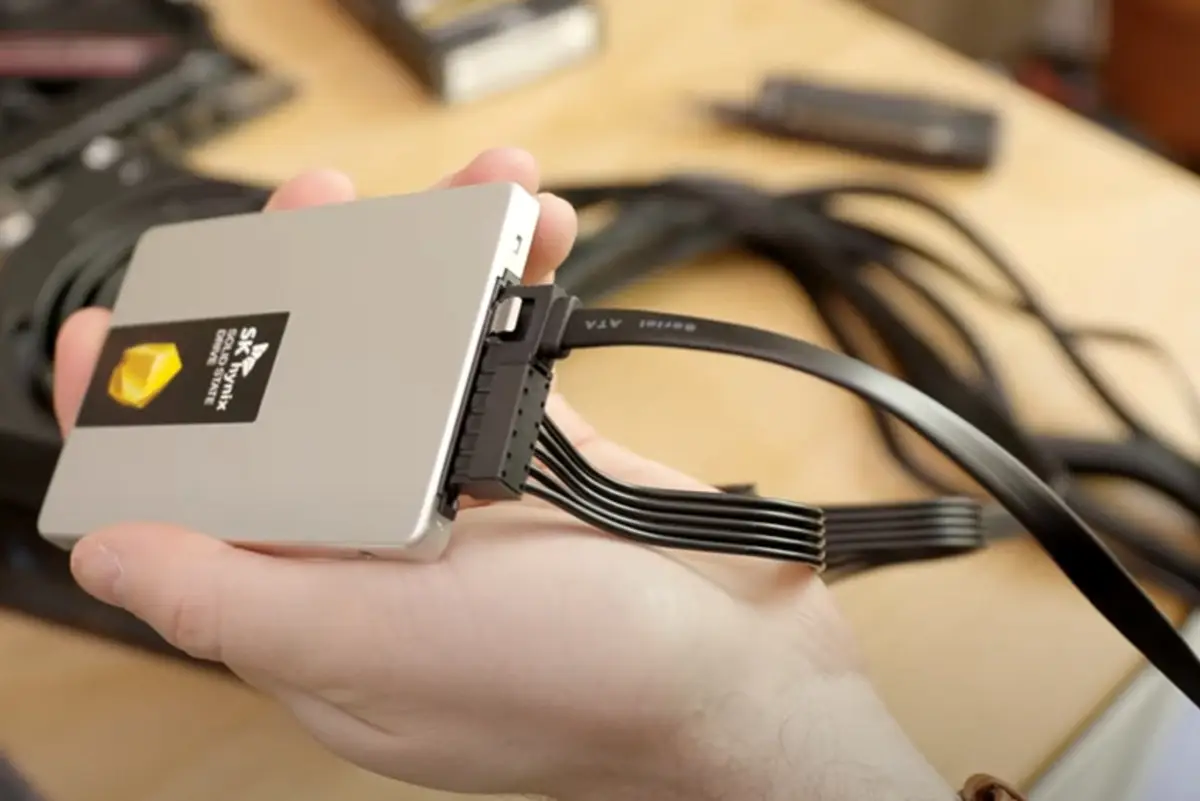
5. Connect the power cable to the SSD: Locate a free SATA power cable from your PC’s power supply unit. The SATA power cable has a long, thin connector with L-shaped ends. Align the power cable’s connector with the SSD’s power port, and firmly insert the connector until it clicks into place.
6. Ensure secure connections: Double-check that both the SATA and power cable connections are secure and firmly attached to the SSD. Ensure that no pins are bent or misaligned, as this may affect the performance and functionality of the SSD.
By connecting the SATA and power cables, you provide the necessary connections for your PC to communicate with and power the Samsung SSD. These connections enable data transfer and ensure that the SSD is properly recognized in your system.
Now that the necessary cables are connected, you can move on to the next step: closing the PC case and preparing to power on your PC.
Close the PC case
After successfully connecting the cables to your Samsung Solid State Drive (SSD), it’s time to close the PC case. Closing the case not only protects the internal components from dust and accidental damage but also ensures the overall stability and proper function of your PC. Follow these steps to close the PC case:
1. Position the side panel: Take the side panel that you removed earlier and carefully align it with the case. Make sure that the panel lines up with the screw holes or latches on the case.
2. Slide or secure the side panel: If your case has a slide-in mechanism, gently slide the panel back into place until it fits snugly. If your case uses screws or latches, follow the specific instructions provided by the case manufacturer to secure the panel in place.
3. Tighten screws or engage latches: If your case has screws, use the appropriate screwdriver to tighten them until they are snug, but avoid over-tightening, as this can damage the case or strip the screw threads. If your case uses latches, make sure they are fully engaged to secure the side panel.
4. Check for proper closure: After securing the side panel, check all sides of the case to ensure it is securely closed. Gently press on the edges or give a light shake to confirm that the panel is snugly and securely in place.
5. Verify cables and connections: Before powering on your PC, do a final check to ensure that all cables and connections are properly seated and secured. Verify that the SATA and power cables connected to your SSD are firmly attached and not loose.
By properly closing the PC case, you safeguard your internal components from dust, debris, and accidental damage. It also ensures that the cables and connections remain secure, minimizing the risk of any disruptions to the functioning of your PC.
Now that your PC case is closed, you’re ready for the next step: powering on your PC and checking the new Samsung SSD!
Power on your PC and check the new drive
With the PC case closed, it’s time to power on your computer and ensure that the new Samsung Solid State Drive (SSD) is recognized and functioning correctly. Follow these steps to power on your PC and check the new drive:
1. Reconnect the power cord: Connect the power cord back into the power outlet, making sure it is securely plugged in. This step restores power to your PC.
2. Press the power button: Locate the power button on your PC case. Press it to turn on your computer. Your PC will begin the startup process, and you’ll see the manufacturer’s logo or BIOS screen depending on your system configuration.
3. Access the BIOS: During startup, your computer may display a message to press a particular key (often Del or F2) to access the BIOS settings. Quickly press the specified key to enter the BIOS.
4. Verify the SSD is detected: Once in the BIOS, navigate to the storage or drive configuration section. Look for the new Samsung SSD in the list of drives connected to your PC. The SSD’s model name or capacity should be displayed, indicating that it has been successfully recognized by the system.
5. Save settings and exit: If your SSD is detected in the BIOS, save the changes (if any) by following the instructions provided in the BIOS interface. Usually, this involves navigating to the Exit menu and selecting the option to save and exit the BIOS. Your PC will then proceed with the normal boot process.
6. Check the new drive in your operating system: After your PC finishes booting up, open your operating system, such as Windows or macOS. Go to the File Explorer (Windows) or Finder (macOS) and check if the new SSD is visible under the list of drives. You should see your Samsung SSD listed with its assigned drive letter or name.
7. Test the new SSD: To ensure that the SSD is functioning correctly, copy some files or launch applications from the new drive. Pay attention to the noticeably faster loading times compared to a traditional hard drive. You can also run benchmarking tools to measure the SSD’s performance and verify its read and write speeds.
If your new SSD is recognized by the BIOS and operating system, and you can access and use it without any issues, congratulations! You have successfully installed and integrated your Samsung SSD into your PC.
However, if you encounter any difficulties, ensure that all cables and connections are securely plugged in and that the SSD is properly seated in the storage bay. Additionally, consult your motherboard’s manual or reach out to the manufacturer’s customer support for troubleshooting assistance.
Now that you have confirmed the successful installation of your Samsung SSD, you can enjoy the improved performance and faster data access that it brings to your PC.
Format and partition the SSD
After installing a new Samsung Solid State Drive (SSD) in your PC, it’s important to format and partition the drive to prepare it for use. Formatting and partitioning allow you to organize and allocate space on the SSD for storing files and installing the operating system. Follow these steps to format and partition your new SSD:
1. Open disk management: In Windows, you can access the Disk Management utility by right-clicking on the Start button and selecting “Disk Management” from the context menu. This utility allows you to manage drives connected to your PC.
2. Locate the new SSD: In the Disk Management window, you should see a list of connected drives. Locate the newly installed Samsung SSD in the list. It will likely be labeled as “Disk X” with a size corresponding to your SSD’s capacity.
3. Initialize the SSD: Right-click on the SSD and select “Initialize Disk”. Choose the appropriate partition style, either MBR (Master Boot Record) or GPT (GUID Partition Table), based on your system requirements. Click “OK” to proceed.
4. Create a new partition: Right-click on the unallocated space of the SSD and select “New Simple Volume”. In the new partition wizard, specify the size of the partition to allocate on your SSD. You can assign a drive letter or mount point to identify the partition. Follow the on-screen prompts to complete the process.
5. Format the partition: Once the new partition is created, right-click on it and select “Format”. Choose the desired file system, such as NTFS, and assign a meaningful volume label. Quick format usually suffices, but if you want to perform a thorough formatting process, select the “Perform a quick format” option. Click “OK” to begin the formatting process.
6. Repeat for additional partitions (if needed): If you want to create multiple partitions on the SSD, repeat steps 4 and 5 for each partition you wish to allocate. Adjust the size and file system selection based on your specific needs.
7. Finalize the formatting and partitioning: Once the formatting process is complete, close the Disk Management utility. Your Samsung SSD is now formatted, partitioned, and ready for use.
Note that if you plan on installing an operating system on the SSD, you may need to restart your PC and boot from an installation media (such as a USB drive or DVD) to initiate the installation process. Follow the on-screen instructions during the installation to select the SSD partition as the destination for the operating system installation.
By formatting and partitioning your Samsung SSD, you have optimized it for storing and organizing files. You can now start utilizing the improved performance and faster data access that the SSD offers.
Remember to regularly backup your data to ensure you have a copy in case of any unforeseen issues or drive failures. With proper care and maintenance, your Samsung SSD will continue to provide reliable and high-performance storage for years to come.
Conclusion
Congratulations on successfully installing your new Samsung Solid State Drive (SSD) in your PC! By following the step-by-step guide outlined in this article, you have unlocked the potential for improved performance, faster data access, and a more robust storage solution.
We began by understanding the benefits of upgrading to a Samsung SSD, including their reliability, speed, data security features, and durability. With these advantages in mind, you embarked on the installation journey, starting with preparing your PC, choosing the right SSD, and backing up your data to ensure a smooth transition.
You then disconnected all power sources, opened the PC case, located the storage bays, and inserted the Samsung SSD securely. After securing the SSD with screws and connecting the necessary SATA and power cables, you closed the PC case and powered on your computer.
With eager anticipation, you checked the BIOS and operating system to verify that the new drive was recognized. After ensuring the successful integration of the SSD, you formatted and partitioned the drive, readying it for use by creating a new partition, formatting it, and customizing the file system and labels.
Now, armed with your newly installed Samsung SSD, you can experience the benefits of faster boot times, quicker application launches, and smooth overall system performance. Take advantage of the increased speed and efficiency of your PC by utilizing the SSD for storing files, running applications, and even installing your operating system.
Remember to keep your SSD firmware updated for optimal performance, and continue to back up your data regularly. With proper care and maintenance, your Samsung SSD will serve you well for years to come.
Thank you for following this guide, and we hope that your newly installed Samsung SSD brings a new level of speed and performance to your PC. Enjoy your enhanced computing experience!