Introduction
Welcome to our guide on how to install an SSD (Solid State Drive) in your PC. Upgrading to an SSD is a great way to boost your computer’s performance and improve its overall speed and responsiveness. Whether you’re a tech enthusiast or a casual user, installing an SSD is a relatively straightforward process that doesn’t require advanced technical skills.
SSDs have become increasingly popular due to their faster read and write speeds compared to traditional hard disk drives (HDDs). They use flash memory to store data, resulting in quicker boot times, faster application loading, and improved system performance. By replacing your current storage drive with an SSD, you’ll experience a significant improvement in your computing experience.
In this guide, we’ll walk you through the step-by-step process of installing an SSD in your PC. You’ll learn how to gather the necessary tools, prepare your PC, locate the storage drive bay, mount the SSD, connect the cables, secure the SSD in place, and finally boot up your PC to configure the SSD.
Before we get started, it’s important to note that every PC is slightly different in terms of its internal components and layout. Therefore, while we aim to provide general instructions that apply to most desktop PCs, we recommend consulting your computer’s manual or contacting the manufacturer for specific guidance tailored to your device.
Now, let’s dive into the exciting world of SSD installation and give your PC a significant performance boost!
Step 1: Gather the necessary tools and materials
Before you begin the installation process, it’s essential to gather all the tools and materials you’ll need. Ensuring you have everything in advance will make the installation process smoother and more efficient. Here’s a list of items you’ll need:
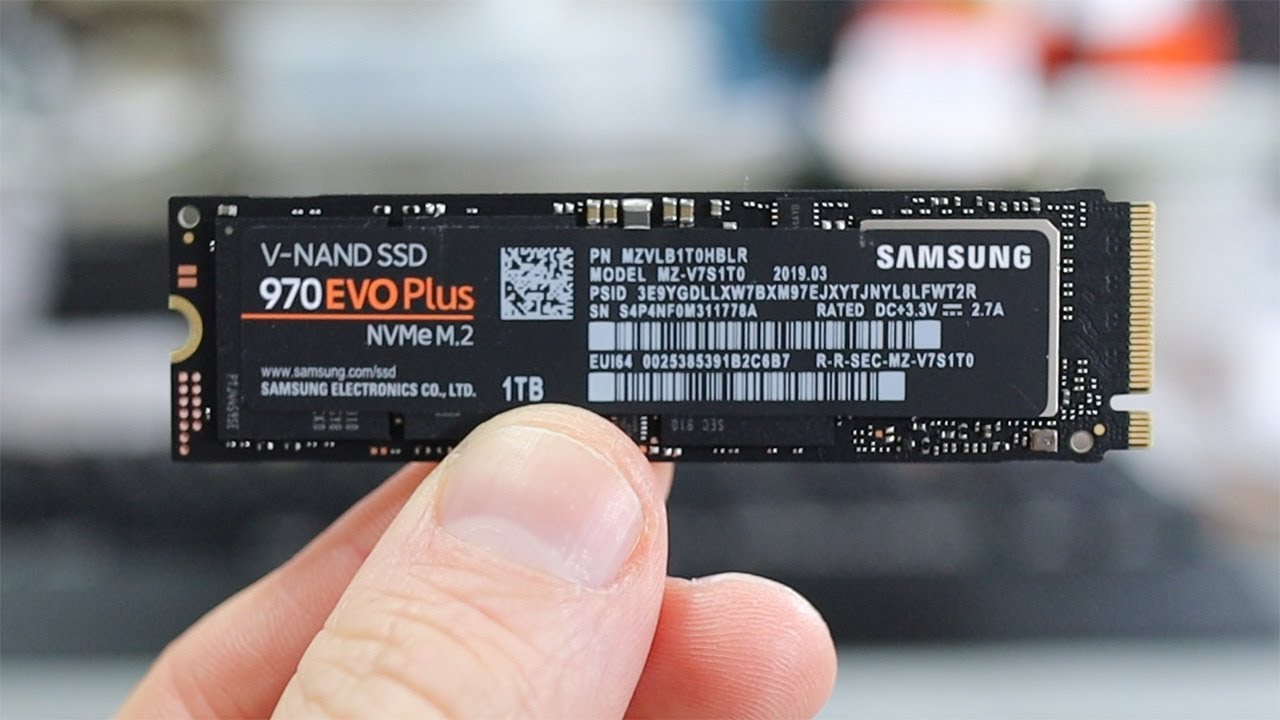
- SSD: Make sure you have the SSD you want to install. Check the specifications of your PC to determine the appropriate size and form factor.
- Screwdriver: Depending on your PC case, you may need a Phillips head or a Torx screwdriver to remove and secure the SSD.
- Anti-static wrist strap: This will help protect your components from static electricity during the installation process.
- SATA cables: Check if you have spare SATA cables or purchase additional ones if needed for connecting the SSD to the motherboard.
- Power cable: Ensure you have a spare power cable to connect the SSD to the power supply.
- Data transfer cable (optional): If you want to transfer data from your existing storage drive to the new SSD, you may need a data transfer cable or an external hard drive enclosure.
It’s always a good idea to gather and prepare all the necessary tools and materials before you start opening up your PC. This way, you won’t have to interrupt the process and search for missing items.
Remember to follow safety precautions and handle your PC components with care. Always disconnect the power cord and ground yourself by touching a metal surface before working on your PC’s internals.
Now that you have all the tools and materials ready, we can move on to preparing your PC for the SSD installation. This is an exciting step that will bring your PC one step closer to improved performance and faster speeds!
Step 2: Prepare your PC for installation
Before installing the SSD, it’s important to prepare your PC by ensuring it’s turned off and disconnected from the power source. Follow these steps to get your PC ready for the installation:
- Turn off your PC: Shut down your computer and make sure it’s completely powered off. Unplug the power cord from the wall outlet to prevent any accidents.
- Disconnect peripherals: Remove any connected peripherals such as monitors, keyboards, and mice. This will ensure a more comfortable and clutter-free workspace during the installation.
- Ground yourself: Grounding yourself is crucial to prevent static electricity from damaging your PC’s components. Touch a grounded metal object, like the PC case, to discharge any static electricity that may have built up in your body.
- Find a well-lit and static-free workspace: Choose a well-lit and clean workspace to perform the installation. A static-free surface, like a wooden table, is preferable to prevent any electrostatic discharge (ESD) that could damage your PC.
- Organize cables: Take a moment to organize the cables inside your PC case. Neatly arrange the existing cables to make it easier to access the drive bay and install the new SSD.
By following these preparation steps, you’ll create an environment that minimizes the risk of static electricity and helps you work more efficiently. Additionally, organizing the cables inside your PC case will make the installation process smoother and prevent any tangled wires or obstacles when mounting the SSD.
Now that your PC is prepped and ready, it’s time to move on to the next step: opening the PC case. Remember to handle the internal components with care to avoid any damage and ensure a successful installation.
Step 3: Open your PC case
In order to install the SSD into your PC, you’ll need to open the PC case to gain access to the internal components. Follow these steps to safely open your PC case:
- Locate the case screws: Depending on the design of your PC case, you’ll typically find screws securing the side panel. They are usually located at the rear of the case. Use a screwdriver to remove these screws.
- Remove the side panel: Carefully slide or lift off the side panel of your PC case. It may require some gentle force, but be cautious not to apply too much pressure as it could damage the case or internal components.
- Set aside the side panel: Find a safe place to set aside the removed side panel. It’s a good idea to place it somewhere where it won’t get damaged or in the way during the installation process.
Opening your PC case is a crucial step to gain access to the internal components. It’s important to handle the case and side panel carefully to avoid any accidental damage. Additionally, be mindful of any sharp edges or points on the case to prevent injury.
Once the PC case is open and the side panel is safely set aside, you’ll be able to proceed to the next step: locating the storage drive bay where the SSD will be installed.
Now that your PC case is open and ready, it’s time to move on to the next step in the installation process: locating the storage drive bay. Let’s continue our journey to upgrade your PC with an SSD!
Step 4: Locate the storage drive bay
The storage drive bay in your PC is where the SSD will be installed. It’s important to locate the appropriate drive bay before proceeding with the installation. Here’s how to find the storage drive bay:
- Inspect the internal components: Take a look inside your PC case and identify the existing storage drives, typically hard disk drives (HDDs) or solid-state drives (SSDs). Note the location and how they are secured.
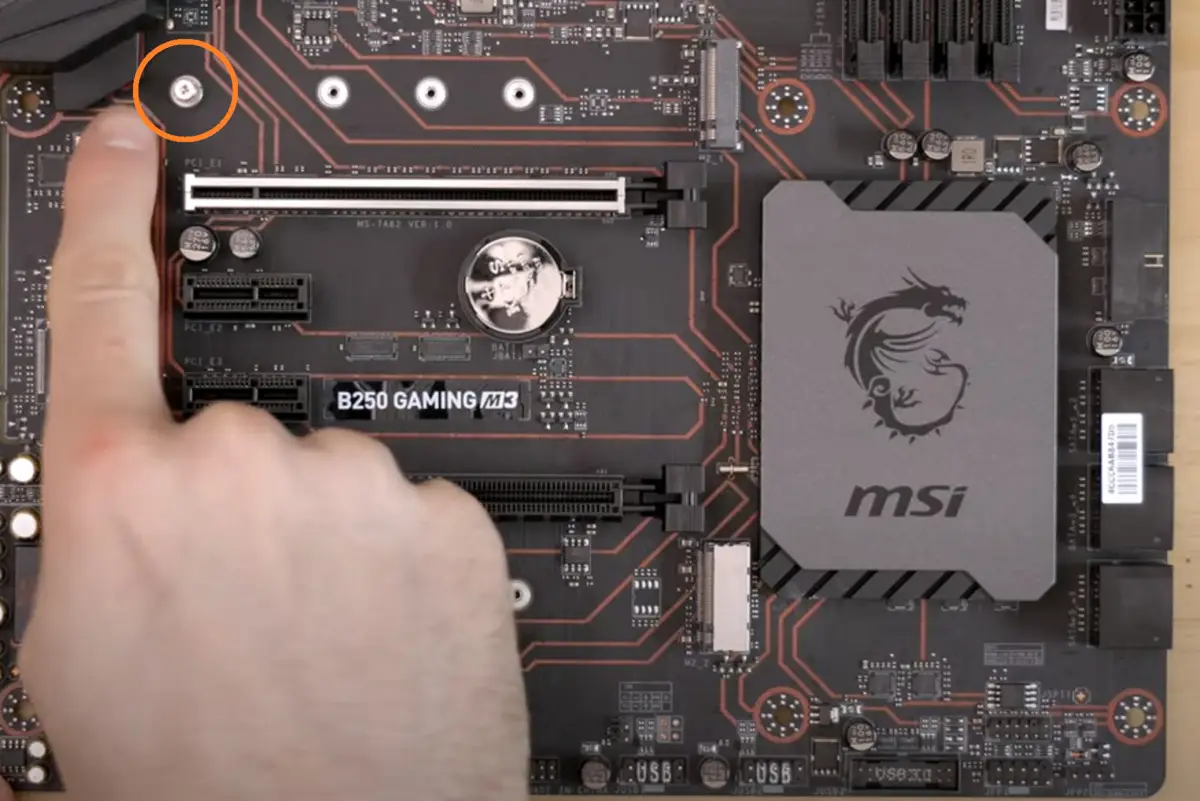
- Refer to the motherboard manual: If you’re unsure about the location of the storage drive bay, consult your motherboard’s manual. It will provide detailed information on the layout and placement of the drive bays.
- Identify the 2.5″ or 3.5″ drive bay: Depending on the size of your SSD, it will either require a 2.5″ or a 3.5″ drive bay. Look for the slots or brackets specifically designed to accommodate these sizes. They are typically located near the front or bottom of the case.
Locating the storage drive bay is crucial to ensure a proper installation of the SSD. By identifying the correct bay for your SSD, you’ll be able to position it securely and connect the necessary cables without any issues.
Take your time to inspect and locate the drive bay while referring to the motherboard manual if needed. Once you’ve identified the appropriate bay, you’re ready to move on to the next step: mounting the SSD in the drive bay.
Now that you’ve found the storage drive bay, let’s proceed with the installation by mounting the SSD securely in place.
Step 5: Mount the SSD in the drive bay
Mounting the SSD in the drive bay is the next step in the installation process. Follow these instructions to securely position the SSD:
- Prepare the SSD: If your SSD didn’t come pre-assembled, you’ll need to attach the mounting brackets or screws to the SSD. Check the SSD’s manual for specific instructions on how to do this.
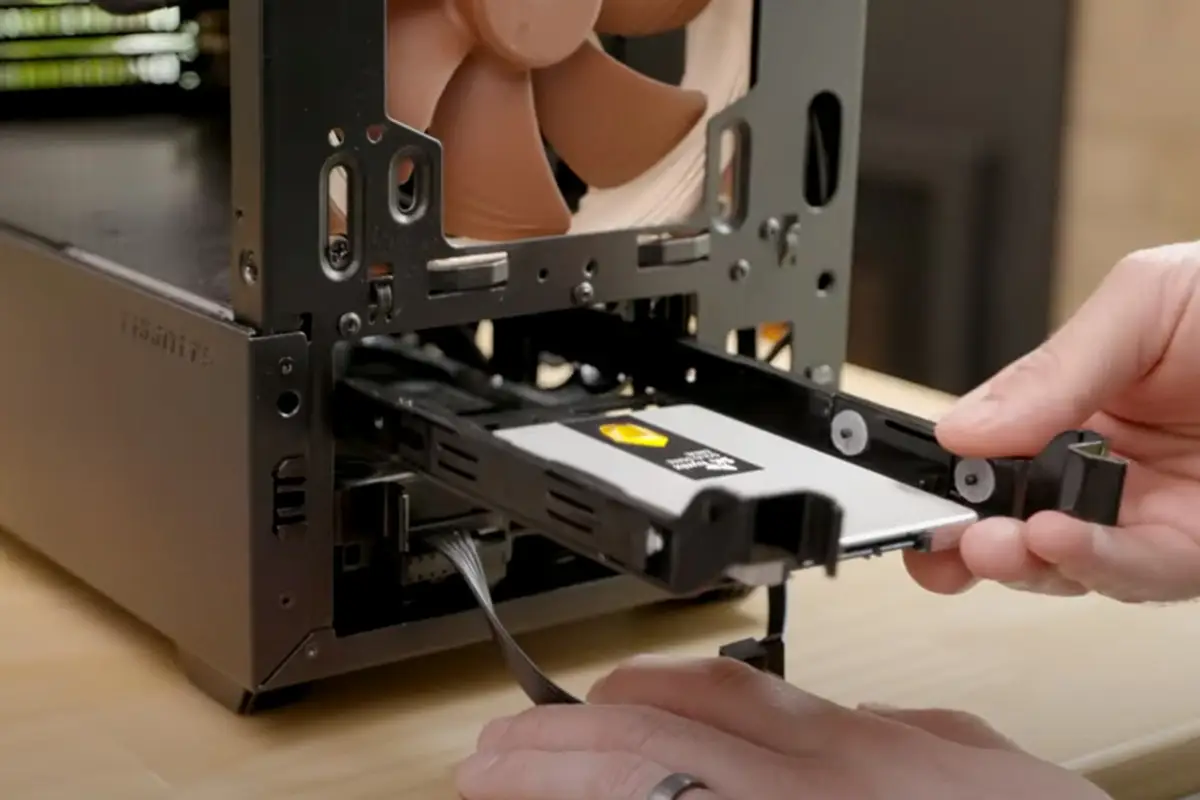
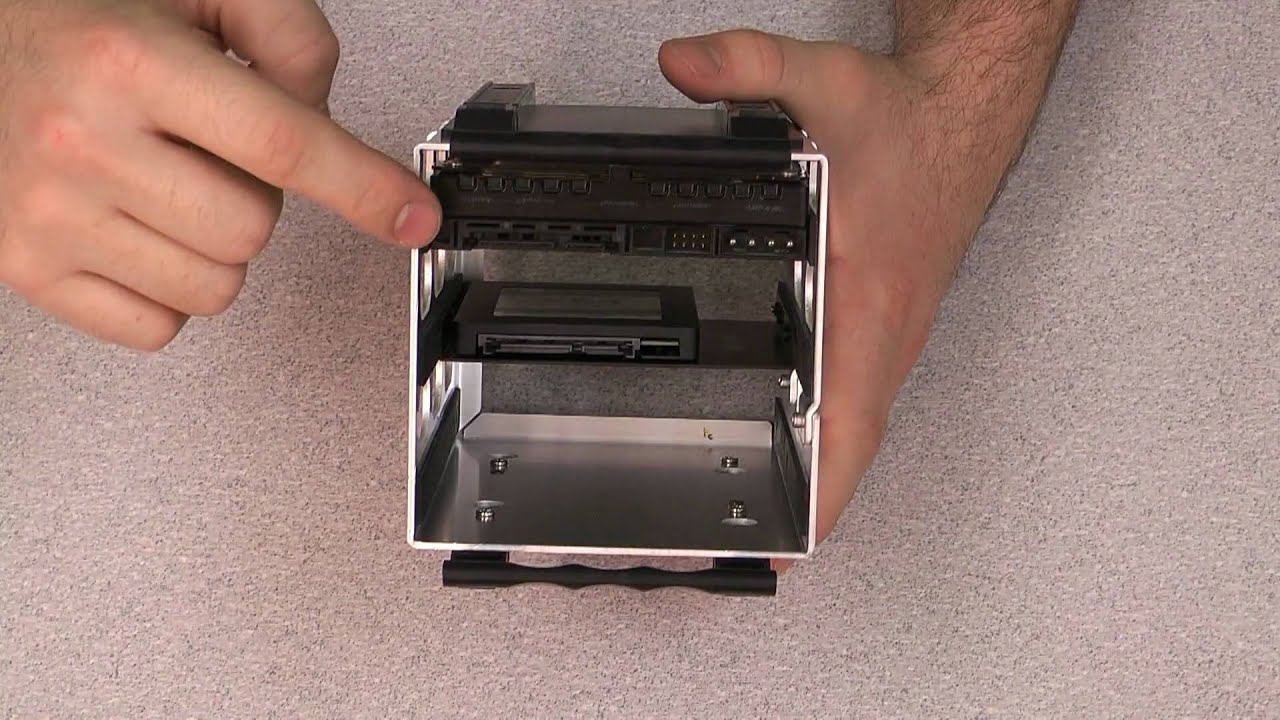
- Align the SSD: Hold the SSD with the connectors facing towards the back of the case. Align the screw holes on the SSD with the corresponding holes in the drive bay.
- Secure the SSD: Using screws or brackets provided with your SSD, carefully fasten the SSD to the drive bay. Make sure it is firmly attached and won’t move or come loose during use.
When mounting the SSD, it’s important to align it properly and ensure a secure attachment. This will prevent any movement or vibrations that could potentially damage the SSD or other components inside the case.
Take your time to carefully mount the SSD, following the instructions provided by the SSD manufacturer. If you encounter any difficulties or have questions, consult the manual or contact the manufacturer for assistance.
With the SSD firmly mounted in the drive bay, you’re ready to move on to the next step: connecting the data and power cables.
Now that your SSD is securely in place, let’s proceed to the next step in the installation process: connecting the necessary cables to the SSD.
Step 6: Connect the data and power cables
Connecting the appropriate cables is crucial to ensure your SSD is properly powered and can communicate with your PC’s motherboard. Follow these steps to connect the necessary data and power cables:
- Locate the SATA ports: Identify the SATA ports on your motherboard. These ports are typically labeled and can be found near the storage drive bays. Make sure you have enough available SATA ports for your SSD.
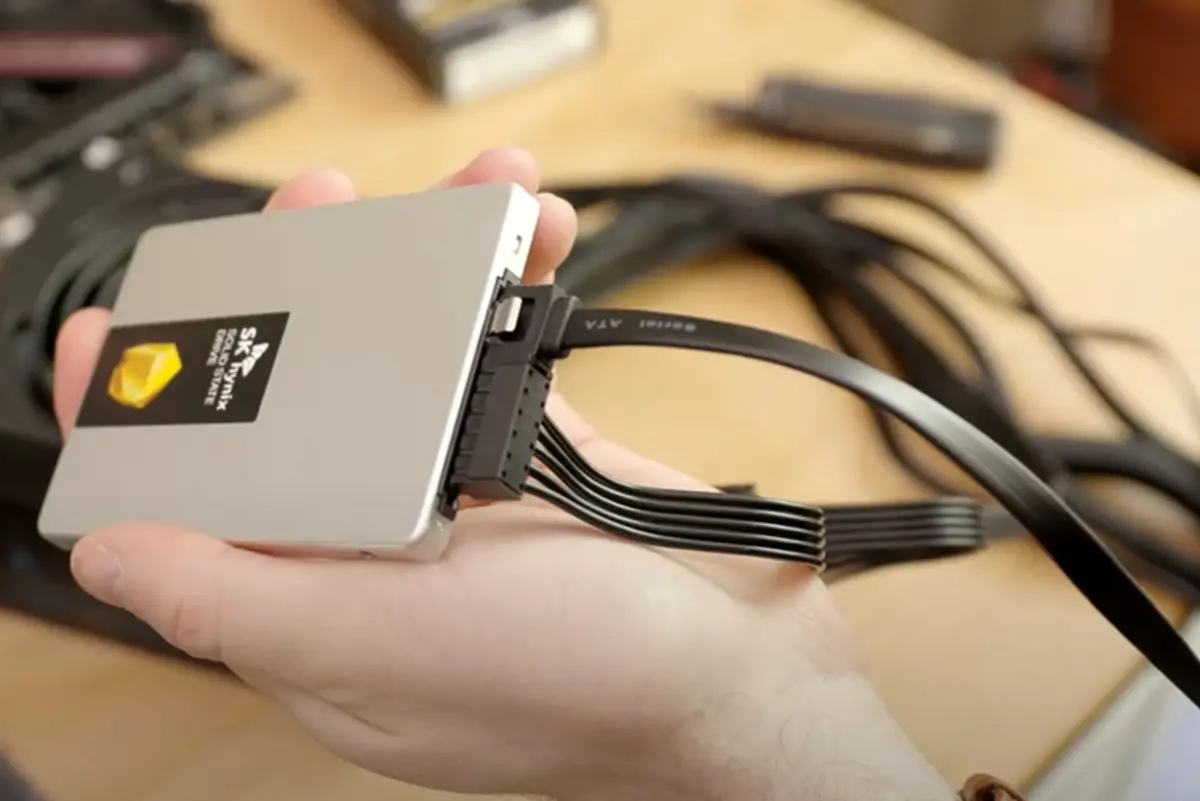
- Connect the SATA data cable: Take one end of the SATA data cable and connect it to an available SATA port on the motherboard. Ensure a secure connection by pushing the cable gently but firmly into the port.
- Connect the other end of the SATA data cable to the SSD: Attach the other end of the SATA data cable to the corresponding SATA port on the SSD. Again, make sure it is securely connected and properly aligned.
- Connect the power cable: Locate a spare power cable from your power supply unit (PSU) or use a SATA power cable. Connect one end to the SSD’s power port and the other end to an available power connector from the PSU.
It’s essential to connect both the SATA data cable and the power cable to ensure your SSD can send and receive data while receiving the necessary power supply. Double-check that all connections are secure before moving on to the next step.
If you encounter any difficulties or are unsure about the cable connections, consult your motherboard’s manual or contact the manufacturer for guidance.
With the data and power cables connected, you’re almost done with the installation process. The next step is to secure the SSD in place within the PC case.
Now that you have successfully connected the necessary cables, let’s proceed to the next step: securing the SSD in place.
Step 7: Secure the SSD in place
Securing the SSD in place is an important step to ensure it remains stable and protected within your PC case. Follow these steps to secure the SSD:
- Check mounting options: Depending on your PC case and SSD, there may be different mounting options available. Check if there are any additional brackets or slots provided to further secure the SSD.
- Use screws or brackets: If your PC case has dedicated screw holes or brackets for securing the SSD, use the screws or brackets provided. Insert them into the designated holes and tighten them until the SSD is firmly held in place.
- Ensure a snug fit: Make sure the SSD is snugly fitted in the drive bay and doesn’t move or wiggle when touched. A secure placement is vital to prevent any shifting or damage during PC operation.
It’s important to follow the specific instructions provided by your PC case manufacturer or the SSD manufacturer when securing the SSD. This will ensure a proper and reliable installation.
If your PC case doesn’t have specific mounting options or you’re unable to find the appropriate screws or brackets, you can also use cable ties, adhesive Velcro, or other securing methods to keep the SSD in place. However, ensure these methods do not obstruct any other components or impede the airflow within your PC case.
After securing the SSD, give it a gentle tug or shake to confirm that it’s properly fixed in the drive bay. If it remains in place without any movement, you’ve successfully completed this step of the installation process.
Now that the SSD is securely mounted, it’s time to move on to the next step: closing the PC case.
Step 8: Close the PC case
After completing the installation of the SSD and ensuring everything is secure, it’s time to close your PC case. Follow these steps to close the case:
- Position the side panel: Take the side panel that you removed earlier and align it with the case. Ensure that any cables inside the case are neatly arranged and not blocking the panel from fitting back into place.
- Slide or press the side panel into position: Slide or gently press the side panel back onto the case until it aligns with the screw holes.
- Secure the side panel with screws: Once the side panel is aligned, use the screws you removed earlier to secure it in place. Tighten the screws, but be careful not to overtighten as it can damage the case or threads.
Ensuring that your PC case is properly closed serves several purposes. It helps protect the internal components from dust, dirt, and unnecessary exposure. Additionally, a closed case improves airflow and prevents accidental contact with any exposed components.
Before finishing up, take a moment to verify that the side panel is securely in place. Give it a gentle shake or tap to confirm that it doesn’t move or rattle. If it remains stable, you’ve successfully closed the PC case.
Now that your SSD is installed, connected, and the PC case is closed, it’s time to move on to the final step: booting up your PC and configuring the SSD.
Step 9: Boot up your PC and configure the SSD
With the SSD installed and the PC case closed, it’s time to boot up your computer and configure the SSD. Follow these steps to ensure a smooth setup:
- Plug in your PC: Reconnect the power cord to your PC and plug it back into a power outlet. Ensure that all other peripherals are properly connected as well.
- Turn on your PC: Press the power button to turn on your computer. Wait for it to go through the boot-up process. You should see the usual startup screen or logo.
- Enter the BIOS/UEFI: During the initial startup, you may need to press a specific key, such as Del, F2, or Esc, to access the BIOS/UEFI setup. Refer to your motherboard’s manual for the correct key.
- Check BIOS/UEFI settings: Once in the BIOS/UEFI setup, navigate to the storage or boot settings. Ensure that the SSD is recognized and set as the primary boot drive. Save any changes made, typically by pressing F10, and exit the BIOS/UEFI setup.
- Install your operating system (if necessary): If you’re installing a fresh copy of the operating system onto the SSD, insert the installation media (e.g., USB drive or DVD) and follow the on-screen prompts to complete the installation process.
- Update drivers and firmware: After booting up your PC with the SSD, it’s recommended to update the drivers and firmware for your SSD. Visit the manufacturer’s website and download the latest drivers and firmware updates.
Configuring the SSD involves ensuring that it is properly recognized by the system and, if necessary, installing the operating system. Additionally, updating drivers and firmware will help optimize the performance and stability of the SSD.
Remember to consult the motherboard or SSD manufacturer’s documentation for specific instructions on configuring the SSD and updating drivers and firmware for your particular hardware.
Congratulations! You have successfully installed and configured the SSD in your PC. Enjoy the improved speed, responsiveness, and overall performance that the SSD brings to your computing experience!
Conclusion
Congratulations! You have successfully completed the installation of an SSD in your PC. By following the step-by-step guide outlined in this article, you have taken a significant step towards boosting your computer’s performance and improving its overall speed and responsiveness.
Upgrading to an SSD provides several advantages over traditional hard disk drives (HDDs). The use of flash memory in SSDs allows for faster read and write speeds, resulting in quicker boot times, faster application loading, and improved system performance. With your new SSD properly installed and configured, you can expect a noticeable improvement in your computing experience.
Throughout the installation process, it’s crucial to handle your PC components with care and follow safety precautions. Always remember to ground yourself before working on the internals of your PC to prevent any static electricity damage.
Additionally, keep in mind that each PC and its components may have slight variations. While this guide provides general instructions applicable to most desktop PCs, it’s always recommended to consult your specific PC or motherboard manufacturer’s manual for any unique information or compatibility concerns.
Now that you’ve successfully completed the installation of your SSD, you can enjoy the benefits of improved speed and performance in your PC. Take some time to explore the enhanced capabilities of your system and experience the joy of faster boot-ups, seamless multitasking, and lightning-fast application loading.
Remember to regularly update the SSD’s drivers and firmware to ensure optimal performance and reliability. By staying up to date with the latest software releases, you can maximize the longevity and functionality of your SSD.
Thank you for choosing our guide on how to install an SSD in your PC. We hope you found the instructions clear and helpful. If you have any further questions or require additional assistance, don’t hesitate to seek guidance from your PC or SSD manufacturer or reach out to a professional technician.
Enjoy your upgraded PC and happy computing!