Introduction
Adding a hard drive to your PC can provide you with the extra storage space you need for larger files, software installations, and backups. Whether you’re a gaming enthusiast, a content creator, or a regular PC user, expanding your storage capacity is a practical and cost-effective solution.
By following a few simple steps, you can easily install a new hard drive in your PC and start enjoying the benefits of increased storage. In this guide, we will walk you through the process, from gathering the necessary tools to configuring the hard drive.
Before diving into the installation process, it’s essential to ensure you are well-prepared. This includes gathering the necessary tools and backing up any important data. Additionally, it’s crucial to handle your PC with care, taking necessary precautions to avoid static electricity discharge and potential damage to the components.
In the following sections, we will cover each step in detail, providing you with a comprehensive guide to successfully add a hard drive to your PC. Let’s get started!
Preparing for Installation
Before you begin the installation process, there are a few essential steps you need to take to ensure a smooth and successful installation of your new hard drive. By properly preparing for the installation, you can minimize the risk of damaging any components and ensure that you have all the necessary tools and resources on hand.
Step 1: Gather the Necessary Tools
To install a new hard drive, you will need the following tools:
- Screwdriver (usually a Phillips head)
- SATA data cable
- SATA power cable
- Anti-static wrist strap (optional but recommended)
Make sure you have these tools readily available before starting the installation.
Step 2: Power Off and Unplug Your PC
Before opening the PC case, it is important to shut down your computer properly and unplug the power cord. This step will ensure your safety and protect the components from any potential damage.
Step 3: Open the PC Case
Depending on the type of PC case you have, you may need to remove screws, slide off panels, or press a latch to open it. Carefully follow the instructions provided by the manufacturer to access the internal components of your PC.
Step 4: Locate Available Drive Bays
Take a look inside your PC case and identify the available drive bays. These are typically slots where you can mount additional storage devices, such as hard drives or solid-state drives. Make sure there is a free bay that can accommodate your new hard drive.
Step 5: Choose the Hard Drive
Now that you have assessed the available drive bays, it’s time to select the hard drive you want to install. Consider factors such as storage capacity, speed, and brand reputation to choose the best option for your needs and budget.
By completing these preparatory steps, you are now ready to begin the installation process with the necessary tools and knowledge. In the next section, we will guide you through the steps of installing the hard drive into your PC.
Step 1: Gather the Necessary Tools
Before you start installing a new hard drive in your PC, it’s important to gather all the necessary tools to ensure a smooth and hassle-free installation process. Having the right tools at hand will save you time and make the task much easier. Here are the tools you’ll need:
- Screwdriver: You’ll typically need a Phillips head screwdriver to remove and secure the screws that hold the hard drive in place.
- SATA data cable: This cable is used to connect the hard drive to the motherboard. It transfers data between the hard drive and the rest of the PC.
- SATA power cable: The power cable is used to supply power to the hard drive from the power supply unit (PSU) of your computer.
- Anti-static wrist strap (optional): While not strictly necessary, an anti-static wrist strap can be useful to prevent any static electricity discharge and protect the sensitive components of your PC.
By gathering these tools before you begin the installation, you’ll have everything you need within reach, minimizing any potential delays or frustrations during the process.
It’s also a good idea to ensure that your tools are in good condition. Check your screwdriver to make sure the head is not worn or damaged. Check the cables for any visible signs of damage or fraying. If you’re using an anti-static wrist strap, make sure it’s functioning properly.
If you find that you’re missing any of these tools, you can easily purchase them from computer supply stores or online retailers. Having the necessary tools will make the installation process much smoother and help ensure that your hard drive is properly installed and functioning correctly.
Once you have all the tools ready, you can move on to the next step in the installation process, which involves powering off and unplugging your PC.
Step 2: Power Off and Unplug Your PC
Before you begin the process of adding a new hard drive to your PC, it is crucial to power off your computer and unplug it from the electrical outlet. This step is essential to ensure your safety and prevent any damage to the components.
Why Should You Power Off and Unplug Your PC?
Powering off your computer ensures that it is completely shut down and no electrical current is running through the system. Unplugging the PC from the electrical outlet prevents any accidental power surge or electrical shock while you work on the internal components.
How to Power Off and Unplug Your PC?
To power off your PC, follow these steps:
- Save any ongoing work and close all running programs.
- Click on the “Start” button on your desktop.
- Select “Shut down” from the options.
- Wait for your computer to shut down completely before proceeding.
Once your PC is powered off, you can safely unplug it from the electrical outlet by following these steps:
- Locate the power cable connected to the back of your computer’s tower.
- Gently pull the plug from the electrical outlet.
- Ensure that the PC is disconnected from the power source before continuing.
It is important to note that some PCs have a standby power feature that allows them to receive power even when they are turned off. To completely remove power, switch off the power supply on the back of the tower or unplug the power cord from the power supply unit (PSU) at the back of the PC.
By taking these precautionary steps, you are ensuring the safety of both yourself and your PC. Once your computer is powered off and unplugged, you can proceed to the next step of opening the PC case to access the internal components.
Step 3: Open the PC Case
After safely powering off and unplugging your PC, the next step is to open the PC case to access the internal components. Opening the case will allow you to install the new hard drive and make the necessary connections. Here’s how you can open the PC case:
1. Determine the Type of PC Case
PC cases come in various designs, but most of them fall into two main types: desktop/tower cases and small form factor cases. Before proceeding, identify the type of case you have to understand how it opens.
2. Identify the Screws or Latches
Look for screws or latches that hold the PC case panels in place. Most cases have thumb screws or regular screws at the back or side of the case. Some cases may have latches or release buttons instead.
3. Remove the Screws or Release the Latches
If your case has screws, use a screwdriver (typically a Phillips head) to remove them. Turn the screws counterclockwise until they are loose and can be easily lifted. If your case has latches, press or release them as directed by the manufacturer.
4. Slide or Remove the Panels
Once the screws are loosened or the latches are released, you can slide or remove the panels to open the case. Most tower cases have a side panel that slides away from the front of the case. Small form factor cases may have a top or back panel that lifts off.
5. Handle the Case with Care
When opening the PC case, be cautious and gentle to avoid damaging any internal components. Avoid applying excessive force or using tools that could inadvertently cause harm.
Remember to keep the screws or latches in a safe place, as you will need them to secure the case later on.
Opening the PC case is an important step in the installation process, as it allows you to access the internal components with ease. Once the case is opened, you’re ready to proceed to the next step of locating the available drive bays.
Step 4: Locate Available Drive Bays
After opening the PC case, the next step is to locate the available drive bays where you can install your new hard drive. Drive bays are slots or compartments within the computer case designed to hold storage devices like hard drives. Here’s how you can locate them:
1. Examine the Internal Layout
Take a moment to familiarize yourself with the internal layout of your PC and how it is organized. Look for the area where the existing hard drives or other storage devices are installed.
2. Identify the Drive Bay Slots
Drive bays can come in different sizes and configurations, depending on the case. They are often located towards the front or middle of the PC case. Look for rectangular slots or trays designed to hold the hard drive.
3. Count the Number of Available Bays
Count how many empty drive bays are available for installing additional storage devices. Keep in mind that some of these bays may already be occupied by existing drives. You will need at least one free bay for your new hard drive.
4. Consider Accessibility and Cabling
Take note of any potential obstacles or cables that may restrict access to the drive bays. Consider how easy or difficult it will be to mount the new hard drive and connect the necessary cables.
5. Determine Compatibility and Size
Ensure that the drive bays are compatible with the size and form factor of your new hard drive. Most modern PC cases are designed to accommodate standard-sized 3.5-inch or 2.5-inch hard drives. Confirm that the drive bays are suitable for the physical dimensions of your chosen hard drive.
By locating the available drive bays, you will have a clear idea of where you can install your new hard drive. This will help you proceed with the installation process more efficiently. In the next step, we will guide you on choosing the right hard drive for your needs.
Step 5: Choose the Hard Drive
Once you have located the available drive bays in your PC, it’s time to choose the appropriate hard drive for your needs. Selecting the right hard drive involves considering factors such as storage capacity, speed, and brand reputation. Here’s how you can choose the perfect hard drive:
1. Determine Your Storage Needs
Assess your storage requirements and determine how much additional space you need. Consider factors such as the size of files you typically work with, the number of games or applications you want to install, and any future storage needs you may have.
2. Consider Hard Drive Types
There are two main types of hard drives: traditional Hard Disk Drives (HDDs) and Solid-State Drives (SSDs). HDDs provide larger storage capacities at a lower cost per gigabyte, whereas SSDs offer faster performance and increased durability but at a higher cost. Choose the type that aligns with your priorities and budget.
3. Compare Storage Capacities
Hard drives come in various storage capacities, ranging from a few hundred gigabytes to several terabytes. Consider your current and future storage needs and select a capacity that will meet your requirements without unnecessary excess.
4. Check Speed and Performance
If speed is a crucial factor for you, consider the rotational speed (RPM) of an HDD or the read/write speeds of an SSD. Higher RPMs and faster read/write speeds generally result in improved performance, but keep in mind that SSDs tend to outperform HDDs in terms of speed.
5. Research Brands and Reviews
Research different hard drive brands and read reviews from reliable sources to get an idea of their reputation and reliability. Stick to well-known brands that have a track record of producing quality drives.
6. Budget Considerations
While it’s important to consider your budget when choosing a hard drive, prioritize quality and performance over cost. Investing in a reputable and reliable brand will help ensure the longevity and reliability of your new hard drive.
By carefully considering your storage needs, examining different hard drive types, and researching brands, you will be able to choose a hard drive that meets your requirements and offers a balance between performance and cost.
Once you have selected the right hard drive, you are ready to move on to the next step of installing the hard drive into your PC.
Installing the Hard Drive
Now that you have chosen the perfect hard drive for your needs, it’s time to proceed with the installation process. Installing a hard drive involves mounting it in a drive bay, connecting the necessary cables, and securing it in place. Follow the steps below to install your new hard drive:
Step 6: Mount the Hard Drive in a Drive Bay
Locate an available drive bay in your PC case and carefully insert the hard drive into the bay. Align the screw holes on the sides of the hard drive with the screw holes on the bay. Ensure a secure fit without forcing the hard drive into place.
Step 7: Connect the SATA Data Cable
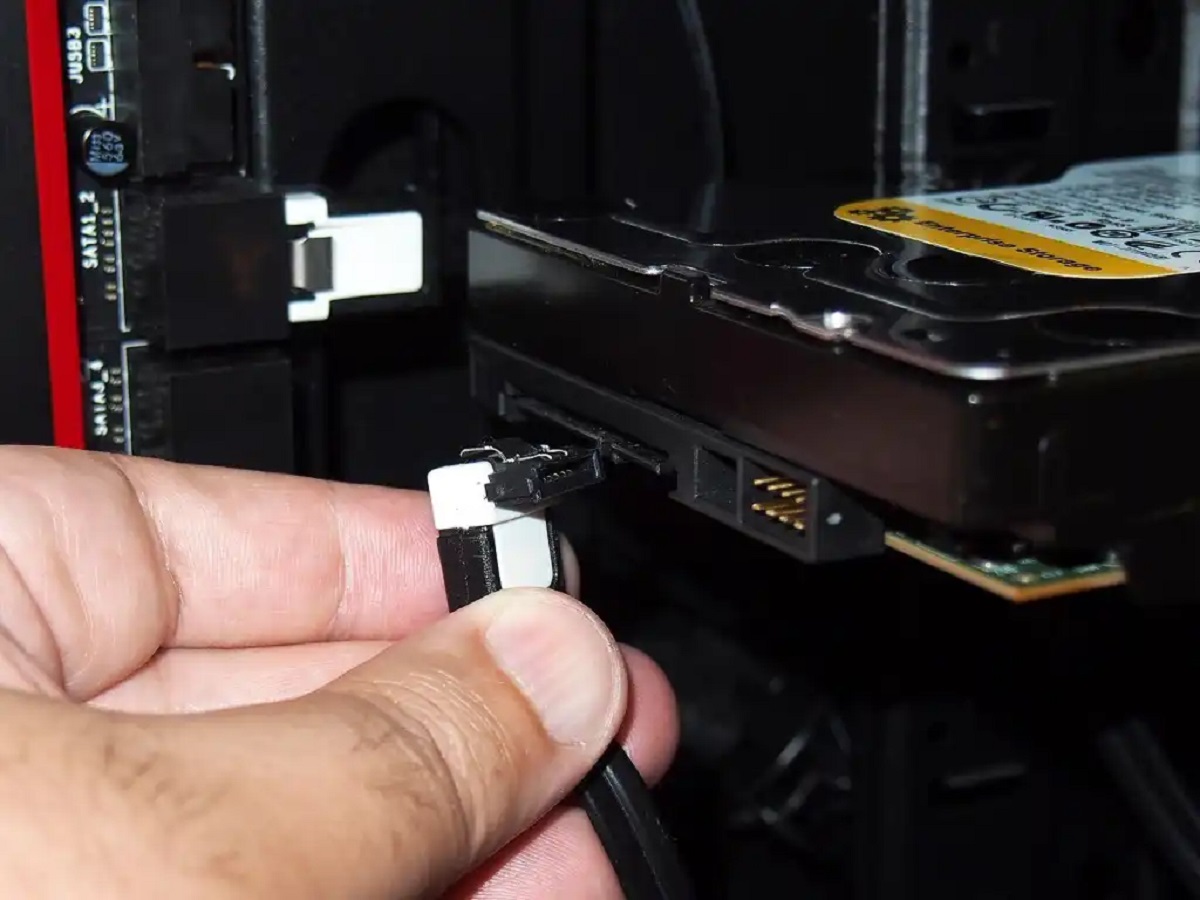
Next, locate the SATA data cable that came with your motherboard or the new hard drive. Connect one end of the cable to the SATA data port on the back of the hard drive and the other end to an available SATA port on the motherboard. Make sure the connection is secure.
Step 8: Hook Up the SATA Power Cable
Find an available SATA power cable from your power supply unit (PSU) and connect it to the power port on the back of the hard drive. Ensure a firm and secure connection.
Step 9: Secure the Hard Drive with Screws
Using the screws you previously set aside, secure the hard drive in place. Insert the screws through the screw holes on the sides of the hard drive and tighten them until the hard drive is securely fastened to the drive bay. Be cautious not to overtighten and damage the screws or hard drive.
Step 10: Close the PC Case
After verifying that the hard drive is properly installed and secured, carefully put the PC case panels back into place. Slide or attach them as directed by the case design, ensuring a snug fit. Secure the panels with screws or latches, using the same method you followed to open the case initially.
Step 11: Power On and Configure the Hard Drive
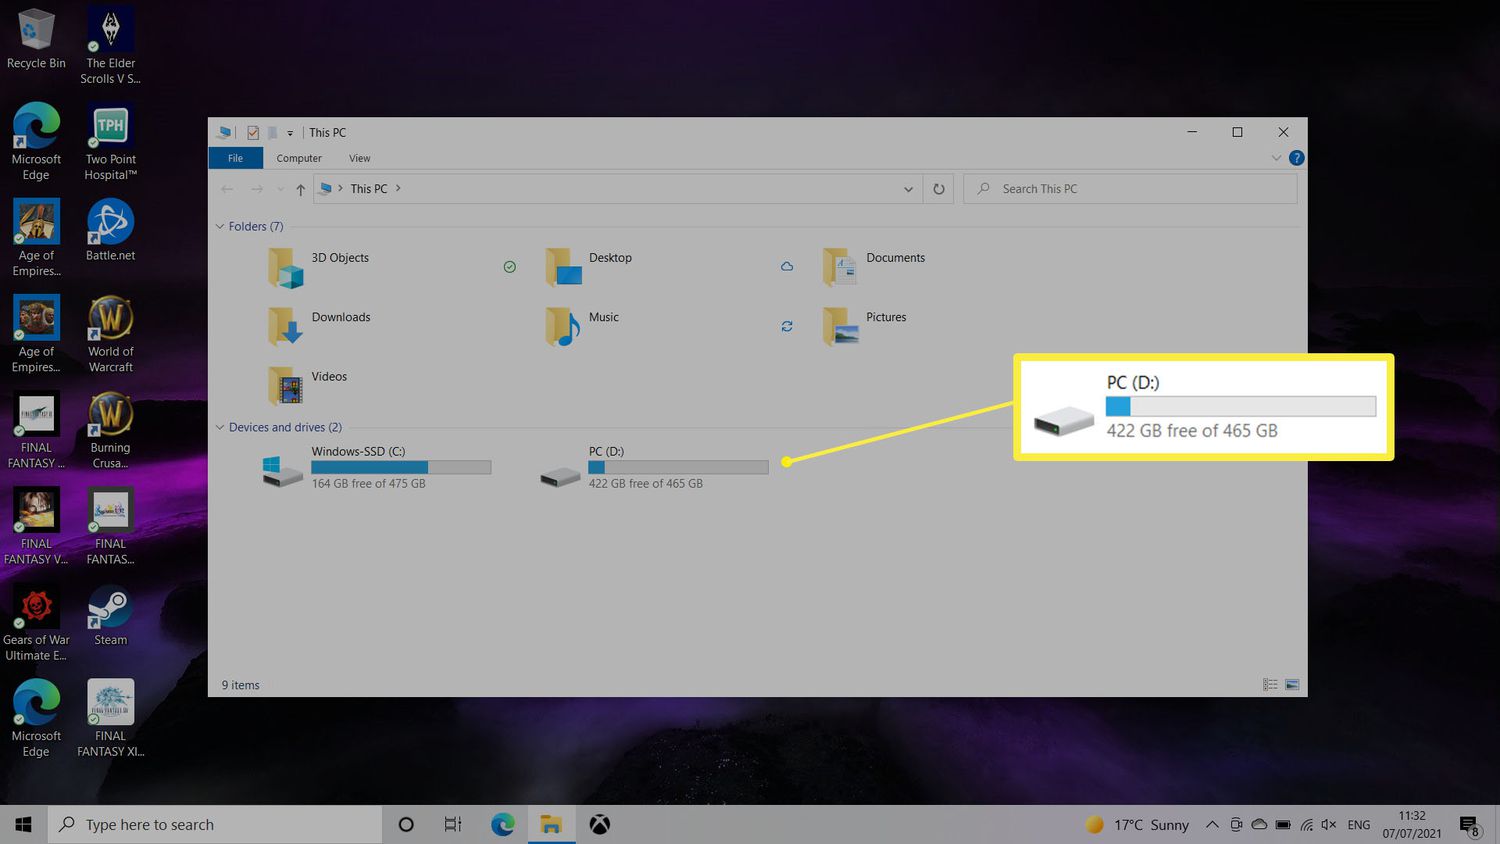
Finally, plug in and power on your PC. The new hard drive should be automatically recognized by the operating system. You may need to format the drive and assign it a drive letter in your operating system’s disk management utility. Consult the documentation or online resources specific to your operating system for guidance on formatting and configuring the new hard drive.
By following these steps, you can successfully install a new hard drive into your PC. Remember to handle all components with care and pay close attention to the connections to ensure a seamless installation.
Step 6: Mount the Hard Drive in a Drive Bay
Now that you have gathered the necessary tools and prepared your PC for installation, it’s time to mount the hard drive in a drive bay. The drive bay is a slot or compartment within the PC case designed to hold storage devices like hard drives. Follow these steps to mount the hard drive:
1. Identify an Available Drive Bay
Once you have opened your PC case, inspect the internal layout to locate the available drive bays. These are typically rectangular slots or trays designed to hold the hard drive. Identify a drive bay that is free and suitable for your new hard drive.
2. Align the Hard Drive
Carefully align the screw holes on the sides of the hard drive with the corresponding holes or mounting brackets inside the drive bay. Be sure to position the hard drive correctly so that the SATA and power connectors are accessible from the back of the case.
3. Insert the Hard Drive
Gently slide the hard drive into the drive bay until it is fully inserted. Ensure that the connectors at the back of the hard drive align properly with the corresponding ports inside the PC case.
4. Secure the Hard Drive
Once the hard drive is inserted, use screws to secure it in place. Locate the screw holes on the sides of the drive bay and align them with the holes on the hard drive. Insert the screws and tighten them using a screwdriver until the hard drive is firmly secured in the drive bay. Be cautious not to overtighten the screws, as it may damage the hard drive or the drive bay.
5. Check for Stability
After securing the hard drive, gently shake or wiggle it to ensure that it is stable and securely mounted in the drive bay. If there is any movement, recheck the screws and make sure they are properly tightened.
Once you have successfully mounted the hard drive in the drive bay, you are ready to proceed to the next steps of connecting the necessary cables and configuring the hard drive. Properly mounting the hard drive is crucial for its stability and longevity, so take your time to ensure a secure installation.
Step 7: Connect the SATA Data Cable
With the hard drive securely mounted in the drive bay, the next step is to connect the SATA data cable. The SATA data cable is responsible for transferring data between the hard drive and the motherboard. Follow these steps to connect the SATA data cable:
1. Locate the SATA Data Cable
Locate the SATA data cable that came with your motherboard or that was included with your new hard drive. It is a thin, flat cable with a small L-shaped connector at each end.
2. Find the SATA Data Port on the Hard Drive
On the back of your hard drive, find the SATA data port. It is a small rectangular-shaped connector with a group of metal prongs inside.
3. Connect One End of the SATA Data Cable
Take one end of the SATA data cable and align the L-shaped connector with the SATA data port on the hard drive. Make sure the connector is oriented correctly and fits snugly into the port.
4. Find an Available SATA Port on the Motherboard
Inside your PC case, locate an available SATA port on the motherboard. These are usually positioned along the edge of the motherboard and are labeled as SATA1, SATA2, etc. Choose an available port that is not already being used.
5. Connect the Other End of the SATA Data Cable
Take the other end of the SATA data cable and connect it to the chosen SATA port on the motherboard. Align the L-shaped connector with the SATA port and insert it firmly, ensuring a secure and tight connection.
6. Secure the SATA Data Cable
Once the cable is connected to both the hard drive and the motherboard, ensure that it is neatly routed and doesn’t obstruct any other components or airflow within the PC case. Use cable ties or clips to secure the cable if necessary.
By correctly connecting the SATA data cable, you are establishing the data connection between the hard drive and the motherboard, allowing for communication and data transfer. Once the data cable is securely connected, you can proceed to the next step of connecting the power supply to the hard drive.
Step 8: Hook Up the SATA Power Cable
After connecting the SATA data cable in the previous step, the next step is to hook up the SATA power cable to the hard drive. The SATA power cable supplies the necessary power to the hard drive. Follow these steps to complete the connection:
1. Locate an Available SATA Power Cable
Locate an available SATA power cable from your power supply unit (PSU). SATA power cables have multiple flattened connectors designed specifically for SATA devices.
2. Identify the SATA Power Port on the Hard Drive
On the back of your hard drive, locate the SATA power port. It is usually a rectangular-shaped port with several small pins or holes.
3. Connect the SATA Power Cable
Take the SATA power cable and align the connectors with the SATA power port on the hard drive. The connectors are designed to fit only one way, so be sure to align them properly and insert them firmly into the port. Ensure a secure and snug connection.
4. Route and Secure the SATA Power Cable
After connecting the SATA power cable to the hard drive, route the cable neatly to avoid any obstructions or interference with other components. Use cable ties or clips to secure the power cable if necessary.
5. Repeat the Process as Needed
If you are installing multiple hard drives, repeat the steps above for each additional drive. Make sure to use separate SATA power cables and avoid overloading any single cable or power connector.
Note: In some cases, you may require a SATA power adapter if your power supply does not provide enough SATA power connectors. These adapters allow you to convert a different type of power connector, such as a molex connector, into a SATA power connector.
By hooking up the SATA power cable to the hard drive, you are providing the necessary power for the hard drive to operate. With both the SATA data cable and the power cable connected, your hard drive is ready to be secured in the drive bay and the PC case closed.
Step 9: Secure the Hard Drive with Screws
After connecting the necessary cables, the next step is to secure the hard drive in place within the drive bay. Securing the hard drive with screws ensures that it remains stable and prevents any movement or damage during use. Follow these steps to secure the hard drive:
1. Align the Screw Holes
Locate the screw holes on the sides of the drive bay where your hard drive is mounted. Align these holes with the corresponding holes on the sides of the hard drive.
2. Insert the Screws
Take the screws that were set aside earlier and insert them through the screw holes on the drive bay and into the corresponding holes on the hard drive. Hold the screw with a screwdriver to guide it into place without applying excessive force.
3. Tighten the Screws
Using your screwdriver, gently tighten the screws until they are snug, but be careful not to overtighten them. Overtightening may damage the hard drive or strip the screw holes.
4. Check for Stability
After tightening the screws, gently shake or wiggle the hard drive to ensure that it is securely fastened in the drive bay. There should be no movement or rattling. If you notice any instability, double-check the screws to ensure they are properly tightened.
Note: Some PC cases may use tool-free mechanisms or other methods to secure the hard drive without screws. In such cases, follow the manufacturer’s instructions to properly secure the hard drive.
By securing the hard drive with screws, you ensure that it remains stable and properly positioned within the drive bay. This step is important to prevent any damage or disruption during regular computer use.
Once the hard drive is securely fastened, you can proceed to the next step of closing the PC case and preparing to power on your computer.
Step 10: Close the PC Case
After successfully installing and securing the hard drive, the next step is to close the PC case. Closing the case not only protects the internal components but also ensures proper airflow and prevents any accidental damage. Follow these steps to close the PC case:
1. Position the Panels
Carefully position the panels or covers back onto the PC case. Ensure that they are aligned correctly and fit snugly. Most cases have panels that slide into place or are secured with screws or latches.
2. Align the Screw Holes or Latches
If your PC case has screws, align the screw holes on the panels with the corresponding holes on the case. Insert the screws and tighten them gently, but do not overtighten. If your case has latches, ensure they are engaged properly to secure the panels.
3. Verify Panel Alignment
Double-check that the panels are aligned correctly and show no gaps or unevenness. The case should be securely closed without any loose panels or protrusions.
4. Check Cable Routing
Ensure that the cables inside the PC case are neatly routed and do not obstruct any airflow or interfere with any components. Arrange the cables along designated cable management channels or secure them with cable ties if necessary.
5. Clean the Case Exterior
Take a moment to clean the exterior of the PC case using a soft, lint-free cloth. Remove any fingerprints, smudges, or dust to keep the case looking clean and presentable.
It is important to properly close the PC case to protect the internal components from dust, debris, and accidental damage. A securely closed case also helps maintain proper airflow, which is crucial for the cooling of the system.
Once the PC case is closed, you are ready to move on to the final steps of powering on your computer and configuring the newly installed hard drive.
Step 11: Power On and Configure the Hard Drive
After closing the PC case, the final step is to power on your computer and configure the newly installed hard drive. By following these steps, you can ensure that the hard drive is recognized by the operating system and ready for use:
1. Plug in and Power On
Plug your PC back into the power source and press the power button to turn it on. Wait for the computer to boot up and reach the desktop.
2. Check BIOS Settings
During the boot-up process, you may need to enter the BIOS settings by pressing a specific key (usually Del, F2, or F12) as indicated on the startup screen. Once in the BIOS settings, navigate to the “Storage” or “SATA Configuration” section and ensure that the new hard drive is detected and enabled.
3. Format the Hard Drive
Open the Disk Management utility in your operating system (e.g., Disk Management in Windows or Disk Utility in macOS). Locate the new hard drive in the list of available disks. Right-click on the unallocated space and select “Format” or “Create New Volume.” Follow the prompts to format the hard drive with your preferred file system (e.g., NTFS for Windows or HFS+ for macOS).
4. Assign a Drive Letter
After formatting, right-click on the newly formatted drive and select “Change Drive Letter and Paths.” Choose an available drive letter and click “OK” to assign it to the hard drive.
5. Verify Accessibility
Open File Explorer (Windows) or Finder (macOS) and navigate to the newly assigned drive letter. Confirm that the hard drive is accessible and ready for use.
By following these steps, you can ensure that the operating system recognizes the newly installed hard drive and it is properly formatted and configured for use. Now, you can start enjoying the additional storage space and take advantage of the increased capacity in your PC.
Final Thoughts
Congratulations! You have successfully added a new hard drive to your PC, expanding your storage capacity and giving yourself more flexibility with your files and applications. Adding a hard drive may seem daunting at first, but by following the steps outlined in this guide, you were able to complete the installation process with ease.
Remember to take precautions while working with your PC, such as powering off, unplugging, and handling components with care. Preparing and gathering the necessary tools beforehand will save you time and ensure a smooth installation process.
Choosing the right hard drive is essential, considering factors such as storage capacity, speed, and brand reputation. By selecting a reliable and suitable drive, you can ensure optimal performance and longevity.
Properly connecting the SATA data and power cables and securing the hard drive with screws ensures stability and reliable data transfer. Double-checking all connections and ensuring they are secure is vital to the functioning of the hard drive.
Finally, closing the PC case and configuring the hard drive through the BIOS and operating system settings completes the installation process. Formatting the hard drive and assigning a drive letter allow you to start using the new storage space efficiently.
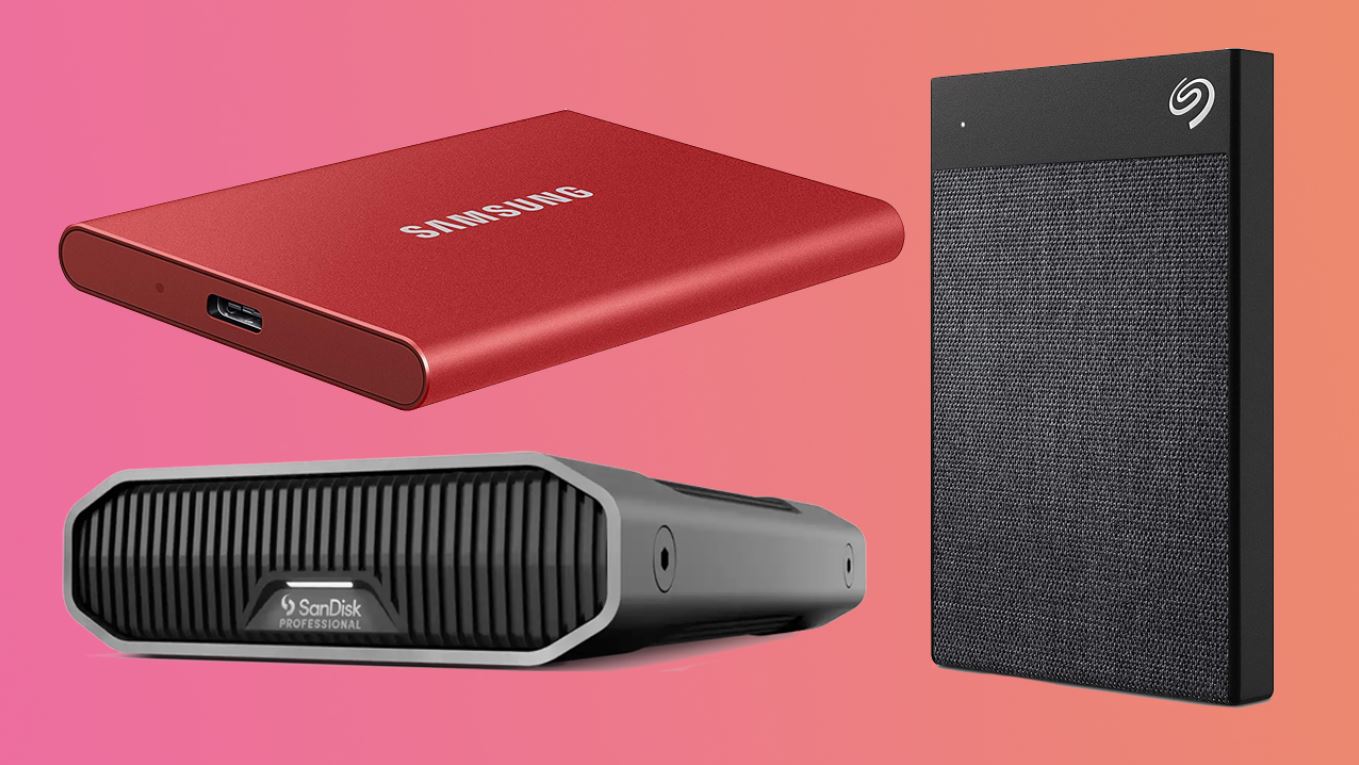
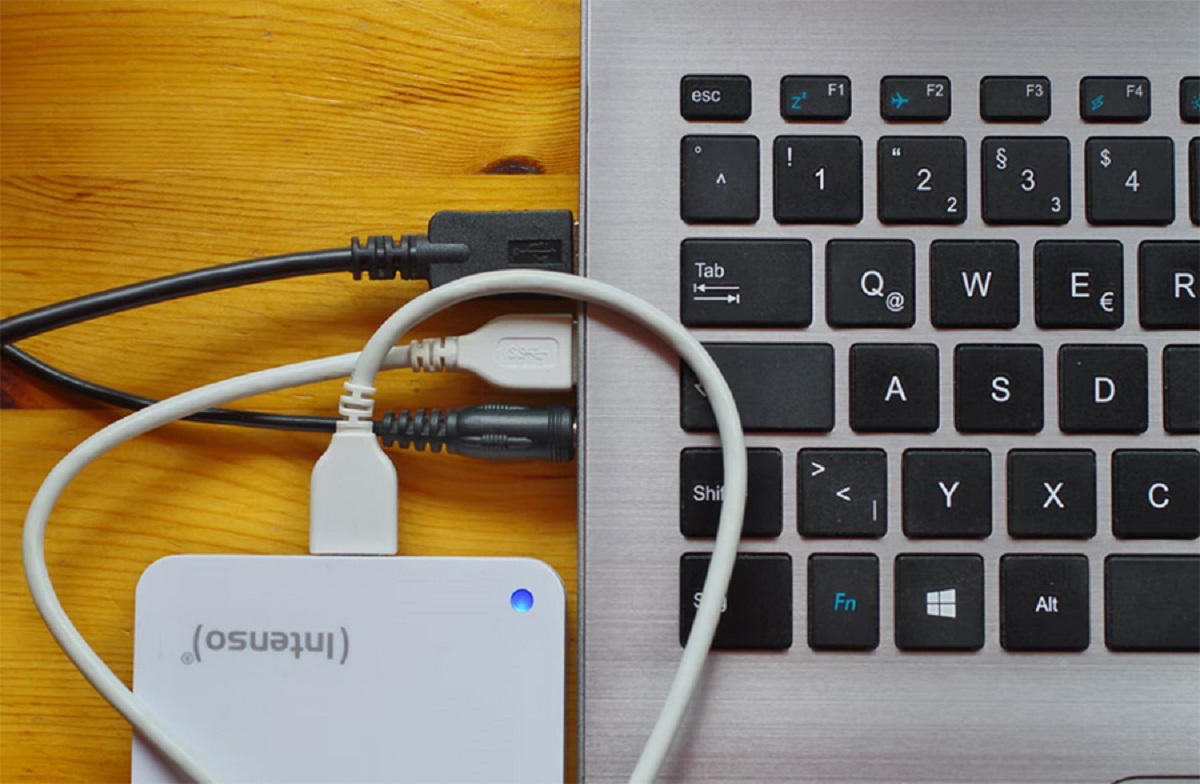
Remember, adding a hard drive is just one way to expand your PC’s storage. You can also consider other solutions such as network-attached storage (NAS) or external hard drives for additional flexibility and backup options.
Now that you have successfully added a hard drive, take some time to explore the new possibilities and enjoy the benefits of increased storage capacity. Whether you’re a gamer, content creator, or regular PC user, this expanded storage will serve you well in managing your digital world.
Thank you for following this guide, and we hope that it has been helpful in your journey to add a hard drive to your PC.


