Introduction
Setting up a new PC can be an exciting endeavor, and one of the crucial steps is installing the Windows operating system. Whether you’re building a custom PC or replacing an old one, knowing how to install Windows ensures that your computer is up and running smoothly.
Windows offers a user-friendly interface and a wide range of features, making it a popular choice for many computer users. Installing Windows on a new PC gives you the opportunity to personalize your system and take advantage of all the benefits the operating system has to offer.
In this guide, we will walk you through the step-by-step process of installing Windows on a new PC. We will cover everything from gathering the necessary equipment to completing the installation and setting up your system post-installation. By following these instructions, you can have your new PC up and running with Windows in no time.
Before we dive into the installation process, it’s essential to ensure that you’re adequately prepared. This includes gathering the necessary equipment and creating a bootable USB drive with the Windows installation files. Additionally, you’ll need to set up the BIOS to boot from the USB drive. These preparations are crucial for a successful installation and will help streamline the process.
Installing Windows on a new PC allows you to take advantage of the latest features, security updates, and performance enhancements. It also gives you the freedom to customize your system and install the software and applications that best suit your needs.
So, if you’re ready to embark on this exciting journey of setting up your new PC with Windows, let’s get started! Follow the step-by-step instructions in the upcoming sections, and soon, you’ll have your new PC powered by Windows, ready to unleash its full potential.
Preparing for Installation
Before diving into the Windows installation process, it’s crucial to adequately prepare your new PC. This ensures a smooth and hassle-free installation experience. By following these preparatory steps, you’ll be ready to install Windows in no time.
Step 1: Gathering the Necessary Equipment
The first step in preparing for the Windows installation is to gather all the necessary equipment. Here’s a checklist of what you’ll need:
- A USB flash drive with at least 8GB of storage capacity
- A valid Windows license key
- A Windows installation ISO file or DVD
- A working PC or laptop with internet access
Make sure you have all these items ready before proceeding to the next step.
Step 2: Creating a Bootable USB Drive
To install Windows on your new PC, you’ll need a bootable USB drive containing the Windows installation files. Follow these steps to create a bootable USB drive:
- Insert the USB drive into your working PC or laptop.
- Download the Windows Media Creation Tool from the official Microsoft website.
- Run the Media Creation Tool and select the option to create a bootable USB drive.
- Follow the instructions provided by the tool to create your bootable USB drive.
Once the bootable USB drive is created, you’re one step closer to installing Windows on your new PC.
Step 3: Setting Up BIOS
Before you can start the Windows installation process, you’ll need to set up your PC’s BIOS to boot from the USB drive. The BIOS (Basic Input/Output System) is firmware embedded on your computer’s motherboard that controls the hardware and initiates the startup process. Here’s how you can access and modify the BIOS settings:
- Restart your PC and press the key or combination of keys (such as F2, F12, or Del) to enter the BIOS. The specific key to access the BIOS may vary depending on your computer’s manufacturer.
- Navigate through the BIOS menu using the arrow keys on your keyboard.
- Find the “Boot” or “Boot Order” section and change the boot priority to prioritize the USB drive.
- Save the changes and exit the BIOS.
With these preparations complete, you’re now ready to proceed with the Windows installation on your new PC. In the upcoming sections, we will guide you through each step of the installation process, ensuring a seamless and successful installation.
Step 1: Gathering the Necessary Equipment
Before you embark on the Windows installation process, it’s important to ensure that you have all the necessary equipment at hand. By gathering these items before starting, you can save yourself time and frustration during the installation process. Here’s a checklist of what you’ll need:
- USB Flash Drive: You’ll need a USB flash drive with a minimum capacity of 8GB to create a bootable USB drive. This will be used to install Windows on your new PC. Make sure the USB drive is empty or doesn’t contain any important data, as it will be formatted during the installation process.
- Valid Windows License Key: To activate your Windows installation, you’ll need a valid license key. This can be in the form of a product key card or a digital license key that was provided with your Windows purchase. Keep this key handy, as you’ll be prompted to enter it during the installation process.
- Windows Installation Media: You’ll require the Windows installation media, which can be either an ISO file or a DVD. This contains all the necessary files to install Windows on your new PC. If you have an ISO file, you can either burn it to a DVD or create a bootable USB drive from it using software such as Rufus or the Windows Media Creation Tool.
- A Working PC or Laptop: You’ll need access to a working computer or laptop with internet access to download the necessary software and create the bootable USB drive. This computer will also come in handy for any troubleshooting or online assistance during the installation process.
By making sure you have all these items in advance, you’ll be well-prepared to install Windows on your new PC without any interruptions. Once you have all the necessary equipment, you can proceed to the next step of creating a bootable USB drive. This will allow you to install Windows and bring your new PC to life.
Step 2: Creating a Bootable USB Drive
To install Windows on your new PC, you’ll need a bootable USB drive containing the Windows installation files. Creating a bootable USB drive is a straightforward process. Here’s a step-by-step guide on how to do it:
- Insert the USB Drive: Insert the USB drive with a minimum capacity of 8GB into a working computer or laptop with an available USB port.
- Download the Windows Media Creation Tool: Visit the official Microsoft website and download the Windows Media Creation Tool. This tool allows you to create a bootable USB drive and download the Windows installation files.
- Launch the Windows Media Creation Tool: Once the download is complete, run the Windows Media Creation Tool to start the process.
- Select the USB Flash Drive: In the Windows Media Creation Tool, select the “Create installation media (USB flash drive, DVD, or ISO file)” option and click “Next.”
- Choose the Appropriate Options: On the next screen, select the language, edition, and architecture (32-bit or 64-bit) that matches the version of Windows you want to install. Ensure that the “USB flash drive” option is selected, and click “Next.”
- Select the USB Drive: The tool will detect the connected USB drive. Make sure the correct drive is selected, as all data on the USB drive will be erased during the process. Click “Next” to continue.
- Wait for the Process to Complete: The Windows Media Creation Tool will now download the necessary files and create a bootable USB drive. This process may take some time, depending on your internet speed.
- Complete the Process: Once the creation process is complete, you’ll see a message indicating that the bootable USB drive is ready. Click “Finish” to exit the Windows Media Creation Tool.
Congratulations! You have successfully created a bootable USB drive for installing Windows on your new PC. Make sure to label the USB drive appropriately so that you can easily identify it in the next steps. With the bootable USB drive in hand, you’re ready to move on to the next step, which involves setting up the BIOS to boot from the USB drive.
Step 3: Setting Up BIOS
Before you start the Windows installation process, you’ll need to configure your computer’s BIOS (Basic Input/Output System) to boot from the USB drive. The BIOS settings control various aspects of your computer’s hardware, including the boot order. Follow these steps to set up your BIOS:
- Restart your Computer: Start by restarting your computer that you want to install Windows on.
- Accessing the BIOS: While your computer boots up, you’ll need to access the BIOS settings. The specific key or combination of keys to access the BIOS may vary depending on your computer’s manufacturer. Common keys to enter the BIOS are F2, F12, or Del. Keep an eye out for a message displayed during startup that indicates the key to access the BIOS.
- Navigating the BIOS: Once you’re inside the BIOS, use the arrow keys on your keyboard to navigate through the various menus and options.
- Find the Boot Menu: Look for a menu or section in the BIOS labeled “Boot” or “Boot Order.” This is where you can modify the boot sequence of your computer.
- Set the Boot Priority: In the Boot menu, locate the option that allows you to change the boot order. Depending on your BIOS version, you may see a list of devices with specific instructions on how to change the boot priority. Ensure that the USB drive is set as the first boot device so that your computer boots from it.
- Save the Changes: Once you’ve set the boot priority, save the changes you made in the BIOS. Look for an option such as “Save and Exit” or “Exit and Save Changes.” Select this option to save the changes and exit the BIOS.
With the BIOS settings adjusted to prioritize the USB drive as the boot device, your computer is now ready to start the Windows installation process. Make sure to have your bootable USB drive inserted into the appropriate USB port. In the next step, we’ll guide you through the process of booting your computer from the USB drive and initiating the Windows installation.
Installing Windows
Now that you’ve prepared your PC and set up the BIOS, it’s time to start the installation process for Windows. Follow these steps to install Windows on your new PC:
Step 4: Booting from the USB Drive:
Restart your computer and make sure the bootable USB drive is inserted into the appropriate USB port. As your computer restarts, it should now boot from the USB drive instead of the regular hard drive.
Step 5: Starting the Installation Process:
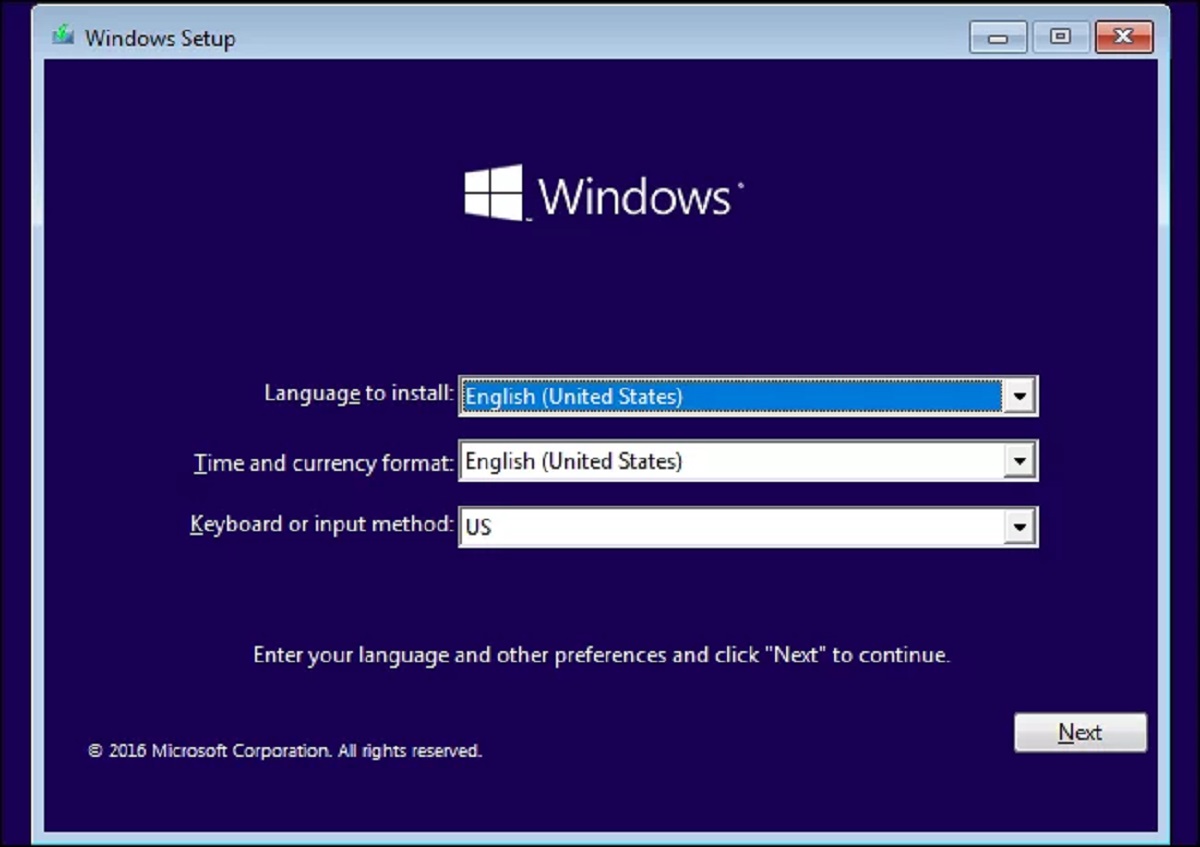
Once your computer boots from the USB drive, you will see the Windows installation screen. Select your preferred language, time, and keyboard settings, and click “Next” to continue.
Step 6: Choosing Installation Settings:
On the next screen, click on “Install Now” to begin the installation process. You will be prompted to enter your Windows license key. Enter the product key that came with your copy of Windows and click “Next.”
Step 7: Selecting the Install Location:
Next, you’ll need to select the installation location for Windows. If you have only one hard drive or SSD in your computer, it should be automatically selected. If you have multiple drives, choose the appropriate drive where you want to install Windows and click “Next.”
Step 8: Formatting the Drive:
If the selected drive already contains data, you will be prompted to format it. Choose the formatting option that suits your needs. Be aware that formatting the drive will erase all existing data, so make sure you have a backup if needed. Once you’ve made your selection, click “Next” to proceed.
Step 9: Installing Windows:
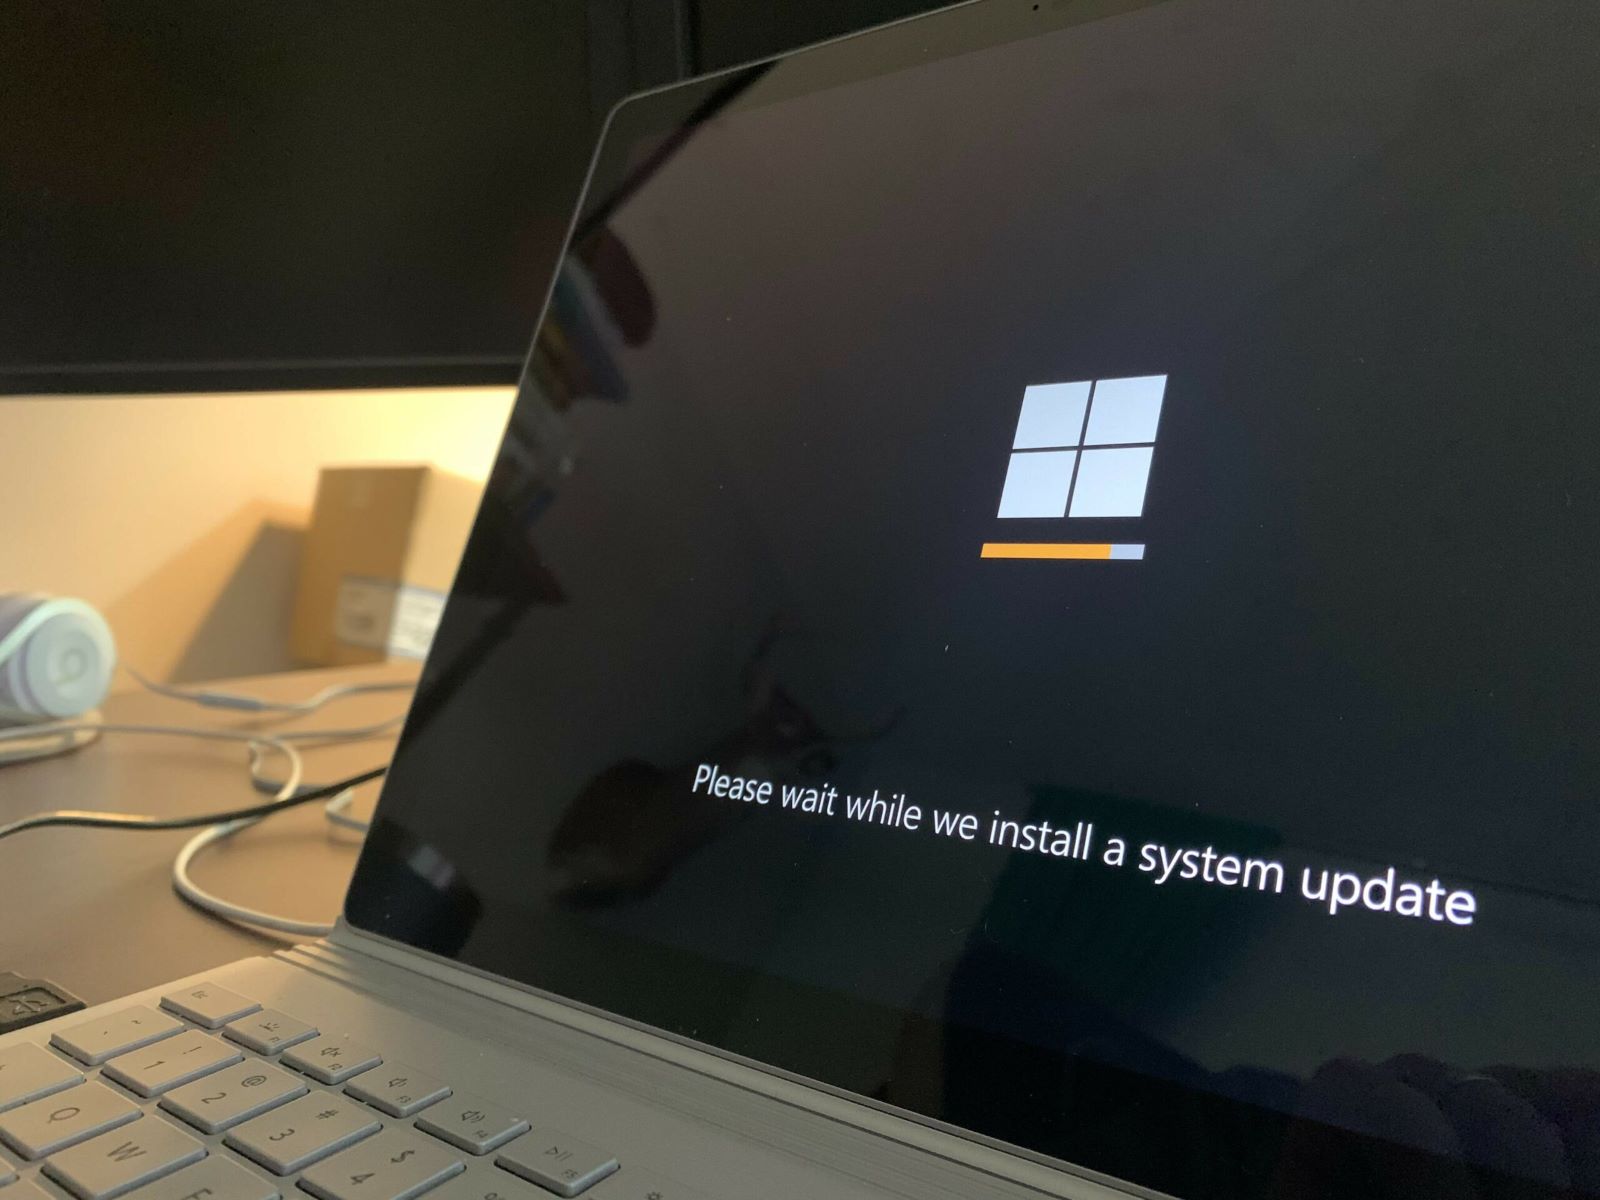
The installation process will now begin, and you’ll see a progress bar indicating the installation status. Windows will copy files, install features, and update settings during this stage. Be patient, as the installation may take some time to complete.
Step 10: Completing the Installation:
Once the installation is finished, your computer will restart. At this point, you may be asked to customize your Windows settings, such as privacy preferences and signing in with a Microsoft account. Follow the prompts to complete the installation process.
Congratulations! You’ve successfully installed Windows on your new PC. Now you can proceed to the post-installation setup, where you’ll configure Windows settings, install device drivers, and activate your copy of Windows.
Step 4: Booting from the USB Drive
Booting your computer from the USB drive is the crucial first step to initiate the Windows installation process. Follow these steps to boot your computer from the USB drive:
- Restart your Computer: Start by restarting your computer.
- Accessing the Boot Menu: As your computer restarts, look for a message that indicates the key or combination of keys to access the boot menu. Common keys to access the boot menu are F12, F10, or Esc. Press the appropriate key immediately when the message appears to enter the boot menu.
- Select the USB Drive: In the boot menu, you’ll see a list of devices from which you can choose to boot. Use the arrow keys on your keyboard to navigate to the USB drive, which may be labeled as “Removable Devices” or “USB Storage Devices.” Select the USB drive as the boot device.
- Boot from the USB Drive: Once you have selected the USB drive as the boot device, press Enter to boot from it. Your computer will now start from the USB drive, bypassing the regular hard drive.
By successfully booting your computer from the USB drive, you’re now ready to begin the Windows installation process. Ensure that the bootable USB drive remains connected during the installation. The next step will guide you through starting the installation process and configuring the initial settings for Windows.
Step 5: Starting the Installation Process
With your computer successfully booting from the USB drive, it’s time to kickstart the installation process for Windows. Follow these steps to get started:
- Select Language, Time, and Keyboard Settings: On the initial Windows installation screen, you’ll be prompted to select your preferred language, time format, and keyboard layout. Choose the appropriate options and click “Next” to continue.
- Initiate the Installation: After selecting your settings, click on the “Install Now” button to begin the Windows installation process.
- Enter the Product Key: You will then be prompted to enter the product key, which came with your copy of Windows. Carefully enter the key in the designated field and click “Next” to proceed.
At this stage, ensure that you have a valid and genuine product key for Windows. It’s important to enter the key correctly without any typographical errors to avoid activation issues in the future.
Once you’ve entered the product key, the installation process will begin. Windows will now copy the necessary files onto your computer and prepare the system for the next steps. This process may take a few minutes, so be patient and let the installation progress.
During the installation, you might notice the system restarting automatically. This is normal and part of the installation process. Avoid interrupting the process or turning off your computer to prevent any potential issues.
Once the initial installation steps are complete, you’ll be prompted to customize a few more settings before proceeding further. This includes selecting the type of installation, such as upgrading an existing Windows version or performing a clean installation, as well as configuring the installation location and hard drive partitioning.
Congratulations! You’ve successfully initiated the Windows installation process. In the next step, we’ll guide you through selecting the installation location and formatting the drive. Stay tuned as we move forward to complete the installation of Windows on your new PC.
Step 6: Choosing Installation Settings
Once you’ve started the Windows installation process, it’s time to make some important choices regarding the installation settings. Follow these steps to configure the installation to suit your preferences:
- Select the Installation Type: After the initial setup, you will see a screen asking you to choose the type of installation. If you’re installing Windows on a new PC or performing a clean installation on a formatted drive, select “Custom: Install Windows only (advanced)”. If you’re upgrading from a previous version of Windows, select the appropriate upgrade option.
- Select the Installation Location: On the next screen, you will see a list of available drives and partitions on your computer. Select the drive where you want to install Windows. If you have multiple drives and want to install Windows on a specific drive, make sure to choose the correct one. If the drive is not yet formatted, you will be given the option to format it during the installation process.
- Format the Drive (Optional): If you selected a drive that is not yet formatted or want to clean the drive before installing Windows, you can choose to format the drive. Formatting a drive erases all existing data on the selected drive, so make sure you have backed up any important files before proceeding. To format the drive, click on the “Format” option. If the drive is already formatted or you prefer not to format it, you can skip this step.
It’s important to note that formatting a drive will erase all data on that drive permanently. Make sure you have selected the correct drive and have backed up any important files before proceeding with the formatting.
Once you have chosen the installation type and selected the installation location, you are ready to proceed to the next step where Windows will begin installing on your chosen drive. During the installation process, your computer may restart several times. Ensure that you don’t interrupt the process and let it continue until completion.
By selecting the installation settings that best suit your needs, you are one step closer to having Windows installed on your new PC. In the next step, we will guide you through the installation process and the final steps needed to complete the installation of Windows.
Step 7: Selecting the Install Location
After choosing the installation type in the previous step, it’s time to select the install location for Windows. This step is particularly important if you have multiple drives or partitions on your computer. Follow these steps to select the appropriate install location:
- Available Drives and Partitions: You will see a list of available drives and partitions on your computer. Take a moment to review the information and ensure you choose the correct drive for the Windows installation.
- Selecting the Drive: If you have a single drive or partition on your computer, it should be automatically selected as the installation location. However, if you have multiple drives or partitions and want to install Windows on a specific drive, select the desired drive by clicking on it.
Take extra caution when selecting the install location, as choosing the wrong drive can result in unintentional data loss or installation on the wrong partition.
At this stage, you have the option to format the selected drive. If the drive has existing data or you want to perform a clean installation, you can choose to format it. Formatting the drive will erase all existing data, so ensure you have backed up any important files before proceeding. If you prefer not to format the drive or if it’s already formatted, you can skip this step.
Formatting a drive is irreversible and permanently deletes all data on that drive. Make sure you have selected the correct drive and have backed up any important files.
Once you have chosen the install location and, if necessary, formatted the drive, you can proceed to the next step to initiate the installation process. Windows will now copy the necessary files and install the operating system on the selected drive. Keep in mind that the installation process may take some time, and your computer may restart multiple times during the process. It’s important not to interrupt the process and let it complete.
With the installation location selected, you’re one step closer to having Windows installed on your new PC. In the next step, we will guide you through the formatting process, if applicable, and the installation of Windows on your chosen drive.
Step 8: Formatting the Drive
In Step 7, you selected the install location for Windows. If the chosen drive contains existing data or if you want to perform a clean installation, you have the option to format the drive. Follow these steps to format the drive:
- Formatting Options: Once you have selected the drive for installation, you’ll see the formatting options. You can choose to format the drive or skip this step if you prefer not to format.
- Formatting the Drive: If you decide to format the drive, click on the “Format” option. This will erase all the data on the selected drive, so make sure you have backed up any important files before proceeding.
- Confirming the Format: After selecting the format option, a confirmation prompt will appear. It will inform you that formatting the drive will permanently erase all data. Confirm your decision to continue with the formatting process.
Formatting the drive prepares it for the installation of Windows by removing all existing data and creating a clean slate. It ensures that the operating system can be installed smoothly without any conflicts or compatibility issues.
Before proceeding with the formatting process, ensure that you have selected the correct drive. Formatting the wrong drive can result in the loss of data permanently. Take extra caution and double-check your selection.
Once you have chosen to format the drive and confirmed the formatting process, Windows will begin preparing the drive for installation. This process may take a few moments, depending on the size and speed of the drive. Be patient and let Windows complete the formatting process.
Once the formatting is complete, you can proceed to the next step to initiate the installation of Windows on the formatted drive. Windows will now copy the necessary files and install the operating system, bringing you one step closer to having a fully functional Windows installation on your new PC.
With the drive formatted and prepared, your new Windows installation is on its way. In the upcoming step, we will guide you through the installation process and the final steps needed to complete the installation and set up Windows on your new PC.
Step 9: Installing Windows
After formatting the drive, you’re now ready to install Windows on your newly prepared drive. Follow these steps to complete the installation process:
- Copying Installation Files: Once the drive is formatted, Windows will begin the process of copying the necessary installation files. This step may take some time, depending on the speed of your computer and the size of the installation files.
- System Restart: During the installation process, your computer may restart multiple times. This is a normal part of the installation procedure. Make sure not to interrupt the process and allow your computer to restart as needed.
- Setting Up Windows: After the installation files have been copied and your computer has restarted, Windows will start setting up the operating system. This involves configuring various settings to ensure a smooth and customized experience.
- Personalization Options: The setup process will prompt you to choose options related to personalization, such as region and keyboard layout preferences. Select the options that apply to you and click “Next” to proceed.
- Account Creation: You will also be prompted to create a user account for Windows. This account will serve as your primary login credentials for accessing the operating system. Enter the requested information, including your name, password, and security questions.
- Accepting License Terms: As part of the installation process, you’ll be required to read and accept the license terms and agreements. It’s important to review and understand these terms before proceeding. Mark the checkbox confirming your acceptance and click “Next” to continue.
During the installation, Windows may also prompt you to connect to a Wi-Fi network. If you have an available network, select it from the list and enter the necessary credentials to establish a connection. This step is optional and can be completed later if you do not have a network connection at the moment.
As the installation progresses, Windows will continue with the necessary configurations and installations in the background. This may take some time, so be patient and let the process complete without interruption.
Once all the steps of the installation process are completed, your computer will restart one final time. After the restart, you’ll be greeted with the Windows desktop, indicating a successful installation. Congratulations! You’ve successfully installed Windows on your new PC.
In the upcoming step, we’ll guide you through the post-installation setup process, including configuring Windows settings, installing device drivers, and activating your copy of Windows.
Step 10: Completing the Installation
With Windows successfully installed on your new PC, there are a few final steps to complete the installation process and ensure everything is set up correctly. Follow these steps to finalize the installation:
- System Configuration: After the last restart, Windows will continue with the final configuration steps. This includes setting up your device, installing drivers, and optimizing the system for optimal performance.
- Windows Settings: Once the system configuration is complete, you’ll be prompted to customize your Windows settings. This includes choosing privacy options, customizing your desktop preferences, and signing in with a Microsoft account if desired.
- Driver Installation: It’s essential to install the necessary device drivers to ensure proper functionality of hardware components. Windows will attempt to install generic drivers automatically, but it’s recommended to download and install the latest drivers from your computer manufacturer’s website for optimal performance.
- Activating Windows: Depending on the version of Windows, you may need to activate your copy of Windows. This typically involves entering the product key that was provided with your Windows purchase. Follow the prompts to activate Windows online or by phone if necessary.
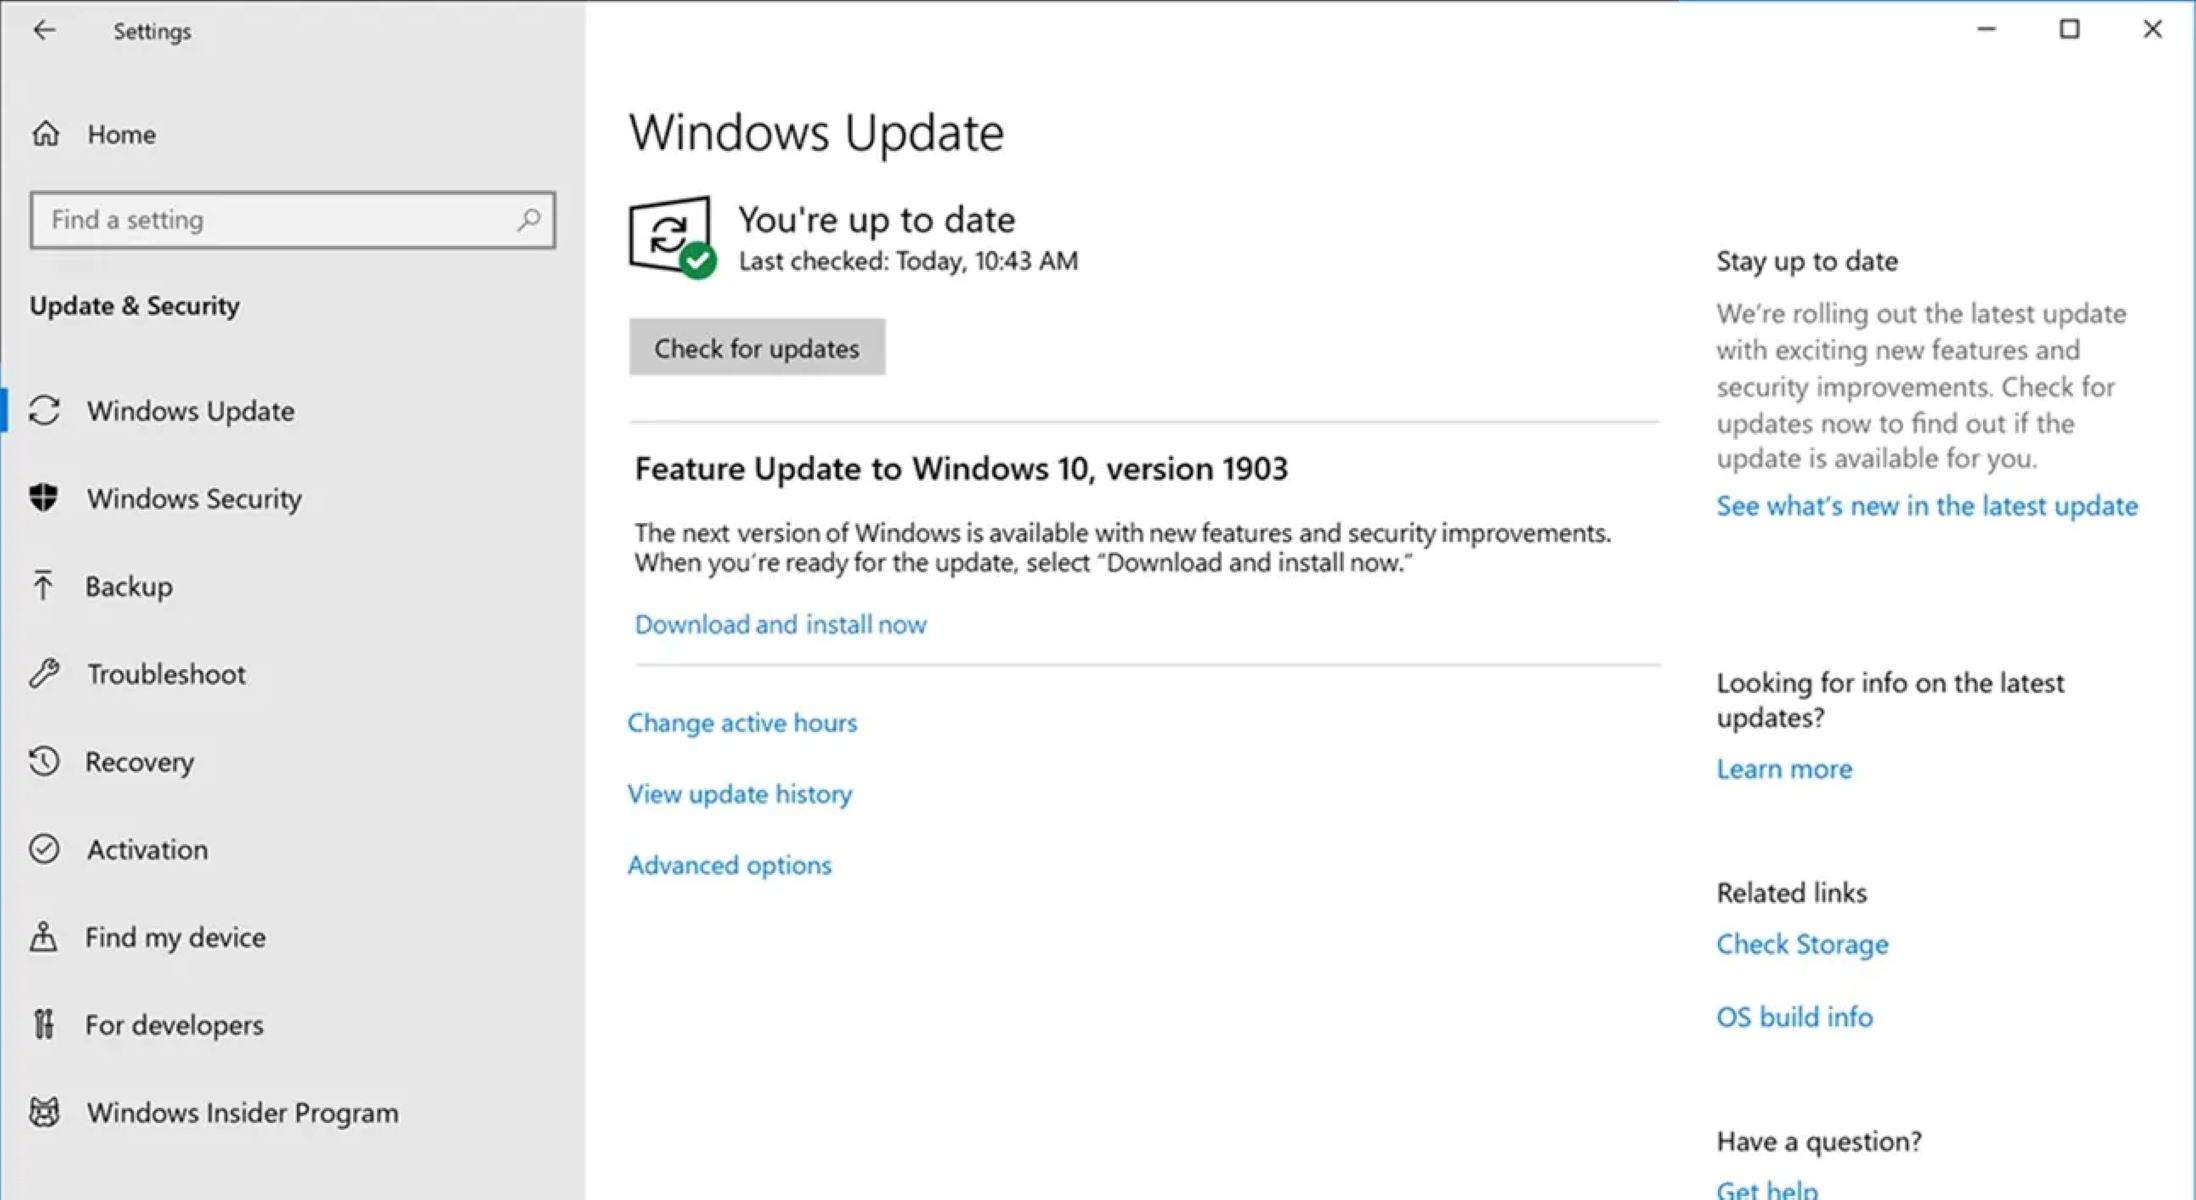
- Security Updates: Once the installation is complete, make sure your system is up to date by installing any available Windows updates. This helps enhance security and stability, as well as provide new features and performance improvements.
Completing these final steps ensures that your Windows installation is fully functional and optimized for your new PC. Take your time to customize Windows settings and install any necessary software or applications that you require.
Throughout the post-installation setup, it’s important to stay connected to the internet. This allows Windows to download and install the latest updates, drivers, and security patches. Regularly updating your system ensures a smooth and secure computing experience.
Congratulations! You have now successfully completed the installation of Windows on your new PC. Take some time to explore the features and functionalities of Windows, and start customizing it to your personal preferences. Enjoy your new computer with Windows and make the most out of your computing experience!
Post-Installation Setup
After completing the installation of Windows on your new PC, there are a few essential steps to take to ensure that your system is fully set up and optimized. Follow these post-installation setup steps to customize your Windows experience and make the most out of your new computer:
- Configure Windows Settings: Take some time to customize Windows settings to suit your preferences. This includes personalizing your desktop background, adjusting display settings, and configuring power options. Explore the settings menu to fine-tune Windows according to your needs.
- Install Device Drivers: It is crucial to install the latest device drivers for your hardware components to ensure optimal performance. Visit your computer manufacturer’s website and download the appropriate drivers for your specific model. Install graphics drivers, audio drivers, network drivers, and any other necessary drivers.
- Activate Windows: If you haven’t already done so during the installation process, activate your copy of Windows by entering the product key. This step ensures that Windows is genuine and validated, granting you access to all features and updates.
- Install Essential Software: Install software applications and programs that you need for your work, productivity, or entertainment. Some essential software may include web browsers, office suites, media players, and antivirus software. Be mindful of reputable sources and download software from trusted websites.
- Apply Security Measures: Strengthen the security of your computer by enabling Windows Defender or installing a reliable antivirus program. Set up regular automated scans and keep your antivirus software up to date. It’s also crucial to enable the Windows Firewall and regularly install Windows security updates.
- Create System Backups: Protect your data and system by creating regular backups of your important files. Windows offers built-in backup and restore features, or you can use third-party backup solutions. Schedule automated backups or manually create backups to ensure that your data is safe in case of any unforeseen circumstances.
Taking these post-installation setup steps will help you personalize and optimize Windows on your new PC. It’s important to regularly update Windows, device drivers, and software applications to ensure a smooth and secure computing experience.
Remember to practice good digital hygiene by creating secure passwords, being cautious of suspicious emails or websites, and regularly running malware scans. By maintaining a secure and up-to-date system, you can enjoy a seamless and reliable computing experience on your new Windows PC.
Enjoy exploring the features and capabilities of Windows, and make your computer truly yours by customizing it to match your unique preferences and requirements for work, play, and everything in between.
Step 11: Configuring Windows Settings
Configuring Windows settings after the installation is an important step to personalize and optimize your computer. By customizing these settings, you can enhance your Windows experience and tailor it to your specific needs. Follow these steps to configure Windows settings on your new PC:
- Personalization: Access the Personalization settings in Windows to customize your desktop background, lock screen, colors, and themes. You can also choose whether to display icons on the desktop and adjust taskbar settings to your liking.
- Privacy: Review and adjust your privacy settings to control how Windows and apps access your personal information. You can manage settings related to location, camera, microphone, and more. Consider your preferences for app permissions and telemetry data sharing.
- Notifications: Fine-tune your notification settings to control which apps can send notifications and how they are displayed. Determine whether you want notifications to appear on the lock screen or if you prefer a quieter experience.
- Power Options: Set up power options to manage your computer’s energy usage. Adjust power plans to balance performance and energy savings according to your needs. You can also customize sleep and display settings to optimize battery life on laptops.
- Taskbar: Customize the taskbar based on your preferences. Choose which icons appear on the taskbar and adjust their position. Enable or disable features such as taskbar auto-hide, task view, and system tray settings.
- File Explorer Options: Modify File Explorer settings to enhance your file browsing experience. Configure options such as the default file view, folder options, and file associations. Additionally, enable Quick Access for easy navigation to frequently used folders.
- Default Apps: Specify which apps handle different types of files and protocols. Set your preferred web browser, media player, email client, and other default apps to streamline your workflow and improve productivity.
- Cortana and Search: Customize Cortana and search settings according to your preferences. Adjust whether you want Cortana’s assistance, set your preferred search engine, and manage your search history and personalized recommendations.
By configuring these Windows settings, you can create a computing environment that suits your style and requirements. Take the time to explore each setting category and make adjustments based on your preferences and workflow.
Remember to periodically review and update these settings as your needs change or new features become available in Windows. By fine-tuning the settings, you can optimize your Windows experience and make the most out of your new PC.
In the next step, we’ll guide you through the process of installing device drivers to ensure that your hardware components are properly recognized and functioning optimally.
Step 12: Installing Device Drivers
Installing device drivers is a crucial step after installing Windows on your new PC. These drivers ensure the proper functionality of your hardware components such as graphics cards, sound cards, network adapters, and more. Follow these steps to install device drivers and ensure optimal performance:
- Identify Your Hardware: Start by identifying the specific hardware components that require drivers. Common devices include graphics cards, audio devices, network adapters, printers, and scanners.
- Visit Manufacturer Websites: Go to the websites of the hardware manufacturers to locate the latest drivers for your specific devices. Search for the driver downloads or support section on their websites.
- Download and Install Drivers: Locate the correct drivers for your hardware components. Select the appropriate driver versions for your operating system and download them. Follow the provided instructions to install the drivers on your PC.
- Graphics Drivers: Graphics card drivers are essential for optimal display and video performance. Visit the website of the graphics card manufacturer (such as NVIDIA or AMD) and download the latest drivers compatible with your graphics card model.
- Audio Drivers: Audio drivers ensure proper functioning of sound cards and audio devices. Visit the website of the sound card manufacturer or the motherboard manufacturer to download the latest audio drivers for your system.
- Network Drivers: Network adapter drivers allow your PC to connect to the internet. Locate the network adapter model in Device Manager, access the manufacturer’s website, and download the appropriate drivers for your specific network adapter.
Repeat the above steps for any other hardware components that require specific drivers. It’s crucial to install the latest drivers provided by the manufacturers to ensure compatibility and optimal performance.
In some cases, Windows may automatically install generic drivers for certain devices. While these drivers provide basic functionality, It’s recommended to install the specific drivers from the manufacturer for the best performance and additional features.
Keep in mind that some hardware components may have integrated device drivers within the Windows installation. Check Device Manager to verify if any devices are marked with an exclamation mark, indicating a missing or outdated driver.
By installing the necessary device drivers, you can ensure that your hardware components function optimally, providing a smooth and efficient computing experience on your new PC.
In the next step, we will guide you through the process of activating Windows to ensure your copy is genuine and validated.
Step 13: Activating Windows
Activating Windows is an important step to ensure that your copy of the operating system is genuine and validated. Activating Windows provides access to all the features, security updates, and support from Microsoft. Follow these steps to activate Windows on your new PC:
- Access Activation Settings: Open the Start menu, click on the Settings (gear) icon to open the Settings app. From there, navigate to the “Update & Security” section.
- Go to Activation: In the “Update & Security” section, select “Activation” from the left-hand menu. You will see information about the activation status of your copy of Windows.
- Enter your Product Key: If you haven’t already entered your product key during the installation process, select “Change product key” and enter your valid product key. Make sure to enter it correctly without any typographical errors.
- Activation through the Internet: After entering the product key, Windows will attempt to activate online. Make sure your computer is connected to the internet, and wait for the activation process to complete. If a valid product key is entered, Windows should be activated successfully.
- Activation through Phone: If you encounter any issues with online activation or if you don’t have an internet connection, you can activate Windows through the phone. Select the option to activate by phone, and follow the instructions provided on the activation screen.
After successfully activating Windows, you will have access to all the features and updates provided by Microsoft. Activating Windows also ensures that your copy is genuine and valid, giving you peace of mind and support from Microsoft if any issues arise.
It’s important to note that the activation process may vary slightly depending on the version of Windows you are using. The instructions provided here are general guidelines, and you should refer to the specific instructions provided by Microsoft for your version of Windows if needed.
By activating Windows, you can make the most out of your new PC and enjoy all the benefits and features that Windows has to offer.
In the next step, we will guide you through the process of installing essential software to further enhance your computing experience on your newly installed Windows system.
Step 14: Install Essential Software
After setting up Windows and activating your copy, it’s time to install essential software to further enhance your computing experience on your new PC. Installing essential software ensures that you have the necessary tools for work, productivity, and entertainment. Follow these steps to install essential software on your Windows system:
- Web Browser: Start by installing a web browser of your choice. Popular options include Google Chrome, Mozilla Firefox, or Microsoft Edge. Having a reliable web browser allows you to surf the internet and access online resources.
- Office Suite: Install an office suite to create and edit documents, spreadsheets, and presentations. Microsoft Office, LibreOffice, or Google Workspace are commonly used suites that offer a range of productivity tools.
- Media Player: Install a media player to enjoy your favorite music, movies, and videos. Popular choices include VLC Media Player, Windows Media Player, or iTunes.
- Security Software: Protect your PC from viruses and malware by installing reliable security software. Consider installing a trustworthy antivirus program, such as Bitdefender, Norton, or Avast.
- Cloud Storage: Set up a cloud storage solution like Dropbox, Google Drive, or Microsoft OneDrive. Cloud storage offers convenient file syncing and backup options, giving you access to your files across multiple devices.
- Productivity Tools: Install additional productivity tools that suit your needs, such as project management software, note-taking apps, or task organizers. Explore software options like Trello, Evernote, or Todoist.
- Graphics and Design Software: If you require graphic design or image editing capabilities, consider installing software like Adobe Photoshop, Illustrator, or GIMP to unleash your creative potential.
- Other Specialty Software: Install any other software applications specific to your interests or hobbies, such as video editing software, music production tools, or coding environments.
Remember to download software from reputable sources and always keep your software up to date to ensure compatibility and security.
Customize the installed software according to your preferences, and take advantage of the features they offer to maximize your productivity, creativity, and entertainment on your new PC.
By installing essential software, you are equipping your new PC with the necessary tools for a seamless and efficient computing experience tailored to your needs.
Congratulations! With all the essential software installed, you’re ready to explore the full potential of your Windows PC. Enjoy your new computer and make the most out of its capabilities!
Conclusion
Congratulations on successfully installing Windows on your new PC! Through this step-by-step guide, you have learned how to prepare for the installation, create a bootable USB drive, set up the BIOS, and complete the installation process. Additionally, you have explored post-installation setup steps, including configuring Windows settings, installing device drivers, activating Windows, and installing essential software.
By following these instructions, you have now set up a fully functional and personalized Windows system. Your new PC is equipped with the necessary software and drivers to optimize performance, security, and productivity.
Remember to regularly update Windows, device drivers, and installed software to ensure a secure and efficient computing experience. Additionally, maintain good digital hygiene practices, such as regularly backing up your files, using strong passwords, and being cautious of suspicious emails or websites.
We hope this guide has been informative and helpful in assisting you with installing and setting up Windows on your new PC. If you encounter any issues or have further questions, don’t hesitate to refer to the official Microsoft documentation or seek assistance from technical support channels.
Enjoy exploring all the features, customizations, and possibilities that Windows offers. Make the most out of your new computer and leverage its capabilities to fulfill your personal and professional needs.
Thank you for choosing Windows, and best wishes for a smooth and enjoyable computing experience!