Introduction
Welcome to our comprehensive guide on how to add an SSD drive to your PC! If you’re looking to boost your computer’s performance and take advantage of faster data transfer speeds, upgrading to a solid-state drive (SSD) is a smart choice. An SSD can significantly improve your system’s responsiveness, reduce boot times, and enhance overall efficiency. In this guide, we will walk you through the process of adding an SSD to your PC, step by step.
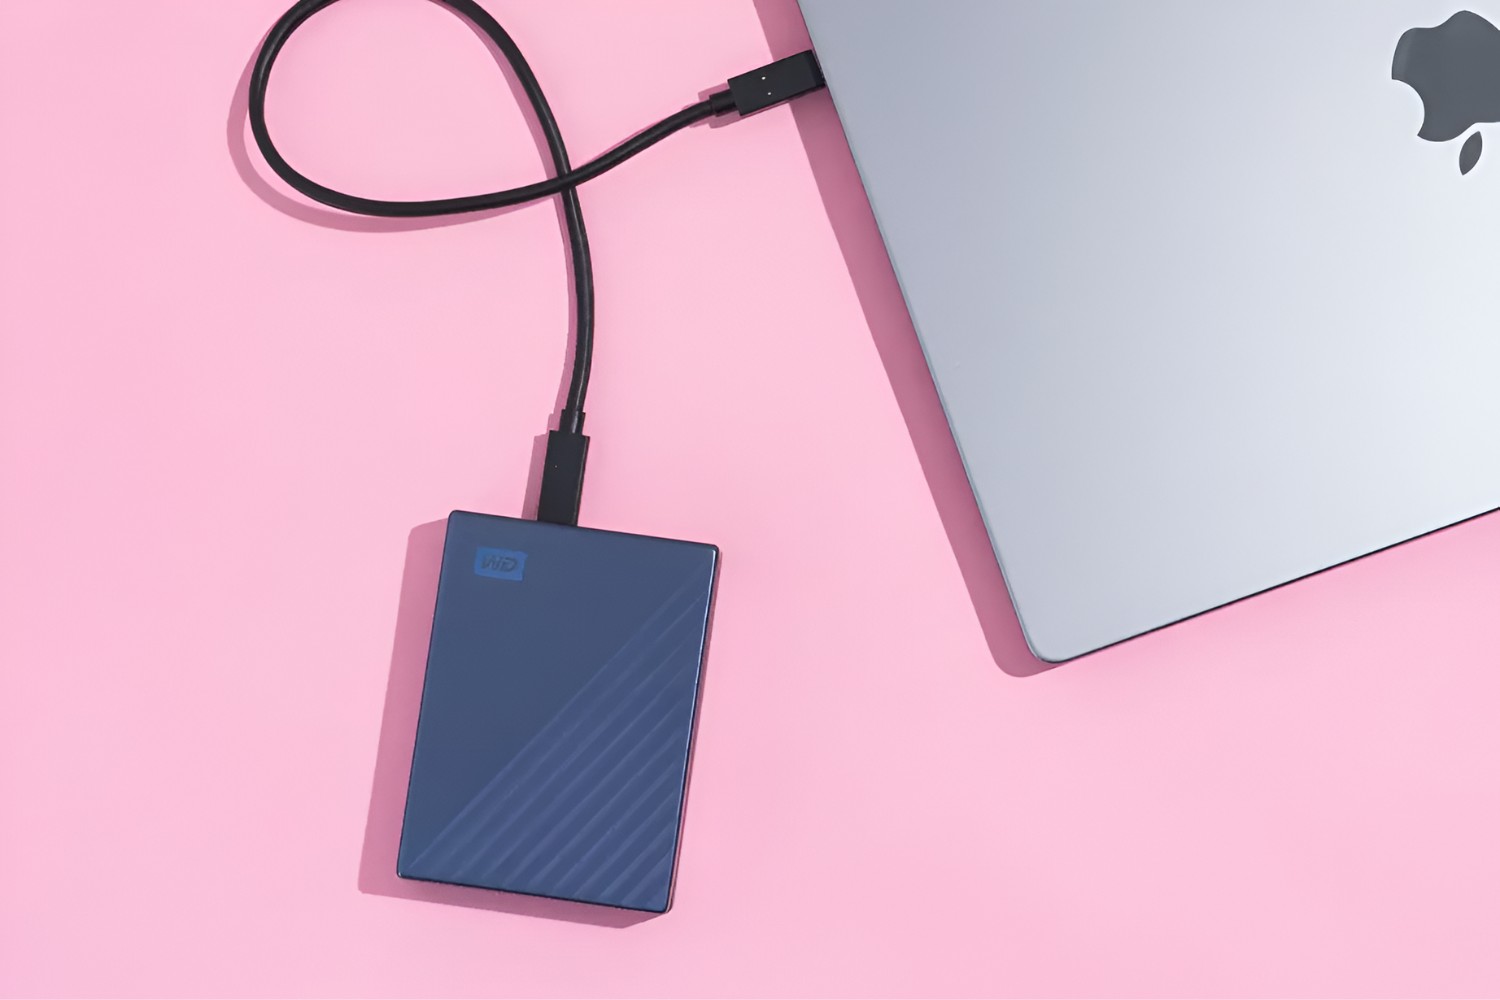
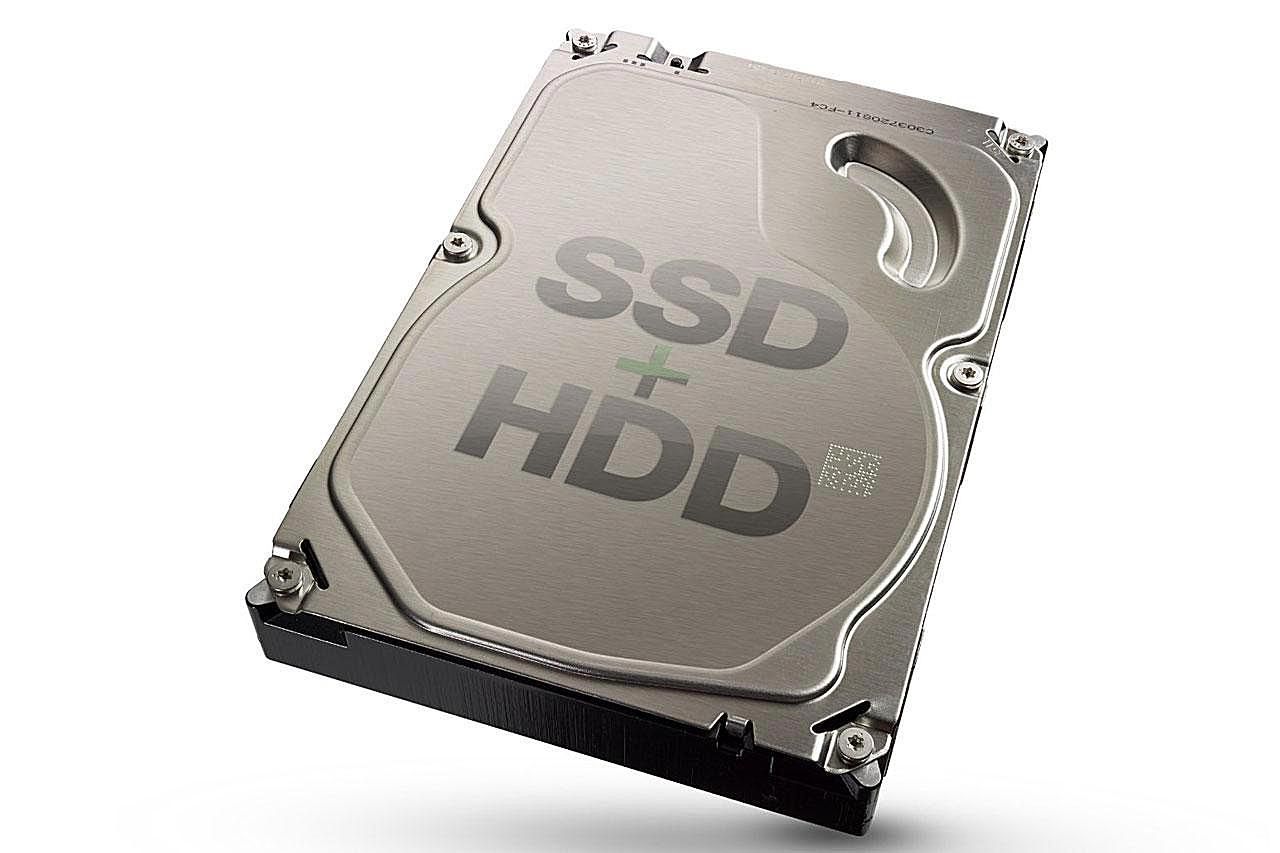
Before we dive into the technicalities, let’s briefly discuss what an SSD is and why it’s a worthwhile investment. Unlike traditional hard disk drives (HDDs), which use spinning platters to store data, SSDs rely on flash memory technology. This means that there are no moving parts, resulting in substantially faster read and write speeds. With an SSD, you can expect quicker application launches, faster file transfers, and smoother multitasking.
Choosing the right SSD for your PC is crucial, as there are various factors to consider, such as capacity, form factor, and interface. We will provide guidance on how to select the best SSD that suits your needs. Additionally, we’ll discuss the tools you’ll need to gather to ensure a smooth installation process.
It’s important to note that adding an SSD to your PC involves opening the computer case and making connections to the motherboard. If you’re not comfortable with this level of technical work, we recommend seeking professional assistance. However, if you’re up for the challenge, we’ll guide you every step of the way to ensure a successful installation.
Once you’ve installed the SSD, there are additional steps to take, such as configuring the drive and transferring data. We’ll cover these topics in detail, providing you with the necessary information to optimize your SSD experience. Additionally, we’ll address some common issues that may arise during the installation process.
Now that you have a general overview, let’s get started with understanding SSDs and choosing the right one for your PC.
Understanding SSDs
Before diving into the installation process, it’s essential to have a solid understanding of what a solid-state drive (SSD) is and how it differs from traditional hard disk drives (HDDs). While HDDs have been the standard for many years, SSDs offer significant advantages in terms of speed, durability, and efficiency.
An SSD is a storage device that uses flash memory technology instead of spinning platters like HDDs. Flash memory allows for faster read and write speeds, resulting in improved system performance. This means that your applications will launch faster, files will transfer more quickly, and your overall computing experience will be smoother.
One of the main advantages of SSDs over HDDs is their lack of moving parts. HDDs use an arm with read/write heads to access data stored on spinning disks. This mechanical process can cause delays and increase the risk of data loss due to physical damage. On the other hand, SSDs have no moving parts, making them more resistant to shock and vibration, resulting in increased durability and reliability.
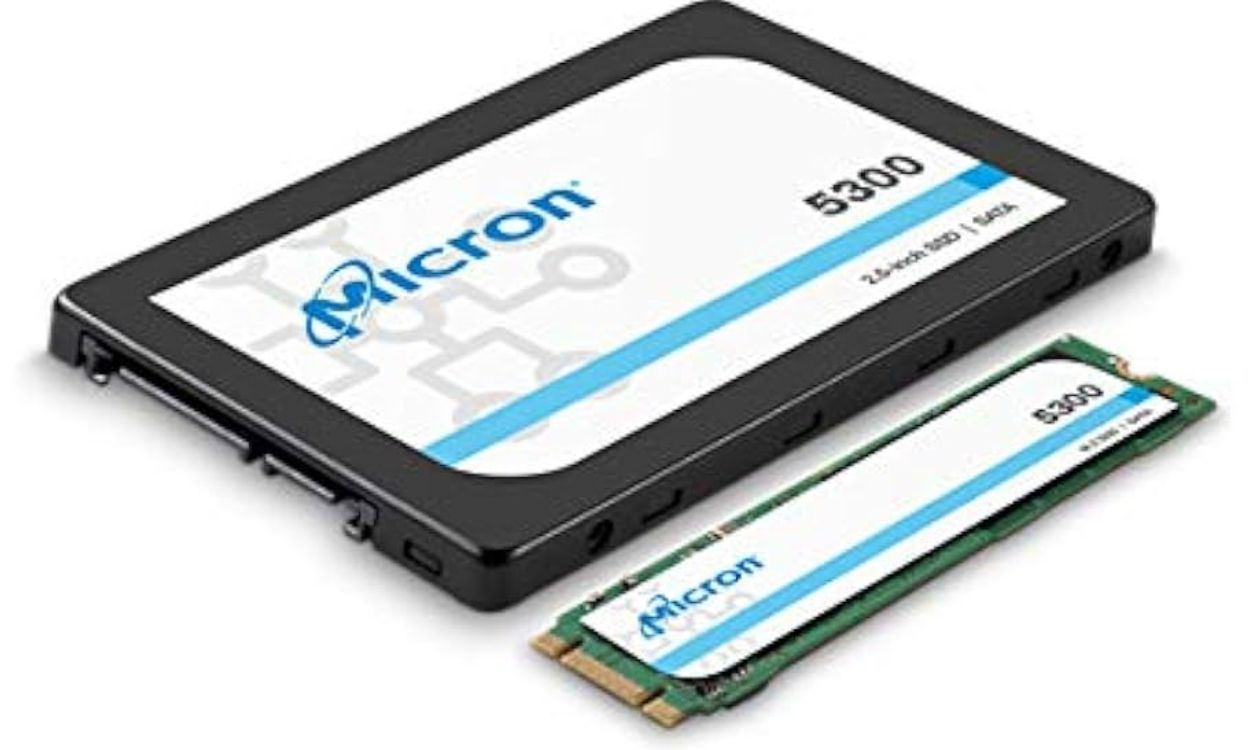
Another crucial aspect of SSDs is their form factor. Commonly available in 2.5-inch and M.2 form factors, SSDs can fit into most desktop and laptop computers. The 2.5-inch form factor is similar to a traditional laptop hard drive, making it compatible with standard drive bays. M.2 SSDs, on the other hand, are smaller, sleeker, and connect directly to the motherboard, allowing for more compact designs and faster data transfer speeds.
When it comes to choosing an SSD, storage capacity is an important consideration. SSDs come in various sizes, ranging from 120GB to multiple terabytes (TB). Consider your storage needs carefully, taking into account the size of your operating system, applications, and files. It’s generally recommended to go for a larger capacity SSD to ensure you have adequate space for your data and future needs.
The interface of an SSD determines how it connects to your PC’s motherboard. The most common interfaces are SATA and PCIe. SATA III is widely supported and provides fast and reliable performance for most users. PCIe SSDs, on the other hand, offer even faster data transfer speeds but may require specific motherboard support.
Now that you have a basic understanding of SSDs, including their advantages, form factors, storage capacity, and interfaces, you’re ready to choose the right SSD for your PC. In the next section, we’ll discuss the factors to consider when making your selection and provide some recommendations to help you make an informed decision.
Choosing the Right SSD
When it comes to choosing the right SSD for your PC, there are a few important factors to consider. These include storage capacity, form factor, interface, and budget. By taking these factors into account, you can ensure that you select an SSD that meets your needs and provides optimal performance.
First, consider the storage capacity that you require. SSDs are available in a range of capacities, from as low as 120GB to several terabytes. Assess your storage needs by considering the size of your operating system, applications, and files. It’s important to allocate enough space to accommodate your current data and allow room for future growth.
Next, determine the form factor that will best suit your PC’s hardware configuration. The two most common form factors are 2.5-inch and M.2. The 2.5-inch form factor is similar to traditional laptop hard drives, making it ideal for desktop PCs and laptops with available drive bays. M.2 SSDs, on the other hand, are more compact and connect directly to the motherboard, allowing for faster data transfer speeds and enabling thinner and lighter laptop designs.
The interface of the SSD is another crucial consideration. SATA III and PCIe are the two main interfaces available. SATA III is the most widely supported and offers fast and reliable performance for most users. It’s compatible with older systems and offers excellent value for money. On the other hand, if you have a newer motherboard with PCIe support, opting for a PCIe SSD can provide even faster data transfer speeds, especially when using the NVMe protocol.
Budget is also an important factor to consider. SSD prices have become more affordable over the years, but higher capacity and faster performance often come with a higher price tag. Determine your budget and prioritize the features that are most important to you. Remember that investing in a high-quality SSD can significantly enhance your PC’s performance and provide long-term value.
Before making a final decision, it’s a good idea to read reviews and compare different SSD models from reputable manufacturers. Look for SSDs with good reliability ratings and positive customer feedback. Additionally, check for warranty information as this can provide peace of mind in case of any issues down the line.
To help you get started with your SSD search, here are a few highly recommended SSD brands: Samsung, Crucial, Western Digital, and Kingston. These brands are known for their reliable products and excellent customer support.
Now that you have a better understanding of the factors to consider when choosing an SSD, you’re ready to make an informed decision. In the next section, we’ll explore the necessary tools you’ll need to gather before proceeding with the installation process.
Gathering the Necessary Tools
Before you begin the process of adding an SSD to your PC, it’s essential to gather the necessary tools to ensure a smooth installation process. Having the right tools at hand will save you time and help prevent any damage to your hardware. Here’s a list of the tools you’ll need:
- Phillips screwdriver: Most PC cases use Phillips screws to secure the side panel, so having a Phillips screwdriver of the appropriate size will make removing and reattaching the panel easier.
- Anti-static wrist strap: This strap helps prevent static electricity from damaging sensitive components during the installation process. It’s a wise precaution to wear an anti-static wrist strap throughout the process, especially when handling the SSD or any internal components.
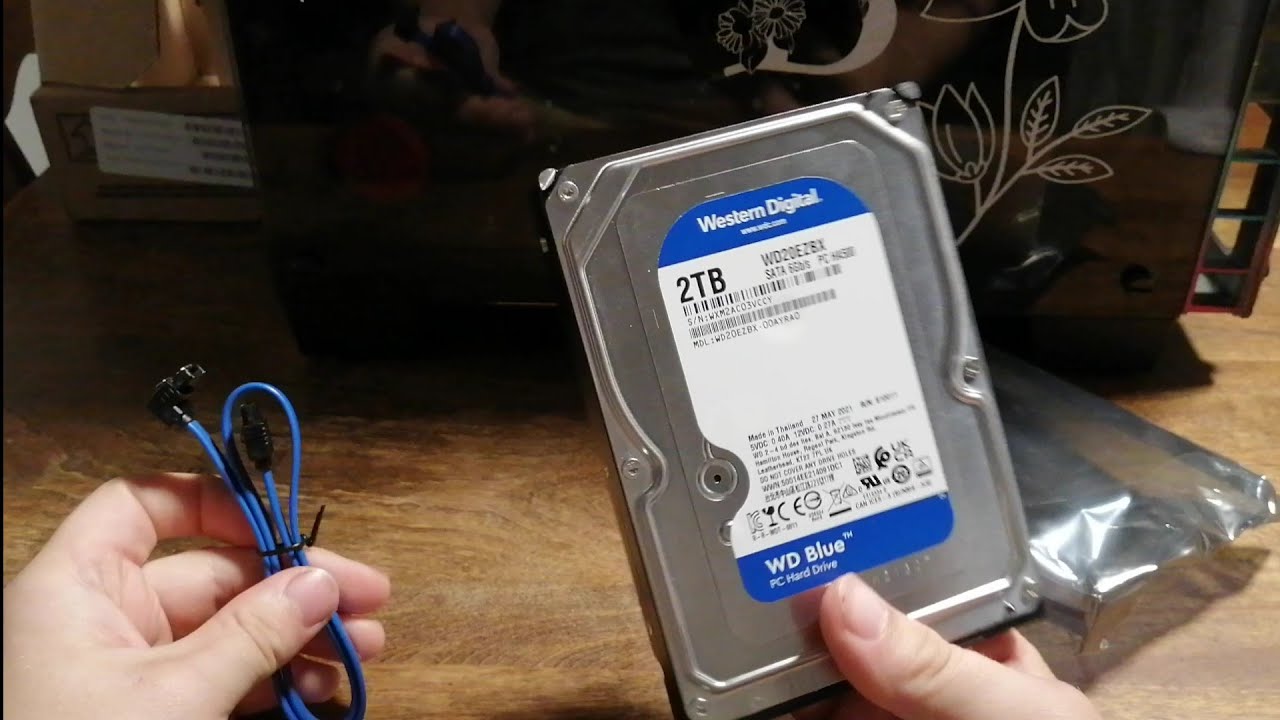
- SATA data cable: Since SSDs typically use the SATA interface to connect to the motherboard, you’ll need a SATA data cable to connect the SSD to the motherboard. This cable usually comes with your motherboard or can be purchased separately if needed.
- SATA power cable: In addition to the data cable, you’ll also require a compatible SATA power cable to connect the SSD to the power supply unit (PSU). This cable should come with your PSU or can be obtained separately if necessary.
- Mounting bracket or adapter (if required): Depending on the form factor of your SSD (2.5-inch or M.2), you may need a mounting bracket or adapter to securely install the SSD in your PC case or motherboard. Check the documentation for your SSD and PC case to determine if any additional mounting hardware is needed.
- Cable ties or adhesive tape: These can come in handy for tidying up the cable management inside your PC case, ensuring that the cables are neatly organized and secure.
By ensuring you have these tools ready beforehand, you’ll be well-prepared for the installation process and can avoid any unnecessary delays or complications. Additionally, it’s always a good idea to have a clean and well-lit workspace to make the installation process more comfortable and to avoid misplacing any small components.
Now that you have gathered the necessary tools, you’re ready to proceed with preparing your PC for the SSD installation. In the next section, we will guide you through the steps to get your PC ready for the upgrade.
Preparing Your PC
Before you start installing the SSD into your PC, it’s important to take a few preparatory steps to ensure a smooth and hassle-free process. These steps will help minimize any potential issues and ensure that your PC is ready for the SSD upgrade. Here’s what you need to do:
- Backup your data: It’s always a good idea to back up your important data before making any hardware changes to your PC. This ensures that your files and documents are safe in case of any unforeseen circumstances. You can use an external hard drive, cloud storage, or a reliable backup software to create a backup of your data.
- Update your operating system: Before adding the SSD, it’s advisable to update your operating system to the latest version. This ensures compatibility and provides any necessary bug fixes or performance improvements that may benefit the SSD installation process.
- Update your BIOS/UEFI firmware: Check if there are any available updates for your computer’s BIOS/UEFI firmware. Keeping your firmware up to date can provide better compatibility and stability for the new hardware you’re installing.
- Clean your PC: Now is a good time to give your PC a thorough cleaning. Remove any dust or debris using compressed air or a soft brush. This helps maintain optimal airflow and prevents overheating of your components.
- Organize cables: Take a few moments to organize the internal cables in your PC. Neatly routing and securing the cables will improve airflow and make it easier to install the SSD and connect the necessary cables later on. Use cable ties or adhesive tape to keep the cables tidy.
- Unplug your PC and ground yourself: Before working inside your PC, make sure to turn off the power and unplug your computer from the wall outlet. Additionally, ground yourself by touching a metal object to discharge any static electricity and protect your PC components from potential damage.
By preparing your PC properly, you’ll reduce the chances of encountering any issues during the installation process and ensure a smooth transition to the new SSD. Once you’ve completed these preparatory steps, you’re ready to move on to the next stage: opening your PC case.
In the following section, we will guide you through the process of opening your PC case, allowing you to gain access to the internals of your computer and proceed with the SSD installation.
Opening Your PC Case
Now that you’ve prepared your PC, it’s time to open the case to gain access to its internal components. Opening your PC case may vary depending on the specific model and design of your computer, but the following general steps should apply to most cases:
- Turn off your PC: Make sure your computer is turned off completely before proceeding. This includes shutting down the operating system and switching off the power supply.
- Unplug your PC: Disconnect the power cord from the wall outlet to ensure there is no electrical power running through your system.
- Ground yourself: Before touching any internal components, ground yourself by touching a metal object or wearing an anti-static wrist strap. This helps prevent any static electricity from damaging sensitive parts of your PC.
- Locate the screws: Most PC cases have screws securing the side panel to the chassis. These screws are usually located at the rear or along the edges of the case. Use a Phillips screwdriver to remove the screws.
- Slide off the side panel: Once the screws are removed, gently slide off the side panel towards the rear of the case. Some cases may require you to lift or slide the panel in a specific direction, so consult the documentation for your PC case if needed.
- Set aside the side panel: Place the removed side panel in a safe and easily accessible location. You may need to reattach it later, so keep it within reach.
After following these steps, you should have successfully opened your PC case, revealing the internal components. Take a few moments to familiarize yourself with the layout of your PC and locate the drive bays and motherboard connections.
Note: If you’re unsure about any specific steps or encounter any difficulties when opening your PC case, it’s always a good idea to consult the documentation or online resources specific to your PC model and case design. Additionally, if you’re not comfortable working inside your PC, it’s recommended to seek assistance from a professional.
Now that the PC case is open, it’s time to proceed with the installation of the SSD. In the next section, we will guide you through the steps to properly install the SSD into your PC.
Installing the SSD
Now that you have successfully opened your PC case, it’s time to install the SSD into your computer. Follow these step-by-step instructions to ensure a proper installation:
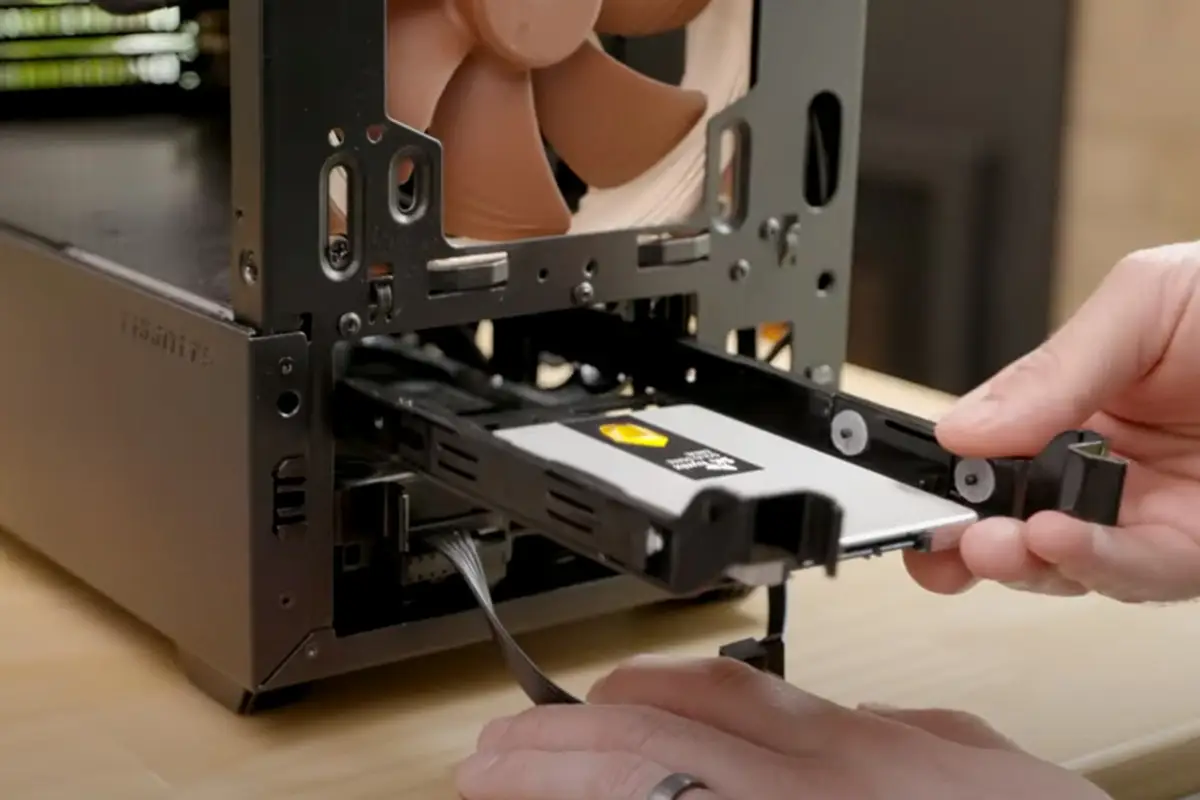
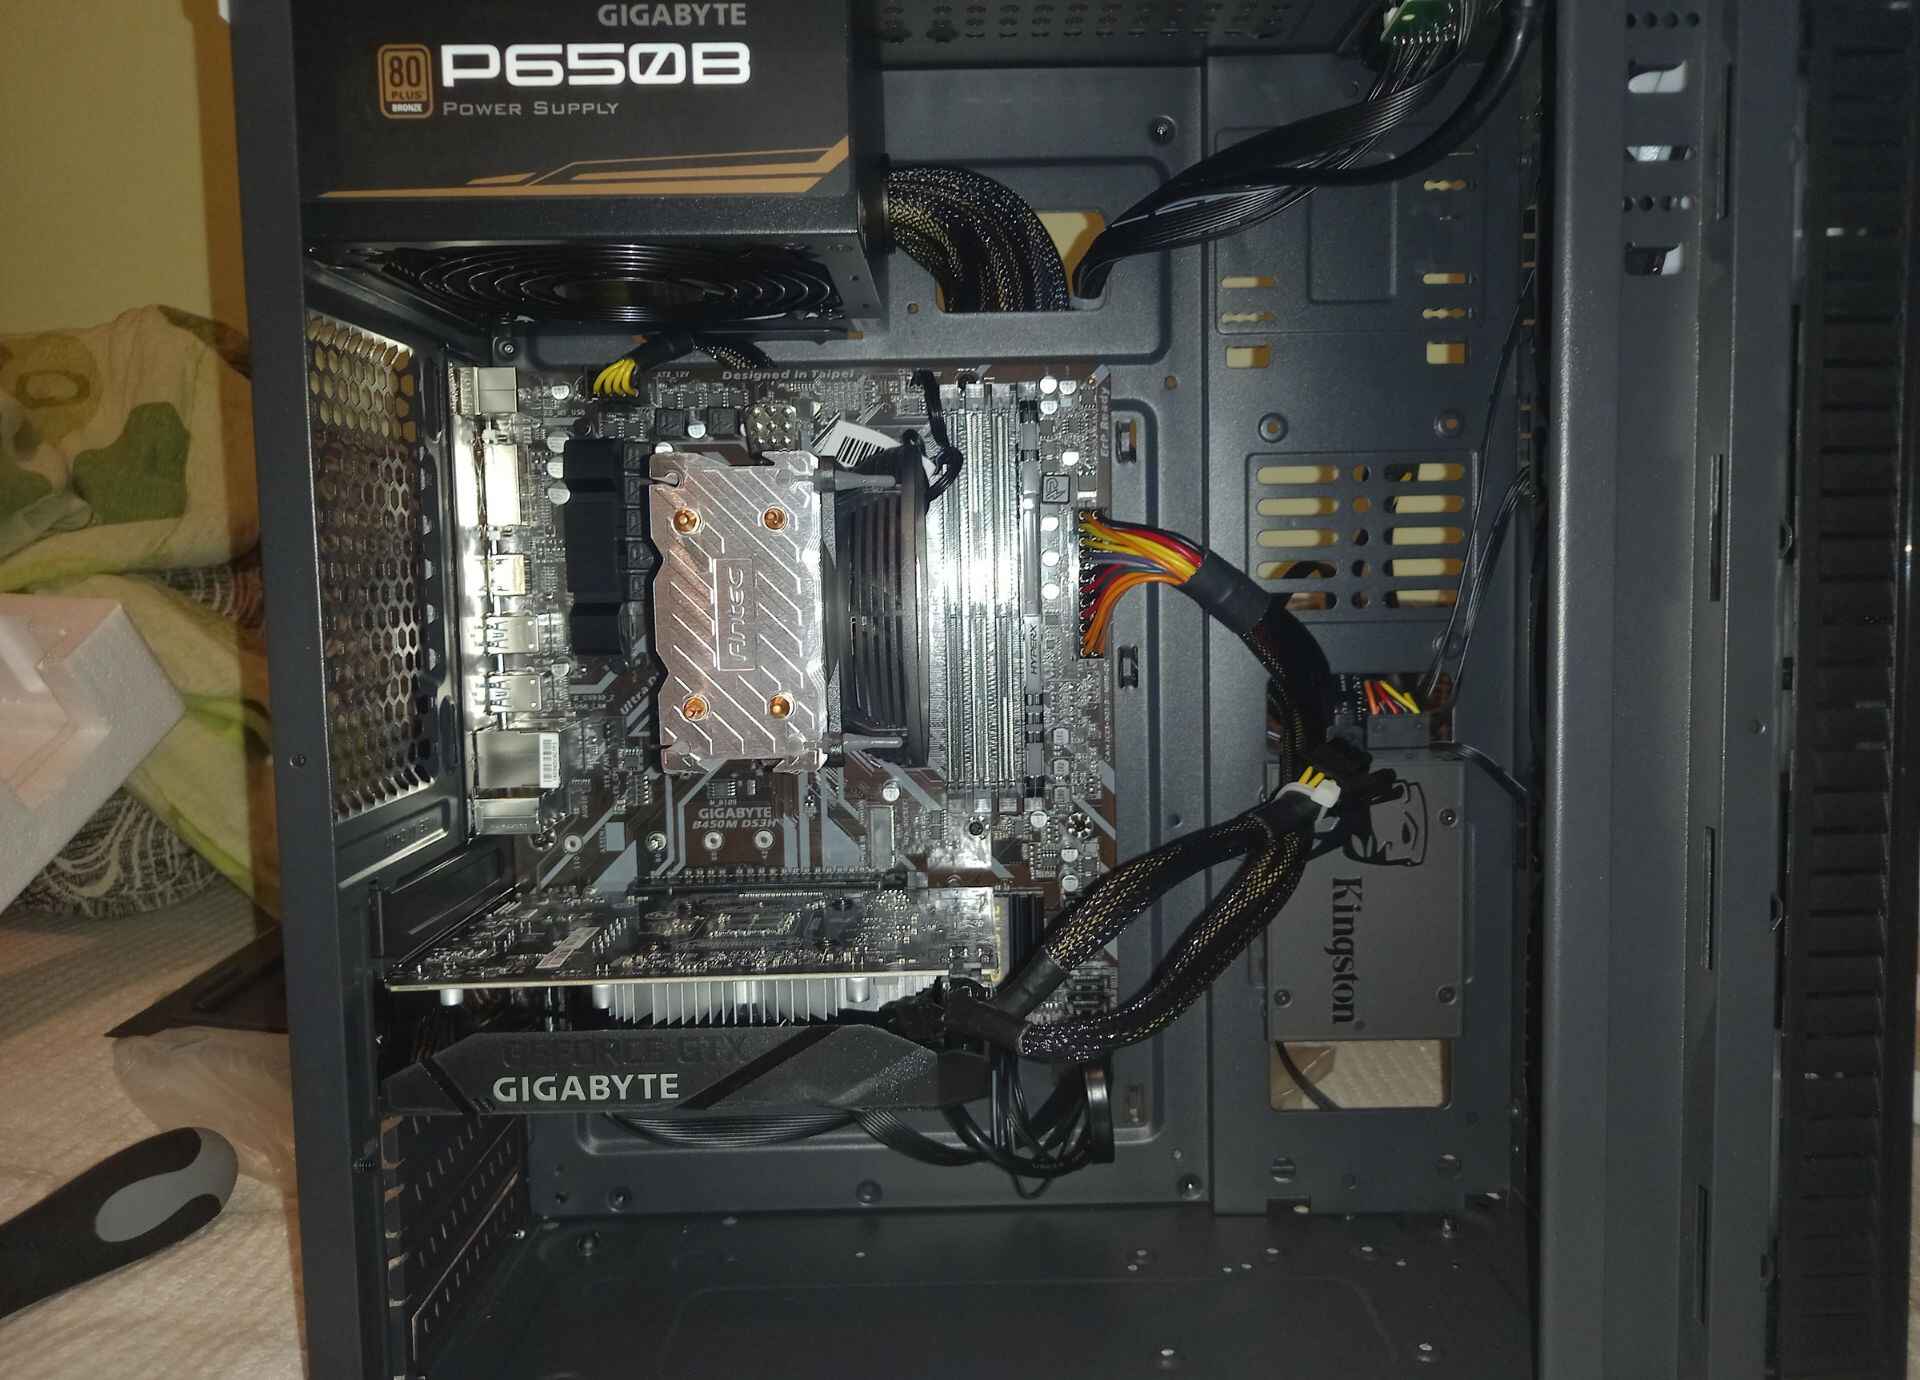
- Locate an available drive bay: Identify an empty drive bay in your PC case where you can install the SSD. Most cases have dedicated 2.5-inch drive bays or brackets specifically designed for SSD installation. If necessary, refer to your PC case’s documentation for guidance on drive bay locations.
- If using a 2.5-inch SSD: If your SSD is the 2.5-inch form factor, position it in the drive bay aligning the screw holes on the SSD with the corresponding holes on the drive bay. Secure the SSD in place using screws or mounting brackets provided with the case.
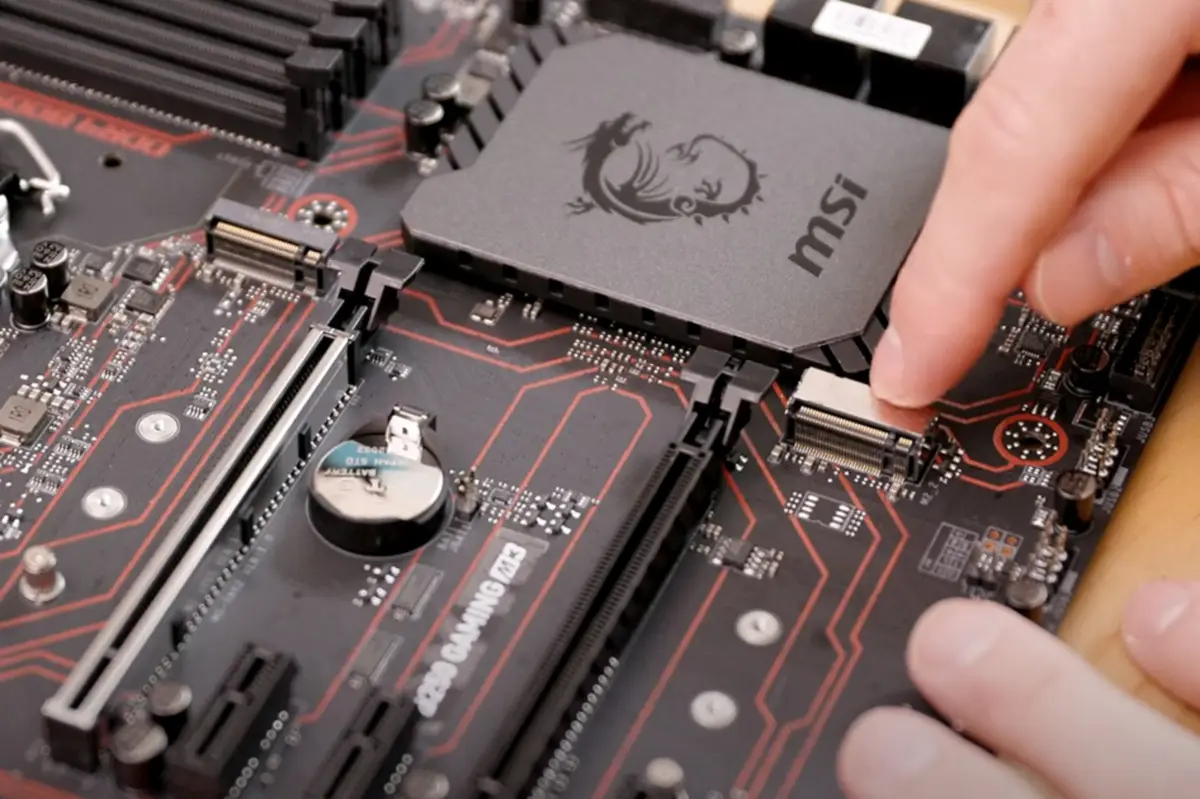
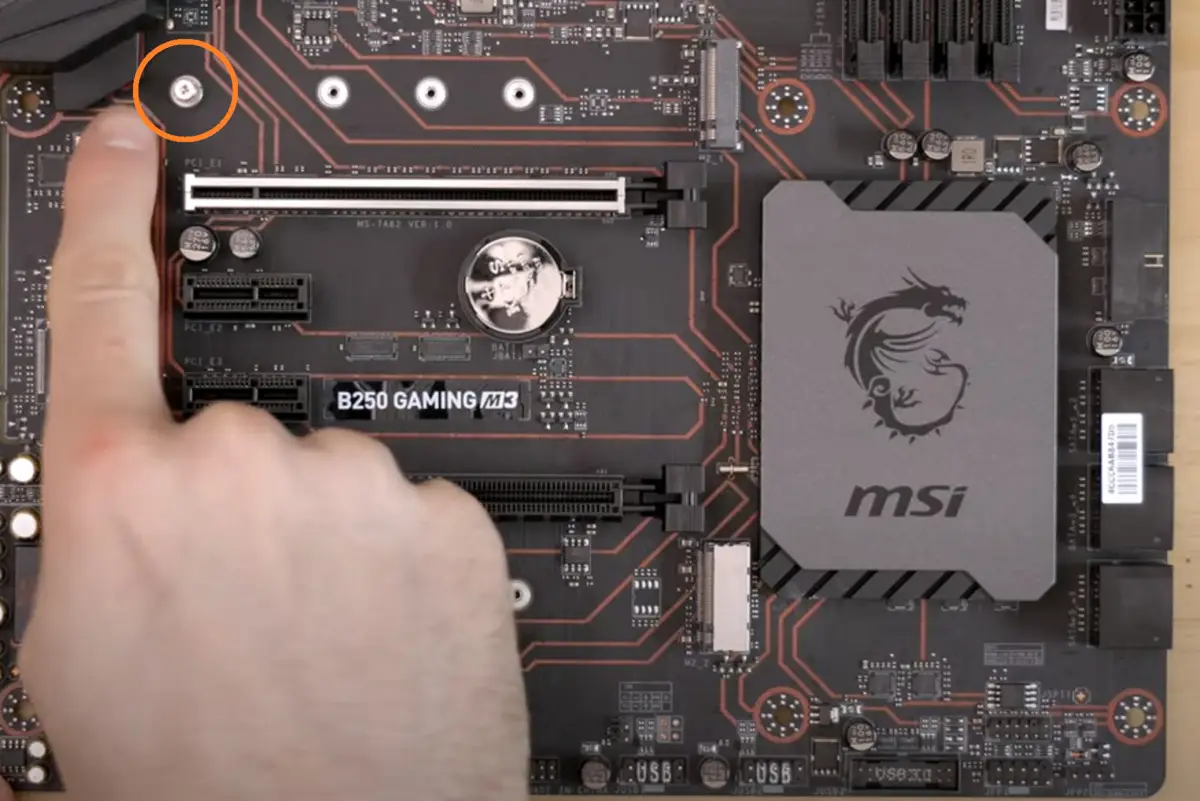
- If using an M.2 SSD: If your SSD is the M.2 form factor, locate the M.2 slot on your motherboard. Gently insert the M.2 SSD into the slot at a 30-degree angle, making sure the gold contacts align with the slot. Apply gentle pressure to push the SSD down until it is snugly seated. Secure the SSD in place using the provided standoff screw.
- Attach the SSD to the case: Secure the SSD to the case using screws or mounting brackets. Make sure the SSD is firmly and securely fastened to prevent movement during operation.
Once the SSD is securely installed, it’s time to connect the necessary cables in the next steps. If you are using a 2.5-inch SSD, continue to the next step. If you have installed an M.2 SSD, skip to step 8.
- Locate the SATA data cable: Identify a spare SATA data cable from your PC’s cables. Connect one end of the SATA data cable to the SATA port on the back of the SSD.
- Connect the other end of the SATA data cable: Locate an available SATA port on your motherboard and connect the other end of the SATA data cable to it. Ensure a secure connection by pressing it firmly until it clicks into place.
Now, let’s move on to connecting the power cable:
- Locate the SATA power cable: Identify a SATA power cable from your power supply unit (PSU). Connect one end of the SATA power cable to the power connector on the SSD.
- Connect the other end of the SATA power cable: Locate a spare SATA power connector from your PSU’s cables and connect the other end of the SATA power cable to it. Ensure a secure connection by pushing it in firmly.
Congratulations! You have now successfully installed the SSD into your PC, connected the necessary cables, and secured it in place. In the next section, we will guide you through the process of closing your PC case and getting your system up and running again.
Connecting the Power Cable
After installing the SSD into your PC, the next step is to connect the necessary power cables to ensure the SSD receives the required power for operation. Follow these steps to connect the power cable to your SSD:
- Locate a SATA power cable: Identify a SATA power cable from your power supply unit (PSU) cables. SATA power cables usually have a black connector with multiple pins.
- Connect the SATA power cable to the SSD: Locate the power connector on the back of the SSD. It is usually located near the data connections. The power connector is a small rectangular port with a series of holes for the pins on the SATA power cable to fit into.
- Align the pins and make the connection: Align the pins on the SATA power cable with the corresponding holes on the SSD’s power connector. Ensure that the orientation is correct and that the pins are fully inserted into the holes. The connection should be firm and secure.
- Double-check the connection: Once the power cable is connected, double-check to ensure it is securely attached to the SSD and that there is no risk of it coming loose during use. Wiggle the cable gently to confirm that it is firmly in place.
With the power cable securely connected, the SSD is now ready to receive power from the PSU. This will enable the SSD to function properly and perform any read and write operations as needed.
Please remember to follow basic safety precautions while working inside your PC, such as turning off the power and grounding yourself to prevent static discharge. If you are uncertain about the connections or require additional assistance, consult your PC or PSU documentation or seek professional help.
In the following section, we will guide you through the process of connecting the data cable to the SSD, allowing it to communicate with the motherboard and other connected devices.
Connecting the Data Cable
Once you have connected the power cable to your SSD, it’s time to establish the data connection between the SSD and the motherboard. This will allow your computer to communicate with the SSD and transfer data. Follow these steps to connect the data cable:
- Locate a SATA data cable: Identify a SATA data cable from your PC’s cables. SATA data cables typically have a smaller, L-shaped connector on each end.
- Connect one end of the SATA data cable to the SSD: Locate the SATA data port on the back of the SSD, near the power connector. Take one end of the SATA data cable and align the connector with the port. Insert it firmly, ensuring it is fully seated.
- Connect the other end of the SATA data cable to the motherboard: Locate an available SATA port on the motherboard. The ports are usually located near the storage connectors on the motherboard, often labeled “SATA”. Take the other end of the SATA data cable and connect it to the SATA port on the motherboard. Ensure a secure connection by pushing it firmly until it clicks into place.
- Secure the cable: Once the data cable is connected to both the SSD and the motherboard, ensure that it is neatly routed and secured with cable ties or adhesive tape, keeping it away from any fans or other components that may obstruct its movement or cause damage.
Now that the data cable is securely connected, your SSD is ready to communicate with the motherboard, allowing for data transfer and access. Ensure that the connections are snug and secure to avoid any intermittent data transfer issues.
Note that if you are using an M.2 SSD, you can skip this step as M.2 SSDs do not require a separate data cable connection. They connect directly to the M.2 slot on the motherboard, eliminating the need for a data cable.
In the next section, we will guide you through the process of closing your PC case, completing the installation, and preparing to boot up your PC with the newly installed SSD.
Closing the PC Case
Now that you have successfully installed the SSD and made all the necessary connections, it’s time to close your PC case. Follow these steps to ensure a proper closure:
- Check internal components: Before closing the case, take a moment to double-check that all the internal components, including the SSD, are securely fastened and properly connected. Ensure that there are no loose cables or components that may interfere with the closing process.
- Position the side panel: Position the side panel back on the PC case, aligning it with the edges and screw holes. Make sure that it is oriented correctly and facing the same way it was before opening the case.
- Secure the side panel: Once the side panel is correctly positioned, insert the screws that were removed earlier to secure it in place. Use a Phillips screwdriver to tighten the screws gently, ensuring that they are snug but not overly tight.
With the side panel securely fastened, your PC case is now closed and ready for operation. Take a moment to admire your handiwork and ensure that everything looks neat and tidy.
It’s important to note that closing the PC case properly is not just about aesthetics; it also helps maintain the integrity of the components inside the case by offering protection from dust, debris, and accidental damage.
Now that your PC case is closed, you can move on to the next step: rebooting your PC and configuring the SSD. In the next section, we will guide you through this process to ensure that your system recognizes and takes full advantage of the newly installed SSD.
Rebooting Your PC
With the SSD successfully installed and the PC case closed, it’s time to reboot your computer in order to recognize and configure the SSD. Follow these steps to reboot your PC:
- Save any open files: Before rebooting, save any open files or programs you may be working on to prevent data loss.
- Close all programs: Close all running programs and ensure that no applications are actively using the SSD.
- Click on the Start menu: In the Windows operating system, click on the Start button located at the bottom-left corner of the screen. Select “Restart” from the power options menu.
- Alternatively, press the power button: If the Restart option is not available in the Start menu, you can press the power button on your computer to initiate a shutdown. Once it shuts down, press the power button again to turn it back on.
- Wait for the PC to reboot: During the reboot process, your PC will go through a series of checks and configurations. This may take a few minutes.
- Enter your BIOS/UEFI settings (optional): Depending on your motherboard and settings, you may need to enter the BIOS/UEFI settings to ensure that the SSD is recognized as the boot drive. This step is typically necessary if you have installed the operating system on the SSD and want it to be the primary boot drive. Consult your motherboard’s documentation for specific instructions on accessing the BIOS/UEFI settings.
- Check for SSD recognition: After the reboot, your operating system should recognize the newly installed SSD. You can verify this by checking the “Disk Management” utility in Windows or similar disk management tools in other operating systems.
During the system reboot, the operating system will detect the newly installed SSD and ensure that it is properly recognized and configured for use. Once your PC has rebooted, you can start reaping the benefits of the faster performance and enhanced storage capabilities that the SSD provides.
If your SSD is not recognized, double-check all the connections and ensure that the SSD is detected in the BIOS/UEFI settings. If necessary, consult the documentation of your SSD or seek further assistance to troubleshoot the recognition issue.
Now that you have successfully rebooted your PC, the next step is to configure the SSD and transfer your data to take full advantage of the improved storage capabilities. In the following sections, we will guide you through these processes in detail.
Configuring the SSD
After rebooting your PC with the newly installed SSD, it’s important to configure the drive to optimize its performance and ensure compatibility with your operating system. Follow these steps to configure your SSD:
- Format the SSD (if necessary): If your SSD is brand new or has not been previously formatted, you will need to format it to prepare it for use. In Windows, you can format the SSD by accessing the Disk Management utility. Right-click on the SSD drive and select “Format”. Follow the prompts to select a file system (such as NTFS) and allocate a drive letter.
- Create partitions (optional): If you prefer to divide your SSD into multiple partitions for different purposes, such as separating the operating system from data storage, you can create partitions using the Disk Management utility or a third-party partitioning tool. This step is optional and depends on your specific needs.
- Assign the drive letter (if not automatically assigned): In some cases, the operating system may not automatically assign a drive letter to the SSD. To access the SSD, you’ll need to assign a drive letter manually. In the Disk Management utility, right-click on the SSD partition, select “Change Drive Letter and Paths,” and choose an available letter.
- Enable TRIM (if applicable): TRIM is a command that helps optimize SSD performance by allowing the operating system to inform the SSD which data blocks are no longer in use. By enabling TRIM, you can help maintain the performance and longevity of the SSD. In Windows, TRIM is usually enabled by default, but it’s a good idea to double-check. Open the Command Prompt as an administrator and type the following command:
fsutil behavior query DisableDeleteNotify. If the result is “0” (zero), TRIM is enabled. If the result is “1”, you can enable TRIM by typing:fsutil behavior set DisableDeleteNotify 0.
By following these steps, you can ensure that your SSD is properly formatted, configured, and optimized for performance. This will enhance the overall efficiency of your system and improve the lifespan of the SSD.
Next, you’ll need to transfer your data to the SSD, including the operating system and any necessary files and applications. In the next section, we will guide you through the process of transferring data to your new SSD.
Transferring Data to the SSD
Transferring your data to the newly installed SSD is an important step to take full advantage of its speed and storage capabilities. Follow these steps to transfer your data:
- Identify the data to transfer: Determine which files, folders, and applications you want to migrate to the SSD. This may include your operating system, important documents, multimedia files, and commonly used applications.
- Consider cloning or clean installation: There are two main methods to transfer data to the SSD. The first option is to clone your existing hard drive to the SSD, which makes an exact copy of your entire system. Alternatively, you can perform a clean installation of the operating system and manually transfer the desired files and applications.
- Clone your hard drive (optional): If you choose to clone your hard drive, you can use software like Clonezilla or Macrium Reflect to create an exact copy of your current drive on the SSD. Follow the instructions provided by the cloning software to complete the process.
- Clean installation of the operating system (optional): If you prefer a clean installation, you will need to install the operating system on the SSD and then reinstall your applications and restore your data from a backup.
- Manually transfer files (if necessary): If you opt for a clean installation, manually transfer your important files by copying them from the original drive to the corresponding folders on the SSD. This includes documents, photos, videos, and other personal files.
- Reinstall applications: After transferring your data, reinstall the necessary applications onto the SSD. You can download the latest versions from their respective websites or use installation disks or files that you have saved.
- Configure your applications: Once the applications are installed, you may need to reconfigure settings and preferences to match your previous setup.
- Verify data integrity: After the transfer is complete, take some time to ensure that all your transferred data is accessible and intact on the SSD. Verify that your operating system functions properly and that applications and files open as expected.
Transferring your data to the SSD allows you to benefit from faster load times, quicker file access, and overall improved performance. Remember to keep a backup of your important files in case of any issues during the transferring process.
In the next section, we will guide you through the process of configuring the BIOS/UEFI settings to ensure that your system recognizes the SSD as the primary boot drive.
Configuring the BIOS
Configuring the BIOS (Basic Input/Output System) or UEFI (Unified Extensible Firmware Interface) settings is necessary to ensure that your system recognizes the SSD as the primary boot drive. Follow these steps to configure the BIOS/UEFI:
- Restart your computer: Save all your work and restart your PC.
- Access the BIOS/UEFI settings: As the computer restarts, press the designated key on your keyboard to access the BIOS/UEFI settings. The specific key varies depending on the computer manufacturer, but it is typically F2, Delete, or Esc. Refer to the manufacturer’s documentation or website if you’re unsure which key to press.
- Navigate to the Boot tab: Once inside the BIOS/UEFI settings, navigate to the Boot tab. This tab contains the settings related to the boot order and storage devices.
- Set the SSD as the primary boot drive: Locate the boot order options or the list of storage devices. Move the SSD to the top of the boot order list to ensure that the system attempts to boot from the SSD first. On some systems, you may need to go into the Hard Drive Boot Priority section and select the SSD as the first device.
- Save and exit: Once you have configured the boot order, save the changes by selecting the option to save and exit the BIOS/UEFI settings. This option is typically located in the Exit tab of the BIOS/UEFI.
- Confirm the changes and reboot: As your computer reboots, it should now recognize the SSD as the primary boot drive. The operating system should load from the SSD, providing faster boot times and overall improved performance.
Keep in mind that the BIOS/UEFI settings may vary depending on your computer’s manufacturer and model. Take your time to explore the settings and refer to the manufacturer’s documentation if you encounter any difficulties.
Configuring the BIOS/UEFI ensures that your system prioritizes the SSD during the boot process, allowing you to fully benefit from its speed and performance. Once the changes are made and your computer recognizes the SSD as the primary boot drive, you can enjoy faster startup times and responsiveness.
In the next section, we will guide you through the process of verifying the SSD installation to ensure that it’s recognized by your operating system and functioning correctly.
Verifying the SSD Installation
After configuring the BIOS/UEFI settings, it’s essential to verify that the SSD installation was successful and that your operating system recognizes it. Follow these steps to verify the SSD installation:
- Boot up your computer: Start your computer and allow it to fully boot into the operating system.
- Check for SSD recognition: Open the Disk Management utility in Windows or a similar disk management tool in other operating systems. Look for the SSD in the list of storage devices. It should be listed as a separate disk with the desired storage capacity.
- Ensure proper formatting: Verify that the SSD appears as a formatted drive with the correct file system (e.g., NTFS). If the SSD is unallocated or not showing the correct capacity, you may need to format it again or allocate the unallocated space.
- Check the drive letter assignment: Confirm that a drive letter is assigned to the SSD partition. This allows you to access the SSD and store data on it. If no drive letter is assigned, right-click on the partition and select “Change Drive Letter and Paths” to assign a letter.
- Perform a test transfer: Test the SSD’s performance by transferring a small file or folder to the drive. Monitor the transfer speed and ensure that it is significantly faster compared to using a traditional hard disk drive.
- Open applications and files: Launch some applications and access files that reside on the SSD. Check if they open quickly and respond without any delays. This confirms that the SSD is functioning properly and providing improved performance.
- Run diagnostic software (optional): If you want to be extra cautious or troubleshoot any issues, you can run diagnostic software specific to the SSD. Some SSD manufacturers provide dedicated software tools that can help you verify the health, speed, and other parameters of the SSD.
- Monitor for errors or anomalies: Continuously monitor the performance of the SSD to ensure there are no errors, crashes, or unusual behaviors. If you encounter any issues, refer to the manufacturer’s documentation or online support resources for troubleshooting steps.
By verifying the SSD installation, you can ensure that the SSD is properly recognized, formatted, and performing optimally. Enjoy the benefits of faster read and write speeds, improved overall system responsiveness, and quicker access to your files and applications.
With the SSD successfully installed, configured, and verified, you can now fully enjoy the enhanced performance and storage capabilities it brings to your PC.
In case you encounter any issues or have further questions, consult the manufacturer’s documentation or seek assistance from their customer support. Now that your SSD installation is complete and verified, you can make the most of your upgraded PC experience!
Troubleshooting Common Issues
While the installation and configuration process of an SSD is generally straightforward, you may encounter some common issues along the way. Here are a few troubleshooting steps to help resolve potential issues:
- Check connections: Ensure that all cables are securely connected to the SSD, including the power and data cables. If any connections feel loose, disconnect and reconnect them firmly.
- Verify power supply: Confirm that the power supply unit (PSU) is providing sufficient power to the SSD. Check that the SATA power cable is securely connected to both the drive and the PSU.
- Restart your computer: Sometimes, a simple restart can resolve minor issues. Restart your computer and check if the SSD is recognized after the reboot.
- Update firmware: Check if there are any firmware updates available for your SSD. Visit the manufacturer’s website and download the latest firmware for your specific model. Follow the instructions provided with the firmware update to install it properly.
- Test the SSD on another system: If possible, connect the SSD to another computer to see if it is recognized and functions correctly. This helps determine if the issue is specific to your system or the SSD itself.
- Check BIOS/UEFI settings again: Double-check the BIOS/UEFI settings to ensure that the SSD is set as the primary boot device and that the SATA ports are correctly configured. Make any necessary changes and save the settings.
- Run disk management tools: Use disk management tools, such as CHKDSK (for Windows) or Disk Utility (for macOS), to scan and repair any potential issues with the SSD’s file system.
- Verify compatibility: Ensure that the SSD is compatible with your motherboard and operating system. Check the documentation for both the motherboard and the SSD to confirm compatibility. If necessary, update your motherboard’s BIOS/UEFI to the latest version.
- Consult manufacturer support: If all else fails, reach out to the SSD manufacturer’s support team. They can provide specific guidance and troubleshooting steps tailored to your SSD model.
If you encounter any issues during the SSD installation, don’t panic. Troubleshooting steps like these often help resolve common problems. Keep in mind that each system configuration is unique, so it’s essential to refer to your specific SSD and motherboard documentation for guidance and support.
By following these troubleshooting steps and seeking assistance when needed, you can effectively resolve common issues and ensure a smooth and successful SSD installation.
Now that you have the tools to troubleshoot common issues, you can confidently navigate any challenges that may arise during your SSD installation.
Conclusion
Congratulations! You have reached the end of our comprehensive guide on how to add an SSD drive to your PC. By following the step-by-step instructions and troubleshooting strategies provided in this guide, you have successfully installed and configured an SSD, allowing you to enjoy improved performance and faster data transfer speeds.
Throughout this guide, you learned about the advantages of SSDs over traditional hard disk drives (HDDs) and how to choose the right SSD for your PC. You gathered the necessary tools, prepared your PC, opened the case, and securely installed the SSD. You connected the power and data cables, closed the PC case, and rebooted your computer. Additionally, you learned how to configure the SSD, transfer data, and configure the BIOS/UEFI settings.
Throughout the installation process, we discussed common issues that may arise and provided troubleshooting guidance to help you overcome them. By following these troubleshooting steps and seeking assistance from the manufacturer if needed, you can resolve potential issues and ensure a smooth SSD installation experience.
An SSD upgrade can significantly enhance your PC’s performance and improve your overall computing experience. With faster system startup times, quicker application launches, and rapid data transfer speeds, you can enjoy a more efficient workflow and reduced waiting times.
Remember to take regular backups of your important files and maintain good data management practices to ensure the safety of your data. It is also important to keep your SSD firmware and operating system updated to benefit from the latest enhancements, bug fixes, and security patches.
We hope that this guide has provided you with the knowledge and confidence to successfully install an SSD drive in your PC. Embrace the speed and efficiency of your newly upgraded system, and enjoy the improved performance for years to come.
Thank you for choosing this guide, and happy computing with your new SSD!