Introduction
Welcome to the world of solid-state drives (SSDs)! In this digital age where speed and performance are paramount, upgrading to an SSD as your primary drive can significantly enhance your computer’s performance. Whether you’re a gaming enthusiast, a professional content creator, or simply someone who values quick boot times and snappy application launches, making your SSD your primary drive is a wise decision.
An SSD, or solid-state drive, is a type of storage device that uses flash memory to store and retrieve data. Unlike traditional hard disk drives (HDDs) that rely on spinning disks and mechanical components, SSDs offer lightning-fast speeds and increased reliability. With no moving parts, SSDs are resistant to physical shock and are completely silent. This makes them not only faster but also more durable compared to HDDs.
So why should you consider making an SSD your primary drive? The advantages are numerous. Firstly, the speed of an SSD is unparalleled. Equipped with high-speed flash memory, an SSD can deliver near-instantaneous file access, resulting in faster boot times, reduced application load times, and improved overall system responsiveness. Tasks that used to take minutes can now be completed in mere seconds!
Another advantage is the increased durability and reliability of SSDs. As mentioned earlier, SSDs have no moving parts, meaning they’re less susceptible to physical damage from drops or vibrations. This makes them perfect for mobile devices like laptops, ensuring your data remains safe even when you’re on the go. Additionally, any accidental power outages or sudden shutdowns won’t cause data loss or corruption, as SSDs have built-in power-loss protection.
Finally, SSDs are energy-efficient. The absence of moving parts means SSDs consume less power, resulting in longer battery life for laptops and reduced electricity bills for desktop computers. This makes SSDs not only beneficial for your device’s performance but also for the environment!
In the following sections, we will guide you through the steps required to make your SSD your primary drive. We’ll cover everything from assessing your needs and checking compatibility to migrating your operating system and optimizing performance. So let’s dive in and unlock the true potential of your computer with an SSD as your primary drive!
What is an SSD?
An SSD, or solid-state drive, is a modern storage device that has revolutionized the way data is stored and accessed in computers and electronic devices. Unlike traditional hard disk drives (HDDs) that rely on spinning disks and magnetic recording, SSDs use flash memory to store data. This flash memory, similar to what you find in USB drives or memory cards, provides numerous advantages over HDDs and has become the preferred choice for many computer users.
The key component of an SSD is its flash memory chips, which are made up of non-volatile memory cells that retain data even when power is removed. This means that the data stored on an SSD remains intact even during power outages or system crashes, ensuring the safety and integrity of your important files.
One of the main advantages of SSDs over HDDs is their incredible speed. Since there are no moving parts in an SSD, data can be accessed and retrieved at an unprecedented rate. This results in significantly faster boot times and application load times, allowing you to start your computer and launch your favorite applications in a matter of seconds. Tasks such as copying files, opening large documents, or running resource-intensive programs are dramatically accelerated, enhancing your overall computing experience.
Another notable advantage of SSDs is their durability and reliability. Without any mechanical parts or spinning disks, SSDs are more resistant to physical shock and damage. They can withstand accidental drops or bumps without risking data loss or drive failure. This makes SSDs ideal for laptops, where portability and durability are key factors.
Furthermore, SSDs operate silently due to the absence of moving components. Unlike HDDs, which produce noticeable noise when accessing data, SSDs maintain a peaceful working environment. This is especially beneficial for those who require a quiet computer environment, such as audio recording studios or libraries.
Additionally, SSDs are more energy-efficient compared to HDDs. Their solid-state nature requires less power, which translates into longer battery life for laptops and lower electricity bills for desktop computers. This makes SSDs not only great for performance, but also for reducing the overall environmental impact.
In summary, an SSD is a modern storage device that uses flash memory to store and retrieve data. With its incredible speed, improved durability, silent operation, and energy efficiency, an SSD is a worthy investment for those looking to enhance their computer’s performance and reliability. In the following sections, we will guide you through the process of making an SSD your primary drive, unlocking the full potential of your computer.
Advantages of Using an SSD as Your Primary Drive
Upgrading to an SSD as your primary drive brings a plethora of advantages that can greatly enhance your computing experience. Let’s explore some of the key benefits of using an SSD as your primary drive:
- Speed and Performance: The most noticeable advantage of using an SSD as your primary drive is the significant improvement in speed and performance. With lightning-fast read and write speeds, SSDs can boot up your operating system in seconds and launch applications in the blink of an eye. Tasks that used to take minutes on a traditional hard drive can be completed in a fraction of the time with an SSD.
- Faster File Transfers: SSDs excel in handling large files and transferring data swiftly. Whether you’re copying files, transferring media, or working with large projects, an SSD can accelerate your workflow by providing seamless and rapid file transfers.
- Incredible Responsiveness: SSDs offer excellent responsiveness, making your entire computing experience more fluid and snappy. Multi-tasking becomes effortless, and you can switch between applications and open files without any noticeable lag, ensuring a smoother and more efficient workflow.
- Improved Gaming Experience: Gamers, rejoice! With an SSD as your primary drive, game load times are significantly reduced. Games launch faster, levels load quicker, and you can get into the action without any frustrating delays. SSDs also help minimize stuttering and improve in-game performance, giving you a competitive edge.
- Energy Efficiency: SSDs are not only faster but also more energy-efficient than traditional hard drives. They consume less power during operation, which translates to increased battery life for laptops and reduced electricity bills for desktop computers.
- Quiet and Cool Operation: Compared to traditional hard drives, SSDs generate virtually no noise as there are no moving parts involved. This not only creates a quieter working environment but also helps keep your computer cool. The absence of moving components means SSDs produce less heat, reducing the need for excessive cooling and improving the overall longevity of your system.
By upgrading to an SSD as your primary drive, you can enjoy faster performance, quicker file transfers, improved responsiveness, enhanced gaming experiences, energy efficiency, and a quieter operating environment. These advantages make SSDs the go-to choice for those seeking optimal speed, efficiency, and reliability in their computing devices.
In the next sections, we will guide you through the step-by-step process of making your SSD your primary drive, ensuring a smooth transition and maximizing the benefits of this upgrade.
Step 1: Assessing Your Needs and Checking Compatibility
Before diving into the process of making your SSD your primary drive, it’s important to assess your needs and ensure compatibility with your system. Follow these steps to get started:
1. Evaluate Your Storage Requirements: Take a look at your current storage situation and determine how much space you need. Consider the number and size of files you typically work with, including documents, photos, videos, and applications. This will help you determine the appropriate capacity for your new SSD.
2. Check Your Available Drive Bays: Open up your computer’s case (if using a desktop) or refer to your laptop’s specifications to identify the available drive bays. Determine if you have an empty drive bay to install the SSD. If not, consider removing an existing drive or investing in an external SSD enclosure for easy external storage.
3. Verify Your System’s Compatibility: Ensure that your computer or laptop supports SSD installation. Check the user manual or manufacturer’s website for specifications related to drive compatibility. Pay attention to factors such as the type of interface (e.g., SATA, NVMe), form factor (e.g., 2.5-inch, M.2), and any specific requirements or limitations.
4. Consider Your Budget: SSDs come in a range of prices based on capacity, speed, and brand. Evaluate your budget and determine how much you’re willing to invest in an SSD that meets your needs. It’s worth noting that even a mid-range SSD can provide a significant performance boost compared to a traditional hard drive.
5. Research and Read Reviews: Take the time to research different SSD models and read customer and expert reviews. Look for reliable brands and SSDs with positive feedback in terms of performance, durability, and customer support. This information can help you make an informed decision and ensure the longevity of your investment.
6. Backup Your Data: It’s crucial to back up your data before making any changes to your storage configuration. This will help prevent data loss or corruption during the installation process. Use cloud storage services, external hard drives, or other backup methods to securely store your important files.
By assessing your storage needs, checking compatibility, considering your budget, and backing up your data, you’ll be well-prepared to proceed with the installation of your SSD as the primary drive. In the next section, we’ll guide you through the process of backing up your data to ensure a seamless transition and safeguard your files.
Step 2: Backing Up Your Data
Prior to making any changes to your storage configuration, it is crucial to back up your data to ensure its safety and avoid any potential loss. Follow these steps to effectively back up your data:
1. Identify Important Files: Take the time to identify and prioritize the files that are most important to you. This includes documents, photos, videos, music, and any other data that you cannot afford to lose. Make a list or create a folder to ensure that all essential files are accounted for.
2. Choose a Backup Method: There are various backup methods available, each with its own advantages. Consider the following options:
- Cloud Storage: Services like Google Drive, Dropbox, or OneDrive provide convenient and secure cloud storage options. Upload your important files to the cloud, allowing you to access and restore them from any device with an internet connection.
- External Hard Drive: Purchase an external hard drive with enough storage capacity to hold your data. Connect the external drive to your computer and copy the desired files onto it. This provides a physical backup that you can store in a safe location.
- Network Attached Storage (NAS): If you have a NAS device, you can back up your data directly to it over your local network. This creates a centralized backup solution accessible to all devices on the network.
- Disk Imaging Software: Disk imaging software like Acronis True Image or Macrium Reflect allows you to create an exact copy of your entire hard drive, including the operating system and all files. This creates a comprehensive backup that can be restored in case of any system failures or emergencies.
3. Execute the Backup Procedure: Once you have chosen the backup method that suits your needs, follow the instructions provided by the selected software or service. This may involve setting up a schedule for automatic backups, selecting the specific folders and files to include, or simply dragging and dropping the files onto the external drive.
4. Verify the Backup: After completing the backup process, it is important to verify that your files have been successfully backed up. Take the time to browse through the backup location or perform test restores to ensure that your files can be accessed and restored when needed.
5. Secure your Backup: Protect your backup by keeping it in a safe and secure location. If using an external hard drive, consider storing it in a fireproof and waterproof safe or keeping it offsite in case of disasters or theft. For cloud storage, enable two-factor authentication and ensure that your account is password-protected.
By following these steps, you can be confident that your important files are safely backed up before proceeding with the installation of your SSD as the primary drive. In the next section, we will guide you through the process of choosing the right SSD for your system, ensuring compatibility and optimal performance.
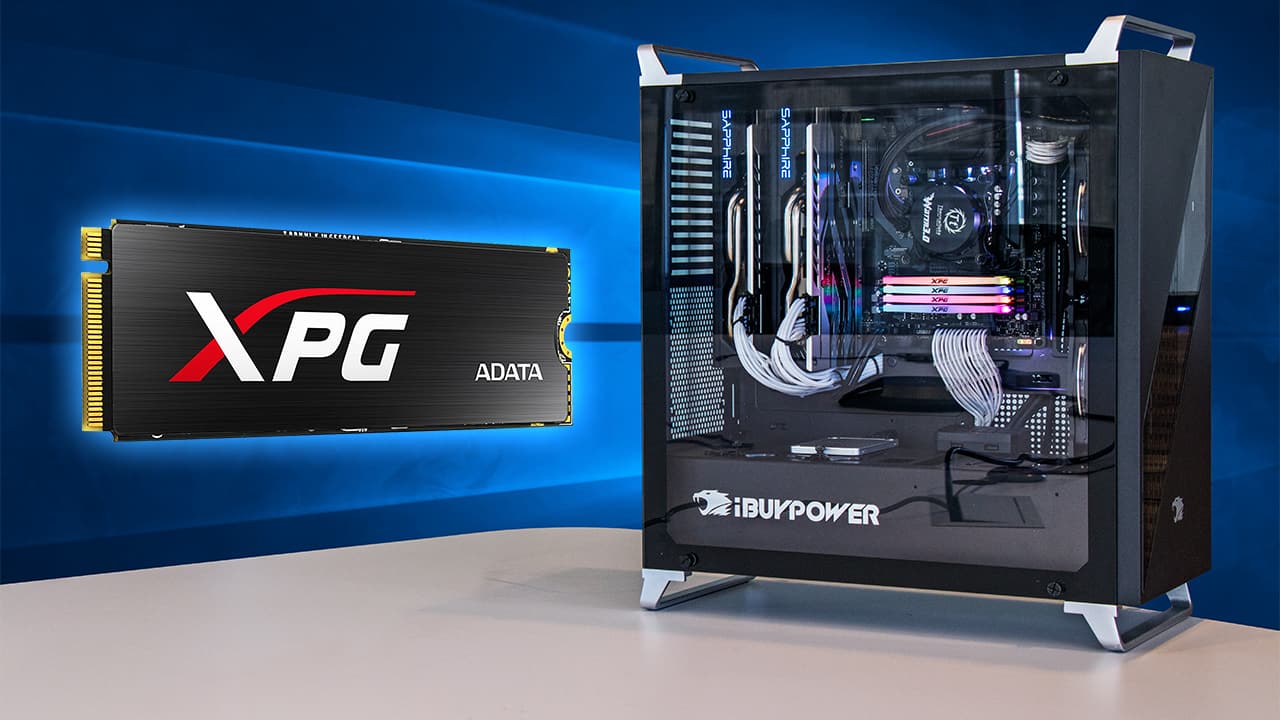
Step 3: Choosing the Right SSD
Choosing the right solid-state drive (SSD) is essential to ensure compatibility and optimal performance. Consider the following factors when selecting an SSD for your system:
1. Capacity: Determine the amount of storage space you require. SSDs come in various capacities, ranging from 120GB to several terabytes. Consider your storage needs and choose a capacity that allows for future growth and accommodates your files, applications, and operating system.
2. Interface: Check your computer or laptop’s specifications to determine the compatible SSD interface. The most common interfaces are SATA (Serial ATA) and NVMe (Non-Volatile Memory Express). SATA is suitable for most systems, while NVMe offers faster transfer speeds and is recommended for high-performance systems with support for PCIe connections.
3. Form Factor: Consider the physical dimensions of the SSD and ensure it is compatible with your system’s drive bay or connector. Common form factors include the traditional 2.5-inch size, which is suitable for most laptops and desktop systems, and the smaller M.2 form factor, which is commonly found in ultrabooks and compact desktops.
4. Speed: Look for SSDs with fast read and write speeds for optimal performance. This information is usually provided in the SSD’s specifications and can greatly impact the overall responsiveness of your system. Consider the workload you will be performing and choose an SSD with speeds that match your requirements.
5. Brand and Reliability: Stick to reputable brands known for their reliability and quality. Research customer reviews, ratings, and professional recommendations to ensure that you select an SSD that has a proven track record of durability and performance. Brands like Samsung, Western Digital, Crucial, and Kingston are well-regarded in the SSD market.
6. Warranty: Consider the warranty offered by the manufacturer. A longer warranty period provides peace of mind and indicates that the manufacturer has confidence in the SSD’s reliability. Check the specific terms and conditions of the warranty, including any requirements for registration or proof of purchase.
7. Price: Evaluate your budget and find a balance between performance and price. While high-end SSDs offer top-tier performance, they may come with a higher price tag. Assess your needs and prioritize the features that are most important to you to find the best SSD within your budget.
8. Compatibility with Operating System: Ensure that the SSD is compatible with your operating system. Most modern SSDs are supported by widely used operating systems like Windows, macOS, and Linux. However, it’s still worth double-checking the SSD’s specifications to confirm compatibility.
By considering these factors, you’ll be able to choose an SSD that best fits your system’s requirements. In the next section, we will guide you through the physical installation of the SSD in your computer or laptop.
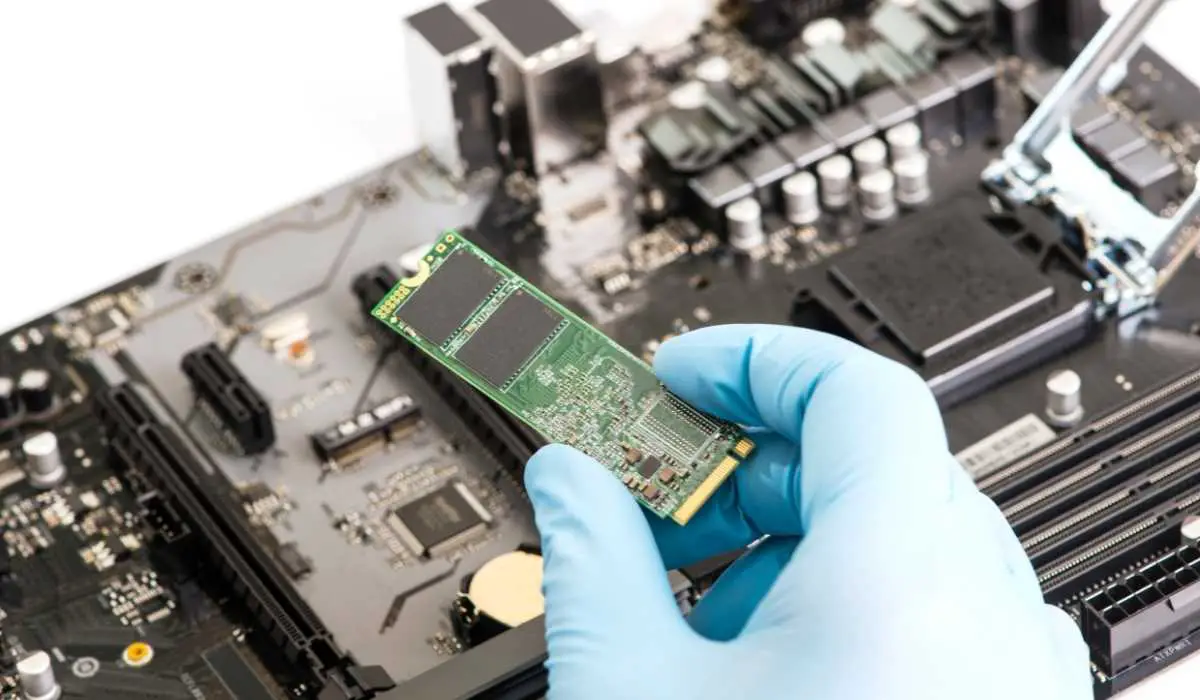
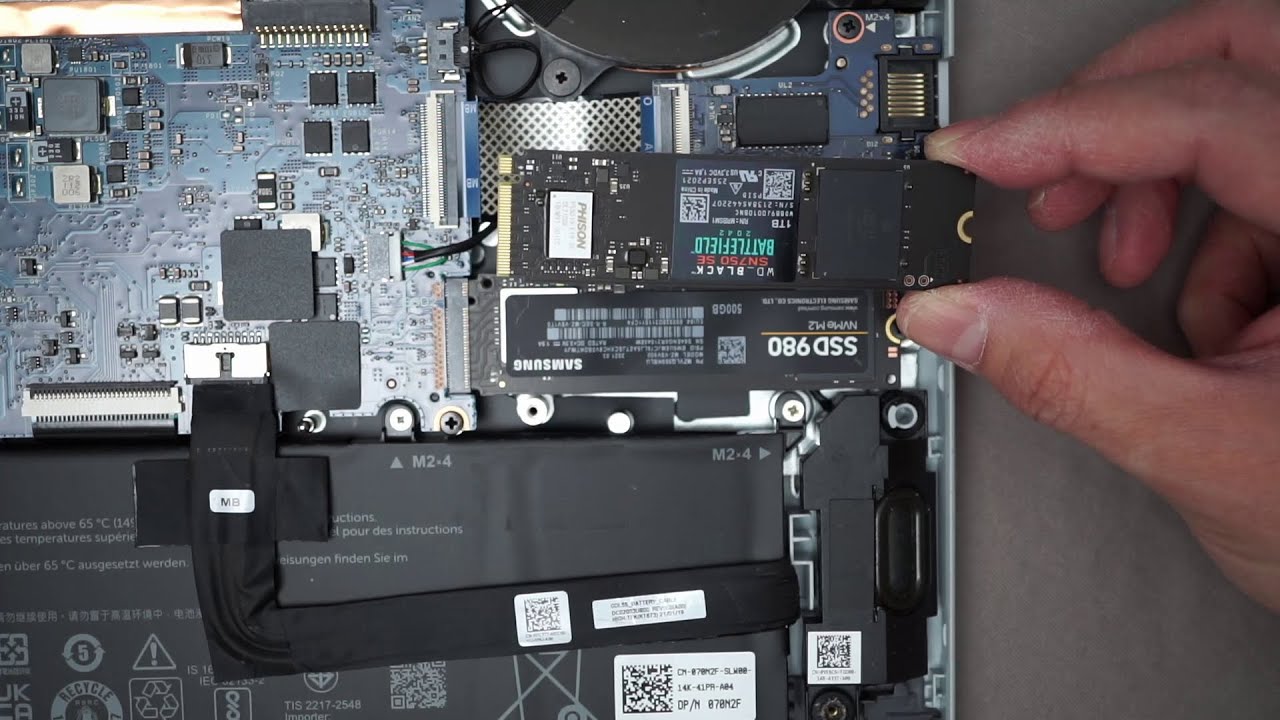
Step 4: Installing the SSD Physically
Now that you have chosen the right solid-state drive (SSD) for your system, it’s time to physically install it in your computer or laptop. Follow these steps to ensure a successful installation:
1. Power Off and Unplug: Before starting the installation process, shut down your computer or laptop and unplug it from the power source. This will prevent any electrical issues or accidental data loss during the installation.
2. Locate the Drive Bay: Open your computer’s case (if using a desktop) or access the appropriate compartment on your laptop to locate the drive bay. Refer to your system’s manual or manufacturer’s website if you’re unsure about the exact location.
3. Prepare the Drive Bay: In desktops, remove the side panel of the case and locate the drive bay slots. If the bay has a removable bracket or tray, remove it or unscrew it using the appropriate tools. In laptops, check if there is an empty slot or if you need to remove the existing hard drive to make room for the SSD.
4. Mount the SSD: Carefully slide the SSD into the empty drive bay or slot, ensuring that the connectors are facing towards the appropriate connection points. If the drive bay has screws or fastening mechanisms, secure the SSD in place using the provided screws or clips. Make sure the SSD is snugly and securely installed.
5. Connect the Cables: Connect the appropriate cables to the SSD. For SATA SSDs, use a SATA data cable to connect the SSD to the motherboard. Connect one end of the cable to the SATA port on the motherboard and the other end to the SATA port on the SSD. Ensure a secure connection by firmly pushing the connector into the ports. If you’re installing an M.2 SSD, refer to your laptop or motherboard’s manual for specific instructions.
6. Secure the SSD: If required, use screws or fastening mechanisms provided with your laptop or desktop case to secure the SSD in place. This will prevent any movement or vibrations that may cause issues during operation.
7. Close the Case: In desktops, carefully put back the side panel of the case and secure it with the screws. For laptops, replace any panels or compartments you removed to access the drive bay. Ensure all screws are tightened properly to prevent any loose components.
8. Power On and Verify: Once the SSD is physically installed, plug in your computer or laptop, and power it on. Enter the system BIOS to ensure that the SSD is detected and recognized as a storage device. If the SSD is not detected, consult your system’s manual or manufacturer’s website for troubleshooting steps.
Congratulations! You have successfully installed the SSD in your computer or laptop. In the next section, we will guide you through the process of configuring the BIOS to ensure that your system recognizes the SSD as the primary drive.
Step 5: Configuring the BIOS
Configuring the BIOS is an essential step after physically installing your new solid-state drive (SSD) as the primary drive. Follow these steps to ensure that your system recognizes the SSD correctly:
1. Power On and Access the BIOS: Start your computer and immediately press the designated key to access the BIOS setup. The key may vary depending on your computer’s manufacturer, but commonly used keys include F2, Del, or Esc. Refer to your system’s manual or manufacturer’s website for the specific key.
2. Navigate to the Boot Menu: Once you’re in the BIOS setup, navigate to the Boot tab or menu. Look for options related to the boot sequence, boot order, or boot devices. There may be a list of devices, such as hard drives or SSDs, displayed on the screen.
3. Set the SSD as the First Boot Device: From the list of boot devices, locate the entry corresponding to your SSD. Use the provided instructions or on-screen prompts to move the SSD to the top position in the boot order. This ensures that your system will boot from the SSD as the primary drive.
4. Disable Other Boot Options (Optional): If you have other storage devices connected, such as traditional hard drives or USB drives, you can choose to disable them in the boot order to prevent any conflicts or confusion during the boot process. However, double-check that your SSD is set as the first boot device to avoid any issues.
5. Save and Exit: Once you have configured the boot order and ensured that the SSD is set as the primary boot device, save the changes in the BIOS setup. Look for an option like “Save and Exit” or “Exit and Save Changes.” The BIOS will confirm the changes before proceeding.
6. Restart Your Computer: After saving the changes, restart your computer to apply the new BIOS settings. The system will now boot from the SSD as the primary drive, providing you with faster boot times and improved performance.
7. Verify SSD Recognition: After the computer restarts, check if the system recognizes the SSD properly. You can do this by checking the drive information in the BIOS setup or by accessing the storage settings in your operating system. Ensure that the SSD is listed as the primary drive and that its specifications (capacity, model) match the actual SSD installed.
By configuring the BIOS to recognize the SSD as the primary boot device, you have completed an important step in fully utilizing the benefits of your new SSD. In the next section, we will guide you through the process of migrating your operating system and data to the SSD.
Step 6: Migrating Your Operating System to the SSD
Migrating your operating system to the newly installed solid-state drive (SSD) is crucial to fully utilize its speed and performance. Follow these steps to ensure a smooth migration:
1. Backup Important Data: Before proceeding with the migration, it’s essential to back up all your important data. This ensures that your files are safe and can be easily restored in case of any issues during the migration process. Use a reliable backup method such as external hard drives, cloud storage, or disk imaging software to create a backup of your data.
2. Choose a Migration Tool: There are several migration tools available that can help you transfer your operating system and data from the old storage drive to the new SSD. Some popular options include EaseUS Todo Backup, Macrium Reflect, and Samsung Data Migration (for Samsung SSD users). Choose a tool that suits your needs and preferences.
3. Connect the SSD: If you haven’t already connected the SSD to your system, do so now. Ensure that the SSD is properly connected using the appropriate cables and that it is recognized by the operating system and BIOS.
4. Run the Migration Tool: Launch the selected migration tool and follow the on-screen instructions to start the migration process. Typically, you will be prompted to select the source (old drive) and the destination (SSD). Make sure to choose the correct drives to avoid any data loss.
5. Configure the Migration Settings: Depending on the chosen migration tool, you may have options to customize the migration settings. This may include choosing to migrate the entire operating system, specific partitions, or just the bootable system files. Consider your preferences and review the provided options before proceeding.
6. Start the Migration: Once you have configured the migration settings, start the migration process. The tool will begin copying the necessary files from the old drive to the SSD. This may take some time depending on the size of the data being transferred and the speed of the drives involved. Be patient and let the migration tool complete the process.
7. Verify Migration Success: After the migration process is completed, verify that the operating system and data have been migrated successfully to the SSD. Restart your computer and ensure that it boots up from the SSD. Check that all your files and applications are intact and accessible. Also, make sure that the old drive is still connected and functioning as a secondary storage device if desired.
8. Test and Optimize Performance: Once the migration is successful, take some time to test the performance of your system with the new SSD. Notice the significant improvements in boot times, application launches, and file transfers. Additionally, you can optimize the SSD’s performance further by enabling TRIM (a command that helps maintain SSD performance) and updating the firmware (if available) to ensure the latest improvements and bug fixes.
By successfully migrating your operating system and data to the SSD, you can fully experience the advantages of improved speed and performance. In the next section, we will guide you through the process of setting up your SSD as the primary drive and ensuring it is recognized by the operating system.
Step 7: Setting Up Your SSD as the Primary Drive
After migrating your operating system to the new solid-state drive (SSD), it’s time to set up the SSD as the primary drive. Follow these steps to ensure the SSD is recognized by the operating system:
1. Power On and Access the Operating System: Start your computer and allow the operating system to fully load. Ensure that the old drive, if still connected, is accessible and that the SSD is recognized as a separate drive.
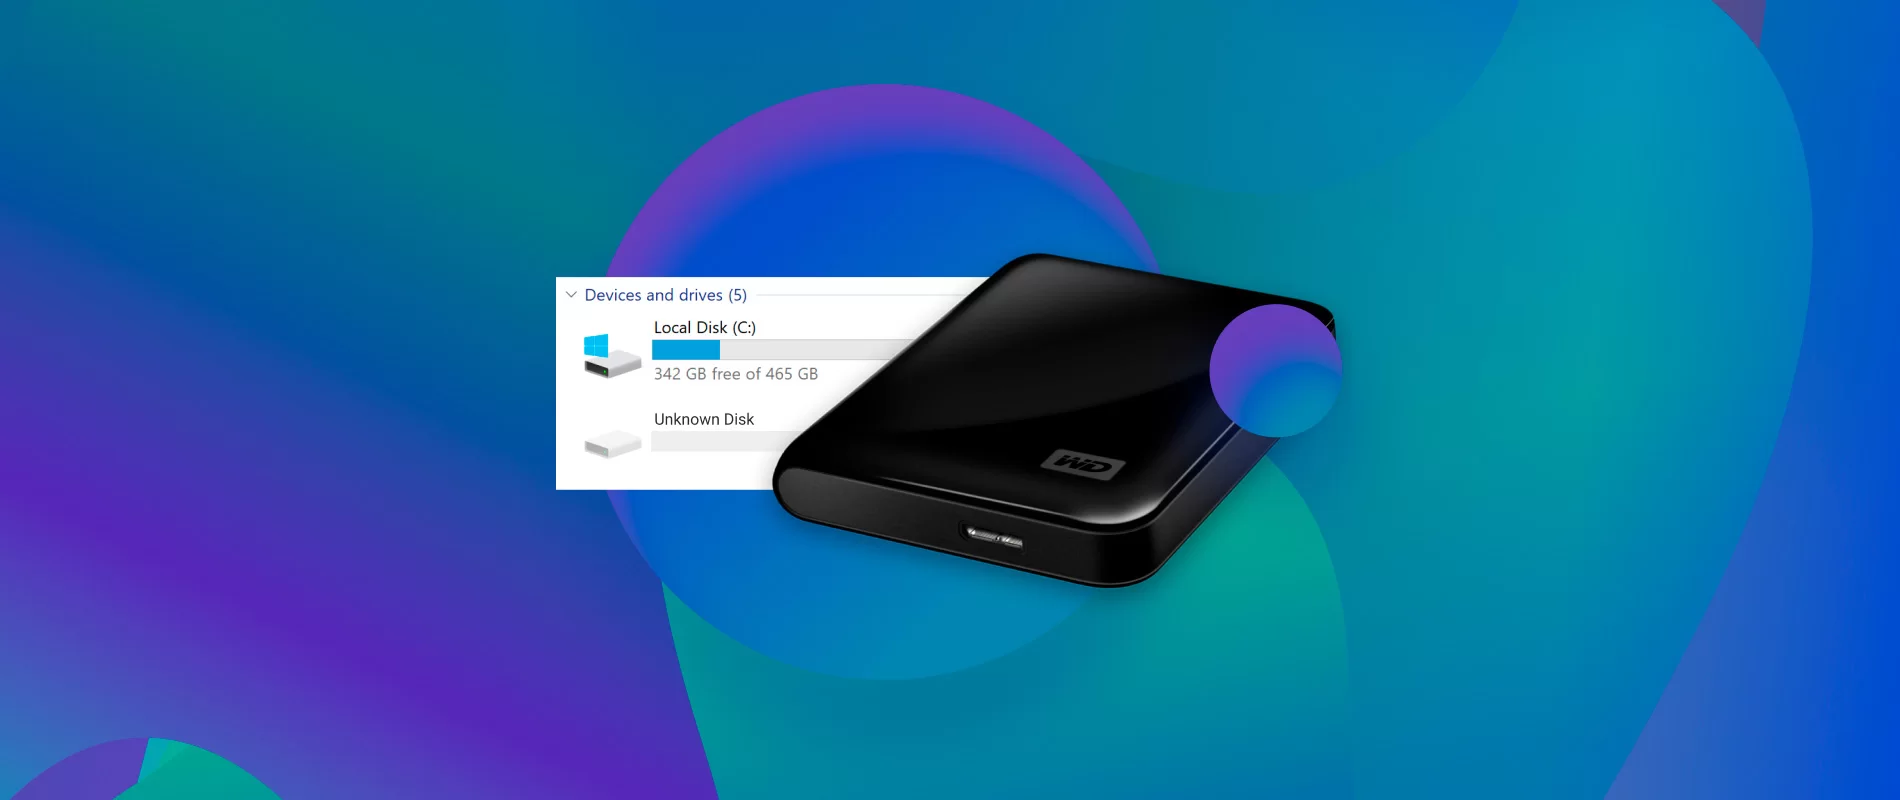
2. Format the SSD: If the SSD appears as a new, unformatted drive, you’ll need to format it to make it usable. Right-click on the SSD drive in the file explorer or disk management tool and select the “Format” option. Choose the desired file system (such as NTFS for Windows) and follow the on-screen instructions to complete the formatting process. Be cautious and choose the correct drive to avoid formatting the wrong one.
3. Assign a Drive Letter: After formatting, assign a drive letter to the SSD. Right-click on the SSD drive in the file explorer or disk management tool, select “Change Drive Letter and Paths,” and choose the desired letter from the available options. This assigns a unique drive letter to the SSD, allowing you to access it easily.
4. Set Up Default Folders: By default, your operating system may still be configured to store files and data on the old drive. To ensure all new files are saved to the SSD, modify the default folder locations. For Windows, open File Explorer, right-click on the default folders (such as Documents, Downloads, or Pictures), select “Properties,” and navigate to the “Location” tab. Choose the new SSD drive letter as the destination for each folder.
5. Move Existing Files (Optional): If you want to free up space on the old drive or organize your files better, you can manually move existing files from the old drive to the SSD. Carefully select and copy the desired files and paste them into the corresponding folders on the SSD. Double-check that the files have been successfully moved before deleting them from the old drive.
6. Test and Verify: Restart your computer and ensure that it boots up using the SSD as the primary drive. Verify that all your applications and files are accessible on the SSD. Double-check that the default folders are correctly saving new files to the SSD and that the old drive is recognized as secondary storage.
7. Double-Check Backup: Once you have verified the successful setup of the SSD as the primary drive, make sure to update your backup strategy accordingly. Adjust backup software settings to include the new drive or verify that your cloud storage solutions are syncing necessary files to the SSD as well.
By setting up your SSD as the primary drive and configuring the default folders, you can enjoy the full benefits of speed and performance offered by the SSD. In the next section, we will guide you through the process of verifying the changes and optimizing the performance of your SSD.
Step 8: Verifying the Changes and Optimizing Performance
After setting up your solid-state drive (SSD) as the primary drive, it’s important to verify the changes and optimize its performance. Follow these steps to ensure your SSD is working effectively:
1. Boot Time and Application Launch: Restart your computer and pay attention to the boot time. Notice the significant improvement compared to when you were using a traditional hard drive. Monitor how quickly your applications launch and load. You should see a noticeable difference in speed and responsiveness.
2. Disk Management: Open the Disk Management tool in your operating system to confirm that the SSD is recognized correctly and that it is listed as the primary drive. Verify that the capacity and file system match the specifications of your SSD.
3. TRIM Enablement: SSDs benefit from TRIM, a command that helps maintain their performance over time. Ensure TRIM is enabled on your operating system. For Windows, open the Command Prompt or PowerShell as an administrator and enter the command “fsutil behavior query DisableDeleteNotify”. If the result is “DisableDeleteNotify = 0”, TRIM is enabled. Otherwise, enable it by entering the command “fsutil behavior set DisableDeleteNotify 0”.
4. Firmware Update: Check the manufacturer’s website for any available firmware updates for your SSD model. Firmware updates often include bug fixes, performance enhancements, and compatibility improvements. Follow the instructions provided by the manufacturer to update the firmware of your SSD, if applicable.
5. Disk Cleanup: Regularly perform disk cleanup to remove unnecessary files and free up storage space on your SSD. In Windows, use the built-in Disk Cleanup tool to delete temporary files, system files, and other unnecessary data. This can help optimize the performance and maintain the longevity of your SSD.
6. Regular Maintenance: Scheduling regular maintenance tasks can further optimize the performance of your SSD. This may include tasks such as running disk optimization tools, updating device drivers, and performing regular system updates. Follow the recommendations provided by your operating system and manufacturer for maintaining your SSD and keeping it running smoothly.
7. Monitoring Software: Consider using SSD monitoring software to keep track of your drive’s health, temperature, and performance. These tools provide valuable insights into the status of your SSD and can help identify any potential issues or performance degradation over time.
8. Ongoing Backup: As you continue using your SSD, maintain a regular backup routine to protect your data. Set up automatic backups or reminders to back up your important files to a secure location. This way, you can ensure that your data remains safe even in the event of unforeseen circumstances.
By verifying the changes made and optimizing the performance of your SSD, you can continue to enjoy fast boot times, improved application responsiveness, and an overall optimized computing experience. Regular maintenance and monitoring will help keep your SSD in excellent shape for years to come.
Conclusion
Congratulations! You have successfully made your solid-state drive (SSD) your primary drive, unlocking its full potential and reaping the benefits of improved speed, performance, and reliability. By following the steps outlined in this guide, you have migrated your operating system, configured the BIOS, and optimized your SSD for optimal performance. Let’s recap the key takeaways:
– SSDs offer lightning-fast speeds, improved durability, energy efficiency, and silent operation compared to traditional hard disk drives (HDDs).
– Assess your storage needs and compatibility before choosing the right SSD for your system.
– Back up your important data before making any changes to your storage configuration.
– Physically install the SSD, ensuring it is correctly connected and secured in the drive bay.
– Configure the BIOS to recognize the SSD as the primary boot device.
– Migrate your operating system to the SSD using a reliable migration tool.
– Set up the SSD as the primary drive in your operating system, ensuring default folders and settings are directed to the SSD.
– Verify the changes made and optimize the SSD’s performance by enabling TRIM, updating the firmware, performing disk cleanup, and scheduling regular maintenance tasks.
With your SSD as the primary drive, you can experience lightning-fast boot times, reduced application load times, and improved overall system responsiveness. You’ll also benefit from the SSD’s durability, energy efficiency, and silent operation. Be sure to regularly back up your important data and monitor the health and performance of your SSD to ensure it continues to perform optimally.
Remember, technology is constantly evolving, and staying informed about updates, new firmware releases, and best practices will help you make the most of your SSD. Enjoy your new and improved computing experience with the speed and reliability of your SSD as the primary drive!