Introduction
Moving your SSD from one PC to another can be a daunting task, especially if you’re not familiar with the process. However, with the right preparation and guidance, it can be a smooth and successful operation. Whether you’re upgrading to a new PC or simply transferring your SSD to a different machine, ensuring that all your data is safely migrated is crucial.
An SSD, or Solid State Drive, is a storage device that uses flash memory to store data. It offers faster read and write speeds compared to traditional hard drives, making it a popular choice for users looking to improve their system’s performance. When you migrate your SSD, you’re essentially transferring both the hardware and the data it contains from one PC to another.
The process of moving an SSD involves a series of steps that require careful attention to detail. This guide will walk you through the necessary preparations and give you a step-by-step breakdown of the entire process. By following these instructions, you’ll be able to successfully move your SSD to a new PC without losing any data or encountering any significant issues.
It’s important to note that this guide assumes you have some basic technical knowledge and are comfortable working with computer hardware. If you’re not confident in your abilities, it may be best to seek professional assistance to ensure a smooth and error-free transfer.
So, if you’re ready to embark on the journey of moving your SSD from one PC to another, let’s dive into the preparations you need to make to ensure a successful migration.
Preparing for the Move
Before you begin the process of moving your SSD from one PC to another, there are a few essential steps you need to take to ensure a seamless transition. These preparations will help safeguard your data and minimize any potential issues that may arise during the move.
Step 1: Back up Your Data
Before you even think about physically moving your SSD, it’s crucial to back up all your important data. This includes documents, photos, videos, and any other files you want to preserve. Backing up your data ensures that even if something goes wrong during the transfer, you won’t lose irreplaceable files.
There are several ways you can back up your data. One option is to use an external storage device, such as an external hard drive or a USB flash drive. Simply copy and paste your files onto the external device. Alternatively, you can utilize cloud storage services like Google Drive or Dropbox to store your data online.
Step 2: Gather the Necessary Tools
Before you can physically remove and install your SSD, you’ll need a few tools at your disposal. Make sure you have a screwdriver set with the appropriate sizes for removing screws from your PC case. Additionally, consider having an anti-static wrist strap to prevent potential damage from static electricity.
It’s also a good idea to have a clean and well-organized workspace. Clear off a table or desk where you can comfortably work on your PCs, and have a soft, non-static surface to place your SSD and other components on.
Step 3: Shut Down and Disconnect the PCs
To avoid any electrical hazards and potential data corruption, you need to power off both your current PC and the PC you’re transferring the SSD to. Shut down the computers properly and disconnect them from their power sources. This step is crucial for the safety of both yourself and your devices.
Once the PCs are powered off and disconnected, it’s time to move on to the next phase: physically removing and installing the SSD.
Step 1: Back up Your Data
Before you embark on the process of moving your SSD from one PC to another, it is crucial to back up all your important data. This ensures that even if something goes wrong during the transfer, you won’t lose any essential files or documents.
There are several methods you can use to back up your data, depending on your preferences and available resources. One option is to use an external storage device, such as an external hard drive or a USB flash drive. Simply connect the device to your computer and copy all the files you want to back up onto it. Ensure that you have enough storage space on the external device to accommodate all your data.
Another convenient way to back up your data is by using cloud storage services. Popular options include Google Drive, Dropbox, and Microsoft OneDrive. These services allow you to store your files securely in the cloud, accessible from any device with an internet connection. Simply upload your important files to the cloud storage service of your choice, and they will be safely stored online.
When selecting which files to back up, consider prioritizing important documents, photos, videos, and any other files that hold sentimental or professional value. It’s also a good idea to back up your browser bookmarks, email contacts, and any other personalized settings you might want to transfer to your new PC.
Take your time to ensure that the backup process is thorough and complete. Double-check the backup device or cloud storage to confirm that all the necessary files have been successfully copied.
Once you have completed the backup process and verified that all your important data is safely stored, you can proceed with confidence to the next steps of moving your SSD to a new PC.
Step 2: Gather the Necessary Tools
To successfully move your SSD from one PC to another, it’s important to gather the necessary tools before you begin. Having the right tools on hand will make the process much smoother and minimize the risk of damaging any components.
One essential tool you’ll need is a screwdriver set. This will allow you to remove the screws from your PC case and access the SSD. Depending on your PC model, you may need different screwdriver sizes, so it’s a good idea to have a variety of options available.
In addition to a screwdriver, you might also want to consider using an anti-static wrist strap. This will help protect your PC components from potential damage caused by static electricity. It’s especially important to use this if you’re working in a carpeted area or during dry weather conditions.
Although not a physical tool, having a clean and organized workspace is crucial. Clear off a table or desk where you can comfortably work on your PCs. It’s essential to have an uncluttered space to avoid any accidental damage or misplacement of components.
Consider using a soft, non-static surface, such as a clean towel or an anti-static mat, to place your SSD and other components on. This will help prevent any static build-up or scratches.
Before you start gathering the tools, it’s a good idea to check the manufacturer’s instructions or online resources for your PC model. They may provide specific guidance on the tools required and any precautions to take during the process.
By having the necessary tools ready, you’ll be well-prepared to move your SSD to a new PC. This will minimize any potential interruptions or delays during the transfer process and ensure that everything goes smoothly. With the tools in hand, you’re now ready to move on to the next step of the process: shutting down and disconnecting the PCs.
Step 3: Shut Down and Disconnect the PCs
Before you can physically move your SSD from one PC to another, it is essential to shut down and disconnect both computers. This step is crucial for the safety of both yourself and your devices, as well as to prevent any data corruption during the transfer process.
Start by properly shutting down your current PC. Save any unsaved work and close all open applications. Click on the Start menu and select the shutdown option. Wait for the computer to completely power off before proceeding to the next step.
Once your current PC is powered off, it’s time to disconnect it from the power source. Unplug the power cord from the electrical outlet or power strip and remove any other external power sources, such as batteries or UPS devices. This will ensure that there is no electrical current running through the PC, minimizing the risk of electric shock or hardware damage.
Next, you’ll want to disconnect any peripherals or devices that are connected to the PC, such as monitors, keyboards, mice, and USB devices. Unplug the cables from the corresponding ports on the PC and carefully set them aside.
Repeat the same process for the PC you’ll be transferring the SSD to. Shut it down properly, disconnect it from the power source, and remove any peripherals or devices connected to it. Double-check that both computers are completely shut down and disconnected before proceeding.
Remember, safety is paramount during this step. Ensure that you are working in a well-ventilated area, away from any liquids or flammable materials. It’s also a good practice to ground yourself by touching a grounded metal object or wearing an anti-static wrist strap to minimize the risk of static electricity damaging any components.
With both PCs shut down and disconnected, you’re now ready to move on to the next phase: physically removing and installing the SSD.
Moving the SSD
Now that you have completed the necessary preparations, it’s time to move your SSD from the current PC to the new one. This process involves safely removing the SSD from its current location and then installing it into the new PC.
Step 4: Remove the SSD from the Current PC
Begin by carefully opening up the case of your current PC. This can usually be done by removing screws or latches on the side panel. Refer to the manufacturer’s instructions, if needed, to ensure you are accessing the correct location.
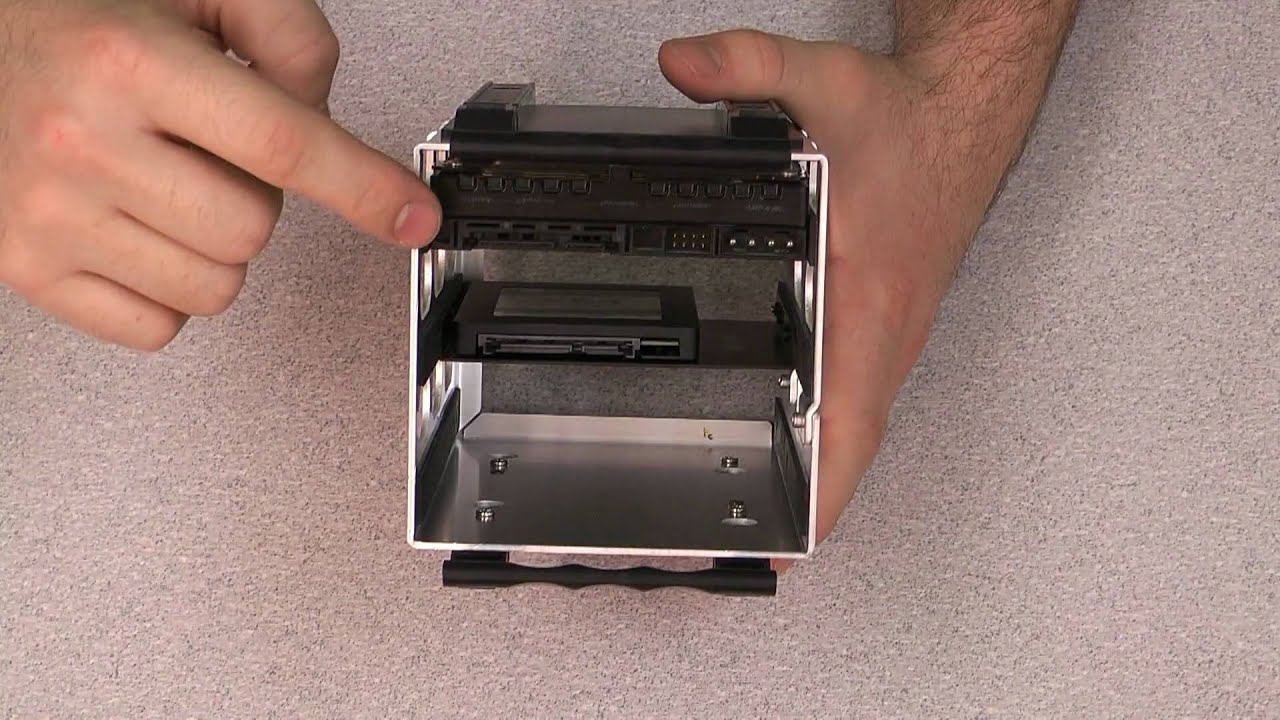
Once the case is open, locate the SSD. It is typically a small rectangular-shaped drive connected to the motherboard. Before removing it, take note of the cables and connection types involved, as this will help you properly connect it in the new PC.
Gently disconnect the cables attached to the SSD. This may involve removing any screws or latches that hold the SSD in place and carefully disconnecting the data and power cables. Handle the SSD with care and avoid touching any delicate components. Place the SSD in an anti-static bag or a safe location to protect it from potential damage.
Step 5: Insert the SSD into the New PC
Now it’s time to install the SSD into the new PC. Open up the case of the new PC using the same method as before, making sure to consult the manufacturer’s instructions, if necessary.
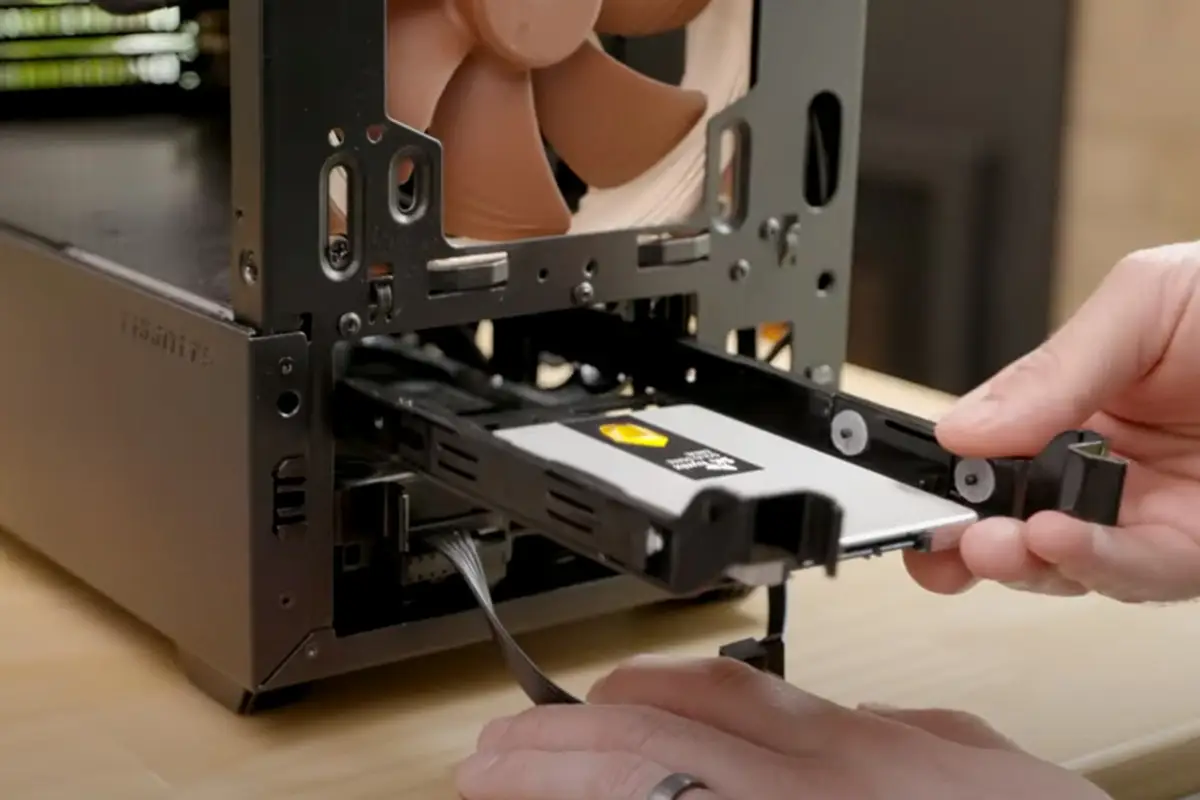
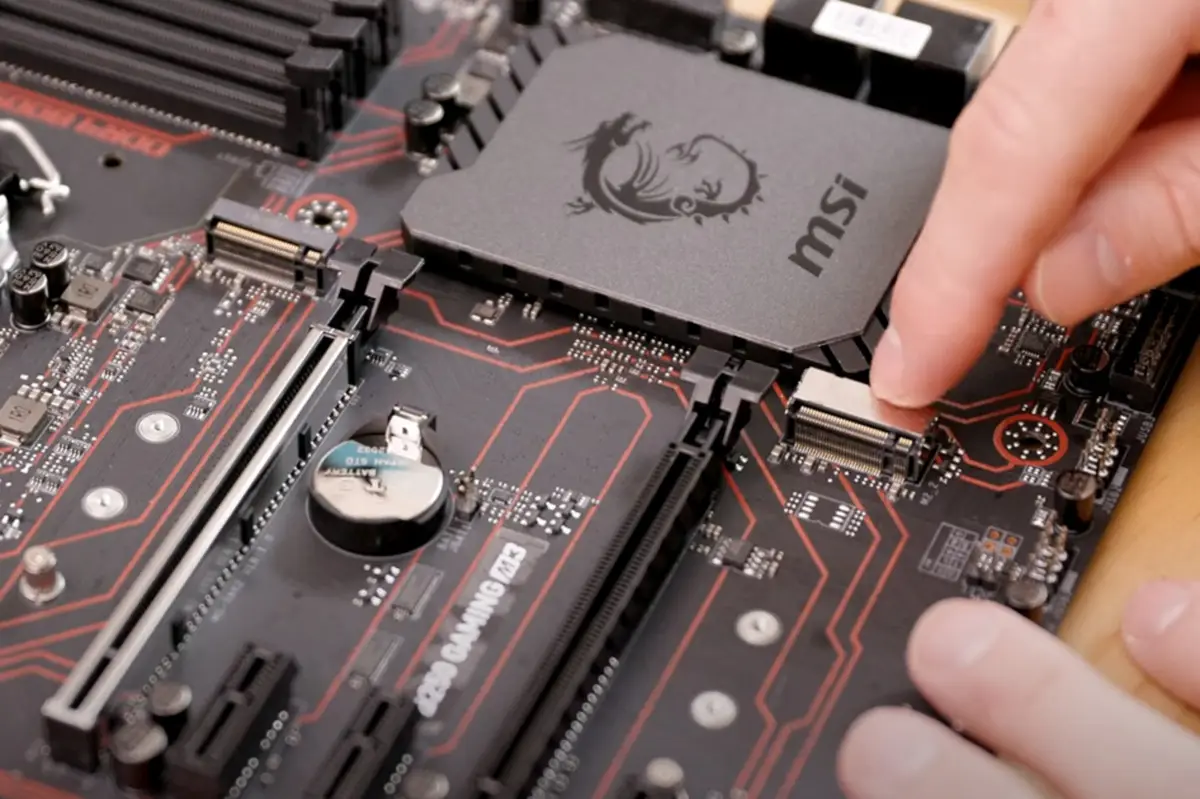
Locate an available slot on the motherboard where you can securely install the SSD. This may be a SATA slot or an M.2 slot, depending on the type of SSD you have. Align the SSD with the slot and gently slide it in, making sure it sits firmly and securely in place.
Reconnect the data and power cables to the corresponding ports on the SSD. Ensure that the cables are securely attached and free from any obstructions that could cause issues.
Step 6: Connect Cables and Power On
After successfully installing the SSD, reassemble the PC by closing the case and securing any screws or latches.
Carefully reconnect all cables to the new PC, including the peripherals and devices that were previously disconnected.
Finally, connect the PC to the power source and power it on. You should see the new PC booting up with the SSD now functioning properly.
With the SSD successfully moved and installed in the new PC, you can now move on to the post-move tasks, which include installing necessary drivers and updates, transferring your backed-up data, and troubleshooting any issues that may arise.
Step 4: Remove the SSD from the Current PC
To move the SSD from your current PC to the new one, you’ll need to safely remove it from its current location. This step involves disconnecting the cables and carefully removing the SSD from the current PC.
Begin by shutting down the current PC if you haven’t already done so. Ensure that the power is completely turned off and remove any connected power sources.
Next, open up the case of your current PC. This can usually be done by removing screws or releasing latches on the side or back panel. Refer to the manufacturer’s instructions if needed, as different PC models may have different mechanisms for accessing the components.
Once the case is open, locate the SSD. It is typically a small rectangular-shaped drive connected to the motherboard. Take note of the cables and connection types involved in the SSD’s installation.
Carefully disconnect the cables attached to the SSD. This may involve removing any screws or latches that hold the SSD in place and gently disconnecting the data and power cables. Avoid applying excessive force and handle the SSD with care to prevent any damage.
Take note of the orientation and position of the removed SSD. This will help ensure proper installation in the new PC and avoid any compatibility issues.
Once the SSD is free from any connections, carefully remove it from the current PC. Place it in an anti-static bag or on a safe surface to protect it from any possible damage during the transfer.
Remember to take precautions such as grounding yourself by touching a grounded metal object or wearing an anti-static wrist strap. This will help prevent any static discharge that could harm the delicate electronic components.
With the SSD successfully removed from the current PC, you’re now ready to move on to the next step: inserting it into the new PC.
Step 5: Insert the SSD into the New PC
Now that you have safely removed the SSD from the current PC, it’s time to insert it into the new PC. This step involves finding the appropriate slot on the motherboard and properly connecting the SSD.
Begin by opening the case of the new PC. Refer to the manufacturer’s instructions for guidance on accessing the internal components, as different PC models may have different mechanisms for opening the case.
Locate an available slot on the motherboard where you can securely install the SSD. The type of slot you’ll need will depend on the type of SSD you have. It could be a SATA slot or an M.2 slot.
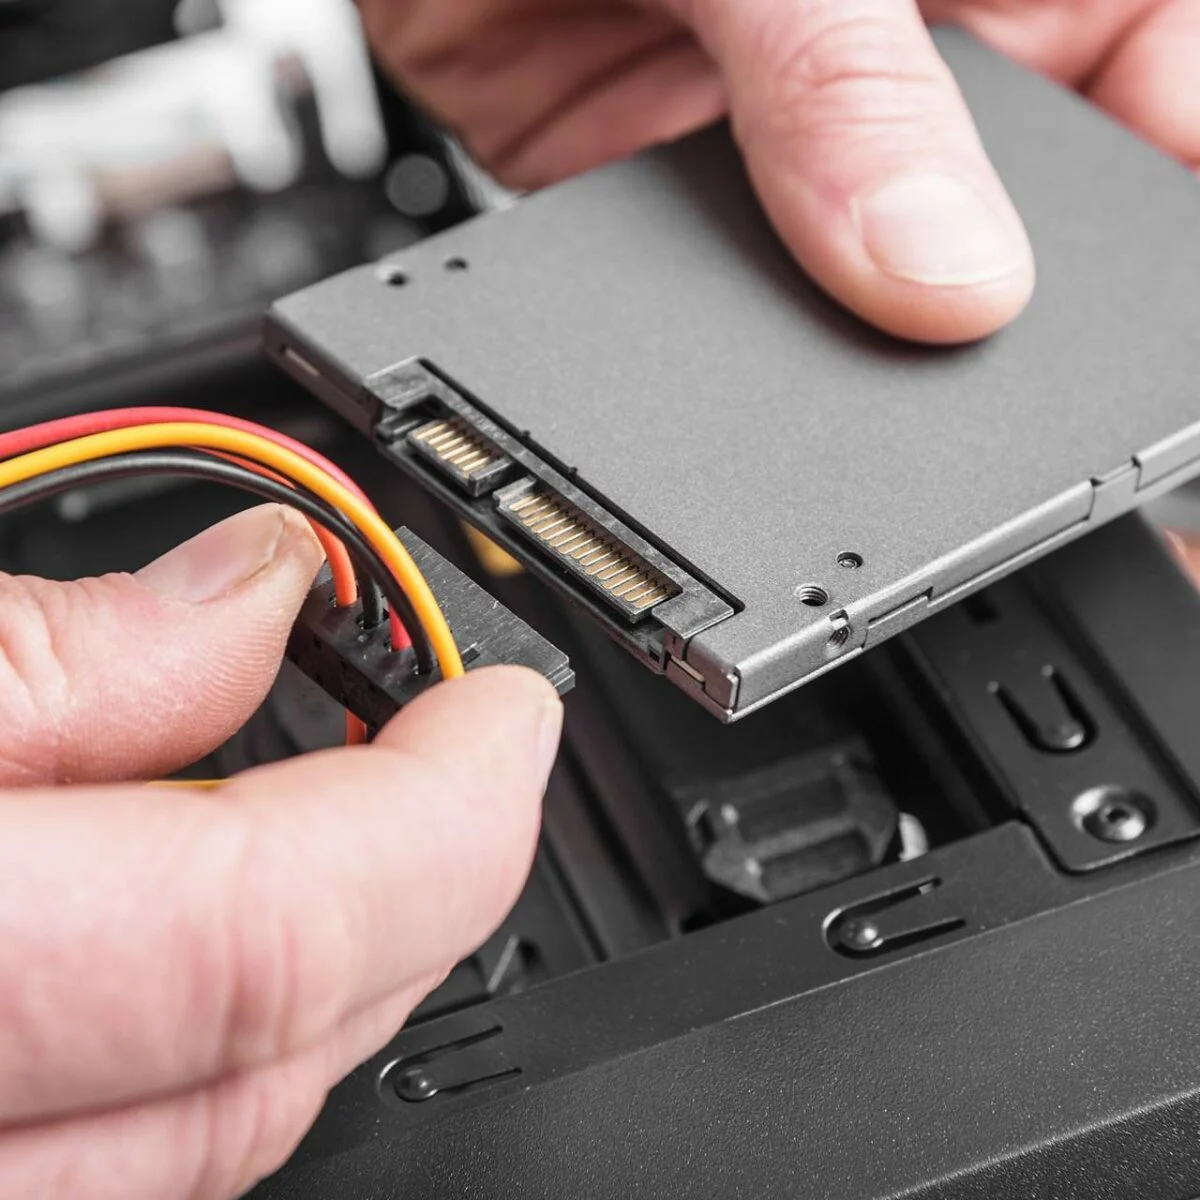
If you’re installing a SATA SSD, locate the SATA data and power connectors on the motherboard. Carefully align the SSD with the slot and insert it, making sure it sits properly and securely.
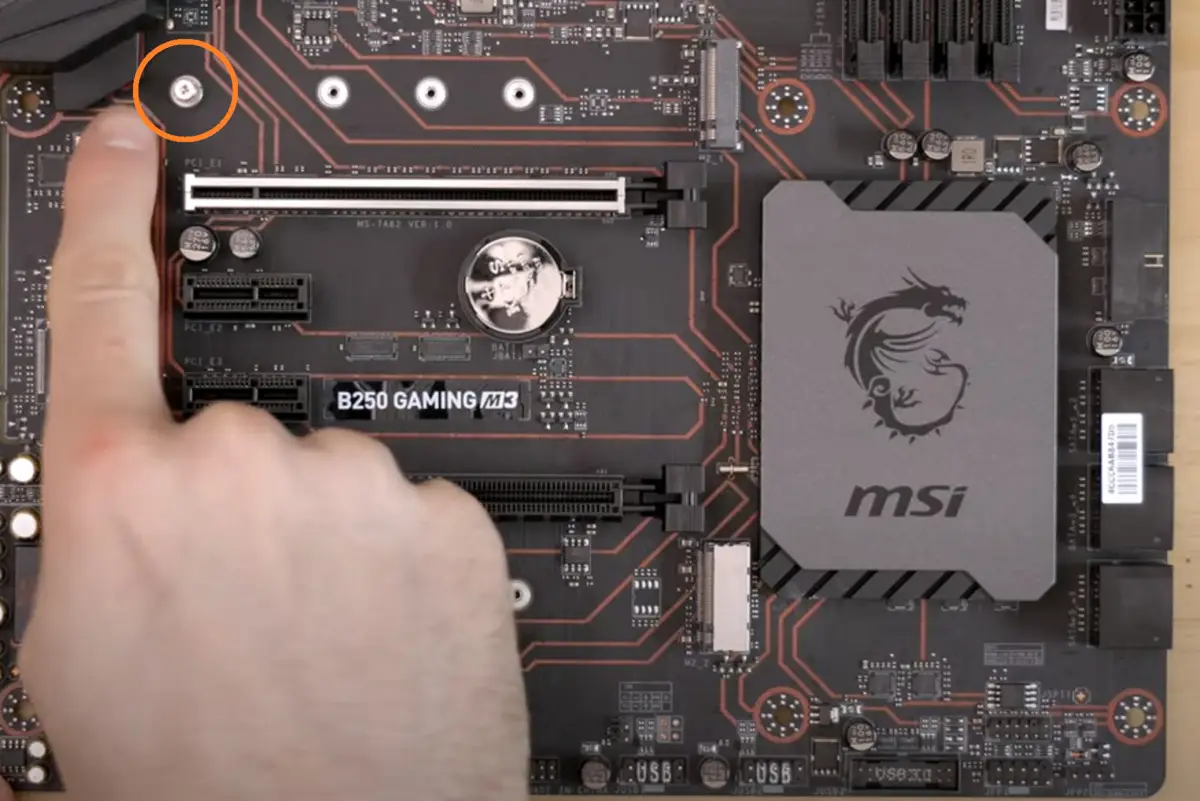
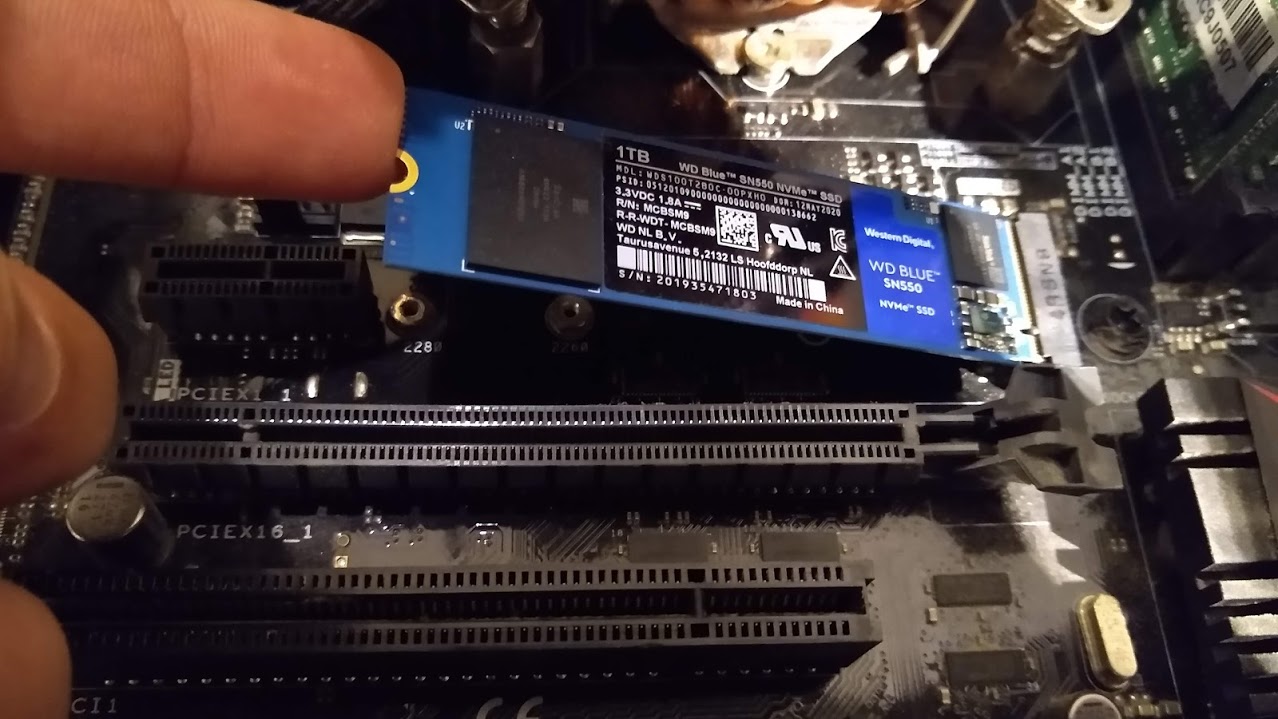
If you’re installing an M.2 SSD, find the appropriate M.2 slot on the motherboard. Some motherboards might have multiple M.2 slots, so choose the one that aligns with your SSD’s specifications. Insert the SSD into the slot at a slight angle and gently press it down until it’s securely in place. Ensure that any retention screws or clips are tightened if required.
Once the SSD is properly inserted, connect the data and power cables to the corresponding ports on the motherboard. For a SATA SSD, connect one end of the SATA data cable to the SSD and the other end to the SATA port on the motherboard. Then, connect the SATA power cable from the power supply unit to the SSD.
If you’re using an M.2 SSD, skip the data and power cable connections as M.2 SSDs directly interface with the motherboard.
Take care to ensure that all connections are securely made and that there are no loose cables or components obstructing the installation.
Once you have properly connected the SSD to the new PC, close the case of the computer and secure any screws or latches to hold it in place.
The SSD is now successfully inserted into the new PC, and you can proceed to the next step: connecting the necessary cables and powering on the system.
Step 6: Connect Cables and Power On
After successfully inserting the SSD into the new PC, it’s time to connect the necessary cables and power on the system. This step ensures that the SSD is properly connected and functioning in the new PC.
Start by closing the case of the new PC. Make sure that all screws or latches are properly secured to ensure the stability and protection of the internal components.
Next, reconnect the cables to the new PC, including the peripherals and devices that were previously disconnected. These may include the monitor, keyboard, mouse, speakers, and any other devices you use with your PC.
Double-check that all cables are securely plugged into their respective ports and that there are no loose connections. Ensure that the SSD’s data and power cables are properly connected to the motherboard and power supply unit.
Once you have confirmed that all necessary cables are connected, it’s time to power on the system. Plug the power cord back into the electrical outlet or power strip, and then turn on the power supply unit.
Press the power button on the front or top panel of the PC to turn it on. As the system boots up, you should see the motherboard detecting the newly installed SSD. Depending on the PC’s BIOS settings, you may need to enter the BIOS setup to ensure that the SSD is recognized correctly.
If everything is functioning correctly, the operating system on the SSD should load, and you’ll be able to use your new PC with the transferred SSD.
Take a few moments to verify that the SSD is working correctly. Check the device manager or BIOS settings to confirm that the SSD is detected and listed. You may also want to run diagnostic tests or benchmarks to ensure optimal performance.
With the SSD successfully connected and the system powered on, you can now proceed to the post-move tasks, which include installing necessary drivers and updates, transferring your backed-up data, and troubleshooting any potential issues that may arise during the migration process.
Post-Move Tasks
After successfully moving your SSD to a new PC, there are a few important tasks to complete to ensure everything is functioning correctly and to optimize your system’s performance.
Step 7: Install Necessary Drivers and Updates
To ensure that all hardware components of your new PC are working properly, it’s crucial to install the necessary drivers. Visit the manufacturer’s website to download and install the latest drivers for your motherboard, graphics card, network card, and any other devices connected to your PC. This will ensure compatibility and enhance your system’s performance.
While installing drivers, make sure to also check for any available updates for your operating system. These updates often include important security patches and bug fixes that help keep your system stable and protected.
Step 8: Transfer Your Backed Up Data
Now that your SSD is successfully installed in the new PC, you can transfer your backed-up data to the SSD. This includes important files, documents, photos, videos, and any other data you previously saved. Use the external storage device or cloud storage service you used for backup to easily transfer the files back onto the SSD.
Take this opportunity to organize your data and ensure everything is in the appropriate folders or directories. This will make it easier to locate files in the future and maintain a well-structured storage system.
Step 9: Troubleshooting and Final Considerations
After completing the driver installations and data transfer, it’s essential to test your system’s stability and performance. Pay attention to any potential issues such as hardware conflicts, compatibility problems, or software errors. Troubleshoot any problems as they arise, referring to online resources, support forums, or seeking professional assistance if needed.
Consider adjusting system settings and optimizing the PC for your specific needs. This may involve configuring power management settings, installing software for improved security, or customizing the desktop environment to your preferences.
Lastly, backup your data regularly to prevent future data loss. Set up automated backups or establish a routine for manually backing up your important files to ensure their safety.
By completing these post-move tasks, you can ensure that your newly transferred SSD is functioning optimally and that your data is safe and accessible. Enjoy your upgraded PC and the improved performance that comes with it!
Step 7: Install Necessary Drivers and Updates
After moving your SSD to a new PC, it is crucial to install the necessary drivers and updates in order to ensure proper functionality and optimize system performance. This step involves downloading and installing the latest drivers specific to your hardware components and checking for any available updates for your operating system.
To begin, visit the manufacturer’s website for your motherboard, graphics card, network card, and any other devices connected to your PC. Look for the support or downloads section and locate the appropriate drivers for your specific model. Download the latest versions of these drivers to ensure compatibility and optimal performance.
Once the drivers are downloaded, run the installation files and follow the on-screen prompts to install them. It is recommended to install the drivers one at a time and restart your PC after each installation to ensure a clean and successful installation process.
While installing the drivers, also check for any available updates for your operating system. For Windows users, go to “Settings” > “Update & Security” > “Windows Update” to check for and install any pending updates. These updates often include important bug fixes, security patches, and performance improvements that can enhance your overall PC experience.
Regularly updating your drivers and operating system is vital for maintaining system stability, compatibility, and security. It ensures that your hardware components are functioning optimally and that you have the latest features and protections available.
In addition to drivers and operating system updates, consider installing any additional software or utilities that may be provided by your hardware manufacturer. These can include software for controlling RGB lighting, monitoring system temperatures, or managing overclocking settings. Refer to the manufacturer’s documentation or website for any recommended software downloads related to your specific hardware components.
By taking the time to install the necessary drivers and updates, you can ensure that your new PC with the migrated SSD is running smoothly and efficiently. It minimizes the risk of compatibility issues, maximizes performance, and allows you to take advantage of the latest features and improvements available for your hardware and operating system.
Step 8: Transfer Your Backed Up Data
Now that your SSD has been successfully installed in the new PC, it’s time to transfer your backed-up data to the SSD. This step ensures that your important files, documents, photos, videos, and other data are accessible on the new system.
Start by connecting the external storage device or accessing the cloud storage service where you have stored your backed-up data. If you backed up your data onto an external hard drive or USB flash drive, connect it to the new PC. If you used cloud storage, log in to your account from the new PC.
Locate the backed-up data you want to transfer. This can include folders, files, or entire drive images, depending on how you organized your backup. If using an external storage device, copy and paste the files from the device to the desired location on the SSD.
If you backed up your data in the cloud, you can download the files directly from the cloud storage service onto the SSD. Most cloud storage services offer intuitive interfaces that allow you to select files and folders for download.
Take this opportunity to organize your data on the SSD. Create folders or directories that make sense for your workflow and help you easily locate files in the future. Consider organizing your documents, photos, videos, and other files into separate folders for better management and accessibility.
For files that are synced with cloud storage services, make sure to install the appropriate software or sync applications on the new PC to enable continuous synchronization with the cloud. This will keep your files up to date and allow for seamless access across multiple devices.
Once the data transfer is complete, verify that all your important files are accessible on the SSD. Open a few files from different folders to ensure that everything transferred accurately and without any corruption or errors.
It’s worth noting that it’s normal for certain system-specific files and settings to be limited to the original PC. In some cases, you may need to manually reconfigure certain software preferences or settings specific to your new PC.
With your data successfully transferred to the SSD, you can now proceed confidently knowing that your files are accessible and your new PC is ready to be used with all your important data at hand.
Step 9: Troubleshooting and Final Considerations
After completing the steps to move your SSD and transfer your data to the new PC, there are a few important final considerations and troubleshooting steps to ensure everything is functioning properly and to address any potential issues that may arise.
Begin by thoroughly testing the system’s stability and performance. Pay attention to any hardware conflicts, compatibility problems, or software errors that may occur. Monitor the system for any unusual behavior, such as frequent crashes, error messages, or slow performance.
If you encounter any issues, try the following troubleshooting steps:
- Ensure that all the necessary drivers and updates are installed, including those for the SSD, motherboard, and other hardware components.
- Check for any firmware updates specifically related to your SSD and apply them if available. These updates can improve compatibility and performance.
- Verify that all cables and connections are secure and properly seated. Loose connections can cause intermittent issues or system instability.
- Perform a thorough virus and malware scan to rule out any security threats that may impact system performance or stability.
- Reset the BIOS settings to default if you made any changes during the installation process. Sometimes incorrect settings can cause issues with hardware detection or system stability.
- If the issues persist, seek assistance from the manufacturer’s support resources, online forums, or professional technicians who are experienced in troubleshooting PC hardware and software issues.
Once your system is functioning smoothly, take some time to fine-tune and optimize it to your preferences. This may include adjusting power management settings, customizing the desktop layout, or installing additional software and applications specific to your needs.
Remember to regularly backup your data to prevent any future data loss. Implement a backup strategy, whether it involves automated backups or a manual routine, to ensure the safety of your important files and documents.
Lastly, keep your system up to date by regularly installing operating system updates, driver updates, and firmware updates as they become available. These updates often include bug fixes, security patches, and performance improvements that can enhance your overall computing experience.
By following these troubleshooting steps and considering the final considerations, you can ensure that your newly moved SSD is integrated seamlessly into your new PC, minimizing any issues and maximizing your system’s performance and reliability. Enjoy your upgraded PC with the improved speed and storage capacity provided by your SSD!
Conclusion
Moving your SSD from one PC to another can seem like a daunting task, but with proper planning and execution, it can be a successful and relatively straightforward process. By following the steps outlined in this guide, you can migrate your SSD to a new PC without losing any data or encountering major issues.
The preparations, which include backing up your data and gathering the necessary tools, are essential for a smooth transfer. Safely removing the SSD from the current PC and properly installing it into the new PC are critical steps that require attention to detail.
After the physical transfer, installing the necessary drivers, updating the operating system, and transferring your backed-up data ensure optimal functionality and accessibility on the new PC. Troubleshooting any potential issues and fine-tuning the system to your preferences further enhance the overall experience.
Always remember to follow safety precautions, ground yourself properly, and handle the SSD and other PC components with care. If you’re uncertain or uncomfortable with any step, seek professional assistance to avoid any accidental damage or mistakes.
Moving your SSD to a new PC allows you to take advantage of improved performance and storage capacity. With faster read and write speeds and expanded storage capabilities, a properly installed SSD can significantly enhance your computing experience.
We hope this guide has provided you with the knowledge and confidence to tackle the process of moving your SSD to a new PC. Embrace the possibilities of a faster and more efficient system as you settle into your upgraded PC with your newly migrated SSD.