Introduction
Welcome to our guide on how to mount an SSD in a Corsair Mounting Bracket for dual solid-state drives (SSDs). If you’ve recently upgraded your storage solution and want to take advantage of the blazing speed and reliability of SSDs, this tutorial is for you. With the Corsair Mounting Bracket, you can securely and conveniently install two SSDs in your PC case, maximizing both storage capacity and performance.
Upgrading to SSDs can significantly improve your system’s boot times, application load times, and overall responsiveness. By mounting your SSDs using the Corsair Mounting Bracket, you can ensure that they are properly secured and installed in a clean and organized manner.
In this guide, we will take you through a step-by-step process, covering everything from preparing the Corsair Mounting Bracket to connecting the SSDs to the motherboard. We will also provide tips on cable management and closing the PC case. By the end of this tutorial, you will have a dual SSD setup that is not only functional but aesthetically pleasing as well.
Before we dive in, it’s important to note that this guide assumes you already have the necessary SSDs and a Corsair Mounting Bracket. If you haven’t purchased these items yet, make sure to check the compatibility with your PC case and ensure you have the correct bracket size for your SSDs.
Now, let’s get started with the first step: preparing the Corsair Mounting Bracket.
Required Tools and Materials
Before you begin the process of mounting SSDs in a Corsair Mounting Bracket, make sure you have the following tools and materials at hand:
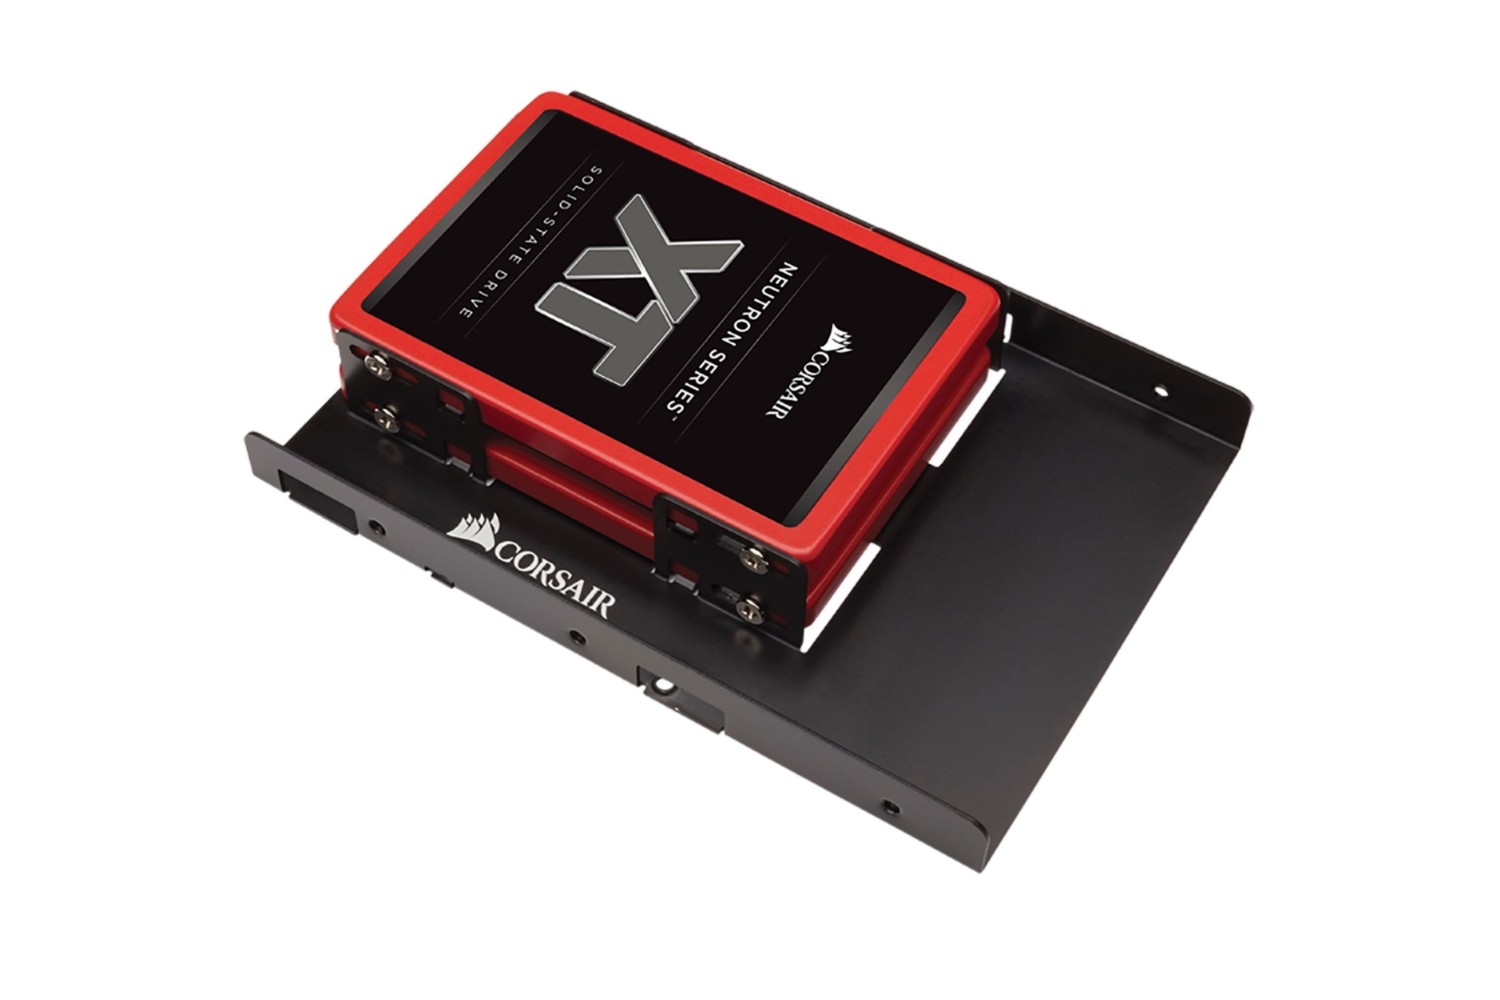
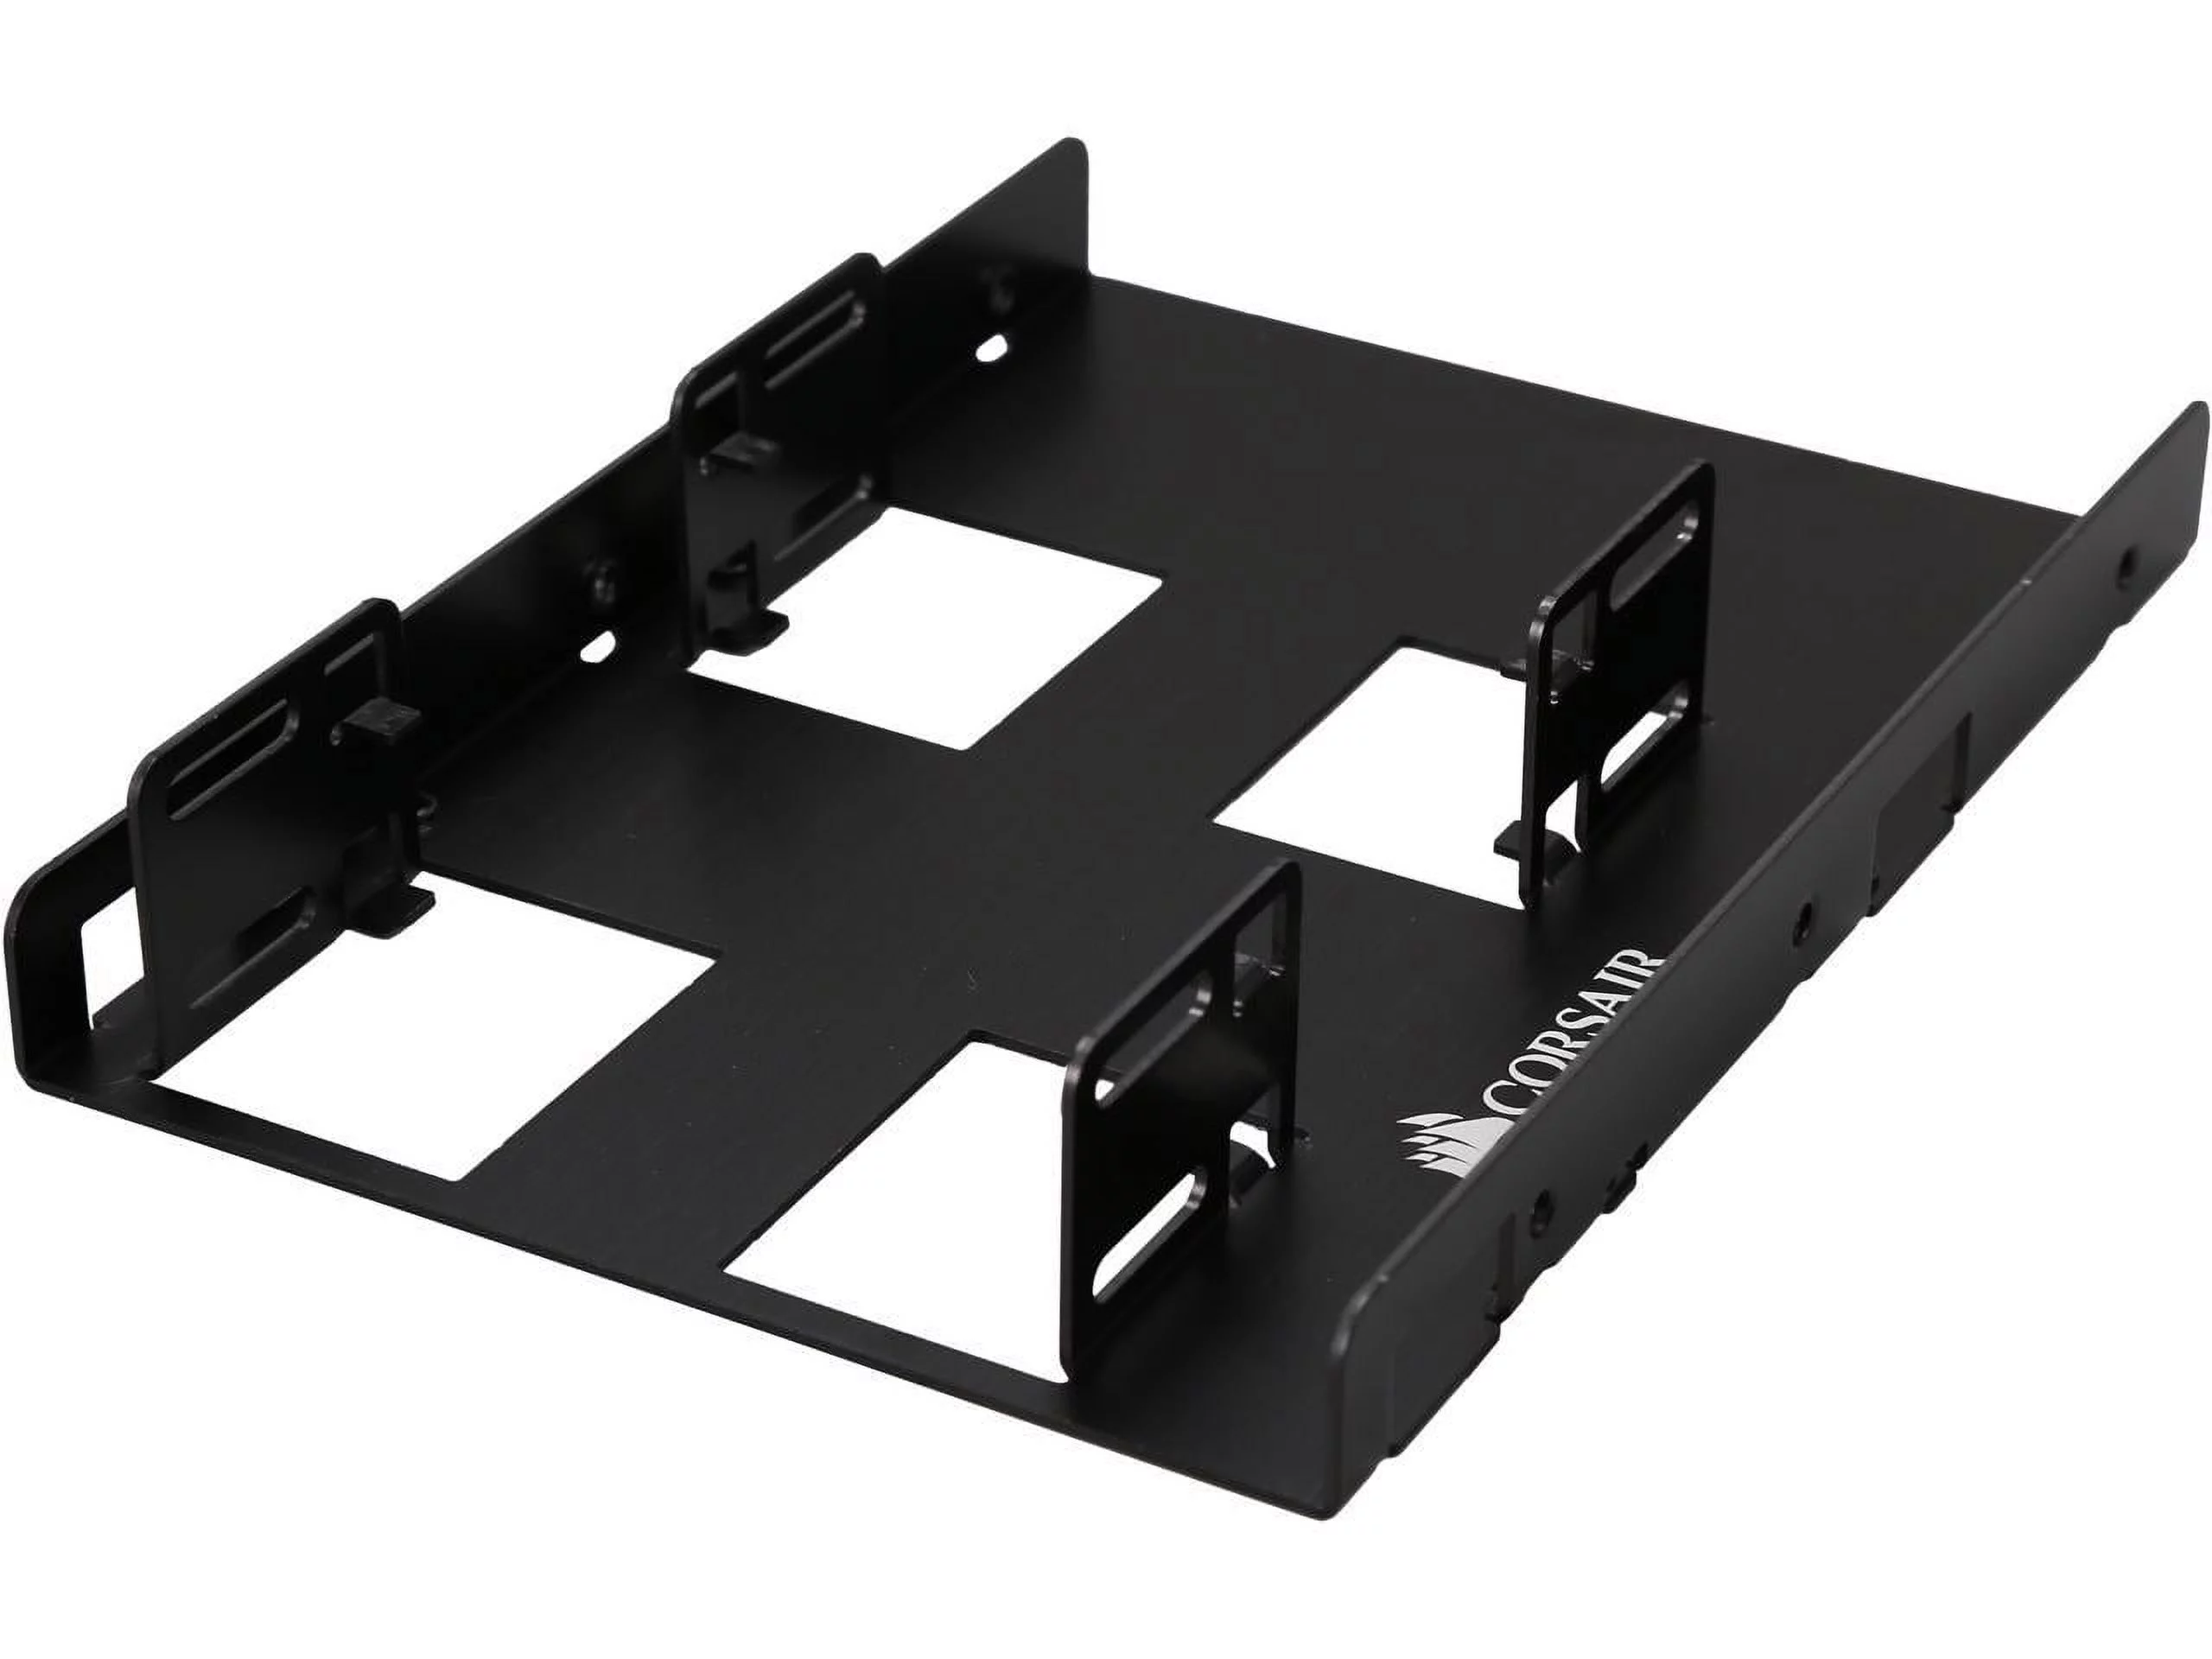
- A Corsair Mounting Bracket: This is the key component that will allow you to install your SSDs securely. Ensure that you have the correct size bracket for your SSDs and PC case.
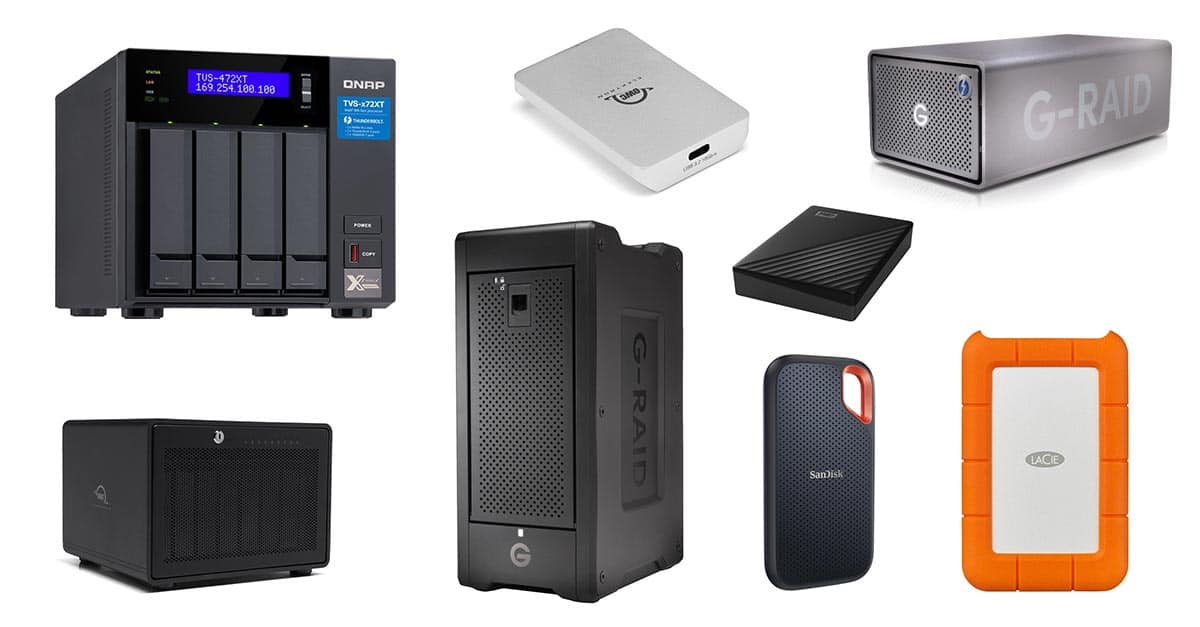
- SSDs: You will need two solid-state drives for this dual SSD setup. Make sure they are compatible with your motherboard and have the necessary SATA cables for connecting to the motherboard.
- Phillips screwdriver: You will need this to secure the SSDs to the mounting bracket and to attach the bracket to the PC case.
- Small pliers or zip ties: These can be helpful for cable management and securing any loose cables.
- Anti-static wrist strap (optional): While not essential, wearing an anti-static wrist strap can help protect your SSDs and other components from electrostatic discharge (ESD) during the installation process.
It’s important to have all the required tools and materials ready before starting the installation process. This will ensure a smooth and efficient setup, saving you time and preventing any potential delays or interruptions.
Once you have gathered all the necessary tools and materials, it’s time to move on to the next step: preparing the Corsair Mounting Bracket.
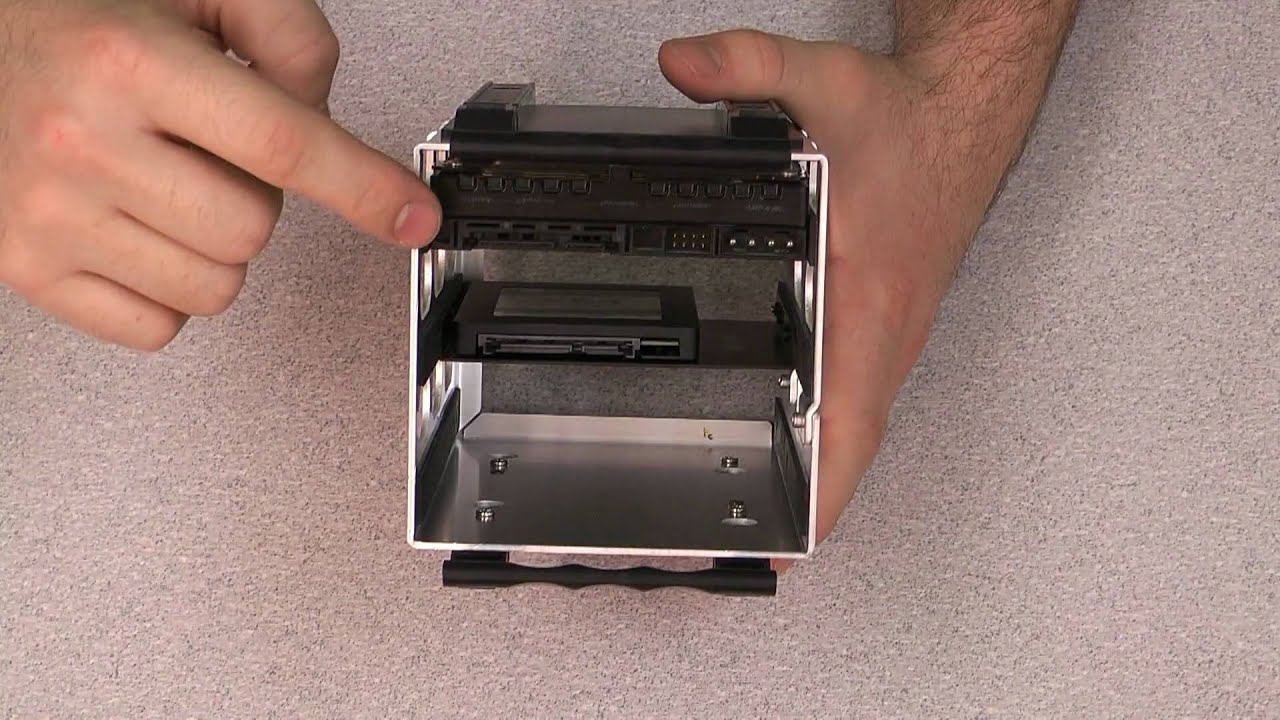
Step 1: Preparing the Corsair Mounting Bracket
Before installing the SSDs in the Corsair Mounting Bracket, it’s important to prepare the bracket itself. Follow these steps to ensure the bracket is ready for the installation process:
- Start by removing the Corsair Mounting Bracket from its packaging. Carefully open the package and take out the bracket. Handle it with care to avoid any damage.
- Inspect the bracket for any visible defects or issues. Check for any loose or broken parts. If you notice any problems, it’s best to contact the manufacturer for a replacement bracket.
- Next, identify the slots or trays where the SSDs will be installed. Depending on the model of the Corsair Mounting Bracket, there will be designated areas for the SSDs to be mounted securely. Take note of their placements.
- Check the mounting hardware that comes with the bracket. Make sure you have all the necessary screws or fasteners required for securing the SSDs to the bracket. If any screws are missing, contact the manufacturer for replacements before proceeding with the installation.
- Before installing the SSDs, it’s a good idea to clean the bracket to ensure a dust-free environment for your SSDs. Gently wipe the surface of the bracket using a microfiber cloth or a lint-free cloth. This will help prevent any unnecessary debris from affecting the installation or performance of your SSDs.
- Once you have completed these steps, the Corsair Mounting Bracket is now prepared for the installation process. You are ready to move on to the next step: Installing the first SSD.
Take your time during this step to ensure that the bracket is in good condition and ready for the installation. Properly preparing the Corsair Mounting Bracket will ensure a secure and stable mounting for your SSDs.
Step 2: Installing the First SSD
Now that the Corsair Mounting Bracket is prepared, it’s time to install the first SSD. Follow these steps to securely mount the SSD in the bracket:
- Locate the first designated slot or tray on the Corsair Mounting Bracket where the SSD will be installed.
- Take the first SSD and carefully align it with the connectors facing towards the bracket’s slot. Ensure that the screw holes on the SSD align with the mounting holes on the bracket.
- Using the screws or fasteners provided with the bracket, secure the SSD to the bracket. Insert the screws through the mounting holes on the SSD and tighten them gently using a Phillips screwdriver. Be cautious not to overtighten, as it can damage the SSD or the bracket.
- Once the first SSD is securely fastened to the bracket, double-check its position and stability. Make sure it is snugly fit and won’t move around during the installation process.
With the first SSD successfully installed, you have completed the initial step in setting up your dual SSD configuration. Congratulations! Now, you can proceed to the next step, which is installing the second SSD in the Corsair Mounting Bracket.
Note: If your Corsair Mounting Bracket has multiple slots or trays for SSDs, repeat the above steps for each additional SSD you plan to install.
Step 3: Installing the Second SSD
After successfully installing the first SSD in the Corsair Mounting Bracket, it’s time to move on to installing the second SSD. Follow these steps to securely mount the second SSD:
- Locate the next available slot or tray on the Corsair Mounting Bracket where the second SSD will be installed.
- Take the second SSD and align it with the connectors facing towards the slot on the bracket. Ensure that the screw holes on the SSD align with the mounting holes on the bracket, just like with the first SSD.
- Using the provided screws or fasteners, secure the second SSD to the bracket by inserting the screws through the mounting holes and tightening them gently with a Phillips screwdriver. Be cautious not to overtighten, as it can cause damage to the SSD or the bracket.
- Once the second SSD is securely fastened to the bracket, check its position and stability. Ensure that it is properly seated and won’t move during the installation process.
With both SSDs now installed in the Corsair Mounting Bracket, you have completed the crucial step of setting up your dual SSD configuration. Take a moment to appreciate your progress before continuing to the next steps.
Before moving forward, it’s essential to ensure that the SSDs are properly secured in the bracket. Double-check that all screws are tight and that the SSDs are aligned correctly. This will help prevent any unexpected movement or damage to the SSDs during the next stages of installation.
Now that both SSDs are securely mounted in the Corsair Mounting Bracket, you are ready to proceed with the next step: securing the SSDs in the bracket.
Step 4: Securing the SSDs in the Mounting Bracket
Now that you have installed both SSDs in the Corsair Mounting Bracket, it’s time to ensure they are properly secured in the bracket. Follow these steps to secure the SSDs:
- Check the positioning of both SSDs in the bracket. Make sure they are aligned evenly and placed snugly against the bracket’s slots or trays.
- Verify that all screws or fasteners used to attach the SSDs to the bracket are tightened adequately. Ensure that the SSDs are firmly fastened and won’t come loose during the installation process.
- Gently give each SSD a slight push or wiggle to test its stability. If you notice any movement, double-check the screws and tighten them if necessary.
- Inspect the bracket to ensure there are no loose parts or anything that could potentially cause damage to the SSDs. Check for any signs of misalignment or instability
- If you have any additional slots or trays on the Corsair Mounting Bracket that are not in use, it’s a good practice to cover them with the provided dust covers or blanks. This will help protect the unused areas and maintain a cleaner and more organized setup.
By securing the SSDs in the Corsair Mounting Bracket, you are taking the necessary precautions to ensure their stability and longevity. Properly securing the SSDs will prevent any unwanted movement or damage that could impact their performance or the overall system.
With the SSDs securely fastened in the Corsair Mounting Bracket, you have completed a critical step in setting up your dual SSD configuration. Take a moment to appreciate your progress before moving on to the next step: attaching the mounting bracket to the PC case.
Step 5: Attaching the Mounting Bracket to the PC Case
Now that the SSDs are securely mounted in the Corsair Mounting Bracket, the next step is attaching the bracket to the PC case. Follow these steps to properly secure the mounting bracket:
- Identify the appropriate location in your PC case to attach the Corsair Mounting Bracket. Look for an area that provides easy access and sufficient space to accommodate the bracket and its attached SSDs.
- Hold the Corsair Mounting Bracket against the chosen spot in the case, ensuring that the bracket aligns with the mounting holes or slots in the case.
- Using a Phillips screwdriver, insert the screws provided with the case through the bracket’s mounting holes and into the corresponding holes in the case. Tighten the screws gently but firmly, ensuring that the bracket is securely attached to the case.
- Double-check the stability of the mounting bracket by giving it a gentle shake. Ensure that it is securely fastened and won’t move or come loose during use.
Attaching the Corsair Mounting Bracket to the PC case is a crucial step in the installation process. A secure attachment will prevent any unnecessary movement or damage to the SSDs and ensure their optimal performance.
It is important to note that the process of attaching the mounting bracket to the PC case may vary depending on the specific case model. Refer to the case’s user manual or manufacturer’s instructions for any specific guidance or alternative mounting methods that may apply.
With the Corsair Mounting Bracket successfully attached to the PC case, you have completed another integral step in setting up your dual SSD configuration. Take a moment to appreciate your progress before moving on to the next step: connecting the SSDs to the motherboard.
Step 6: Connecting the SSDs to the Motherboard
Now that the Corsair Mounting Bracket is securely attached to the PC case, the next step is to connect the SSDs to the motherboard. Follow these steps to properly establish the connections:
- Locate the SATA ports on your motherboard. These are typically labeled and can be found near the storage or SATA connectors.
- Identify the SATA cables that came with your SSDs or the motherboard. These cables have a thin, flat design with connectors on both ends.
- Take one SATA cable and connect one end to the SATA port on the motherboard.
- Connect the other end of the SATA cable to the corresponding SATA port on the first SSD. Ensure that the connector is inserted straight and fully seated.
- If you have a second SSD, repeat steps 3 and 4, connecting it to an available SATA port on the motherboard using another SATA cable.
Once you establish the connections between the SSDs and the motherboard, the SSDs will be recognized as storage devices by the system. They will be ready for initialization and partitioning, allowing you to utilize their storage capacity for your operating system, applications, and data.
It is worth noting that some motherboards may require additional steps, such as enabling the SATA ports in the BIOS or configuring RAID settings. Consult your motherboard’s manual or manufacturer’s documentation for specific instructions related to your motherboard model.
With the SSDs successfully connected to the motherboard, you have completed another critical step in setting up your dual SSD configuration. Take a moment to appreciate your progress before moving on to the next step: cable management.
Step 7: Cable Management
With the SSDs connected to the motherboard, it’s time to address cable management to ensure a clean and organized setup. Follow these steps to effectively manage the cables:
- Start by carefully organizing the SATA cables connected to the SSDs. Group them together near the area where the connections were made to keep them tidy and prevent any accidental disconnections.
- Route the SATA cables along the designated cable management channels or routes in your PC case. This helps to keep the cables hidden and out of the way, improving airflow and aesthetics.
- Use zip ties or small cable clips to secure the SATA cables and prevent them from dangling or interfering with other components. Make sure not to tighten the zip ties too much to avoid damaging the cables.
- If necessary, use a small pair of pliers to carefully bend and route any excess cables to further tidy up the cable management. This helps to maintain a clean and uncluttered interior.
- Double-check your cable management before closing the PC case. Ensure that the cables are neatly arranged, organized, and do not obstruct the movement of any fans or obstruct any component.
Efficient cable management not only improves the aesthetics of your PC build but also enhances airflow, reduces the risk of cable damage, and makes future upgrades or maintenance easier. Taking the time to properly manage the cables will greatly contribute to the overall cleanliness and functionality of your system.
Remember, cable management techniques may vary depending on your specific case model, components, and personal preference. Take advantage of any features or cable management solutions provided by your case to achieve the best possible result.
With the cables neatly managed, you’ve successfully completed another important step in setting up your dual SSD configuration. Take a moment to admire your clean and organized setup before moving on to the final step: closing the PC case.
Step 8: Closing the PC Case
With all the components properly installed and cables managed, it’s time to complete the setup by closing the PC case. Follow these steps to ensure a secure and tidy closure:
- Check for any obstructions or loose cables inside the case that could interfere with closing the side panels. Take a moment to adjust or secure any loose components or cables to ensure a smooth closing process.
- Carefully position the side panel of the PC case back into place. Ensure that it is aligned correctly with the screw holes or latches.
- Depending on your case model, use either screws or latches to secure the side panel back onto the case. Refer to your case’s manual for specific instructions on securing the side panel.
- Give the side panel a gentle push to confirm that it is securely closed. Make sure there are no gaps or loose areas that could result in vibrations or dust ingress.
- Repeat the same process for the other side panel if applicable, ensuring that it is aligned and securely closed.
With the PC case now closed, you have completed the final step in setting up your dual SSD configuration. Take a moment to appreciate your hard work and attention to detail.
As a final check, power on your PC and ensure that the system recognizes both SSDs. Enter the BIOS or check your operating system’s Disk Management utility to ensure that the SSDs are properly detected and accessible.
Congratulations! You have successfully mounted and installed dual SSDs in a Corsair Mounting Bracket, connected them to the motherboard, managed the cables, and closed the PC case. Your system is now equipped with high-speed storage and a clean, efficient setup.
Enjoy the improved performance and storage capabilities offered by your newly installed dual SSD configuration!
Conclusion
Congratulations on successfully completing the process of mounting dual SSDs in a Corsair Mounting Bracket! By following the step-by-step instructions in this guide, you have transformed your storage solution into a high-performance and organized setup.
Throughout the installation process, you have learned how to prepare the Corsair Mounting Bracket, install the SSDs, secure them in the bracket, and connect them to the motherboard. Additionally, you have gained valuable knowledge on cable management techniques and closing the PC case for a clean and efficient system.
With your dual SSD configuration in place, you can experience the benefits of faster boot times, improved application load times, and increased overall system responsiveness. Whether you use your system for gaming, graphic design, video editing, or any other demanding tasks, the speed and reliability offered by SSDs will greatly enhance your computing experience.
Remember, proper maintenance of your dual SSD setup is important for continued performance. Regularly update the firmware of your SSDs, keep your operating system and drivers up to date, and periodically monitor the health and temperature of your SSDs using appropriate software.
Thank you for following this guide on how to mount an SSD in a Corsair Mounting Bracket for dual solid-state drives. We hope this tutorial has been informative and helpful in your PC building journey.
Enjoy the increased speed, storage capacity, and overall performance of your dual SSD setup! Happy computing!