Introduction
Welcome to this comprehensive guide on how to connect an SSD (Solid State Drive) to a PC. As technology advances, more and more computer users are realizing the benefits of upgrading their storage drives to SSDs. Solid State Drives offer faster speeds, improved performance, and enhanced reliability compared to traditional hard disk drives. If you’re looking to boost your PC’s speed and storage capacity, connecting an SSD is a great solution.
In this step-by-step tutorial, we will walk you through the process of connecting an SSD to your PC. Whether you’re a seasoned tech enthusiast or a beginner, don’t worry – we’ve got you covered. Before we dive into the steps, it’s important to note that every PC setup may be slightly different, so keep your PC’s user manual handy for specific instructions or consult with a professional if needed.
Connecting an SSD involves a few basic steps, such as gathering the necessary tools and materials, opening your PC case, identifying the appropriate SATA connector, securing the SSD, and connecting power cables. By following these steps, you’ll be well on your way to enjoying the benefits of a faster and more reliable storage solution for your PC.
Now that you have an overview of what we’ll be covering, let’s jump right in and start connecting your SSD to your PC. Remember to take your time, be careful when working with your PC’s components, and consult your PC’s user manual for any specific instructions relevant to your setup. With that said, let’s get started!
Step 1: Gathering the necessary tools and materials
Before you begin the process of connecting your SSD to your PC, it’s important to gather all the necessary tools and materials. This will ensure a smooth and hassle-free installation process. Here’s what you’ll need:
- A screwdriver (typically a Phillips-head screwdriver)
- An SSD (Solid State Drive)
- SATA cables
- A SATA power cable
- Your PC’s user manual (for reference)
The screwdriver is used to open your PC case, while the SSD, SATA cables, and SATA power cable are the essential components for connecting the SSD to your PC. These items can be easily purchased from any computer hardware store or online retailer.
Make sure you have the correct type of SSD for your PC. Most modern PCs use the standard 2.5-inch SATA SSDs, but there are also M.2 SSDs that require a different connection method. Check your PC’s user manual or consult with a professional if you are unsure about the compatibility of your SSD.
Additionally, it’s always a good idea to have your PC’s user manual on hand. While this guide will provide you with general steps, your PC’s specific setup may vary. The user manual will provide you with detailed instructions for your particular model and can be helpful in troubleshooting any issues that may arise during the installation process.
Once you have gathered all the necessary tools and materials, you’re ready to move on to the next step: shutting down your PC and opening the case. Remember to turn off your PC and unplug it from the power source before proceeding.
Step 2: Shutting down the PC and opening the case
Now that you have gathered all the necessary tools and materials, it’s time to shut down your PC and open the case to gain access to the internal components. Follow these steps:
- Save all your work and close any open programs or applications.
- Shut down your PC using the appropriate method, either through the Start menu or by pressing the power button.
- Once your PC is completely shut down, unplug it from the power source to ensure your safety.
- Place the PC on a stable surface with enough space to work comfortably.
- Locate the screws or latches securing the PC case. They are usually found at the back of the PC.
- Use a screwdriver or release the latches to remove the side panel of the case.
It’s important to handle your PC with care and avoid static electricity. Before touching any internal components, ground yourself by touching a metal surface or wearing an anti-static wristband. This will help prevent any damage to the sensitive electronic components inside your PC.
With the PC case open, you now have access to the motherboard and other components. Take a moment to familiarize yourself with the layout of your PC’s internals. Look for the SATA connectors on the motherboard, as this is where you will connect the SSD.
By carefully following these steps, you have successfully shut down your PC and opened the case, preparing it for the installation of your SSD. In the next step, we will identify the appropriate SATA connector on your motherboard.
Step 3: Identifying the appropriate SATA connector
With your PC case open, it’s time to identify the appropriate SATA connector on your motherboard. This step is crucial as it ensures that the SSD is connected to the correct port for optimal performance. Follow these steps:
- Locate the SATA ports on your motherboard. They are rectangular-shaped connectors usually located near the bottom edge.
- Examine the SATA connectors and identify the one labeled as “SATA 3” or “SATA 6Gbps”. This is the latest and fastest version of the SATA interface, which will provide the best performance for your SSD. If your motherboard does not have a specific labeling, consult your user manual or look for the fastest ports available.
- Take note of the position of the identified SATA connector for future reference.
It’s important to connect your SSD to the appropriate SATA port to take advantage of the faster data transfer rates and maximize the performance of your storage device. Using an older or slower SATA port may result in reduced speed and performance of your SSD.
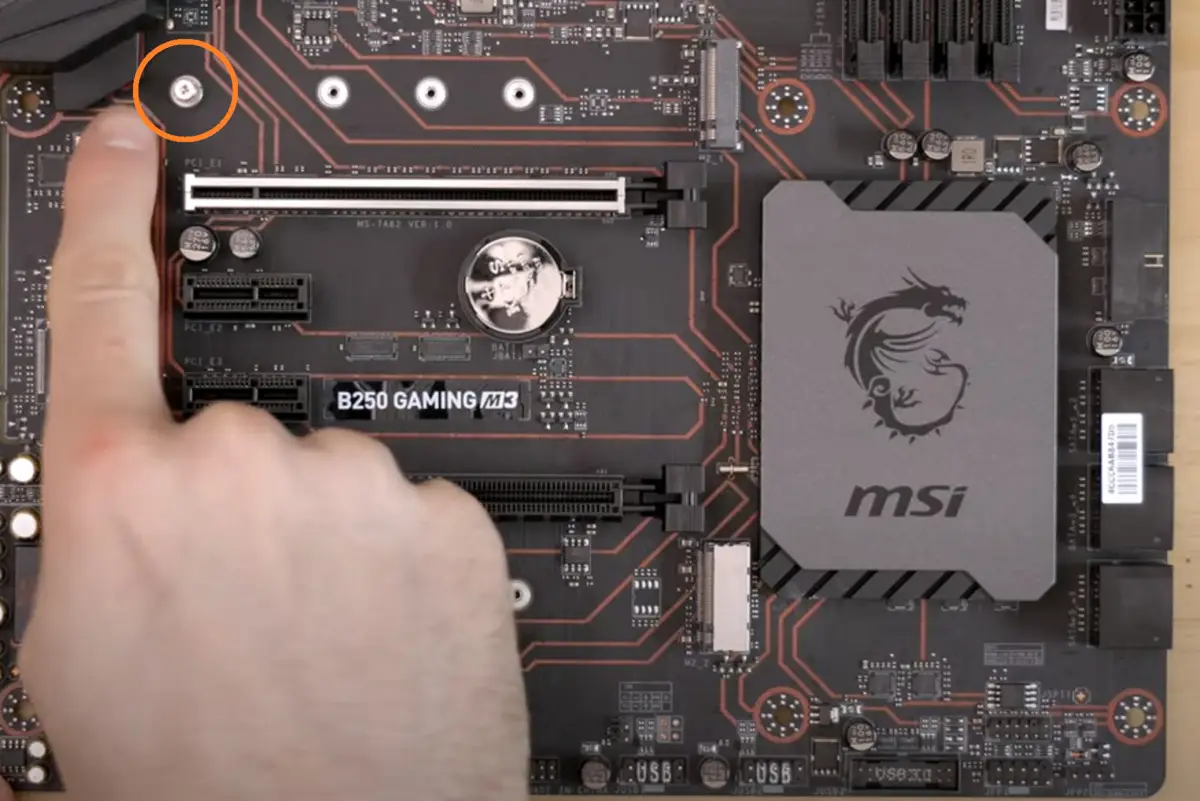
If you’re using an M.2 SSD, it will connect directly to the M.2 slot on your motherboard. Locate the M.2 slot, which is typically located near the center of the motherboard. Refer to your motherboard’s user manual for the specific location and installation instructions for your M.2 SSD.
Once you have identified the appropriate SATA connector or M.2 slot, you are ready to move on to the next step, which is connecting the SSD to the SATA connector. We will cover this in detail in the following step.
Step 4: Connecting the SSD to the SATA connector
Now that you have identified the appropriate SATA connector on your motherboard, it’s time to connect your SSD. Follow these steps:
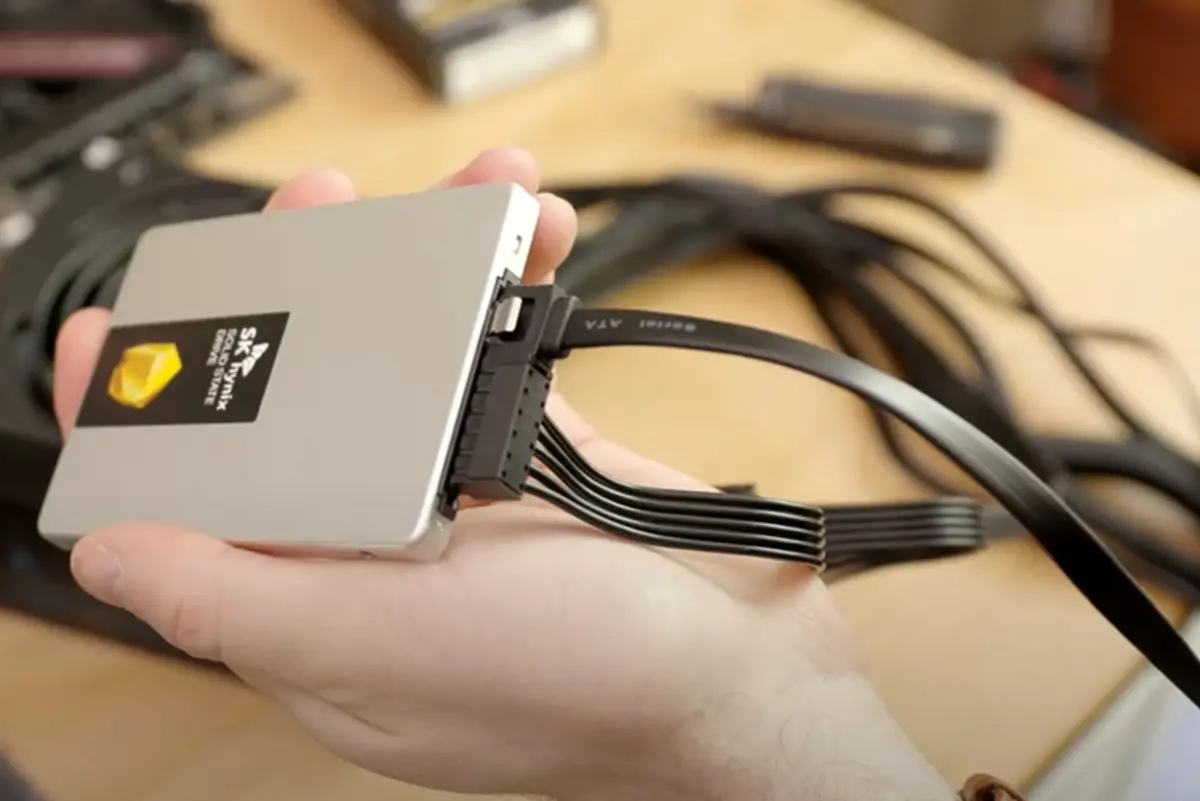
- Take your SSD and locate the SATA connector on its back. It is a small L-shaped connector.
- Align the SATA connector on the SSD with the designated SATA port on your motherboard.
- Gently push the SSD connector into the SATA port until it is fully inserted. It should fit snugly, but be careful not to use excessive force.
- Once the SSD is properly connected to the SATA connector, secure it in place using the screws provided with your SSD. If your SSD does not come with screws, you can use the screws from the removed hard disk drive to secure it.
It’s important to ensure a secure and stable connection between the SSD and the SATA connector. This will prevent any accidental disconnection or unstable performance. Double-check that the SSD is firmly attached and does not move when lightly nudged.
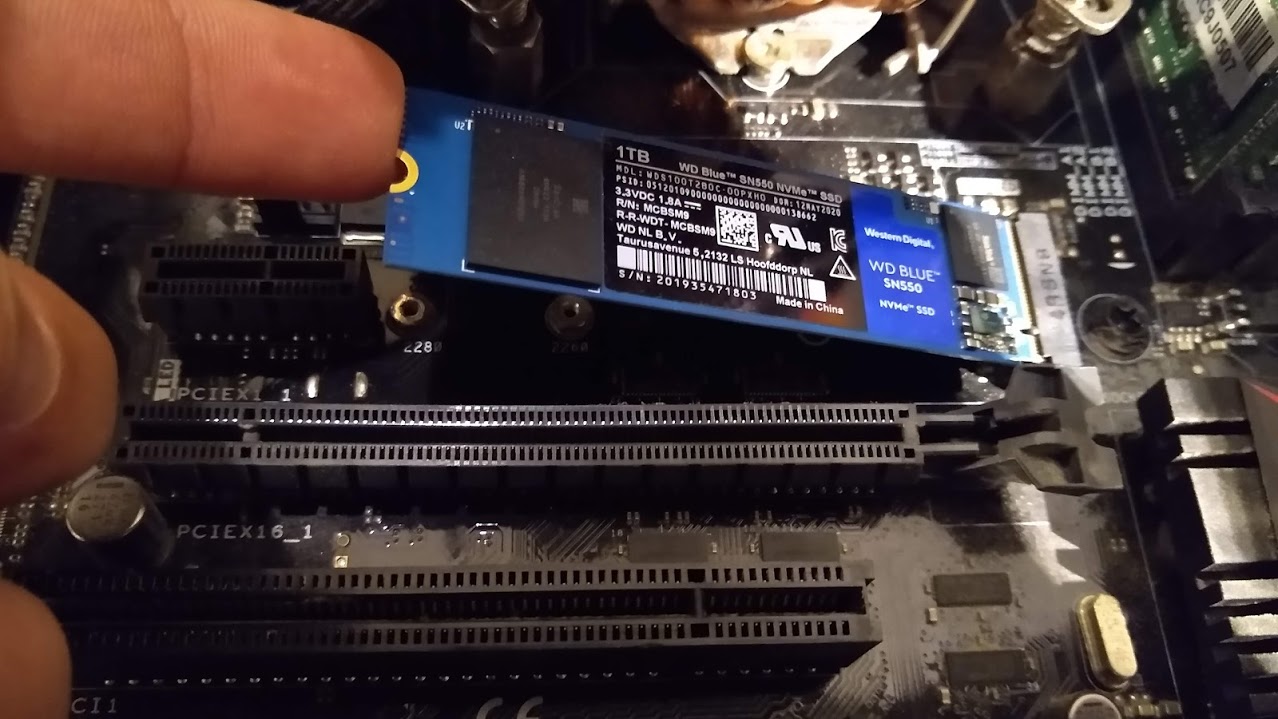
If you are installing an M.2 SSD, instead of using SATA connectors, carefully slide the M.2 SSD into the M.2 slot on your motherboard. Align the notches on the M.2 SSD with the slot and apply gentle pressure to push it in. Secure it in place using the screw provided on the motherboard.
With your SSD securely connected to the SATA connector or M.2 slot, you are ready to move on to the next step, which involves connecting the power cable to the SSD. This will provide the necessary power for your SSD to function.
Step 5: Securing the SSD in place
Now that your SSD is connected to the appropriate SATA connector or M.2 slot, it’s time to secure it in place inside your PC case. This step ensures that the SSD remains stable and prevents any movement or damage during regular usage. Follow these steps:
- Take a look at the available mounting options inside your PC case. Most cases will have dedicated SSD mounting points or brackets where you can attach the SSD.
- Place the SSD in the desired mounting location. If your case has designated SSD mounts, align the screw holes on the SSD with the corresponding holes on the mount.
- Use the screws provided with your SSD to secure it in place. Insert the screws into the holes on the mount and onto the SSD, then tighten them gently. Be careful not to over-tighten the screws as it may damage the SSD or the PC case.
If your PC case does not have dedicated SSD mounts, you can use other methods to secure the SSD. Velcro strips or adhesive-backed cable ties can be used to attach the SSD to a vacant area inside the case. Just make sure to place the SSD in a position that won’t obstruct any other components or hinder airflow.
Securing the SSD ensures that it remains in place even if your PC is moved or bumped. This is particularly important if you frequently transport or move your PC.
Once the SSD is securely fastened inside your PC case, you can proceed to the next step, which involves connecting the power cable to the SSD. This will provide the necessary power for your SSD to function properly.
Step 6: Connecting the power cable to the SSD
Now that your SSD is securely in place, it’s time to connect the power cable to provide the necessary power for it to function. Follow these steps:
- Locate the SATA power cable from your power supply unit (PSU). It is a flat and wide cable with a connector that matches the one on your SSD.
- Take the SATA power cable and align the connector with the corresponding port on the SSD.
- Gently push the connector into the port until it is fully inserted. It should fit snugly, but be careful not to use excessive force.
Double-check that the SATA power cable is securely connected to the SSD and the power supply unit. It should not come loose or disconnected when lightly nudged.
If your SSD requires additional power through a different type of connector, such as a PCIe power connector for high-performance SSDs, check the documentation that came with your SSD or consult your user manual for specific instructions on how to connect the power cable.
By connecting the power cable to the SSD, you are ensuring that it receives the necessary power supply to function properly. This will enable you to take full advantage of the fast and reliable storage capabilities of your SSD.
Finally, we’re ready for the last step in this installation process, which involves closing your PC case and powering on the computer. Let’s proceed to the next step.
Step 7: Closing the PC case and powering on the computer
Now that you have successfully connected your SSD and ensured it is securely in place, it’s time to close the PC case and power on your computer. Follow these steps:
- Take the side panel of your PC case and carefully align it with the edges of the case.
- Slide the panel back into place, ensuring that it fits snugly and is properly aligned with the screw holes.
- Use the screws that you removed earlier to secure the side panel. Insert the screws into the holes and tighten them gently, being careful not to over-tighten.
- Once the PC case is securely closed, plug in your PC and connect it to the power source.
- Press the power button to turn on your computer.
As your computer powers on, it may take a few moments for it to recognize the newly installed SSD. Once your operating system loads, you should see the SSD appear as a new storage device.
Before you start using your SSD, it’s a good practice to check if it is recognized by your computer. Open your File Explorer (Windows) or Finder (Mac), and you should see the SSD listed among your other drives.
Congratulations! You have successfully connected and installed your SSD to your PC. You can now enjoy the benefits of faster speeds and improved performance that an SSD brings to your computer.
If, for any reason, your computer does not recognize the SSD or you encounter any issues during or after the installation process, consult your PC’s user manual or consider seeking assistance from a professional to troubleshoot and resolve the problem.
By following these steps and closing your PC case, you have completed the process of connecting your SSD to your PC. Enjoy the enhanced storage capabilities and improved overall performance that your new SSD provides!
Conclusion
Congratulations on successfully connecting your SSD to your PC! By following the step-by-step guide in this article, you have upgraded your storage solution and unlocked the benefits of faster speeds and improved performance that an SSD provides.
Throughout this process, we covered the necessary tools and materials, shutting down your PC and opening the case, identifying the appropriate SATA connector, connecting the SSD to the SATA connector, securing the SSD in place, connecting the power cable, and closing the PC case. Each step was crucial in ensuring a proper and successful installation.
Remember, the speed and performance advantages of an SSD are truly remarkable compared to traditional hard disk drives. With faster boot times, quicker file transfers, and overall snappier system responsiveness, you’ll see an immediate impact on your computing experience.
As you continue to use your PC with the newly installed SSD, be sure to regularly back up your data and keep your operating system and drivers up to date for optimal performance. Additionally, consider optimizing your SSD by enabling features such as TRIM on your operating system and managing your storage space efficiently.
If you have any questions or encounter any issues along the way, don’t hesitate to consult your PC’s user manual or seek assistance from a professional. They can provide guidance and solutions tailored to your specific setup.
Enjoy the improved speed and storage performance that your newly connected SSD brings to your PC. It’s time to take your computing experience to the next level!