Introduction
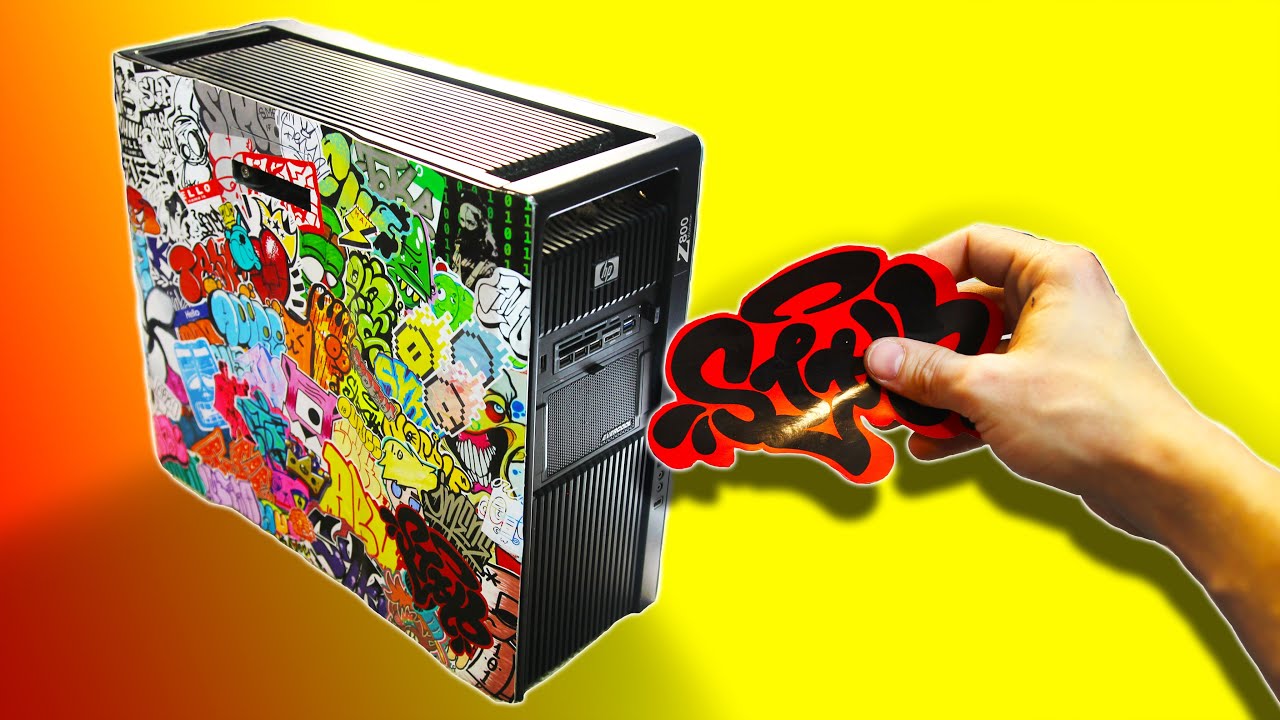
Welcome to our comprehensive guide on removing stickers from a PC case. Over time, stickers and decals can accumulate on the surface of your computer case, whether they are remnants from old promotions, brands, or simply decorative ones you no longer desire. Removing these stickers without causing damage to the case requires the right materials and techniques. In this article, we will walk you through various methods that can help you effectively remove these stickers and restore the original look of your PC case.
Gaining a clear and clutter-free PC case not only improves the aesthetic appeal but also helps in creating a professional and streamlined setup. Whether you’re planning to sell your computer, upgrade its components, or simply refresh its appearance, removing stickers is an important step in the process. However, it’s crucial to proceed with caution and choose the right methods to avoid any scratches or damage.
It’s important to note that the effectiveness of each method may vary depending on the type of sticker, the adhesive used, and the material of your PC case. It’s recommended to test these methods on a small, inconspicuous area of the case before applying them to the entire surface. With proper care and attention, you can safely and successfully remove stickers from your PC case, giving it a fresh and clean look.
Gathering the Necessary Tools
Before you begin the sticker removal process, it’s important to gather the necessary tools to ensure a smooth and successful operation. Having the right tools at hand will make the process easier and help prevent any potential damage to your PC case. Here are some essential tools you will need:
- Microfiber cloth: This soft cloth will be used to wipe away any residue left behind after removing the sticker.
- Credit card or plastic scraper: A plastic card or scraper can be used to gently lift the edges of the sticker and pry it off the case without causing any scratches.
- Rubbing alcohol or nail polish remover: These solutions can be effective in dissolving the adhesive and making it easier to remove the sticker.
- Blow dryer: Applying heat to the sticker can help loosen the adhesive and make it easier to peel off.
- Baking soda and oil: Creating a paste using baking soda and oil can provide a gentle abrasive to help remove stubborn sticker residue.
- Adhesive remover or Goo Gone: These specialized products are specifically designed to remove sticky residue and can be effective in tackling stubborn stickers.
Having these tools readily available will ensure that you have everything you need to successfully remove stickers from your PC case. Additionally, it’s always a good idea to have a clean, clutter-free workspace to work on, free from any potential hazards or distractions. With the right tools and a well-organized workspace, you’re ready to begin the sticker removal process and restore the pristine appearance of your PC case.
Method 1: Using Heat
Using heat is a common and effective method for removing stickers from a PC case. The application of heat helps to soften the adhesive, making it easier to peel off the sticker without leaving any residue behind. Here’s how you can use heat to remove stickers:
- Start by unplugging your PC and ensuring that it is turned off.
- Plug in a blow dryer and set it to a medium or high heat setting.
- Aim the blow dryer at the sticker, holding it a few inches away from the case.
- Move the blow dryer in a back-and-forth motion across the sticker, evenly distributing the heat.
- Continue heating the sticker for about 30 seconds, or until you can feel the adhesive starting to loosen.
- Using your fingers or a plastic scraper, gently lift the edges of the sticker.
- Peel off the sticker slowly, applying more heat if needed to loosen stubborn spots.
- If any residue remains, use a microfiber cloth and rubbing alcohol or nail polish remover to wipe it away.
Be cautious not to apply excessive heat or hold the blow dryer too close to the case, as this can damage the surface. It’s important to keep the blow dryer in motion to avoid overheating one spot for too long. Additionally, always be mindful of the safety precautions when working with heat-emitting devices.
Using heat is a quick and efficient method for removing stickers from a PC case. It requires minimal tools and is generally safe to use on most computer case materials. However, it’s always recommended to test this method on a small, inconspicuous area of the case first to ensure it does not cause any damage or discoloration.
Method 2: Using Rubbing Alcohol or Nail Polish Remover
Rubbing alcohol and nail polish remover are commonly used to remove sticky residues, making them effective options for removing stickers from a PC case. Both substances work by breaking down the adhesive, allowing the stickers to be peeled off easily. Here’s how you can use rubbing alcohol or nail polish remover to remove stickers:
- Start by applying a small amount of rubbing alcohol or nail polish remover to a cotton ball or a soft cloth.
- Gently dab the cotton ball or cloth onto the sticker, ensuring that it is fully saturated.
- Allow the rubbing alcohol or nail polish remover to sit on the sticker for a few minutes to break down the adhesive.
- Using your fingers or a plastic scraper, gently lift the edges of the sticker.
- Peel off the sticker slowly, applying more rubbing alcohol or nail polish remover if necessary.
- If any residue remains, use a clean cotton ball or cloth soaked in rubbing alcohol or nail polish remover to gently wipe it away.
- Once the sticker and residue are removed, clean the area with a damp cloth to ensure no leftover adhesive remains.
When using rubbing alcohol or nail polish remover, it’s important to note that these substances can potentially cause damage to certain PC case materials or paint finishes. Before applying them to the entire sticker or case, test them on a small, inconspicuous area to ensure compatibility.
Additionally, it’s important to work in a well-ventilated area when using these substances, as they can emit strong fumes. Avoid direct contact with your skin and follow the safety instructions provided by the manufacturer.
Using rubbing alcohol or nail polish remover can be an effective method for removing stickers from a PC case, as they are readily available and affordable. However, always exercise caution and take proper safety measures when using these substances.
Method 3: Using a Blow Dryer
Another effective method for removing stickers from a PC case is by using a blow dryer. The heat from the blow dryer helps to soften the adhesive, allowing for easy and residue-free removal of the sticker. Follow these steps to use a blow dryer for sticker removal:
- Turn off and unplug your PC to ensure safety.
- Plug in the blow dryer and set it to a medium or high heat setting.
- Aim the blow dryer at the sticker, holding it a few inches away from the case.
- Move the blow dryer back and forth across the sticker to evenly distribute the heat.
- Continue heating the sticker for about 30 seconds, or until you notice the adhesive starting to loosen.
- Using your fingers or a plastic scraper, gently lift the edges of the sticker.
- Slowly peel off the sticker, applying more heat if necessary to loosen stubborn spots.
- If there’s any residue left behind, use a microfiber cloth and rubbing alcohol or a mild adhesive remover to clean it.
It’s important to be cautious while using the blow dryer to avoid overheating or damaging the PC case. Keep the blow dryer in motion to prevent excessive heat in one particular spot. Always test the method on a small, inconspicuous area of the case before applying it to the entire sticker to ensure compatibility and avoid any unintended consequences.
The blow dryer method is suitable for most PC case materials and is a relatively quick and easy solution for sticker removal. It requires minimal tools and is safe to use when proper precautions are taken.
Keep in mind that different PC cases may have different levels of adhesion for stickers, so the time required for the heat to loosen the adhesive may vary by case. Exercise patience as you work with the blow dryer to achieve the desired results without causing any damage to the PC case.
Method 4: Using a Mixture of Baking Soda and Oil
If you’re looking for a natural and gentle method to remove stickers from a PC case, using a mixture of baking soda and oil can be an effective solution. The combination of these two ingredients creates a paste that acts as a mild abrasive, helping to lift off the sticker and any residue. Follow these steps to use the baking soda and oil mixture:
- In a small bowl, combine equal parts baking soda and oil, such as vegetable or olive oil.
- Stir the mixture until it forms a thick paste with a consistency similar to toothpaste.
- Using your fingers or a clean cloth, apply the paste to the sticker, covering it completely.
- Allow the mixture to sit on the sticker for about 10-15 minutes to soften the adhesive.
- Gently rub the sticker in circular motions with your fingertips or a soft cloth.
- As you rub, you should notice the sticker starting to lift off the PC case.
- Continue rubbing until the sticker is fully removed.
- Once the sticker is removed, use a damp cloth to wipe away any excess paste and residue.
The baking soda and oil method is safe to use on most PC case materials, but it’s always recommended to test it on a small, inconspicuous area beforehand to ensure compatibility. The gentle abrasive nature of the mixture helps to remove the sticker without scratching or damaging the surface of the case.
After using the baking soda and oil mixture, you may notice a slight residue left behind. Simply wipe the area with a clean damp cloth to eliminate any remaining paste or adhesive. This method is an eco-friendly alternative that does not require any harsh chemicals.
Keep in mind that this method may take some time and effort, especially for larger or more stubborn stickers. Be patient and work in small sections, applying more of the baking soda and oil mixture as needed to completely remove the sticker and any residue.
Method 5: Using Adhesive Remover or Goo Gone
If you’re dealing with particularly stubborn stickers or adhesive residue on your PC case, using a specialized adhesive remover or a product like Goo Gone can be highly effective. These products are specifically designed to dissolve sticky residues, making sticker removal easier and quicker. Follow these steps to use adhesive remover or Goo Gone:
- Start by reading and following the instructions provided by the adhesive remover or Goo Gone product.
- Apply a small amount of the adhesive remover or Goo Gone onto a clean cloth or cotton ball.
- Gently rub the product onto the sticker, ensuring it is completely covered.
- Allow the adhesive remover or Goo Gone to penetrate the sticker for a few minutes.
- Using your fingers or a plastic scraper, gently peel off the sticker.
- If any residue remains, reapply the adhesive remover or Goo Gone and gently rub until the residue is dissolved.
- Wipe away any excess product with a damp cloth.
Adhesive removers and Goo Gone are formulated to be safe for use on various surfaces, including most PC case materials. However, it’s always a good idea to test the product on a small, inconspicuous area of the case first to ensure it doesn’t cause any adverse effects.
These specialized products are designed to tackle stubborn stickers and adhesive residue, making them highly effective in quickly and easily removing them. They may have a strong odor, so make sure to use them in a well-ventilated area and follow the safety instructions provided by the manufacturer.
Keep in mind that not all adhesive removers or Goo Gone products are suitable for every PC case material. Make sure to choose one that is compatible with the material of your PC case to avoid any damage or discoloration.
Adhesive removers and Goo Gone are convenient options for removing stickers, particularly if other methods have been unsuccessful. They save time and effort by effectively dissolving the adhesive, allowing for easy sticker removal and a clean PC case surface.
Precautions and Tips for Removing Stickers from a PC Case
While removing stickers from a PC case can be a straightforward process, it’s important to take precautions to prevent any damage and ensure a smooth removal. Here are some key tips and precautions to keep in mind:
- Test on a small area: Before applying any sticker removal method to the entire sticker or PC case, test it on a small, inconspicuous area to ensure compatibility and to check for any adverse reactions.
- Work in a well-ventilated area: Some sticker removal methods involve the use of chemicals or heat. It’s crucial to work in a well-ventilated area to avoid inhaling fumes and to ensure adequate air circulation.
- Use protective gear: When working with chemicals or heat-emitting devices, consider wearing gloves, goggles, and a mask to protect your hands, eyes, and respiratory system.
- Be gentle: Whether using heat or a scraping tool, always apply gentle pressure to avoid damaging the PC case or leaving scratches. Take your time and be patient throughout the process.
- Remove any residue: After removing the sticker, clean any adhesive residue left on the PC case. Use a gentle adhesive remover, rubbing alcohol, or a specialized product like Goo Gone to dissolve the residue, then wipe it away with a clean cloth.
- Maintain a clean workspace: Clear your workspace of any unnecessary items or debris. This will help prevent any accidental spills or damage to your PC case.
- Follow manufacturer instructions: If you’re using specific adhesive removers or products like Goo Gone, carefully read and follow the instructions provided by the manufacturer to ensure proper and safe usage.
- Be mindful of compatibility: Different PC case materials may require different methods or products for sticker removal. Ensure that the method you choose is suitable for the material of your PC case to prevent any damage.
By following these precautions and tips, you can safely and effectively remove stickers from your PC case without causing any harm. Remember to exercise caution, take your time, and choose the method that best suits your needs and the material of your PC case.
Conclusion
Removing stickers from a PC case can be a daunting task, but with the right methods and precautions, it can be easily accomplished. Whether you choose to use heat, rubbing alcohol, a blow dryer, a baking soda and oil mixture, or adhesive remover, each method offers its own benefits and can effectively remove stickers without causing damage to your PC case.
Remember to gather the necessary tools, such as a microfiber cloth, credit card or plastic scraper, rubbing alcohol or nail polish remover, a blow dryer, baking soda and oil, or adhesive remover. These tools will aid in the sticker removal process and ensure a smoother experience.
It’s crucial to be cautious throughout the removal process and test any method on a small, inconspicuous area to avoid any potential damage or discoloration. Additionally, working in a well-ventilated area and using proper protective gear when necessary are essential safety measures to consider.
By following the provided methods and taking the necessary precautions, you can successfully remove stickers from your PC case and restore its clean and professional appearance. Whether you’re planning to sell your computer, upgrade its components, or simply refresh its look, a sticker-free case will help create a sleek and organized setup.
Remember to select the method that is most suitable for your PC case material and sticker type. If one method does not yield the desired results, feel free to try another until you achieve the desired outcome.
With a little patience and the right tools, you can say goodbye to unwanted stickers on your PC case and enjoy a visually appealing computer setup. Keep these methods and tips in mind, and get ready to give your PC case a fresh start!


