Introduction
When it comes to building a high-performance gaming or workstation setup, one of the most exciting aspects is customizing your PC case. Modifying your PC case not only allows you to showcase your personal style, but it also offers practical benefits such as improved airflow, better cable management, and enhanced cooling capabilities. Whether you’re a seasoned PC enthusiast or just starting out, choosing the right PC case and implementing modifications can take your build to the next level.
But with so many options available in the market, it can be overwhelming to decide where to start. Should you go for a sleek, minimalist design or opt for a bold, eye-catching case? What modifications should you prioritize for optimal performance and aesthetics? In this article, we will guide you through the process of modding your PC case, providing insights and tips to help you make informed decisions along the way.
Before diving into the exciting world of PC case modifications, it’s essential to have a clear understanding of your specific requirements and preferences. Consider factors such as the size of your motherboard, the number of expansion slots you need, and the level of noise tolerance. Additionally, think about the future-proofing aspect and whether you’ll be upgrading or adding components in the future.
Keep in mind that while customization options are almost limitless, it’s crucial to strike a balance between style and functionality. Opting for a case that offers ample space for cable management, comes with dust filters for easy maintenance, and provides enough room for future upgrades or water cooling solutions will save you a lot of headaches down the line.
In the next sections, we will explore a variety of PC case modifications, from simple tweaks to more advanced enhancements. Whether you’re looking to spruce up the exterior, optimize airflow, add LED lighting, or even implement a custom water cooling system, we’ll provide detailed instructions and tips to make the process smooth and enjoyable. So let’s jump in and begin the journey to transform your PC case into a true masterpiece!
Choosing the Right PC Case
Before diving into PC case modifications, it is crucial to start with the right foundation. Choosing the perfect PC case sets the stage for a successful and visually appealing build. Here are a few key factors to consider when selecting your PC case.
- Size and Form Factor: PC cases come in various sizes, including full tower, mid-tower, and mini-ITX. The size you choose should be based on your needs for expansion, storage, and cooling. Consider the dimensions of your motherboard, the number of expansion slots required, and whether you plan to use liquid cooling solutions.
- Design and Aesthetics: Your PC case is a reflection of your style and personality. There are options for sleek, minimalist designs as well as bold, gaming-focused aesthetics. Consider the exterior finish, side panel options (tempered glass or acrylic), and any unique features like RGB lighting or integrated fan controllers.
- Airflow and Cooling: Efficient airflow is crucial for maintaining optimal performance and temperature in your build. Look for cases that offer ample ventilation options, including front, top, and rear fan mounts, as well as dust filters to prevent dust buildup. Additionally, consider whether the case supports adequate room for CPU coolers and GPU length.
- Expandability and Storage: Evaluate the number of drive bays or slots available for SSDs and HDDs to ensure you have enough storage for your needs. Additionally, look for cases that offer multiple USB ports (including USB 3.0) and front-panel audio jacks for easy accessibility.
- Cable Management: A clean and organized interior not only improves airflow but also makes your build look professional. Look for cases with ample routing holes, velcro straps, and rubber grommets to facilitate easy cable management. Additionally, consider cases with PSU shrouds to hide unsightly cables.
- Noise Reduction: If noise is a concern for you, look for cases with sound-dampening materials and features like padded side panels, vibration-dampening mounts for drives and fans, and removable dust filters that can reduce noise while optimizing airflow.
By carefully considering these factors, you can narrow down your options and find the perfect PC case for your build. Remember, the right case not only enhances the visual appeal of your setup but also provides the necessary functionality and flexibility for future expansions or modifications. With your PC case chosen, let’s move on to exploring various modifications you can make to further enhance your setup’s aesthetics and performance in the following sections.
Modifying the Exterior
One of the first areas you can focus on when modding your PC case is the exterior. By customizing the exterior, you can give your build a unique and personalized look. Here are some modification ideas to consider:
- Painting or Vinyl Wrapping: Transform the appearance of your PC case by giving it a fresh coat of paint or applying vinyl wraps. Choose colors, patterns, or designs that align with your personal style or match the theme of your setup.
- Custom Side Panels: Replace the stock side panel of your PC case with a custom-made panel. Opt for a panel with a window to show off your hardware or a panel with unique cut-outs or designs for added flair.
- Engraving or Etching: Add a touch of elegance by engraving or etching designs or patterns onto the metal or glass surfaces of your PC case. This can be done by laser engraving or using etching creams to create intricate and personalized details.
- Custom Decals and Stickers: Personalize your PC case further by applying custom decals or stickers. Whether it’s your favorite gaming logo, a unique design, or even your own artwork, decals and stickers are a cost-effective way to add personality to your build.
- Case Feet and Handles: Upgrade the look and functionality of your PC case by installing customized case feet or handles. These additions not only make it easier to move your PC but also add a touch of style.
- RGB Lighting Strips: Install RGB lighting strips on the exterior of your PC case to add a vibrant and dynamic lighting effect. These strips can be controlled via software to synchronize with other RGB components in your setup.
When modifying the exterior of your PC case, it’s essential to be mindful of the balance between aesthetics and functionality. Ensure that any modifications you make do not hinder the overall cooling or airflow performance of your build. Additionally, remember to follow proper safety precautions and guidelines when painting or applying any modifications to your PC case.
By thinking creatively and incorporating these exterior modifications, you can achieve a visually striking PC case that reflects your style and stands out from the crowd. Let’s move on to the next section and explore ways to enhance the airflow in your PC case for improved cooling.
Enhancing Airflow
Efficient airflow is crucial to maintain optimal temperatures and maximize the performance of your PC components. By enhancing airflow within your PC case, you can ensure that hot air is expelled efficiently, preventing thermal throttling and improving overall system stability. Here are some effective ways to enhance airflow in your PC case:
- Positioning of Fans: Strategically place fans in your PC case to create a smooth and continuous airflow path. Consider installing intake fans at the front or bottom of the case and exhaust fans at the rear or top to ensure cool air is brought in and hot air is expelled effectively.
- Adding Additional Fans: If your PC case has available fan mounts, consider adding more fans. Increasing the number of fans can greatly improve overall airflow and reduce temperatures. Ensure that the fans are properly sized and positioned to promote efficient movement of air.
- Using High-Airflow Fans: Invest in high-airflow fans that are designed to move larger volumes of air at lower speeds. These fans are optimized for better cooling performance and reduced noise levels, allowing for optimal airflow within your PC case.
- Optimizing Fan Orientation: Pay attention to the orientation of your fans. Position them to blow air in the intended direction, either as intake or exhaust, to facilitate proper airflow through the case. Improper fan orientation can disrupt the intended airflow path.
- Removing Obstructions: Clear any obstructions that may impede the flow of air within your PC case. Ensure that cables are neatly organized and do not block the fans or obstruct the airflow. Use cable management solutions to keep cables away from the path of the airflow.
- Using Fan Filters: Install dust filters on the intake fans to prevent dust buildup inside your PC case. Dust accumulation can hamper airflow and lead to higher temperatures. Regular cleaning of these filters will ensure constant airflow and efficient cooling.
It’s important to strike a balance between the number of fans installed and the space available within your PC case. Too many fans can disrupt the intended airflow path or create unnecessary noise. Therefore, optimize fan placement based on your specific case and components.
By implementing these techniques, you can effectively enhance the airflow within your PC case, resulting in improved cooling and an overall more stable system. In the next section, let’s explore how adding LED lighting can further elevate the aesthetics of your PC case.
Adding LED Lighting
One of the most popular ways to enhance the visual appeal of your PC case is by adding LED lighting. LED lighting not only adds a vibrant and futuristic look to your build but also allows you to customize the lighting effects to match your personal style or the overall theme of your setup. Here are some ideas for adding LED lighting to your PC case:
- LED Light Strips: Attach LED light strips to the interior of your PC case. These thin and flexible strips can be easily mounted along the edges or inside the case to provide a backlighting effect or illuminate specific components.
- Fans with Built-in LEDs: Consider replacing your stock fans with ones that have built-in LEDs. These LED fans combine functionality with lighting, providing both cooling and visual appeal to your PC case.
- LED Fans and Radiator Covers: If you have liquid cooling systems in your build, upgrade the aesthetics by using LED fans or radiator covers. These components not only enhance the lighting effects but also showcase the cooling solution in a visually appealing way.
- RGB Lighting Controllers: Invest in RGB lighting controllers that allow you to control and customize the lighting effects of your LED components. With these controllers, you can choose from a wide range of colors, adjust brightness, and create dynamic lighting patterns.
- RGB Light Strips with Software Control: Use LED light strips that can be controlled through software. These strips often come with compatibility with popular motherboard lighting control software, allowing for synchronized lighting effects with other RGB components in the build.
- LED Cable Extensions: Personalize your cable management by using LED cable extensions. These extensions are compatible with various types of cables, such as power, SATA, and HDMI, and add a stylish touch to your build by illuminating the cable pathways.
When adding LED lighting to your PC case, it’s important to consider the overall balance and not overdo it. Too much lighting can be overwhelming and may potentially interfere with the functionality of your components. Strive for a cohesive and visually pleasing lighting scheme that enhances the overall aesthetics without compromising performance or distracting from the focus on your hardware.
With LED lighting, you can take your PC case from ordinary to extraordinary, creating a visually stunning centerpiece for your setup. In the next section, we’ll discuss how to upgrade your storage options for improved performance and capacity.
Upgrading Storage Options
As the need for storage space continues to grow, upgrading your storage options is essential to ensure that you have enough capacity for your files, games, and applications. With advancements in technology, there are various ways to enhance your storage capabilities within your PC case. Here are some options for upgrading your storage:
- SSD Upgrades: Consider replacing your traditional hard disk drives (HDDs) with solid-state drives (SSDs). SSDs offer significantly faster read and write speeds, resulting in improved overall system performance. They are available in various capacities and form factors to suit your needs.
- M.2 NVMe SSDs: Take advantage of the high-speed M.2 NVMe SSDs that connect directly to the motherboard. These SSDs offer even faster performance compared to traditional SSDs and can greatly reduce load times for applications and games.
- RAID Configuration: Set up a RAID (Redundant Array of Independent Disks) configuration to combine multiple storage drives into a single logical unit. RAID configurations can provide enhanced data protection, increased performance, or a combination of both, depending on the RAID level you choose.
- External Storage Solutions: If you require additional storage capacity that is not limited by the physical space within your PC case, consider using external storage solutions. External hard drives or network-attached storage (NAS) devices offer flexible options for expanding your storage capacity.
- Hot-Swap Drive Bays: Install hot-swap drive bays in your PC case to facilitate easy and quick swapping of storage drives. These bays allow you to add or remove storage drives without needing to open up your PC case, providing convenient access for backups or additional storage.
When upgrading your storage options, it’s important to consider the available space within your PC case and the compatibility with your motherboard and other components. Ensure that you have the necessary connectors and interfaces to support the storage devices you plan to install.
By upgrading your storage options, you can not only increase the capacity to store your valuable data but also significantly improve the performance of your system. In the next section, let’s dive into the importance of customizing cable management in your PC case for a clean and organized build.
Customizing Cable Management
A clean and organized cable management system is not only visually appealing but also plays a crucial role in maintaining good airflow and optimal performance within your PC case. Customizing cable management ensures that cables are neatly routed, reducing clutter, improving airflow, and making future upgrades or maintenance easier. Here are some tips for customizing your cable management:
- Routing Holes and Grommets: Utilize the routing holes and grommets within your PC case to guide cables to their respective destinations. These features keep cables hidden from view and prevent them from obstructing airflow.
- Velcro Straps and Cable Ties: Use velcro straps or cable ties to bundle and secure cables together. This keeps them organized, prevents tangles, and makes it easier to manage and identify individual cables when needed.
- PSU Shroud and Cable Covers: If your PC case has a PSU shroud or cable covers, take advantage of them to hide cables that connect to the power supply. This not only improves aesthetics but also helps maintain a clean interior and unobstructed airflow.
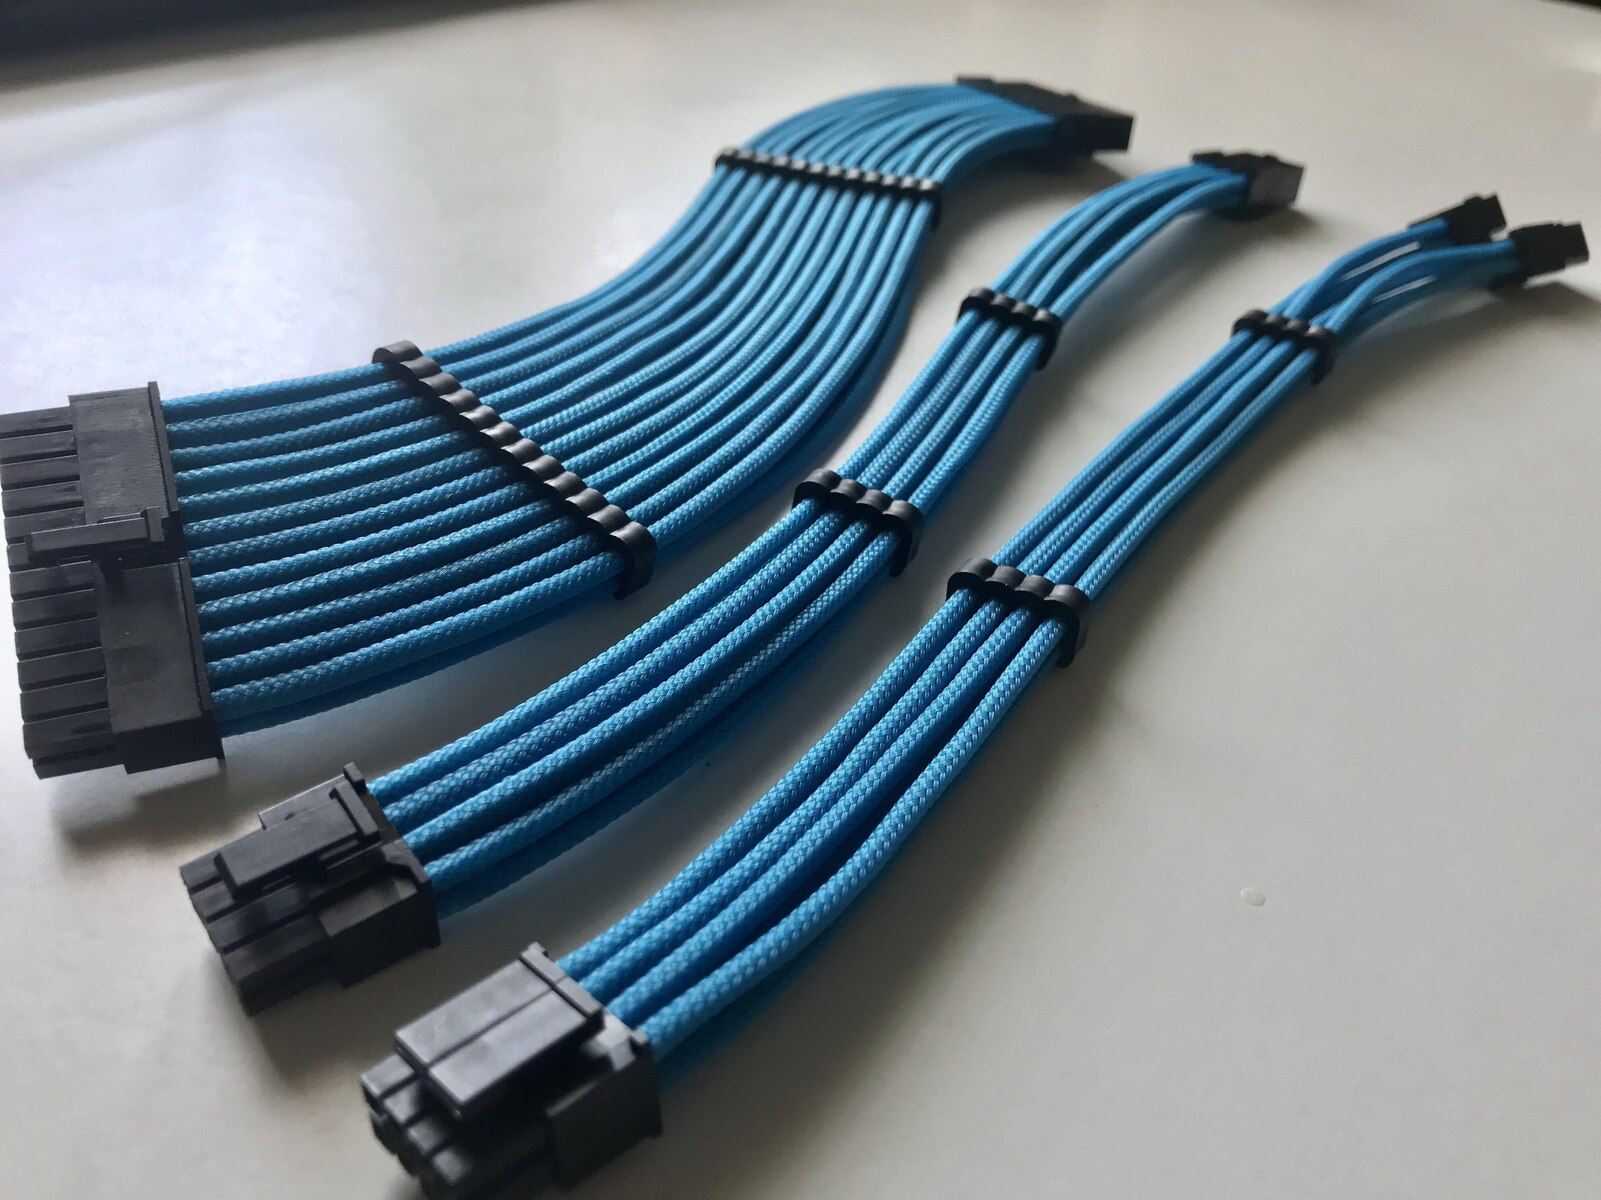
- Extensions and Custom Cables: Consider using cable extensions or custom cables that are individually sleeved to achieve a cleaner and more uniform look. These extensions and cables come in a variety of colors and lengths, allowing you to match your build’s theme or create a unique color scheme.
- Wireless Peripherals and Internal Connectivity: Minimize the number of cables required by opting for wireless peripherals, such as keyboards and mice, where possible. Additionally, choose motherboards with built-in Wi-Fi or Bluetooth capabilities to reduce the need for additional cables.
- Proper Length Management: Trim excess cable length to avoid a cluttered and tangled mess. Excessively long cables can obstruct airflow and make cable management more challenging. Consider using cable combs to organize and align cables neatly.
Investing time in customizing your cable management not only improves the aesthetics of your build but also has practical benefits. Adequate cable management allows for efficient airflow, reducing the risk of components overheating and improving the overall lifespan of your PC.
By implementing these cable management techniques, you can achieve a clean and organized interior, showcasing your hardware and maximizing the performance of your PC. In the next section, let’s explore how installing additional cooling fans can further enhance the airflow and cooling efficiency of your build.
Installing Additional Cooling Fans
To improve the airflow and cooling capabilities of your PC case, installing additional cooling fans is a highly effective solution. Extra fans can help dissipate heat more efficiently, ensuring that your components stay cool even during demanding tasks. Here are some tips for installing additional cooling fans:
- Identify Optimal Fan Placement: Assess your PC case’s layout and identify areas that could benefit from additional airflow. Common locations for additional fans include the front, rear, top, and side panels. Consider placing intake fans in areas that bring cool air into the case, while utilizing exhaust fans to expel hot air.
- Airflow Direction: Ensure that the fans are orientated in the correct direction to maintain proper airflow. Intake fans should be positioned to draw cool air into the case, while exhaust fans should push hot air out. Verify the airflow direction indicated by the fan manufacturer’s arrow on the fan frame.
- Fan Sizes and Compatibility: Check your PC case’s specifications to determine which fan sizes are compatible. Common sizes are 120mm and 140mm, but some cases may support larger fans. Utilizing fans of appropriate size helps maintain a balance between noise level, airflow, and available space.
- Fan Speeds and Noise Levels: Consider the speed and noise levels of the fans you intend to install. Fans with adjustable speeds can strike a balance between cooling performance and noise output. Opt for fans designed to operate quietly for a more pleasant gaming or work environment.
- Fan Dust Filters: When installing additional fans, ensure that your PC case has dust filters in the appropriate locations. Dust filters help prevent dust accumulation inside the case, reducing the need for frequent cleanings and maintaining optimal airflow over time.
- Fan Control and Management: For fine-tuning performance and noise levels, consider using a fan controller or motherboard software that allows you to adjust fan speeds or create custom fan profiles. This enables better control over the cooling capabilities of your PC.
Remember to power your additional fans using available fan headers on your motherboard or fan controllers. Ensure that the total power draw of all installed fans is within the capacity of the fan headers or controllers you are using.
By installing additional cooling fans, you can actively improve the airflow and heat dissipation in your PC case. This leads to more stable temperatures and enhances the overall performance of your components. In the next section, we’ll explore the exciting world of custom water cooling and the benefits it offers.
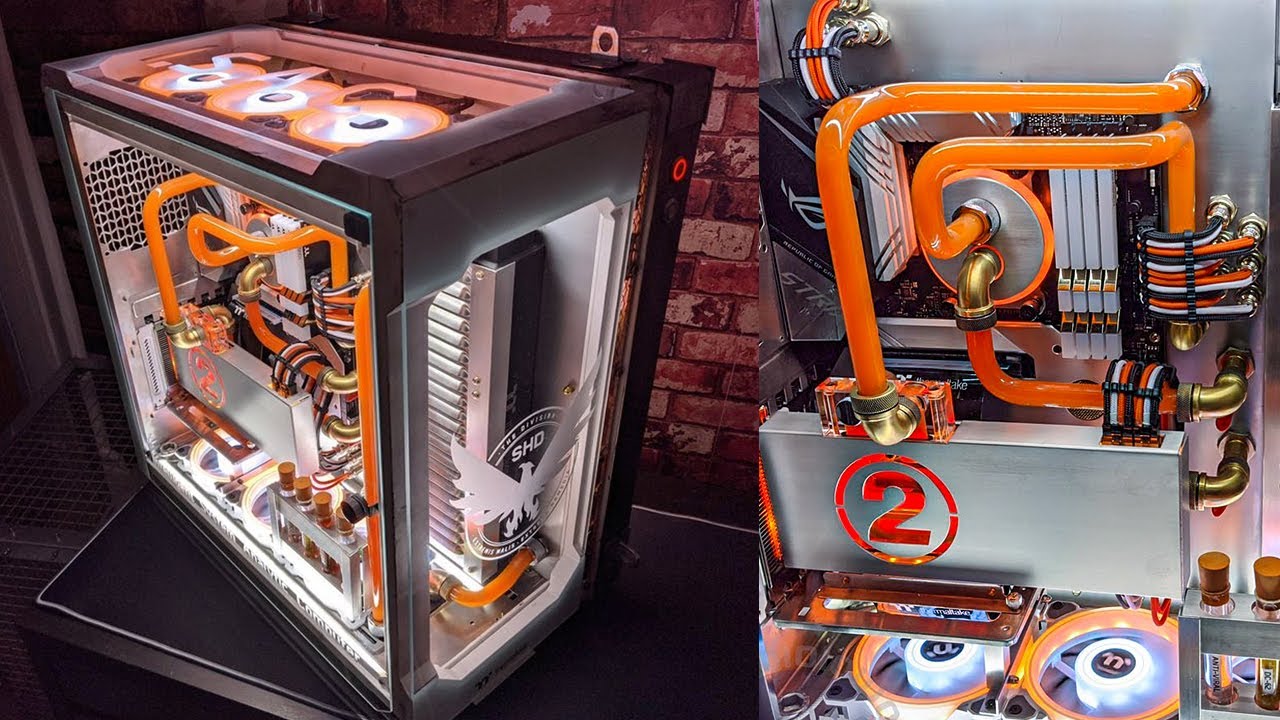
Custom Water Cooling
For users seeking the pinnacle of cooling performance and aesthetics, custom water cooling systems offer unparalleled benefits. Custom water cooling involves replacing traditional air cooling with a dedicated liquid cooling setup designed to keep your components running at optimal temperatures. Here are key points to consider about custom water cooling:
- Components for Water Cooling: Custom water cooling setups typically consist of several components, including a pump, reservoir, radiator, fans, water blocks, tubing, and coolant. Each component plays a vital role in circulating and dissipating heat efficiently.
- Improved Cooling Efficiency: Custom water cooling systems transfer heat more effectively than air cooling. Liquid absorbs heat from the components, which is then carried away to the radiator for dissipation. This results in lower overall temperatures and improved performance for your CPU and GPU.
- Reduced Noise Levels: Water cooling systems often produce less noise compared to air cooling setups. The absence of bulky air coolers and the use of larger radiators with low-speed fans contribute to a quieter computing experience, particularly during demanding tasks.
- Customization and Aesthetics: Custom water cooling allows you the freedom to tailor the visual appearance of your PC. Components such as water blocks, fittings, and colored coolants can be chosen based on your preferred color scheme or theme, creating a stunning and unique look for your build.
- Overclocking Potential: Custom water cooling offers superior thermal dissipation, which can greatly benefit overclocking enthusiasts. The improved cooling allows for higher voltage and frequency settings, unlocking the full potential of your CPU and GPU without compromising stability.
- Complexity and Maintenance: It’s important to note that custom water cooling can be more complex to install and maintain compared to air cooling. Proper planning, careful assembly, and periodic maintenance are necessary to ensure the longevity and efficiency of your water cooling system.
Custom water cooling is an advanced cooling solution that requires extensive knowledge and research. It’s crucial to carefully review compatibility, perform regular maintenance, and follow safety guidelines to prevent any potential leaks or damage to your components.
If you’re willing to invest time, effort, and resources into a custom water cooling setup, you’ll be rewarded with exceptional cooling performance, reduced noise levels, and a visually stunning PC. However, it’s important to weigh the benefits against the complexity and cost associated with custom water cooling before making the decision to pursue this advanced cooling solution.
In the next section, we’ll explore how you can add a personal touch to your PC case by customizing case graphics and decals.
Personalizing Case Graphics and Decals
Adding custom graphics and decals to your PC case is a fantastic way to showcase your personality and make your build truly unique. Personalizing your PC case with graphics and decals allows you to create a visually stunning and eye-catching design that reflects your individual style. Here are some ideas for personalizing your case graphics and decals:
- Custom Vinyl Decals: Vinyl decals are an affordable and versatile option for personalizing your PC case. They come in various sizes, shapes, and designs, allowing you to choose decals that complement your build’s theme or showcase your favorite artwork, logo, or text.
- Full Case Wraps: For a bold and immersive design, consider using full case wraps. These wraps cover the entire exterior of your PC case, creating a cohesive and visually striking look. Full case wraps are available in a wide range of designs and patterns to suit your preferences.
- Custom Painted Graphics: If you’re artistically inclined, you can unleash your creativity by hand painting graphics or designs onto your PC case. This highly personalized approach allows for unlimited customization and ensures that your case is truly one-of-a-kind.
- Etched or Engraved Designs: Add a touch of elegance to your PC case by etching or engraving designs onto metal or glass surfaces. Utilize laser engraving or etching creams to create intricate, permanent designs that make your case stand out.
- LED Backlit Logos: Illuminate your custom graphics and decals by adding LED backlighting behind them. This creates a striking visual effect and draws attention to your personalized designs. LED backlighting can be easily controlled and customized to match your desired color scheme.
- Custom Acrylic Panels: Replace your PC case’s stock side panels with custom-made acrylic panels. These panels can be laser-cut with your desired designs or patterns, allowing you to showcase your creativity and add a personalized touch to your build.
When personalizing your PC case with graphics and decals, it’s important to carefully plan the design and ensure it complements the overall theme and aesthetic of your build. Consider the placement of graphics and decals to create a visually balanced and cohesive look. Additionally, take into account the type of adhesive used, ensuring it is safe for your PC case’s surface and won’t cause any damage.
Personalizing your PC case with graphics and decals is a fantastic opportunity to make your build truly unique and showcase your creativity. Whether you choose vinyl decals, full case wraps, custom paint, or engraved designs, personalization adds that extra level of customization that sets your PC apart from the rest. In the next section, we’ll explore soundproofing options to reduce noise within your PC case.
Soundproofing Options
Noise can be a significant concern for many PC enthusiasts, especially when building a high-performance system. Soundproofing your PC case can help reduce the noise generated by cooling fans, components, and even HDDs, creating a more enjoyable and quieter computing experience. Here are some soundproofing options to consider:
- Sound-Dampening Materials: Use soundproofing foam or padding specifically designed for PC cases. These materials help absorb and dampen the sound produced by your components, reducing noise levels inside the case.
- Padded Side Panels: Opt for PC cases with padded side panels. These panels are lined with sound-absorbing material, minimizing noise leakage from within the case and shielding your surroundings from the noise generated by your PC.
- Vibration-Dampening Mounts: To address vibration-related noise, use anti-vibration mounts for your HDDs, SSDs, fans, and other components. These mounts isolate the components from the case, reducing vibrations that can contribute to overall noise levels.
- Noise-Reducing Fans: Consider using fans specifically engineered for reduced noise levels. These fans are designed with features like low-noise bearings or specially shaped fan blades that minimize turbulence and reduce noise output while maintaining optimal airflow.
- Removable Dust Filters: Clean and unobstructed airflow helps minimize the noise generated by fans running at higher speeds. Regularly clean or replace removable dust filters to prevent dust buildup, which can increase fan noise due to restricted airflow.
- Cable Management: Proper cable management not only improves airflow but also reduces the chance of cables interfering with fan blades, potentially causing additional noise. Organize and secure cables away from fans using cable ties or Velcro straps, ensuring they are not obstructing airflow or creating unnecessary vibrations.
It’s important to note that while soundproofing measures can significantly reduce noise levels, some noise may still be present, particularly from high-performance components under heavy loads. It’s essential to strike a balance between noise reduction and maintaining proper ventilation and cooling within your system.
By implementing soundproofing options, you can create a quieter environment for your PC, enhancing your overall gaming or work experience. These options allow you to strike a balance between cooling performance and noise reduction, ensuring that your PC remains both functional and comfortable. As we reach the end of our discussion, let’s reflect on the various modifications and customization options we’ve explored to elevate your PC case to the next level.
Final Thoughts
Customizing and modding your PC case is an exciting journey that allows you to unleash your creativity, showcase your personal style, and maximize the performance of your build. From selecting the right PC case to implementing modifications such as customizing the exterior, enhancing airflow, adding LED lighting, upgrading storage options, customizing cable management, installing additional cooling fans, exploring custom water cooling, personalizing case graphics and decals, and soundproofing your PC case, each step adds its own unique touch to your build.
Through careful consideration of your needs, preferences, and compatibility, you can create a PC case that not only performs optimally but also stands out from the crowd. Whether you’re a hardcore gamer, a design professional, or a technology enthusiast, customizing your PC case allows you to create a system that reflects your passion and style.
Remember to strike a balance between aesthetics and functionality. While a visually stunning case is undoubtedly appealing, it’s important to ensure that your modifications do not compromise the cooling efficiency and long-term stability of your components. Proper cable management, airflow optimization, and maintenance are crucial for maintaining the performance and lifespan of your PC.
Additionally, always consider safety precautions and follow manufacturer guidelines when performing any modifications, particularly when it comes to custom water cooling and electrical connections.
We hope this guide has provided you with valuable insights and inspiration for transforming your PC case into a masterpiece. With a plethora of customizations and modifications available, your PC case is a canvas waiting to be transformed into something truly remarkable. Enjoy the process, let your creativity soar, and build a PC that not only meets your needs but also becomes a source of pride and admiration.