Introduction
Have you ever wanted to combine your love for gaming and computer building into one unique project? Well, you’re in luck! In this guide, we will provide you with step-by-step instructions on how to mod a PS3 into a PC case. This exciting project allows you to transform your PlayStation 3 gaming console into a fully functional computer, giving you the best of both worlds.
Why would you want to do this, you might ask? Well, there are several reasons why modding a PS3 into a PC case can be a thrilling endeavor. Firstly, it allows you to repurpose your old PlayStation 3 and give it a new lease on life. Instead of gathering dust in your attic or ending up in a landfill, you can transform it into a unique, conversation-starting piece of hardware.
Secondly, modding a PS3 into a PC case provides you with the opportunity to showcase your creativity and technical skills. It’s a chance to let your imagination run wild as you design and build a custom PC case that reflects your personal style. Whether you prefer a sleek and minimalist aesthetic or a bold and eye-catching design, this project allows you to customize your PC case according to your preferences.
Furthermore, by modding a PS3 into a PC case, you can save money. Building a high-quality gaming rig from scratch can be expensive, but repurposing an existing gaming console significantly reduces costs. You can use the PC components you already have or invest in new ones, depending on your budget and desired performance level.
Lastly, modding a PS3 into a PC case is an excellent learning opportunity. It gives you hands-on experience in disassembling and modifying hardware, understanding computer components, and troubleshooting any issues that may arise. It’s a fun and educational project that can expand your knowledge and skills in computer building.
In this guide, we will cover everything you need to know to successfully mod a PS3 into a PC case. From disassembling the PlayStation 3 to preparing the PC components, modifying the case, mounting the components, and wiring everything together, we’ve got you covered. Let’s dive in and turn your old console into a fully functional PC that is sure to impress!
Tools and Materials Required
Before you begin the process of modding your PS3 into a PC case, there are a few essential tools and materials you will need to gather. Having these items on hand will make the project much easier and ensure that you have everything you need to complete the conversion successfully. Here’s a list of what you’ll need:
- Screwdriver set: You will need a set of screwdrivers with various sizes and types. This will allow you to safely disassemble the PS3 and access its internal components.
- PC components: To transform your PS3 into a PC, you will need a set of PC components. This includes a motherboard, CPU, RAM, storage device (such as an SSD or HDD), power supply unit (PSU), and a cooling system. Make sure the components you choose are compatible with the PS3 case and meet your desired performance specifications.
- Thermal paste: This is necessary to ensure proper heat transfer between the CPU and the cooling system. It helps prevent overheating and ensures optimal performance.
- Cable management supplies: To keep the internal components organized and minimize cable clutter, you will need zip ties, Velcro straps, and cable clips.
- Wire cutters and strippers: These tools will come in handy when you need to cut and strip wires for cable management and connecting components.
- Electrical tape: Use electrical tape to secure and insulate wires, preventing any potential short circuits.
- Optional: Modding materials and tools, such as paints, vinyl wraps, or decals, if you want to customize the appearance of your PC case.
It’s important to ensure you have all the necessary tools and materials before you begin the modding process. This will help streamline the project and prevent delays due to missing items. Take the time to gather everything you need, as it will make the process much smoother and more enjoyable.
Now that you have all the tools and materials ready, let’s move on to the next step: disassembling the PS3.
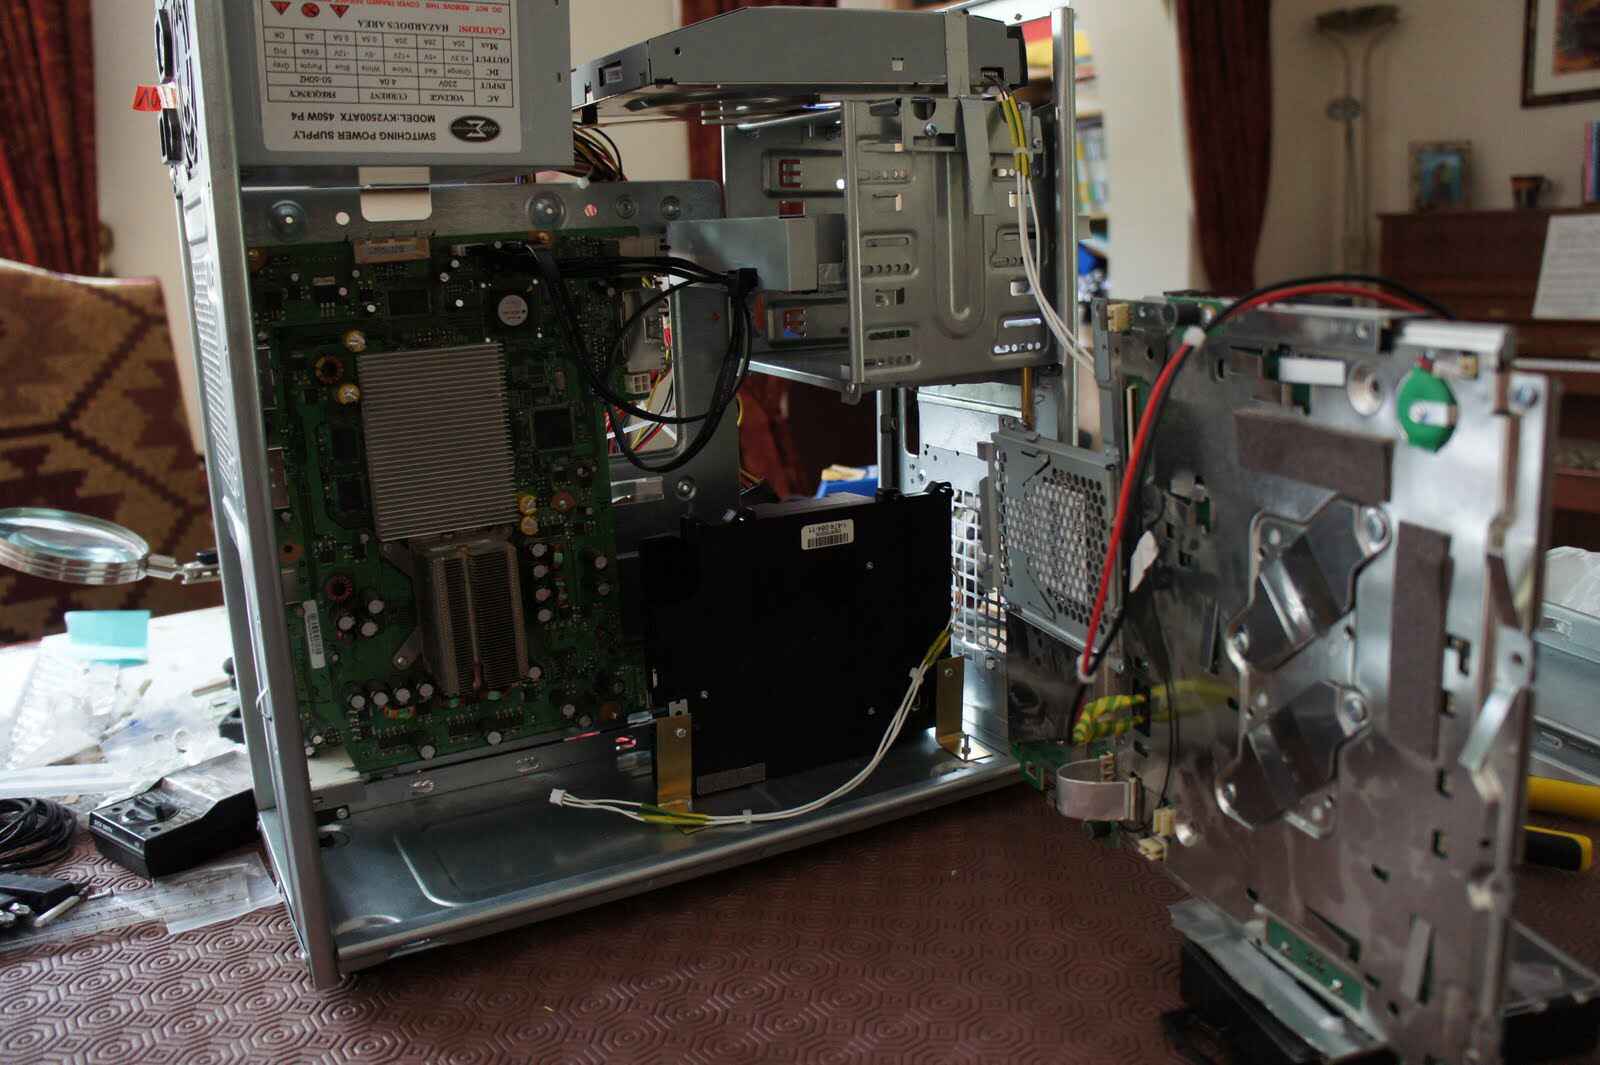
Step 1: Disassembling the PS3
Before you can begin the process of modding your PS3 into a PC case, you’ll first need to disassemble the PlayStation 3. This will give you access to the internal components that you’ll be replacing with the PC hardware. Follow these steps to safely disassemble your PS3:
- Power off and unplug the PS3: Ensure that the console is completely powered off and disconnect it from any power sources.
- Remove the hard drive: The hard drive is located on the side or back of the PS3. Use a screwdriver to remove the screws securing the hard drive bracket. Carefully detach the hard drive and set it aside.
- Remove the warranty sticker: On the bottom of the PS3, you’ll find a warranty sticker. Carefully peel it off to reveal the screws underneath.
- Open the PS3 case: Using a screwdriver, remove the screws that are now visible after removing the warranty sticker. Keep these screws in a safe place as you’ll need them later.
- Gently pry open the case: Start by using your fingers to separate the top cover of the PS3 from the bottom. Be gentle and take your time to avoid damaging any components.
- Disconnect the cables: Inside the PS3, you’ll find various cables connecting the components. Carefully disconnect these cables, making note of their positions for reassembly later.
- Remove the power supply: The power supply unit (PSU) is located near the rear of the PS3. Remove any screws securing it and gently detach it from the console.
- Remove the cooling system: The cooling system is usually located on top of the motherboard. Carefully unscrew it and remove it from the console.
- Remove the motherboard: Locate the screws securing the motherboard to the bottom part of the case. Remove these screws and carefully lift the motherboard out of the PS3.
Once you have successfully disassembled the PS3 and removed the internal components, you can move on to the next step: preparing the PC components.
Step 2: Preparing the PC Components
With the PS3 successfully disassembled, it’s time to prepare the PC components that will be replacing the internal hardware. Here’s what you need to do:
- Select compatible components: Ensure that the PC components you have chosen are compatible with the PS3 case. Consider factors such as the motherboard size, power supply unit (PSU) dimensions, and cooling system compatibility. Refer to the specifications of the PS3 case and the PC components to make sure they align.
- Prepare the motherboard: Inspect the motherboard for any dust or debris and clean it if necessary. Install the CPU, RAM, and any additional expansion cards following the manufacturer’s instructions. Apply thermal paste on the CPU to promote efficient heat transfer.
- Prepare the power supply unit: Install the power supply unit (PSU) into the appropriate slot in the PS3 case. Ensure that it is securely mounted and the necessary cables are accessible for wiring later on.
- Prepare the storage device: If you are using a new storage device, connect it to the motherboard using the appropriate cables. If you are reusing an existing storage device, ensure that it is in good working condition and compatible with the motherboard.
- Prepare the cooling system: Depending on the PS3 case and your cooling requirements, install the cooling fans or liquid cooling system. Ensure that the cooling system is properly connected to the motherboard and positioned for efficient airflow.
- Organize the cables: Before mounting the components, take the time to organize the cables. Use zip ties, Velcro straps, and cable clips to secure and manage the cables. This will help with cable management later on and ensure a cleaner installation.
- Double-check component compatibility: Before proceeding, double-check that all the PC components are properly installed and compatible with each other. Refer to the manufacturer’s instructions and specifications to confirm.
By properly preparing the PC components, you are ensuring a smooth installation process and minimizing any potential issues. Once you have completed these steps, you’re ready to move on to the next exciting phase: modifying the PS3 case to accommodate the PC components.
Step 3: Modifying the PS3 Case
Now that you have prepared the PC components, it’s time to modify the PS3 case to accommodate these new hardware. This step involves making necessary modifications to the case for proper fitting and ventilation. Follow these steps to modify the PS3 case:
- Plan your modifications: Before making any changes, take some time to plan out the modifications you need to make. Consider the size and position requirements of the PC components, such as the motherboard, cooling system, and storage devices. Visualize where each component will be placed and how they will fit into the PS3 case.
- Measure and mark: Use a ruler or measuring tape to mark the areas of the case that need modification. This may include cutting holes for cable management, creating openings for airflow, or making space for larger components.
- Put safety measures in place: Before cutting or drilling into the PS3 case, take appropriate safety precautions. Use safety goggles and gloves to protect yourself from any potential injuries.
- Start cutting or drilling: Carefully cut or drill according to your marked measurements. Use appropriate tools for the specific modifications needed. Take your time and make clean and precise cuts for a professional finish.
- Create openings for cable management: If necessary, create openings or channels to route the cables neatly. This will help with cable management and improve the overall aesthetics of the PC case.
- Ensure proper ventilation: With the new components, it’s crucial to provide adequate ventilation for cooling. Modify the case to include additional fan mounts or create openings for proper airflow. This will help prevent overheating and maintain optimal performance.
- Smooth out rough edges: After making the necessary modifications, use sandpaper or a file to smooth out any rough edges. This will prevent any injuries when handling the case and give it a professional look.
Remember to take your time and be precise during the modification process. It’s essential to maintain the structural integrity of the case while making the necessary changes to accommodate the PC components. Once you have successfully modified the PS3 case, you are ready to move on to the next step: mounting the PC components into the case.
Step 4: Mounting the PC Components
With the PS3 case modified and ready, it’s time to mount the PC components into their designated positions. This step involves securely installing the motherboard, storage devices, cooling system, and other hardware. Follow these steps to properly mount the PC components:
- Position the motherboard: Carefully place the motherboard into the designated area within the PS3 case. Ensure the motherboard aligns with the mounting holes in the case.
- Secure the motherboard: Use screws provided with the case to secure the motherboard. Make sure it is firmly attached and does not move or flex when pressure is applied.
- Mount the storage devices: Install the storage device, such as an SSD or HDD, into the designated slots or brackets. Secure it using screws or other fastening mechanisms provided with the case.
- Install the cooling system: Depending on your chosen cooling system, mount the fans or radiator in the appropriate locations within the case. Ensure they are securely fastened and positioned for optimal airflow.
- Attach the power supply unit (PSU): Connect the PSU to the appropriate cables and mount it securely in the designated PSU slot within the case. Ensure the connections are secure and the cables are neatly organized.
- Double-check component placement: Before proceeding, double-check that all the PC components are securely mounted and properly connected. Ensure that there is sufficient space between components for proper airflow and cooling.
Throughout the mounting process, pay close attention to cable management. Use zip ties, Velcro straps, or cable clips to secure and organize the cables, promoting proper airflow and keeping the interior clean and neat. This will not only enhance the aesthetics but also assist with future maintenance and troubleshooting.
Once all the components are mounted and properly secured, you’re ready to move on to the next step: wiring and connecting the components.
Step 5: Wiring and Connecting Components
Now that the PC components are mounted in the PS3 case, it’s time to wire and connect them properly. This step involves ensuring that all the necessary cables are connected to the appropriate components and that the wiring is organized for optimal performance and functionality. Follow these steps to wire and connect the components:
- Refer to the manuals: Consult the manuals or documentation that came with your PC components to understand the proper connections and wiring requirements for each component.
- Connect the cables: Start by connecting the necessary power cables from the power supply unit (PSU) to the motherboard, graphics card, storage devices, and other components. Follow the specific guidelines provided by the manufacturers for each component.
- Connect the case cables: The PS3 case will have cables for the power button, LED indicators, and other control functions. Connect these cables to their corresponding headers on the motherboard.
- Wiring for cable management: Take the time to route and organize the cables properly for optimal cable management. Use zip ties, Velcro straps, or cable clips to secure and tuck away any excess cables. This will not only improve the overall aesthetics but also facilitate better airflow and easier maintenance.
- Double-check connections: Before closing the case, double-check all the connections to ensure they are secure and properly seated. Ensure that there are no loose or disconnected cables that may cause functionality issues.
It’s crucial to be patient and meticulous when wiring and connecting the components. Take your time to properly route and organize the cables to ensure a clean and organized interior. This will make future upgrades or maintenance tasks much easier. Once all the components are properly connected, you’re now ready to move on to the final step: testing and troubleshooting.
Step 6: Testing and Troubleshooting
After successfully wiring and connecting all the components, it’s crucial to test your newly modded PS3 PC case to ensure that everything is functioning properly. This final step involves testing the hardware, checking for any issues, and troubleshooting if necessary. Here’s what you need to do:
- Connect peripherals: Connect a monitor, keyboard, and mouse to the appropriate ports on the PC case.
- Power on the system: Plug in the power cable and press the power button to turn on the PC.
- Check for proper boot-up: Observe the startup process to ensure that the system powers on and the BIOS or operating system loads without any issues.
- Test hardware functionality: Test the functionality of each component, including the CPU, RAM, storage devices, graphics card, and cooling system. Run stress tests or benchmarking software to ensure stable performance.
- Monitor temperatures: Keep an eye on the temperatures of the CPU and other components during heavy usage. Ensure that the cooling system is effectively keeping the temperature within safe limits.
- Troubleshoot issues: If you encounter any hardware or software issues during testing, refer to the manuals, online resources, or forums for troubleshooting guidance. Check for loose connections, ensure all drivers are properly installed, and update firmware if necessary.
- Make any necessary adjustments: If you identify any issues or areas that need improvement, take the time to make the necessary adjustments. This may involve fine-tuning cooling system configurations, tidying up cables, or addressing any hardware compatibility issues.
Testing and troubleshooting are essential to ensure that your modded PS3 PC case is functioning optimally. Pay attention to any warning signs, such as unusual noises, overheating, or system crashes. Utilize the resources available to you, such as forums and online communities, to seek guidance and assistance if needed. Remember that patience and persistence are key to overcoming any challenges that may arise.
Once you are satisfied with the performance and functionality of your modded PS3 PC case, you can now enjoy gaming and computing with your unique creation!
Conclusion
Congratulations! You have successfully completed the process of modding a PS3 into a PC case. By repurposing your old PlayStation 3 and transforming it into a fully functional computer, you have created a unique and personalized piece of hardware that combines your love for gaming and computer building.
Throughout this guide, you have learned how to disassemble the PS3, prepare the PC components, modify the PS3 case, mount the PC components, wire and connect everything, and test for proper functionality. It has been an exciting journey, allowing you to showcase your creativity, technical skills, and dedication to DIY projects.
Modding a PS3 into a PC case offers several benefits. It gives your old console a new lease on life, reduces electronic waste, and allows you to showcase your individual style and customization preferences. Moreover, it can save you money compared to building a PC from scratch, while also providing a valuable learning opportunity to expand your knowledge and skills in computer building.
Remember that patience and attention to detail are crucial throughout the entire process. Taking the time to properly disassemble, modify, mount, wire, and test the components ensures a successful outcome and a functional PC case that meets your gaming and computing needs.
Now that you have completed the modding process, take a moment to appreciate your achievement. Share your unique creation with friends, showcase it online, or simply enjoy the satisfaction of transforming an old console into a highly functional and personalized PC case.
Thank you for following this guide. We hope you have enjoyed the experience of modding your PS3 into a PC case and that it brings you many hours of gaming and computing enjoyment!