Introduction
Welcome to the world of customizable PC builds! If you’re tired of the standard tower-style computer cases and are looking for a way to create a unique and eye-catching setup, then turning any PC case into a pedestal might be just what you need. By transforming your PC case into a pedestal, you not only add a touch of elegance and creativity to your workspace, but you also gain practical benefits such as improved airflow and easier access to your components.
In this guide, we will take you through the step-by-step process of converting any PC case into a pedestal. Whether you’re a seasoned PC enthusiast or a beginner looking to embark on your first DIY project, this guide has got you covered. We’ll walk you through the tools and materials needed, provide detailed instructions for each step, and offer tips and tricks to help you achieve the best results.
But before we dive into the nitty-gritty of the process, it’s important to note that this project requires basic knowledge of PC hardware and an understanding of safe handling practices when working with electronics. If you’re not confident in your abilities or if you’re unsure about any step, it’s always a good idea to seek guidance from a professional or experienced individual.
Now, let’s get started on turning your PC case into a stunning pedestal that will elevate your computer setup to new heights!
Tools and Materials Needed
Before we begin the transformation process, let’s gather all the necessary tools and materials. Here’s a list of what you’ll need:
- A suitable PC case: Choose a PC case that you’d like to convert into a pedestal. It’s important to ensure that the case has enough space to accommodate the components you plan to install.
- Screwdrivers: You’ll need a set of screwdrivers with various sizes, including both Phillips and flathead screwdrivers. These will be essential for disassembling the PC case and making modifications.
- Power drill: A power drill will come in handy for making holes if you plan to add additional features to your pedestal, such as cable management or custom lighting.
- Rubber feet: To ensure stability and prevent scratches on your desk or floor, consider getting rubber feet to attach to the bottom of the pedestal.
- Adhesive or double-sided tape: Depending on your design, you may need adhesive or double-sided tape to secure certain components or embellishments to the pedestal.
- Sanding paper or file: If you plan to modify the PC case or the pedestal structure, having sanding paper or a file will help you smooth out any rough edges.
- Paint or vinyl wrap: Optional but recommended, paint or vinyl wrap can be used to give the pedestal a personalized touch and match your overall setup aesthetic.
- Additional components: Depending on your preferences, you may want to gather additional components such as LED strips, fans, or custom panels to enhance the appearance and functionality of your pedestal.
With these tools and materials at hand, you’ll be ready to embark on the journey of transforming your PC case into a beautiful pedestal. Remember to work in a well-ventilated area and follow safety precautions throughout the process to ensure a successful and satisfying outcome.
Step 1: Acquiring a Suitable PC Case
The first step in making any PC case into a pedestal is to find a suitable case that fits your needs and preferences. Here are some tips to help you choose the right PC case:
- Consider size and compatibility: Make sure the PC case you choose has enough space to accommodate your components and any future upgrades you may have in mind. Check the dimensions and ensure it is compatible with your motherboard size.
- Check for good airflow: Look for a case that has proper ventilation, with enough fan mounts or vents to ensure efficient cooling for your components. Good airflow is crucial to prevent overheating.
- Think about cable management: Consider a PC case that offers ample space for cable routing and management. This will help you maintain a clean and organized interior, reducing the chances of tangled cables and improving airflow.
- Look for aesthetics: Choose a PC case that matches your style and complements the overall look of your setup. Whether you prefer a sleek and minimalist design or a bold and eye-catching case, find one that reflects your personality.
- Consider future expansion: If you plan to upgrade or add more components in the future, choose a PC case that provides enough room and support for expansion. Look for features like extra drive bays or space for larger graphics cards.
Once you have selected a suitable PC case, you’re ready to move on to the next step of transforming it into a pedestal. Be sure to assess the condition of the case and clean it thoroughly before proceeding. This will ensure a clean canvas for your modifications and help maintain the longevity of your pedestal.
Stay tuned for the next step, where we will guide you through the process of dismantling the PC case and preparing it for the pedestal conversion.
Step 2: Dismantling the PC Case
Now that you have acquired a suitable PC case, it’s time to start the transformation process by dismantling the case. Follow these steps to ensure a smooth and safe disassembly:
- Prepare your workspace: Find a clean and well-lit area to work on your PC case. Place a soft cloth or protective mat on the surface to prevent any scratches.
- Power down and unplug: Turn off your computer and unplug all the cables from the back of the PC case. This ensures that you’re working with no power and reduces the risk of electrical accidents.
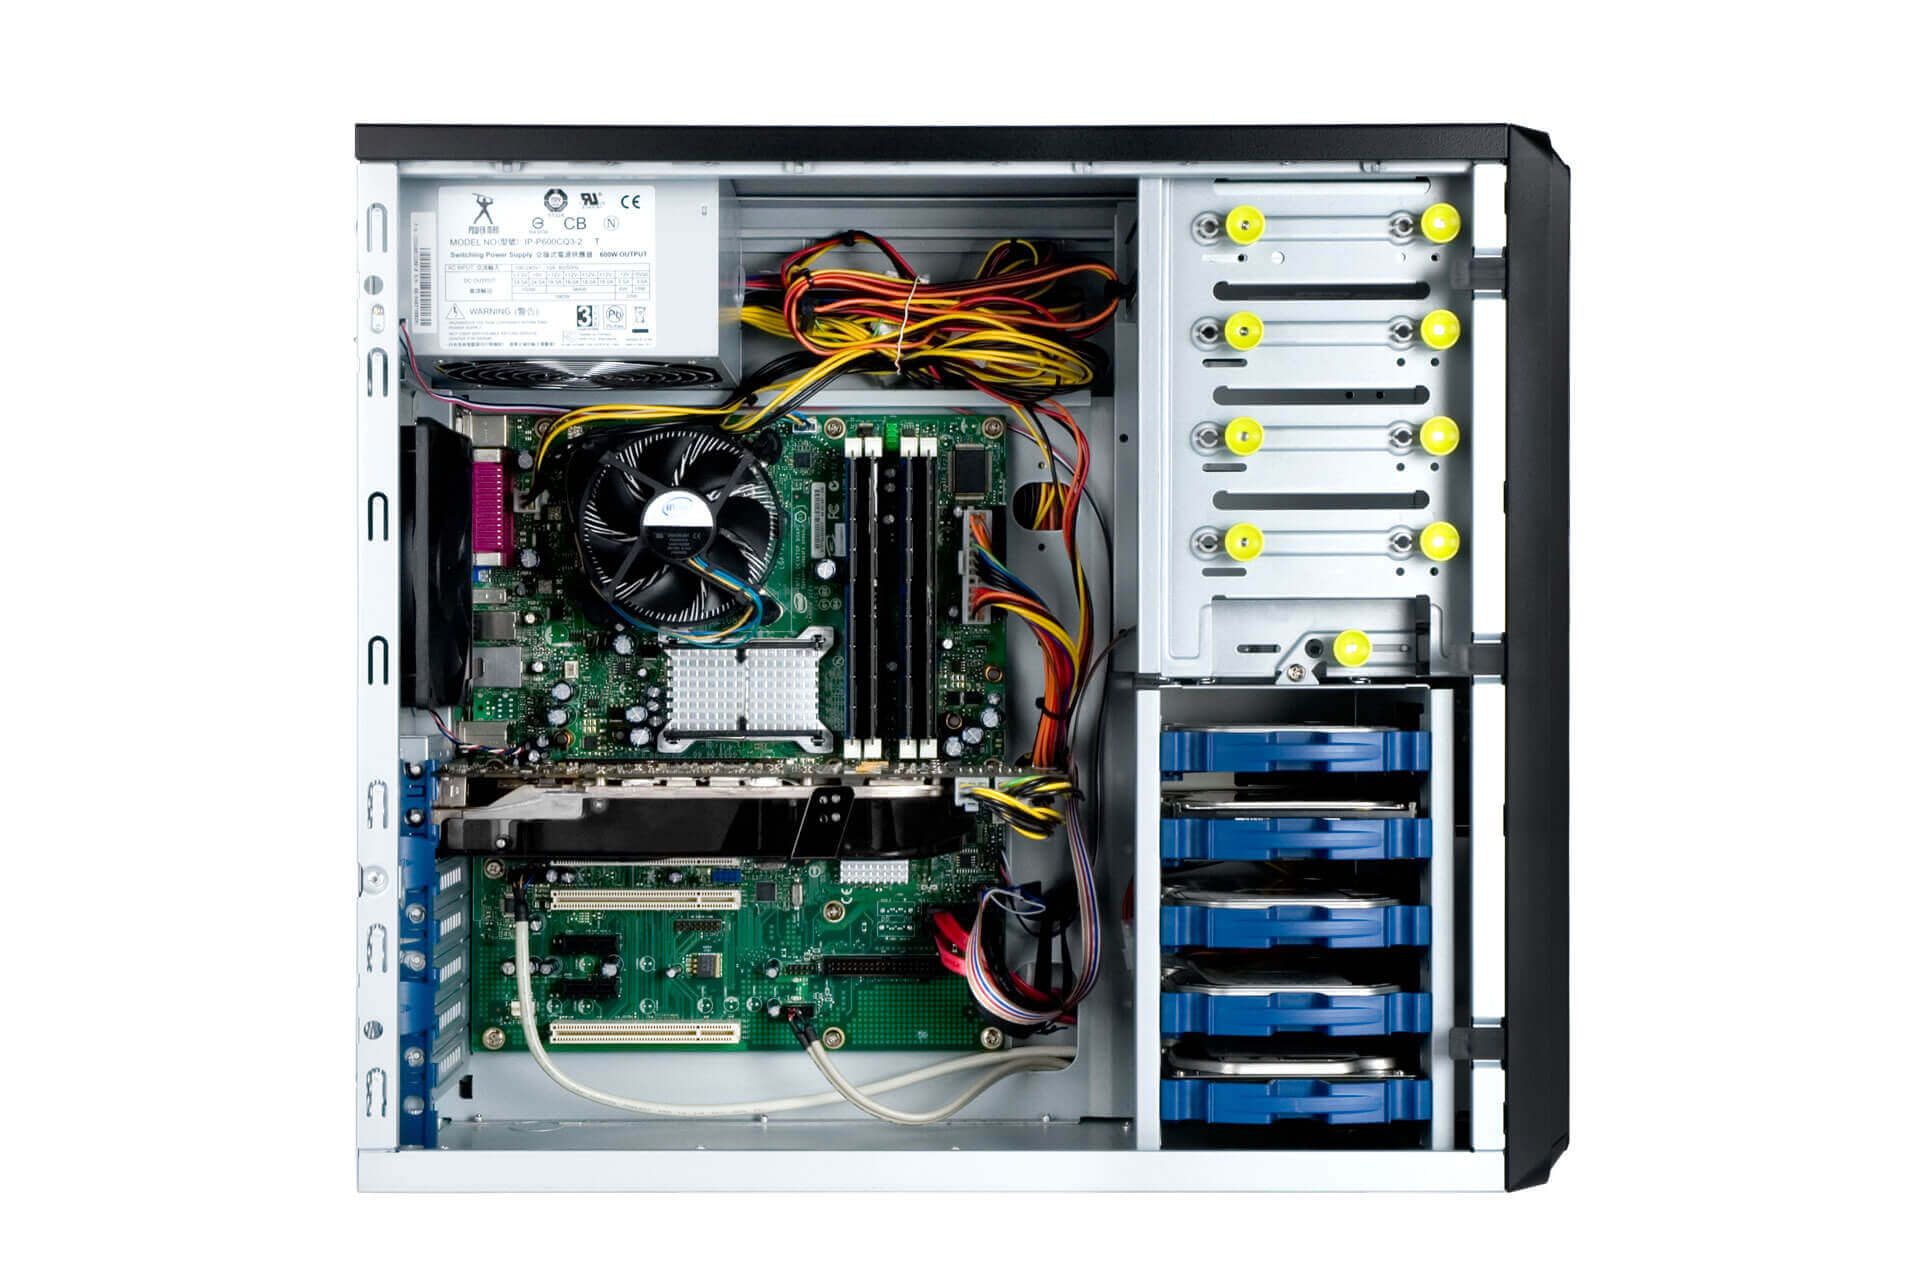
- Remove the side panels: Most PC cases have removable side panels that provide access to the internal components. Use a screwdriver to unscrew the screws holding the side panels in place. Gently slide the panels off and set them aside.
- Take out any removable components: Depending on your case, there may be additional components like drive bays or fan brackets that are easily removable. Unscrew and remove these components to make way for the pedestal modifications.
- Disconnect the cables: Carefully disconnect all the cables connected to the motherboard, graphics card, power supply, and any other components inside the case. Take note of how the cables are connected to ensure easy reassembly later on.
- Remove the motherboard: Unscrew the screws holding the motherboard in place. Gently lift the motherboard out of the case, taking care not to damage any of the components. Place the motherboard on an anti-static surface.
- Continue with other components: If there are any additional components installed, such as the power supply, hard drives, or graphics cards, remove them following the manufacturer’s instructions.
As you dismantle the PC case, take your time and be mindful of not causing any damage to the components or the case itself. Keep the screws and small parts in a safe place, ensuring they don’t get lost during the disassembly process.
With the PC case now dismantled, you’re ready to move on to the next step: preparing the base for your pedestal conversion. Stay tuned to learn how to create a sturdy foundation for your transformed PC case pedestal.
Step 3: Preparing the Base
With the PC case dismantled, it’s time to prepare the base of your pedestal. This step involves creating a sturdy foundation that will support your transformed PC case. Follow these steps to prepare the base:
- Choose a suitable base material: Select a material that is durable and can support the weight of the PC case. Common options include wood, metal, or acrylic. Consider the aesthetics and functionality of the material to ensure it matches your vision for the pedestal.
- Measure and cut the base material: Measure the dimensions of your PC case and mark the dimensions on the base material. Use a saw or cutting tool to carefully cut the material to the desired size. Ensure that the base is slightly larger than the PC case to provide sufficient stability.
- Sand or file the edges: After cutting the base material, use sanding paper or a file to smooth out any rough edges. This will give the base a clean and polished finish, reducing the risk of splinters or cuts.
- Apply any necessary finishes: Depending on the material you’ve chosen, you may want to apply a finish to the base for added protection and aesthetics. For wood, you can apply varnish or paint to seal the surface. Metal or acrylic bases can be painted or polished to desired specifications.
- Attach rubber feet: To prevent the base from slipping or scratching your desk or floor, attach rubber feet to the bottom of the base. These can be easily secured with adhesive or screws, depending on the type of rubber feet you have.
As you prepare the base, keep in mind the dimensions and weight of your PC case to ensure proper support. It’s also important to align the base with the PC case’s I/O ports and any other openings required for cable management or additional features.
Once the base is prepared and ready, you’re one step closer to completing your PC case pedestal. In the next step, we’ll guide you through building the pedestal structure to elevate your transformed case. Stay tuned!
Step 4: Building the Pedestal Structure
Now that you have prepared the base, it’s time to build the pedestal structure that will support your transformed PC case. Follow these steps to create a sturdy and visually appealing pedestal:
- Determine the desired height: Consider the height that you want your pedestal to be and measure accordingly. This will depend on personal preference and the space available in your setup.
- Choose the pedestal material: Select a material that is strong and can withstand the weight of the PC case. Popular options include wood, metal, or acrylic. Take into account both aesthetics and durability when making your choice.
- Measure and cut the pedestal material: Measure the desired dimensions for the pedestal and mark the measurements on the material. Use a saw or cutting tool to carefully cut the material into the appropriate pieces.
- Assemble the pedestal structure: Depending on the design you have in mind, use screws, brackets, or adhesive to assemble the pieces of the pedestal together. Ensure that the structure is stable and can securely hold the weight of the PC case.
- Sand or file any rough edges: After assembling the pedestal structure, use sanding paper or a file to smooth out any rough edges. This will give the pedestal a polished and professional look.
- Attach the base to the pedestal: Place the prepared base on the bottom of the pedestal structure. Depending on the material used, you can secure it with screws, brackets, or adhesive. Ensure that the base is centered and securely attached.
- Paint or finish the pedestal: If desired, apply a coat of paint or finish to the pedestal to match your overall setup aesthetic. This step is optional but can enhance the visual appeal of your transformed case pedestal.
Remember to take your time during the assembly process and double-check the stability of the pedestal structure. It’s crucial to ensure that the pedestal can support the weight of the PC case while maintaining its integrity.
As you complete this step, you’re getting closer to having your transformed PC case on a stylish pedestal. In the next step, we’ll guide you through attaching the PC case to the pedestal. Keep on reading!
Step 5: Attaching the PC Case to the Pedestal
Now that you have built the pedestal structure, it’s time to attach your PC case to the pedestal. Follow these steps to securely mount your transformed PC case:
- Position the PC case on the pedestal: Carefully place the PC case on top of the pedestal structure. Ensure that it is centered and aligned with the base.
- Mark the mounting points: Using a pen or marker, make marks on the pedestal where the mounting points of the PC case align with the structure. These marks will serve as a guide for drilling holes or attaching brackets.
- Drill holes or attach brackets: Depending on your design and the materials used, you can either drill holes on the marked points or attach brackets to the PC case and the pedestal structure. Use appropriate screws or bolts to secure the case to the pedestal.
- Ensure stability: Once the PC case is attached to the pedestal, check for stability. Gently shake the structure to ensure that it is secure and there is no wobbling or movement.
- Connect the cables: Reconnect the cables to the motherboard, graphics card, power supply, and other components. Follow any cable management techniques you had in mind or refer to the instructions for proper cable routing.
During this step, it’s crucial to ensure that the PC case is securely attached to the pedestal to prevent any mishaps or accidents. Double-check the alignment and stability of the case, making any necessary adjustments before moving forward.
With the PC case now firmly attached to the pedestal, you’re almost done with the transformation process. In the next step, we’ll explore options for enhancing the aesthetics of your newly transformed PC case pedestal. Keep reading to make it truly stand out!
Step 6: Enhancing the Aesthetics
Now that your PC case is securely attached to the pedestal, it’s time to enhance the aesthetics of your transformed setup. Here are some tips to make your PC case pedestal truly stand out:
- Paint or vinyl wrap: Consider painting the PC case or applying a vinyl wrap to give it a fresh, personalized look. Choose a color or design that complements your overall setup aesthetic.
- Cable management: Take the time to organize and manage your cables for a clean and clutter-free appearance. Utilize cable ties, clips, or cable management solutions to keep the cables neatly tucked away.
- LED lighting: Add LED strips or lighting components to your PC case pedestal for a stunning visual effect. These can be placed strategically to highlight the case’s features or create a unique ambiance.
- Custom panels or decals: Consider adding custom panels or decals to the PC case to display your personal branding, favorite graphics, or logos. This can give your setup a unique and personalized touch.
- Acrylic side panel: If your PC case allows for it, replace one of the side panels with an acrylic panel. This will showcase the internal components and add a sleek and modern look to your pedestal.
- Cable sleeves: Install cable sleeves or cable management covers to hide and streamline the appearance of your cables. This can give your PC case pedestal a clean, professional look.
- Custom modifications: Consider adding your own custom modifications to make your PC case pedestal truly unique. This could include custom engravings, additional hardware, or creative embellishments.
Remember that the aesthetics of your PC case pedestal are highly personal, and should reflect your own preferences and style. Explore different options and experiment with combinations to create a setup that you find visually pleasing.
By following these tips and adding your own creative flair, you can transform your PC case pedestal into a visually stunning centerpiece for your workspace.
In the next step, we’ll discuss options for installing additional features to further improve the functionality of your PC case pedestal. Keep reading to learn more!
Step 7: Installing Additional Features
Now that you have enhanced the aesthetics of your PC case pedestal, it’s time to explore options for installing additional features to further enhance its functionality. Here are some ideas to consider:
- Fan placement and cooling: Evaluate your PC case’s cooling needs and consider adding additional fans to improve airflow. Ensure proper placement and alignment for optimal cooling performance.
- Water cooling: If you’re interested in advanced cooling solutions, consider installing a water cooling system. This can provide better efficiency and quieter operation compared to traditional air cooling methods.
- Front panel connectors: Assess your connectivity requirements and consider adding additional USB ports or audio jacks to the front panel of your PC case. This can provide convenience and easy access for connecting external devices.
- Storage expansion: If your case has limited storage capacity, consider adding additional storage options such as SSD brackets or hard drive racks. This can give you more space for storing files and games.
- Custom airflow routing: Experiment with different airflow routing options within your PC case. By strategically placing fans and directing airflow, you can optimize cooling performance and minimize heat buildup.
- Noise reduction: Install acoustic panels or sound dampening materials inside your PC case to reduce noise levels. This can create a quieter and more enjoyable computing experience.
- Cable management solutions: Look for specialized cable management solutions such as cable combs, clips, or channels to further improve the organization and aesthetics of your cable routing.
- RGB lighting control: If you have RGB components, consider installing a lighting control system to synchronize and customize their colors and effects. This can create a visually stunning and cohesive lighting display.
When installing additional features, it’s important to consider compatibility, space constraints, and safety precautions. Read the manufacturer’s instructions carefully and ensure the components are installed securely and correctly.
By exploring these options and implementing the features that align with your needs, you can create a PC case pedestal that not only looks great but also offers improved functionality and performance.
In the final step, we’ll cover the importance of final touches and testing to ensure everything is in working order. Keep reading to complete your PC case pedestal transformation!
Step 8: Final Touches and Testing
Congratulations! You’re nearing the completion of your PC case pedestal transformation. In this final step, we will cover the importance of final touches and testing to ensure that your setup is not only visually appealing but also fully functional.
- Inspect for any loose connections: Double-check all the cable connections inside your PC case. Ensure that they are secure, properly seated, and not putting any strain on the components.
- Check for proper component alignment: Take a close look at your motherboard, graphics card, and other installed components to ensure they are properly aligned and seated in their respective slots.
- Tidy up cable management: Spend some time tidying up your cable management to ensure that everything is neatly organized and there are no cables obstructing airflow or fans.
- Perform a test boot: Power on your PC and check that all the components are functioning properly. Pay attention to any error messages, unusual sounds, or abnormalities during the boot and software loading process.
- Monitor temperatures: Use monitoring software to keep an eye on the temperatures of your CPU, GPU, and other components. Ensure that they are operating within safe and acceptable ranges.
- Run stress tests: To further ensure system stability and performance, consider running stress tests on your CPU and GPU. This will help identify any potential overheating or instability issues.
- Make any necessary adjustments: If you encounter any issues during the testing phase, make the necessary adjustments to resolve them. This may include adjusting fan speeds, reseating components, or reinstalling drivers.
- Finalize the aesthetic touches: Add any final aesthetic touches, such as custom decals, cable sleeves, or LED lighting effects, to complete the visual appeal of your PC case pedestal.
By conducting these final touches and testing procedures, you can ensure that your PC case pedestal is not only a visually stunning centerpiece but also a fully functional and reliable part of your computing setup.
Now that you have completed all the steps, sit back and admire your transformed PC case pedestal. Enjoy the improved aesthetics, airflow, and easy access to your components. It’s time to showcase your unique and personalized creation to the world!
Conclusion
Congratulations on successfully transforming your PC case into a stunning pedestal! Through the step-by-step process outlined in this guide, you have created a unique and visually appealing centerpiece for your computer setup.
By acquiring a suitable PC case, dismantling it, preparing the base, building the pedestal structure, attaching the PC case, enhancing the aesthetics, installing additional features, and carrying out final touches and testing, you have transformed a standard PC case into a personalized work of art.
Not only does your PC case pedestal elevate the aesthetics of your workspace, but it also offers practical benefits such as improved airflow, easier access to components, and enhanced cable management. You have created a functional and stylish solution that reflects your personal preferences and elevates your computing experience.
Remember, throughout the process, it is important to prioritize safety, compatibility, and attention to detail. Take your time, follow the instructions carefully, and make adjustments whenever necessary to ensure that your transformed PC case pedestal is reliable, stable, and performs optimally.
Now that your PC case pedestal is complete, enjoy the satisfaction of having a unique and personalized setup that showcases your creativity and passion for technology. Whether you’re a seasoned PC enthusiast or a beginner in the world of DIY projects, this transformation process allows you to unleash your imagination and create something truly special.
Thank you for following this guide, and we hope you enjoy your transformed PC case pedestal for years to come. Happy computing!


